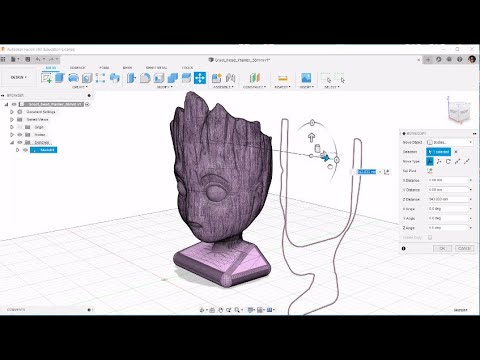
Some printable designs are what CNC folks would call a “flat part” — which is to say the top and bottom are exactly alike, and so having the drawing of either top or bottom means you can extrude to create a whole 3D part. This remix that I sought for a DIN rail mount was just such a design, with the only exceptions being a couple of screw holes that are easy to add in. With this type of design, there is thus an easy workaround whenever your source geometry from an imported STL is showing tons of tiny polygons that are essentially geometrical “waste” that’s hindering from having a water tight, printable, “solid body.” I hope this tutorial is helpful.
Great video thanks! I do have a CAD question you might know the answer to. I’ve been trying to import Ryan’s Blank CAD for LR3 control box case into FreeCad to remix for the Manta mp8 board. The lowest level I can import the step file is as two parts (top and bottom). There is no Sketch, Pad, Hole, etc information. I do have the import STEP preferences set with compound merge off. I’ve asked around on other forums and the consensus is the STEP file was exported without the lower level information. Do I have to reinstall Fusion and use the native file to remix? Thanks.
All of my popular remixes of LowRider control boxes were all based on Ryan’s blank box CAD design. I’m trying to remember right now whether I opened a step file in a free program for conversion or if I simply downloaded the STL file from Printables and imported it into SketchUp (which brings it in as a mesh). I would suspect I did the latter but I’m not positive. Anyway, I know it is possible because somehow I did it. Does that latter option sound like something you might be able to do?
This is all pretty new to me, so it’s just a matter of which learning curve I slide down screaming. FreeCAD has mesh tools, I’ll see what I can do with them. Thanks.
If you’re using f360, it has a “Create section from mesh” feature that I find super useful for RE work on STL files (found under ‘mesh/create’). This tool lets you quickly generate cross sections that you can easily trace to create sketches. After you create a cross section sketch (not a true sketch you can use yet), you have to then open it as a sketch and use ‘fit curves to mesh section’ to create the actual sketch to be used for modeling. For this step you have various tools to trace arcs, lines, circles, and even splines, which will attempt to follow the cross section created earlier. Note that splines can be useful in a pinch, but they greatly limit what you can modify later on; so I usually try to redraw complex curves as a series of tangent arcs (which are easy to adjust/modify later on). Once the fit curves to mesh is done, you can use that sketch just like a normal sketch, to create a proper solid body which you can use to easily modify geometry or add/subract features.
I use this method all the time for my remixes. It’s more efficient and flexible vs doing mesh booleans etc, and generally results in more accurate geometry as well.

