I’ve been using the probe function of Grblgru and Estlcam quite a bit in the last several months. I thought I’d post a picture of what little you can get away with to get this done. Of course you can invest in some pretty expensive probes but it isn’t necessary. Additionally, when you crash one of these it is not that big a deal. Total investment about 25 cents, seriously.
The more complicated one on the left I made months ago and it is still working fine despite many crashes lol. A bit of wood, wire, rivet heads and a pen spring slide up to close a NO switch wired to my control board pin and Gnd.
The simpler one on the right I made recently to probe down to 0.25mm spacing. Combined with a strip of aluminum tape on the surface I was scanning it looked like a little sewing machine. It is simply a 1/4" dowel drilled in the end with a 3.5mm bit and a 2 mm hole drilled to where I needed to get the wire out. The ‘probe’ part is a Dupont style connector for use with breadboards. One alligator clip to this wire and the other to the aluminum tape run back to the control board pin and gdn. The key with this one is a very slow probe seek rate to give the firmware a chance to register the contact or else the pin will be bent.
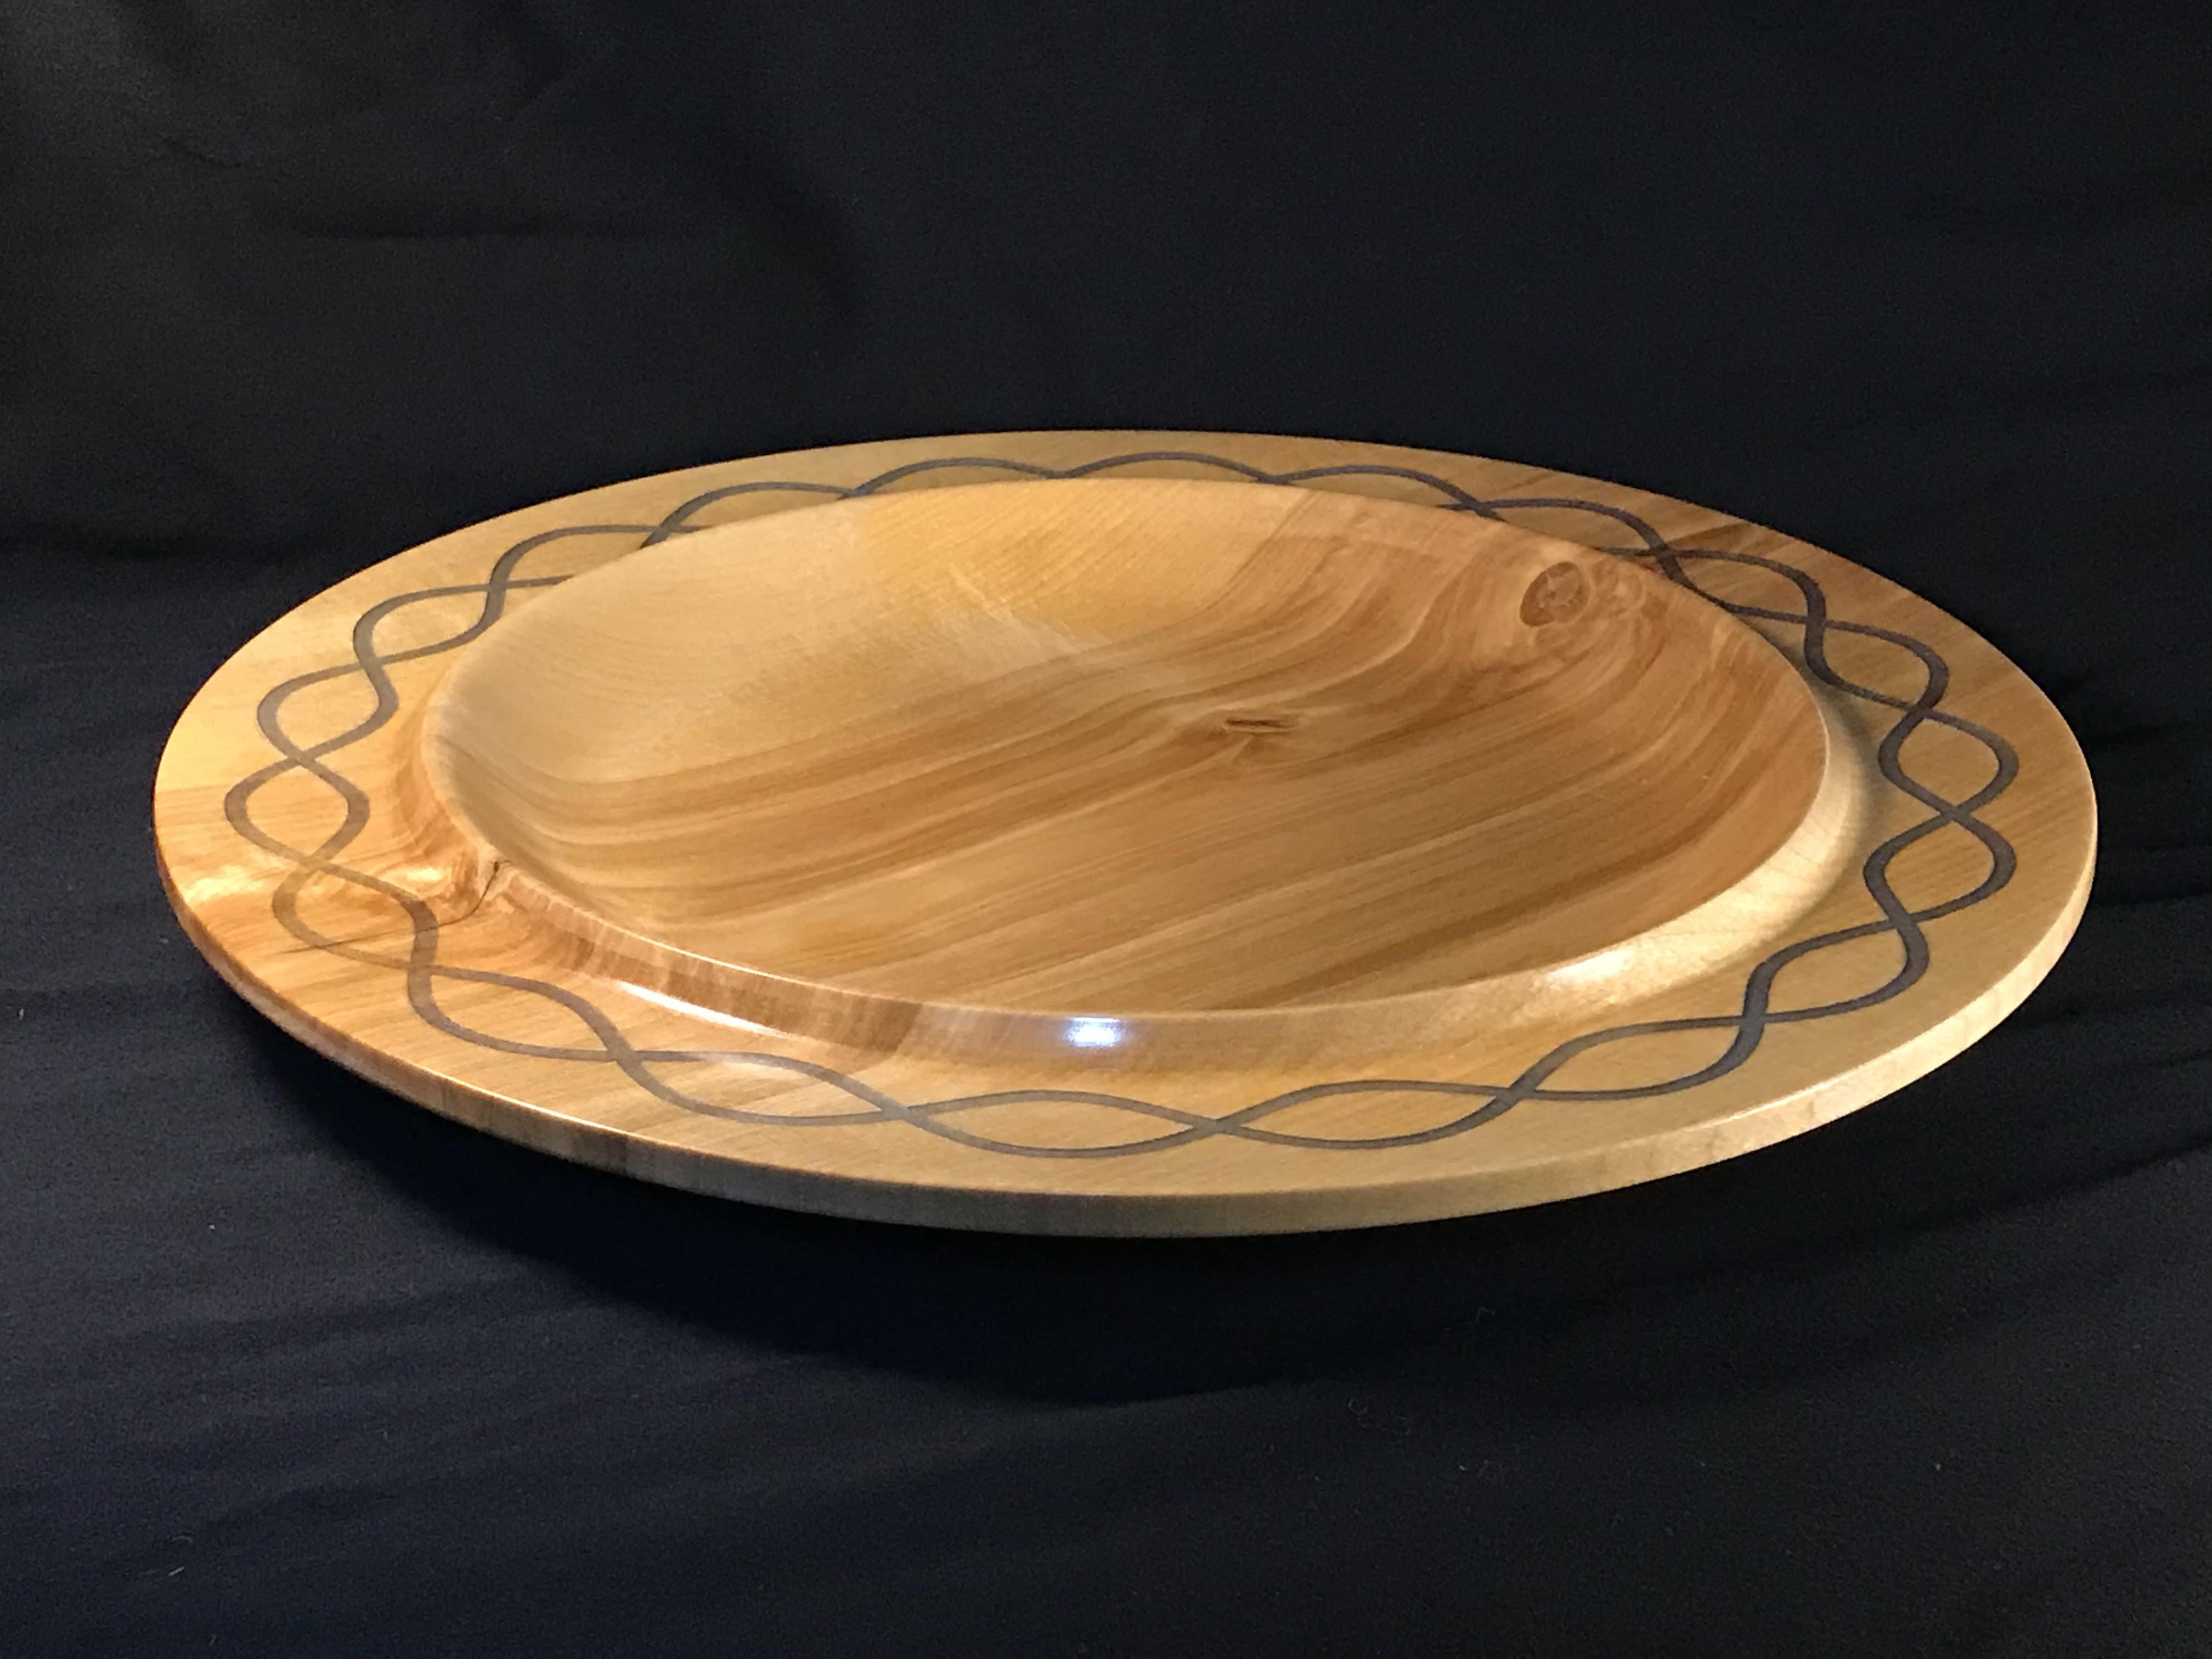
I turn a bowl on the wood lathe because it’s much faster and I can get a better result. I take the bowl on its chuck to the CNC and scan with a probe.
I transfer the data into a generalized spreadsheet program I wrote. That data is automatically copied into a variety of possible configurations. I copy the one I want into one of the Grblgru macros I’ve written and run it.
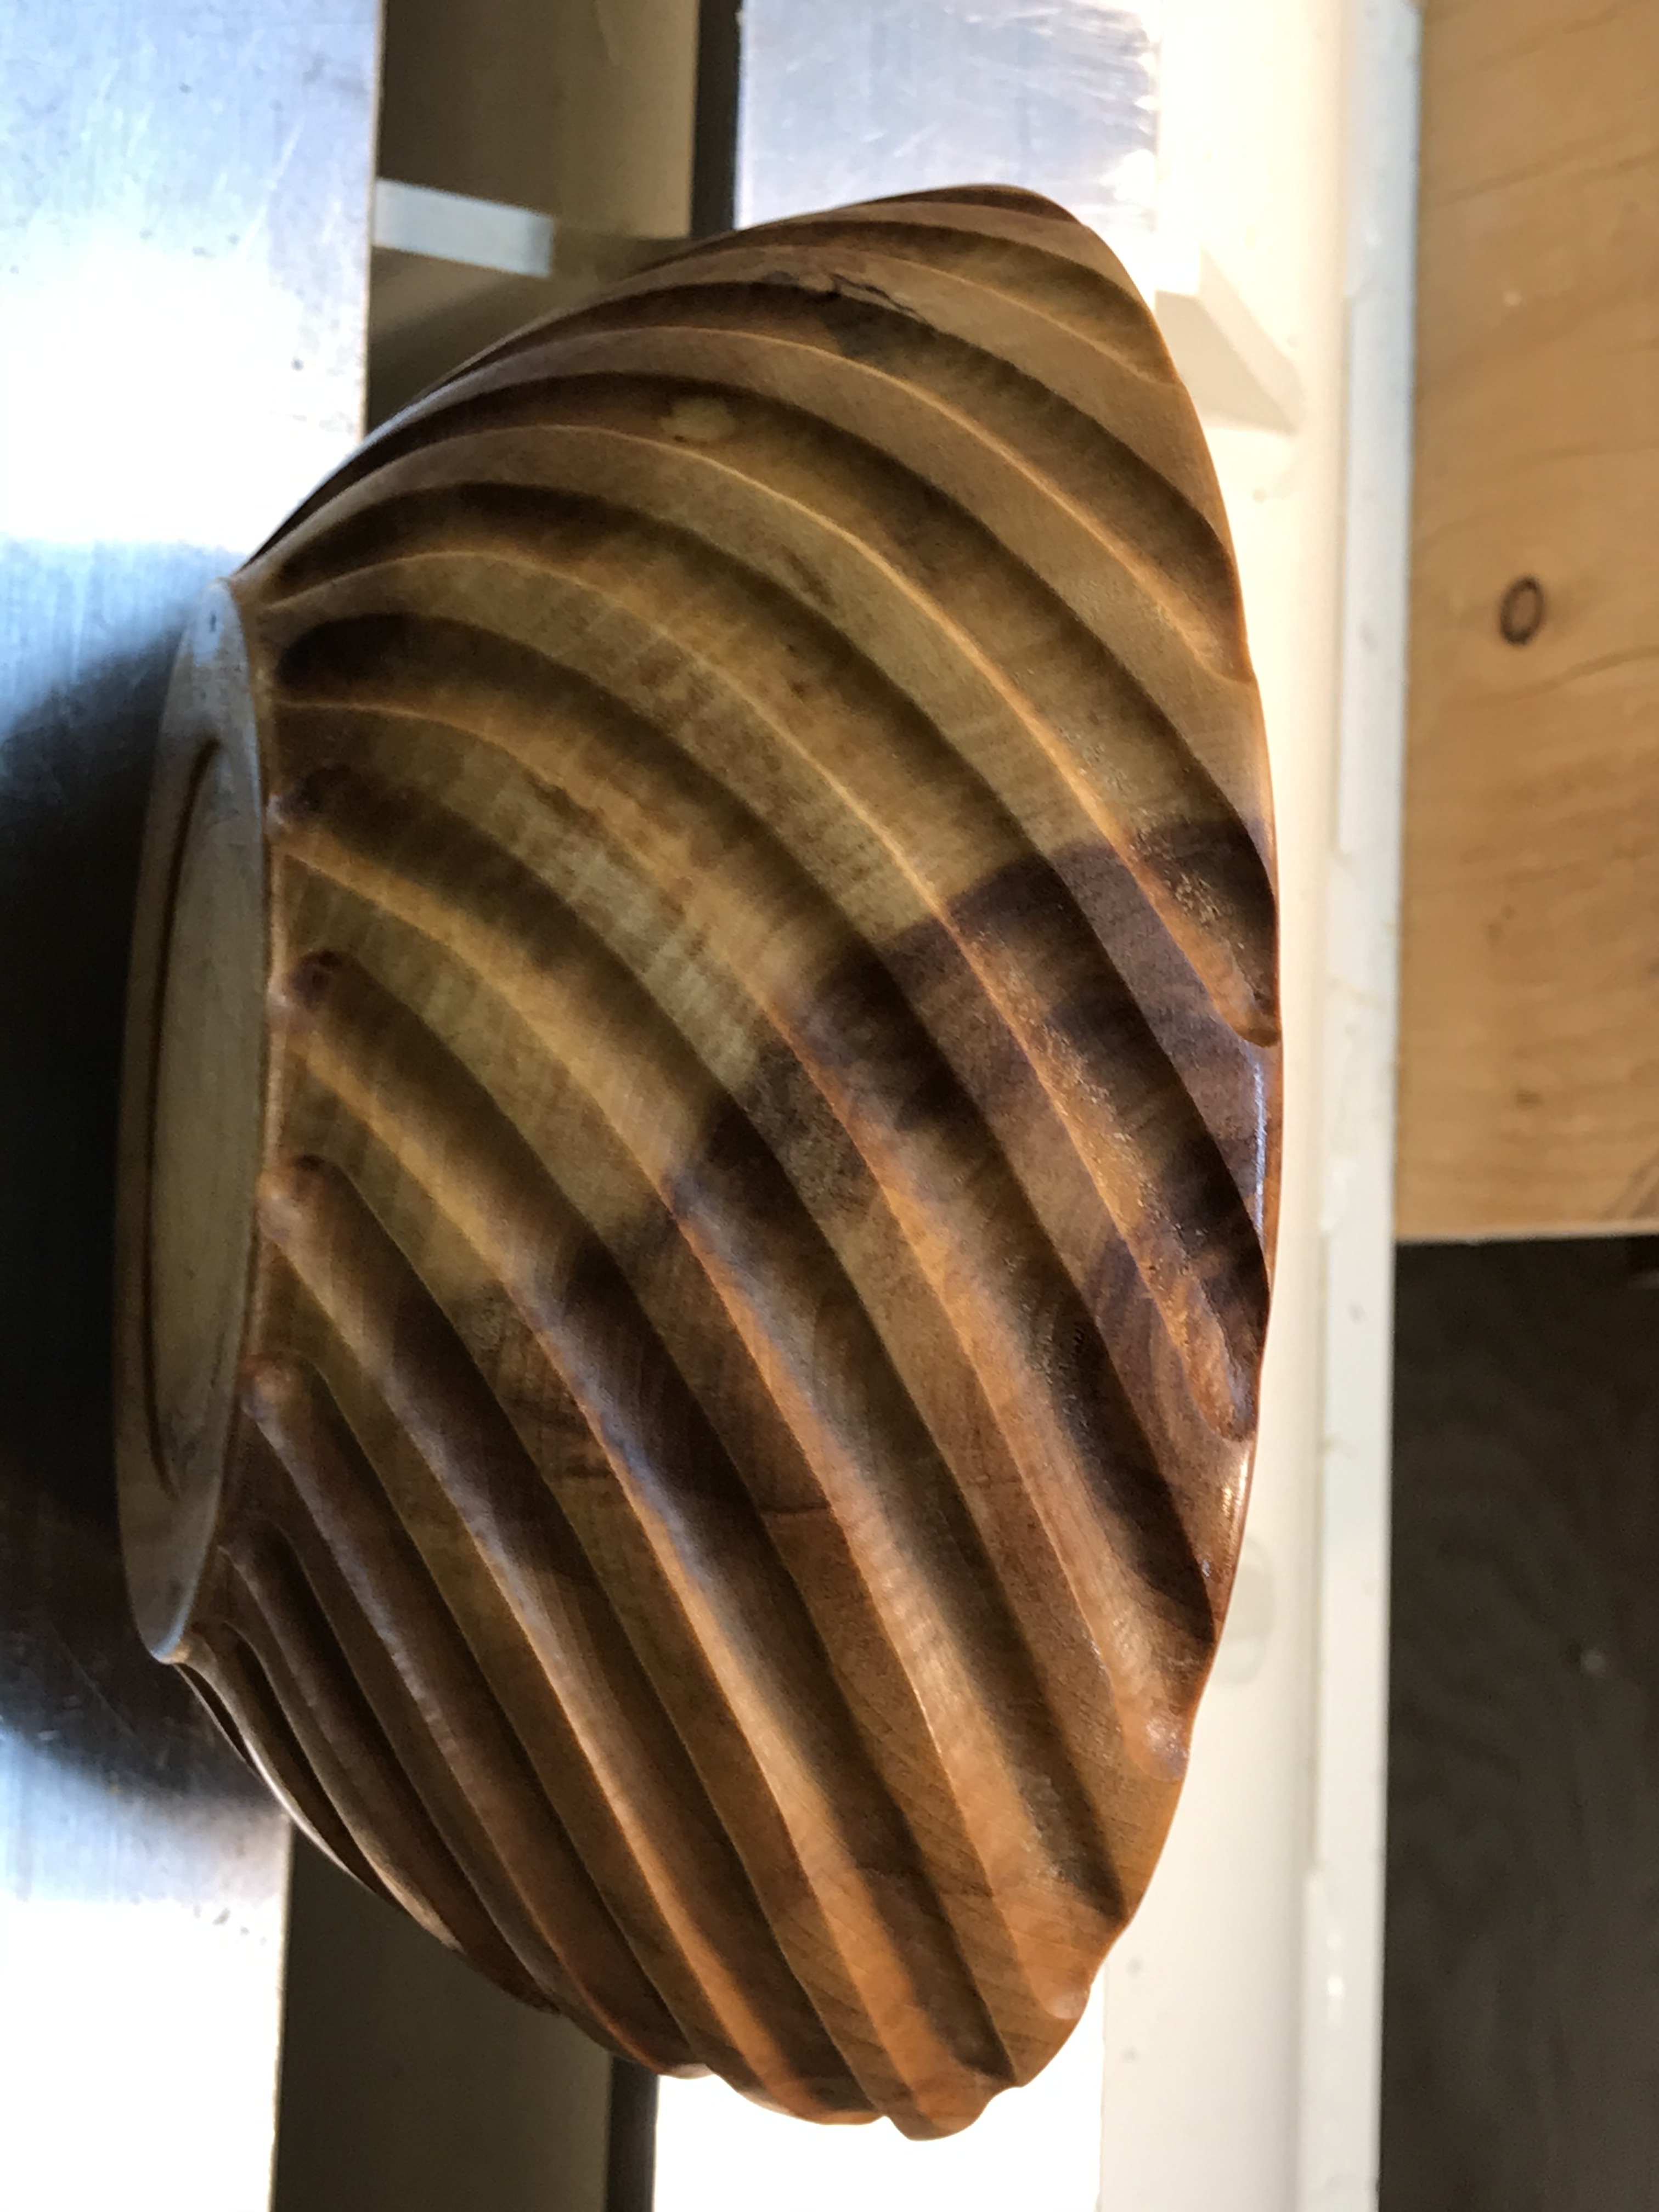
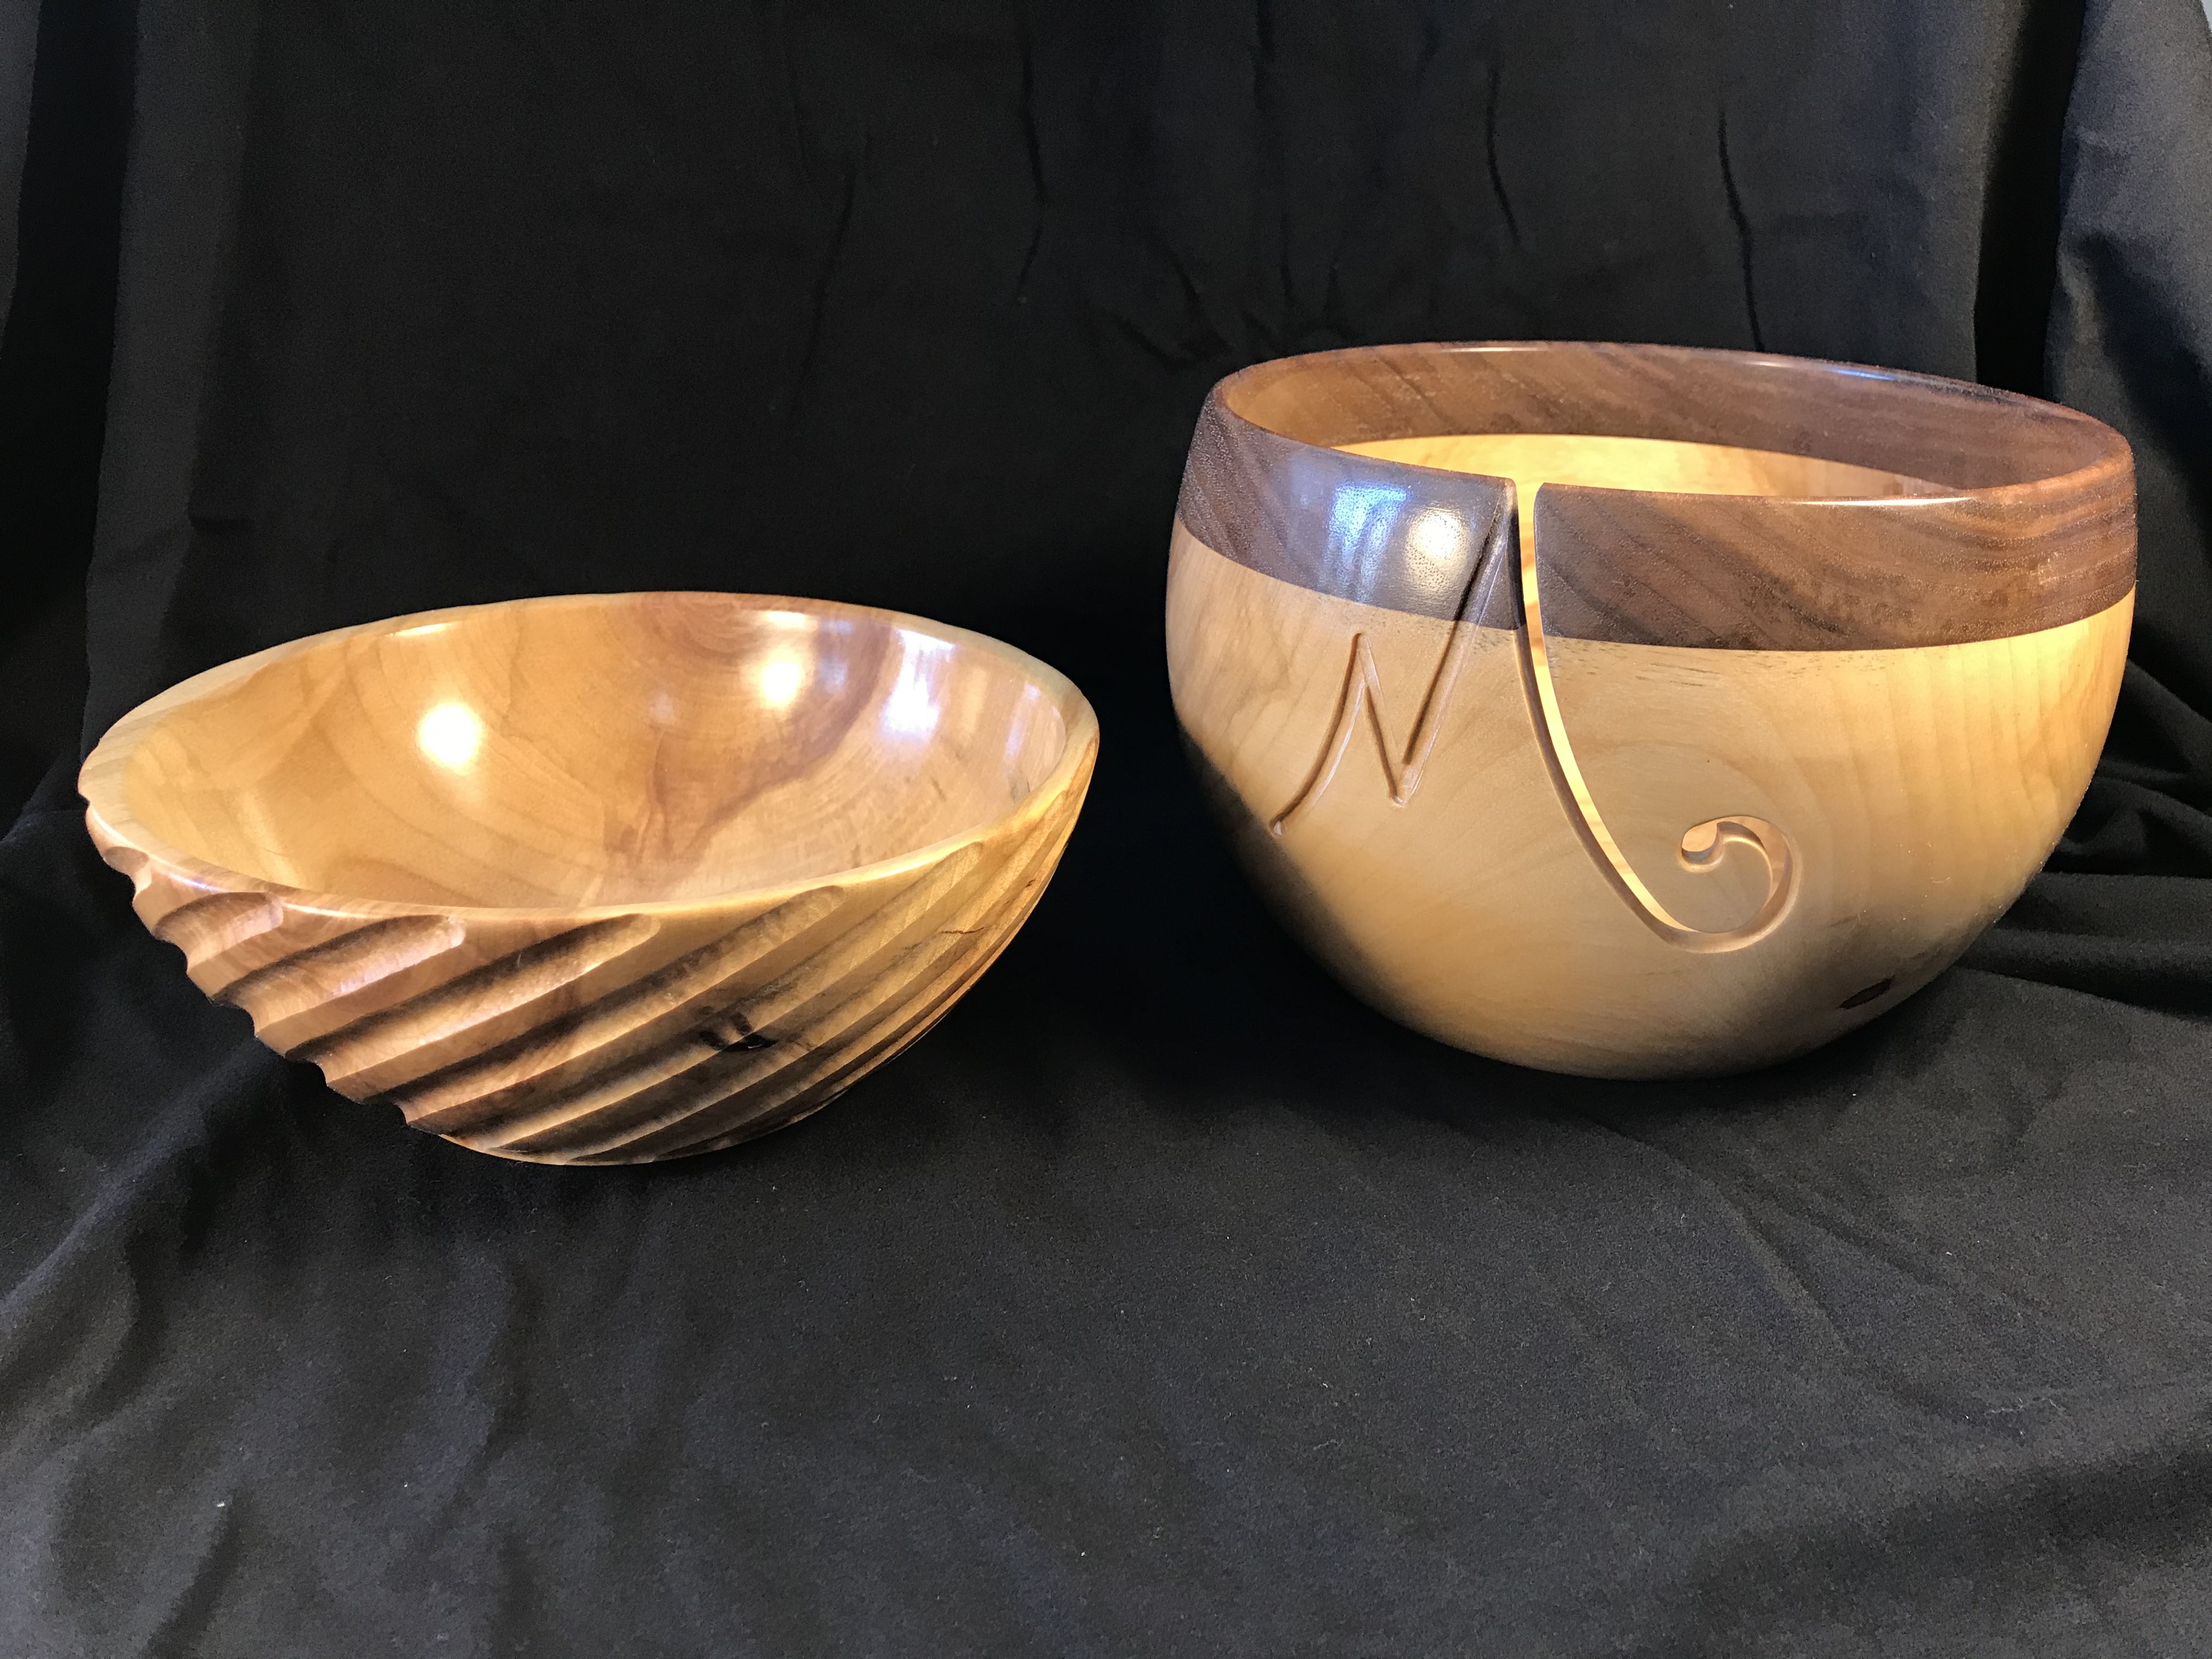
Scan to cut takes about 2 minutes. Here are a couple of examples of a simple arc macro of about 30 lines. Each cut takes about 7 seconds so one pass takes less that 5 minutes depending on how many arcs I want to try. This is Birch.
3/8" cove bit at about 4 to 5mm depth - 2 passes for the depth.
Back to the wood lathe for a little sanding then off to the finish room.
I’m still fine tuning things and experimenting with different patterns. A decent sinusoidal pattern is a pretty tough one so far but I’m close. Of course I can use someone else’s pattern but this is more fun.
Since this posting things have evolved a lot for me. I now use Grblgru to map an outline of one of my turnings mounted on a 4th+5th axis and save it usually as an STL. I have commented elsewhere in this forum about using simple Z probes. I can then use Grblgru to project an image on the surface and burn or carve that in with a laser or router/spindle. Alternatively I can export the file to another great program called COrnlathe, create a design generate the appropriate GCode and export that back into Grblgru to carve it onto my turning. This is a huge leap ahead in being able to digitize one of my own turnings, create a design, and carve it. Grblgru has been really helpful with adapting his program. COrnlathe is another really great program for creating designs then GCode for turnings.
This is really cool. I’m not getting how you did the carving on the bowls you posted in March '20. Do you have any pictures or video showing any of that process?
Alas I didn’t video the first few bowls, just a few pictures. I am eventually setting up a YouTube channel to show my progress with some other techniques. I have invested more time learning software and techniques of what I can and can’t do, than videoing. I’ve made many modifications to my 4th/5th axis and expect to make a few more. I don’t have anyone to show the way so the learning curve is steep ha ha.
Hi Riley. I still have my MPCNC and my LowRider. I use the MPCNC mostly for laser work since it’s so nimble. I have also made two more machines ha ha. Currently I mainly use a PrintNC since it’s Much stiffer. I use up to 5 axes now too. My two V1 machines can use 4 axes.
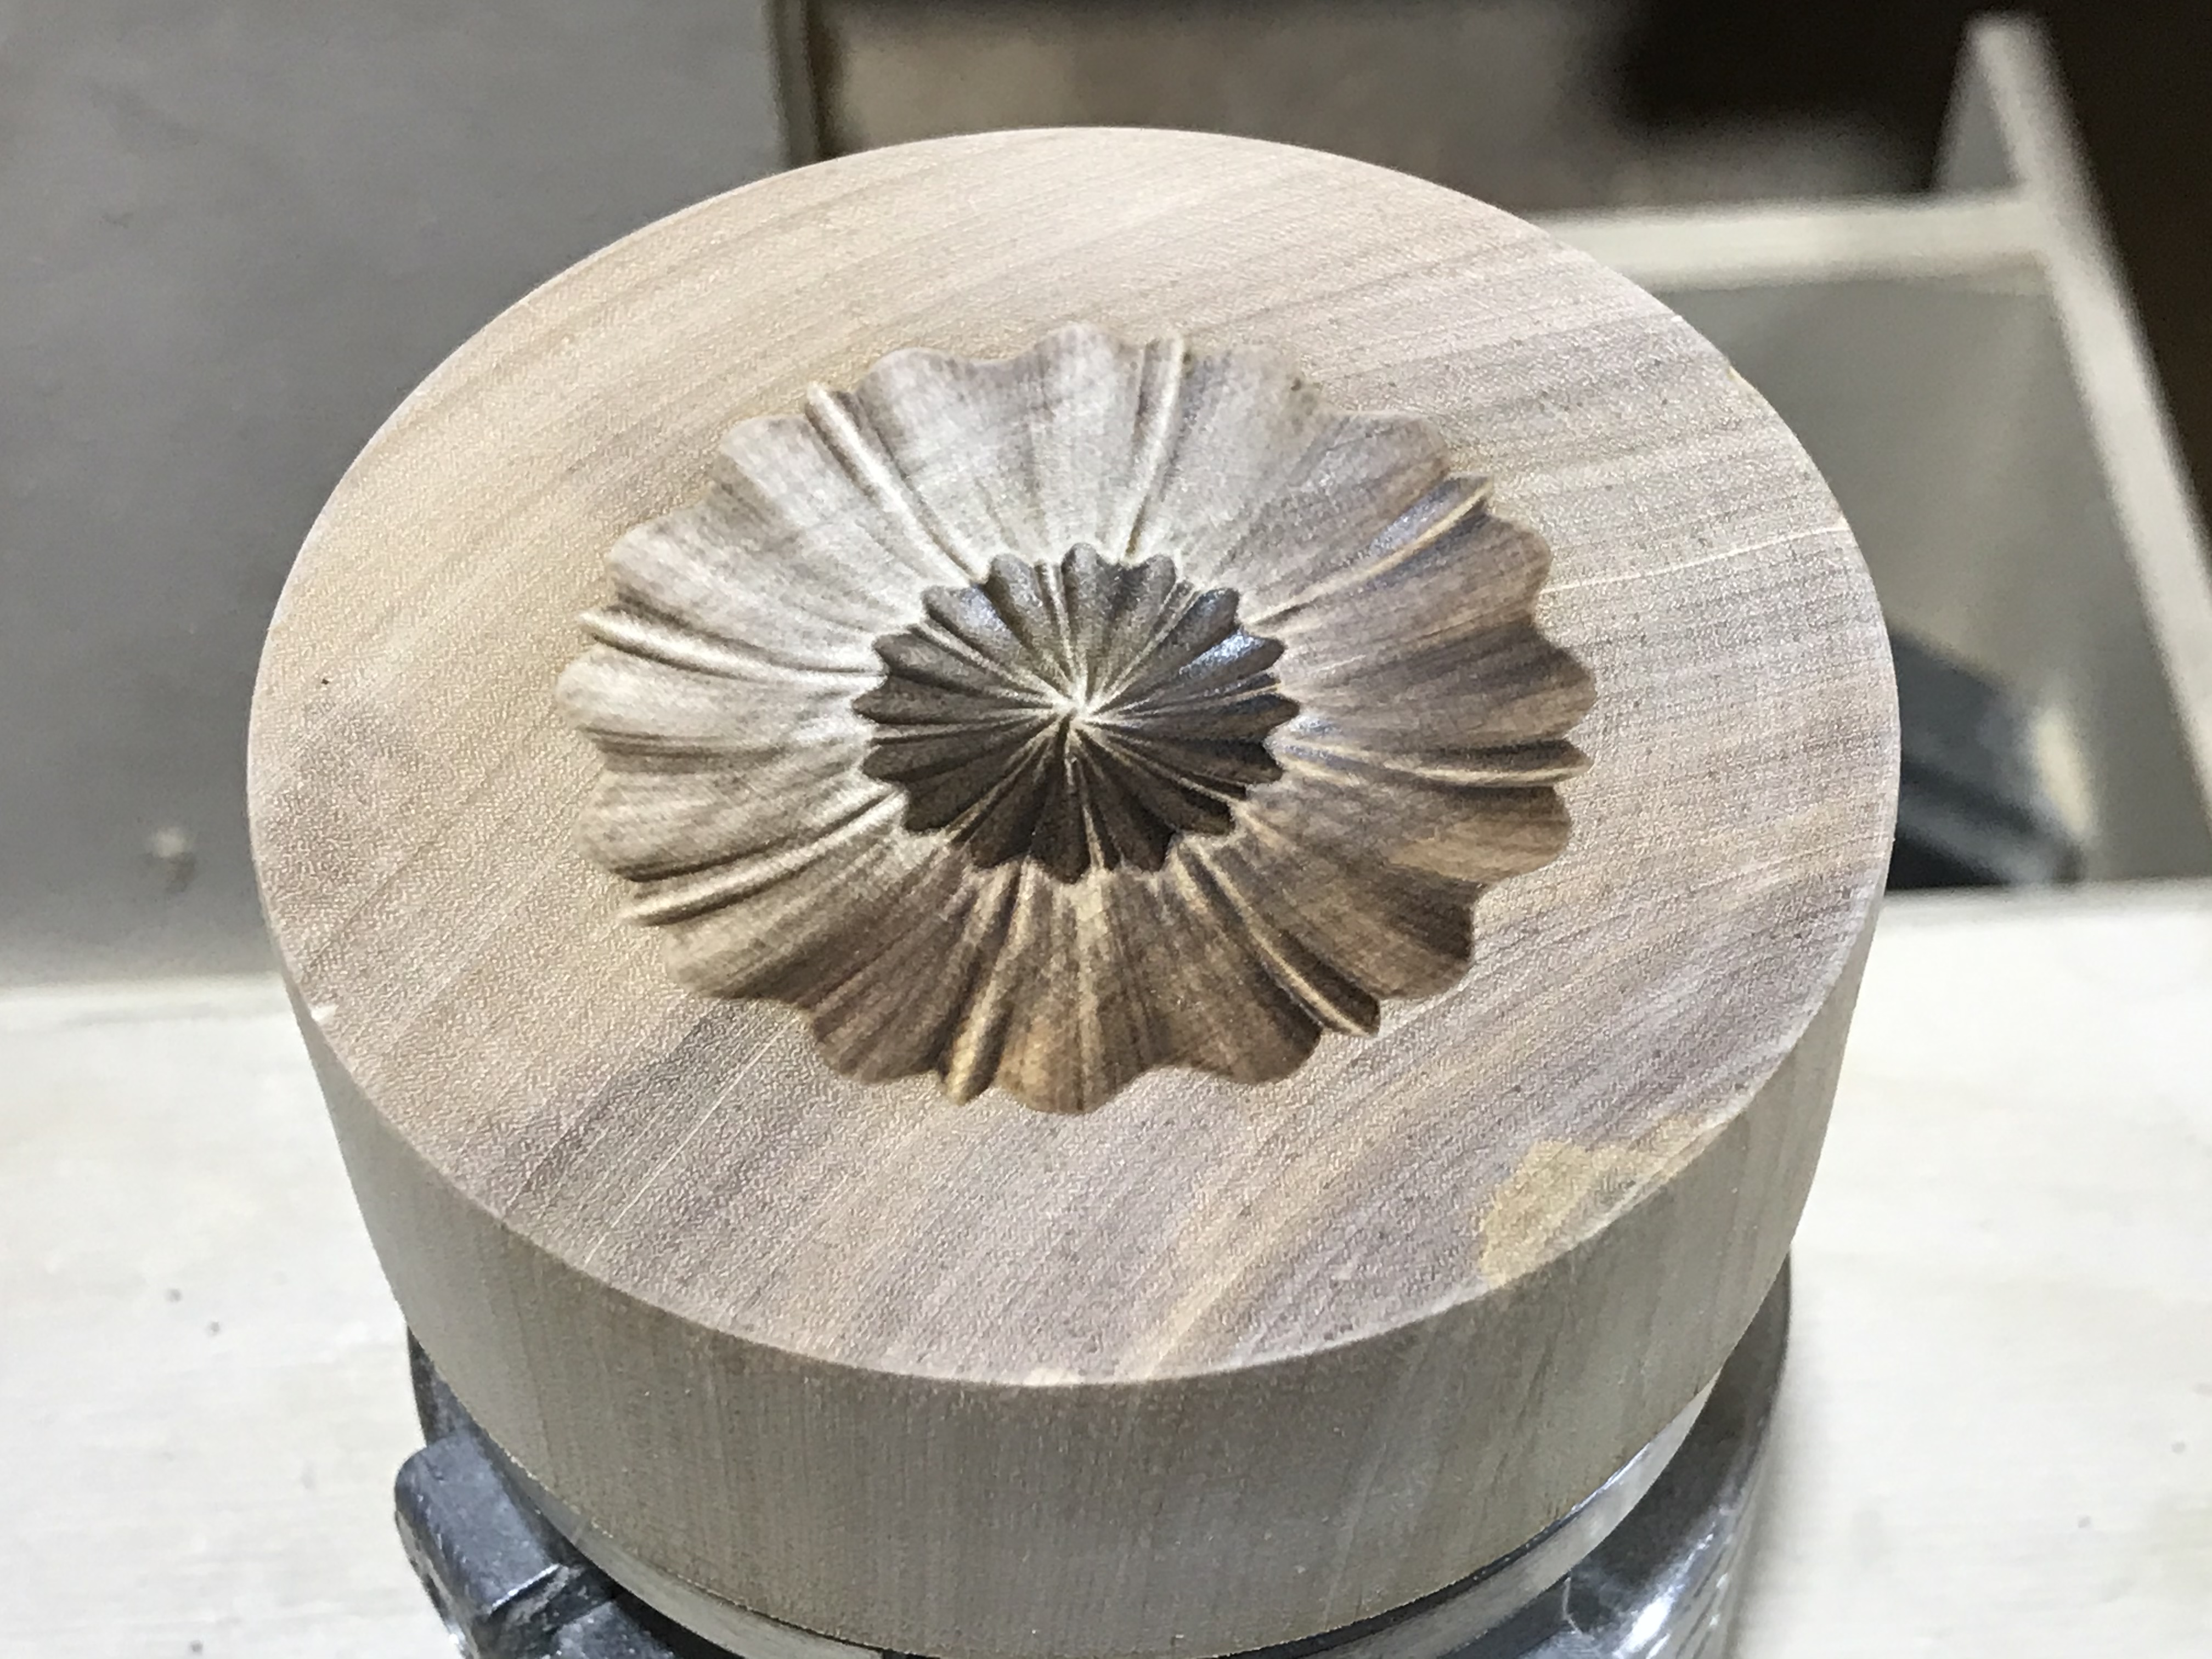
I use Grblgru a lot. I continue to work with the author to develop and refine features so my machine can do new tricks like this:
In this test I am using a 60 degree VBit to carve 0.5mm deep. This is really hard to do properly which is why I am testing it. Any problems, like being off centre 1mm at the beginning, are exposed. Successful test as a result.
Cheers, Jeff