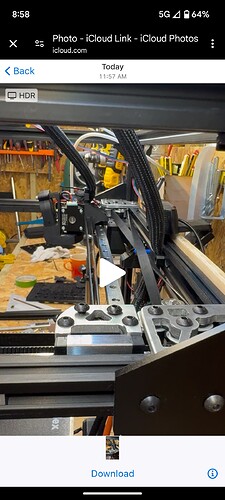
I did wonder about that, but both have 20 tooth on them the Z axis have 16.
# See docs/Config_Reference.md for a description of parameters.
[include mainsail.cfg]
# Motor1
[stepper_x]
step_pin: PE6
dir_pin: PE5
enable_pin: !PC14
microsteps: 16
rotation_distance: 40
endstop_pin: ^PF4
position_endstop: 0
position_min: 0
position_max: 300
homing_speed: 75
homing_retract_dist: 5
second_homing_speed: 3

# Motor2
[stepper_y]
step_pin: PE2
dir_pin: PE1
enable_pin: !PE4
microsteps: 16
rotation_distance: 40
endstop_pin: ^PF3
position_endstop: 300
position_min: 0
position_max: 300
homing_speed: 75
homing_retract_dist: 5
second_homing_speed: 3
# Motor3
[stepper_z]
step_pin: PB8
dir_pin: !PB7
enable_pin: !PE0
microsteps: 16
rotation_distance: 32
endstop_pin: probe:z_virtual_endstop
position_min: -5
position_max: 298
homing_speed: 25
second_homing_speed: 3
homing_retract_dist: 5
## Motor4
[stepper_z1]
step_pin: PB4
dir_pin: PB3
enable_pin: !PB6
microsteps: 16
rotation_distance: 32
endstop_pin: probe:z_virtual_endstop
# Motor5
[stepper_z2]
step_pin: PG13
dir_pin: PG12
enable_pin: !PG15
microsteps: 16
rotation_distance: 32
endstop_pin: probe:z_virtual_endstop
## Motor6
[extruder]
step_pin: PG9
dir_pin: PD7
enable_pin: !PG11
heater_pin: PA1 # HE1
sensor_pin: PC5 # T1
microsteps: 16
rotation_distance: 3.5
nozzle_diameter: 0.4
filament_diameter: 1.75
heater_pin: PA0 # HE0
sensor_pin: PB0 # T0
sensor_type: EPCOS 100K B57560G104F
#control: pid
#pid_Kp: 22.2
#pid_Ki: 1.08
#pid_Kd: 114
min_temp: 0
max_temp: 250
max_extrude_only_distance: 150.0
[heater_bed]
heater_pin: PF5
sensor_pin: PB1 # TB
sensor_type: Generic 3950
min_temp: 00
max_temp: 130
max_power: 1
# Fan0
[heater_fan fan]
pin: PF7
## Fan1
[fan]
pin: PF9
max_power: 0.4
[mcu]
serial: /dev/serial/by-id/usb-Klipper_stm32h723xx_1B0016000851313339373836-if00
[printer]
kinematics: corexy
max_velocity: 300
max_accel: 7000
max_z_velocity: 50
max_z_accel: 500
[gcode_arcs]
resolution: 1
########################################
# TMC2209 configuration
########################################
## Motor1
[tmc2209 stepper_x]
uart_pin: PC13
#diag_pin: PF4
interpolate: False
run_current: 1
stealthchop_threshold: 999999
## Motor2
[tmc2209 stepper_y]
uart_pin: PE3
#diag_pin: PF3
run_current: 1
interpolate: False
stealthchop_threshold: 999999
## Motor3
[tmc2209 stepper_z]
uart_pin: PB9
#diag_pin: PF2
run_current: 0.800
stealthchop_threshold: 999999
## Motor4
[tmc2209 stepper_z1]
uart_pin: PB5
#diag_pin: PF1
run_current: 0.800
stealthchop_threshold: 999999
# Motor5
[tmc2209 stepper_z2]
uart_pin: PG14
run_current: 0.800
stealthchop_threshold: 999999
## Motor6
[tmc2209 extruder]
uart_pin: PG10
run_current: 0.800
stealthchop_threshold: 999999
[board_pins]
aliases:
# EXP1 header
EXP1_1=PE7, EXP1_2=PG1,
EXP1_3=PG0, EXP1_4=PF15,
EXP1_5=PF14, EXP1_6=PF13, # Slot in the socket on this side
EXP1_7=PF12, EXP1_8=PF11,
EXP1_9=<GND>, EXP1_10=<5V>,
# EXP2 header
EXP2_1=PE13, EXP2_2=PE12,
EXP2_3=PE15, EXP2_4=PE11,
EXP2_5=PE10, EXP2_6=PE14, # Slot in the socket on this side
EXP2_7=PE8, EXP2_8=<RST>,
EXP2_9=<GND>, EXP2_10=<NC>
# See the sample-lcd.cfg file for definitions of common LCD displays.
[temperature_sensor Manta_M8P_temp]
sensor_type: temperature_mcu
min_temp: 0
max_temp: 100
[temperature_sensor RaspberryPi]
sensor_type: temperature_host
min_temp: 0
max_temp: 100
[adxl345]
cs_pin: PA15
spi_software_sclk_pin: PC10
spi_software_mosi_pin: PC12
spi_software_miso_pin: PC11
spi_speed: 5000000
rate: 3200
axes_map:x,-y,-z
[resonance_tester]
accel_chip: adxl345
probe_points: 150, 150, 20 # an example
[output_pin probe_enable]
pin: PD12
value: 0
[gcode_macro Probe_Deploy]
gcode:
SET_PIN PIN=probe_enable VALUE=1
[gcode_macro Probe_Stow]
gcode:
SET_PIN PIN=probe_enable VALUE=0
[probe]
pin: ^!PD13 #For V1 version, set to ^PD13 for high-level trigger; for V2 version, set to ^!PD13 for low-level trigger.
deactivate_on_each_sample: False
x_offset: 7.0
y_offset: -25.0
z_offset: 0.95
speed: 5.0
activate_gcode:
Probe_Deploy
G4 P500 # Allow 500 milliseconds for the probe to deploy
deactivate_gcode:
Probe_Stow
[homing_override]
gcode:
G90 ; Use absolute positioning
G28 X Y ; Home X and Y axes first
G0 X150 Y150 ; Move to the center of the bed
G28 Z ; Home Z axis (this should move the bed up towards Z0)
G1 Z20 ; Move bed down slightly to avoid collision
Z_TILT_ADJUST ; Perform bed tilt calibration
G0 X150 Y150 ; Move to the center of the bed
G28 Z
BED_MESH_PROFILE LOAD="default"
axes: z
set_position_z: 0
[z_tilt]
#z_positions:
# 0,0
# 150,300
# 300,0
z_positions:
-21, 37.5
152, 355
345, 37.5
points:
25,25
150,275
275,25
speed: 150 # Speed of movement during tilt calibration
horizontal_move_z: 5 # Safe move height above the bed
retry_tolerance: 0.01
retries: 6
[output_pin power_detect]
# Pull the pin initially high after starting Klipper
pin: PD14
value: 1
shutdown_value: 0
[gcode_macro POWER_ON]
description: Turn on the printer via the relay
gcode:
SET_PIN PIN=power_detect VALUE=1
[gcode_macro POWER_OFF]
description: Turn off the printer via the relay
gcode:
{ action_respond_info('Shutting down now') }
SET_PIN PIN=power_detect VALUE=0
[gcode_macro DO_SHUTDOWN]
description: Turn off all heaters and cut power once below 60C
gcode:
TURN_OFF_HEATERS
TEMPERATURE_WAIT SENSOR=extruder MAXIMUM=60
POWER_OFF
[filament_switch_sensor filament_switch_sensor]
switch_pin: ^PF0
pause_on_runout: false
runout_gcode: PAUSE
[filament_motion_sensor filament_motion_sensor]
switch_pin: ^PC15
detection_length: 7
extruder: extruder
pause_on_runout: false
runout_gcode: PAUSE
[delayed_gcode DISABLEFILAMENTSENSOR]
initial_duration: 1
gcode:
SET_FILAMENT_SENSOR SENSOR=filament_motion_sensor ENABLE=0
[bed_mesh]
speed: 125
horizontal_move_z: 5
mesh_min: 25, 25
mesh_max: 275,275
probe_count: 5, 5
algorithm: bicubic
bicubic_tension: 0.2
fade_start: 1
fade_end: 10
fade_target: 0
[gcode_macro PRINT_START]
gcode:
G28
[gcode_macro PRINT_END]
gcode:
TURN_OFF_HEATERS
G0 Z298
DO_SHUTDOWN
#*# <---------------------- SAVE_CONFIG ---------------------->
#*# DO NOT EDIT THIS BLOCK OR BELOW. The contents are auto-generated.
#*#
#*# [input_shaper]
#*# shaper_type_x = ei
#*# shaper_freq_x = 43.0
#*# shaper_type_y = 2hump_ei
#*# shaper_freq_y = 43.2
#*#
#*# [extruder]
#*# control = pid
#*# pid_kp = 15.199
#*# pid_ki = 0.396
#*# pid_kd = 145.912
#*#
#*# [heater_bed]
#*# control = pid
#*# pid_kp = 55.056
#*# pid_ki = 1.375
#*# pid_kd = 551.246
#*#
#*# [probe]
#*#
#*# [bed_mesh default]
#*# version = 1
#*# points =
#*# -0.250000, -0.070000, -0.020000, -0.060000, -0.240000
#*# -0.260000, -0.010000, -0.000000, -0.070000, -0.210000
#*# -0.250000, -0.110000, -0.050000, -0.130000, -0.380000
#*# -0.370000, -0.160000, -0.140000, -0.230000, -0.520000
#*# -0.440000, -0.290000, -0.260000, -0.360000, -0.670000
#*# x_count = 5
#*# y_count = 5
#*# mesh_x_pps = 2
#*# mesh_y_pps = 2
#*# algo = bicubic
#*# tension = 0.2
#*# min_x = 25.0
#*# max_x = 275.0
#*# min_y = 25.0
#*# max_y = 275.0
