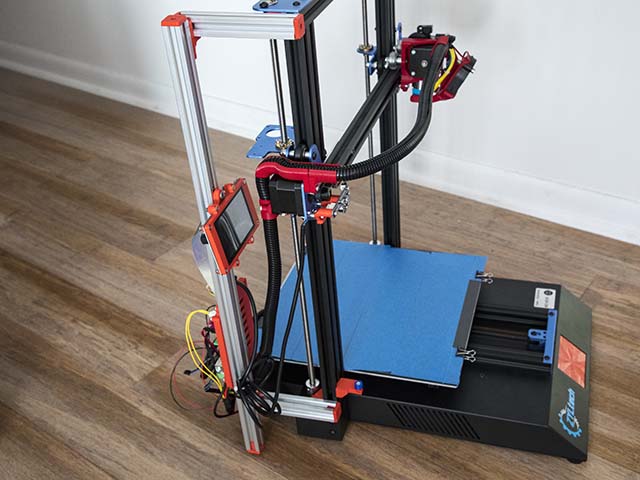
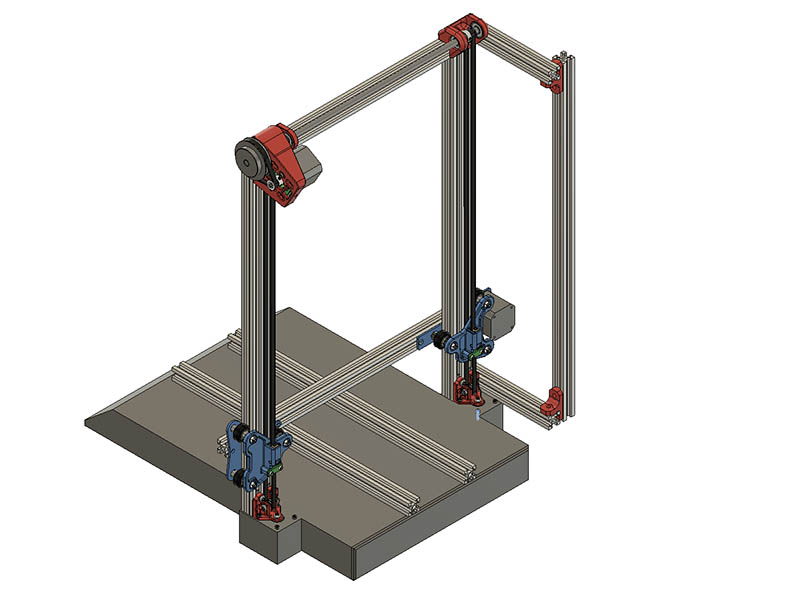
I have been meaning to upgrade this printer for over a year now. I bought this back in the fall of 2020 when they had a pretty good sale on it. This worked for about a couple of months before jamming & was too much trouble for me to fix since I was not crazy about the Bowden setup anyway. This is 12"x12"x12" printer & here is a link to the printer. New! ZYLtech Gear V3 Large Volume 3D Printer I am not a big fan of Bowden extruders, but thought I would give it another try & upgrade to direct drive if it didn’t work out. It didn’t work out and I have had the 24v E3D hotend & BMG clone extruder for a while. Now I know why I put this off for quite a while. I spent most of last week working on it.
First thing I realized was the bearings in the wheels leaked grease. Since openbuilds had a sale last week, I bought 8 extreme wheels to replace the X & Y wheels & replaced the 6 Z-axis wheels with some spare regular wheels with the good bearings.
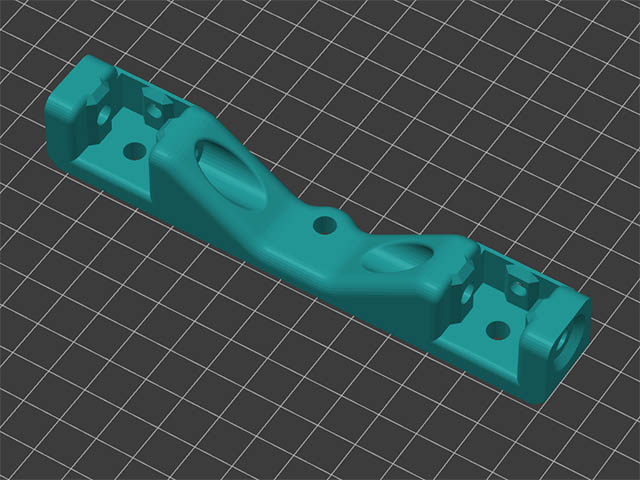
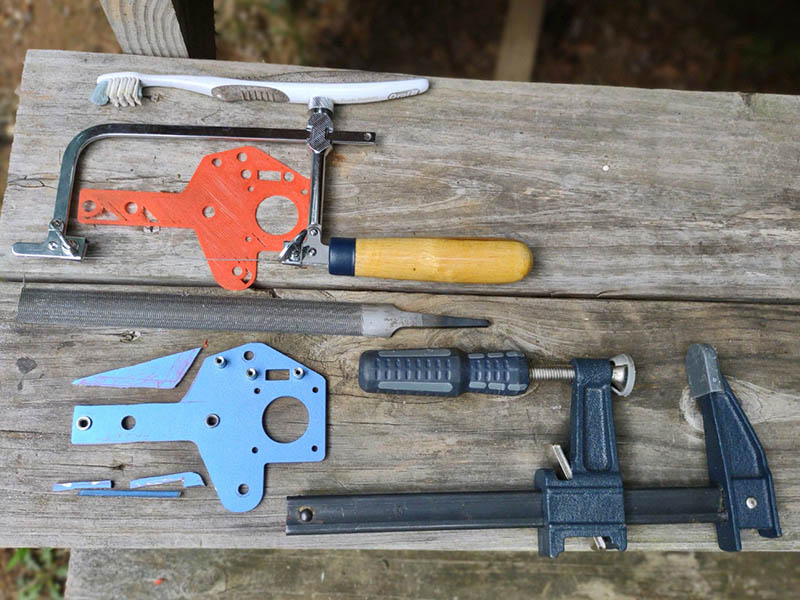
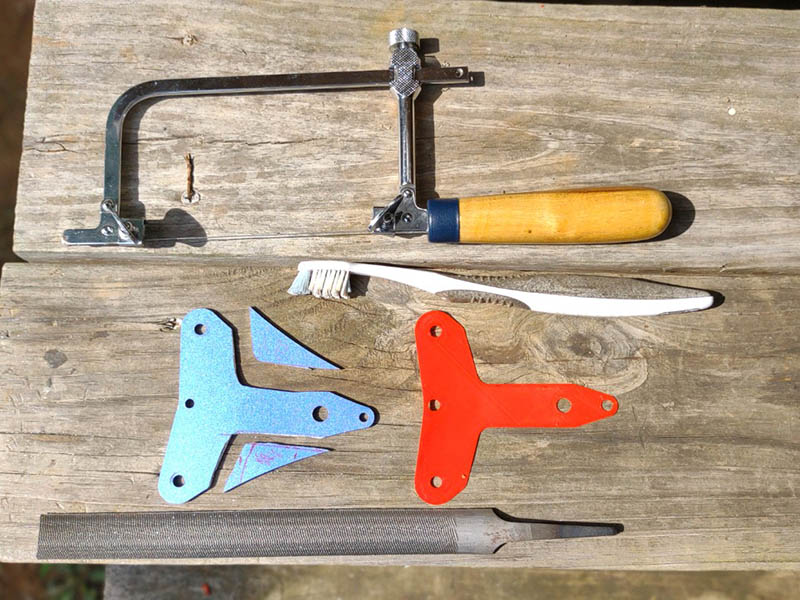
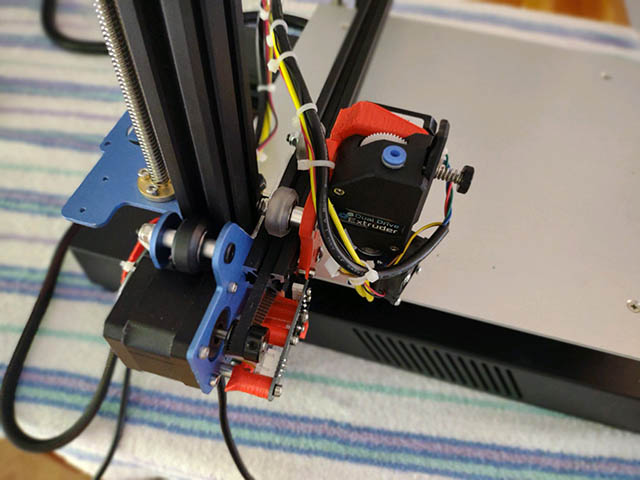
Now that the wheels were replaced, I thought my only major hurdle would be wire management. After assembling the plastic carriage I had designed for the BMG extruder & E3D hotend, I realized the locknuts on the wheels hit the metal plates on the end. The original design did not have this problem because the screw head was on the wheel end. Thought I might be able to solve the problem with a M5 jam nut & lock washer, but only gained a little more bed width. I did not have much clearance for a locknut behind the extruder. I decided to cut away some metal from those brackets to solve the problem since it. Using my old jewelry saw was the cleanest method for the little bit of cutting this needed. I made a couple of plastic templates in case I messed up & had to 3d print or cut a couple of new plates. All went well though. Here are a couple of photos.
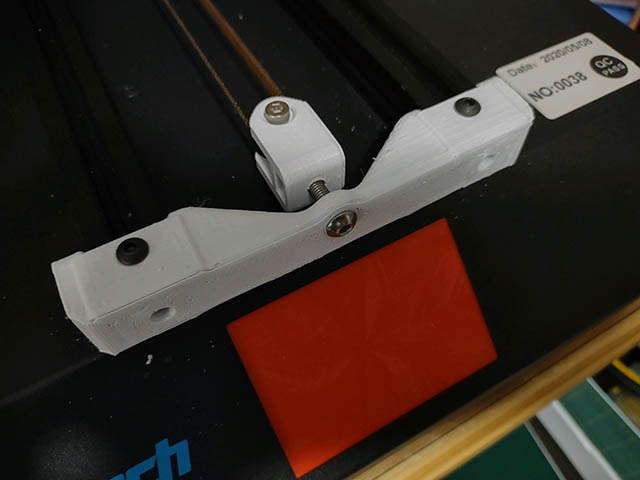
Afte 1st test fit with these mods, The hotend still did not quite reach the edge of the far end, so I cut another 3-4mm off the T shaped metal part and it fit. The next problem was the carriage alsohit the X belt tensioner before reaching edge of bed, so I was able to redesign a 3d printed version of part of it to fix that problem. I also swapped a few of the M3 pan head screws with socket cap screws and regular t-nuts with the drop in t-nuts where I could. Here is the X axis belt tensioning before & after. I did use drop in t-nuts with the tensioner since I needed as much room as possible there.
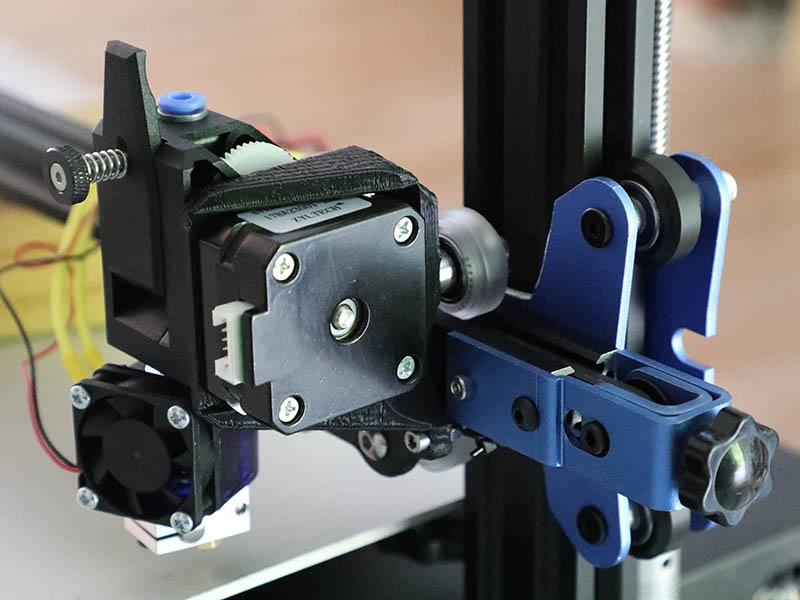

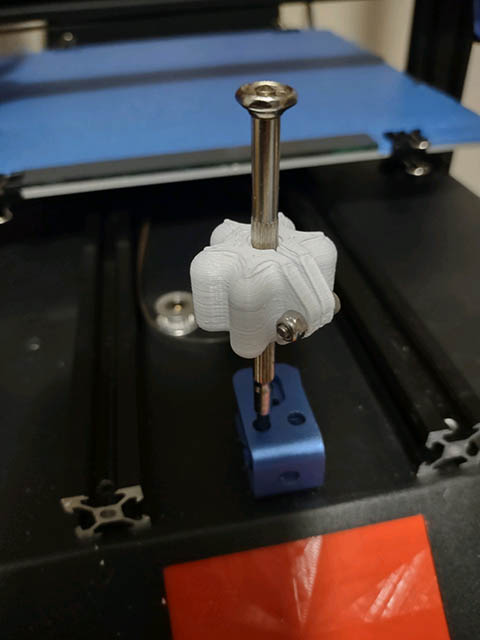
Before I could actually test the movement of this machine, I had to redesign a mount for the X/Z combo limit switch & also a new mount to hold the M3 screw for the Z micro adjustment. After a few trial and error prints, it worked well. You can see the 3d printed parts in red in photo below.

Now I was ready to test the electrical connections. I first tested the heatbed & hotend & they worked. I then homed the machine & all 3 axis moved correctly. I was a couple of millimeters off from the edge of build plate. I decided to tweak the carriage a little and had room to move the extruder 3mm closer to the carriage by recessing the wheel screw behind the motor. Now I have full movement of the 310x310mm bed.
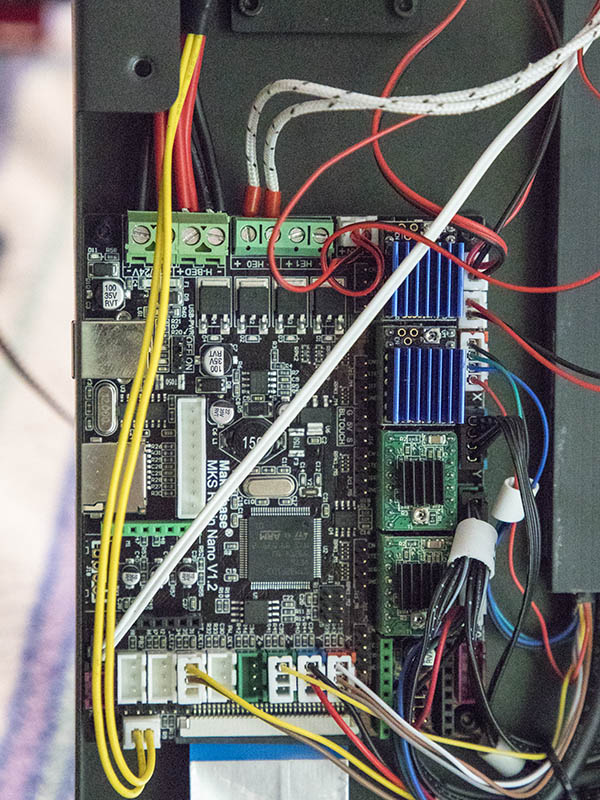
I only have the wire management left now. I tried using one of the black plastic wire sleeves, but does not work well, so for now I just put some wire ties every so often. It still needs some work to keep from hitting the bed in the back & am also not going to get full height unless I lengthen some of the wires or move the controller board from under the machine. I am more inclined to move the controller board and maybe go to a different controller as I don’t like the MKS Robin nano V1.2 board. I can live with not being able to go full height for now as I generally don’t print very tall parts anyway. The board has TMC2208 drivers on the X & Y and A4988 drivers on the Z & Extruder. Those A4988s are really loud now that I am used to the TMC2209. I ordered 4-TMC 2209 drivers to replace them. The fans in the case will be the loudest items after that.
I also do not have a cooling fan on here yet but will print slower until I get around to that item. Think I will leave this alone for a few days now.