That’s a pretty cool print monitoring system you’ve got. I was thinking of putting in a camera, but if you can have a pug watch it the whole time I think its a much better solution!
2 Likes
Makes sense! The cutout i made at the end of my table for vertical pieces makes a great “cockpit” to stand in, so the “traditional” orientation works for me. I can see how one might prefer it to be rotated. Everyone’s happy! Hope your gantry length issue is only a minor hiccup!
1 Like
We’re all in the same club. The early LR4 beta had some doubt about sizing, then an early calculator had a bug, then I decided I needed a bit more X on my table. Much longer story shortened: I’ve built 5 LR4 gantry assemblies so far. And this weekend I’ll be assembling my 6th and hopefully final gantry for the what will be my small LR4.
2 Likes
Well, glad we don’t need stainless tubing any more ala LR2, that would get expensive!
2 Likes
Nice progress and pictures.
Getting close. Might even finish have things moving tonight.
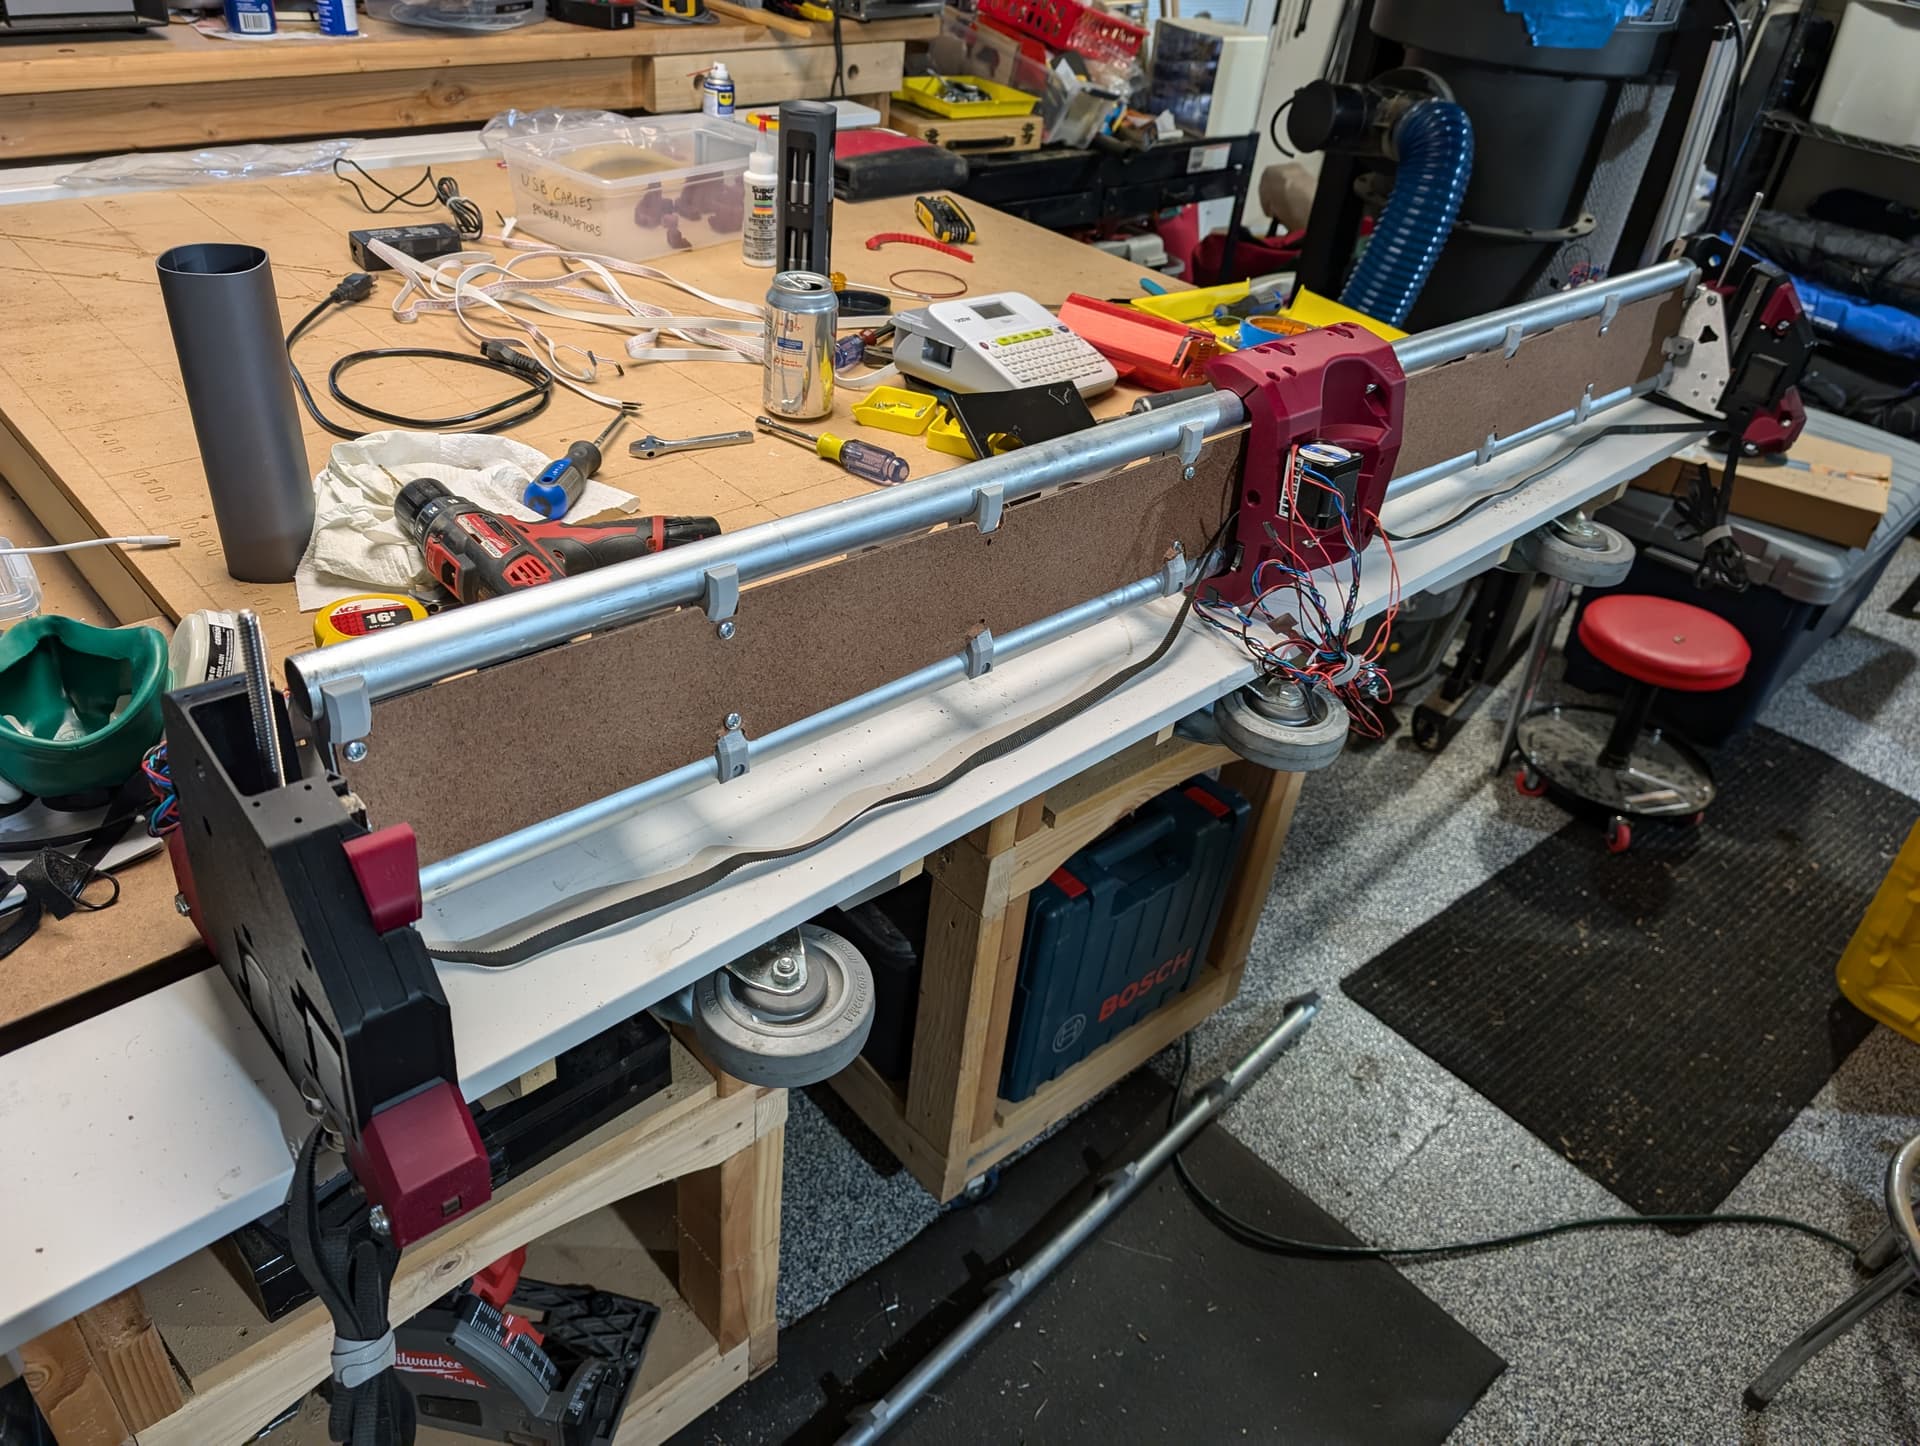
I cut my too-short struts in half to serve as temporary struts (cut hidden behind core.) I noticed I had the roller wheel axle bolts backwards on the min XY side; second pic shows corrected (the whole side should be flush other than limit switch and idlers.)
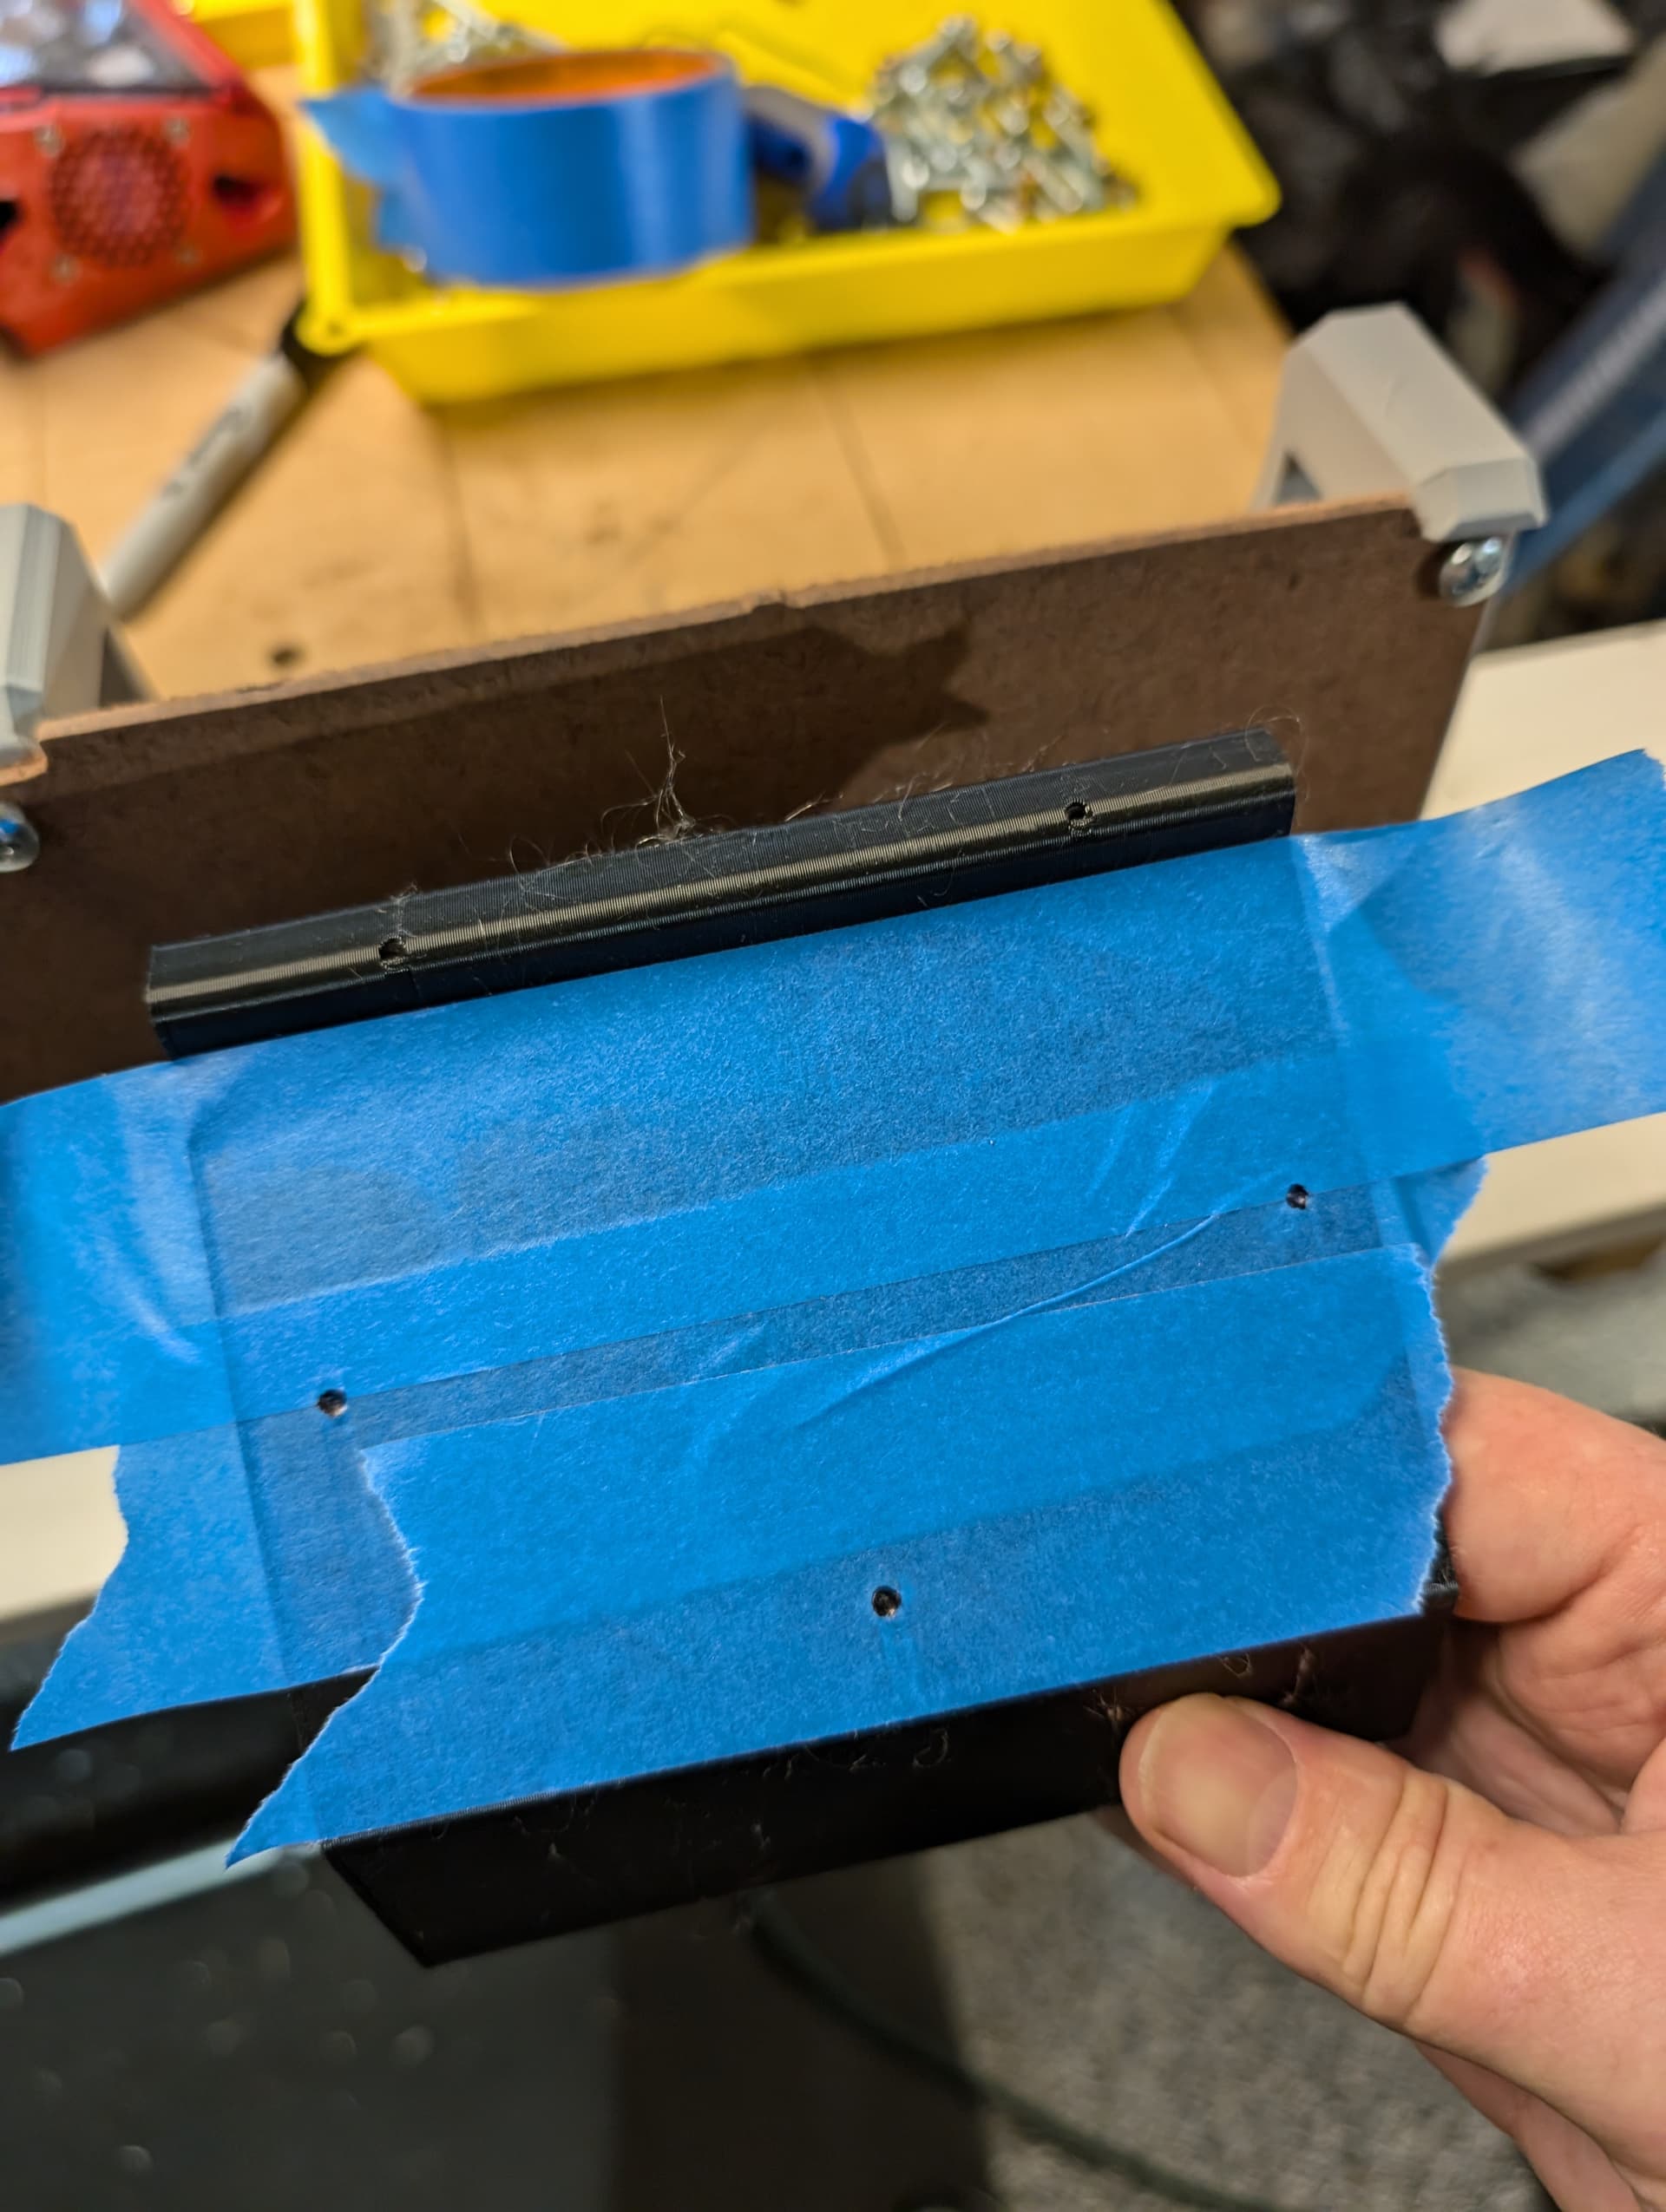
I used the ol’ blue tape trick to transfer the mounting holes for the jackpot case to the hardboard. Saved the tape for the future “correct” ones!
5 Likes

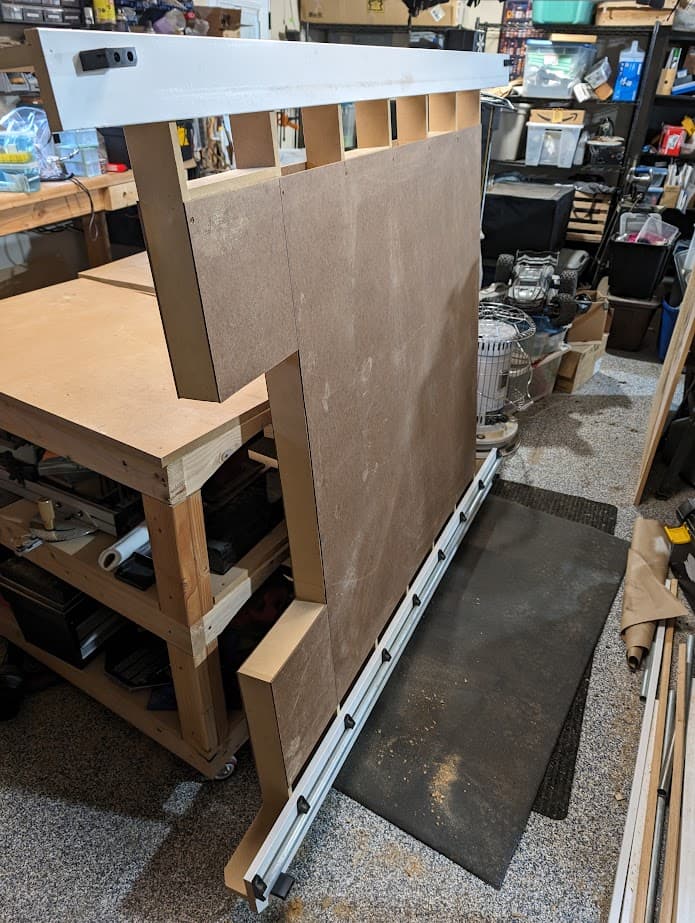
Training wheels!
One of my favorite things about the LR3 and LR4 is that they can be lifted off the table and stored.
These wheels are so I can store the table vertically (I take off the heavy MDF spoilboard first.) The rolling cabinet things it sits on can then roll under my giant workbench.
Not the most elegant thing ever, but it works! It’s Ryan’s table design with a cutout for vertical cuts–I’m planning on making a dovetail-slotted fixture to clamp pieces vertically with those Microjig Matchfit clamps for my LR4. In the meantime, the cutout makes a nice place to stand and pretend I’m captain of a ship.
Will be away from the garage for a bit, but should resume my LR4 build shortly.
12 Likes
![]()
1 Like
@Jonathjon He is looking to take your job, LOL
3 Likes
That is exactly what I need to build. A removable top that can be stored on its side. Perfect!
1 Like
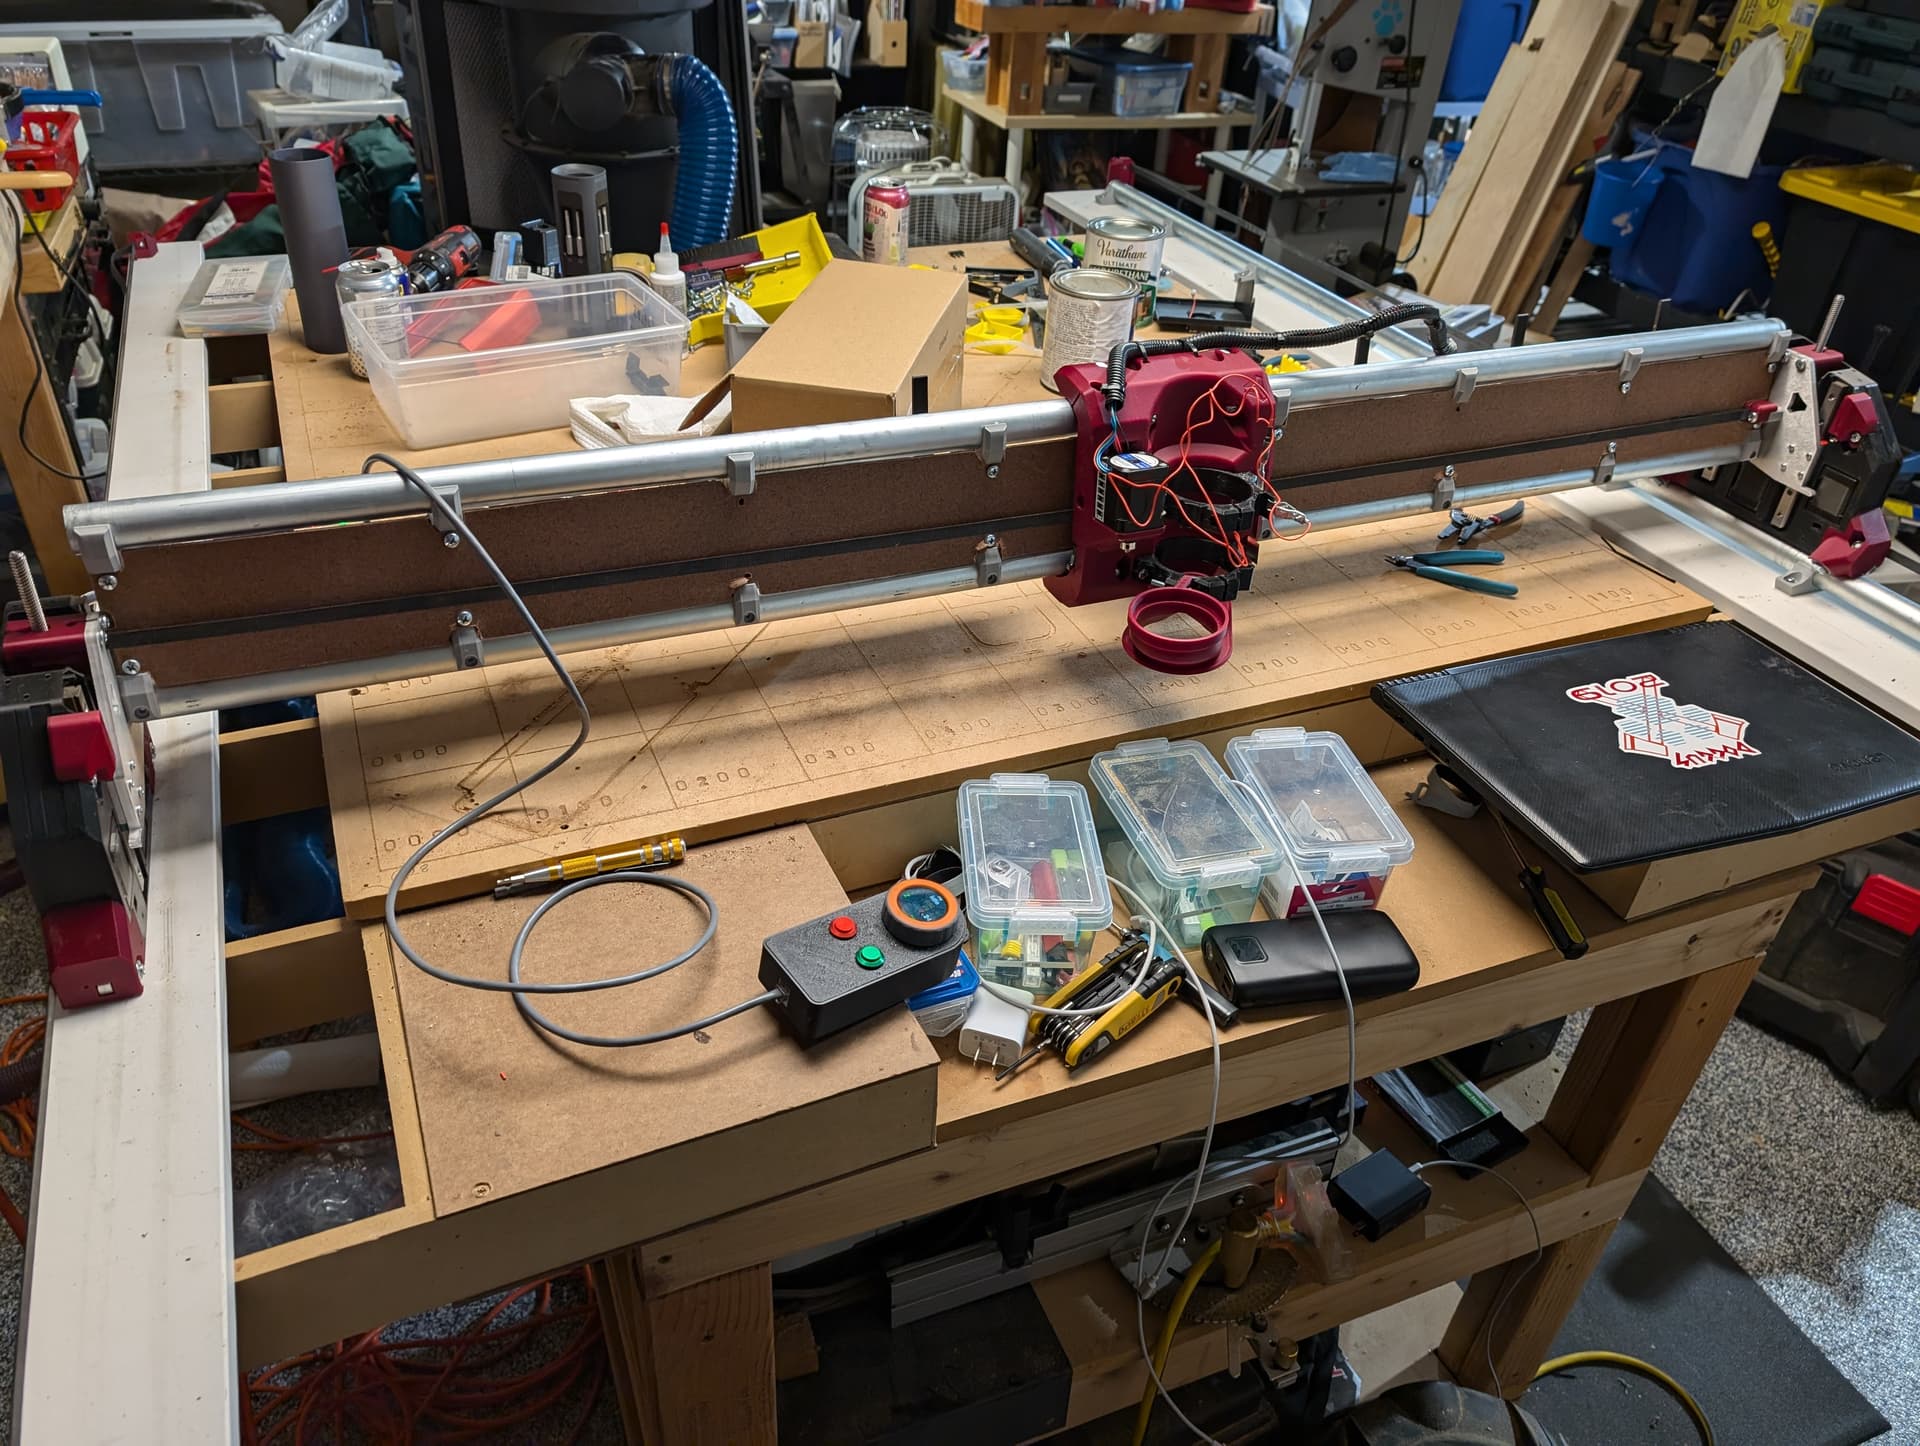
Initial wiring done, kind of a rats nest but it’ll be ok for now. Made the cooling fan disconnectable.
Not pretty, but will get things cutting and revisit.
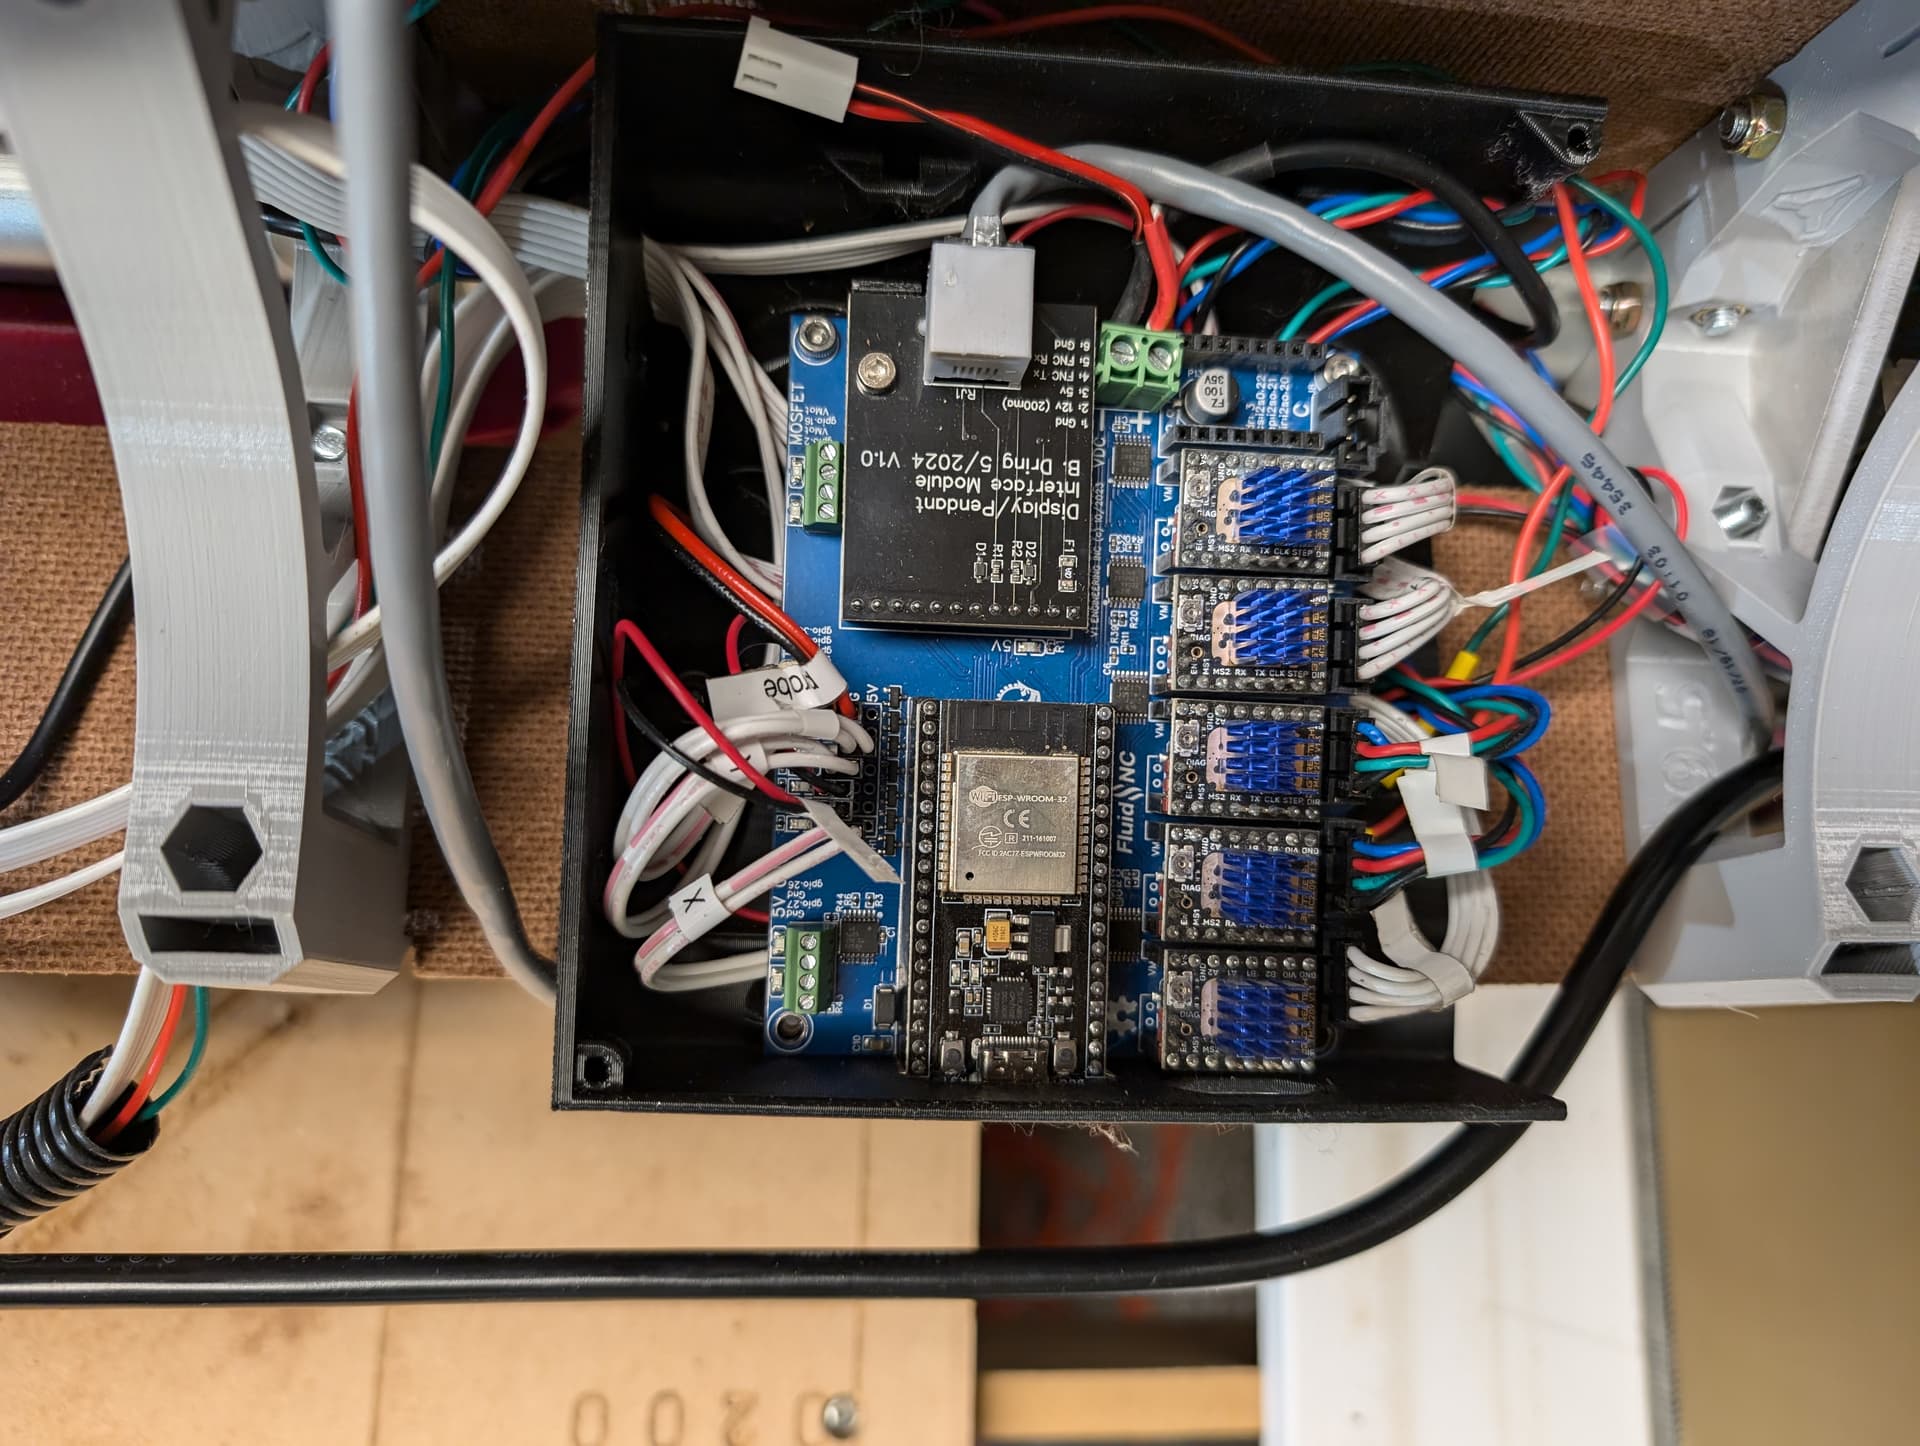
Noticed one of my Z limit switches was flickering weirdly, so replacing that now. Just seems to be the switch thankfully, rewiring would be a pain.
Turned off the power and held onto the gantry, waiting for the usual, unceremonious, Z crash.
But the Z didn’t crash. It held.
Is… this one of the greatest new features (!!!) or is it because I haven’t connected the Z stubs, whatever that entails?
If so, what a delightful surprise! (edit: sounds like not by design, but perhaps there is a way to keep it, without sacrificing accuracy?)
1 Like
Every axis is homing gloriously. I had a bad Z limit switch, which was easy to track down thanks to the little LEDs on the jackpot. Interestingly, it was causing other axes to fail to home too, weird side effect.
Love how the new belts connect and install, so easy. So fun to see the evolution from my old lr2 and lr3.
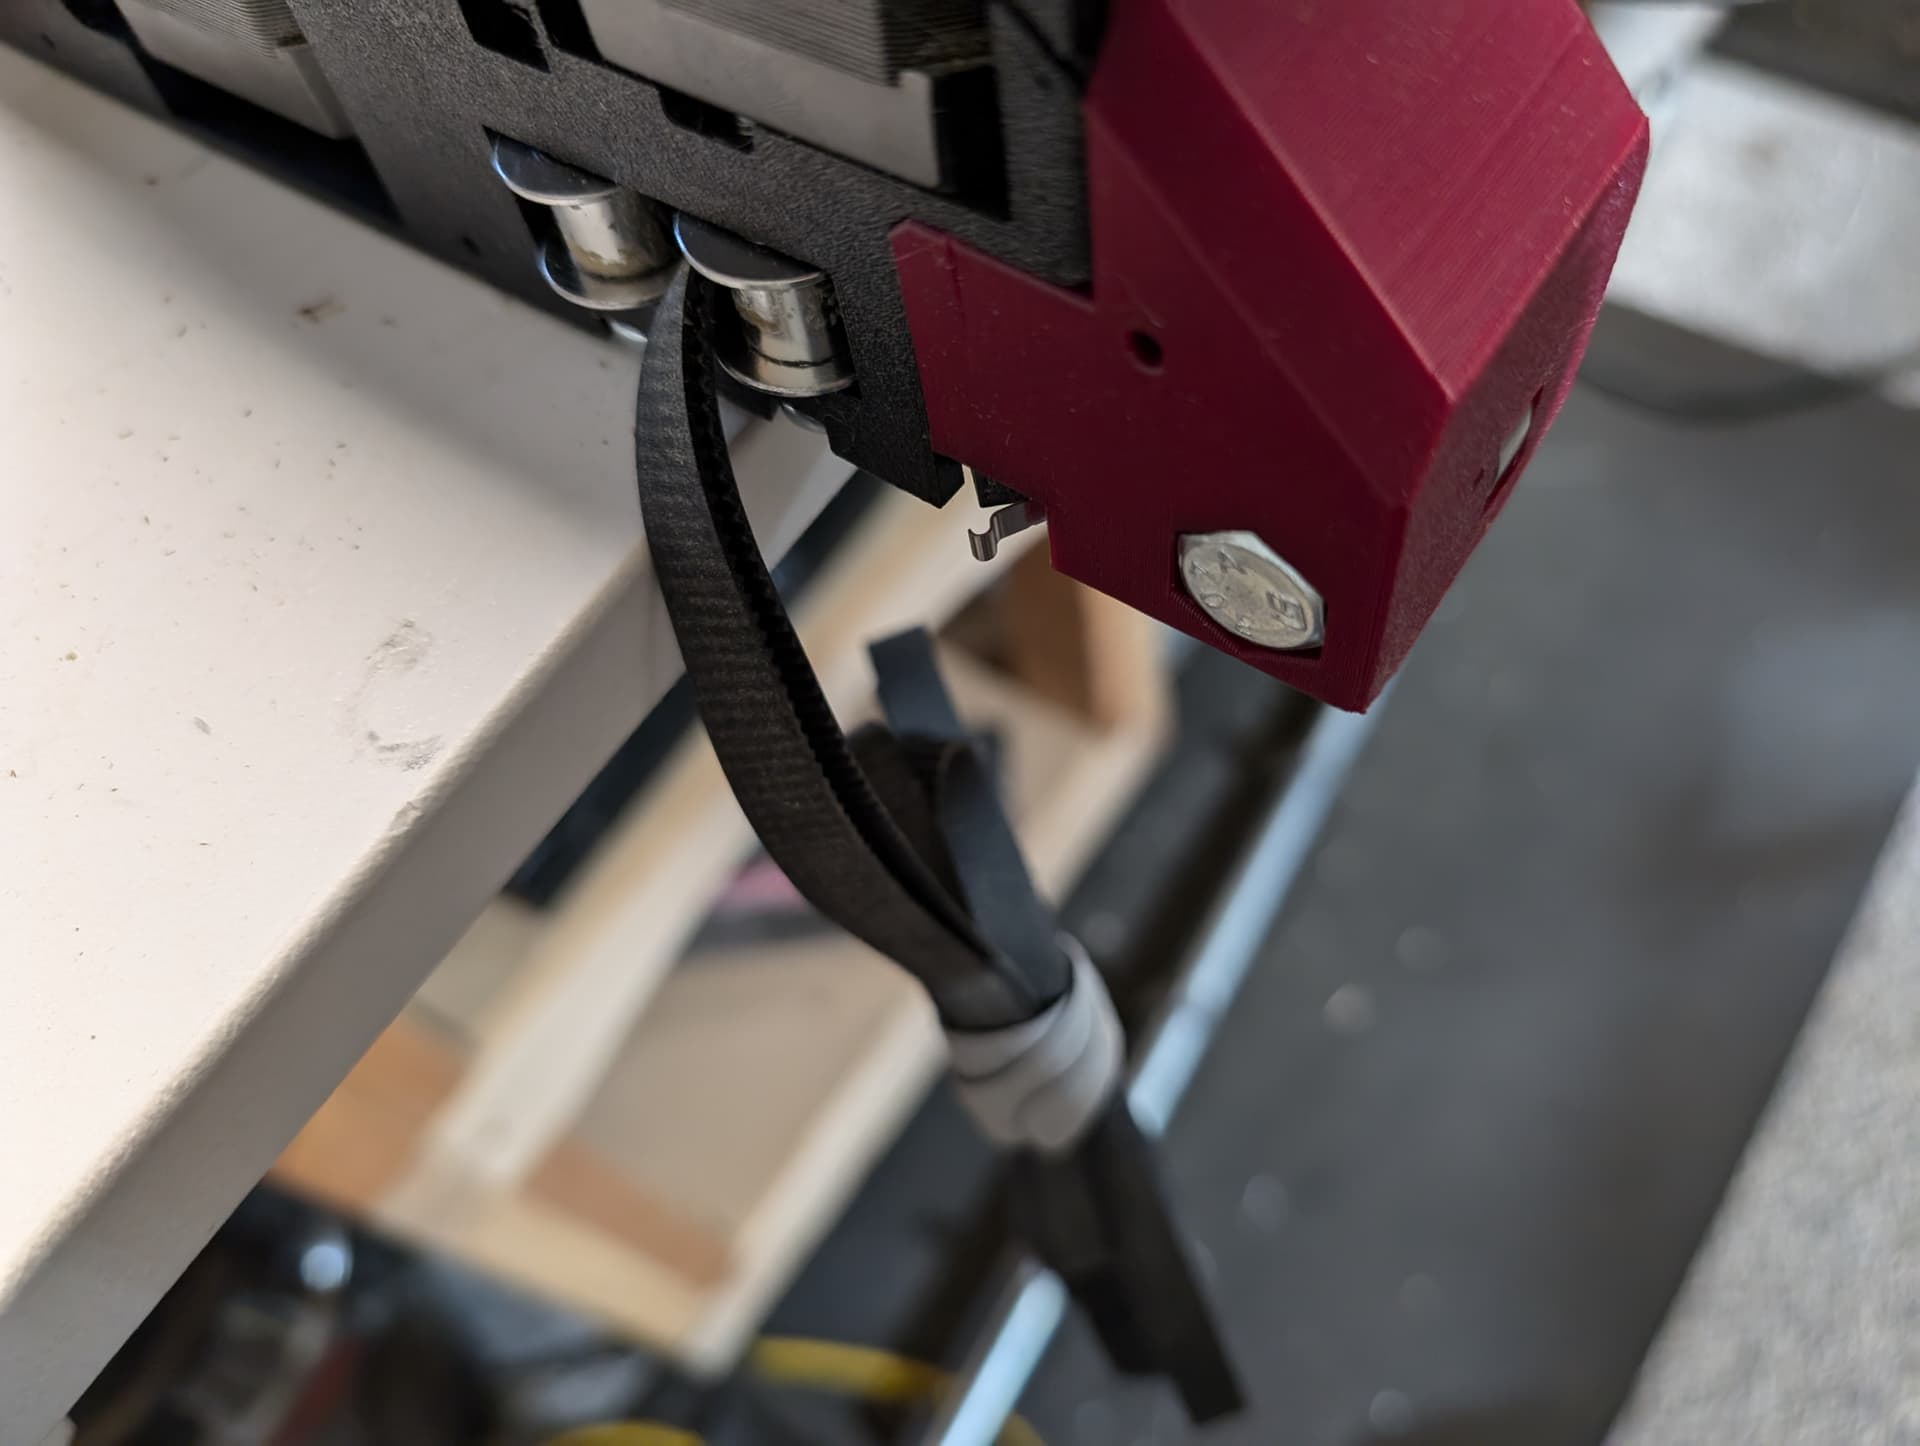
Tomorrow squaring and cut tests. I ordered a 10’ 2.5" vac hose which I realized is too short for my needs, so probably going to get that fancy one at Rockler in the morning. Not quite sure how it “connects” to the dust shoe, looks like a zip tie.
Still blown away that the Z axis doesn’t crash now. Still need to lube the axes more, but hoping that’s a feature I can keep this without causing other issues.
Eagerly awaiting the final instructions such as “Setting the Z stub distance.”
1 Like
Curious what Ryan, Beta testers and others think.
Personally kept tinkering until the gantry dropped when unpowered similar to LR3. Am using stock 4 start leadscrew.
- Kept tinkering with XZ plates and linear rail alignment/fastening until XZ plates glided smoothly on linear rails. Ensured XZ plates were not binding or sticking anywhere along the linear rails.
- Kept tinkering with with leadscrew alignment within Z stub until found minimal resistance. I.e. Lower beam as much as possible, feel how much the coupler lets the leadscrew flex within the Z Stub’s slotted hole, then position leadscrew centered so minimal resistance/friction.
- Liberally lubed leadscrew. This made a huge difference, more than I expected.
- Ensured bolt fastening Z stub to Z Nut was loose and not snugged up.
2 Likes
I see. I do need to lube and do that final adjustment. The 2 Z stub “pieces” on each side nested nicely but I haven’t connected them. Jogging and homing seemed smooth up and down. The leadscrew is the one for the LR4 in the upgrade kit.
Edit: ah yes, with the added weight of the router and the lube, it behaves as expected and drops. Not a big deal since I’m used to it.
2 Likes
Looks like I got one of the fancy “pulsy-boy” Kobalts, but ran it for 15 mins and the pulsing weirdness seems to have stabilized. Phew! It’s been sitting new in the box for a year. Really looking forward to using all my ER-11 collets, got a bunch of cheap ish metric bits.
1 Like
Ryan has reported that for ones where it’s still funky after a run in you can sometimes flip the brushes around and it behaves again.
3 Likes
Ah! Good to know, thanks. Seems to have settled in. Going to be handy to have the lower RPM too, compared to my Dewalt.
1 Like
The Rockler anti-static 2.5" hose ($50… nice, but also heavy!) was only 10’ too (not even, maybe if I hang on it like a vine and swing like a chimp!) so for now I am going to try and print an adapter for my LR3 ~1.5" shop vac hose, and eventually order the longer version of the 2.5" hose from Ryan’s amazon link.
Started the Z Leveling and squaring process (Jackpot.) Looks like the instructions are still underway (various Marlin M114’s mixed in with the z leveling instructions, but can just use the probe button in the UI) so just used my LR3 probe script, where I call G38.2 for the probing part. Since I was using Z-75 as a parameter, after my LR4 exceeded those 75 mm, it goes into alarm and drops like a rock.
That behavior is sure startling (potentially dangerous) and I wish the motors would never just completely shut off, with the power still on, which seems to happen in a some of the alarm states, but not all.
I’ve increased the max Z probing travel to avoid that, but it looks like G38.3 (unlike G38.2) will NOT go into error and drop dangerously, if the probe fails. I will play with that and verify: Supported Gcodes | Wiki.js
Interesting, that is a good find. I need to try that out. What happens if it does not error out, just a failed message?