If you got it “brand new in box”, are there anymore available at your source?
Maybe I’m a cheap person, but couldn’t bring myself to pay the “normal” price I normally find for that enclosure, and now the “newer” version, well to me it’s a joke. Would rather build my own, but somehow feel a wooden enclosure seems a bit like a tinder box.
You know the saying “Best laid plans…”, well I have shifted a bit from extending the JL1 to building another CNC laser printer based on this : DIY Simple Laser engraver (sorry @geodave ). I can probably print all the part in about 20 hours on my Ender 3. And I have all the extrusion I need already on hand.
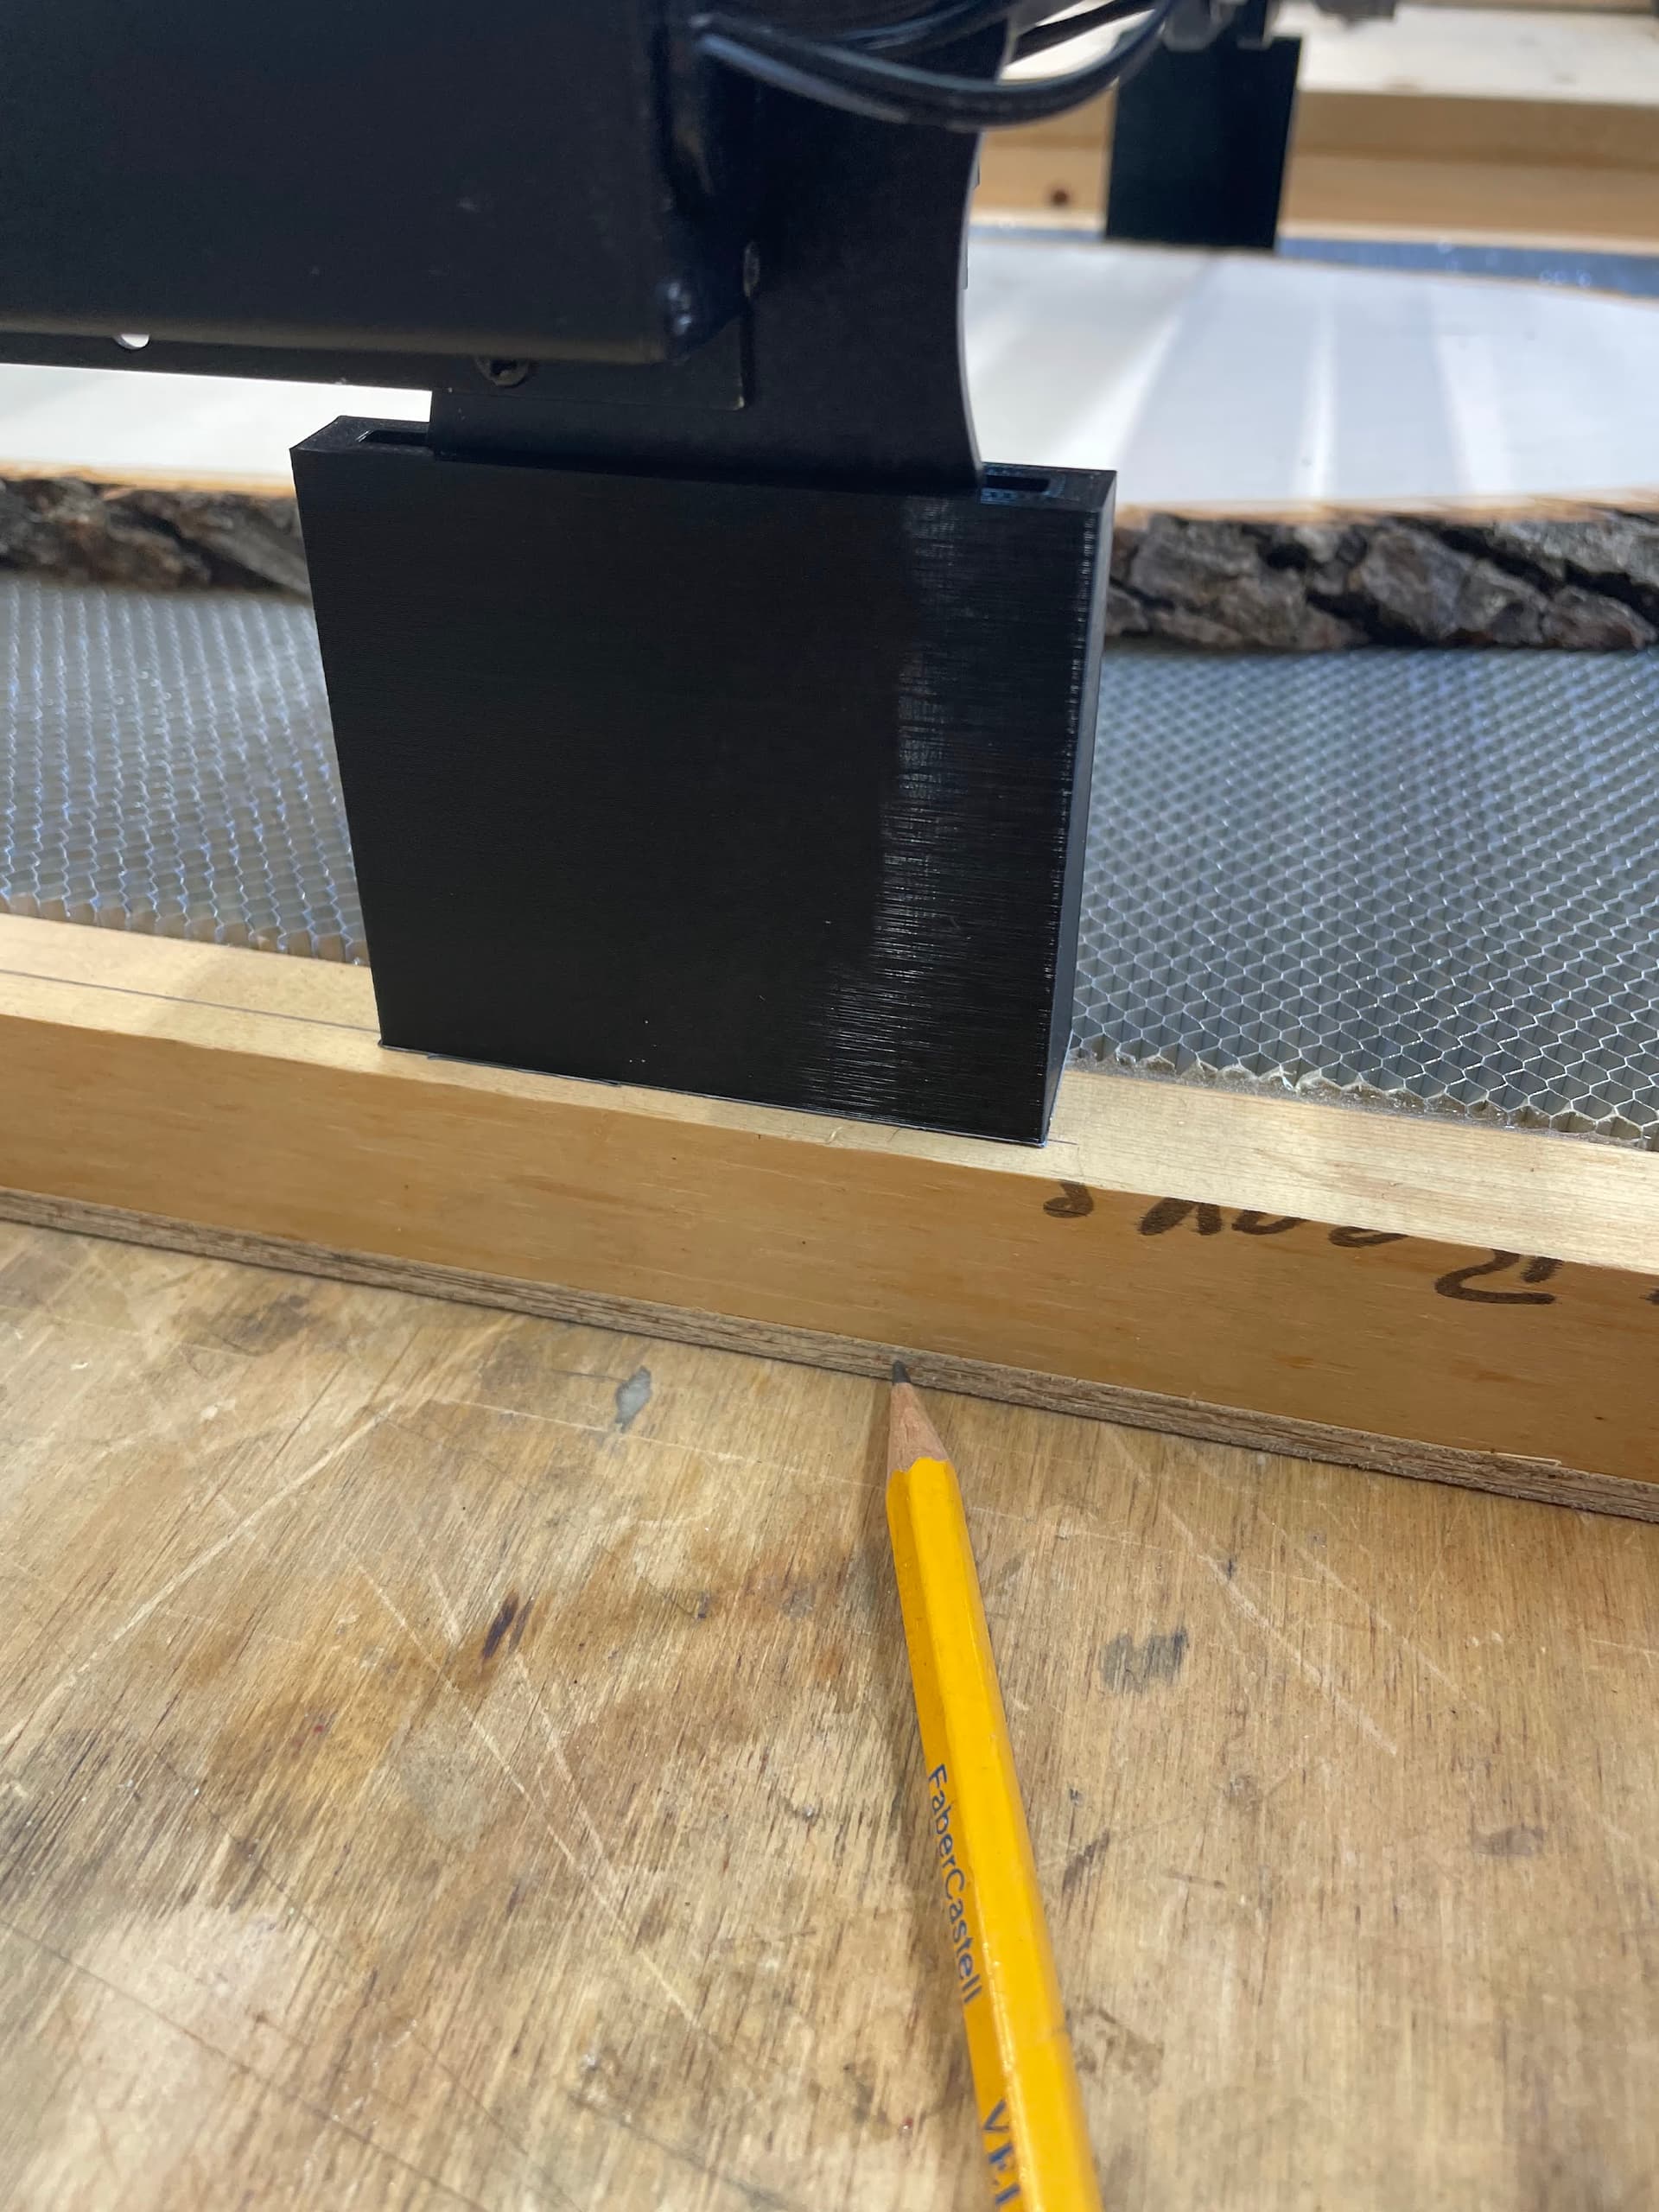
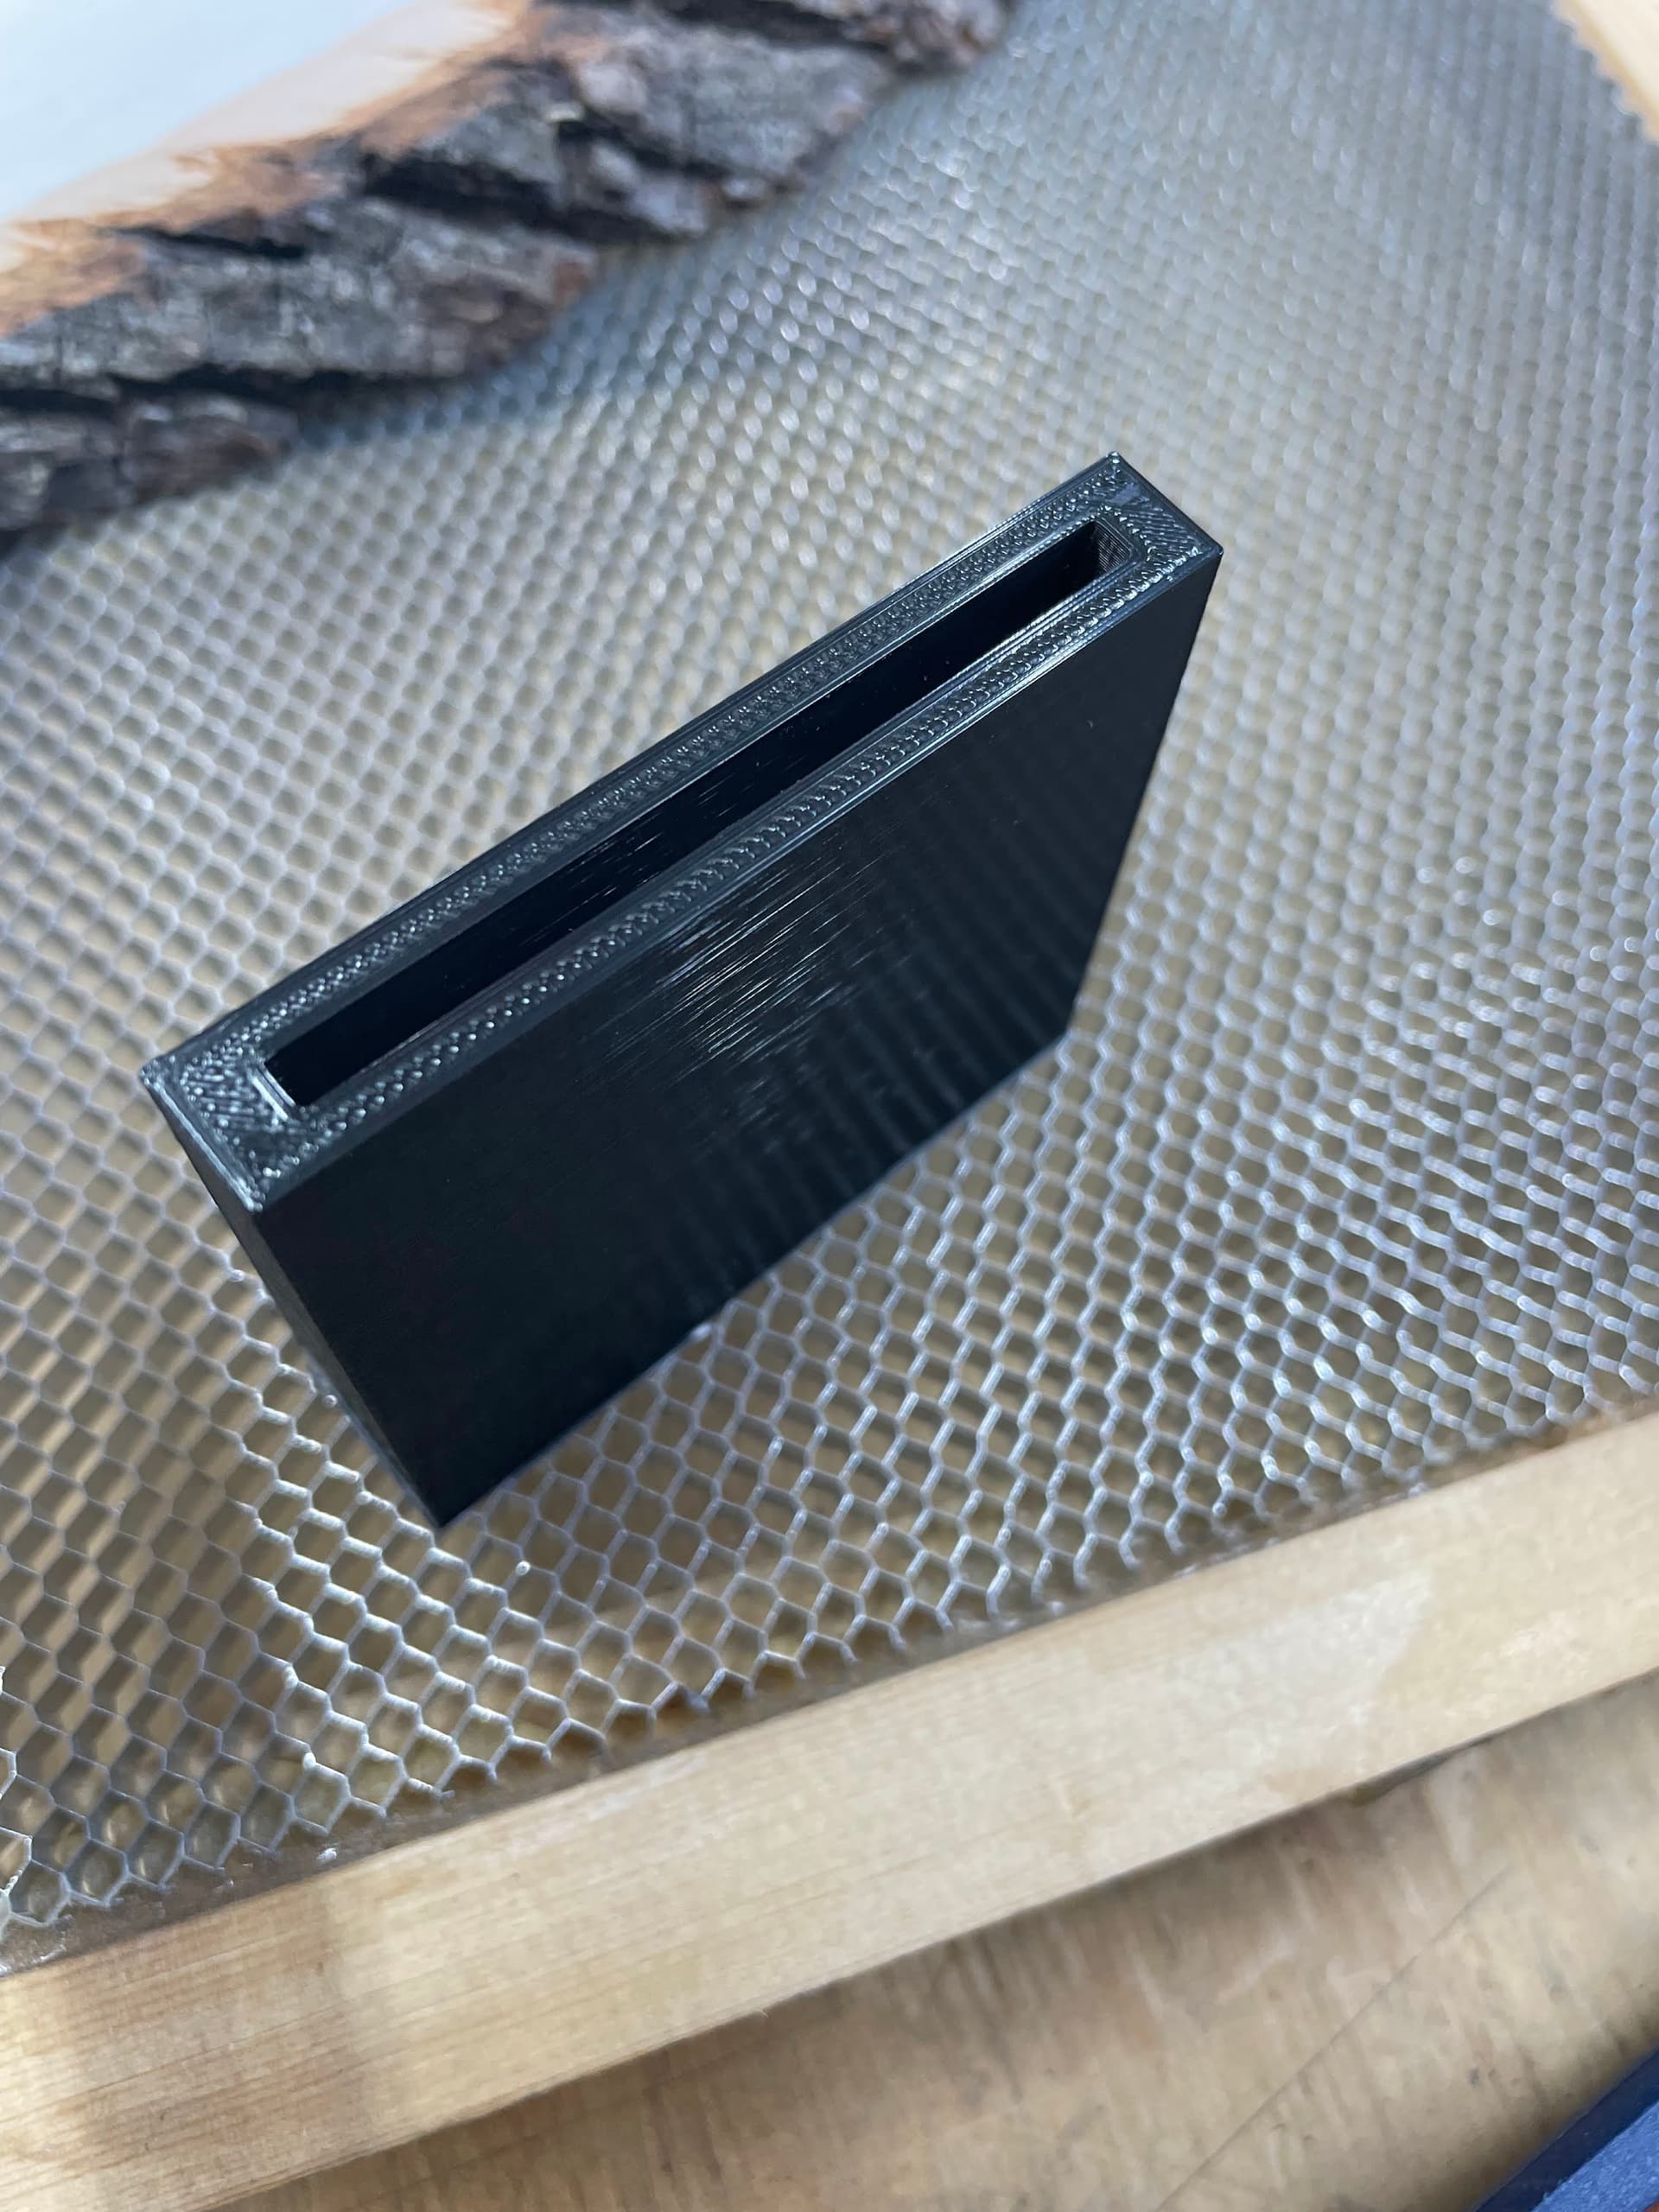
But! I did make an upgrade to my JL1 and will post the parts on Printable later tonight. I wanted to engrave on thicker and longer pieces that could fit under the frame of the JL1. So I made these:
Three of them are the same size and fit the narrower legs of the unit and the last one is for the leg under the controller board. They raise the base 50mm and using the other Dave’s sliding Z-axis I can still go right down to the surface if I need to. I was thinking of gluing them to the legs with epoxy, but have decided to just use them when I really need to raise the machine.
You can see the wood slab that I intend to engrave on the honeycomb in the pictures.
I’ll post the link to Printable as soon as I figure out how to do the posting.
It will be the first time I’ve put anything up to a 3D hosting site.
As noted in another posting, I realize that the microstepping value and the steps per mm may not be correct for this setup. I will check it all and report back as to whether the above .yaml file is a good starting point.
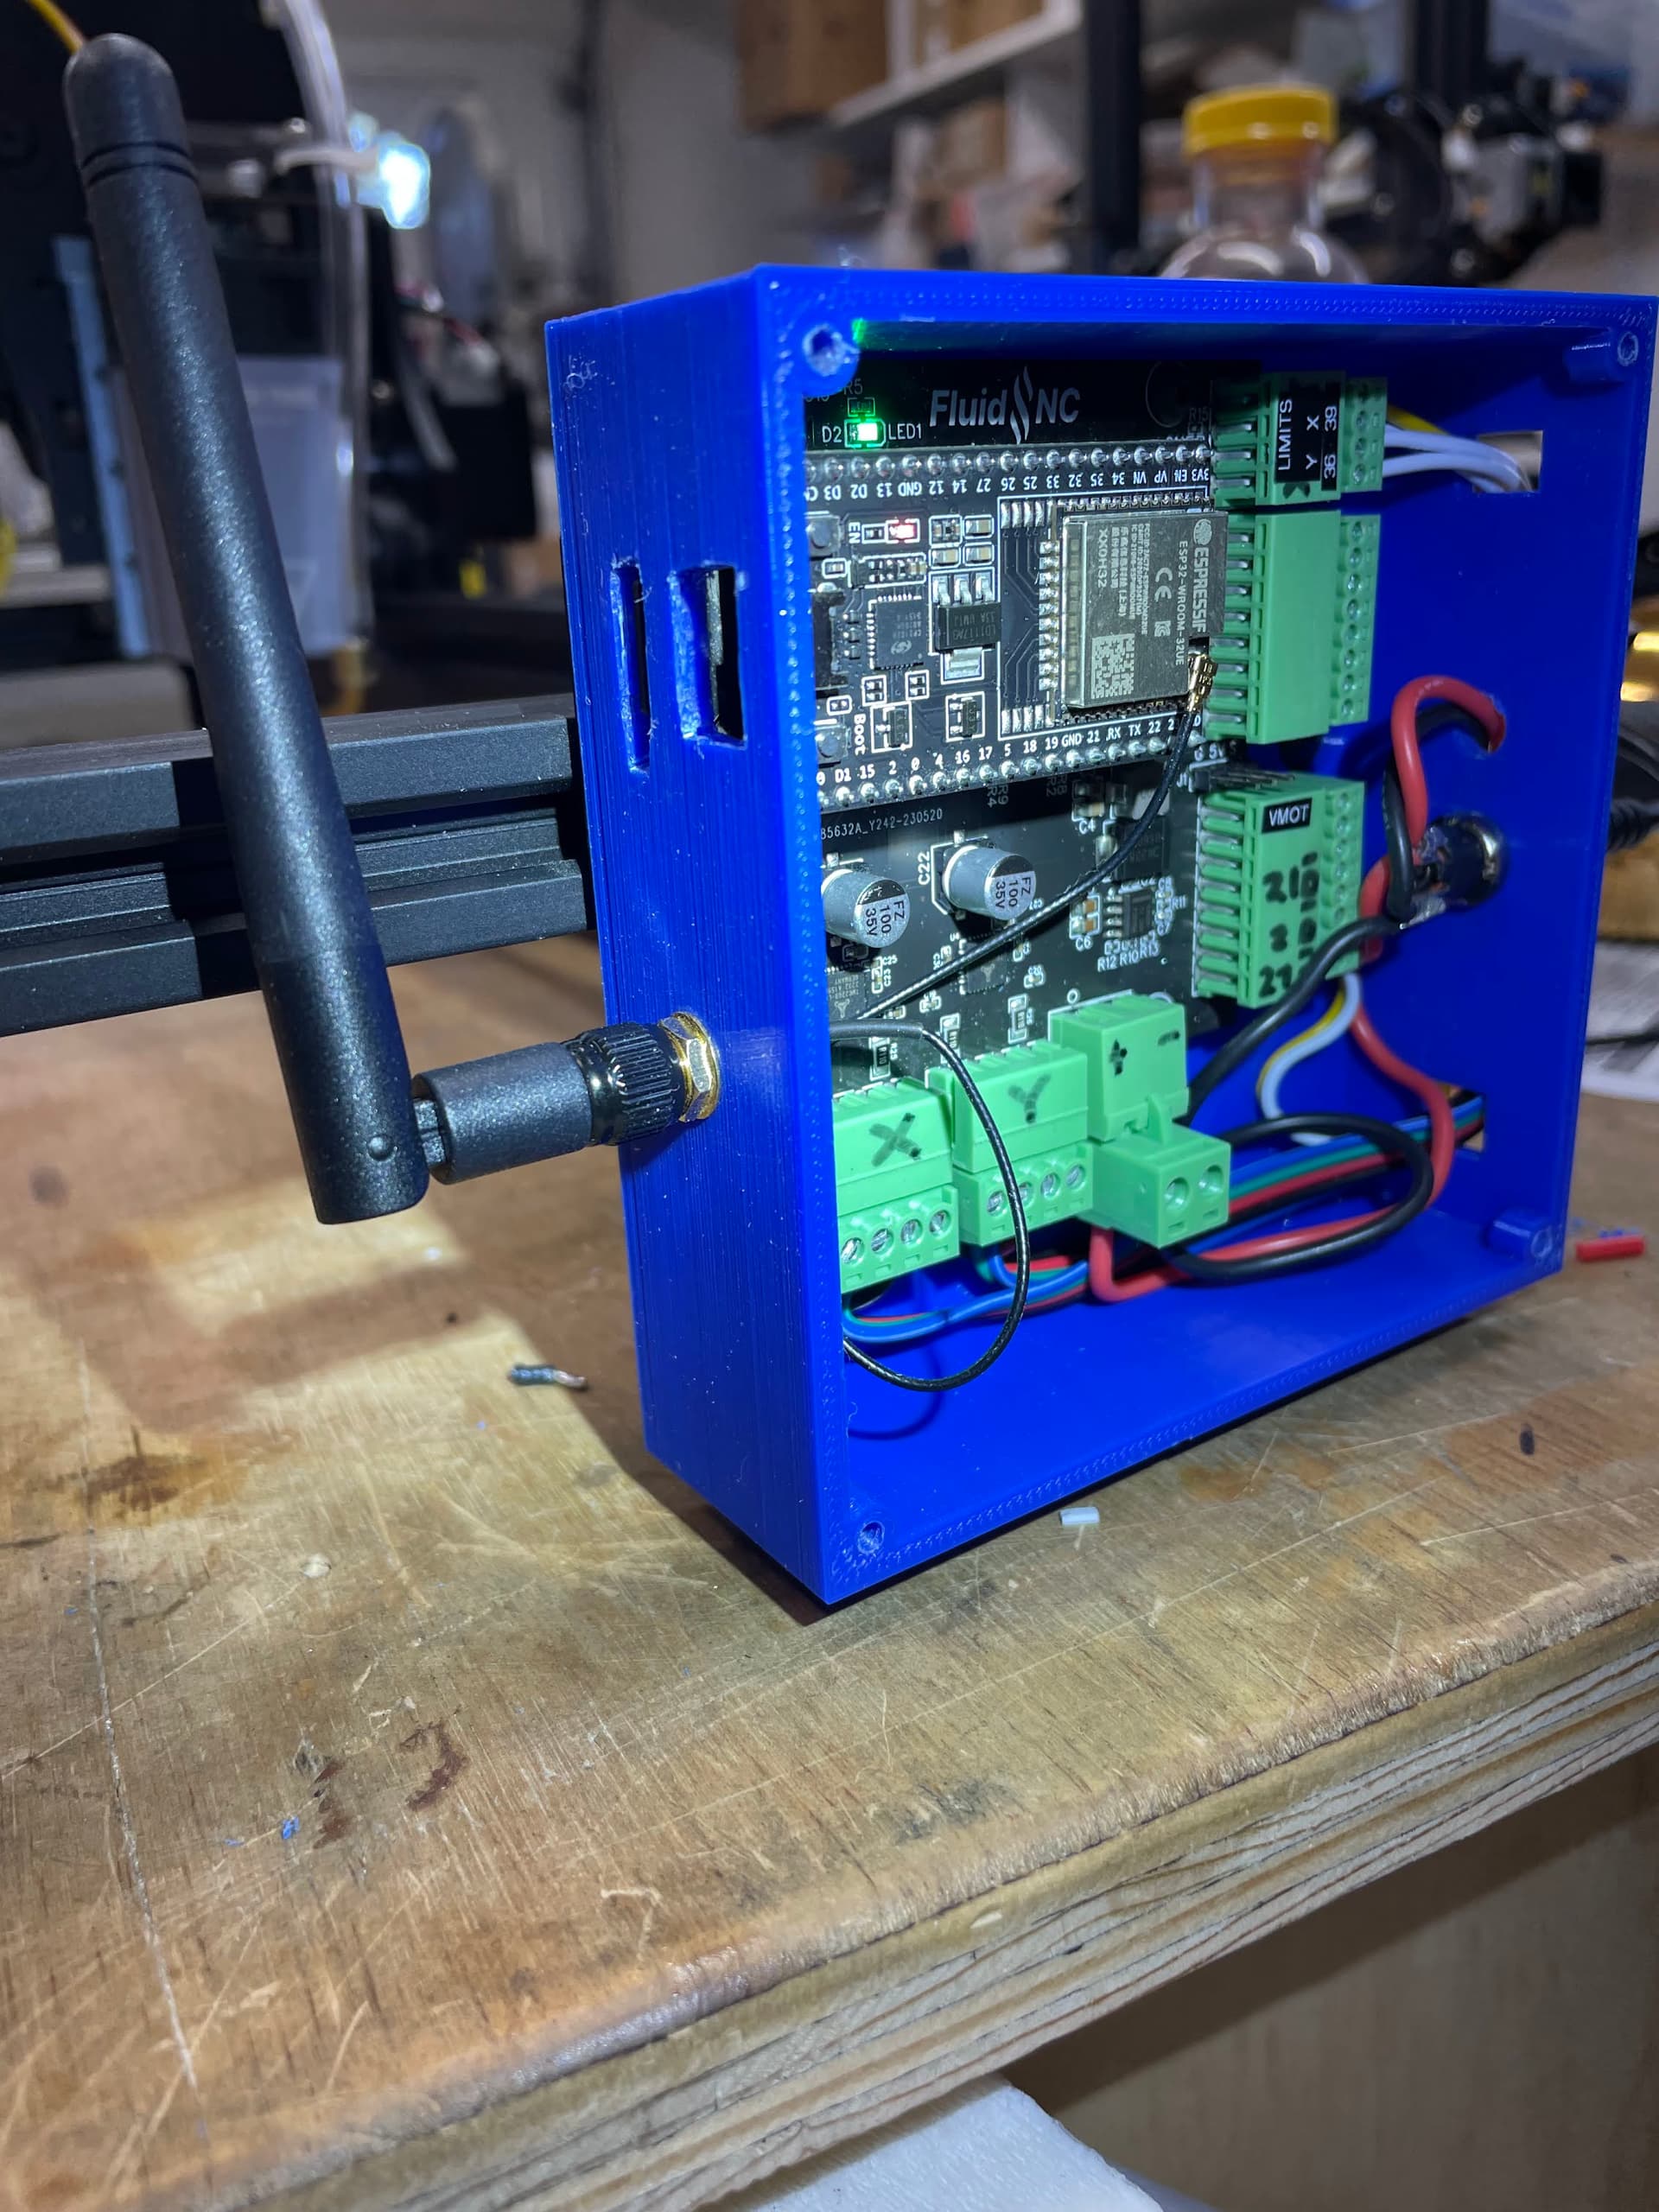
I have finished the controller box for the BDring FluidNC TMC2209 Pen/Laser controller, so that it attaches to the existing mounting holes of the JL-1. Here are the picture (without the matching lid).
I have updated the model in FreeCAD to correct the misplacement of the ESP32 access holes on the left side of the box.
If anyone would like the model as a STEP or STL file I’m happy to post them. I will be also making a posting on the LightBurn forum as soon as I put the files into Thingiverse and Printables.
I have the older 2209 pen/laser controller, not sure how different the footprint of the 2 are.
I was thinking of getting a new board for the nicer wire management, and I have a couple of ZenXY builds to get done by Christmas… this looks like a nice case solution even for a more generic application.