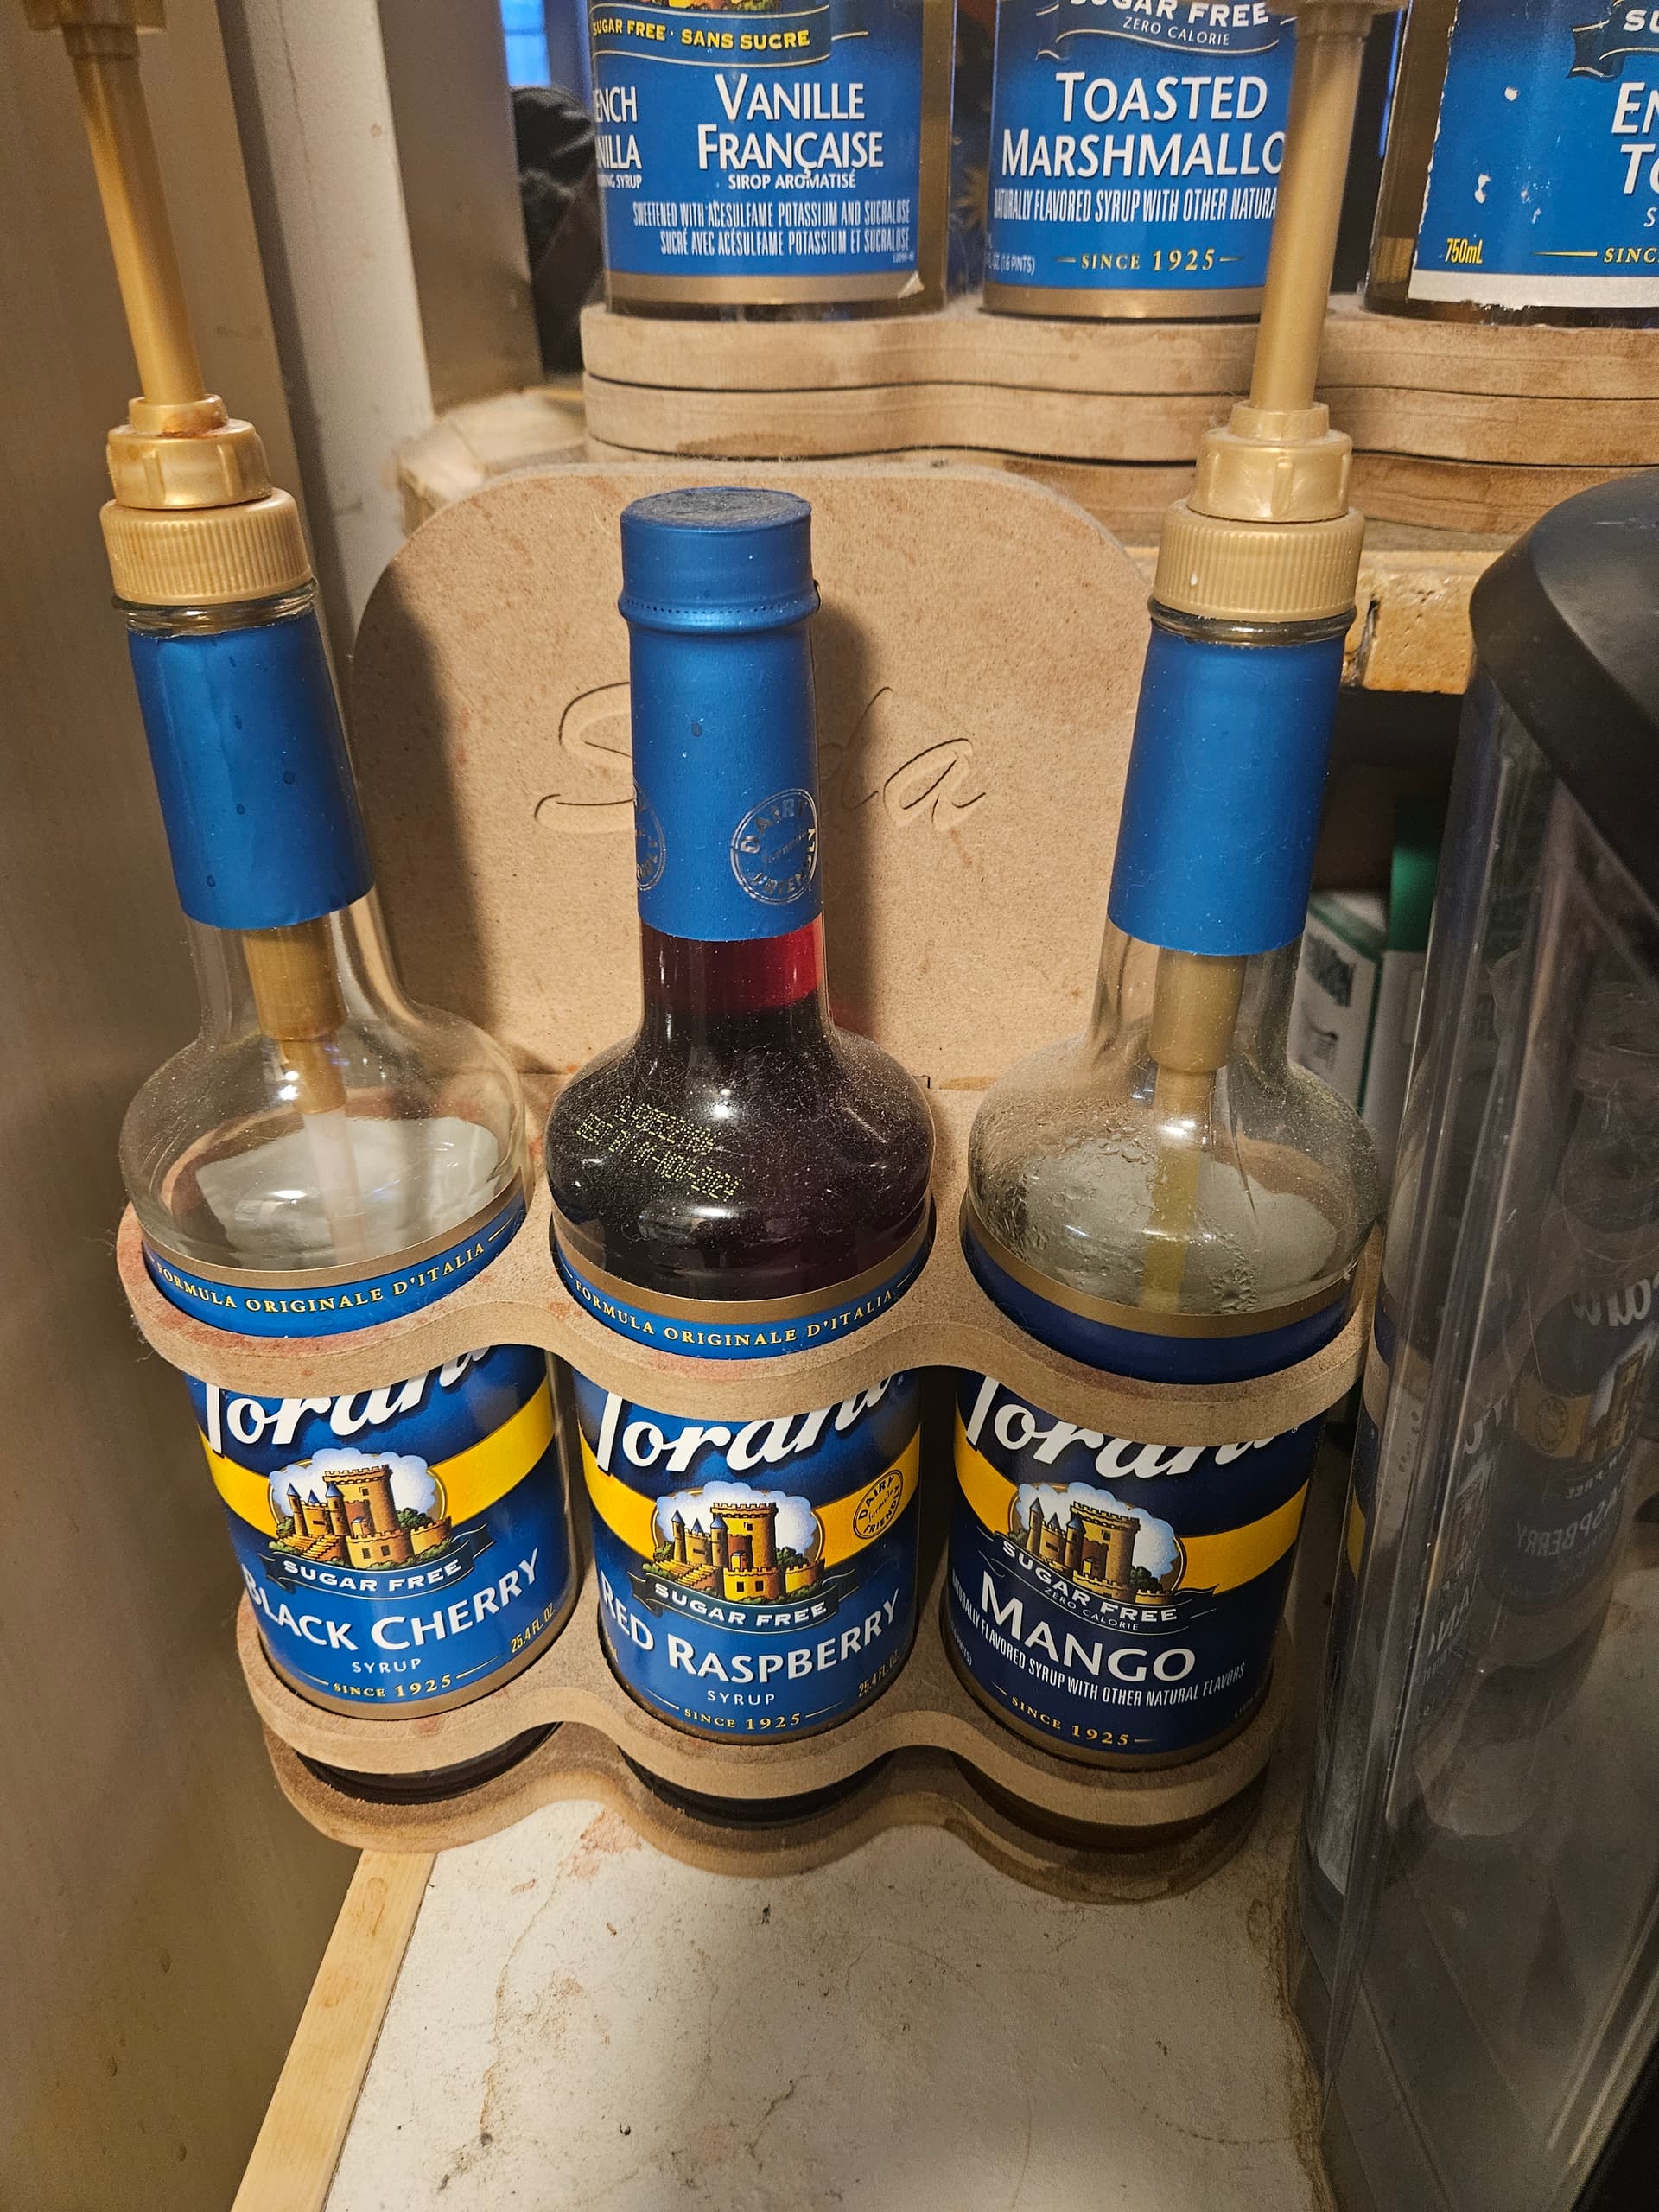
One of my early Primo projects was something similar. Each one holds 3 bottles, and I made 2, one labelled for soda and one for coffee flavours.
I am going to re-make them, because I’ve found that I regularly keep 4 flavours for each…
I am going to re-make them, because I’ve found that I regularly keep 4 flavours for each…
Literally as soon as I cut the first shelf, I thought about expanding the design, but I think I’m going to try to live with this version for a while. No need to go hog wild with the syrups. ![]()
The tough part is that I use sugar free syrups while the rest of my family prefers the regular, so that does argue for a larger shelf.
I like your design. Contrasting yours with mine, it’s pretty clear I haven’t fully embraced the freedom that the CNC offers me.
I’m pretty good with practical designs, as I’ve done a good many things of that sort for 3D printing, but I’d definitely like to do some more decorative things with the CNC like carving and inlays.
My wife sent me a story that represents the extreme end of that curve:
Imagine creating a modern version of a gothic monastery using a CNC to cut and carve stone. Now imagine doing it with no experience in using a CNC. Kudos to these monks!
Tried that initially, but for whatever reason I couldn’t manage to copy the existing drawing to paste another copy to flip. Wanted to cut both as a single operation.
You move the cutout-outline-part out and away from the drawing then mirror it and make a new one just like the first but dont move it.
Lol. I was also teaching myself how to do.stuff lkke that with the CAD. I wanted something that I couldn’t do with a table saw and hole saws, and that’s what I came up with. I like the design, too and that’s how I’ll do the next version, but I may incorporate 3D printed parts into the mix for the base.
Next version I’ll see if I can manage some inlay into the back for the labels.
I want to pick up some epoxy and tints for stuff like that…at least until I can get ramped up on doing inlays.
But next project will likely be some templates for curves on a music production desk I’ve been meaning to build.
I think I understand what you’re saying. So, in Estlcam, you don’t copy and mirror the drawing itself, but rather the tool path? Is that correct?
Bonus points for also integrating RGB LEDs. ![]()
I’m currently working on a design for mounting LED channels, because some cheap LED bulbs I bought for my over-range light on my microwave turned out to be complete garbage and the very first one I plugged in blew up and destroyed the circuit that controls my over-range light…won’t turn off at all, so I just left it without a bulb, and I’m going to mount an RGBCCT strip above the stove, controlled by WLED.
I’m guessing I may end up having to switch to plain white LEDs, as the RGBCCT strip just doesn’t get as bright as I’d like, but for the moment, it’ll be better than nothing, and I already have all the parts I need on hand.
“Toolpath” was the vocabulary lesson. Yes. Generate the first one, move, then mirror. Then generate another from the same drawing. I typically also highlight them both and set the tabs to my usual size (5 mm high 5 mm long) then manually add the tabs. Once all that is done you can manually set cut order (if not carving) save, and generate gcode.