I had an MPCNC a few years ago but had to tear it down when we sold out house and moved into a smaller place. The plan was to rebuild it once we had a house built and I had access to a full shop. That was pre COVID and the housing market in my area went nuts during COVID and we couldn’t get our house built due to lots of shortages so we wound up purchasing another house. This garage is smaller than my previous so I’m trying to make the most of the space I have. I still have the strippers and controller from the MPCNC, which I’m hoping can be used for the LR4, however, I’m most interested in the ability to remove the CNC from the table so I can put it on a shop table but I haven’t been able to find a video where anyone actually shows what’s involved in removing\replacing the gantry and storing it so I was curious if anyone has a link showing that.
I also need to figure out how (semi)permanent and rigid the table needs to be so I can decide what size I can get away with (ie, can I build a table top that folds into the wall and I pull it down when needed or would that not offer enough support on the folding legs and a more solid locking setup be required?)
Appreciate any and all tips and I’m hoping to be fully back in the community soon.
you release the belts for Y and pick up the gantry (with care for the power cord of course). It takes less than a minute depending on your printed part tolerance and how easy the pieces come out and how tight the belts are.
I mounted my lowrider on a 3/4" thick piece of plywood attached to the top of an old door that sits on two bunk bed end frames that are screwed together. the door isn’t attached to the base. It sounds super janky, but it cuts just fine. the vacuum sits under the table and the lowrider is non intrusive so I can mostly use the table with the lowrider on it. The MPCNC it replaced took up the whole work space top.
Thank you for the reply. So all the electronics are contained on the Gantry? I guess that makes complete sense. It appears that if I want to cut a 4 foot wide sheet of plywood the table needs to be about 60 inches. Is there additional clearance required on either side of the table (is anything else hanging off?)
Like I said, just trying to determine what I can put together in my small space that I can store away. Also, how wide would a gantry for a 4 foot wide table be? I’d have to be able to find a place to store that separately and I’m trying to determine if I need to temper my ambitions.
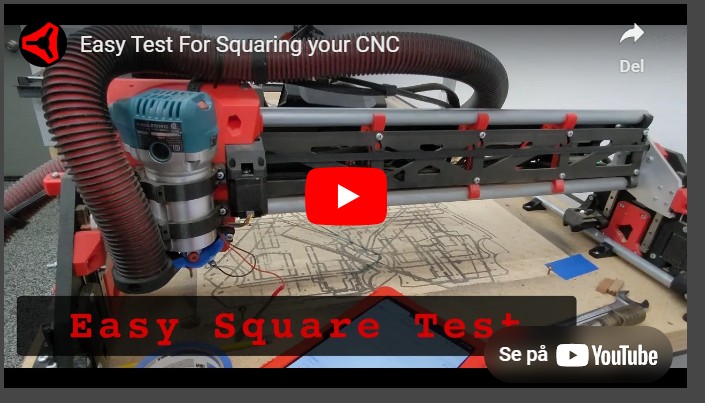
I’m pretty sure that my video of me building a torsion box for a full size table for my LowRider 3, shows me carrying the LowRider away from the table. I tried to set the time index on this link, to when that happens.
I don’t think the video showed me disconnecting the belts, but that’s easy and quick. A tensioning screw on the end is loosened, and the printed part with the belt attached, gets released.
There is some “overhead” so to speak of the side assemblies, the linear guides, the XZ plates, and the left and right sides of the core that carries the router.
Just enter your desired cuttable area into the LR4 size calculator in the docs, and it will spit out how large your final table dimensions need to be to account for the added “overhead.”
For my LR4 that’s cable of cutting a full width sheet of material (around 49" wide material) my LR4, from outside to outside of the side assemblies, is just under 59 1/4" wide. Between about 59 1/8" and 59 1/4".
Thank you for the reply. I was watching some of your other videos that were specifically labeled with Lowrider V4 trying to get an idea of what the table build requires, like that piece of conduit on the one side which probably prevents the table from being 2 parts (like a foldable table, for instance). Again, I’m really just trying to determine what I need before I start so I can figure out where it’s going to live in my small space.
I did check with the calculator and it’s roughly 60 inches for a table capable of cutting 48 inch wide stock, I was just wondering if that means the gantry will be 60 inches wide or if it will be wider by a bit. TBH, I’m not sure I have anywhere I can stash something 60 inches wide (I may have to drop to something that has a total width on the gantry of 48ish inches).
Again, thank you for all the info, on your channel and here.
I sold a complete LowRider 4 (Jonathan and I are officially approved, before anyone wants to complain) and shipped it with the rails. Since Y was 2.5m I had to cut the Y-rail in the middle and printed an adapter where it could be put back together. It seems to work really well, the customer never complained about it.
So in short: You can do that. I would then recommend a system where you need to push the table against the other one as to connect the rails and then have some latches on the underside/side to keep the two boards together.
Ok, I think based on my space I’ll have to temper my expectations on size. That’s not really a problem, just will limit some of my use cases I was hoping for. That said, I do have a few concerns before I start building. Originally I intended to use the steppers from my Burly build, but apparently those are only 74 oz steppers and bigger are required now so looks like I’ll have to basically buy a whole new kit (as it also appears that the RAMBo controller is no longer usable either, or at least not the preferred controller).
Anyway, I would also like to add a diode laser head (I currently have the DeWalt router that was recommended back then that I’ll be using) and be able to swap the 2 out. I currently have an Atomstack S20 but I won’t be using both at the same time. Any pointers to what I need to print differently to mount those and be able to swap between them?
I’ve ordered PET-CF to print the parts out of. I am printing on a Bambu Lab P1P with a hardened steel nozzle. I would use PLA but I’m in FL and the garage temps in the summer can really mess with that. I would use regular PETG but apparently that’s not recommended because of flex.
I plan on ordering all the parts from the V1 Store except, apparently, the vacuum hose since that’s not available there. I will be adding the touch plate that is in the store as well. Anything else I should get? (I own threadlock so I’m good there).
Is there anything that I need to think through that I may be forgetting? I’m trying to plan this completely through so I don’t hit a snag mid build, or worse, when I’m done, and think “man, I wish I would’ve done that”
Since a diode laser typically does not weigh a whole lot, having it stay in place while the router installed is possibly doable, if not ideal, but the challenge is having a mount that is rigid enough to not have flex/vibration cause issues during using it. I have a kinematic alternate tool-changer mount that I designed and listed on printables (uses magnets to hold a tool), but during an earlier version of the mount (for LowRider v3) I remember at least one person had major jitter issues trying to use it for a diode laser. The new mount for LR4 use is stiffer, but I don’t know yet if someone has confirmed it’s good for diode use.
Another approach is now doable on LR4 because the LR4’s main tool holder can be tightened/loosened on the front, without messing with the screws that attach it to the core, which an improvement that I love and really appreciate - one that the LR3 did not have. Because of that, you can make (and more easily use) a printed holder for your diode laser, that has outer cylinder characteristics matching the router, and swap the router and the diode, using the main tool mounts. A thing to possibly do here for convenience, is either not bind your power supply cords deeply into some umbilical mix, or bring power options for both tools to the core, and have a “bobtailed” short power cord on each, that can plug/unplug without dismantling your main umbilical mix.
I have started buying parts to build my own LR4 But can’t find the black and red vac hose shown in this picture. I know it doesn’t matter for the functionality. But I would prefer to keep the entire setup to the two colors.
That Vac Hose is shown on the LR3. The LR4 uses a larger dust collector hose by default. If you really want that hose with an adapter, you might try checking the LR3 docs.