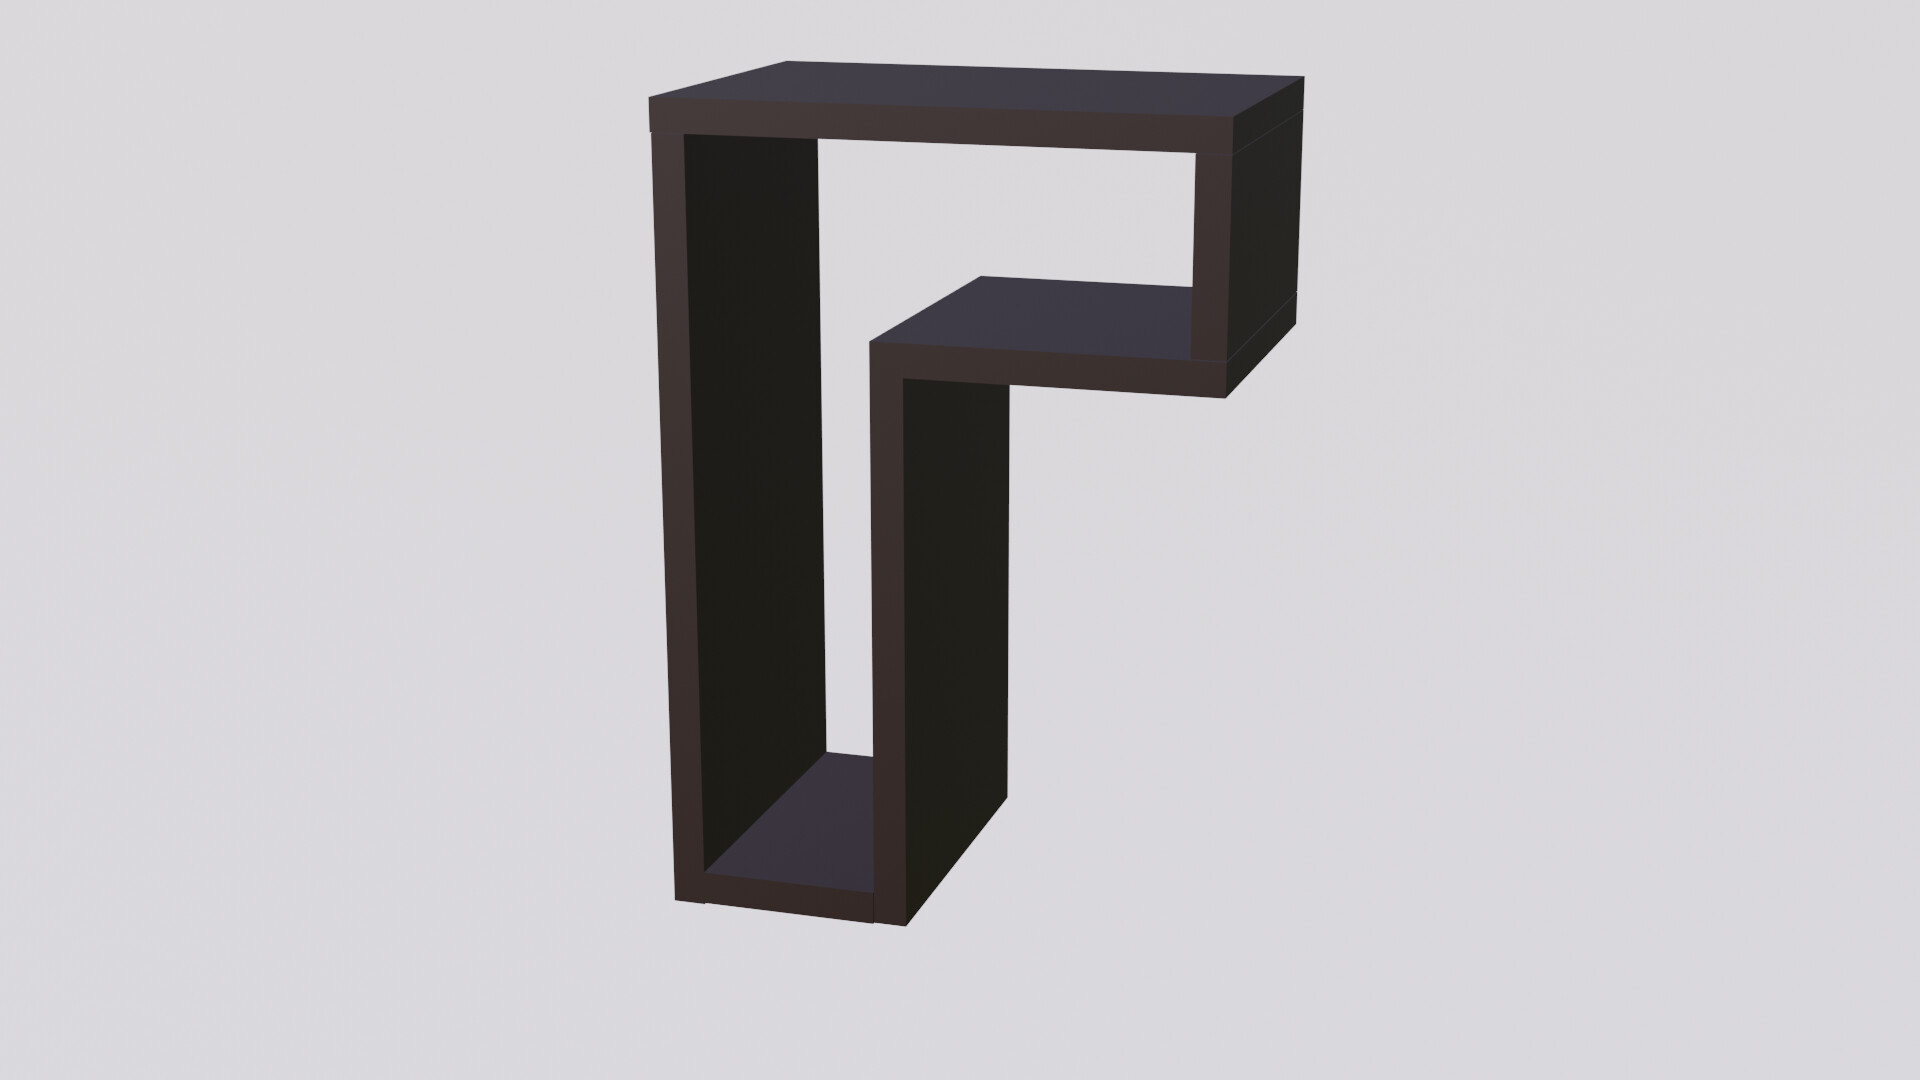
It’s not a terribly large piece but I’d stay well clear of pocket holes if you want it to look like a nice piece of furniture, as of necessity, they’ll be exposed.
What tools do you have?
I can’t do a sketch to explain at the moment, but I’d mitre or dovetail or box joint all the corners. The box join is probably the best if you can work out how to do that - a simple jig and trim router might be the easiest if you don’t have a tablesaw.
Fastening to the wall then becomes problematic, because an 18mm thick structure doesn’t give you much "wiggle room, if you don’t have the means to drill accurately.
Think about fixing a backing piece painted to match the wall, and then you can discretely screw straight into that.
If you would like a better explanation just give me a shout, but I’ll be on aeroplanes and in transit generally until about Monday, so have no ability to provide a sensible response until then.
I’d definitely do a mitre joint on all those pieces to keep the oak grain flowing
This kind of construction is not very forgiving though, you need to be pretty accurate…
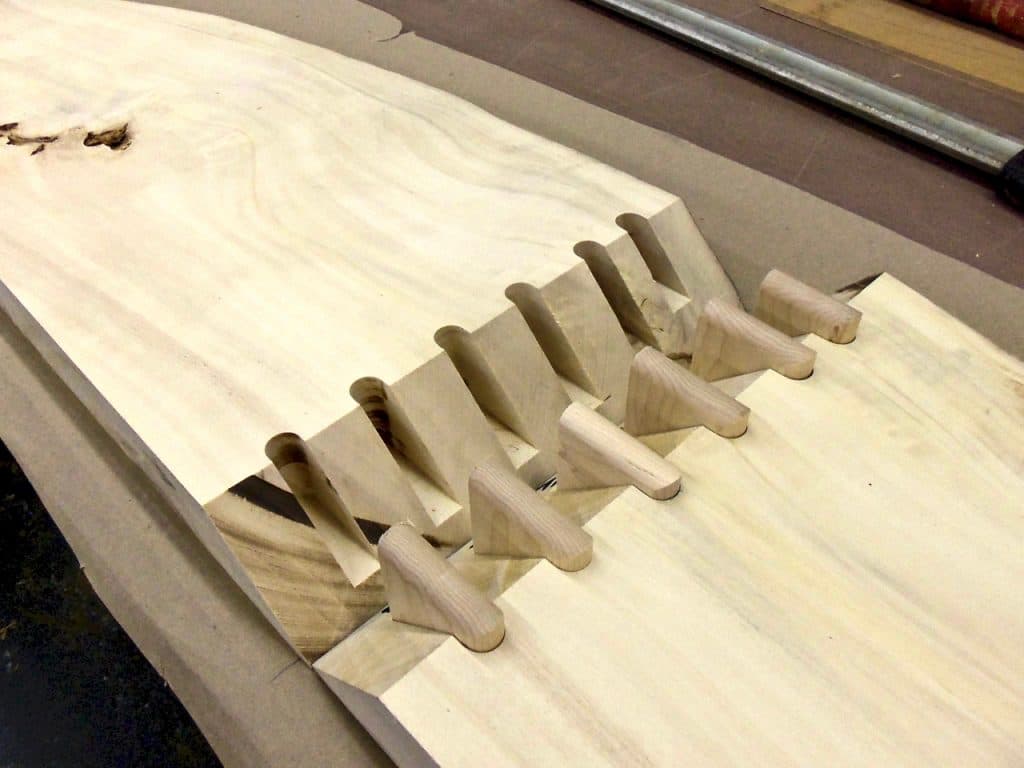
For assembly, I’d add a couple dowels and glue the planks together, there are a lot of jigs available out there, just be sure the one you choose can do dowels at an angle
It’s also possible to make hidden finger joint using a table router, but I think it’s a lot more complicated than plain dowels…
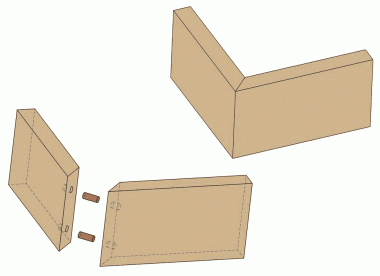
If you want something a bit fancier, you can make a miter joint with a visible “spline”, either across the angle or along the edge
You’d only need a table saw for this kind of joint…
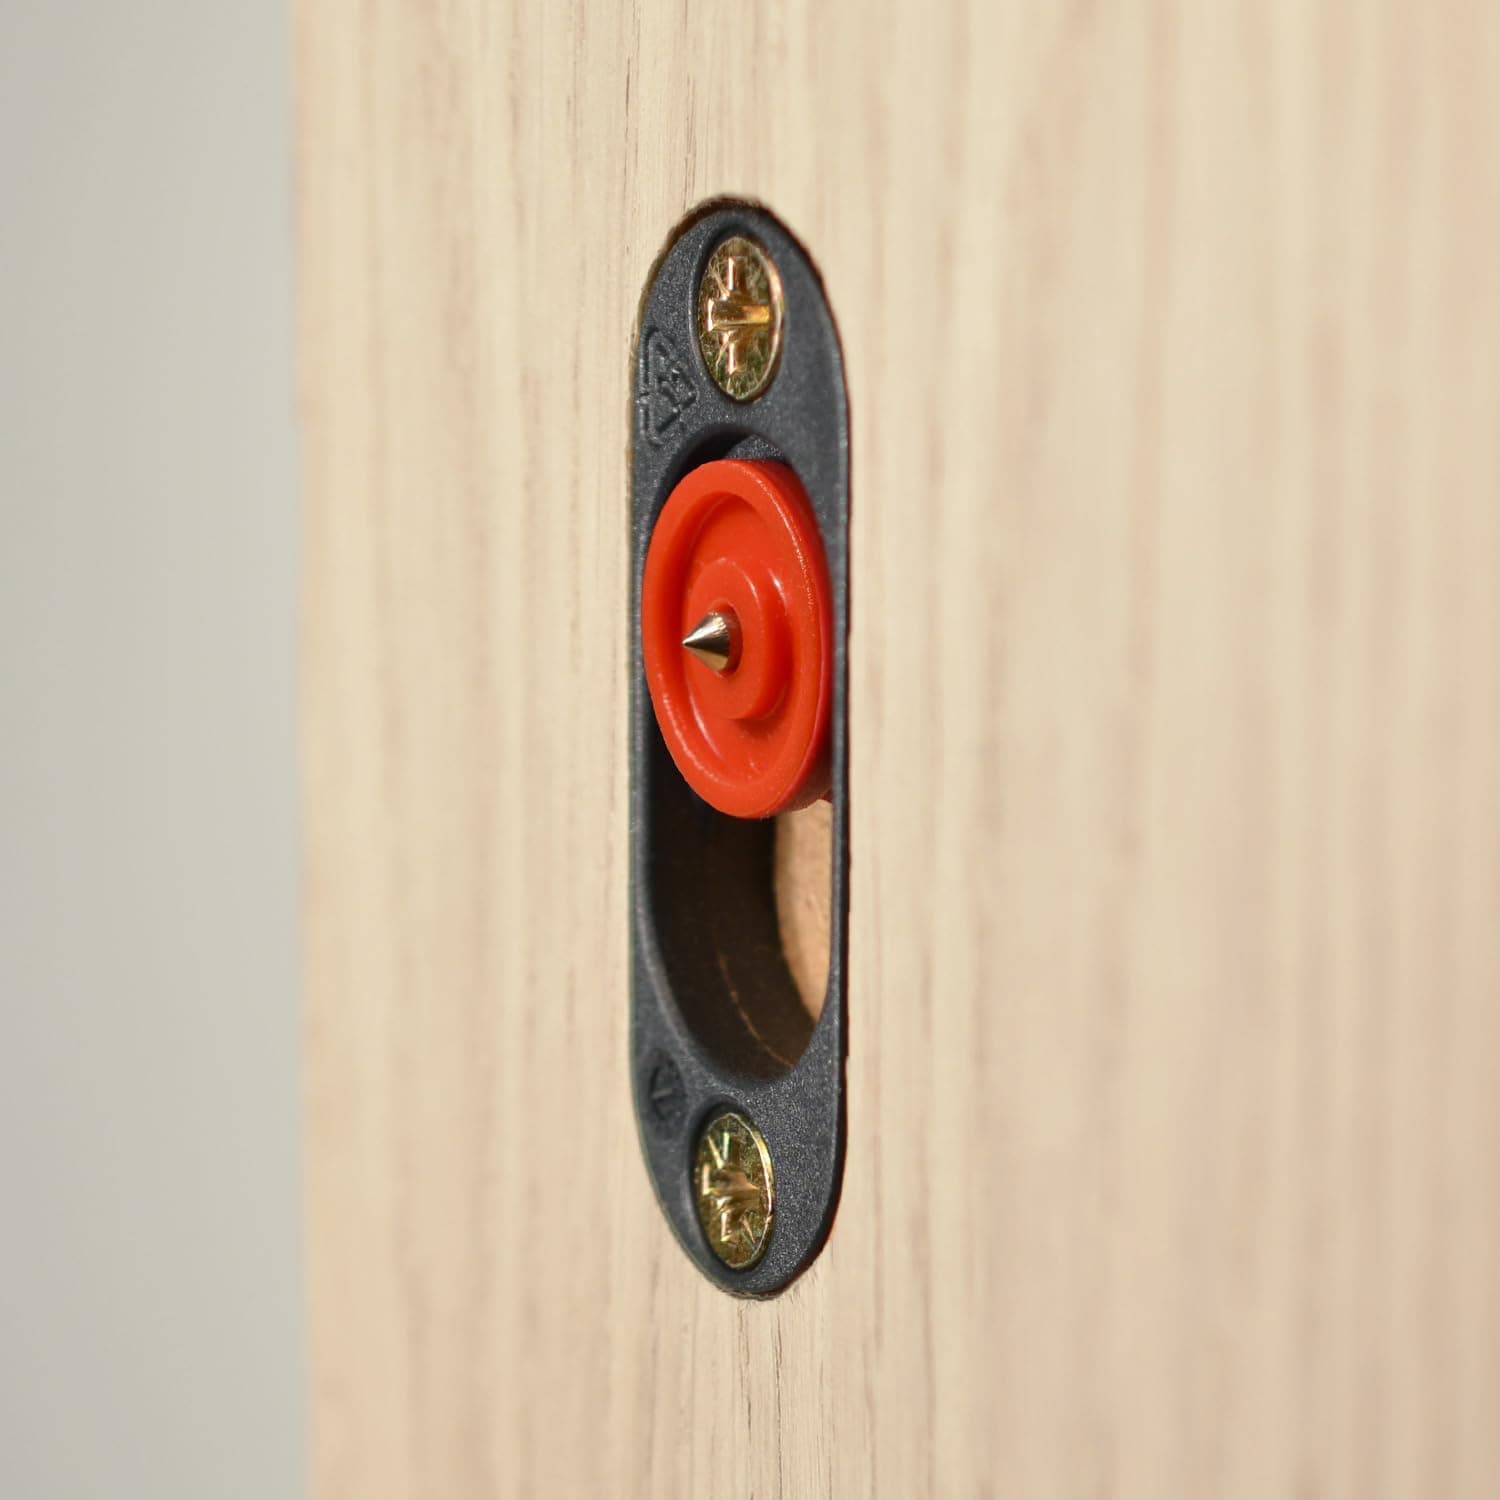
For hanging on the wall, I’d go with a buttonfix embedded inside the thickness of either sides
3d printing a jig and using a guide ring or a copy bit with the router, you can easyly create the pocket…
Just route a channel and add a diffuser with a led strip inside?
You’d also need to route the wires though, which could be a bit more complicated depending on where you want those leds located
If you want the leds only under the top and at the back, you could also just stick a led strip^there, it won’t be visible once the nightstand is installed (unless you regularly crouch and lay on the floor beside your bed that is…)
As far as tools go, I think you need a table saw or track saw (I prefer track saw for furniture, but it’s up to your taste…), a router for the channels and pockets (but you’d already have one for the cnc anyway), and a doweling jig (if you decide to do dowels)
Clamps, too… they’re a must, and you never have enough of them…
This should get you going…
If it’s the first piece of furniture you’re building though, maybe just don’t overdo it…
Simple butt joints with dowels will do just fine if done correctly, and it’s a lot easier to get right than miter joints
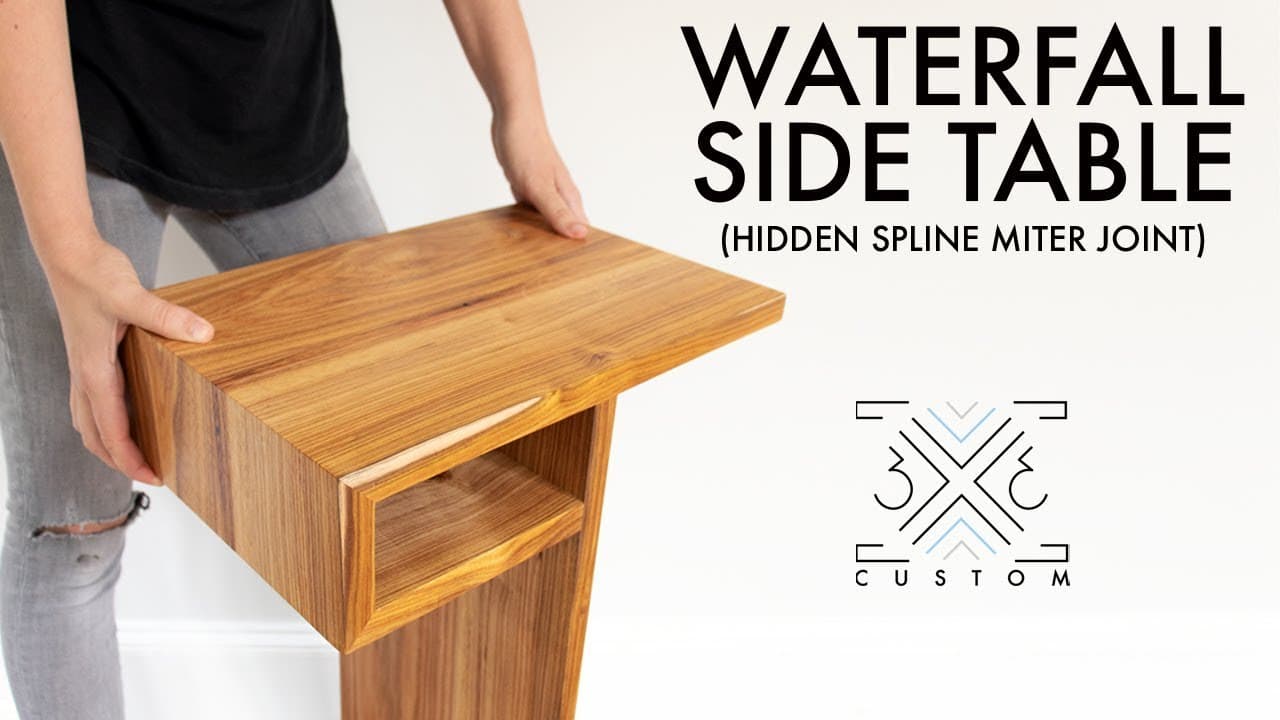
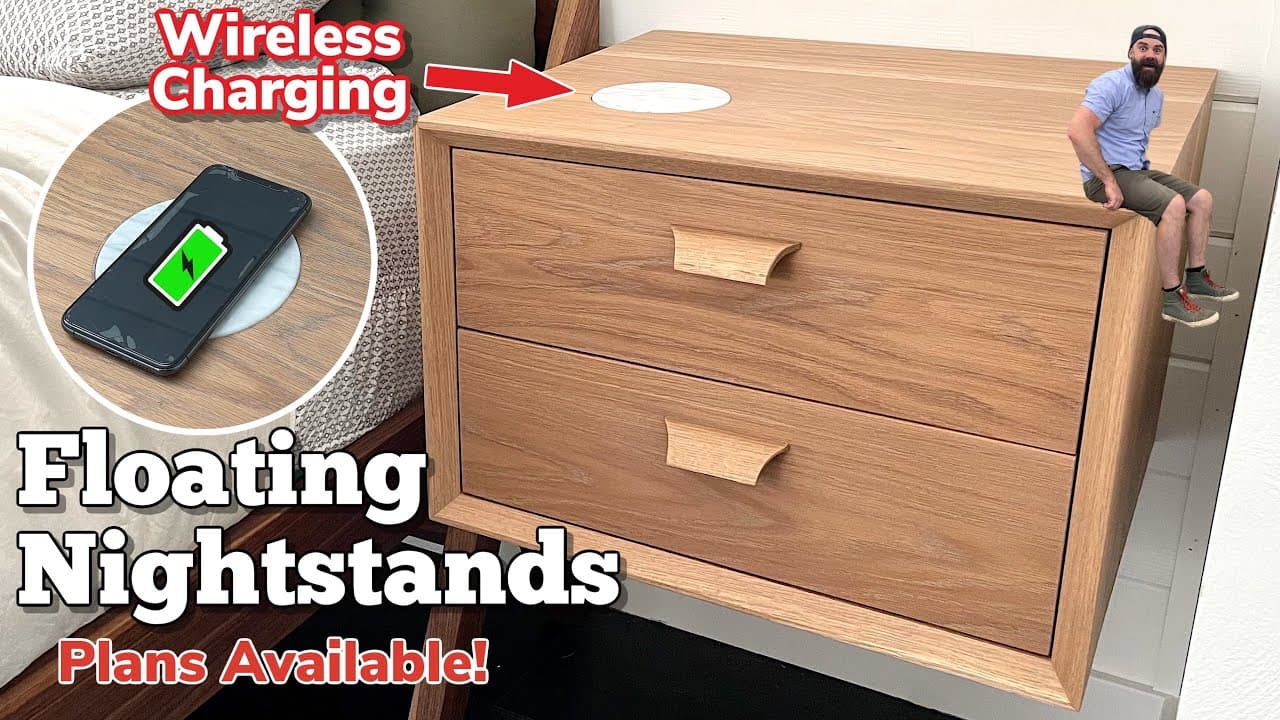
Here’s an interesting video about how you can make a nightstand more or less complicated, and still get perfectly fine results, even with a simpler build…
You can use pocket holes. You just have to plan for them accordingly. Make sure all the holes are on the back or bottom of the pieces. It’s not like you’ll be laying on the floor looking up at the bottom of the table very often.
In the case of your design, it would mean all the vertical pieces are longer so that the horizontal pieces all have the pocket holes on the bottom of them.
Personally, I’d adjust the design so that the top ‘box’ is enclosed with a drawer in it. Then I’d use a piece of plywood as a back panel behind the drawer. Now you have a solid piece of wood you can use to mount to the wall by drilling straight through the plywood into a joist in the wall.
This also gives you a drawer to put stuff in you don’t want laying out.
While we’re adding scope creep to your design… Install a Qi charger embedded into the underside of the top piece for charging your phone