The Honey Board

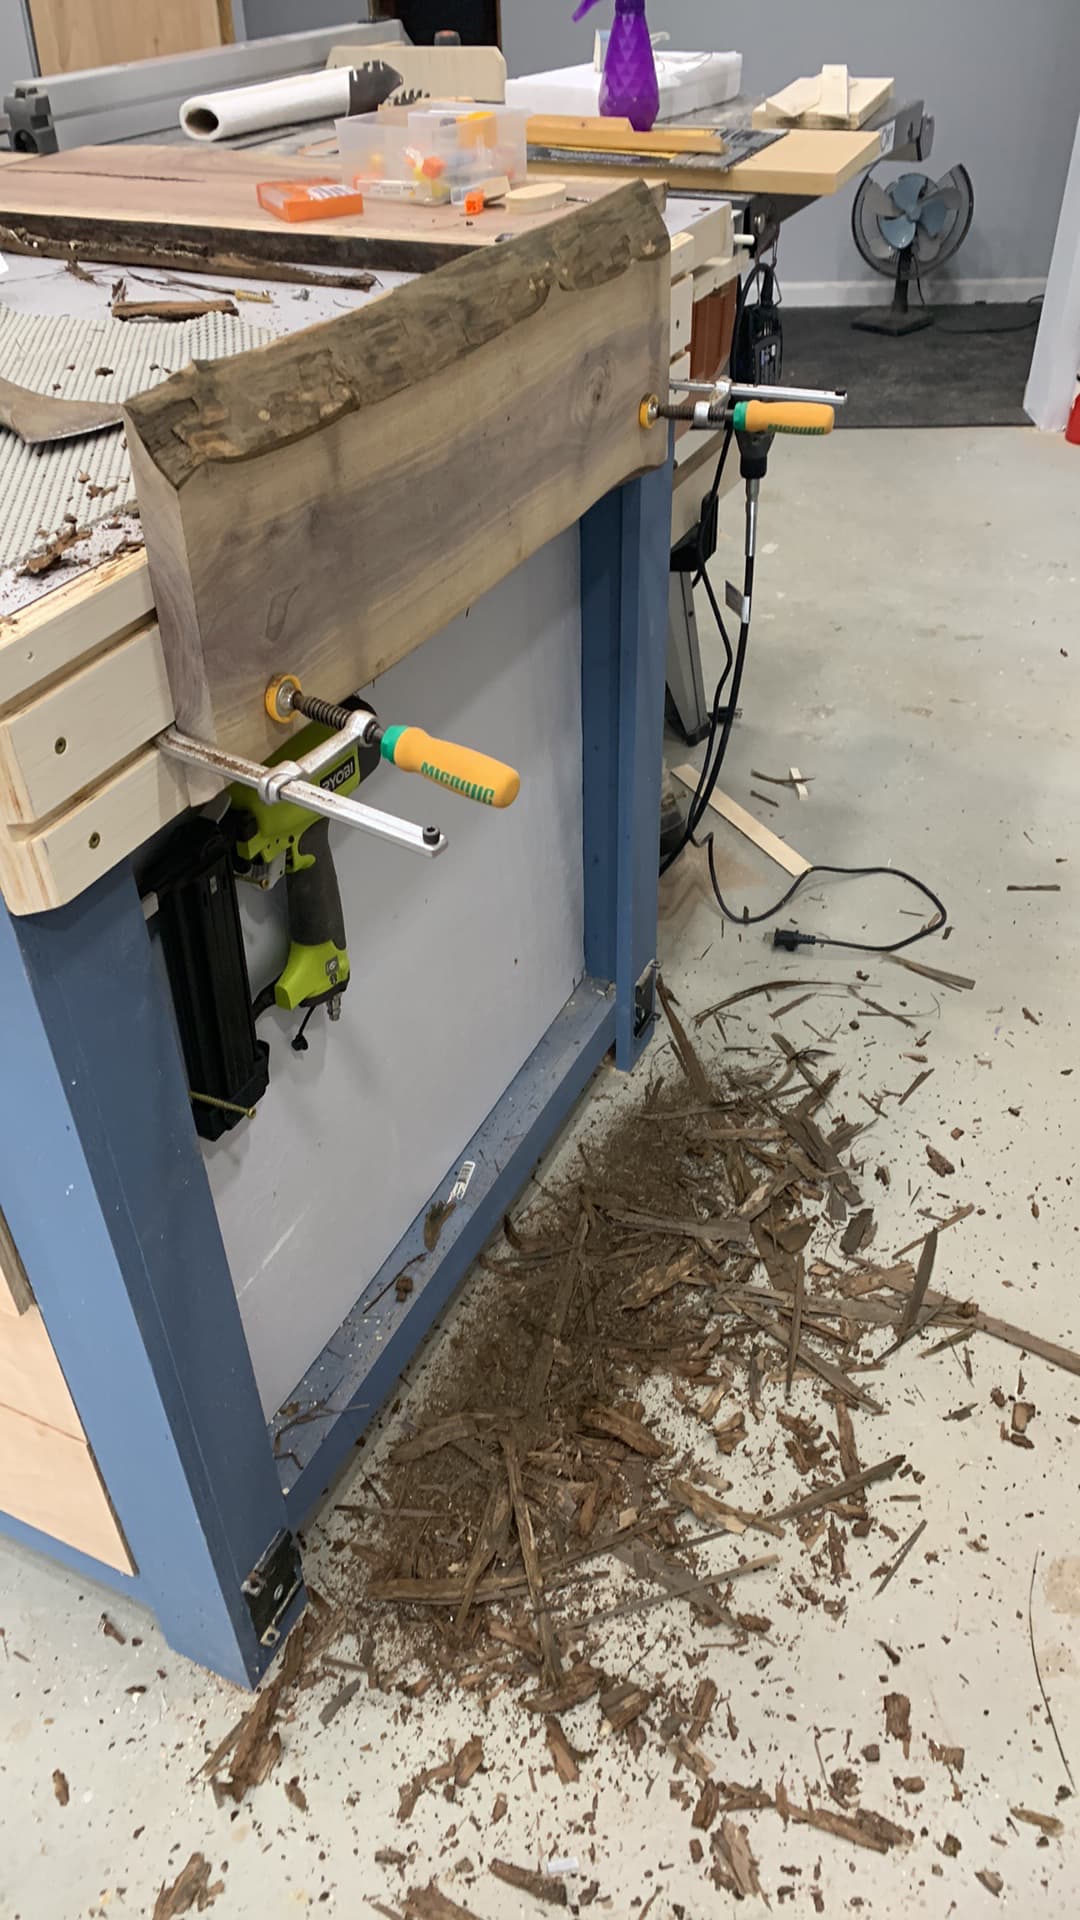
Been using my newly built LR3 pretty much every day, cranking out a variety of practice stuff in plywood and hardiboard, but I recently went to my local lumber yard and picked up 9 bdft of walnut for a few projects.

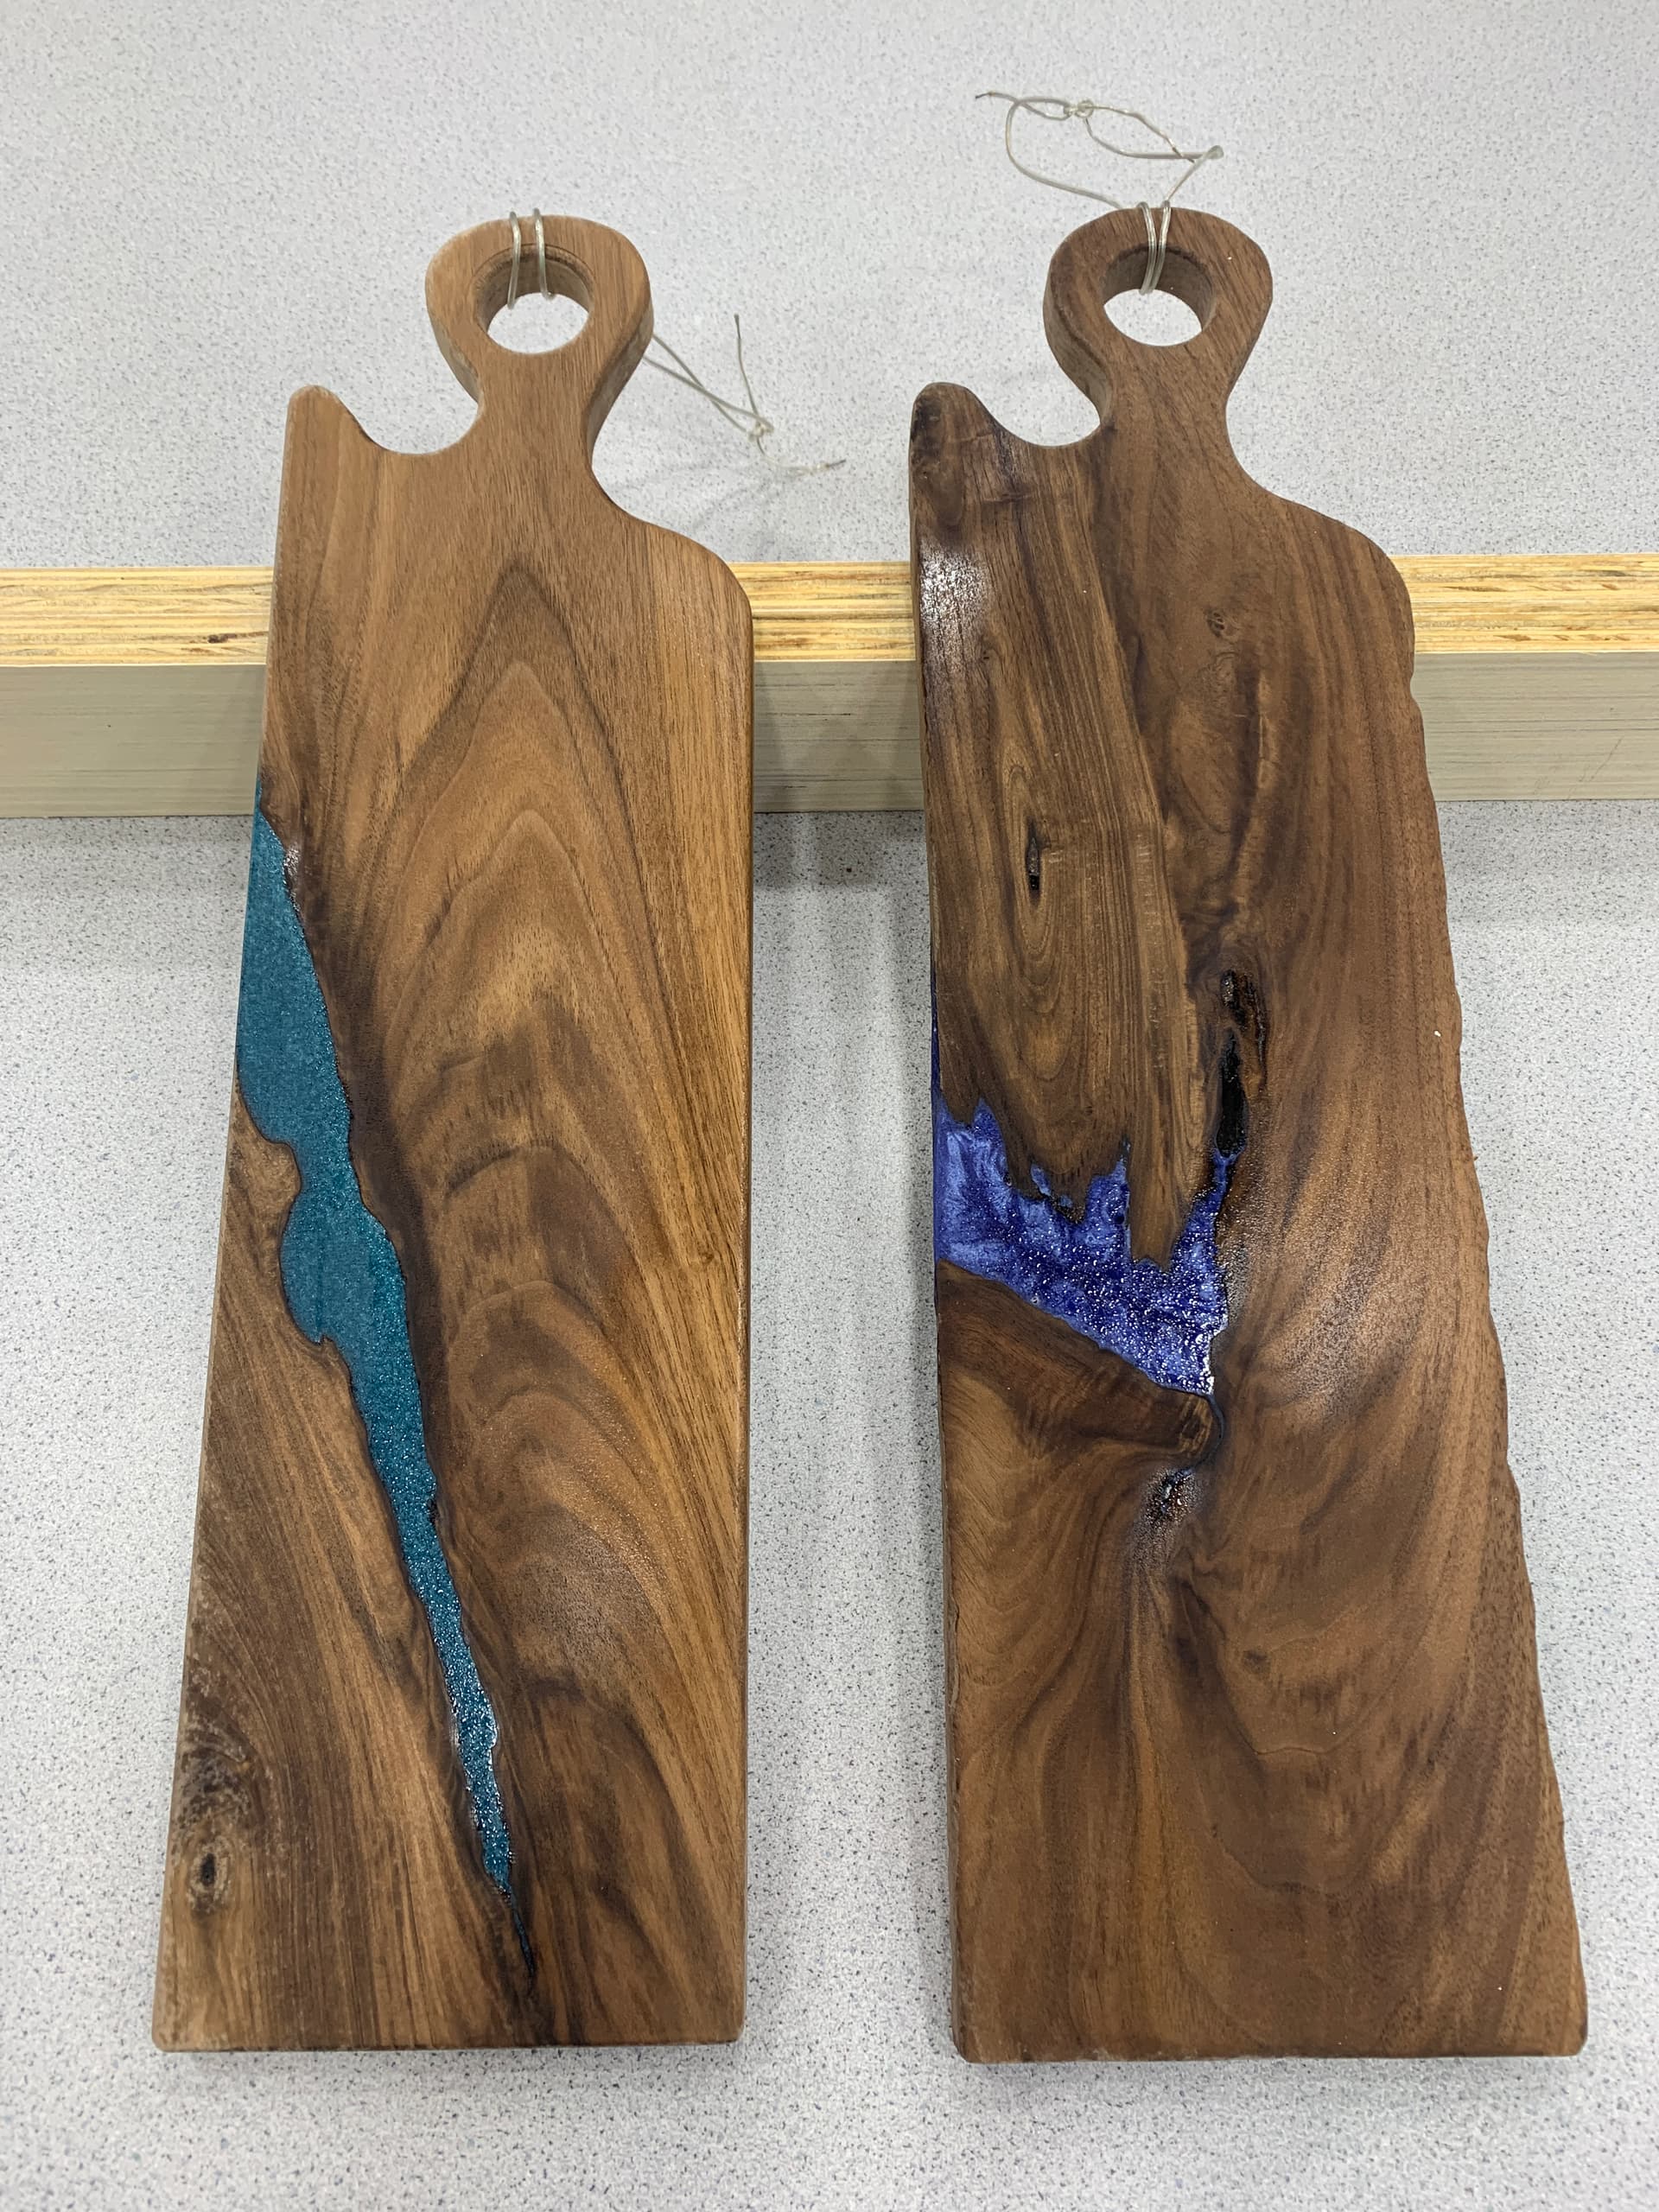
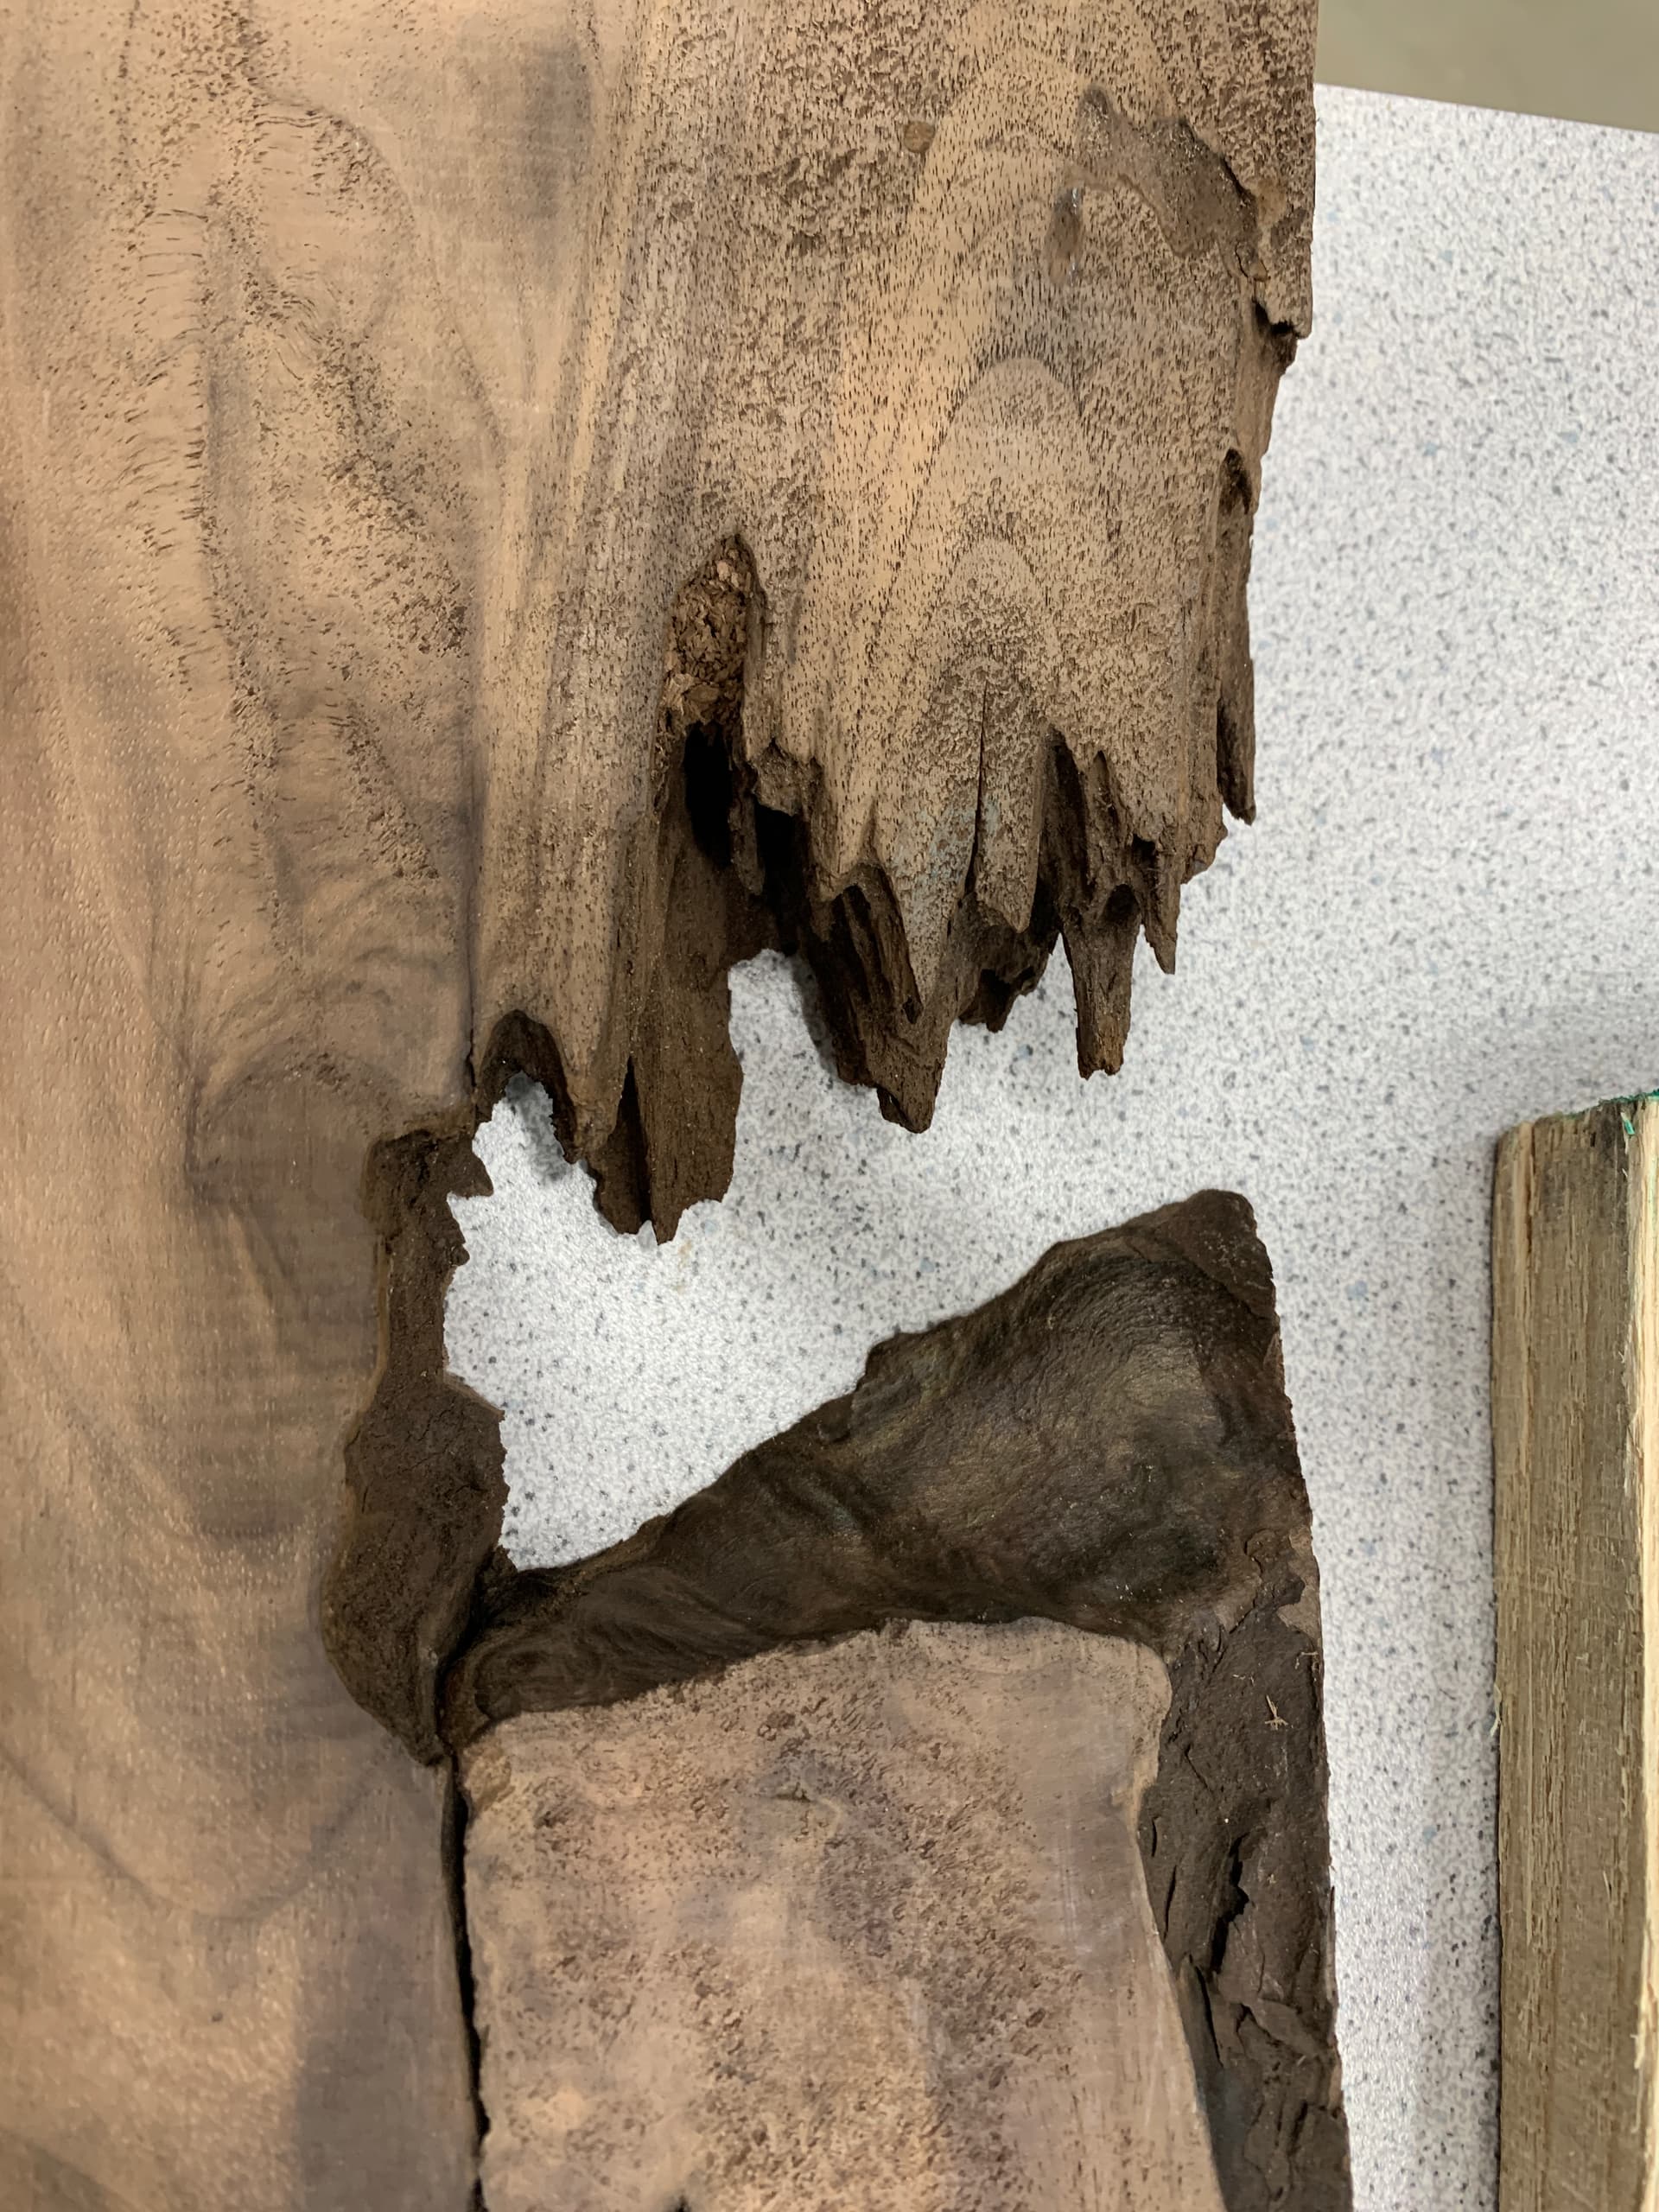
One of the boards had a split at one end, and a gnarly rotted out burl knot- so I sectioned those pieces off at 20”, ending up with a 36” board, and a 6” x 5.5 cut-off

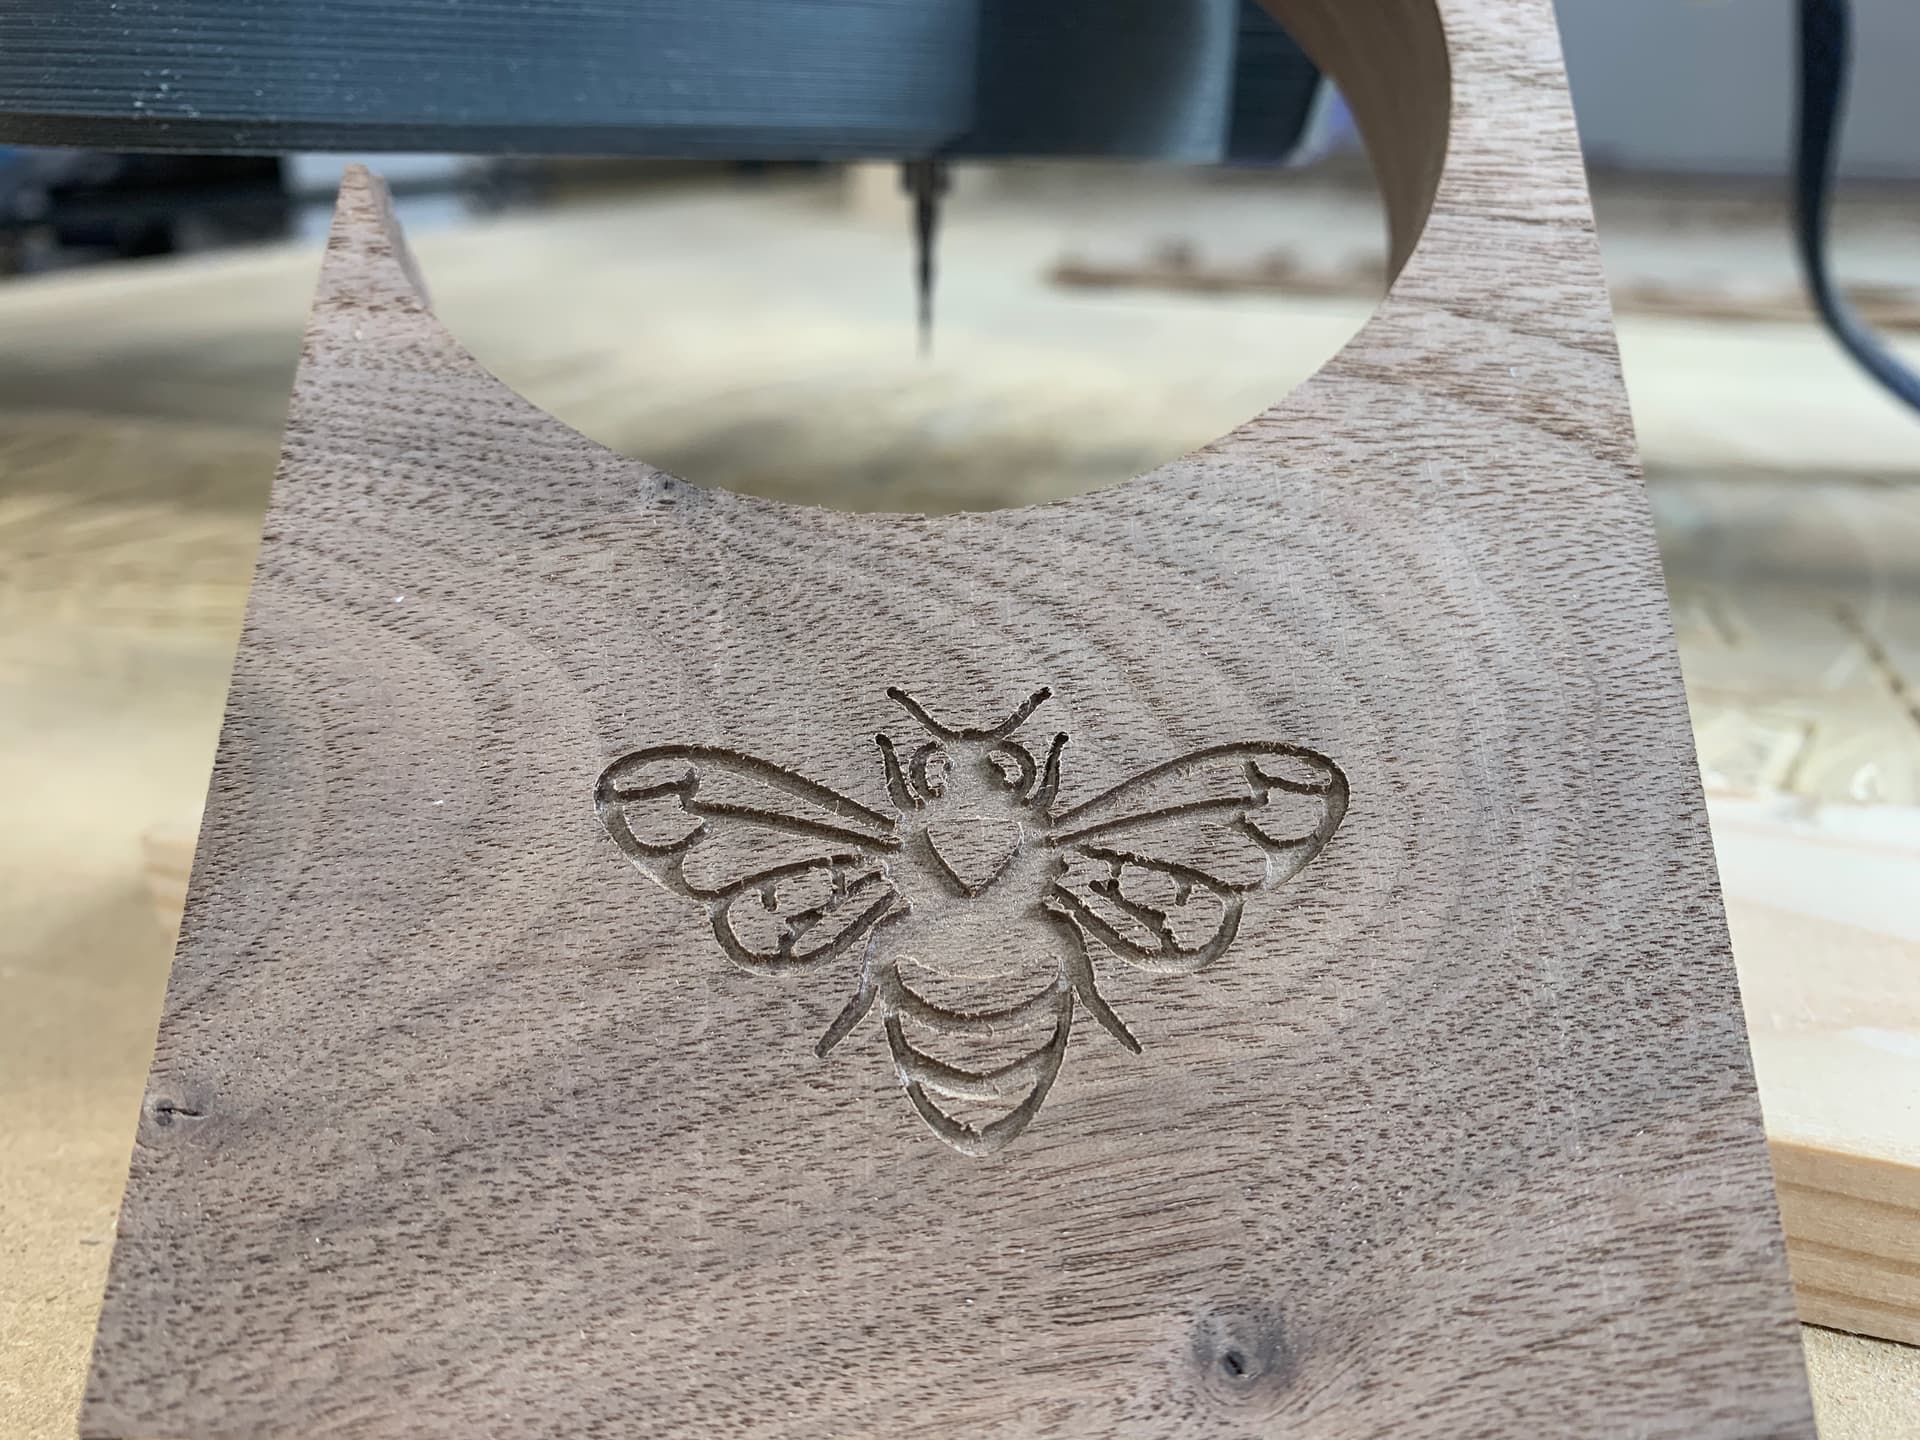
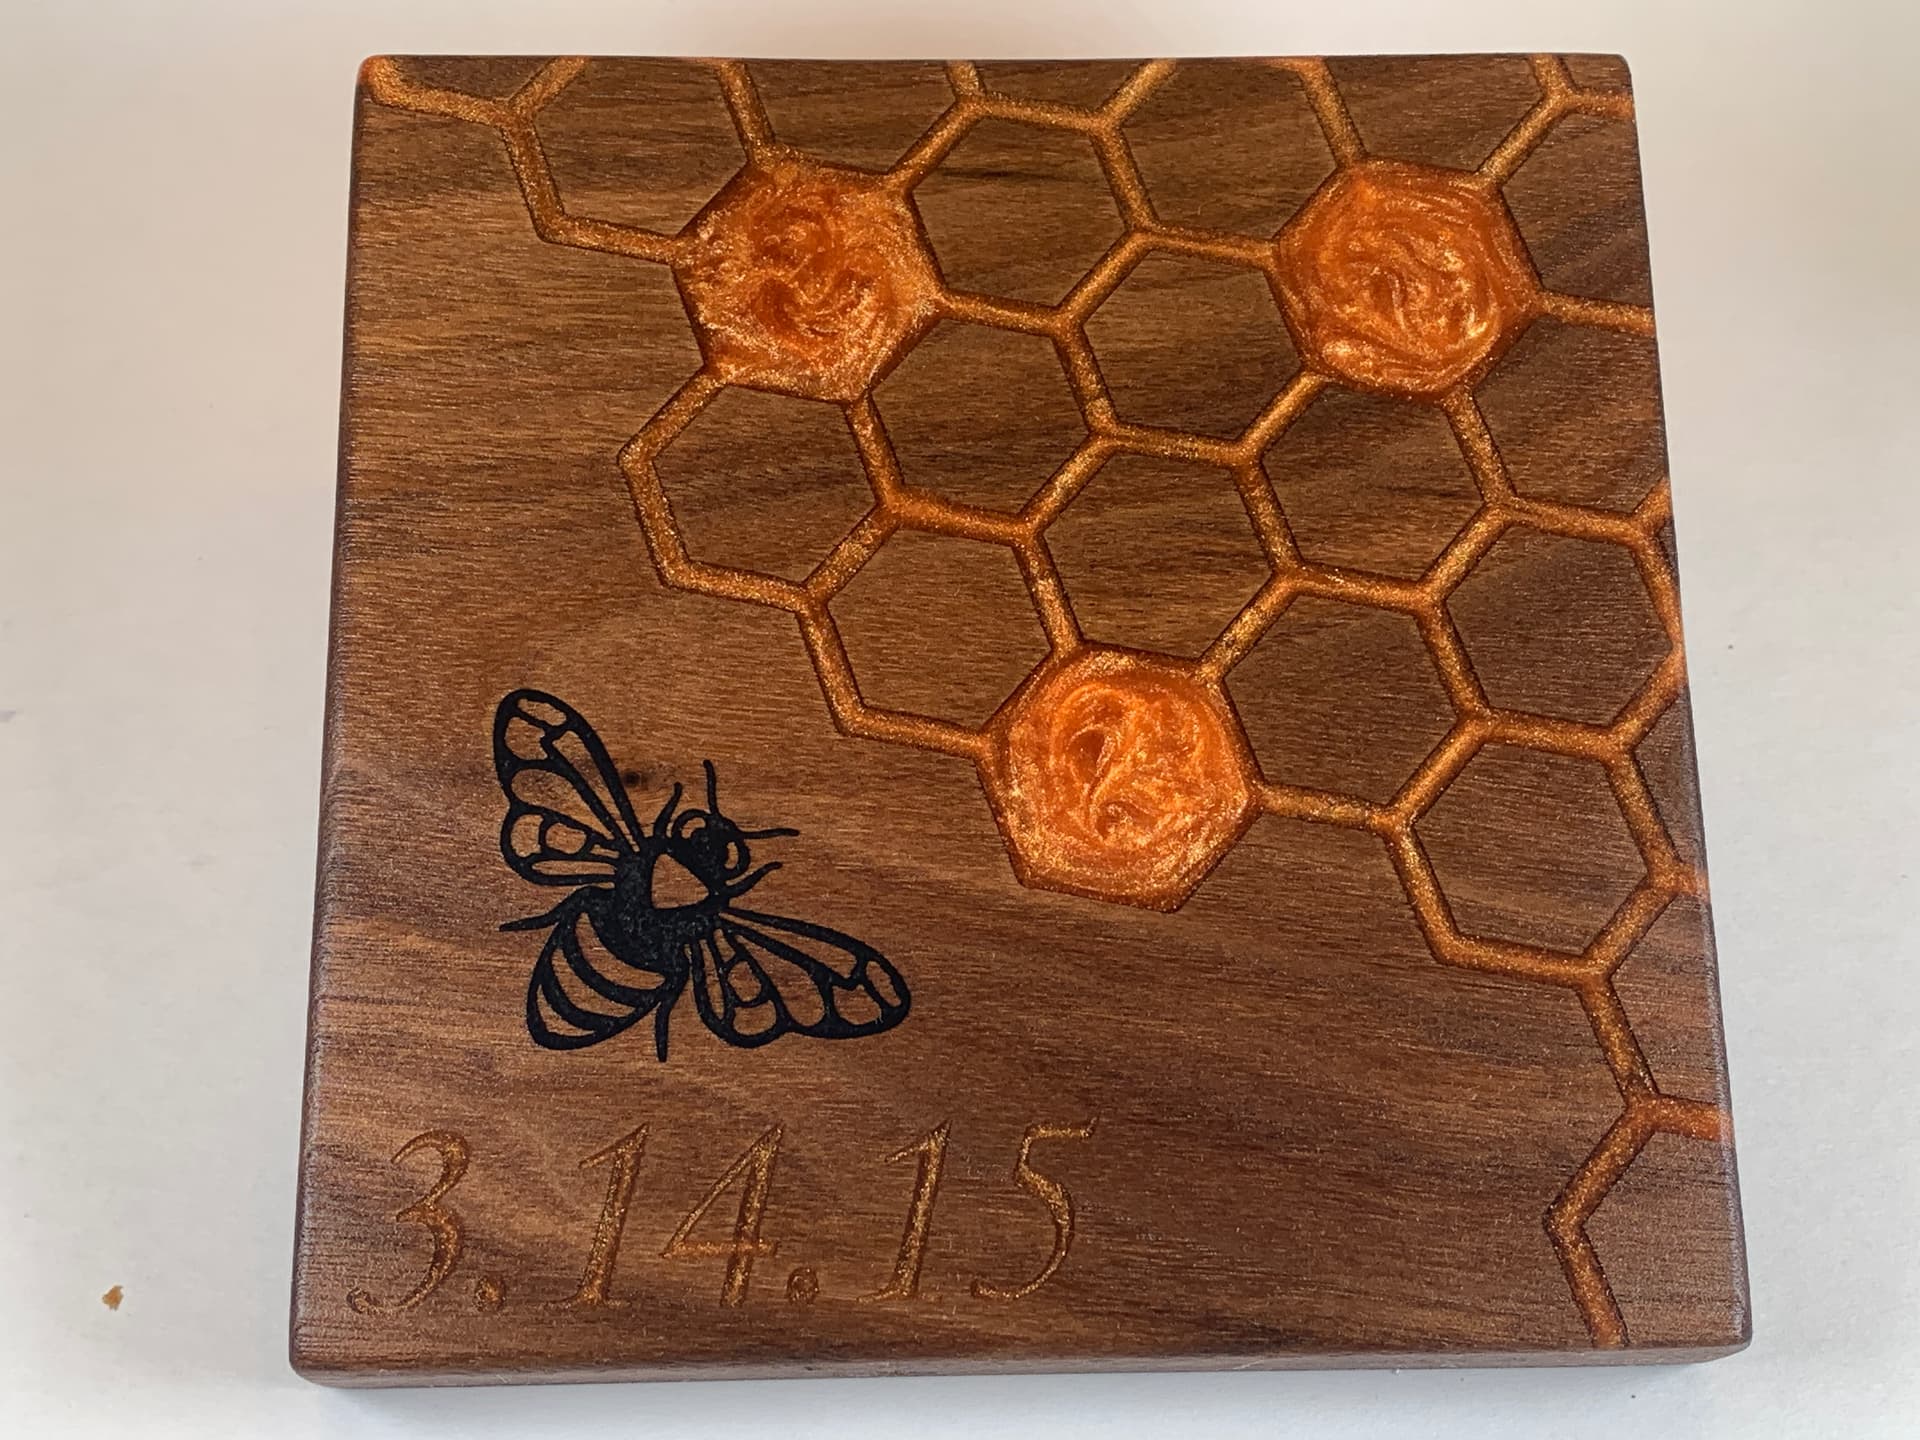
Been messing around with Carveco (3 months free trial, which is awesome) and came up with a nature inspired geometric pattern- the honeycomb hexagon.

So I used a 1/16” spiral down cut, and engraved it 1/2” into the piece - took all of 9 minutes running the bit at 3mm step down, 20mm/s.

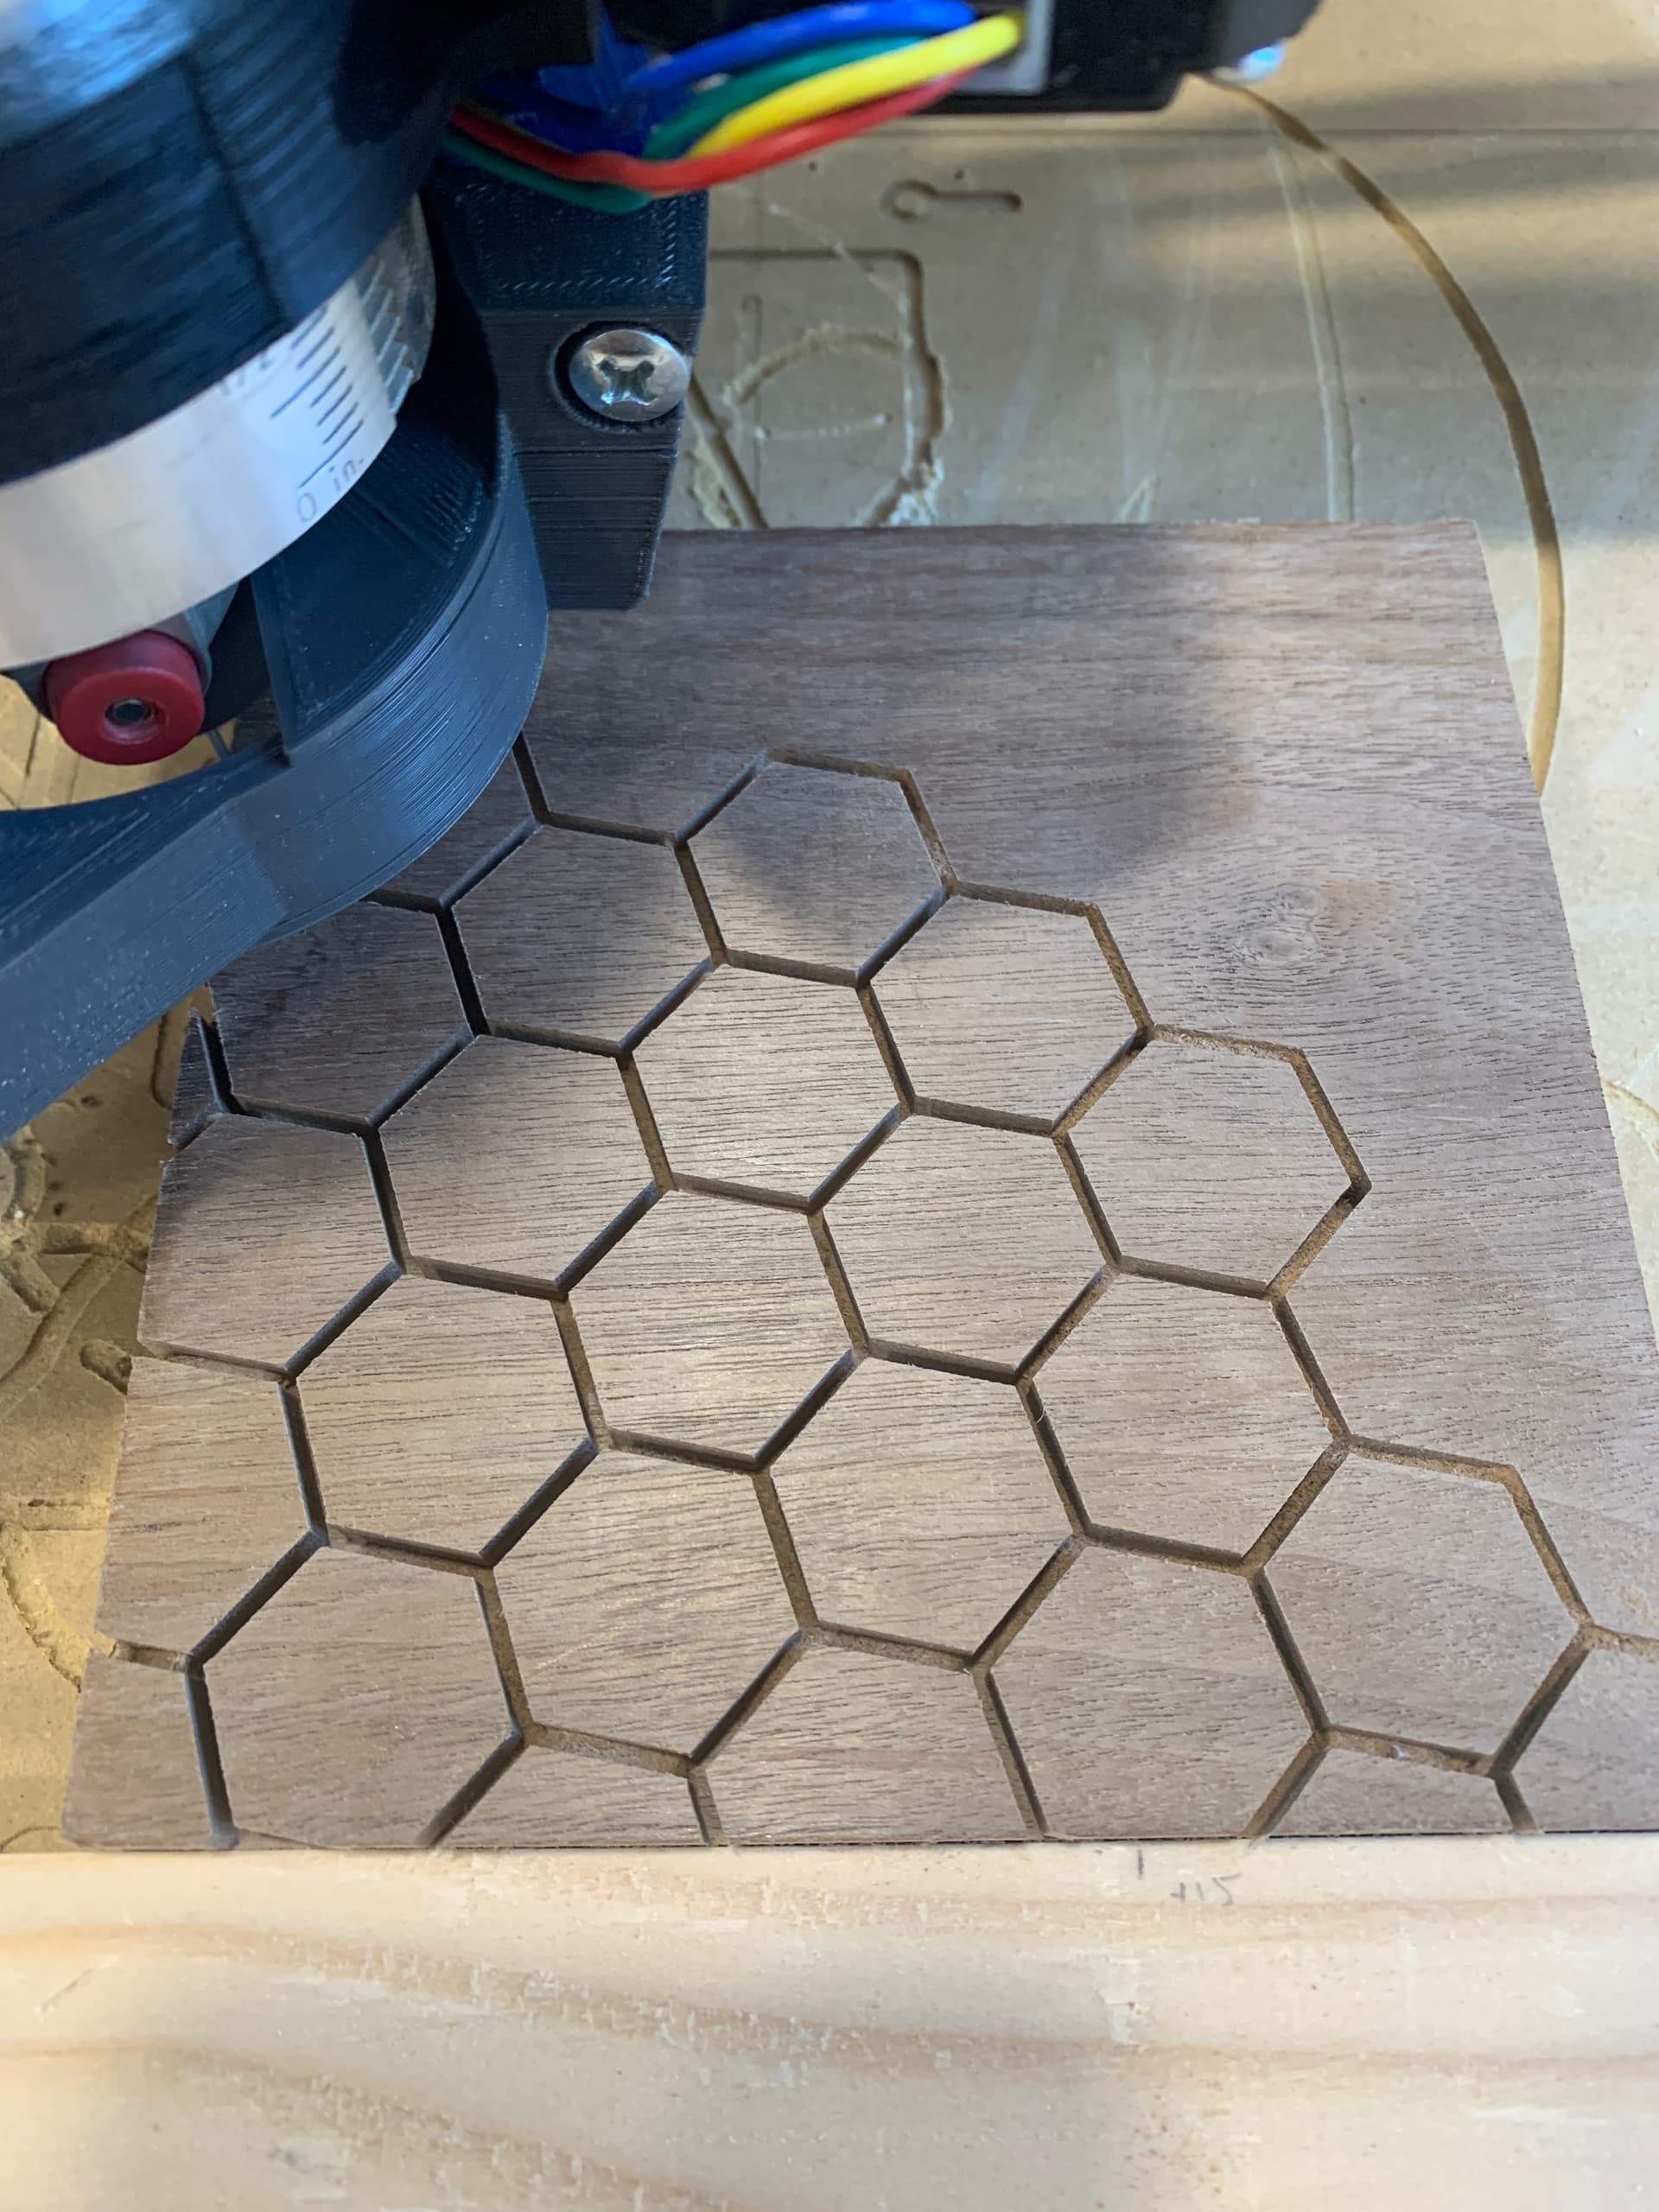
I also took the same bit into my handheld router, and cleared out 3 of the cells (I forgot to save the toolpath for that job, lol)

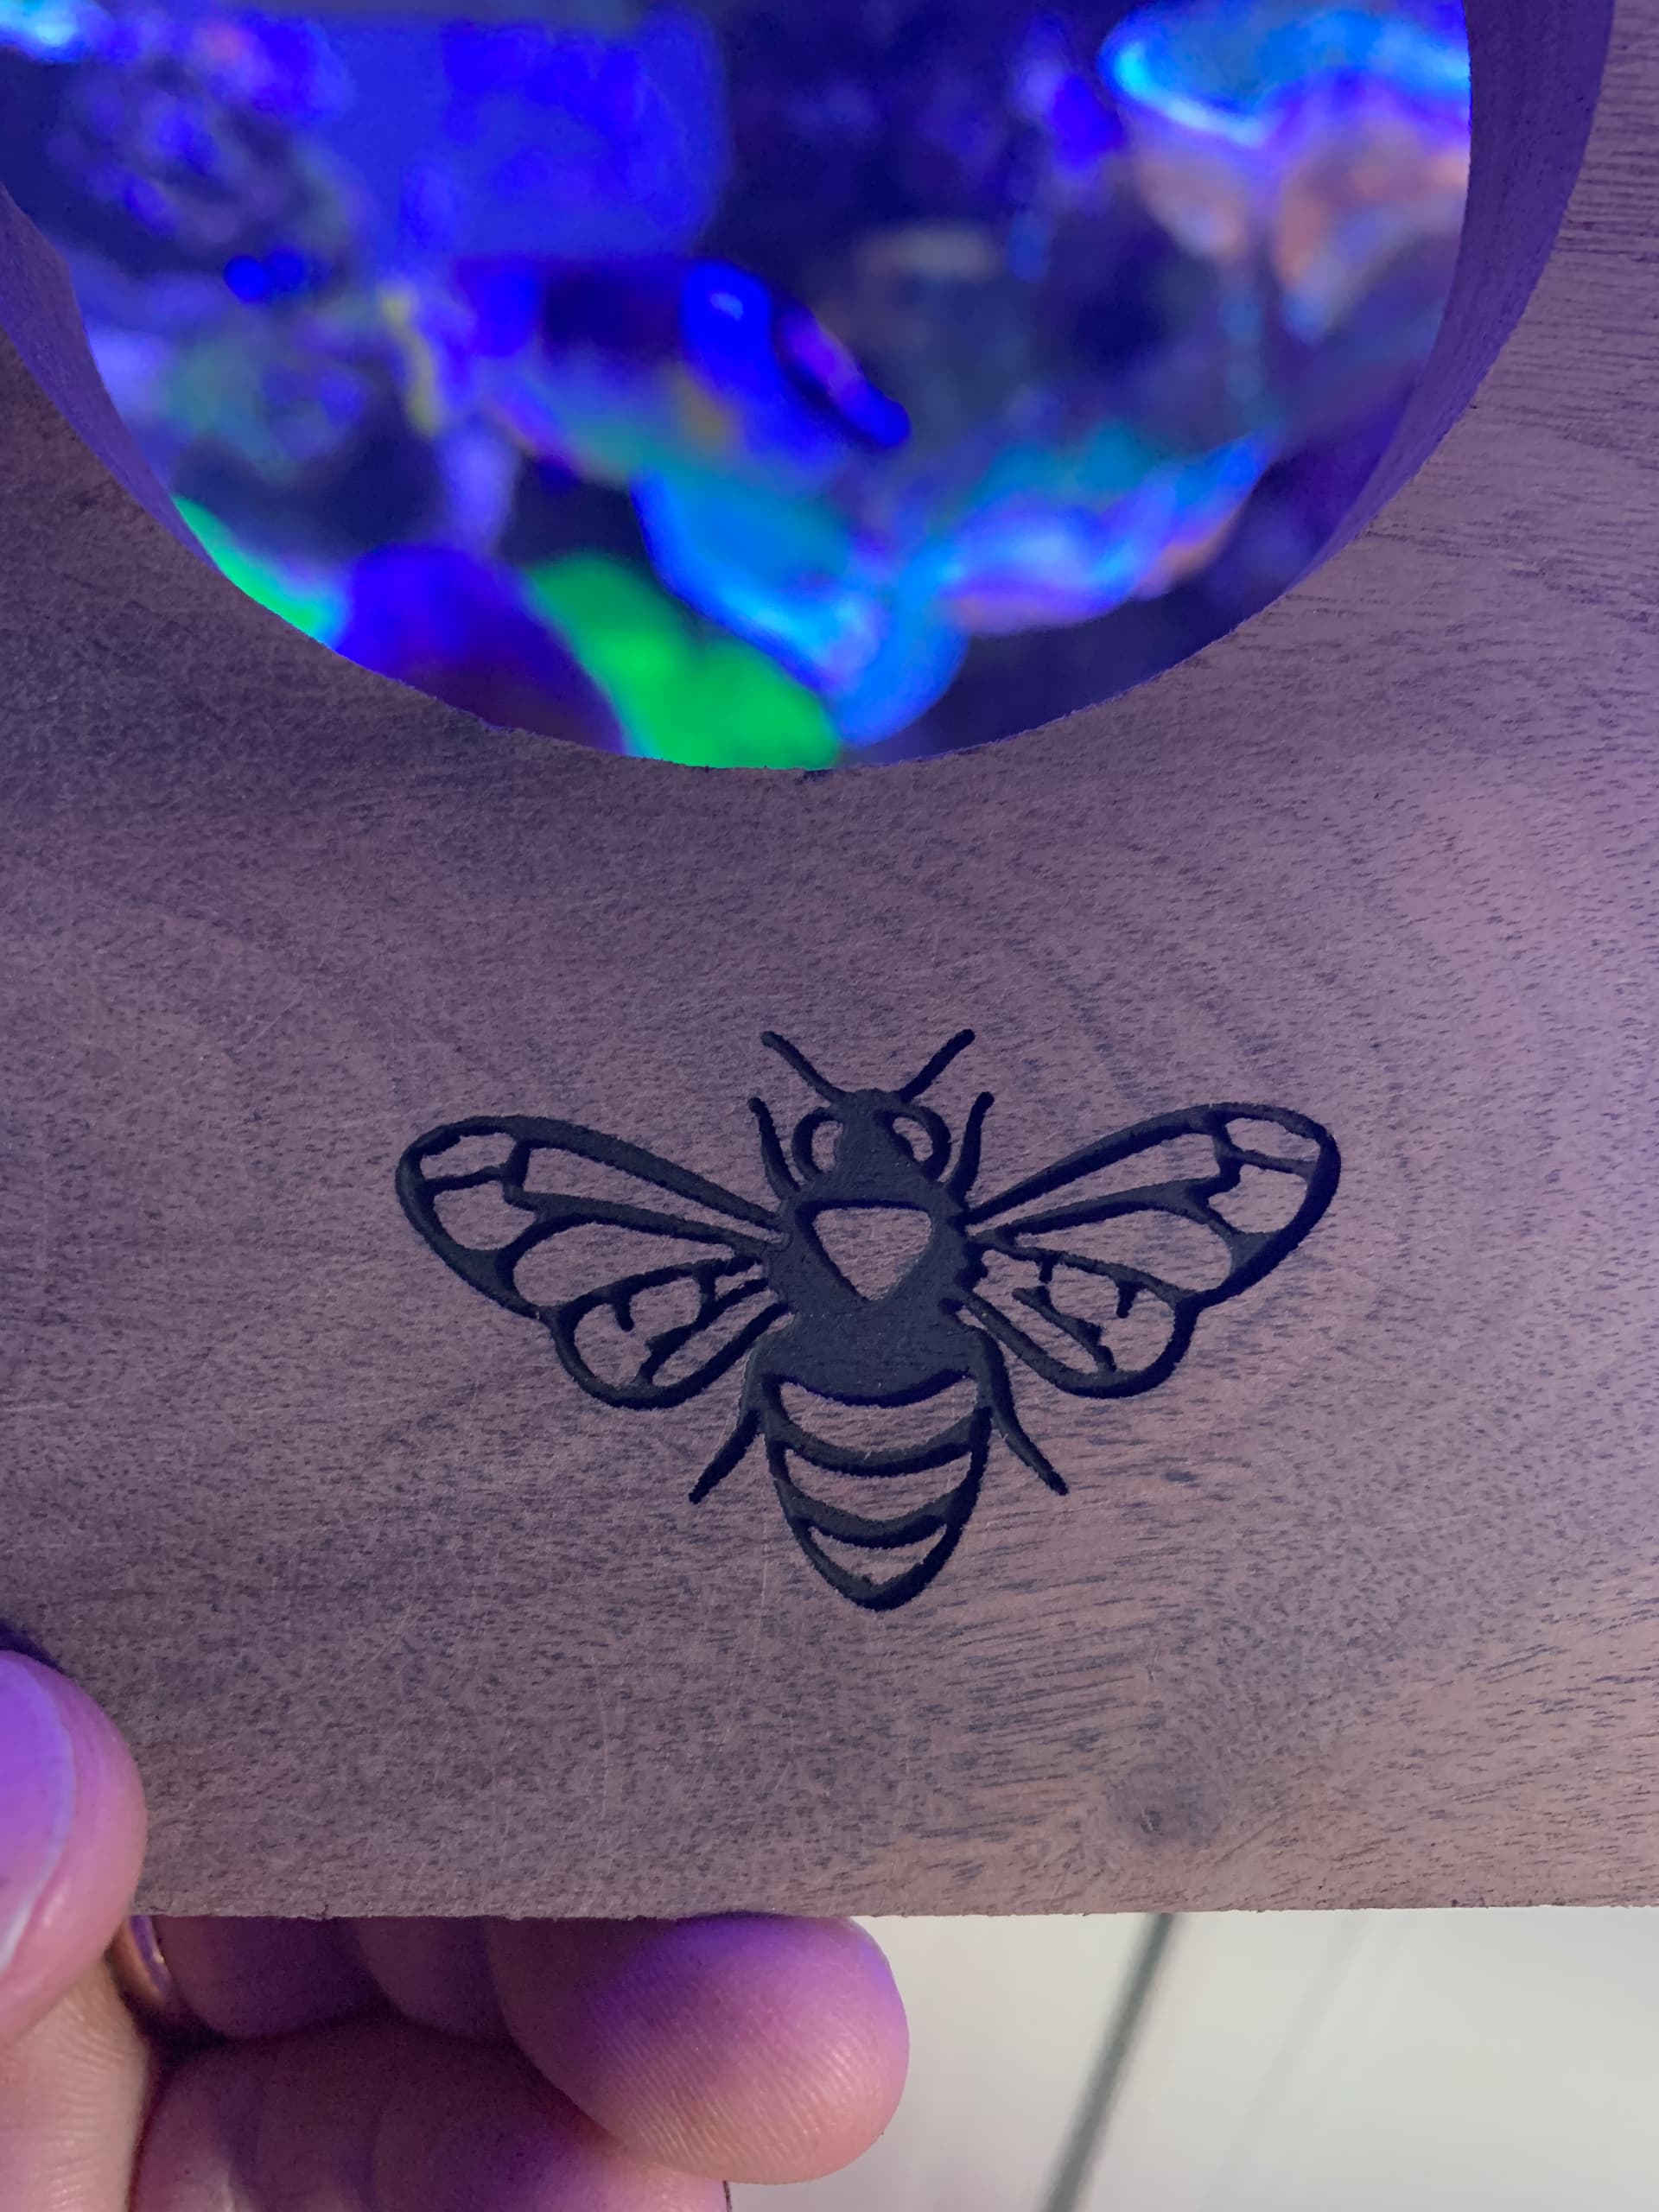
Then I whipped up a batch of Totalboat high performance epoxy, threw in some copper and gold mica powder, and poured

24 hours later, double sided taped it to my bench, added a 1/8th round over with the router, and hit it with the ROS, going 80-120-180-220, before water popping to raise the grain, letting it dry and repeating the sanding.

20 minutes in a mineral oil bath, wiped down with a rag, then staged for a product picture for my company Facebook page


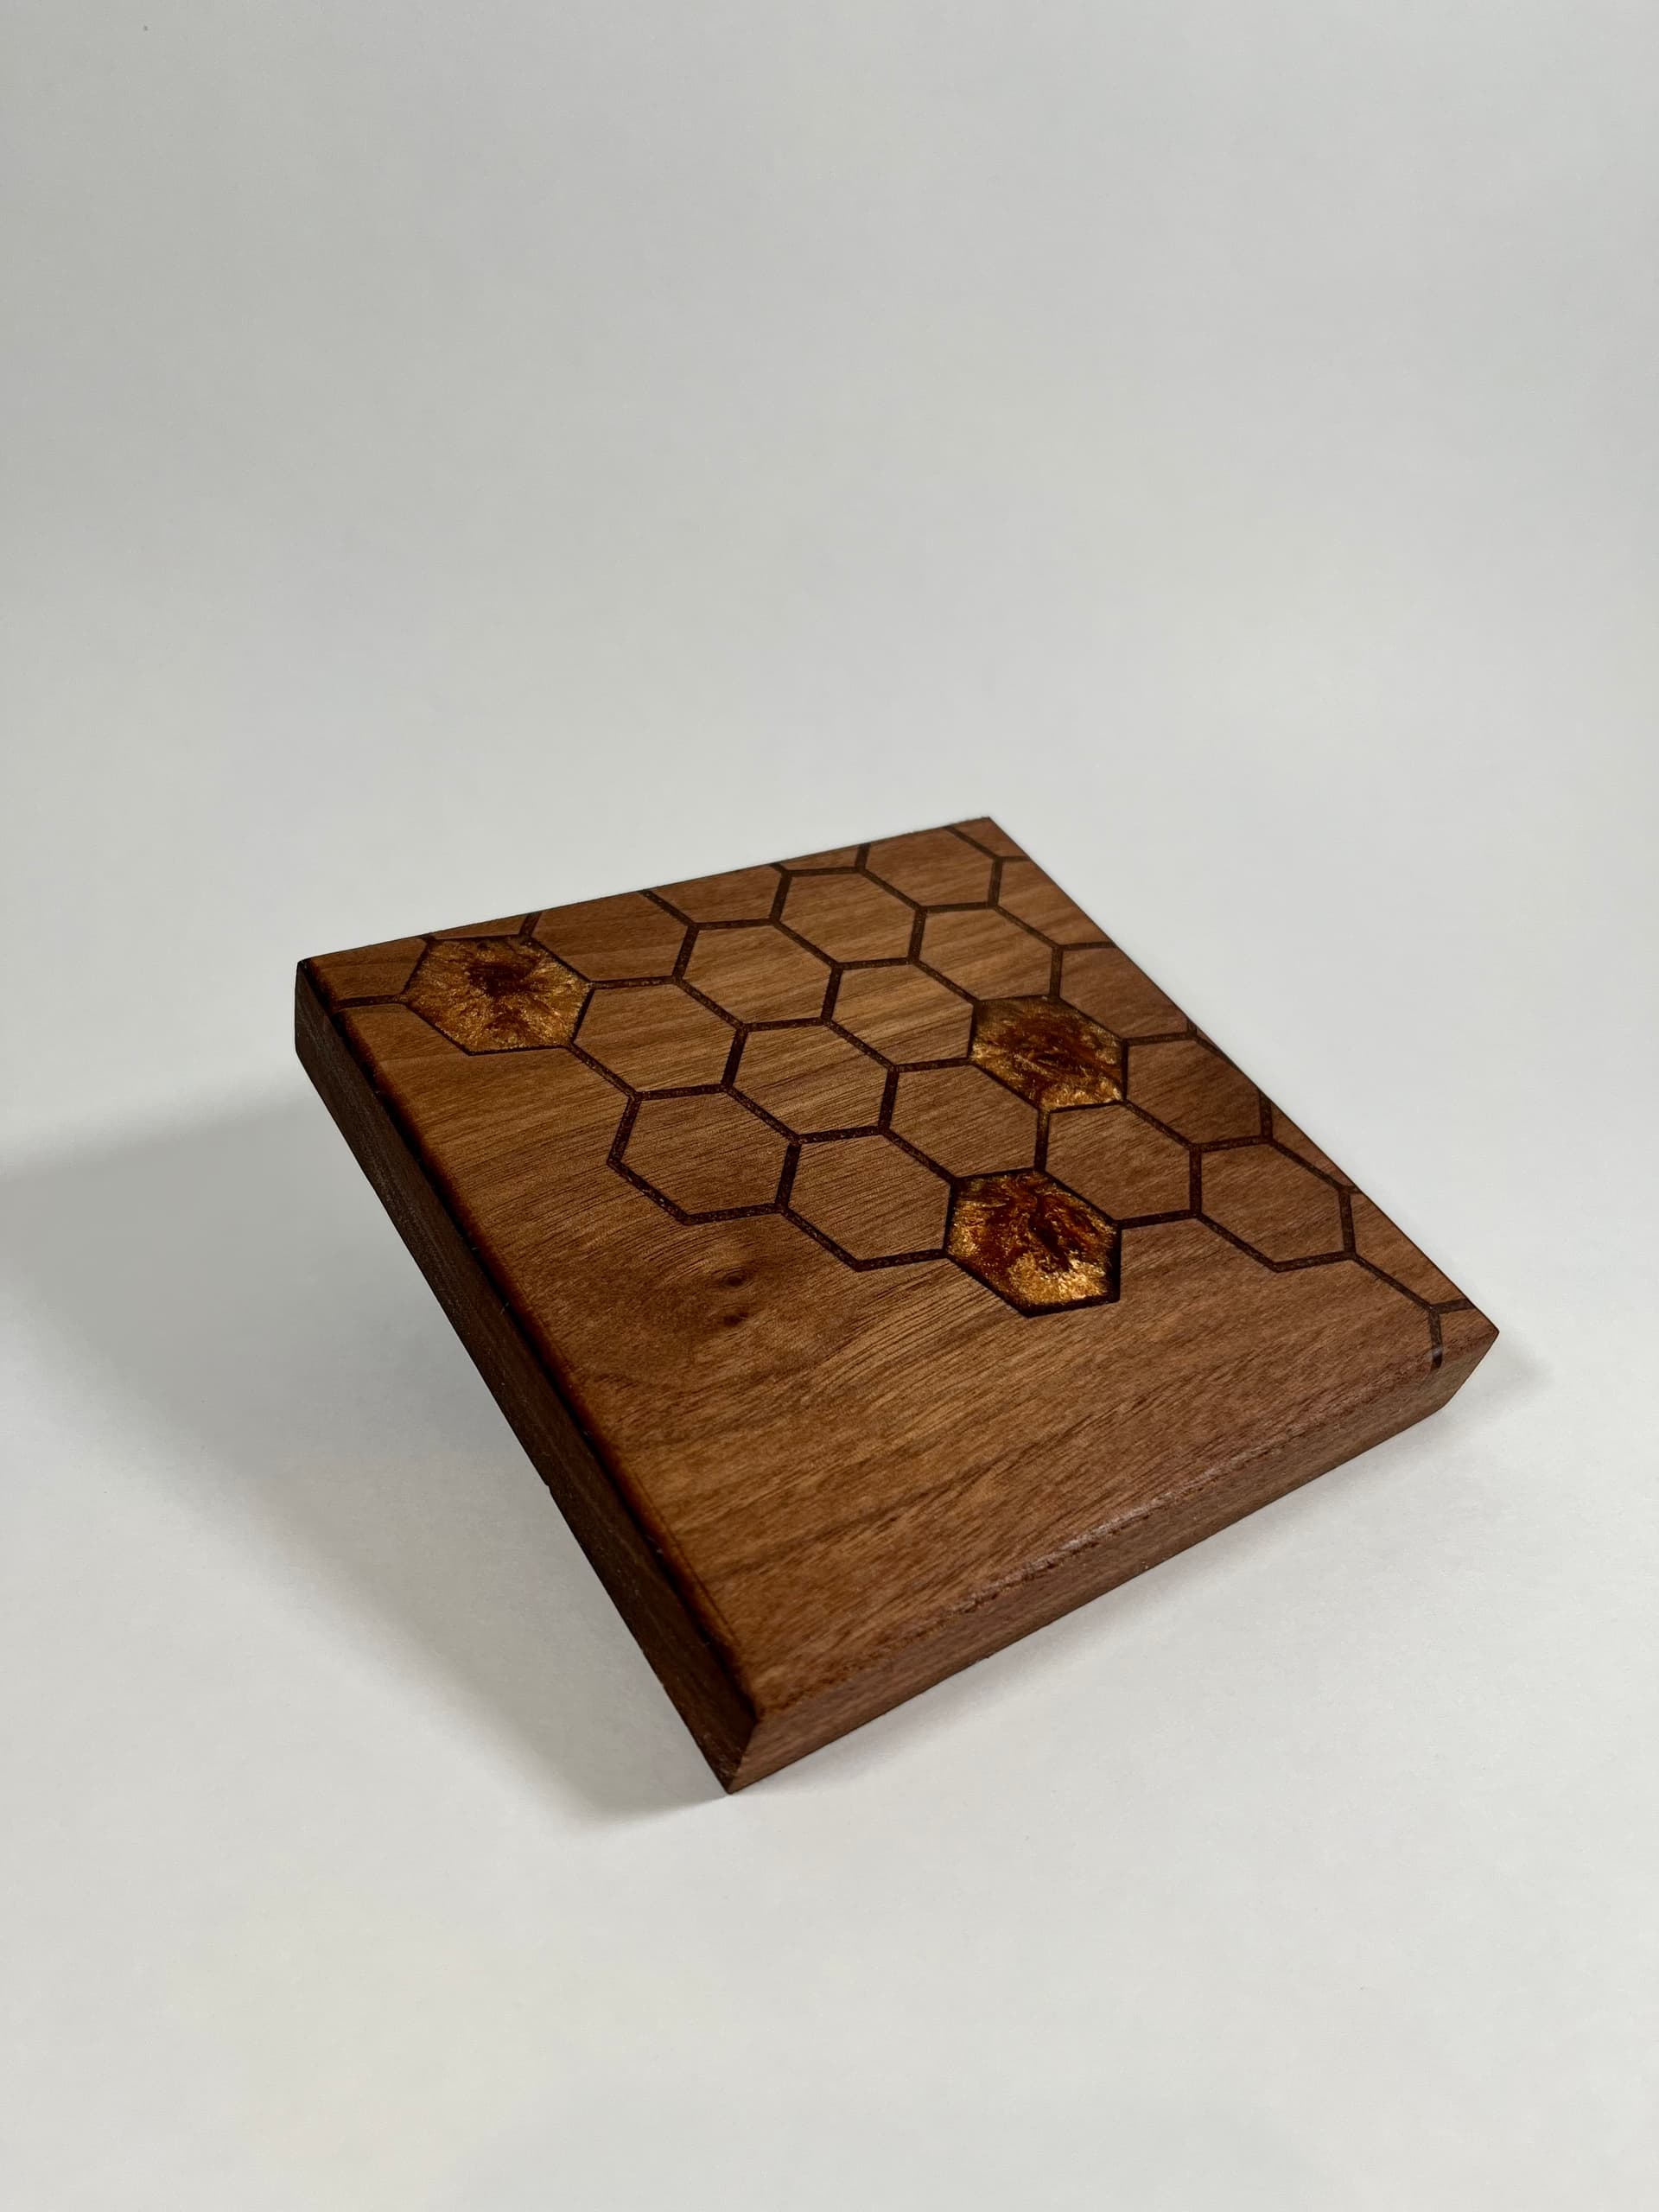
And viola! The ‘Honey Board’, which looks like a mini charcuterie board, but is the new cool fad. I hope.

Since posting, I’ve got orders for 3, including a custom engraved one, and may have an ongoing consignment order for 30/month out of an apiarist store in Tucson, contact through a friend!

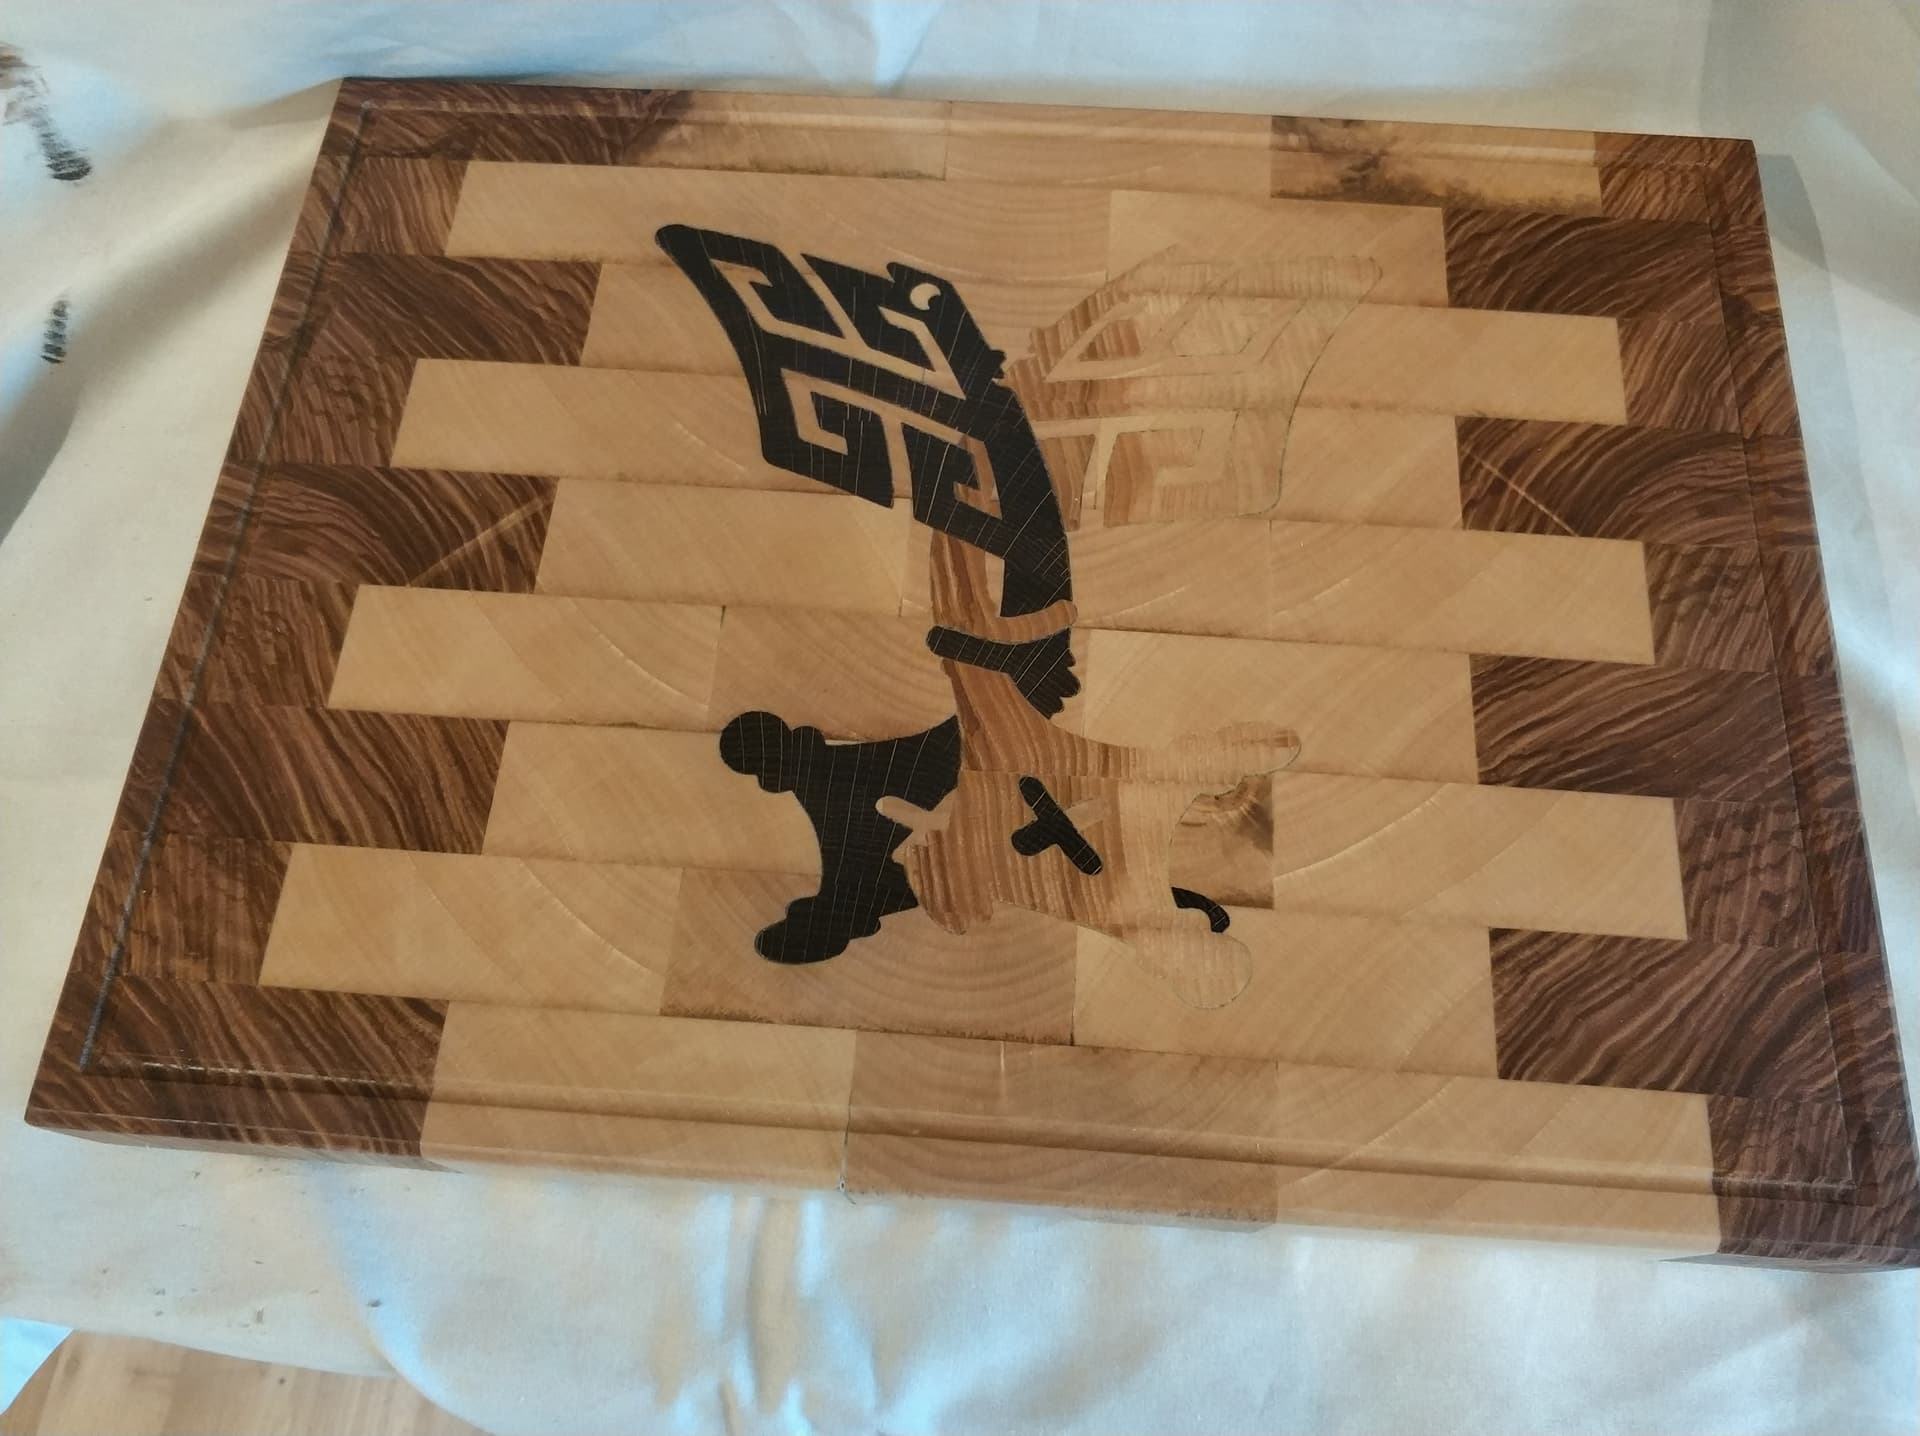
Also- here’s how the other ends of the board turned out-


20 Likes

Okay, how does that feel?! That is so freaking cool and fantastic news.

how does it feel?

I recouped my LR3 investment back in 2 weekends- it feels FREAKING AMAZING. Thats for 3 of the honey boards, 5 signs and a few holiday items.

2 Likes

Well now I think I need a customer testimonial section on the site.

Other than telling me my lottery ticket hit all 6 numbers, I don’t think you could say anything to make me smile more. Keep it up!

7 Likes

Ok, quick update

Client asked for an inlay of a bee, and I stupidly (lol) suggested we make it life-size and detailed.

Dumbass move.

Anyway- introducing bee carve V3… this took some trial and error, but I’ve got it nailed.

It 1.5” across the wingtips, 0.8” body length.

0.5mm ballnose running at 15mm/s, 0.25mm DOC for 1mm total.

Took 25 minutes, although my safe z wasn’t set to 1” so a lot of retraction and movement. Could easily shave off 15 minutes by making safe Z 5mm and 0.75 step down.

Hit it with some flat black Spray paint, and 220 grit paper to remove the paint on surface

And while that was carving, I started processing a walnut live edge board that I’m going to carve with the bee-hive motif and 3-4 various sized bees

6 Likes

The bee looks really great. How does the rest of the wood stay so clean after spraying? If I do it the black paint seeps into the surrounding wood.

And I am so jealous of your walnut. Basically impossible to get in Germany. I was really lucky to have a friend who’s got a friend who’s got a sawmill. He had maple, ash and oak and that’s all I am going to get here if I don’t want to buy 1m³… :frowning:

2 Likes

I hit it with a quick coat of clear spray to seal it up. Let it dry 30 minutes, then hit it with color.

I do the same before I use colored epoxy, to avoid the bleed-out.

Yeah, I’m so happy about the walnut. While it isn’t super inexpensive at my local place, it is abundant and great quality.

2 Likes

Thanks, that are the same tips I got in my epoxy post. There seems to be a pattern. :smile: Will absolutely do it like that the next time.

1 Like

Don’t do what I did and get so eager that you forget to do it on the final piece. I had to do some extra sanding on the client piece, and I was cutting it a little close

Sent this guy off to his new home today-


That makes 3 commissioned boards, two asking for the same design.

8 Likes

They really look great. Out of curiosity: how much do you charge? I’ve got more and more friends asking for things, some I can easily do, some will be harder and take a while. I am feeling kind of bad to ask my friends for money, but it’s my time and material… :sweat_smile:

Definitely need to charge if it’s not for direct family.

Base charge is 40 for the 5.5x5.5 board with the honeycomb inly, an extra $10 for customization.

Somewhere around $3.50 for materials, and around an hour at $35/ hour shop rate . That covers cnc and epoxy pour. Since I can multitask while machine is running, I feel charging more for sanding and finishing etc is excessive. As long as those steps don’t go past the time taken to prep and cut, I feel like charging more would be double dipping. That’s only small jobs though that I could potentiall batch out

I didn’t charge anything for the design time For the bee, which was 2 hours. And a 20 min test cut. I figure I’ll use that a lot so I’ll recoup that part over a few boards with the customization fee.

Wife says it wouldn’t sell at $40, but I’m getting solid interest and no one has passed after hearing price, so it’s working out

1 Like

Cool, thanks so much. I also think the price is fair. :slightly_smiling_face:

I honestly think that is a steal. Glad you can make that work.

IMO, it is ok to charge for machine time. The machine does wear out and repairs take labor and parts to fix.

That said, if you’re finding customers at $40 and you’re enjoying it, don’t let me change your mind.

3 Likes

Fortunately, I don’t advertise prices so I have leeway to increase if demand goes up. I’m also a little hesitant to raise prices because it’s literally some of my first products- I’m just not sure of the wider appeal.

If I priced it out as shop time plus machine time- it’s be at $75-80. That won’t work. It’s still a decent profit margin for the work involved, and it’s maybe undervalued while I build a client base and portfolio- but there isn’t really that much to it. Fine tuning the toolpaths and working out epoxy ratios has been done, so I can literally go
From s2s lumber to finished sanded piece in less than an hour hands on time, excluding the 24 hours for the epoxy to cure.

And of course- Etsy is a problem with its ridiculous pricing structure. I had someone ask me to price out a 8’ x3’ walnut river table, then gave me a top end of $600. Because they saw one on Etsy for that size and price. I had to refuse because literally the slabs alone would have been $1200…

While the business is very new- I spent most of my free time since 2020 planning the business (I was supposed to open March 2020… but we pulled kids out of school for Covid and they only just went back. I hate being a virologist and seeing this clusterF) and have listened to hundreds of hours of small business pricing models. It’s kinda where I landed for those smaller items, but will of course adapt as things get more complex

What I really want to do is end grain butcher blocks with vcarve inlays… I happen to be gluing up some small test panels this week and hope to do one next week. I’ll be stoked if it works out. But I need to prioritize better- I’m also trying to get my laser set up and the braces installed. Can’t do that if the machine is running, lol

3 Likes

Oh, I did a cutting board with an inlay for my brother, turned out pretty great. :slight_smile: 
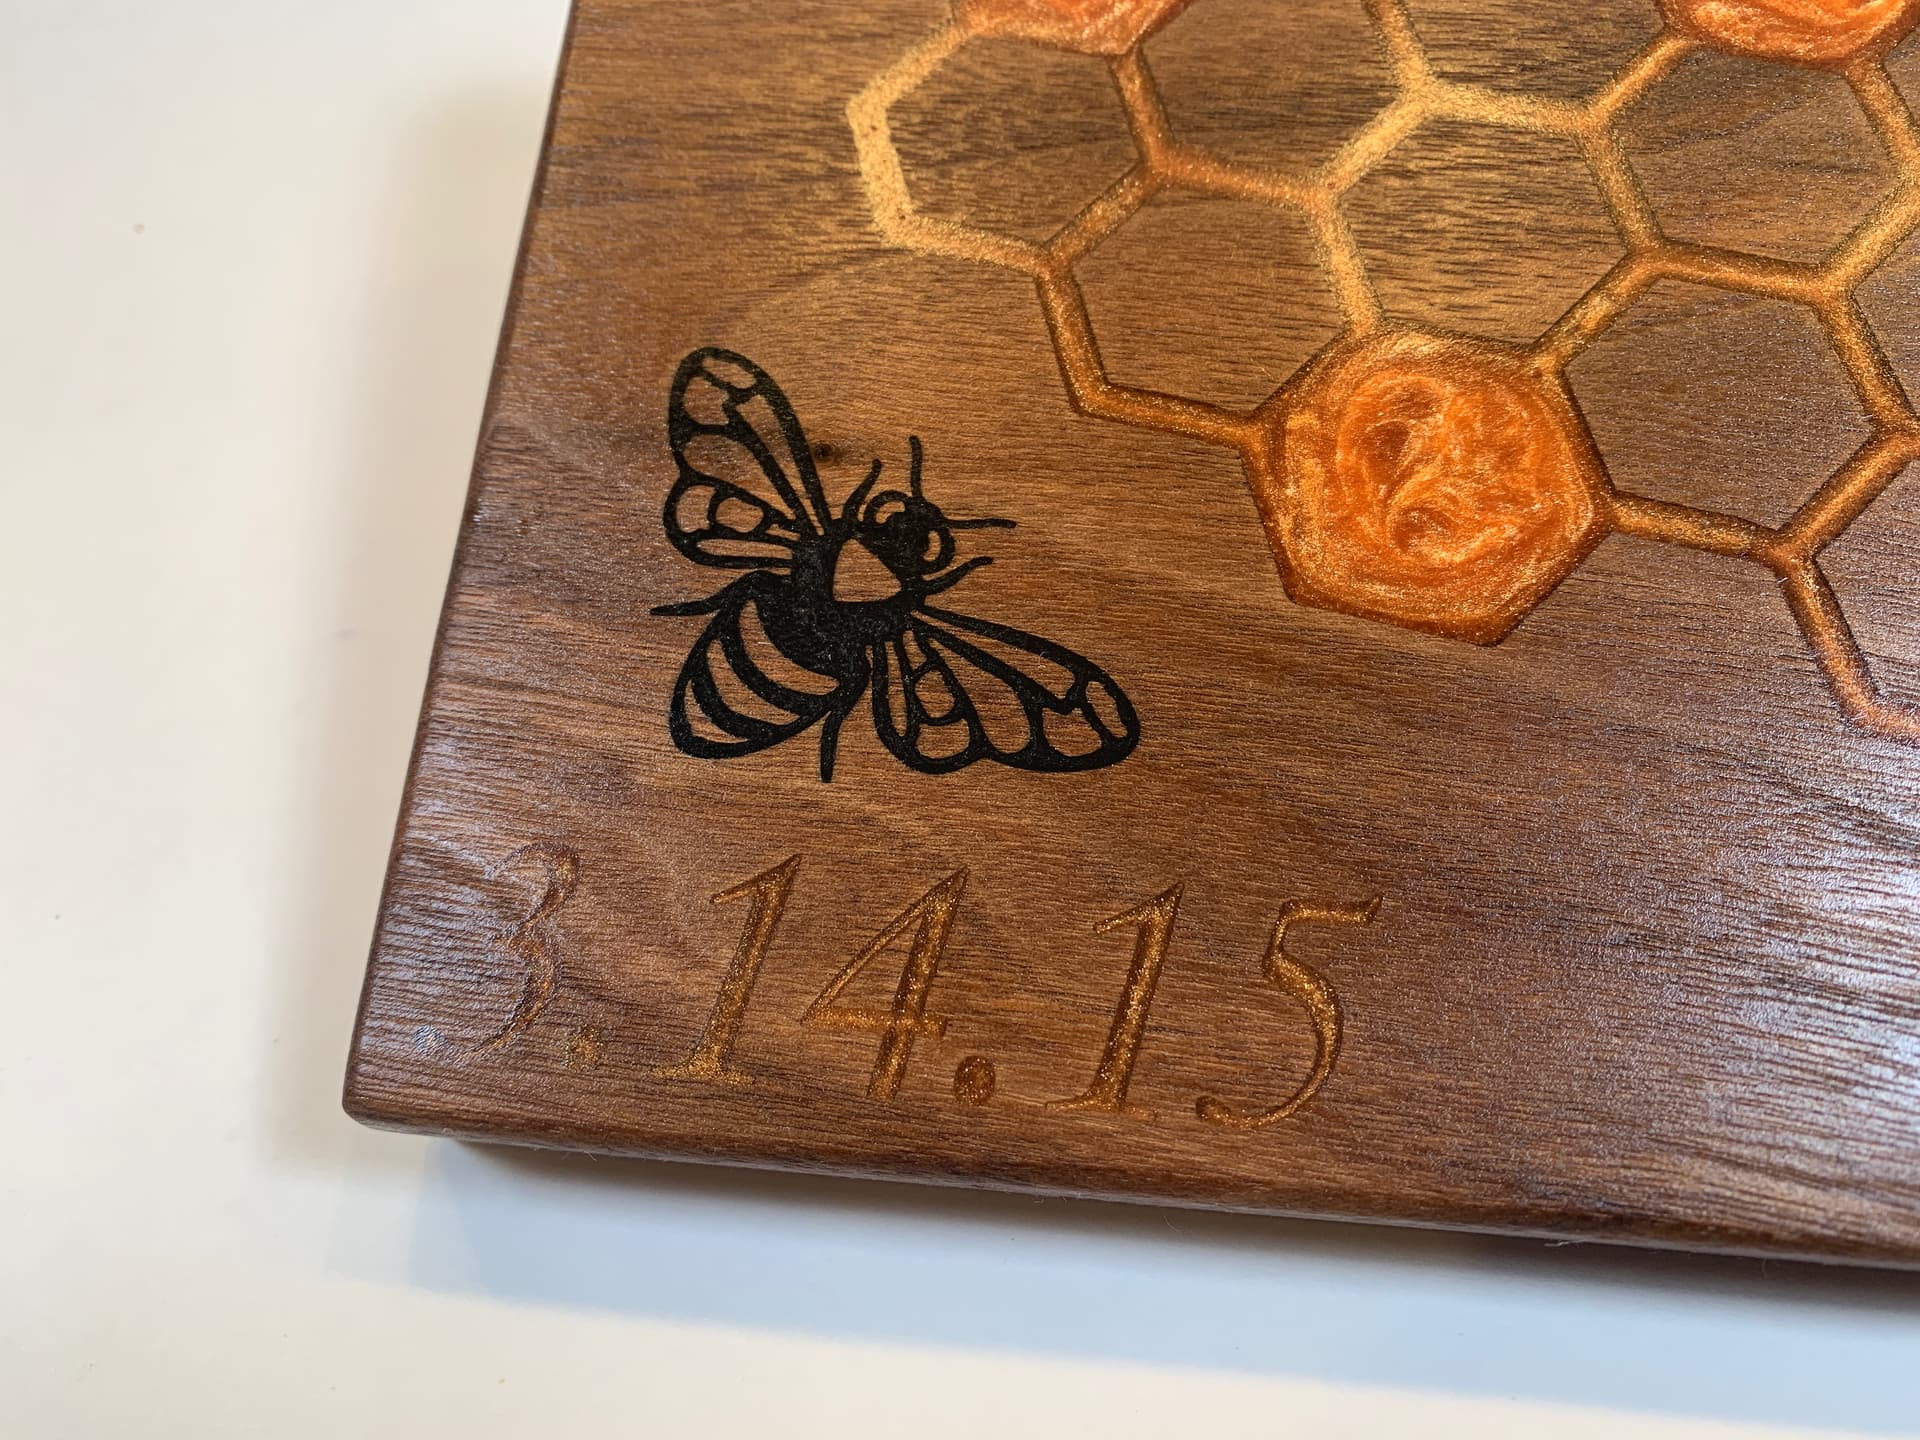
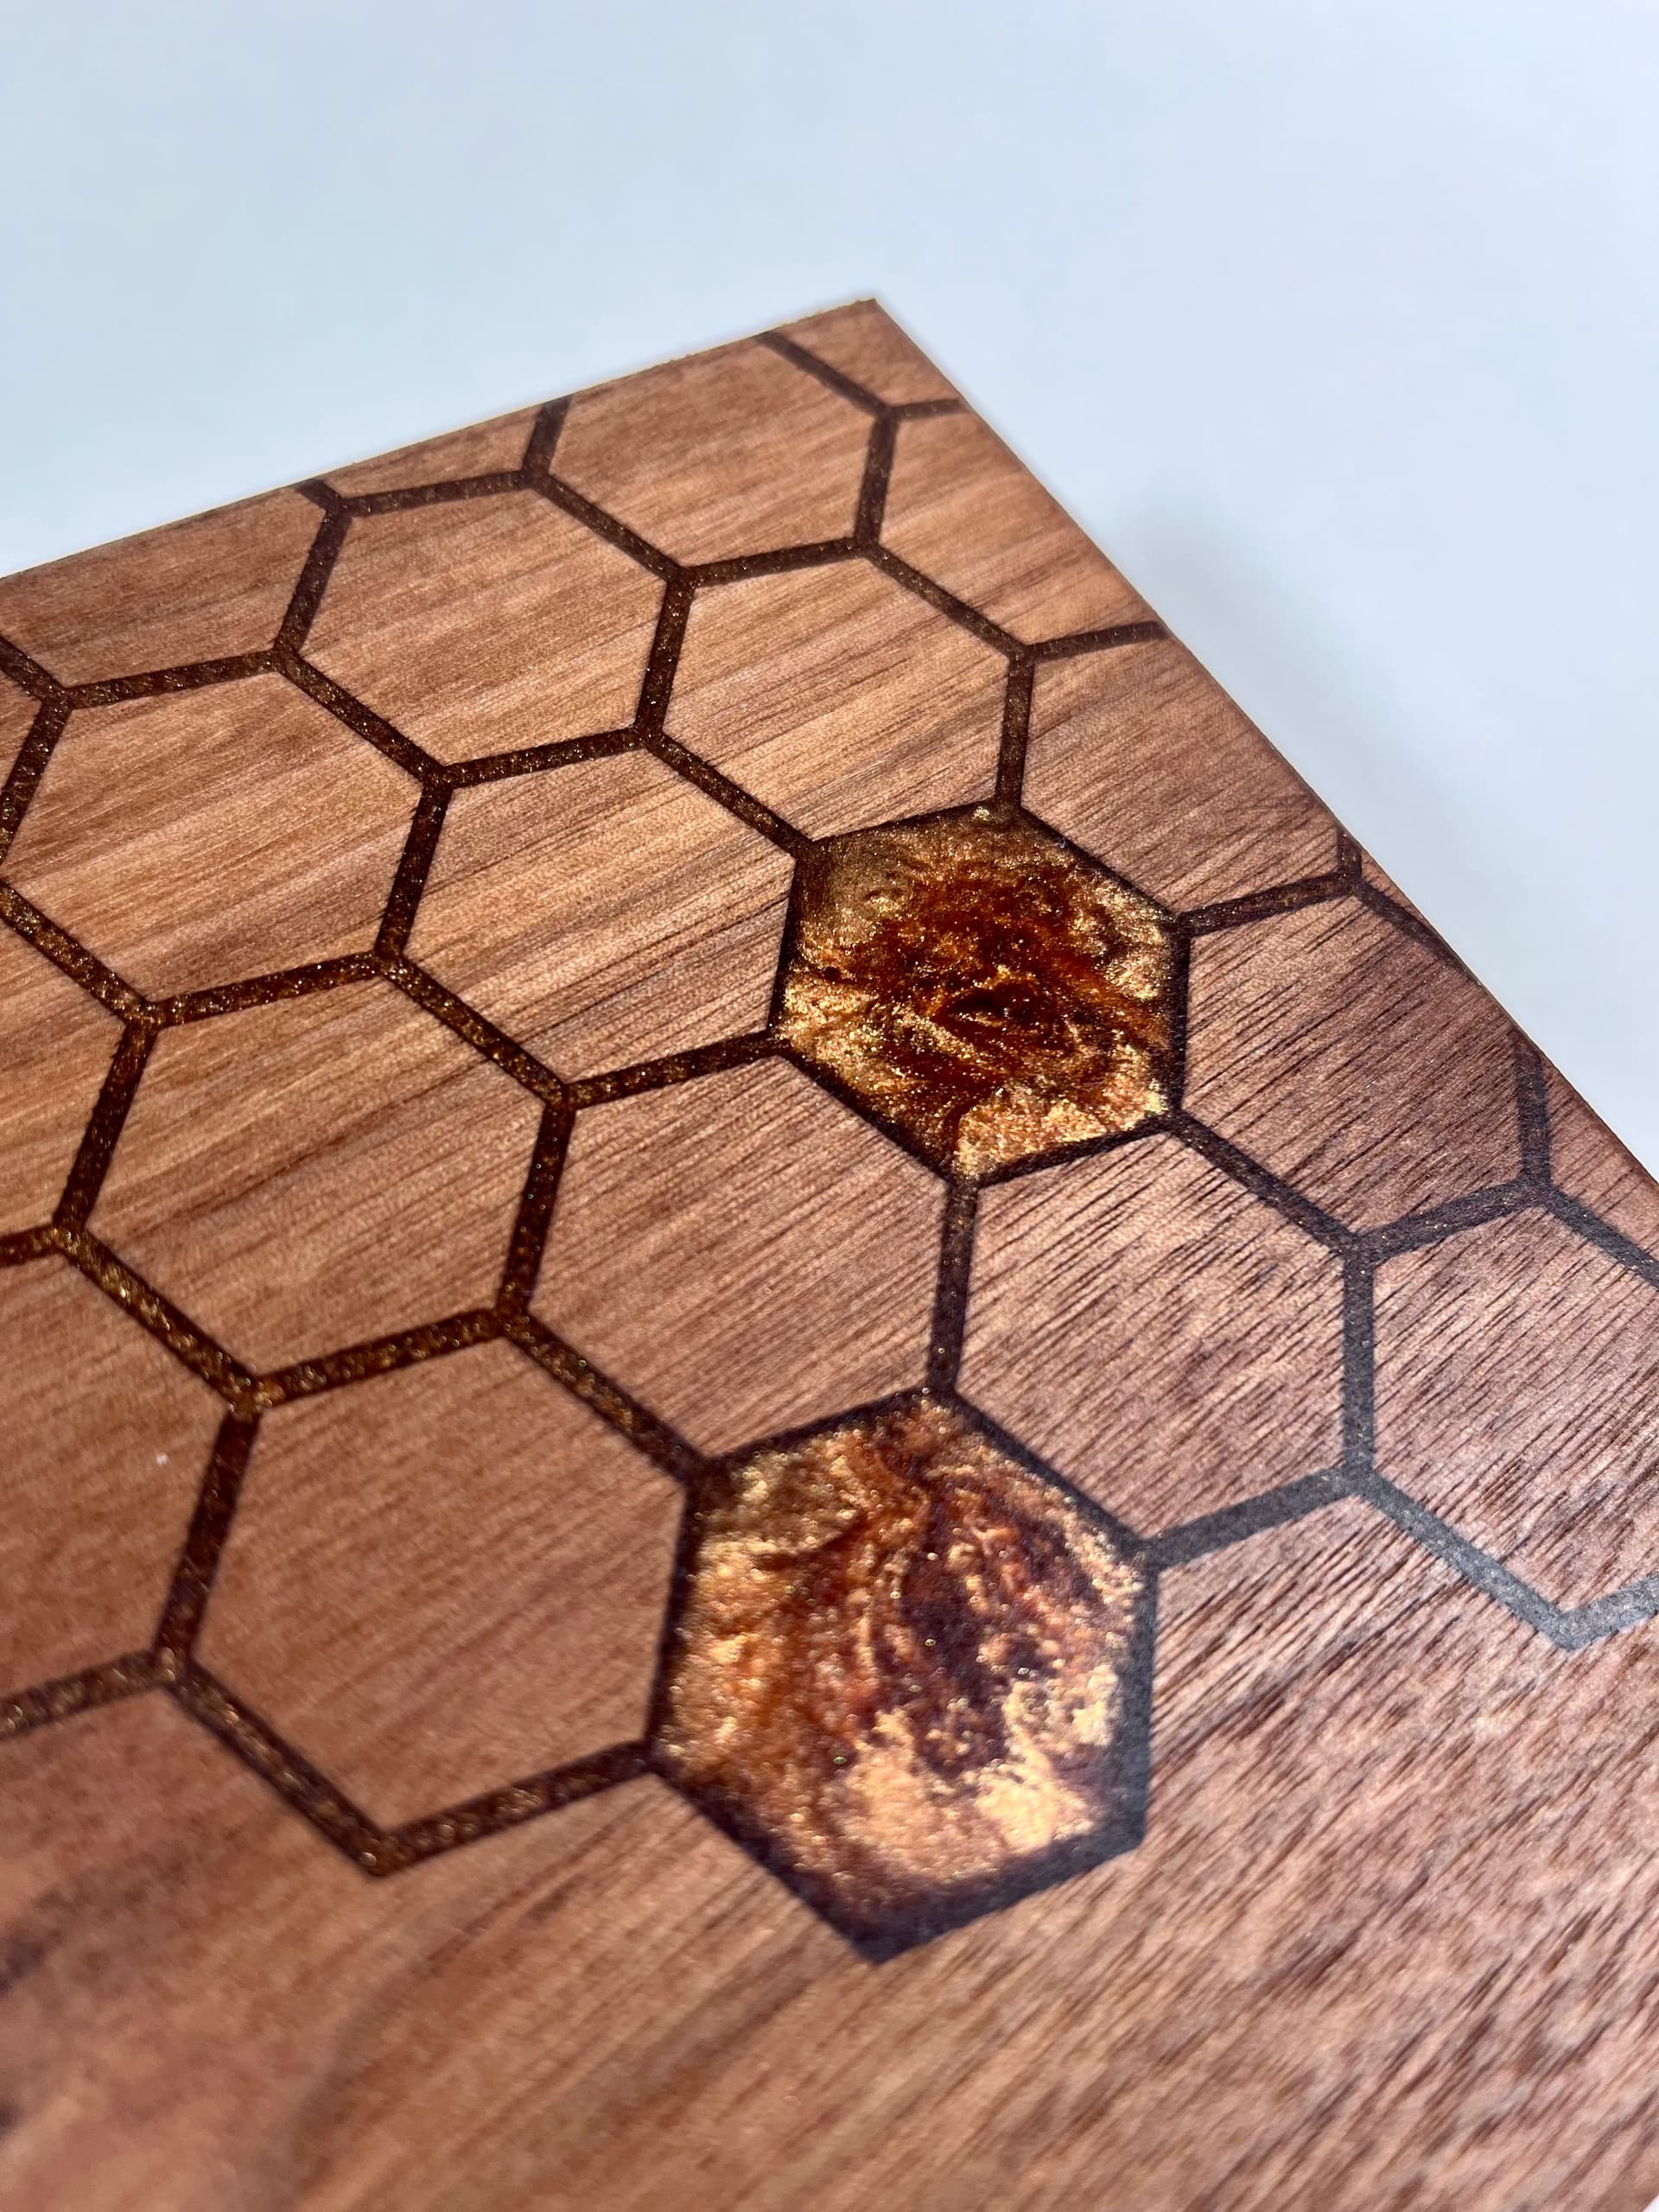
(Though the one inlay is too light and does not fit exactly, see other thread for inlay woes… :D)

2 Likes

That looks good!

i could never figure out how to do it in estlcam, although i never actually tried cutting something

i found out by asking the few here who have done inlays- and they either use V-carve ($$$$) or Carveco ($)

i opted for carveco after finding a PP script for it by a user here, and the fact you can get it free for 3 months. after that- its $15/month, which is a great price IMO. ALL of my LR3 work has been done on carveco, and using Inkscape for a few things. They ahve great support on the FB page, and many great YT tutorials, including some specifically for v-carve inlays, by a user.

im currently making a couple end grain boards- a walnut and a cherry, and plan to make thinner boards from offcuts for the inlay panels. probably a couple weeks before i get those finished though- not a lot of time in the shop right now

1 Like

There is another thread at the moment where it is explained how to do it in Estlcam (only works if it is not too deep). F-Engrave also works well if you get used to it. :slight_smile:
Thread here: V-Carve Inlay Using Estlcam (But Technique Can Be Used With Any CAM Software)

2 Likes