The 'Black and Blue' LR3 build

Perfect!

1 Like

I am BLOWN AWAY at how clean the shapes came out, and how accurate it all is.

Upcut vs MDF was messy, but the foam
Was super crisp. Used the standard parameters in the milling page, and the 1/8” bit I got in the kit.

Still have a lot to do- dust collection, power cable management (thinking a swing out boom arm, couple feet above the middle of the table) kill switch, router control.

Got a bowl bit and a few sizes v-bits coming soon, and taking a trip to the lumber yard for some walnut and maple so I can do some feed and speed tests over the next week.

Appreciate all your hard work in bringing this tech within reach and opening up this crazy hobby to me. I have a feeling this may be a major part of the woodworking business I’m building.

4 Likes

Glad to have you around, and enjoying this with us. The excitement is contagious. Believe it or not your thread has had a lot to do with all I have gotten done the last couple days. Your are having fun and learning, so I have been doing the same.

3 Likes

That’s great to hear. Thanks man.

1 Like

Lol, so was doing a quick 1/4” mdf cutout of the ‘peloton P’ for my wife (she’s a peloton nerd) for on the gym wall, and she came into the shop to see what I was doing. So, surprise blown.

She about flipped when she saw it though. “So, the CNC can do that?

Yes babe, I’ve been telling you this for like 3 months.

An hour later I get a Pinterest board share request FILLED with Cnc projects that she wants for the house, for gifts, etc, with the accompanying statement that “whatever cutters or files you need, get them”

So- lumberyard for walnut and maple next week, Amana and SpeTools for bits, and Carveco maker software on the download list.

I feel like it’s Christmas lol

8 Likes

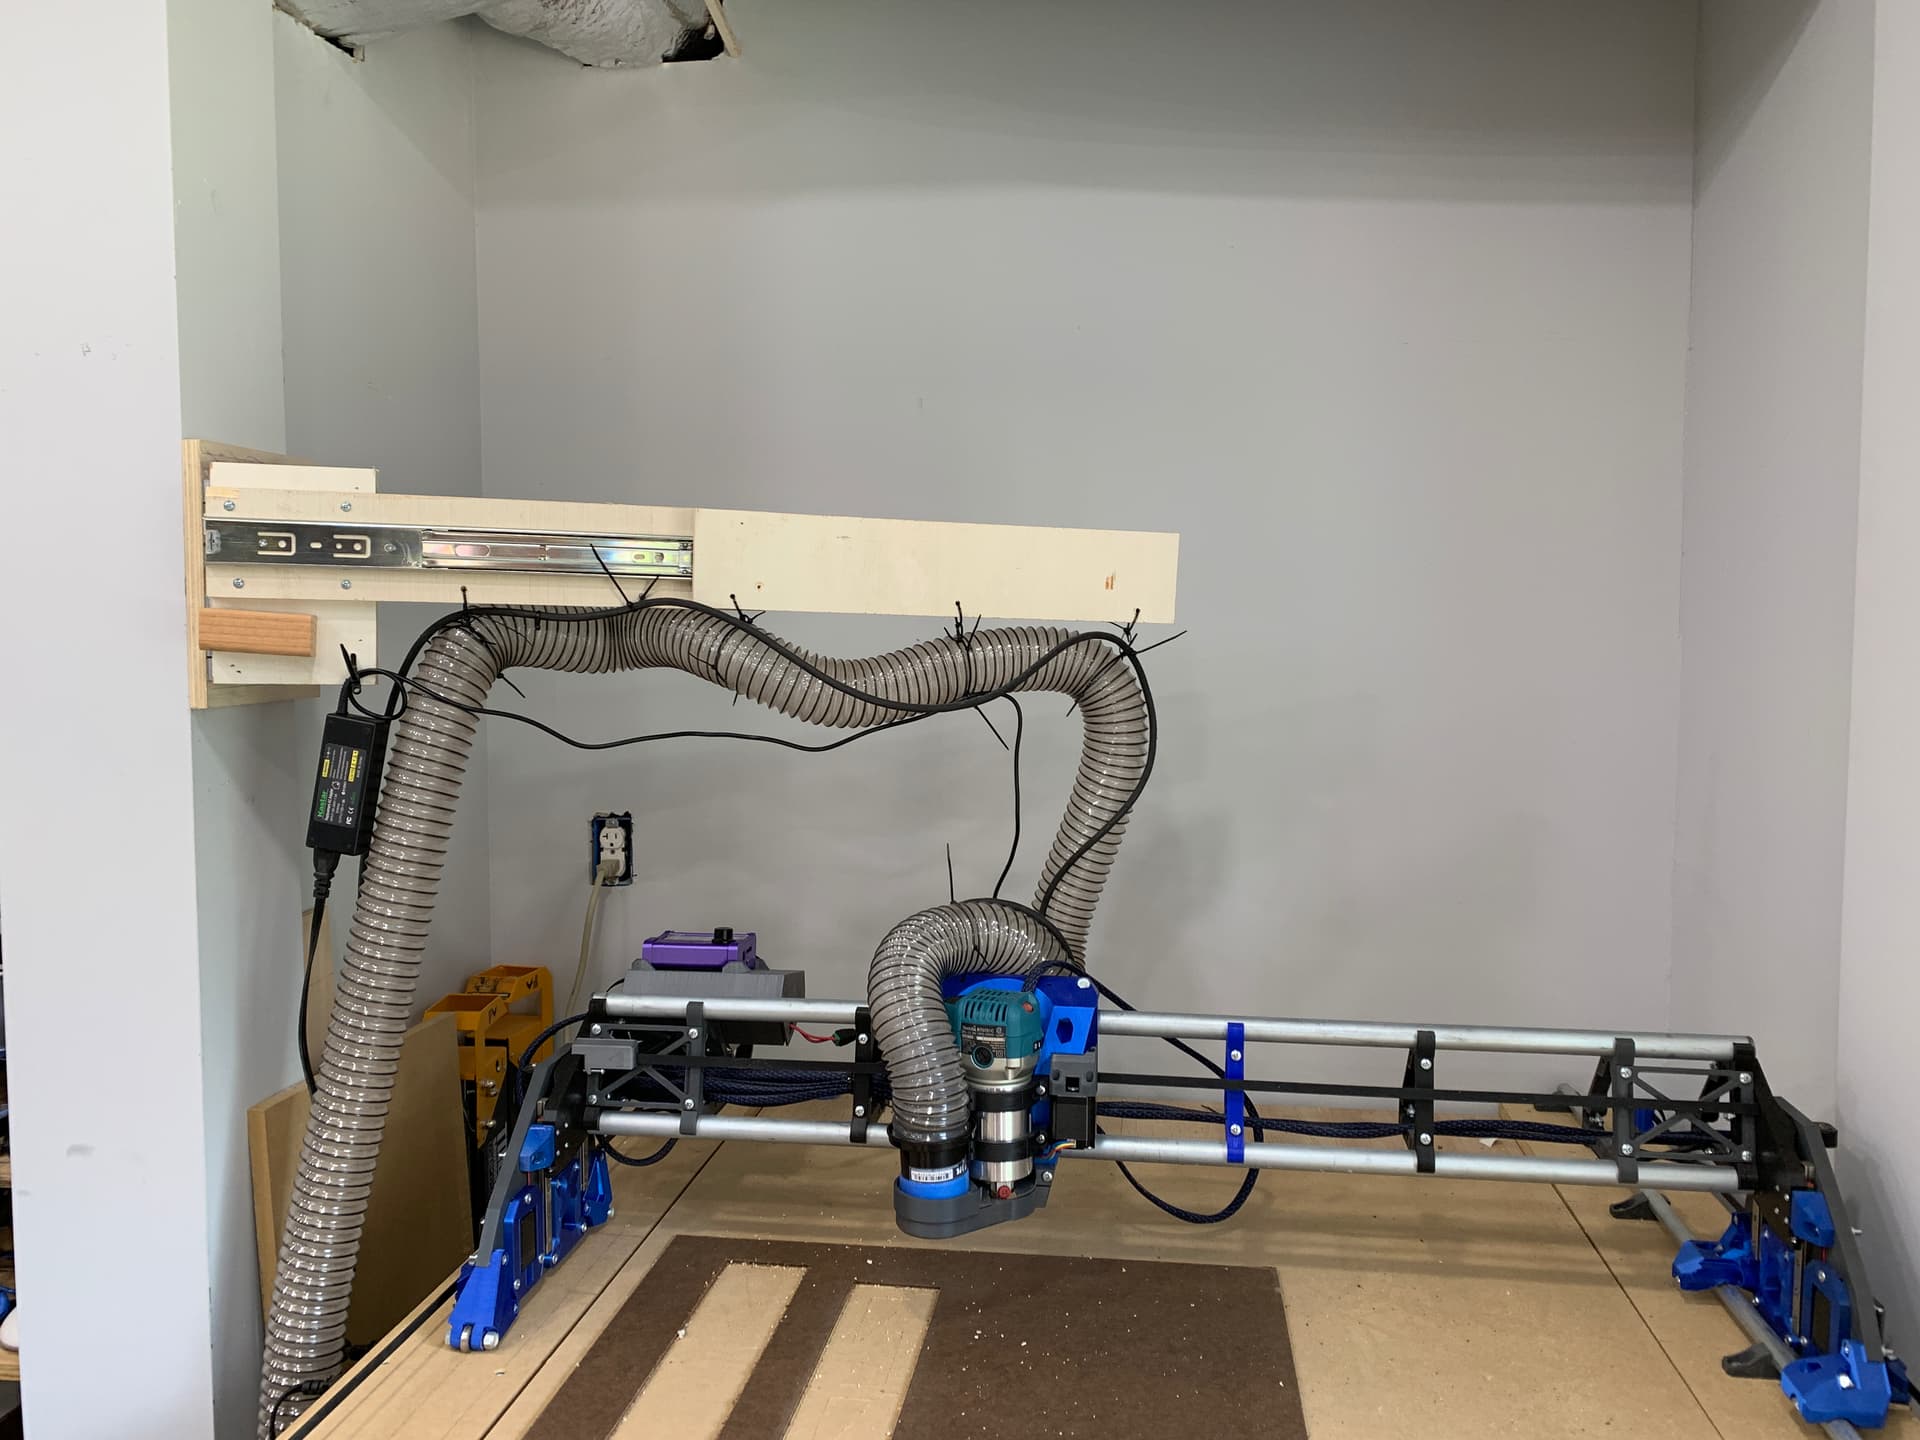
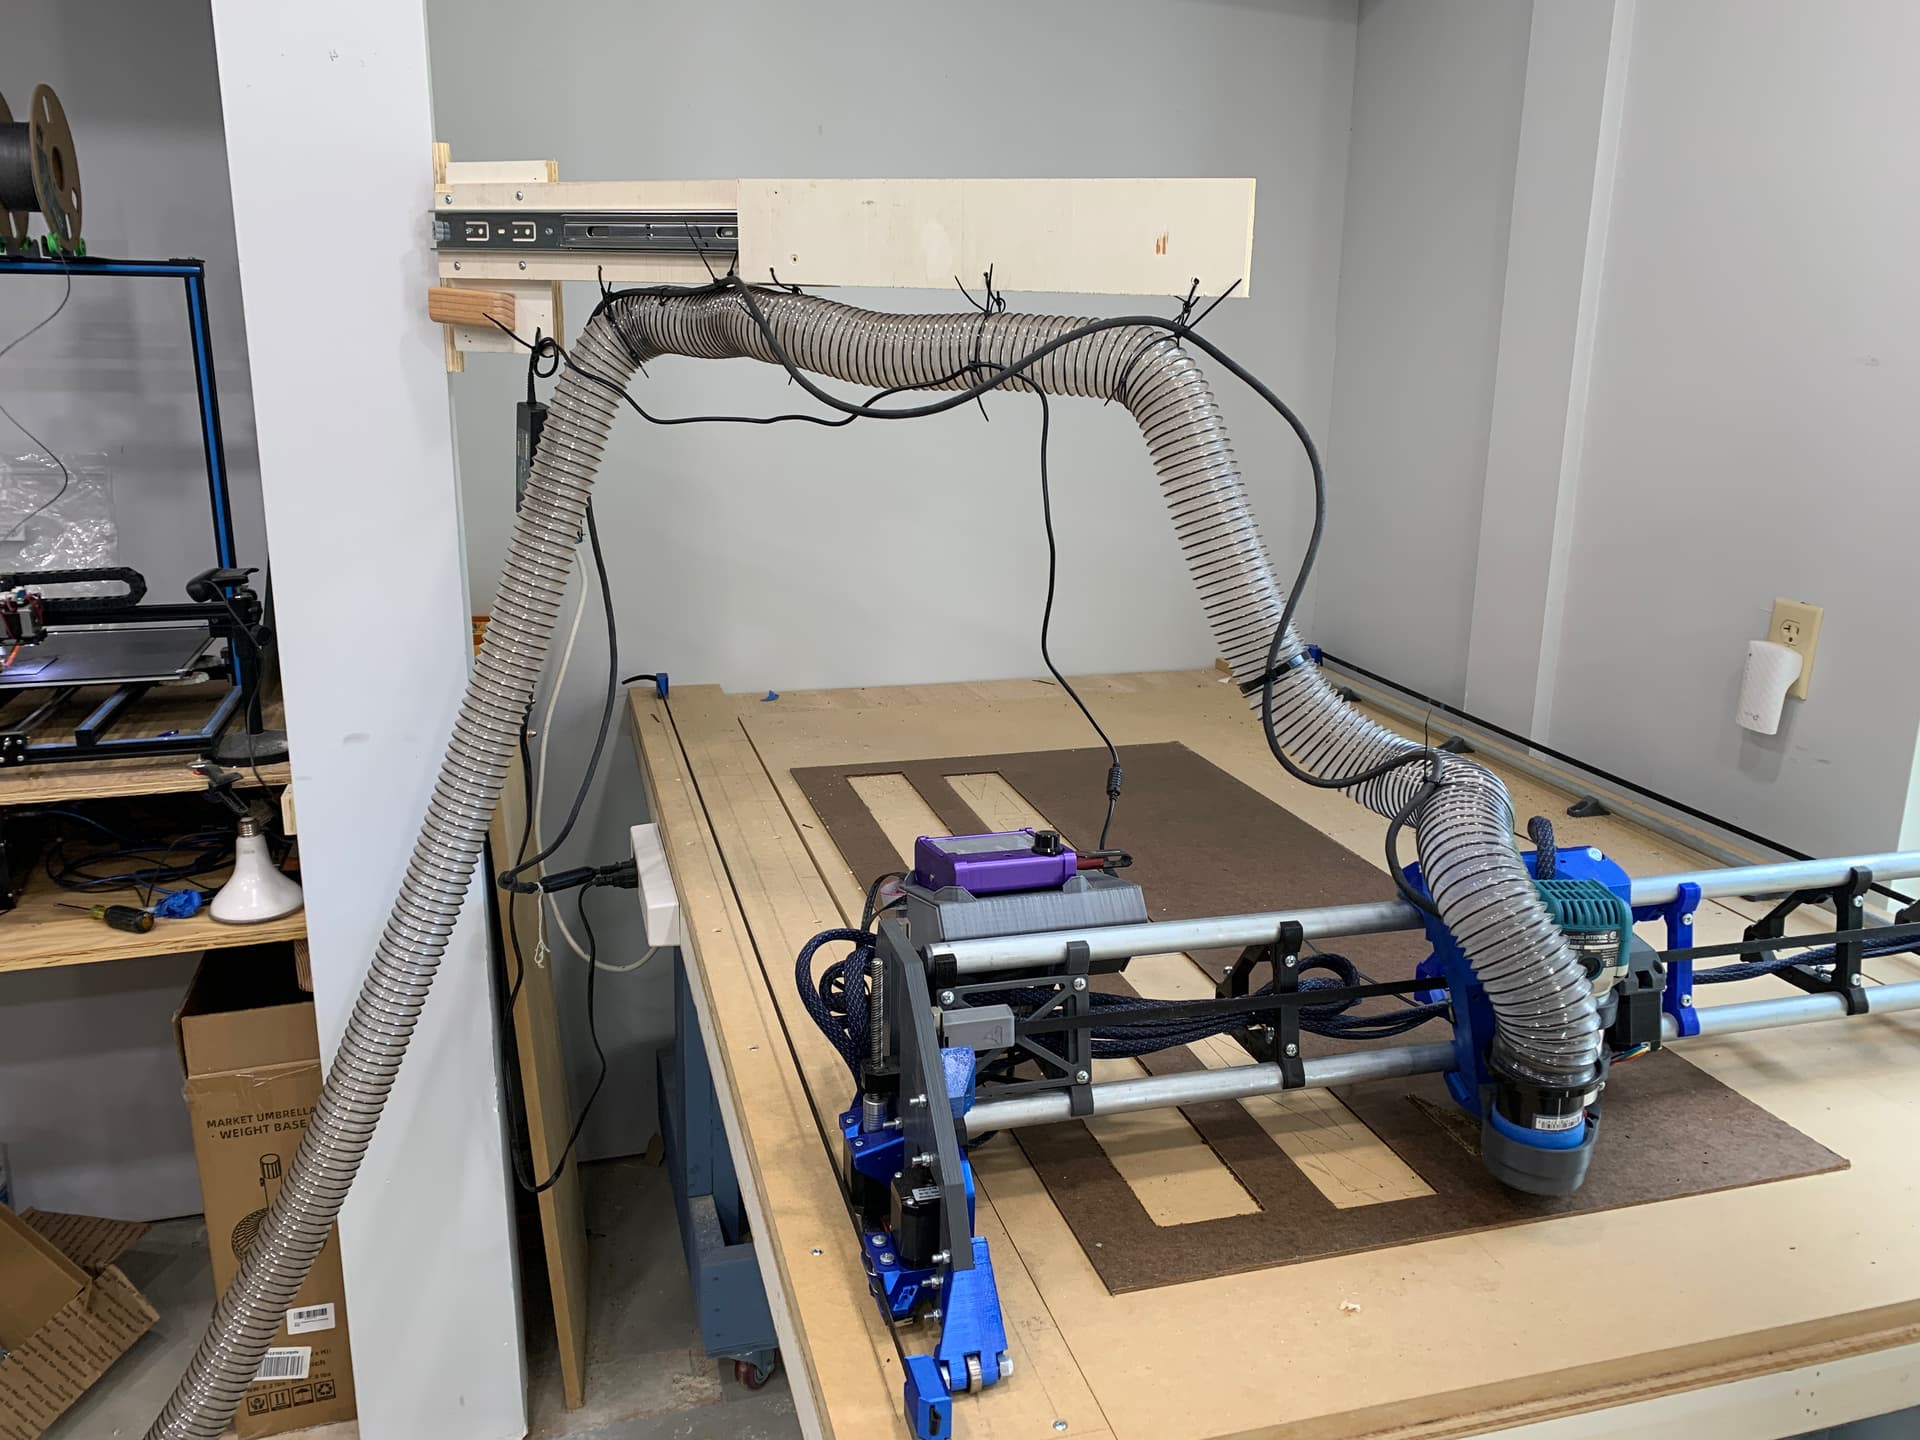
So, it might not be pretty, but the over-table boom air for the 2.5” dust collection and power cords works great.

I didn’t even have to cut anything- threw it all together in 25 minutes with scraps that were already sized, and used a surplus drawer slide for the folding mechanism (so the arm doesn’t arc quite as much as it pushes back compared to a fully rigid arm)

V2 will be have be mounted on a French cleat, a Voronoi pattern and some integrated hooks so the whole thing can be packed away when I need to move/stow the table


8 Likes

May have gone a little too deep on last nights cut, lol

3 Likes

And the finished Peloton sign for the wife’s gym…

8 Likes

Too deep is ok. That’s why they call it a spoil board :+1:

Those both look great. I hope you’re having a lot of fun.

4 Likes

It’ll all get scraped off when I surface it anyway. Doing some 3D carves with a 0.5mm ball nose taper so it needs to be dialed in

Here’s what I’m doing

Oh, yeah, having a blast. The wife and her parents now understand this isn’t just a toy

7 Likes

been having a lot of fun cranking out some projects. even have a couple ‘client’ builds going. nothing fancy, but neighborhood people interested in fall stuff

My wife really wants me to get a laser in order to crank out tree decorations etc, but i think id find it super useful for cutting 1/4" ply. the trash I have in the house, or that i can get from HD is doesnt machine very well. even with a compression bit im having to sand it quite a bit more than anticipated.

but id rather by a laser head than spend a lot more on a whole thing, particularly since i have this 3x5 useable bed. thinking about a 12W neje (i think its the A40?) head instead of a while machine. making a housing for the LR3 for use with the laser is more complicated with the height of the plates, but not too hard

anyone have any jumping off points Re; laser with an skr pro1.2 board on LR3?

2 Likes


2 Likes

Be realistic about expectations on cutting 1/4" “junk” ply with a laser. While the thin veneers usually cut clean, the glue can be a problem, so you end up not making it through, even with multiple passes.

This is my experience with a K40 nominal 40W CO2 laser, I’d expect a diode laser to have even more trouble.

6 Likes

yeah, i should have been more clear. thanks for the heads up

with the laser, id buy ‘laser-rated’ basswood ply or the like that seems to be very common on amazon for this application. i wouldnt use this junk stuff. i expect this particular piece i bought for this project is going to end up in the back of the garage for the next 6 years, because i even feel bad burning it as scrap after smelling how it came off the circular saw.

2 Likes

3 Likes

5 Likes

OOOOh that is going to be nice!

1 Like

Right? I love it. This is a tester piece to nail the design. The path is 1/16” but I may bump it to 1/8”. I forgot to clear the cells with another toolpath so I did it with a handheld router

Plan is to scale this up and do a 24”x 60” 2” thick white oak desk top and do a rainbow gradient fill.

Also going to do ‘honey boards’ like mini charcuterie board for holding honeycomb. Big seller at craft fairs around here

How about adding some drips in there to make it kinda look like running honey.

Just cuz I like the look of the fresh pour that kinda Winnie the Pooh sloppy honey, contrast to the precise hexagon.

Just an idea…I could get off my butt and give it a try myself. :sweat_smile:

2 Likes

It also reminds me of hive (the game):

https://www.amazon.com/Smart-Zone-Games-5525890-Possibilities/dp/B000EN5ZLW

1 Like