Title: Overcoming Unexpected Challenges and Taking First Steps with My Setup
Hello everyone!
I think I finally did it! It wasn’t easy, and I ran into some strange and specific issues along the way:
- The TFT display refused to update with a particular board that had been working fine just before (still a mystery to me).
- A defective SKR 1.2 Pro board that wasn’t detecting the endstops.
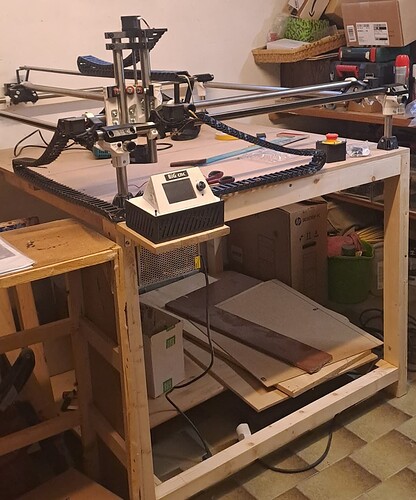
Since the last time I wrote, I’ve also installed the new board, which started up flawlessly, attached the touch plate, checked the squaring, and printed my first ring… although, unfortunately, the pen holder is a bit too flexible, which causes the pen to wobble.
What do you think? Should I run the test again? How does it look to you?
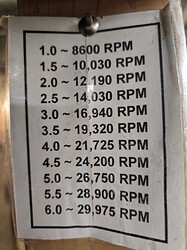
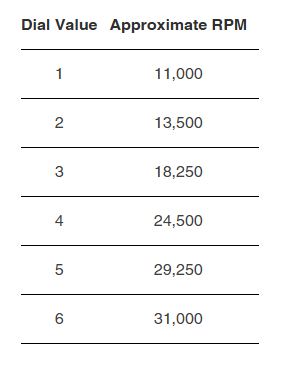
Now I need to start working with the milling tool, but I have a few questions. How can I determine the rotation speed given that my tool is similar to a Makita router and doesn’t have a tachometer? Do you have any tips for testing with different materials?
As usual: GRAZIE!!


