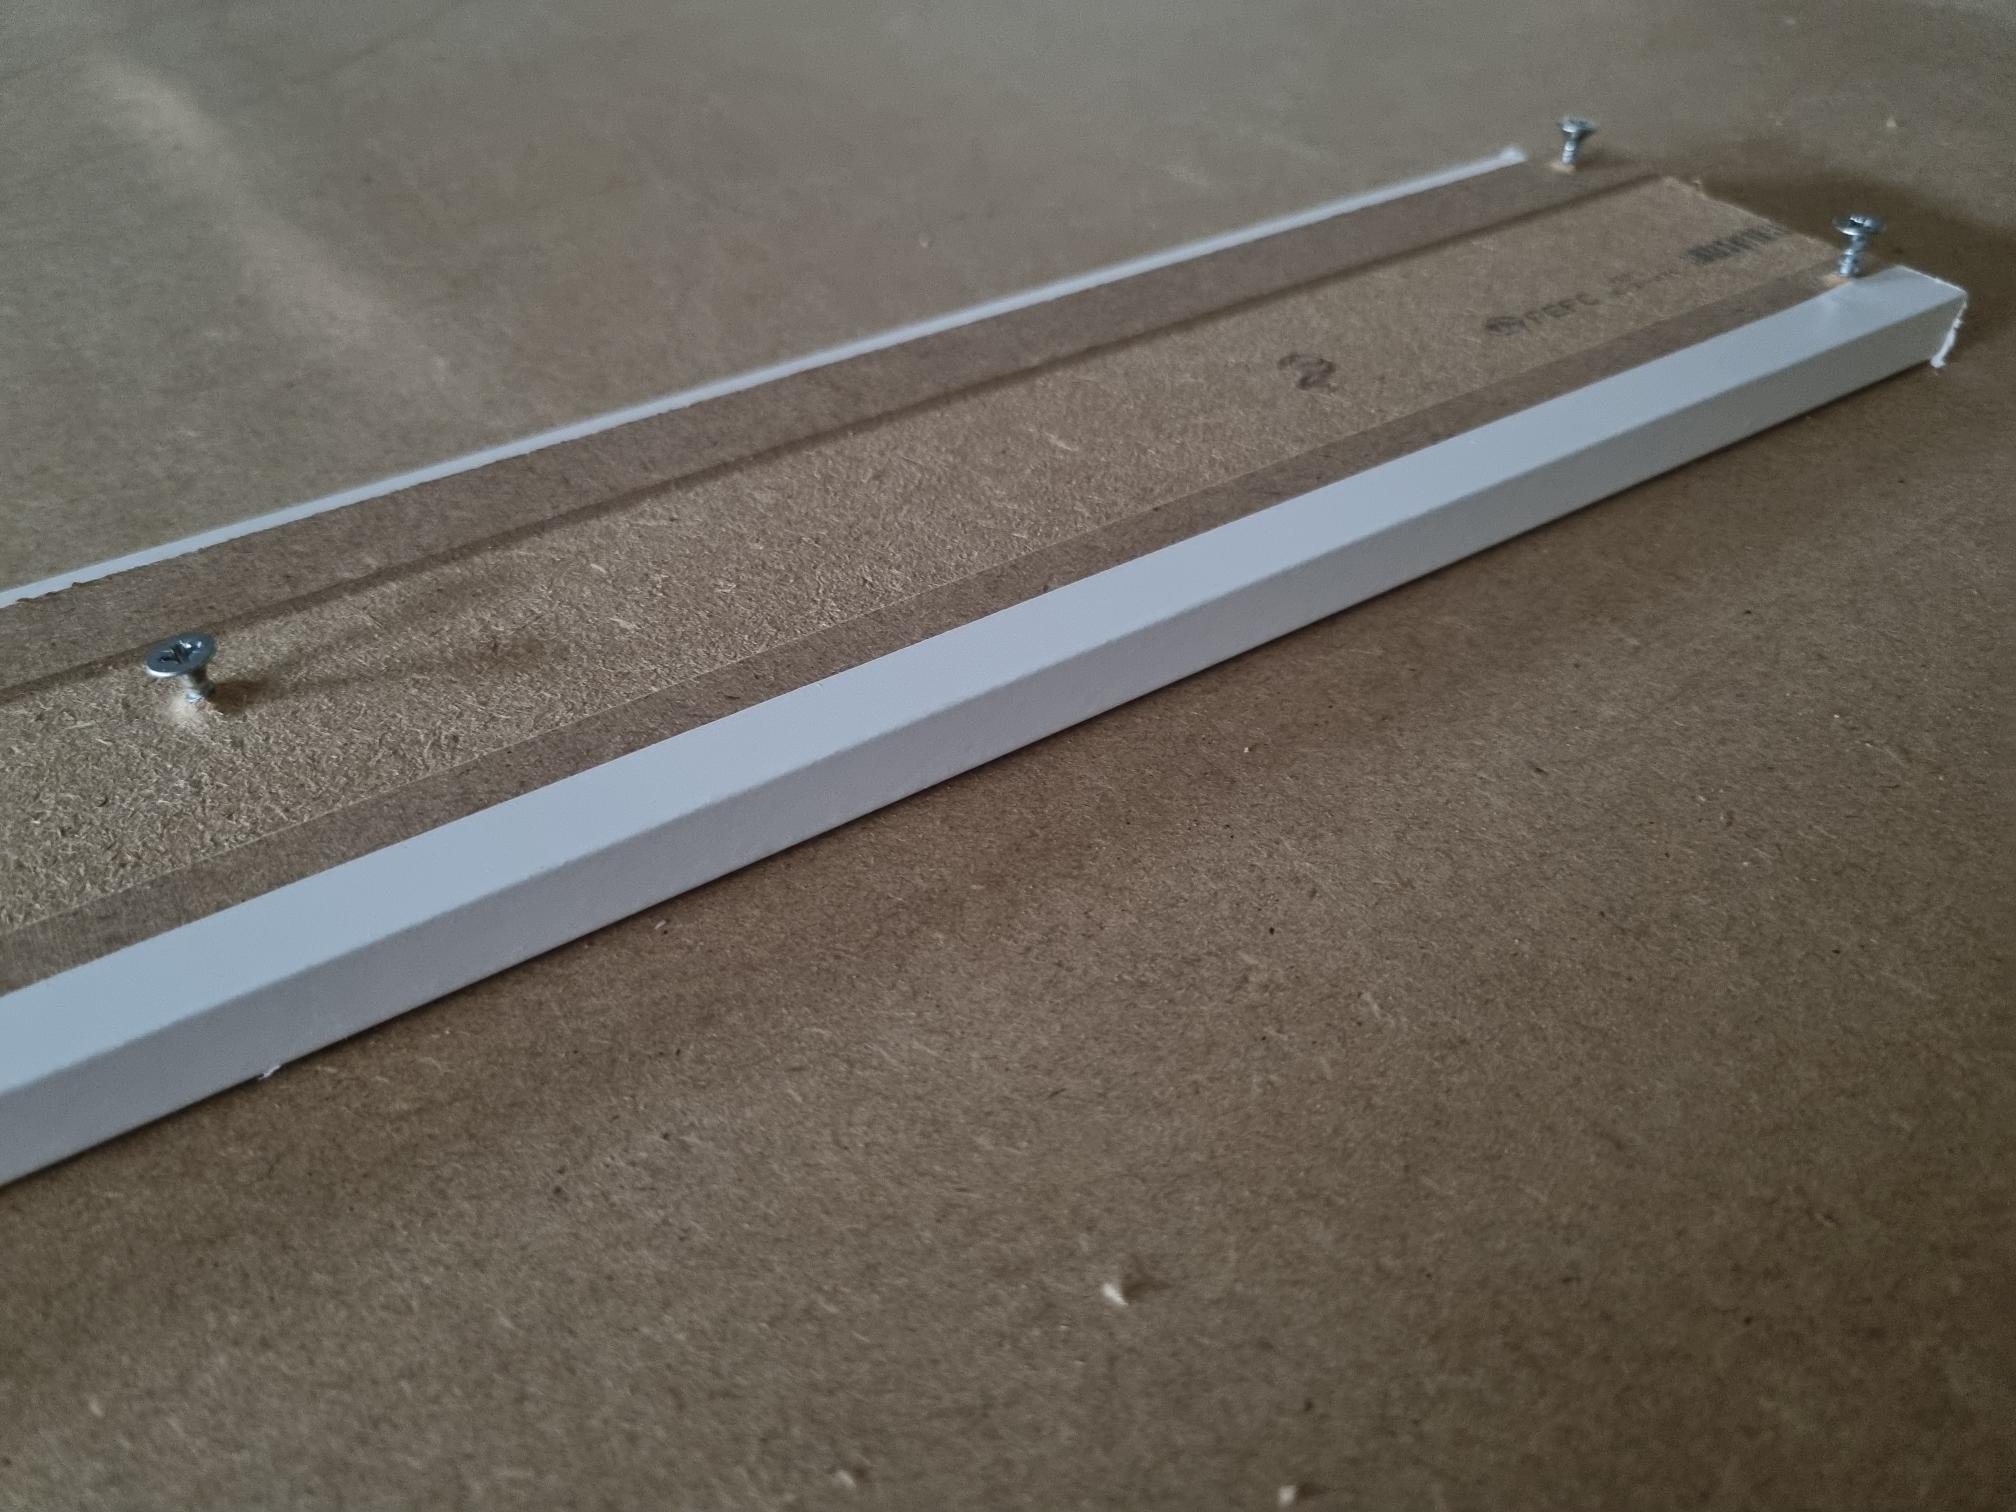
So, I need some help in surfacing a MDF piece. Never done surfacing and thought it would be easy. I was wrong I know my LR3 is like 80-90% “ready” but that shouldn´t stop me.
Let me tell the background story first first (and give you another reason to have a CNC machine)!
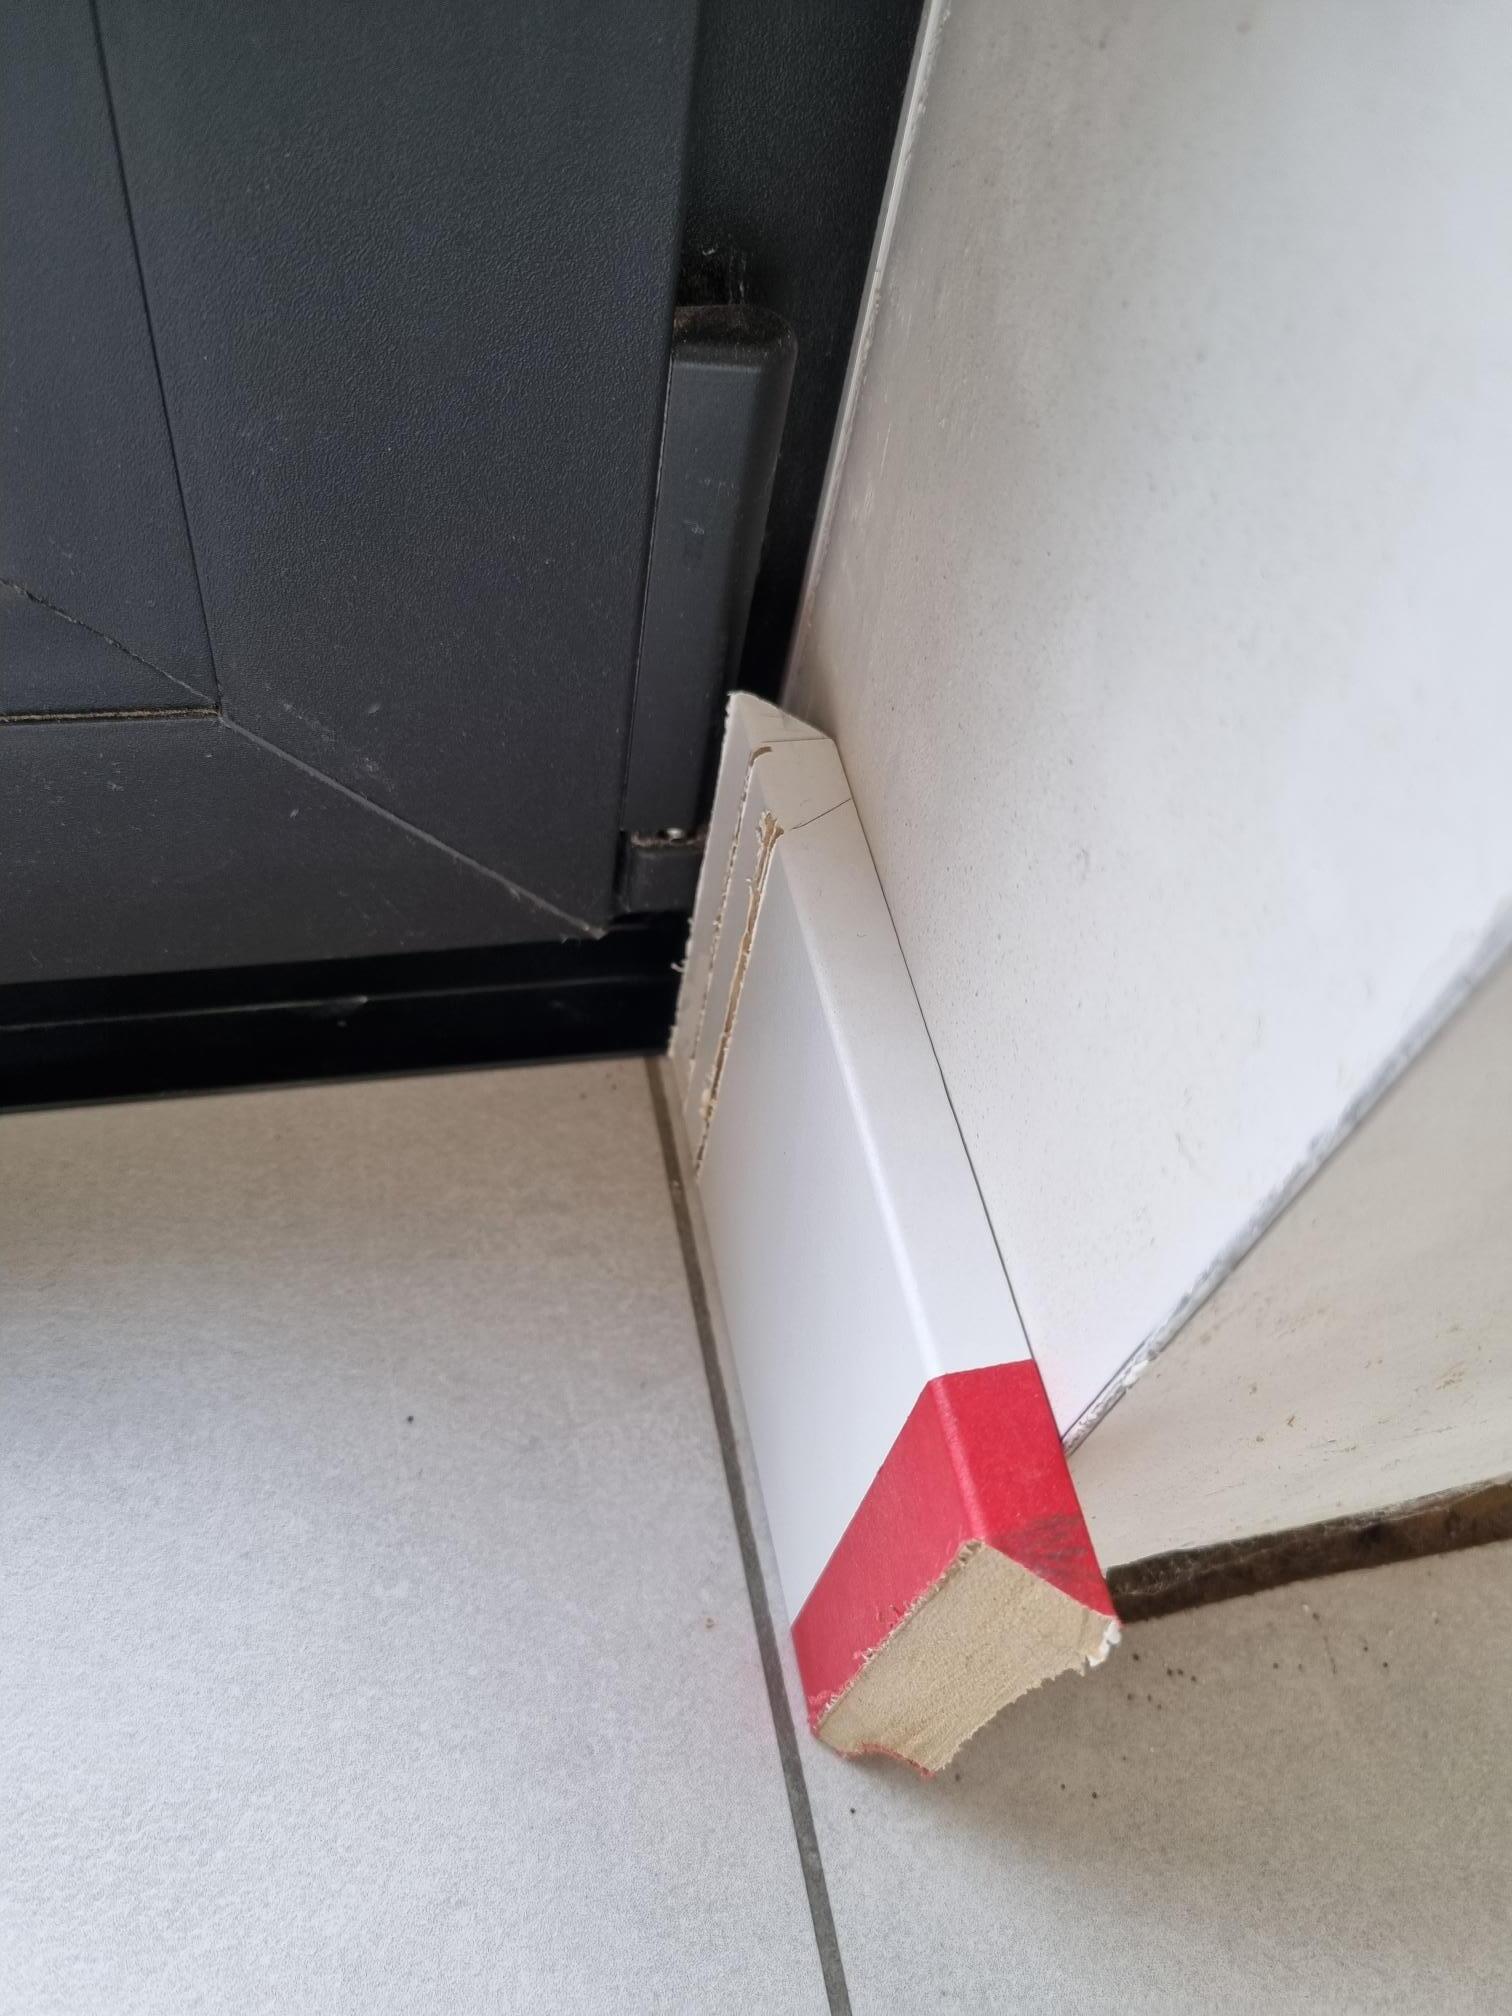
I am renovating the house. I am at the point of installing “skirting wall” (?). But at a window I have limited room. That looks like this. I wouldn´t be able to open the window.
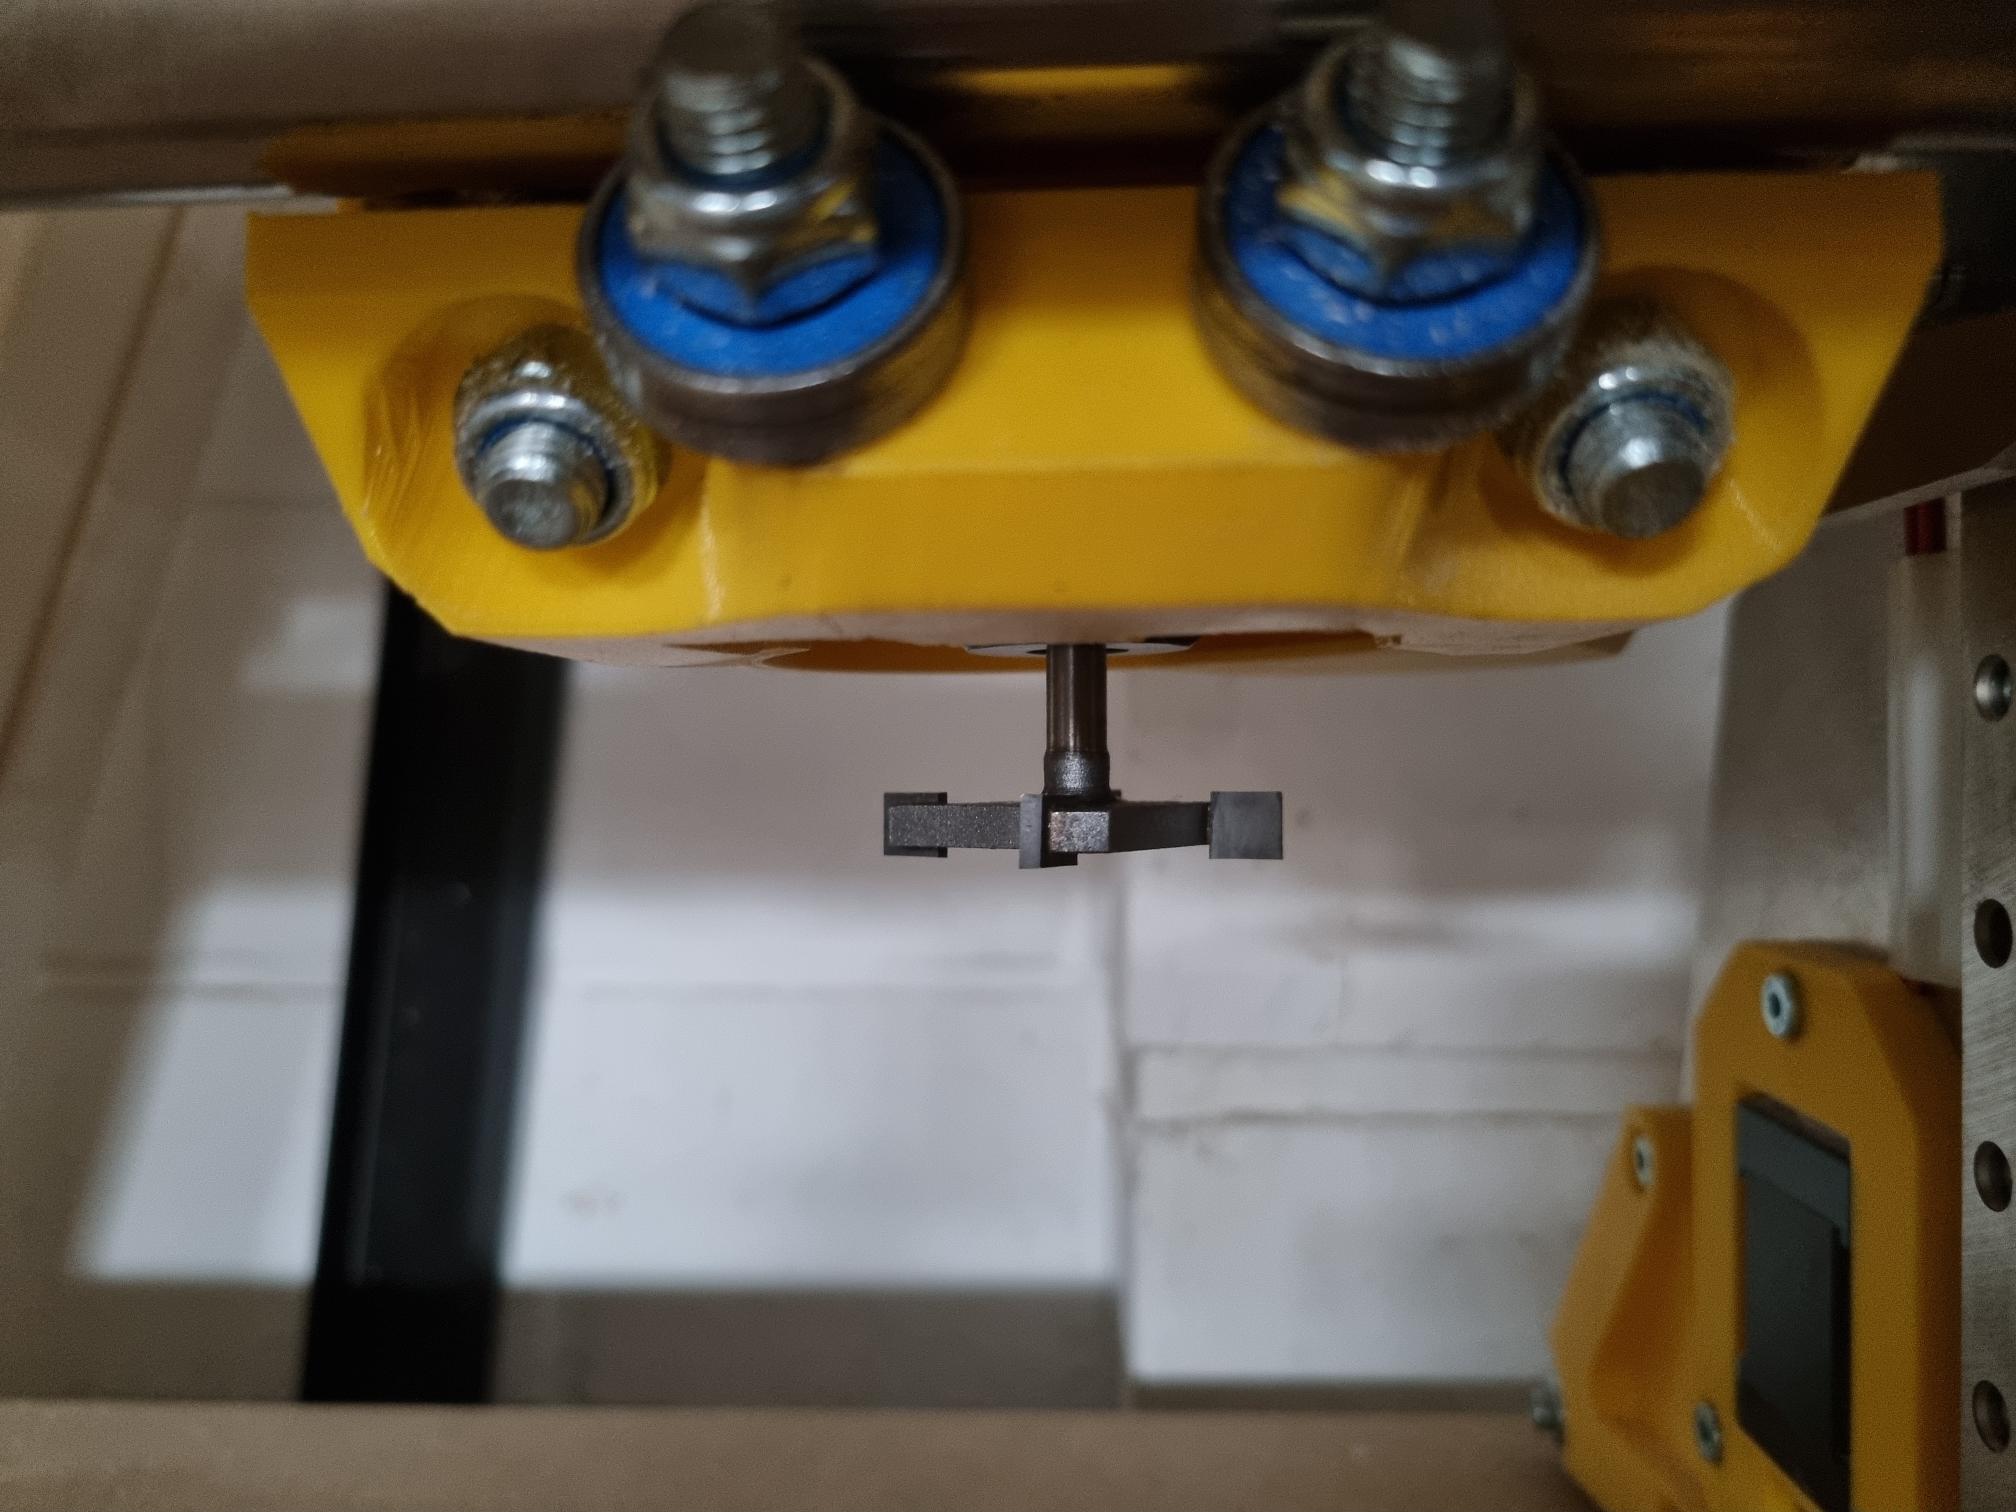
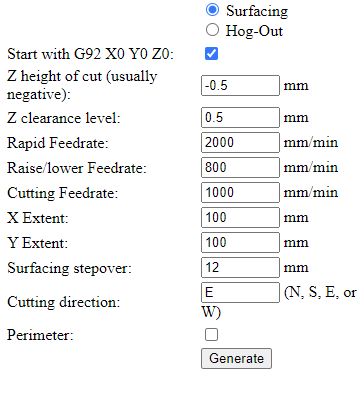
I thought on designing a simple square and work it in ESTLCAM, but that was too much stuff to get it right. So used Jamie´s surfacing script with these settings:
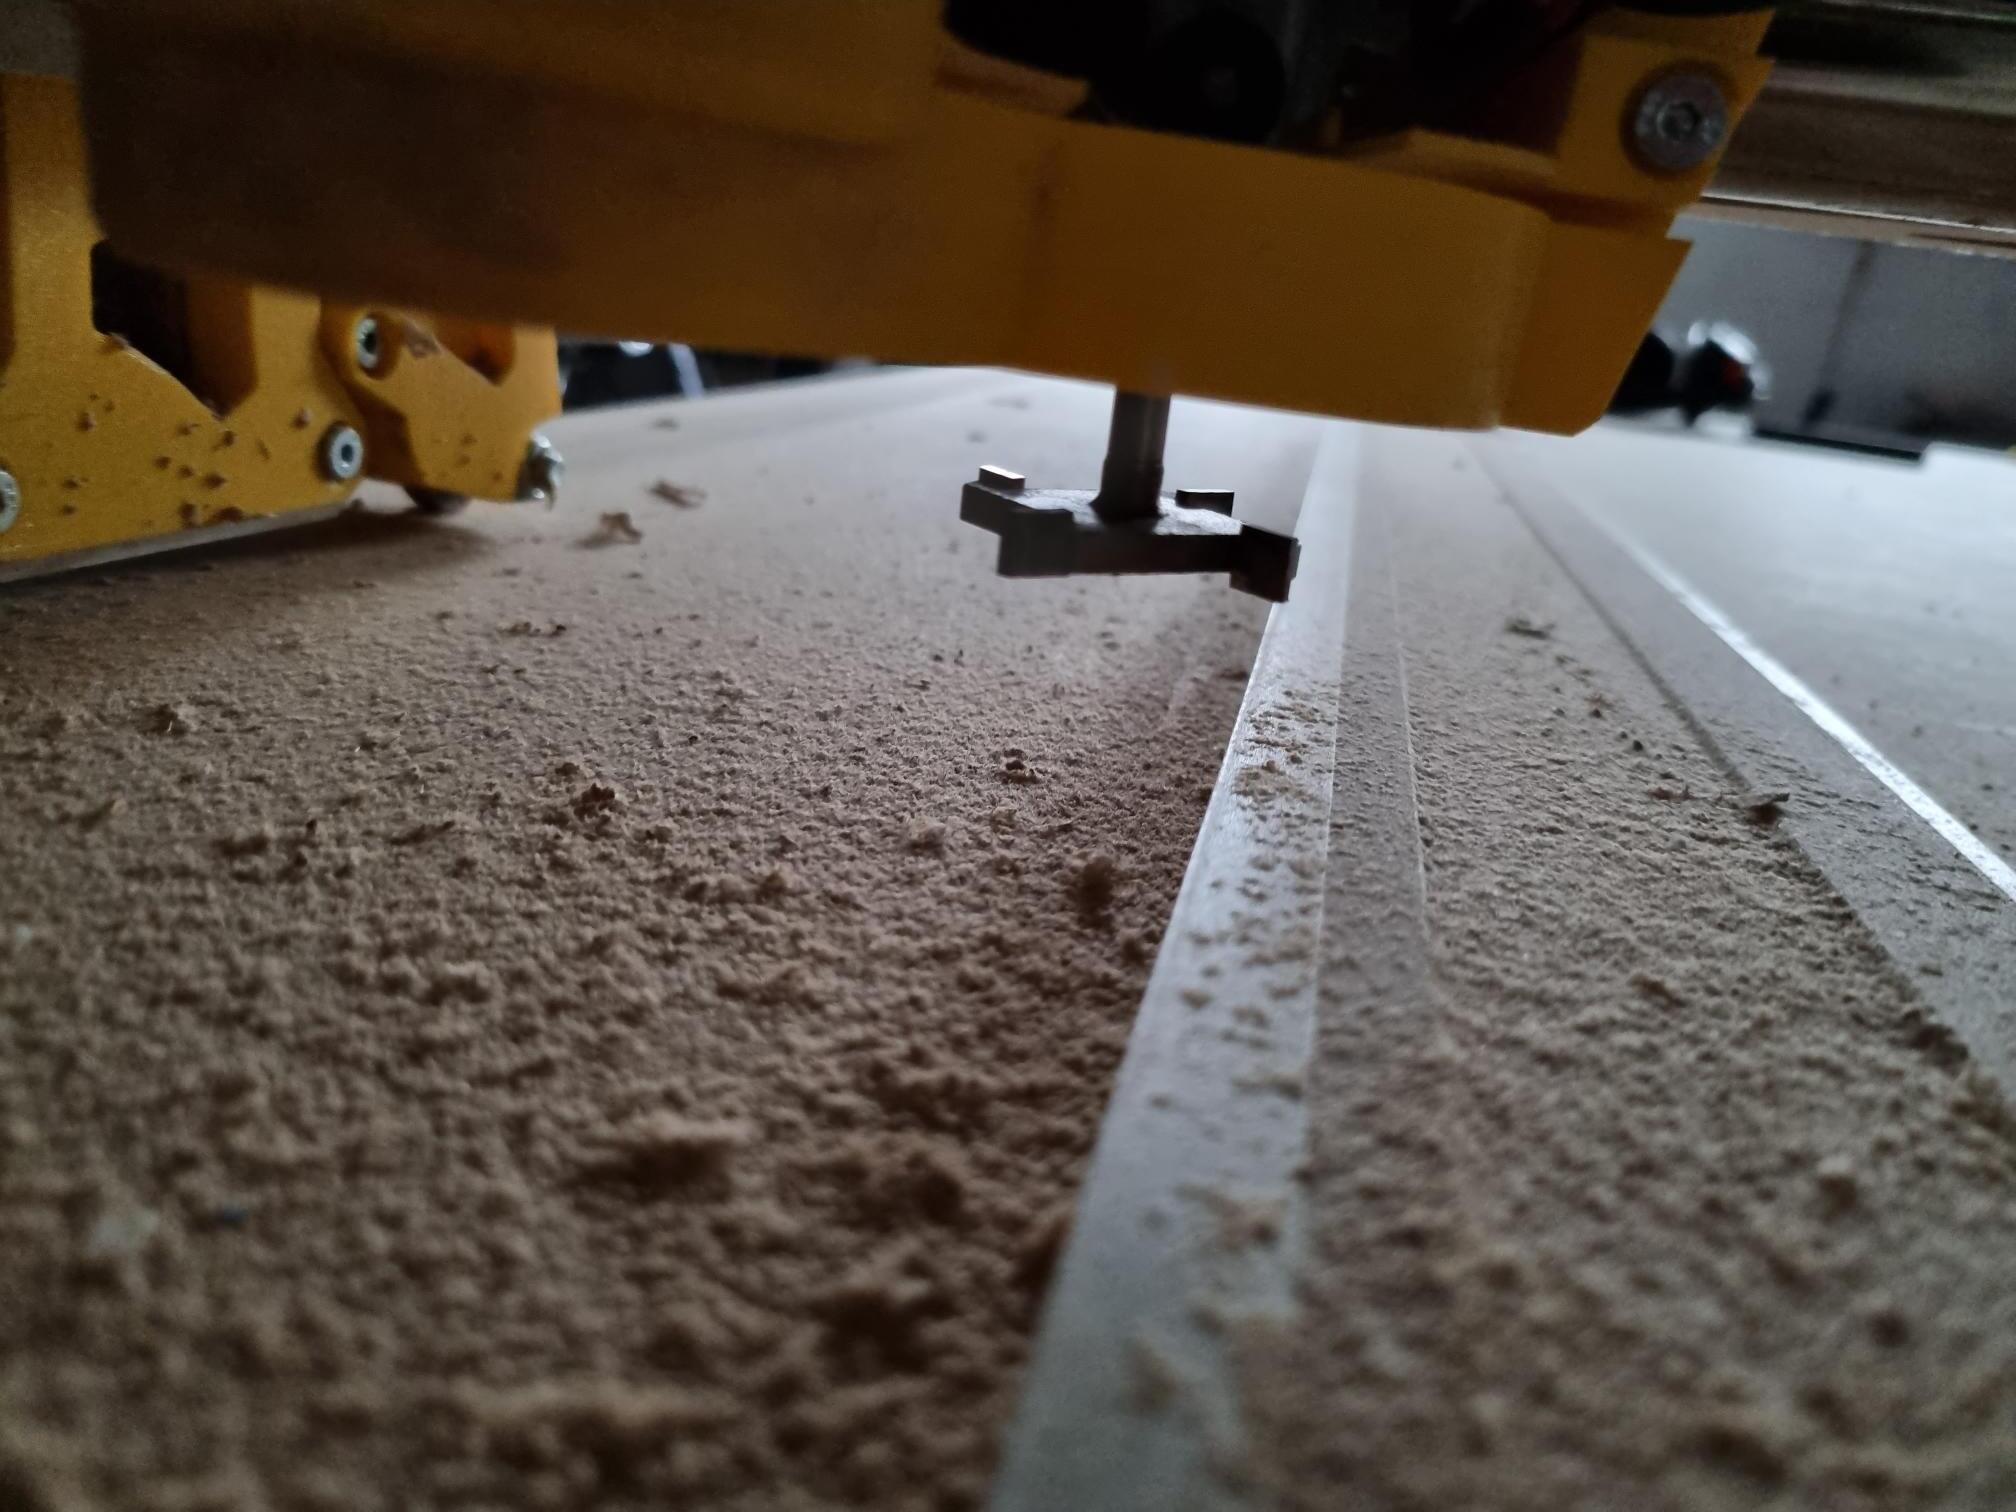
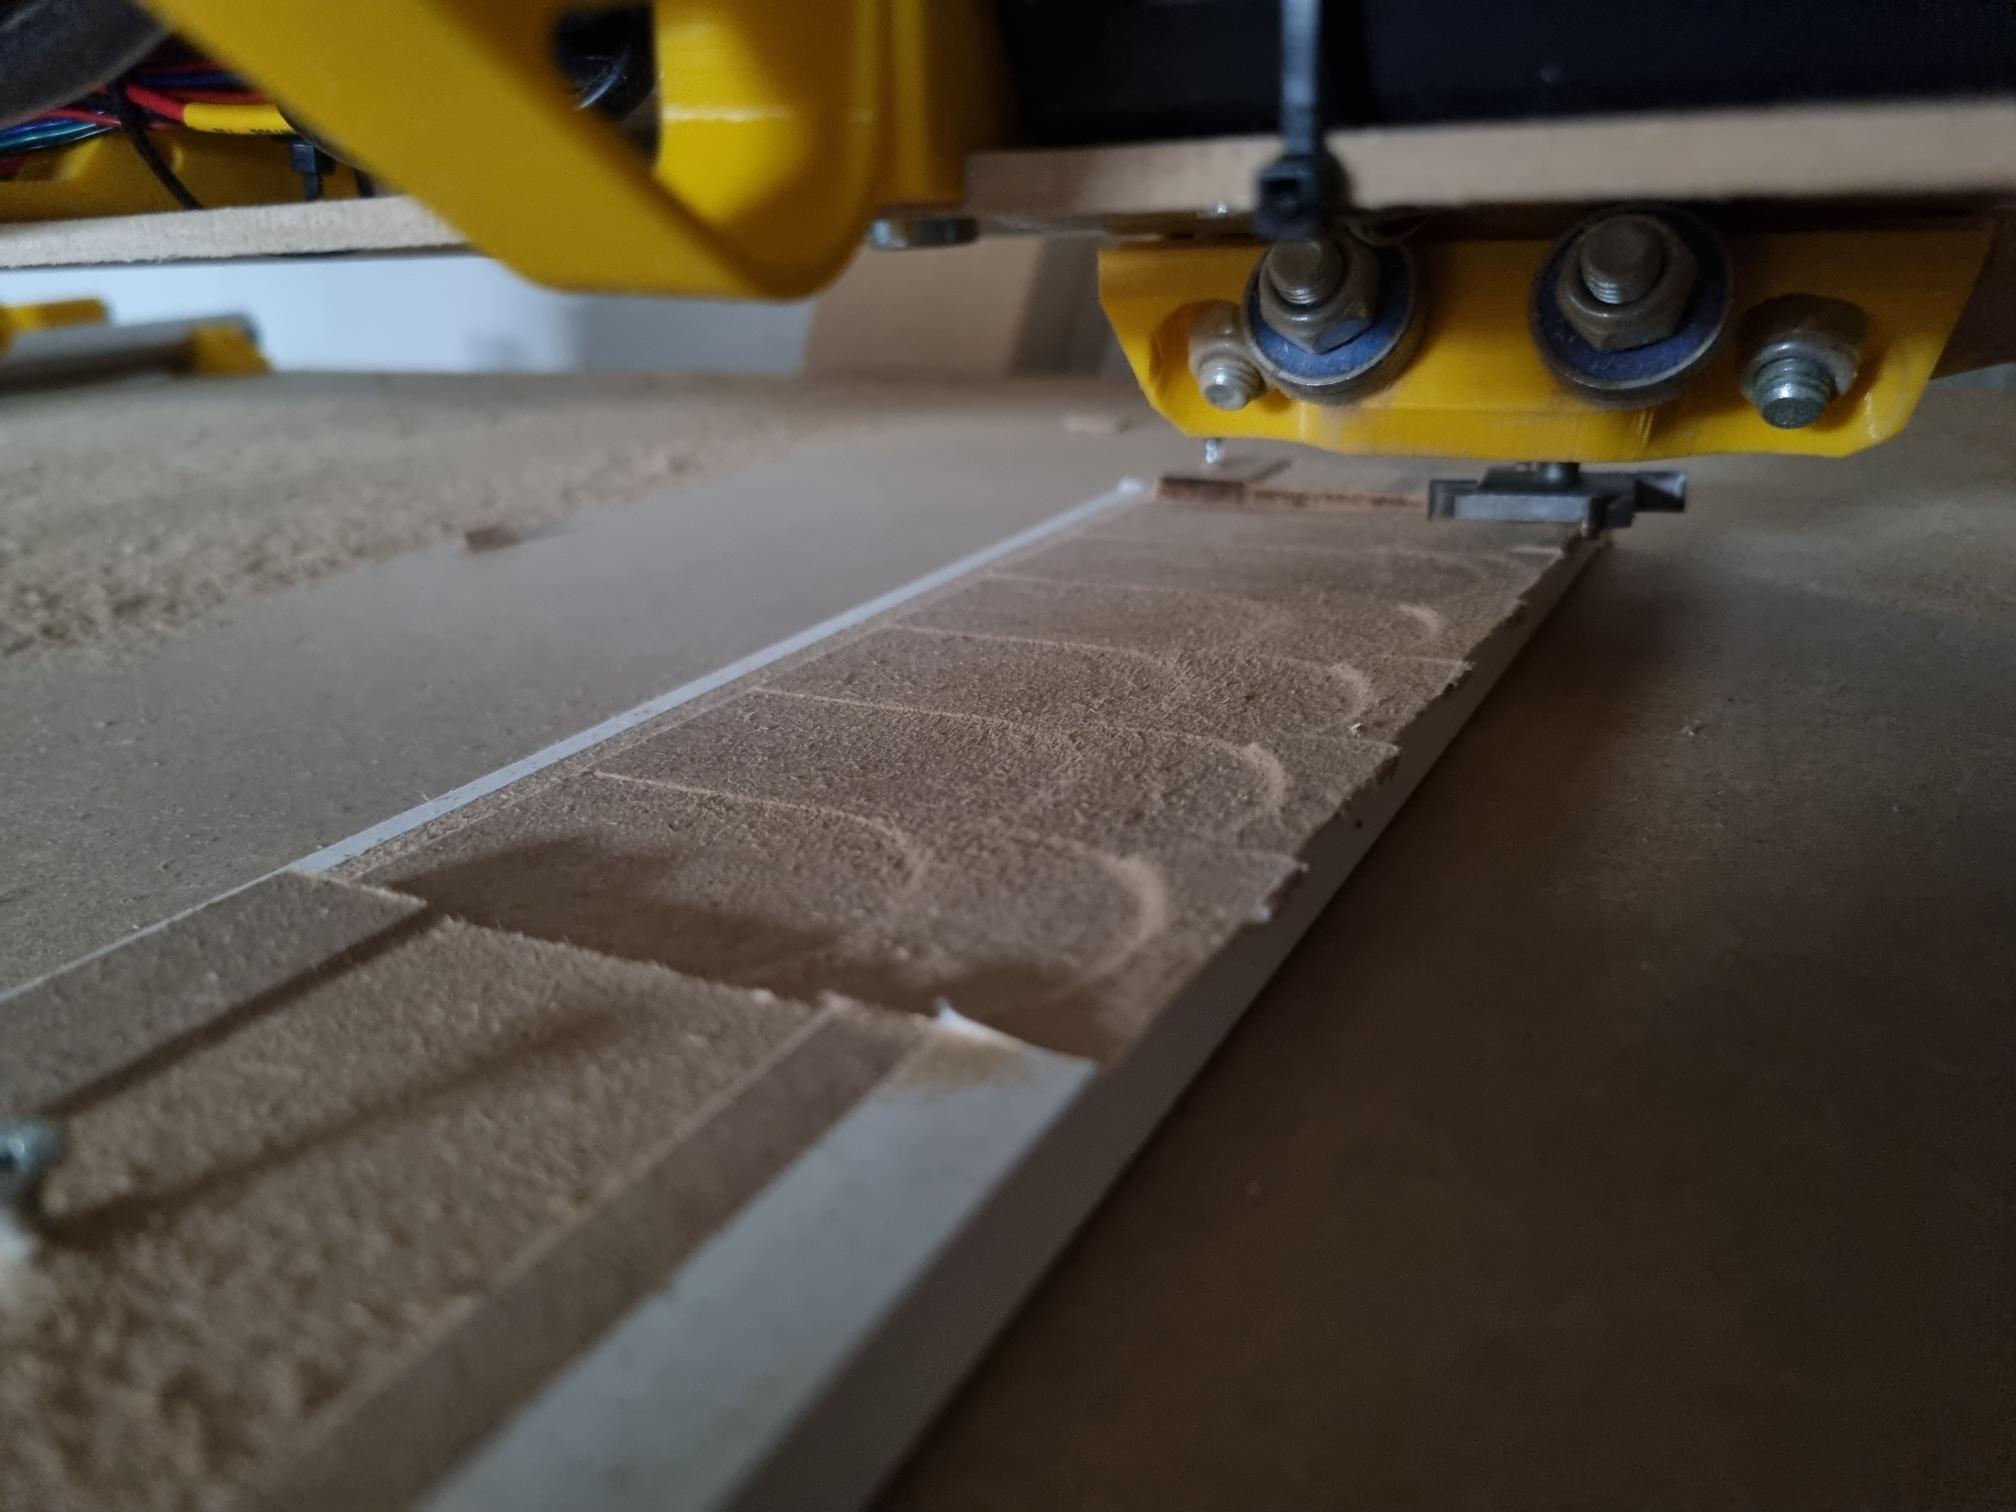
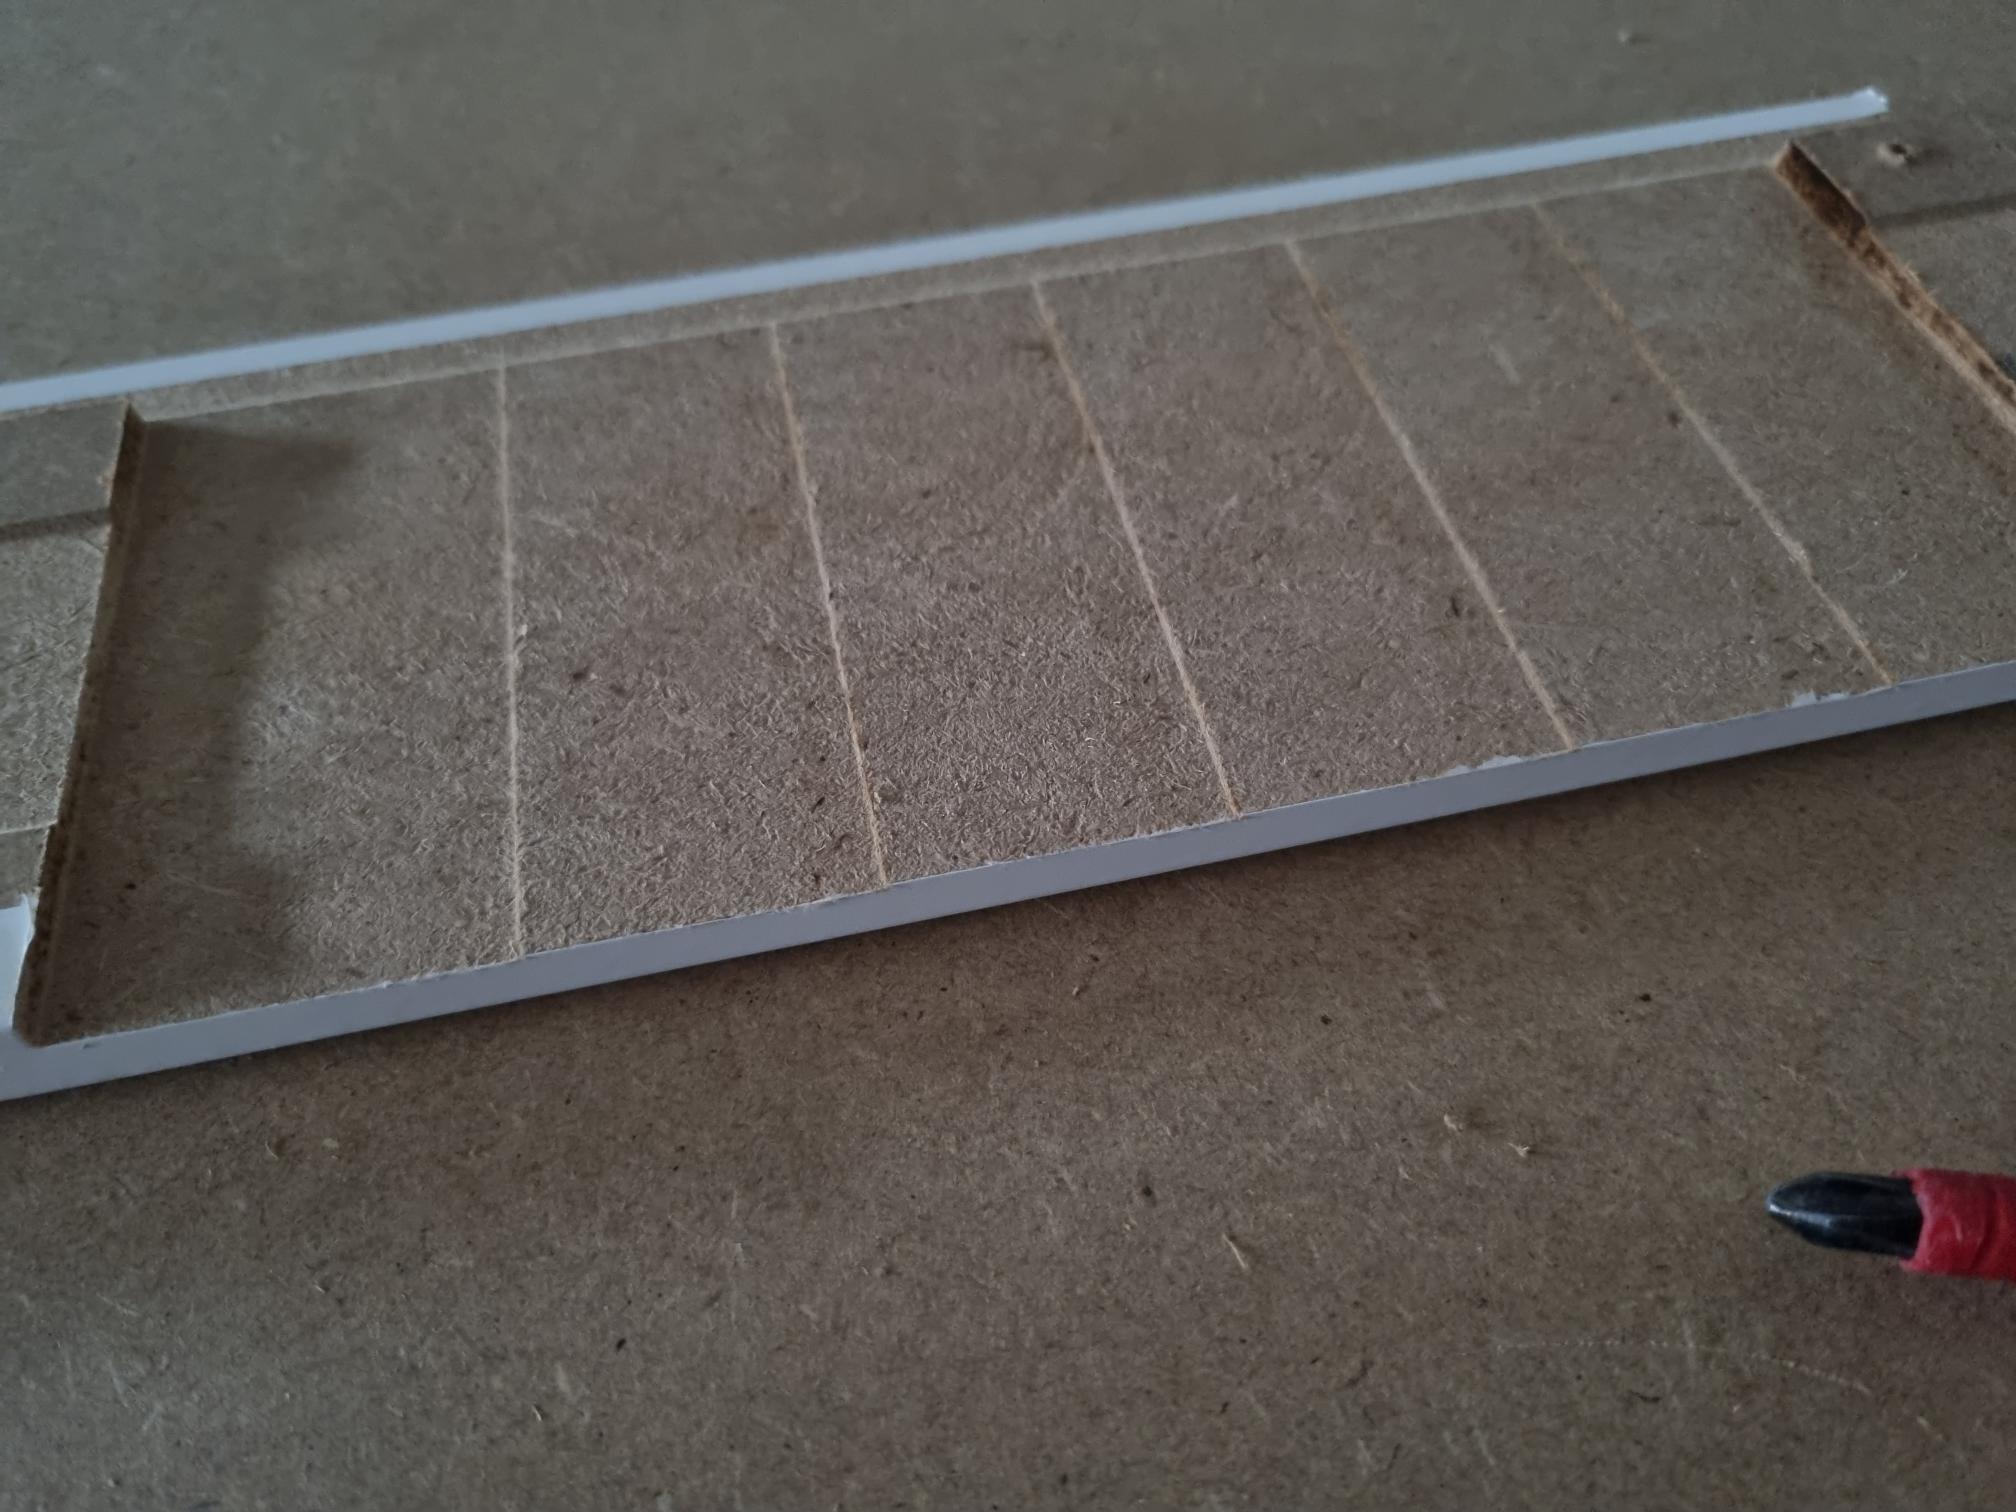
And for some reason while milling I heard 3 different types of noise. Probabely due to little difference in height, but I wasn´t expecting this. The same goes for the result.
I have no idea what causes this!
Now, since I plan on surfacing parts more often I need to resolve these two issues.
the result after the initial job is strange. Does anyone have a clue?
based on what I can see I have an idea in what direction I should tram the router, but how would I do that?
I know I might need to buy a better bit, but first would like to improve my process, as my job was really slow like a turtle. If I would increase RPM or moving speeds the bit jams on the piece. When I then see Ryan´s speedy process on MDF I think something is very wrong that I can not use some better speeds
If you’re taking all that depth and stepover in one pass, you’re already doing pretty good, I think.
Sometimes you get a faster cycle time by decreasing the depth and cranking up the speed sometimes by increasing the depth and reducing the travel moves.
I’ll be corrected if I’m wrong, but I don’t think there are adjustment provisions, per se, for tram. Adding aome tape inside the router clamp to move it into alignment seems to be the most common solution. I’ve done that, because none if my printers were square.
I think that is relative. You are suing the largest diameter bit I have ever seen one of these routers swing. In terms of Material Removal Rate (MRR) I bet you are doing pretty good, actually. Now my next tip is probably not going to save you a ton of time, but…
A smaller endmill, I suggest 1/8, 1/4"-(maybe even 1/2") is going to remove the same amount of material (by moving a faster) but the Tram issue will be much less prevalent. That size endmill is also more useful for other things.
To actually tram it in, you will find the tape trick does work and doesn’t require much. Typically, I get things real nice with 4 layers of masking tape or less. It only goes on the inner part of the clamp, and only 1/4 - 1/2 of the surface (as in 12 to 3 o’clock, or 12 to 1:30). I have a tramming tool on printables and thingiverse.
I had a similar problem initially when I used a really large bit for surfacing.
Switched to a 1/2" dovetail when @jamiek mentioned that he was using one.
Your machine may have a clean direction (+/- X or Y).
Use Jamie’s code generator to pick the direction leading into the lowest point on your bit if the bit isn’t trammed.
My settings surfacing mdf 2 days ago were:
; mode: surfacing
; rapid feedrate: 3000 mm/min
; raise/lower feedrate: 800 mm/min
; pen down z level: -2
; pen up z level: 0.5
; drawing feedrate: 3000 mm/min
; x extent: 160
; y extent: 140
; stepover: 12 mm
; direction: N
; perimeter: false
But you seem to be missing settings. These are the options I have for surfacing (ignore settings).
oh ok, I hoped it was going to be a super fast proces, I will need to adjust my expectations here Never done some surfacing before so had no idea what to expect.
great, I am going to do so! Thanks!
Well, I can say using this for the first time I was a bit scarry of what would happen I imagined bigger is better, and faster. But I see your point, a smaller diameter can take higher speeds and might indeed be as fast (or maybe a bit faster).
you are saying, on the core side, right? Your tramming tool I´ve seen in the past indeed and is on my to do list:)
TBH for now I am more interested to understand why I got the first result duing surfacing. Any ideas on that? Could it be that the bit couldn´t handle the DOC and needed some time to get there?
I initially wanted to use a regular bit to. But this idiot bought a “surfacing bit” with the idea that it would make a difference As I plan on surfacing a lot of wood in the coming months, I am glad to read this suggestion, it will save some money!
Did this speed work out ok? and could you tell what size of bit?
wierd! might be a bug, I first did a squareness test, so maybe that´s why certain settings didn´t load.
Yeah I think that was all just a bad choice of feeds and speeds. Large diameter puts a lot more strain on the whole system. I have used a 1/2" “surfacing” dove tail bit and it can fly…and I thought that was giant.
I’ve used these settings on walnut. When I used a larger bit at a slower speed I got some scorching. High speed and slower rpm is better for surfacing I find. Surfacing MDF is even easier, but dustier.
1/2" dovetail for the win!
That lower cabinet box should have had some filler/scribe added on the side to set it ~1/2" farther from that wall, but it is what it is now (as long as it doesn’t interfere with the cabinet door when fully opened). With different thickness, using a miter joint is going to require off angle cuts (or several cuts/test fits). I’d do that instead of butt/coped joints on that corner… miters are more durable vs endgrain mdf. It’s probably going to get hit by the bottom of that door often. Maybe rubberized base would be good there (you can find it at trim suppliers… meant for curved walls… PITA to prep for paint though).
yes! It´s sometimes difficult to choose a combo out those millions of options
Good to know you guys prefer the dovetail. I can buy 4 of them for the price of this surfacing bit Will buy few in the local shop and see how it performs.
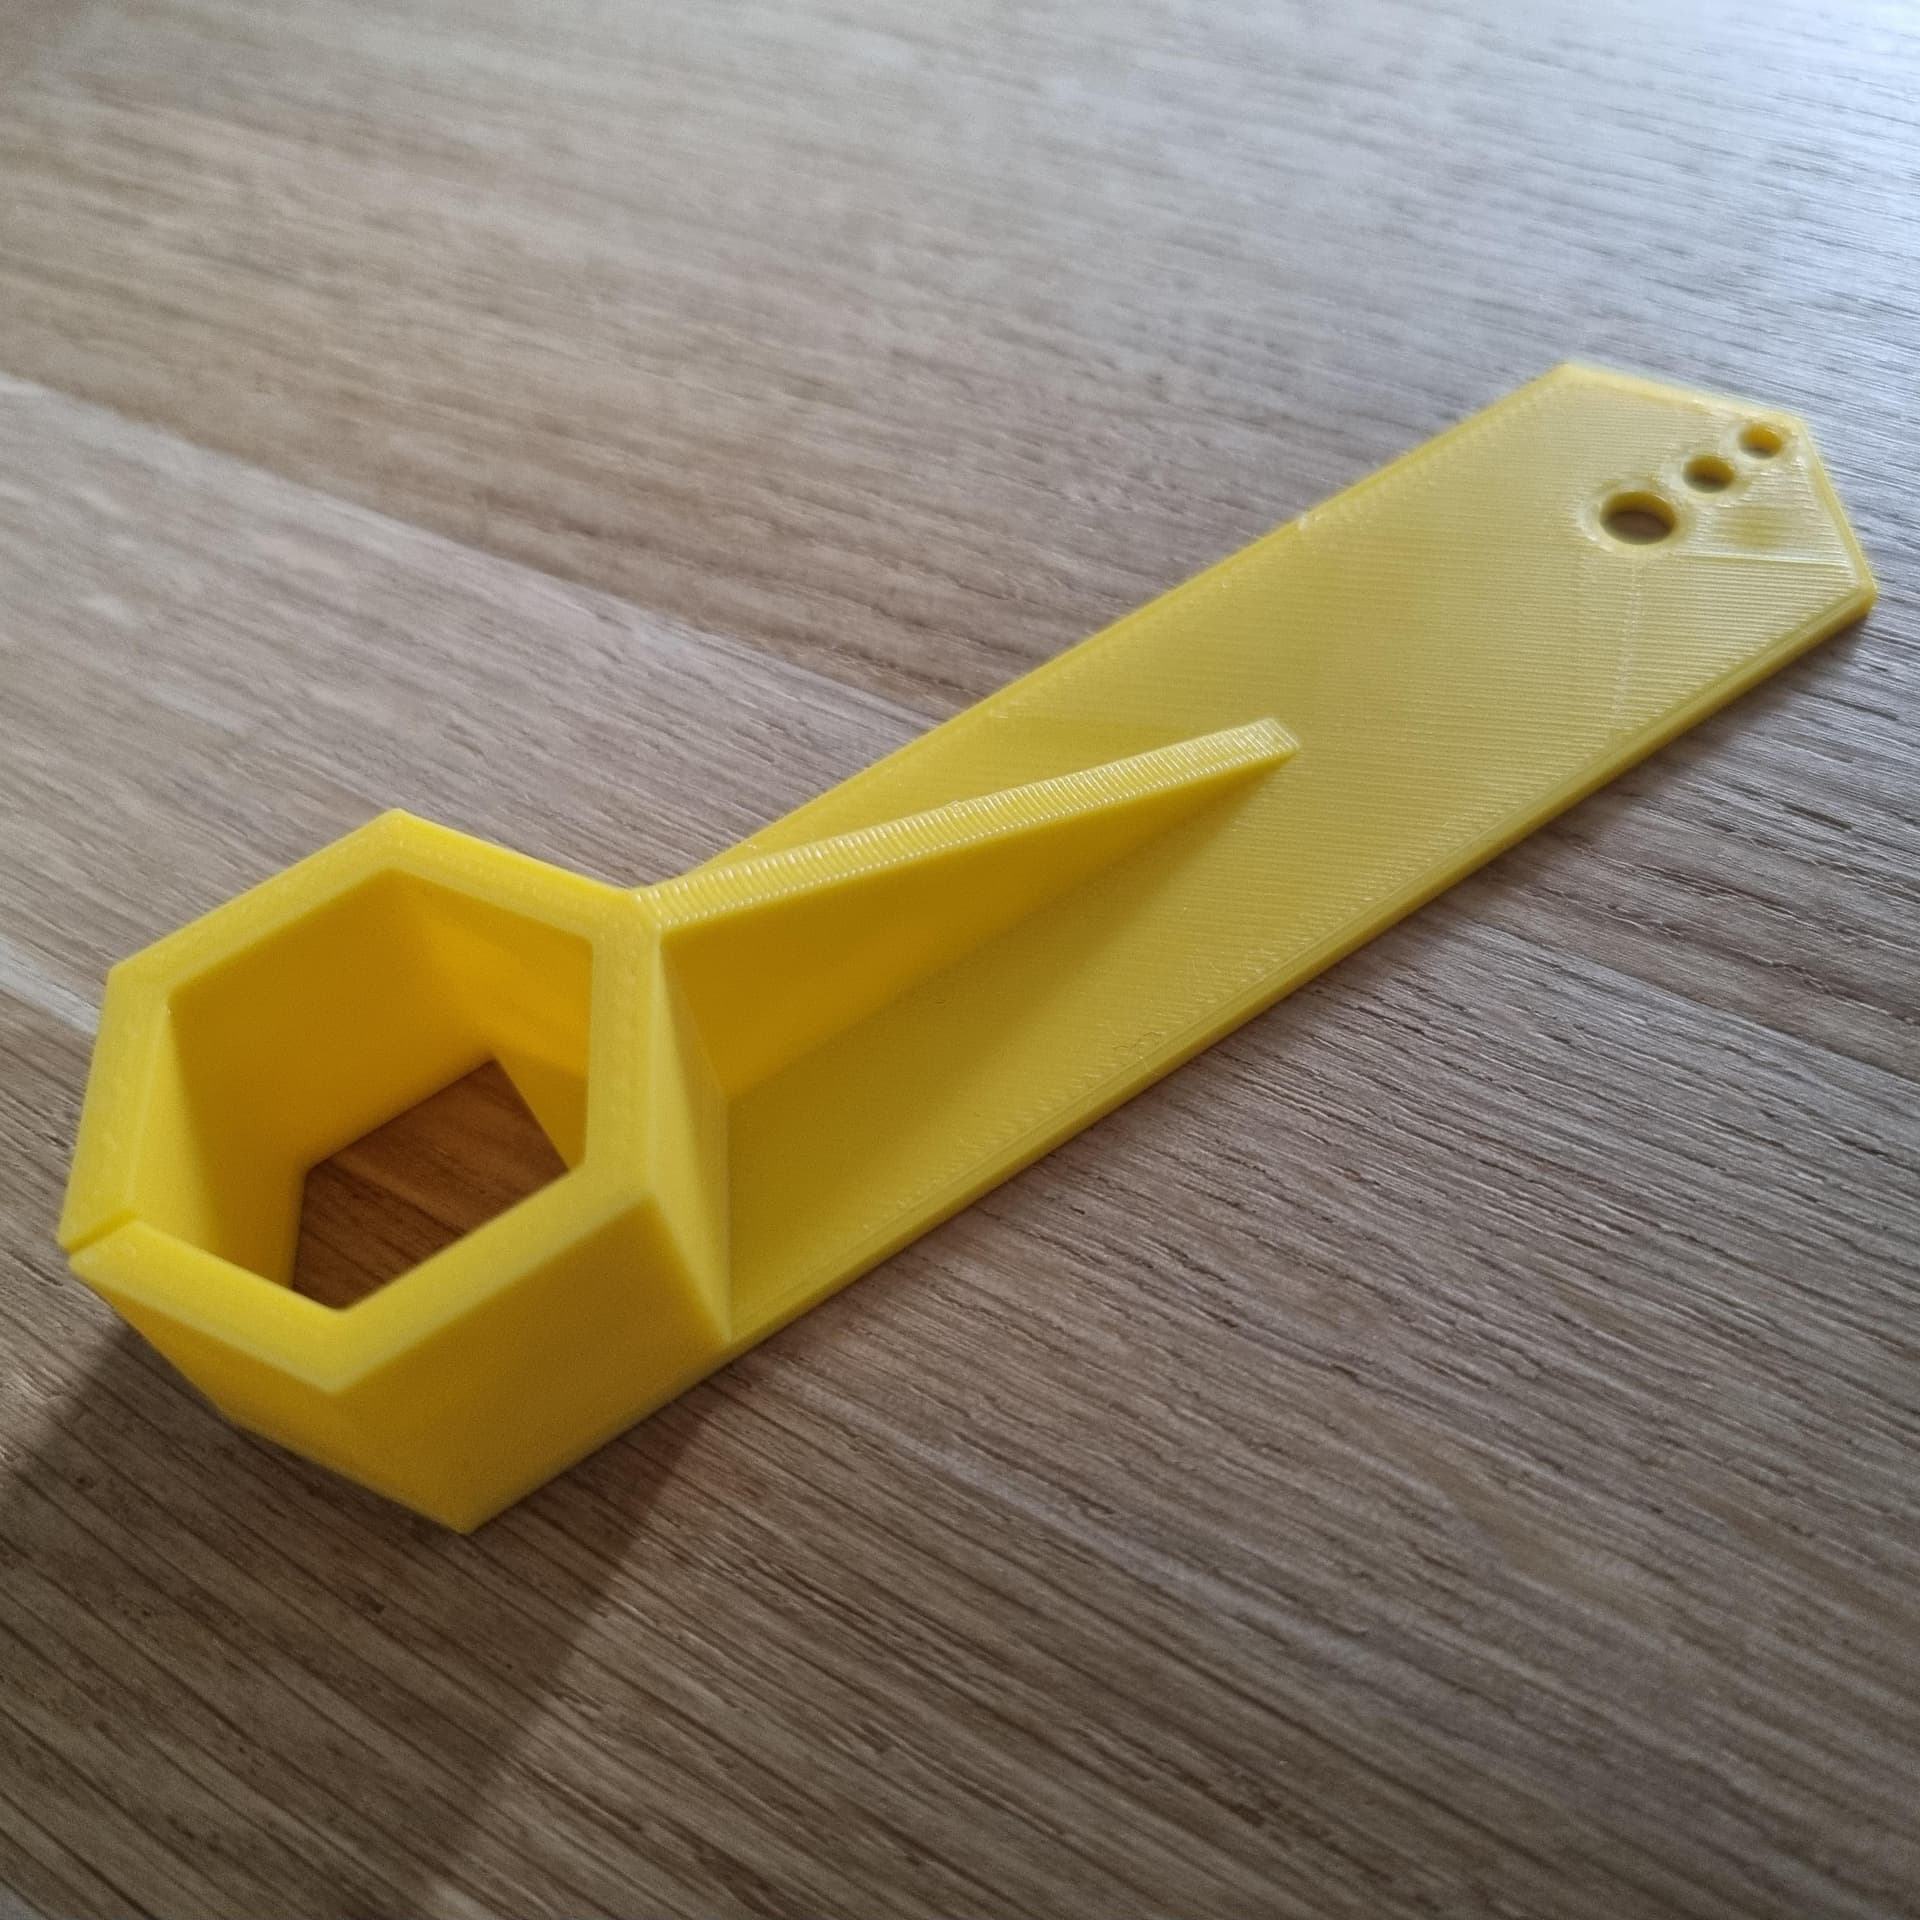
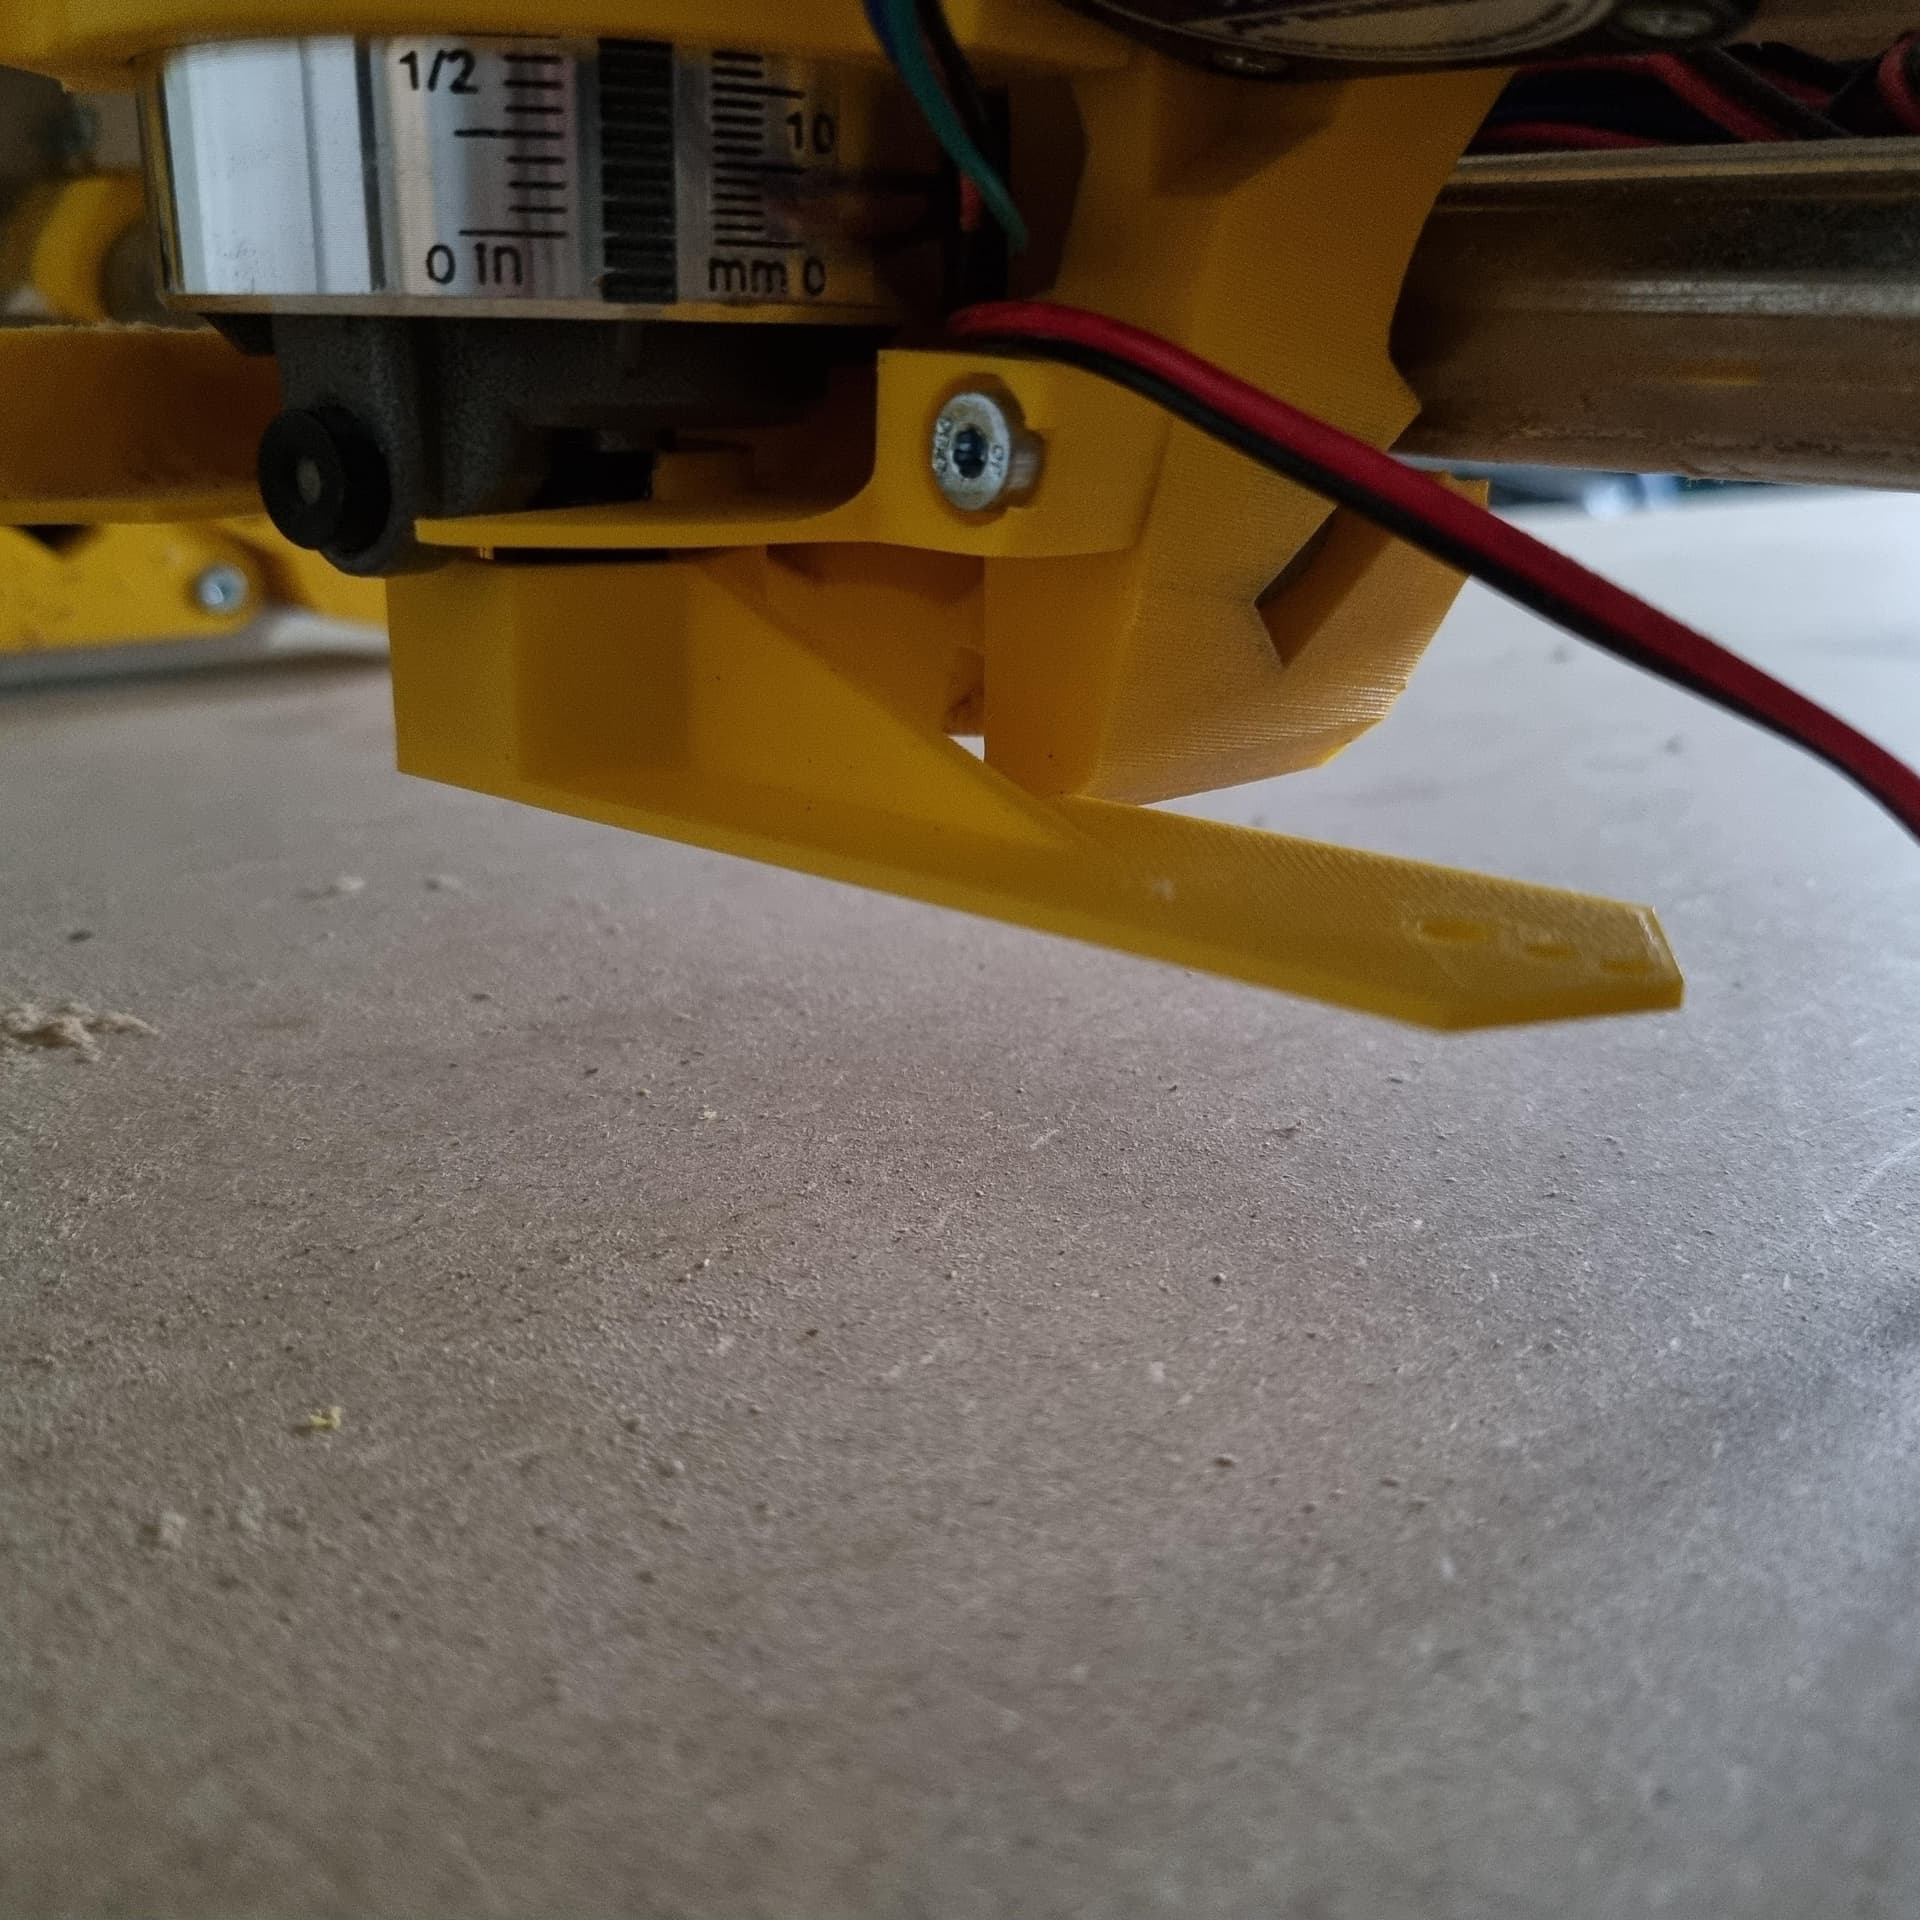
In the meanwhile I printed this one, so will start investigating on how to tram the router in both x & y direction.
great feedback!
it´s actually a window, one that to goes all the way down to the floor. Originally it was a fixed window, but we wanted to be able to tilt it for drawing in fresh air quickly (when the oposite sliding door would be open too). So it will not swing open very often.
The house is a “modern 80-90´s” villa with lots of rounded walls and indents just for show. Horrible for placing those wallboards. So tbh I gave up on cutting the perfect corner, before attaching to the wall I fill those corners with silicone and cut away what´s to much. After a fresh coat of paint you can´t see that I did this. Maybe not how it should, but it works fine and save me hours of work
@vicious1
not sure if this been posted in some other thread already (couldn´t find it).
It seems this tool works great on a my Katsu but no so good for the LR3 as it can´t swing all the way round.
I already made some changes with tape, and that works out great but feel that I will still need to tweak some more to have it perfectly aligned. Not been able to swing it around blocks the tuning process a bit I believe
If I can add 2 more requests (for a future version of it):
make the second hole just a tad more tight. It can fit a router bit (what´s great) but on collision with the spoilboard it moves quickly up/down, so need to restart measuring process. (an alternative would be to make a cilinder that sticks out, so there´s enough room to hold the shaft, which you could then align with the topside.
if you could extend the angled inforcement a bit furter that would be awesome as I now feel it flexes a bit much.