I’m not good at this CNC game. I’m good enough to fool the uneducated, but they have no idea the hassle I go through to get the results. Every time I think I’ve reached a level of success, I get a painful reminder of how little I’m capable of.
This last project cost me $100 in wood, and incredible amount of time, and I ultimately failed. I need help. Let me explain where I’m at and then maybe there are some helpful people here that can point me in a better direction.
My MPCNC has a cutting area of 24" x 24", which I know is big. I have mid-span supports in both directions. I’m running the Nema 17 motors Ryan sells with a 24V power supply using the Einsy Rambo board (leftover from a Prusa upgrade). I’m using the Makita RT0701C router as the cutting tool. Estlcam has been the software I use to create tool paths.
Here are my issues.
I can’t make chips. Chips are a myth are in my world. Most of what I’ve cut successfully has been 1/2 inch birch plywood. Every time I try to slow the router speed down, I get chatter. I’ve resigned myself to just burning up bits faster. That’s the least of my concerns as long as I get the results I want.
I’m impatient. Likely the reason I have issue 1. I seem to have the best luck with 1/4 inch shank bits, rather than the 1/8 inch shank. I can run a 1/4inch upcut single flute at 25 mm/s with a DOC of 3mm. Router setting is somewhere between 4-6 with dust everywhere. One of the 1/2 inch Baltic birch monogram signs I’ve been making takes around 20-30 minutes to cut that is usually in the neighborhood of a 24inch dimension. A 1/8 inch bit at those speeds will likely chatter. I’m pretty sure it shouldn’t matter what shank I use, but it seems to.
It doesn’t feel like the machine cuts square from project to project. What I mean is that if I cut a rectangle, out, the rectangle will be square. But say I move carriage over to cut a rectangle next to the previous one, the rectangle cutout will be square, but the hole left will have more of a slant than the previous one.
Some phantom behavior that I can’t explain. I had it recently where a simple rectangle cut decided to just not move in the X&Y direction and instead just drove right down into the spoilboard and continue to drive down until I stopped it. I’ve had issues lately where the Z-axis won’t go up or down. Take the router out and the travel seems fine. As I’m writing this, I’m wondering if the router power cord is getting caught on one of the Z-axis bearings and preventing it from moving.
V-bits seem inconsistent. I’ve surfaced the spoilboard and planed the wood, but I don’t get straight lines. Maybe it’s the bits I’m using. I tend to go after the Amazon bits because of price, availability, shipping time, and because I’ve resigned myself to burning up bits anyway. Pocketing seems add to issues because of the height differences between bits.
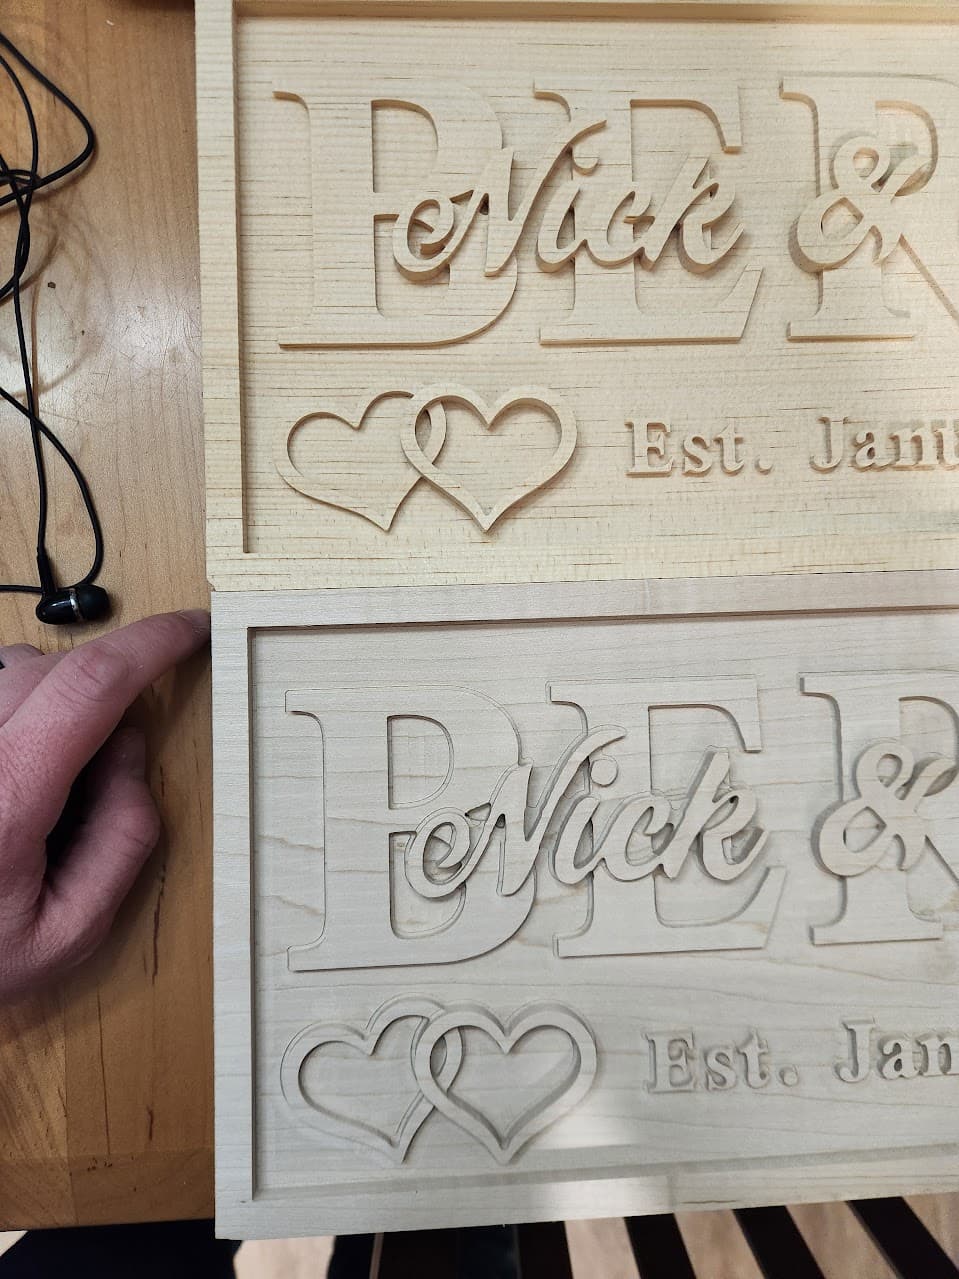
Z-Height seems inconsistent even though I’m using a touchplate. I’m not talking about the issue above, but on a pocketing example, I get two different depths between tool changes. It doesn’t always happen, but when it does, it comes at the worst possible time. Here’s an example:
Not sure if the photo shows it clear enough, but both cuts ran the exact same GCODE. It’s a 1/4 inch pocket and the 1/16 finish. The pine practice cut on the top doesn’t show the 1/16 bit line, but the cut on the maple has the 1/16 bit almost 1mm deeper than the pocketing bit. Both tools used the V1 touchplate to set the Z-height. Is there that much slop in the Z-axis? I checked everything that I saw and nothing felt loose. Leadscrew is lubed and moves freely. Unfortunately the cut is too detailed and the maple is hard enough that I don’t think I can sand my way out of it and it doesn’t look good enough for me to give it as a gift. So now the bride & groom will likely be getting a gift card.
Issues 4-6 are what cost me an 8ft section of practice pine and a 6ft piece of maple. The picture above are the most successful cuts I’ve had. Those were the last sections I had of each wood.
Takes 2.5 hours to cut that out so I’ve been out in the garage almost every night making one or two attempts after work. Sleep eludes me.,
The problem is obviously me, since there are plenty of people on here that are far more successful. I’ve done my best to research each issue, but information is scattered. Unfortunately a lot of the responses are just “it’s dependent on your machine”. Considering the money and time spent on this project alone, it has me re-evaluating things. Are there upgrades I should do? Tests I should run? With the size of the machine, would the LowRider be a better fit and would be able to cut faster? I don’t really cut anything over an inch thick. Or (with no offense to Ryan and what he has created), should I be purchasing a different machine that is better suited to my expectations and also takes myself out of the equation from a build standpoint?
A long winded writeup, but I appreciate any insight anyone can provide.
A LowRider is definitely better at that size, but your results look stunning and they are not a beginner’s project and you still did it. Your speeds and feeds are fine for an MPCNC in my opinion, I never went faster than 2000mm/min and 3mm deep in hardwood/plywood with mine and it was smaller than yours.
Harder materials are… well harder. What works for speeds in pine might not be as good in maple. My Primo showed similar problems even without switching bits in many of my early projects, the larger pocketing wasnt the same depth as the outline. The majn difference was that the machine was working slower doing the outline than the straight pocketing.
This told me that the machine was flexing doing the pocketing, which effectively lifted the bit. It was less obvious than your ~1mm, but definitely there.
The solution was to slow down.
Oh, and my Primo has a cutting area of 25" by 37", which really is tok big for the platform. Now I have a LR4 at 25" by 49" so the lman js sti to cut the Primo down to a manageable size, as soon as I decide what size rhat is.
First I have to say; That is very nice work.
Z height problems and changes. I looked back at your projects you have posted over the years. You do have the experience. Things to keep in mind, parts wear out. Check to see that your collets are not dirty, clean often including the shank. Alcohol and starter fluid are my favorite. Finish with compress air.
One of my trouble shooting aids. I always have a least one camera recording the the entire run. Slow motion playback has uncovered a few difficult issues.
The coupler between the z stepper and leadscrew. I have one that failed, most likely due to abuse. It became “loose” very little spring in it and tended to twist somewhat. Replacing it corrected the Z errors
I made a small change to my Z axis adding a Thrust bearing to support the load up and down.
Can you verify the depth of the 1/4"pocket and the 1/16 finish cut?
I had chatter on my mpcnc because each truck and the core were cracked and the core had play between the bearing and the x and y core tubes, which i was unaware of after many many hours of foam cutting at very high speed. I reprinted all of them and then it was tight again.
The one project i did in red oak with the unbroken first set was slow and i threw away the bit when it was done.
Your projects look great! The out of square is from a motor step skip somewhere… Too fast
This was literally years ago, and I don’t remember much, but I do still have the piece. The first rough was in MDF, and the “good” one was poplar. Both are soft compared to maple, though MDF has its pen challenges. The MDF was worse than the poplar as far as deflection goes.
Most of what I changed when I was dealing with stuff like oak and walnut was the depth per pass of the cuts. Once I had good chips from the tool, it was good.
Feeds and speeds from someone else’s machine is always a guideline at best. Mostly I use a feed of about 1800 mm/minute and a depth of 2.5-3.5mm with a 1/8" single flute endmill. I can go a bit deeper and faster with a 1/4".
The LR3 could probably have gone faster, but I just kept pretty much the same settings, and had fewer problems with jitter. The LR4 is a beast, and I’m still dialing in what I can. I can use faster speeds on the router, and faster feeds, with deeper cuts my last few runs were 2400mm/minute with 6.5mm depth. This seems OK with some material, and is pushing it with MDF, but seemed OK for through cuts.
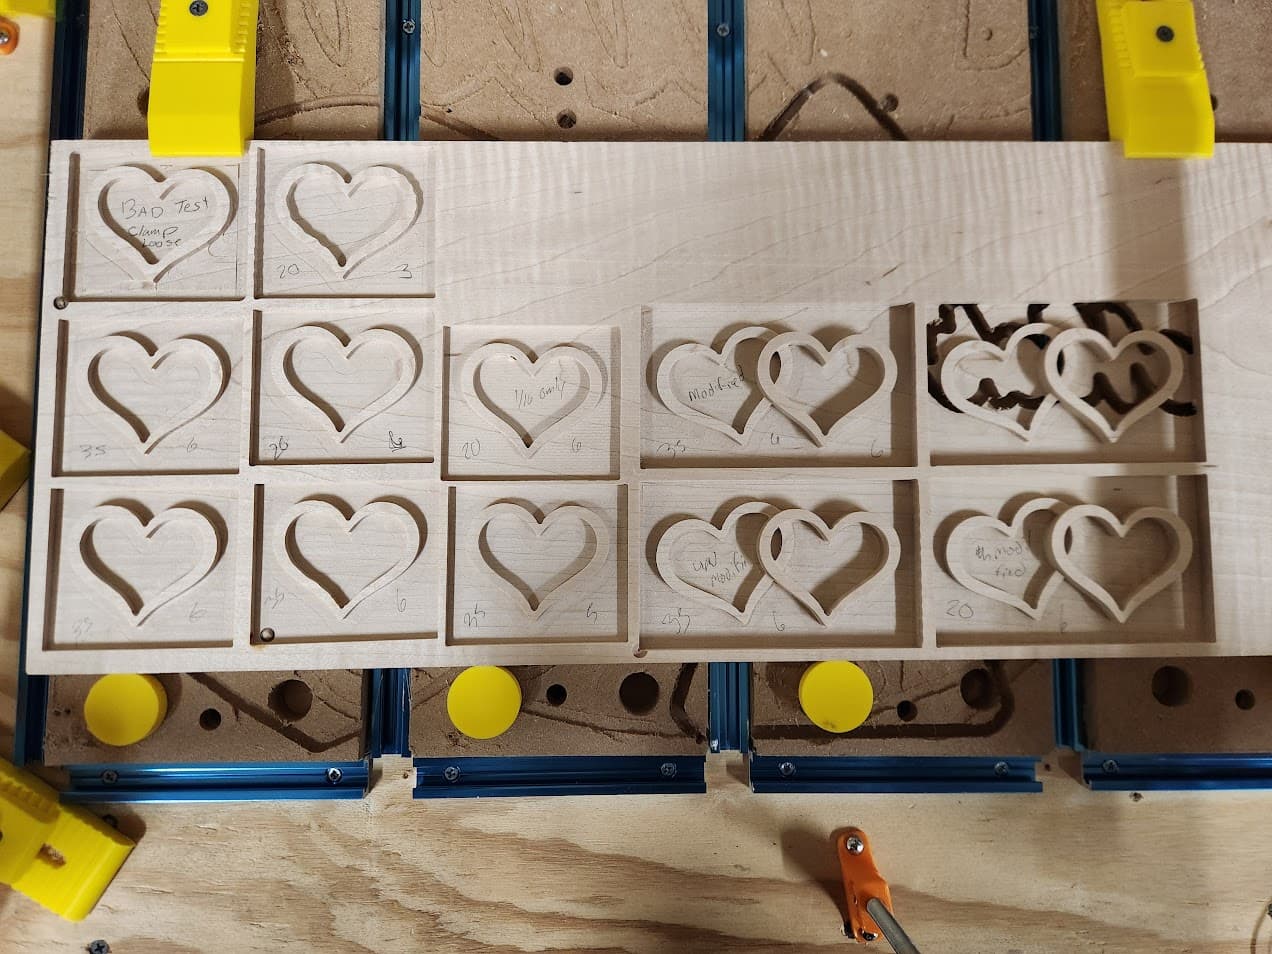
So after some reflection based on things said here and my own observations, I tried some test cuts on the back side of one of the maple cuts that had really messed up. First I think that some of my severe Z axis issue were indeed from getting the router caught on one the of the bearings. The downcut bit I bought for this is a bit longer, so the router is in a higher place than normal. And that explains why I didn’t have any resistance when I took the router out. User error, so I’m cognizant of that now.
The big issue is the finishing bit being a different height and I thought out it. The V1E simple touchplate has an alligator clip. It’s difficult to get it clipped on to a 1/16" bit. My first test cut, I ran the same parameters that I did as the sign that failed. There were no issues with the finishing passes being deeper. So my thought is that maybe the clip is moving while homing the Z position and causes some inconsistency there. I had an idea using a magnet to stick the clip to the collet nut instead and that seemed to work. I ran a bunch of test cuts with much better results. The only ones you can see are barely there, certainly less than the 1mm issue I was having.
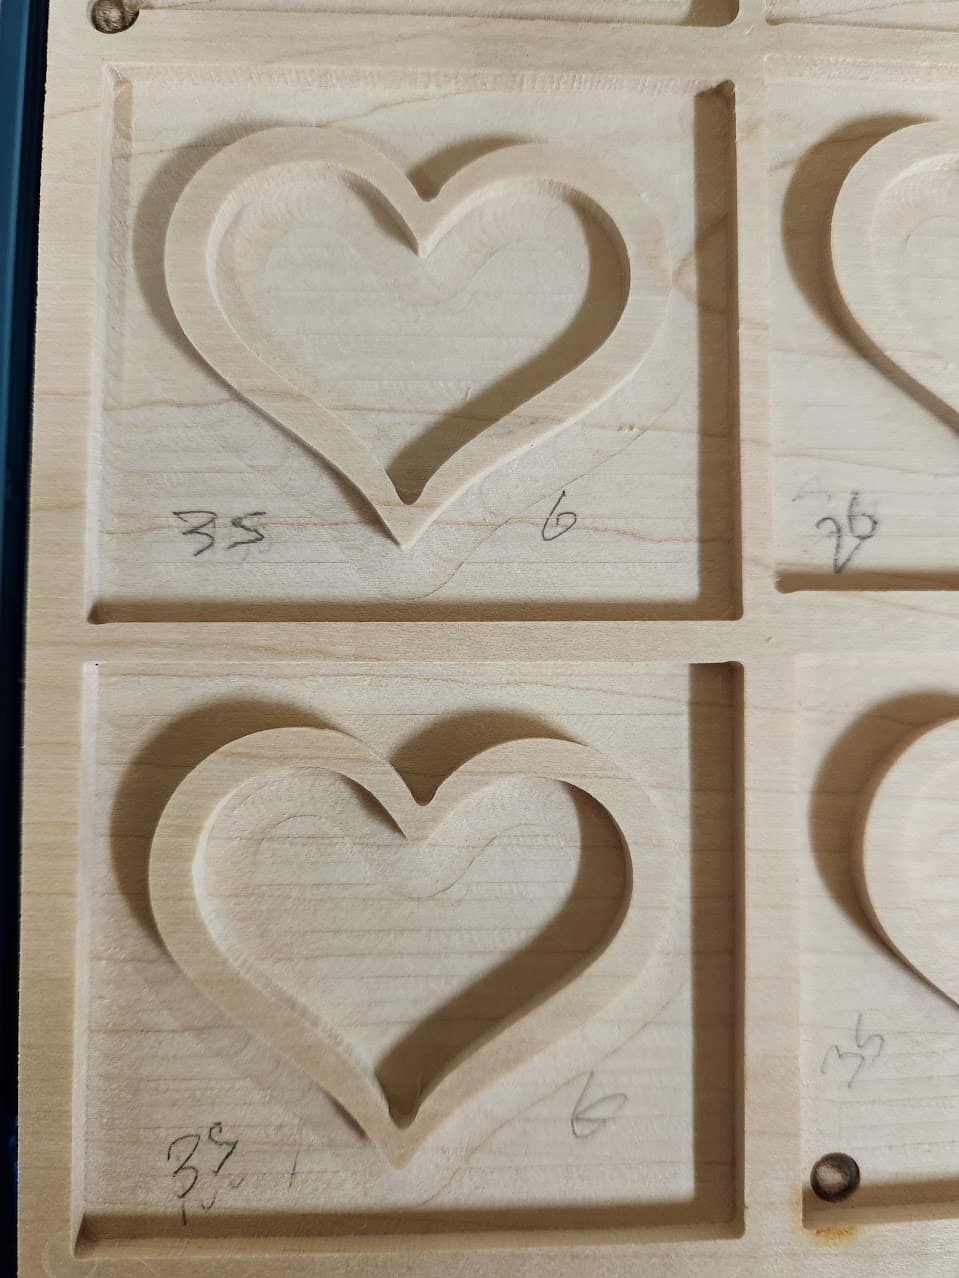
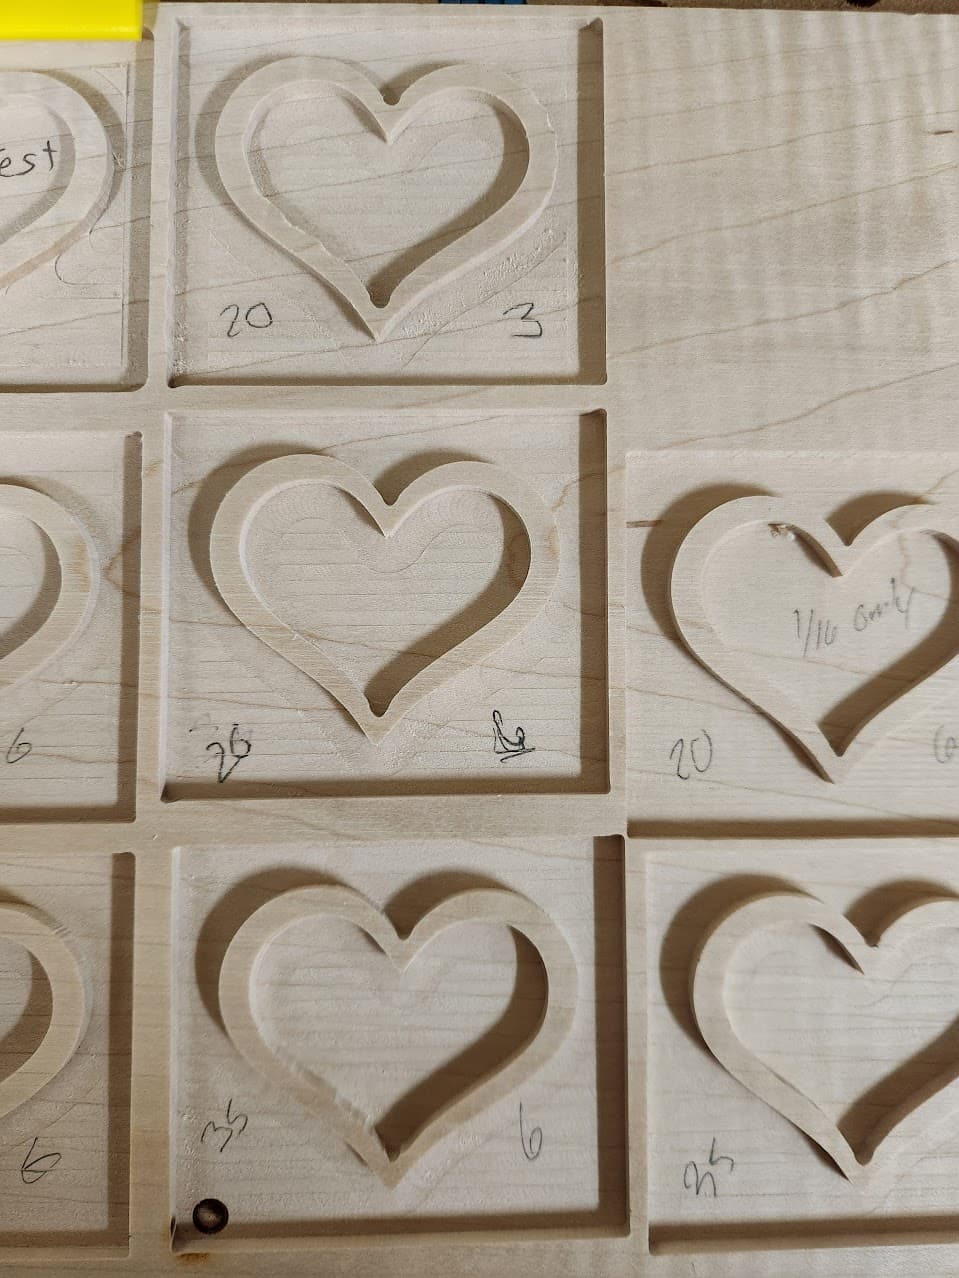
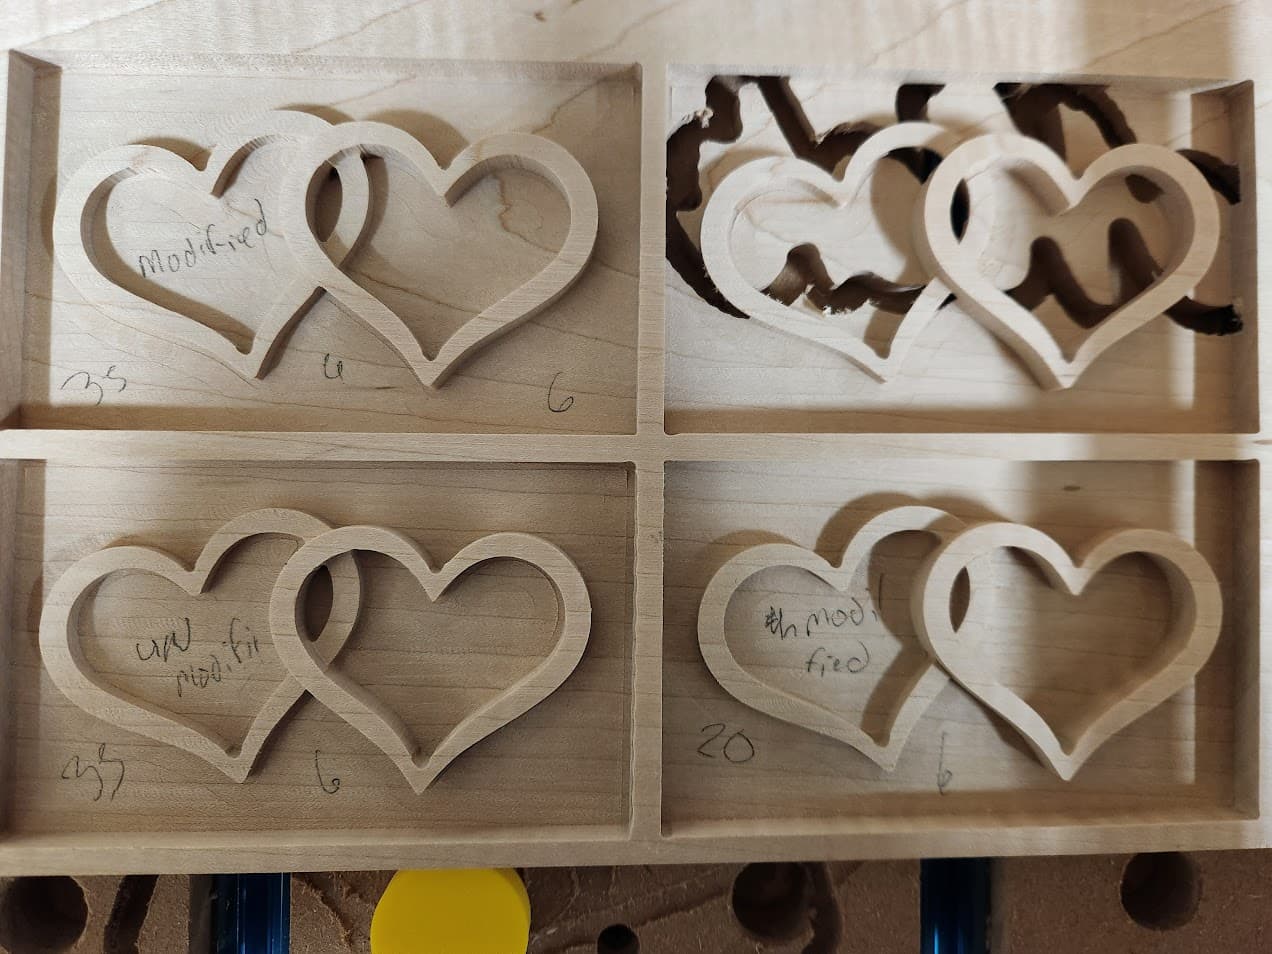
The markings are what my feedrate was and what the router dial was set to. 35mm/s is what I was set to when I was originally doing the sign. It is easy to see where the 1/4" bit went around the heart. I am not sure if there’s anything I can do to improve that. One of the cuts I slowed down to 20mm/s and a dial setting of 3. You can see it had plenty of chatter, but it also didn’t alleviate that border at all. The only one that didn’t have that border is when I did the entire thing in 1/16" bit, but that you could see way more cut lines that I think would be harder to sand out than the border of the 1/4".
The far right test cut obviously hit into the mistakes I had made on the previous side. That one had the worst different between the two bits, but it still isn’t bad at all. And I can’t put a ton of stock in that because of what was on the underside.
Undeterred, I bought another $75 piece of maple this morning. In for a penny, in for a pound I guess. I am going to slow down the feedrate to 20mm/s. 35 was looking fine, but in the interest of reducing the change for error, I’ll slow down. I also bought a 1x12 instead of a 1x10 this time around. The sign is 8.75" tall, so the 1x10 only gave me at most 1/2" of error in a perfect world. That’s not a lot and for the extra $10, I’ll take extra wiggle room.
I wanted to have this all done by Monday when this guy gets back from his honeymoon. But if it’s a few days later than that, so be it. I wasn’t invited to the wedding anyway, so there really is no expectation here. So why am I doing it? Because then I have some knowledge/skill to make something for someone who actually wants me at their wedding.
The final cut succeeded-ish. I slowed things down, but there was definitely more chatter than the previous piece of wood. Unfortunately, the overall product was a fail. Trying to finish the maple didn’t look great. The sanding sealer and and stain just didn’t take it very well. So it doesn’t look good enough to give as a gift, but an overall a learning experience.
It gave me some things to think about and we’ll see what I attempt next.