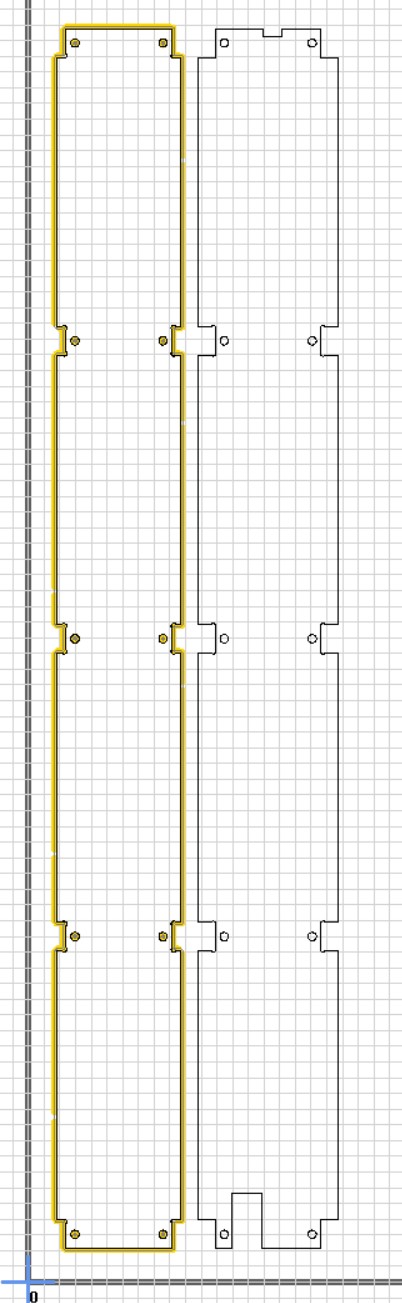
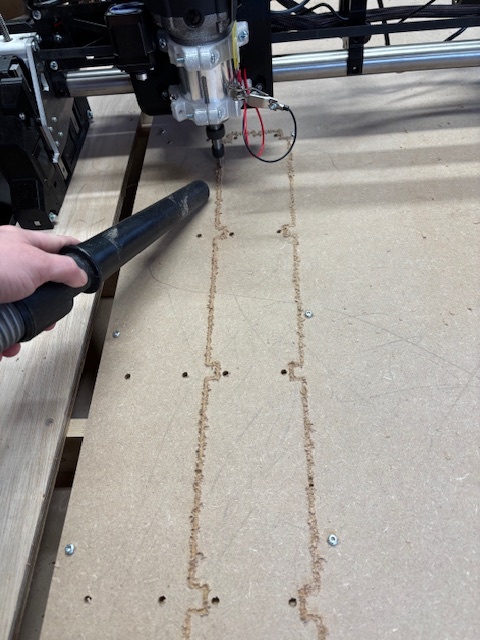
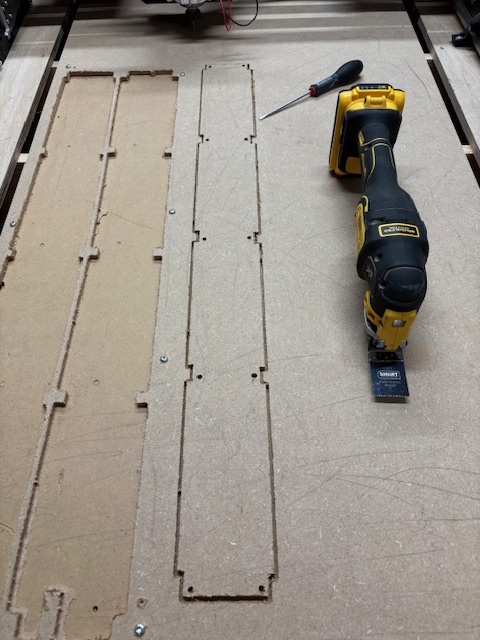
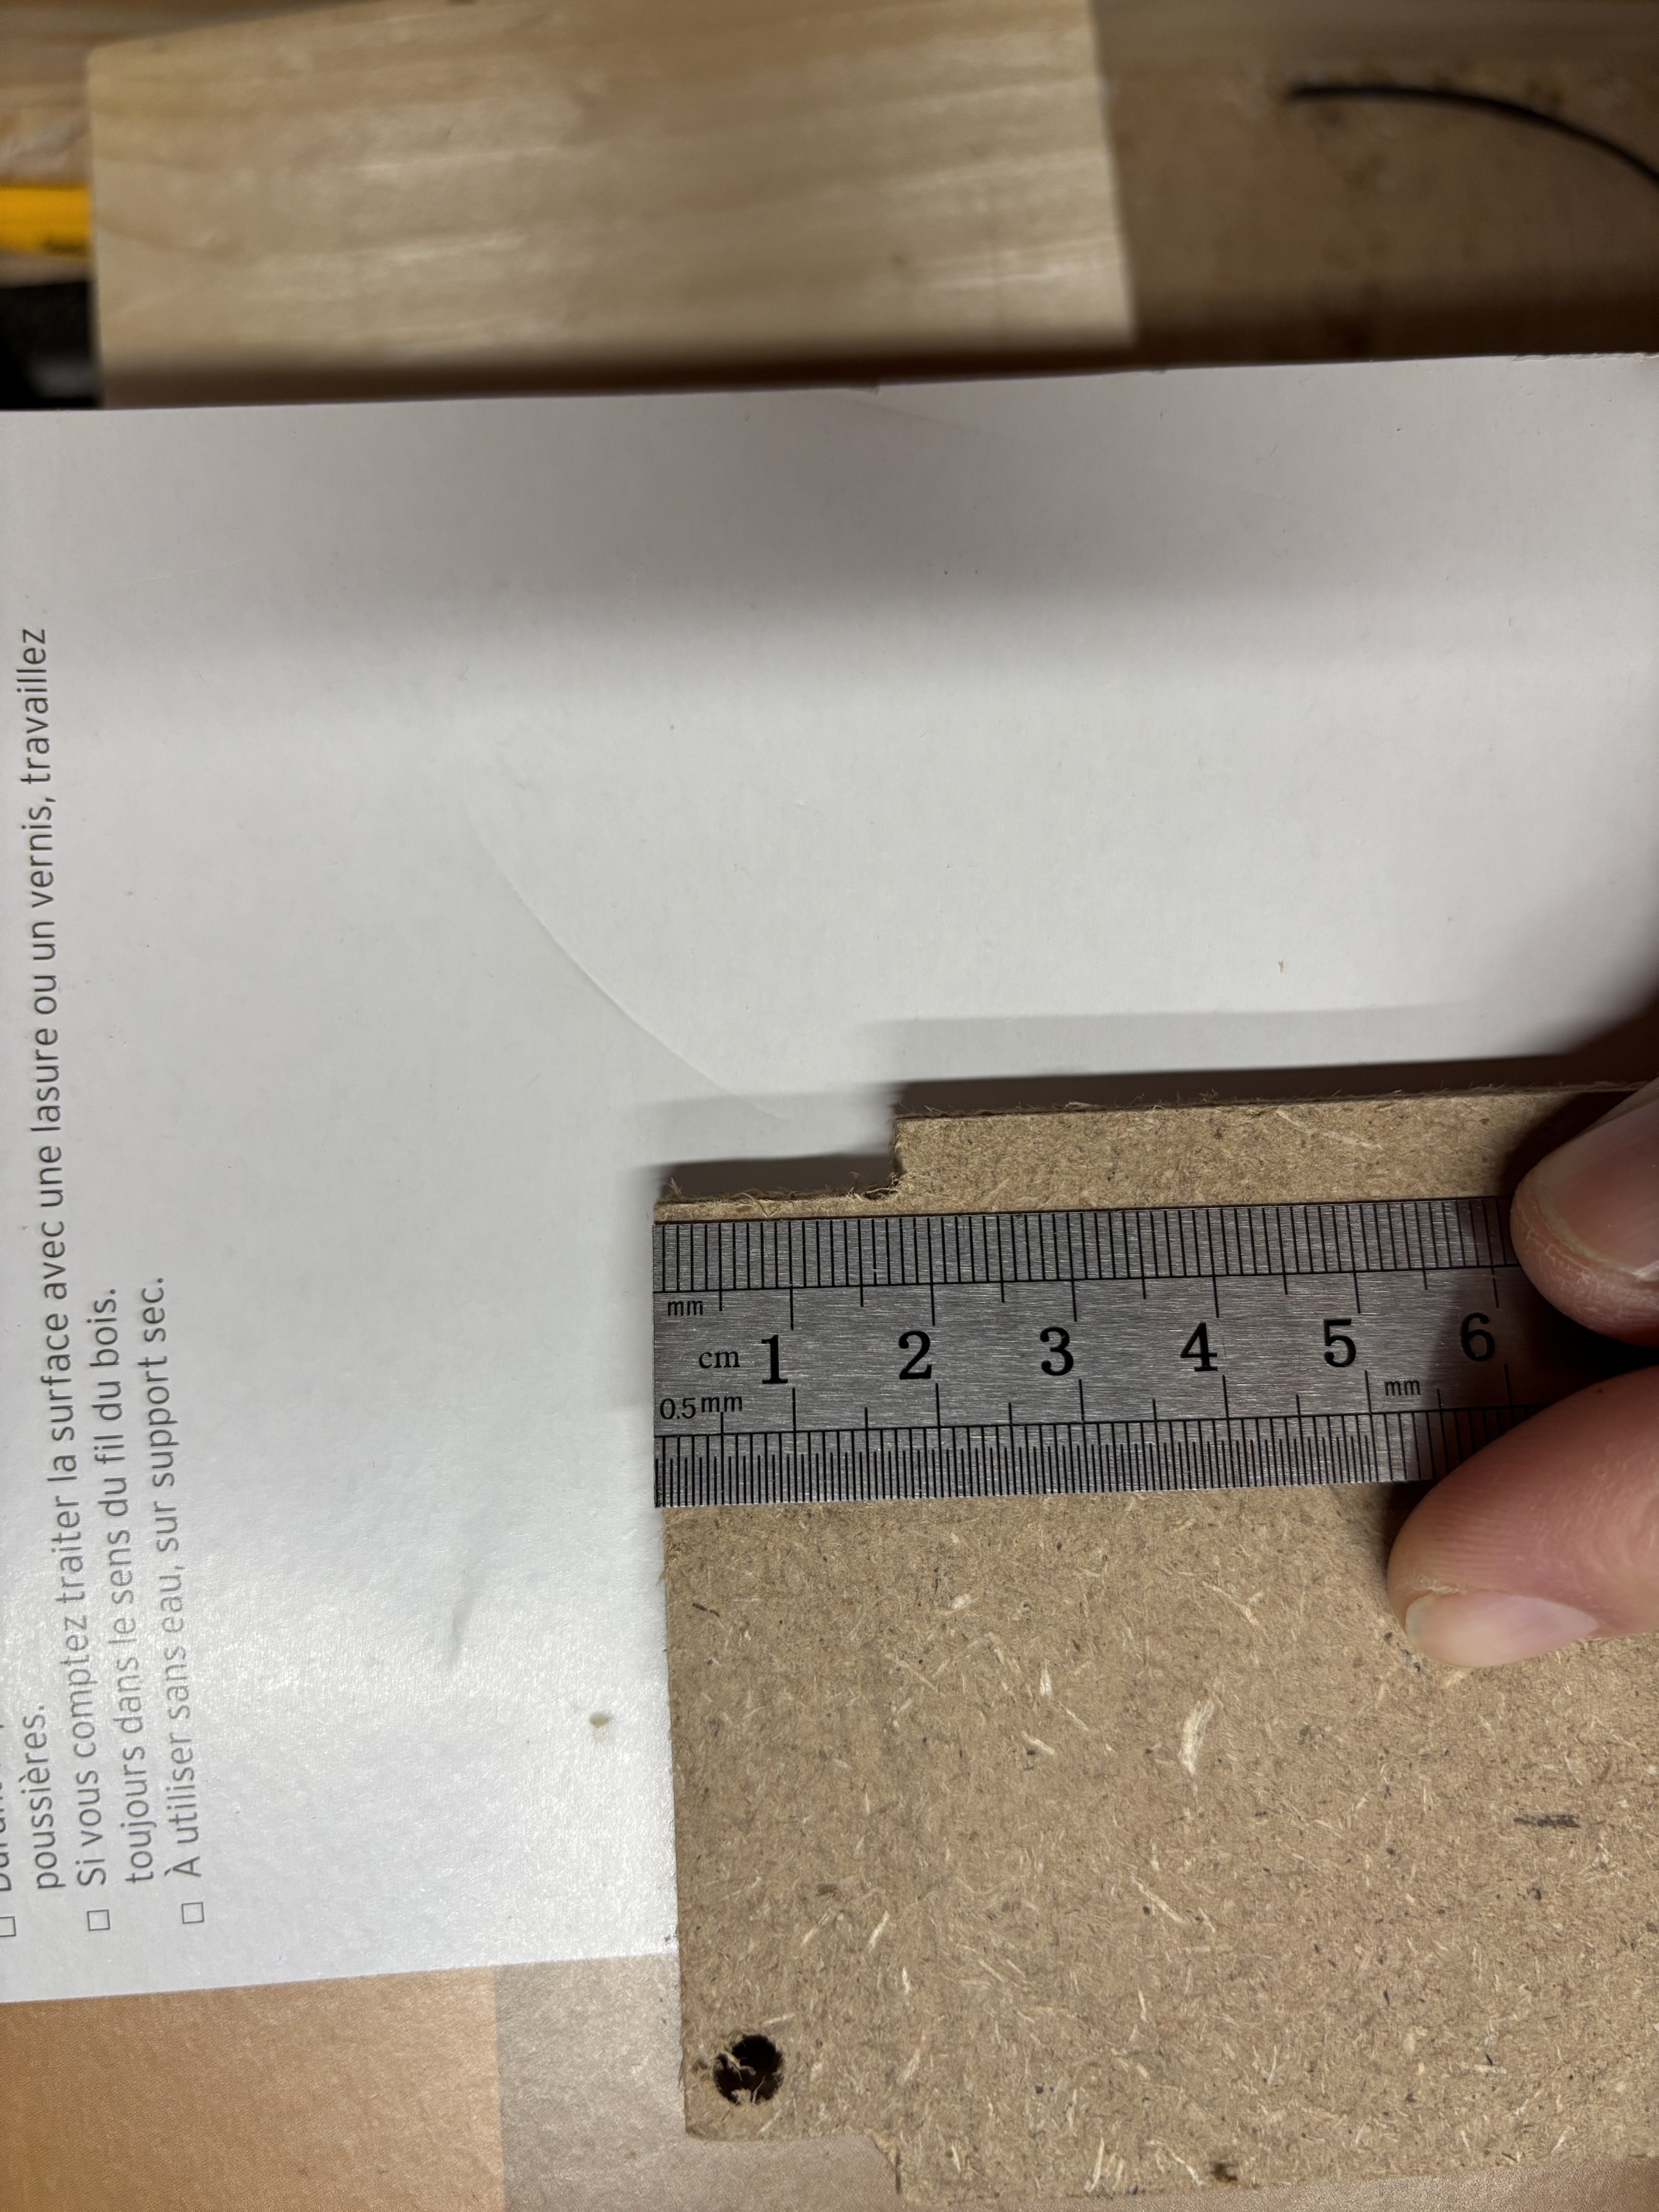
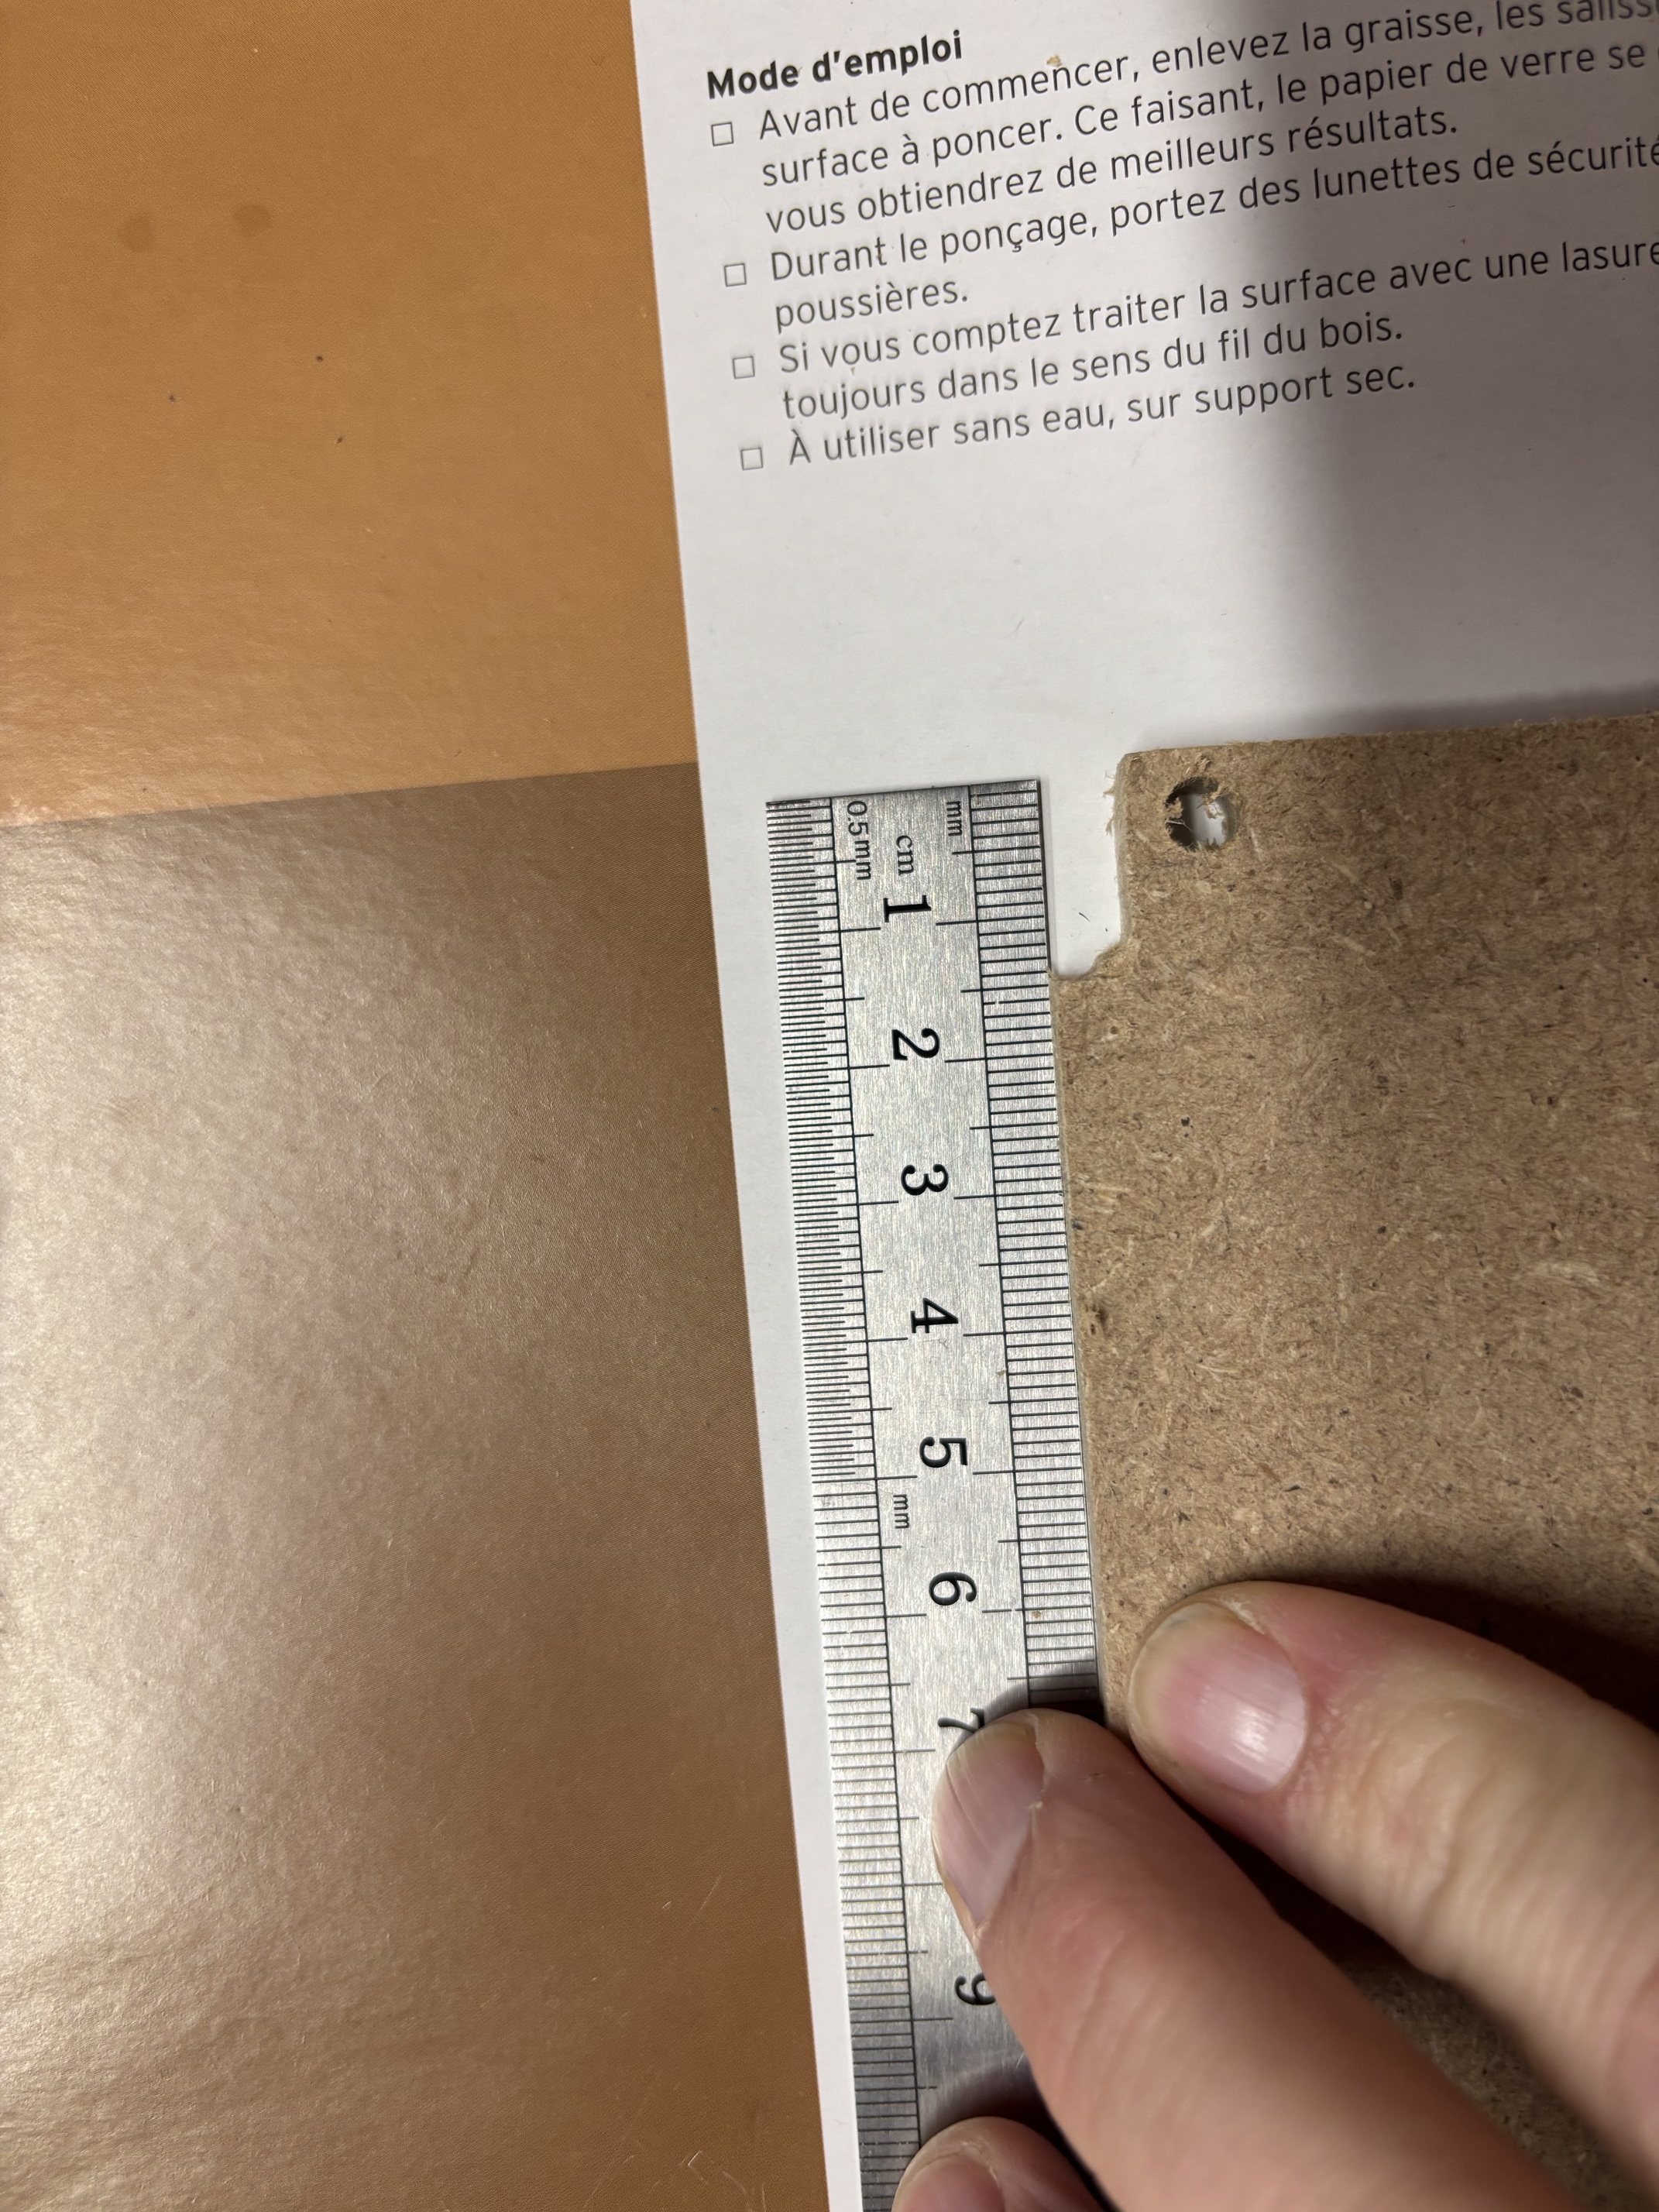
I recently milled the strut plates from my LR4. Today I took of the temporary printed once and wanted to replace them with the plates. I then discovered that the holes are not aligned with the notches. First I thought that the holes were milled incorrect, but closer inspection showed that the notches do not align. As you can see on the pictures the notches on the left side of the strut are about 5mm misaligned. It is cut with 3 passes, so it is consistantly incorrect each pass. On the estlcam software the notches are aligned.
Yeah, it seems like the machine cut the struts and the first row of holes right, and then it had a hickup somewhere, maybe a cord that got caught, a step that was lost, something in the way.
All is aligned in the file and eslcam. Strange thing is also, today I cut another strut plate and it had the same issue. So it is definitely repeatable and not missed step or something. It takes the same path each pass. For the third strut that I cut I also slowed down the speed and used another but, hence the somewhat cleaner cut.
Will take full pictures and measurements of the plates tomorrow. Didn’t have the time today
It’s still possible that it could be a missed step somewhere if you have a cable that is getting snagged. I have a pick n place machine that misses steps completely repeatably on certain moves.
Perhaps try do a single pass with a pen mount or something to see if it does it then, too?
Edit: What’s the actual cut process you’re doing? Is it outline first then holes? Are they all with the same tool and in one file or is it multiple files with repeated starts between etc?
Ok thanks, will check all cables and tie wraps and report! I do holes first, then outline. Same tool. Two on the left were one file, same tool, one start. Holes first and then both outlines. One on the right was done a different day had same issues.
In the case of my pick n place machine it’s also that it has a tight spot in the movement because of the terribly designed V-wheels running on aluminium extrusion. I should have said that it could be anything causing a particularly high load at some point including something in the CAM itself.
I’d be going through and tracing the job itself then verifying that it comes back to the same zero position at the end. If it traces it perfectly and comes back to zero, it’s likely something causing missed steps under cutting load. If it traces it with faults and doesn’t come back to zero then it’s likely something getting caught up/tight in the movement platform. If it traces it with faults and comes back to zero then I’d suspect something in the gcode/CAM process has gone weird.
This has happened so often for me. It is surprising how easy it can be for the router cable to catch on the hose hooks which makes it just a little off.
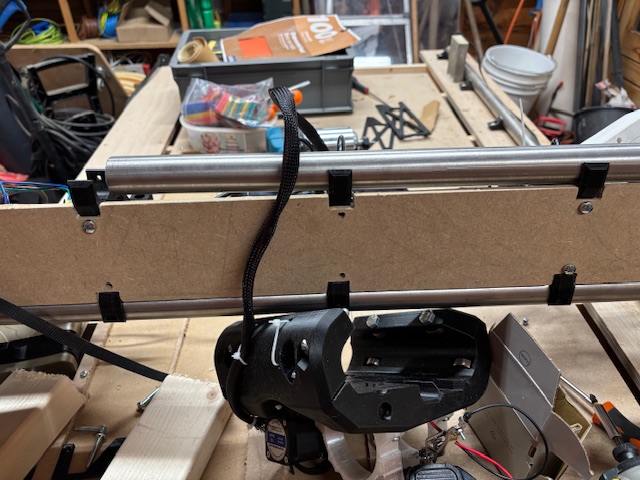
There are a few in my thread (LR4 - Ghostrider B2/RC2 - #112 by Tokoloshe) as well as on YouTube. I also use a dragchain for the rest of the cables on X, the tape measure trick would also work.
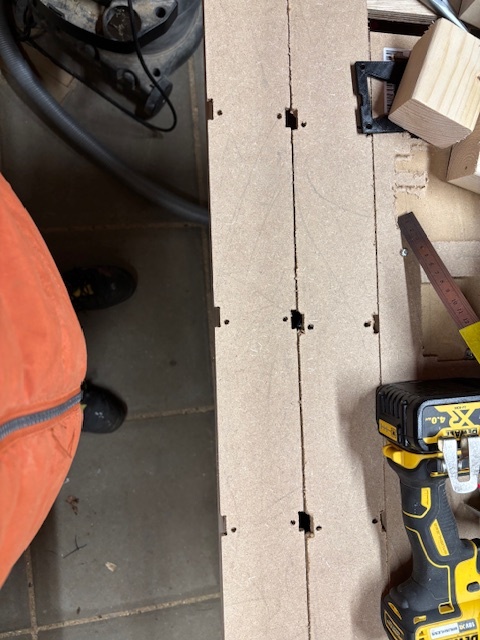
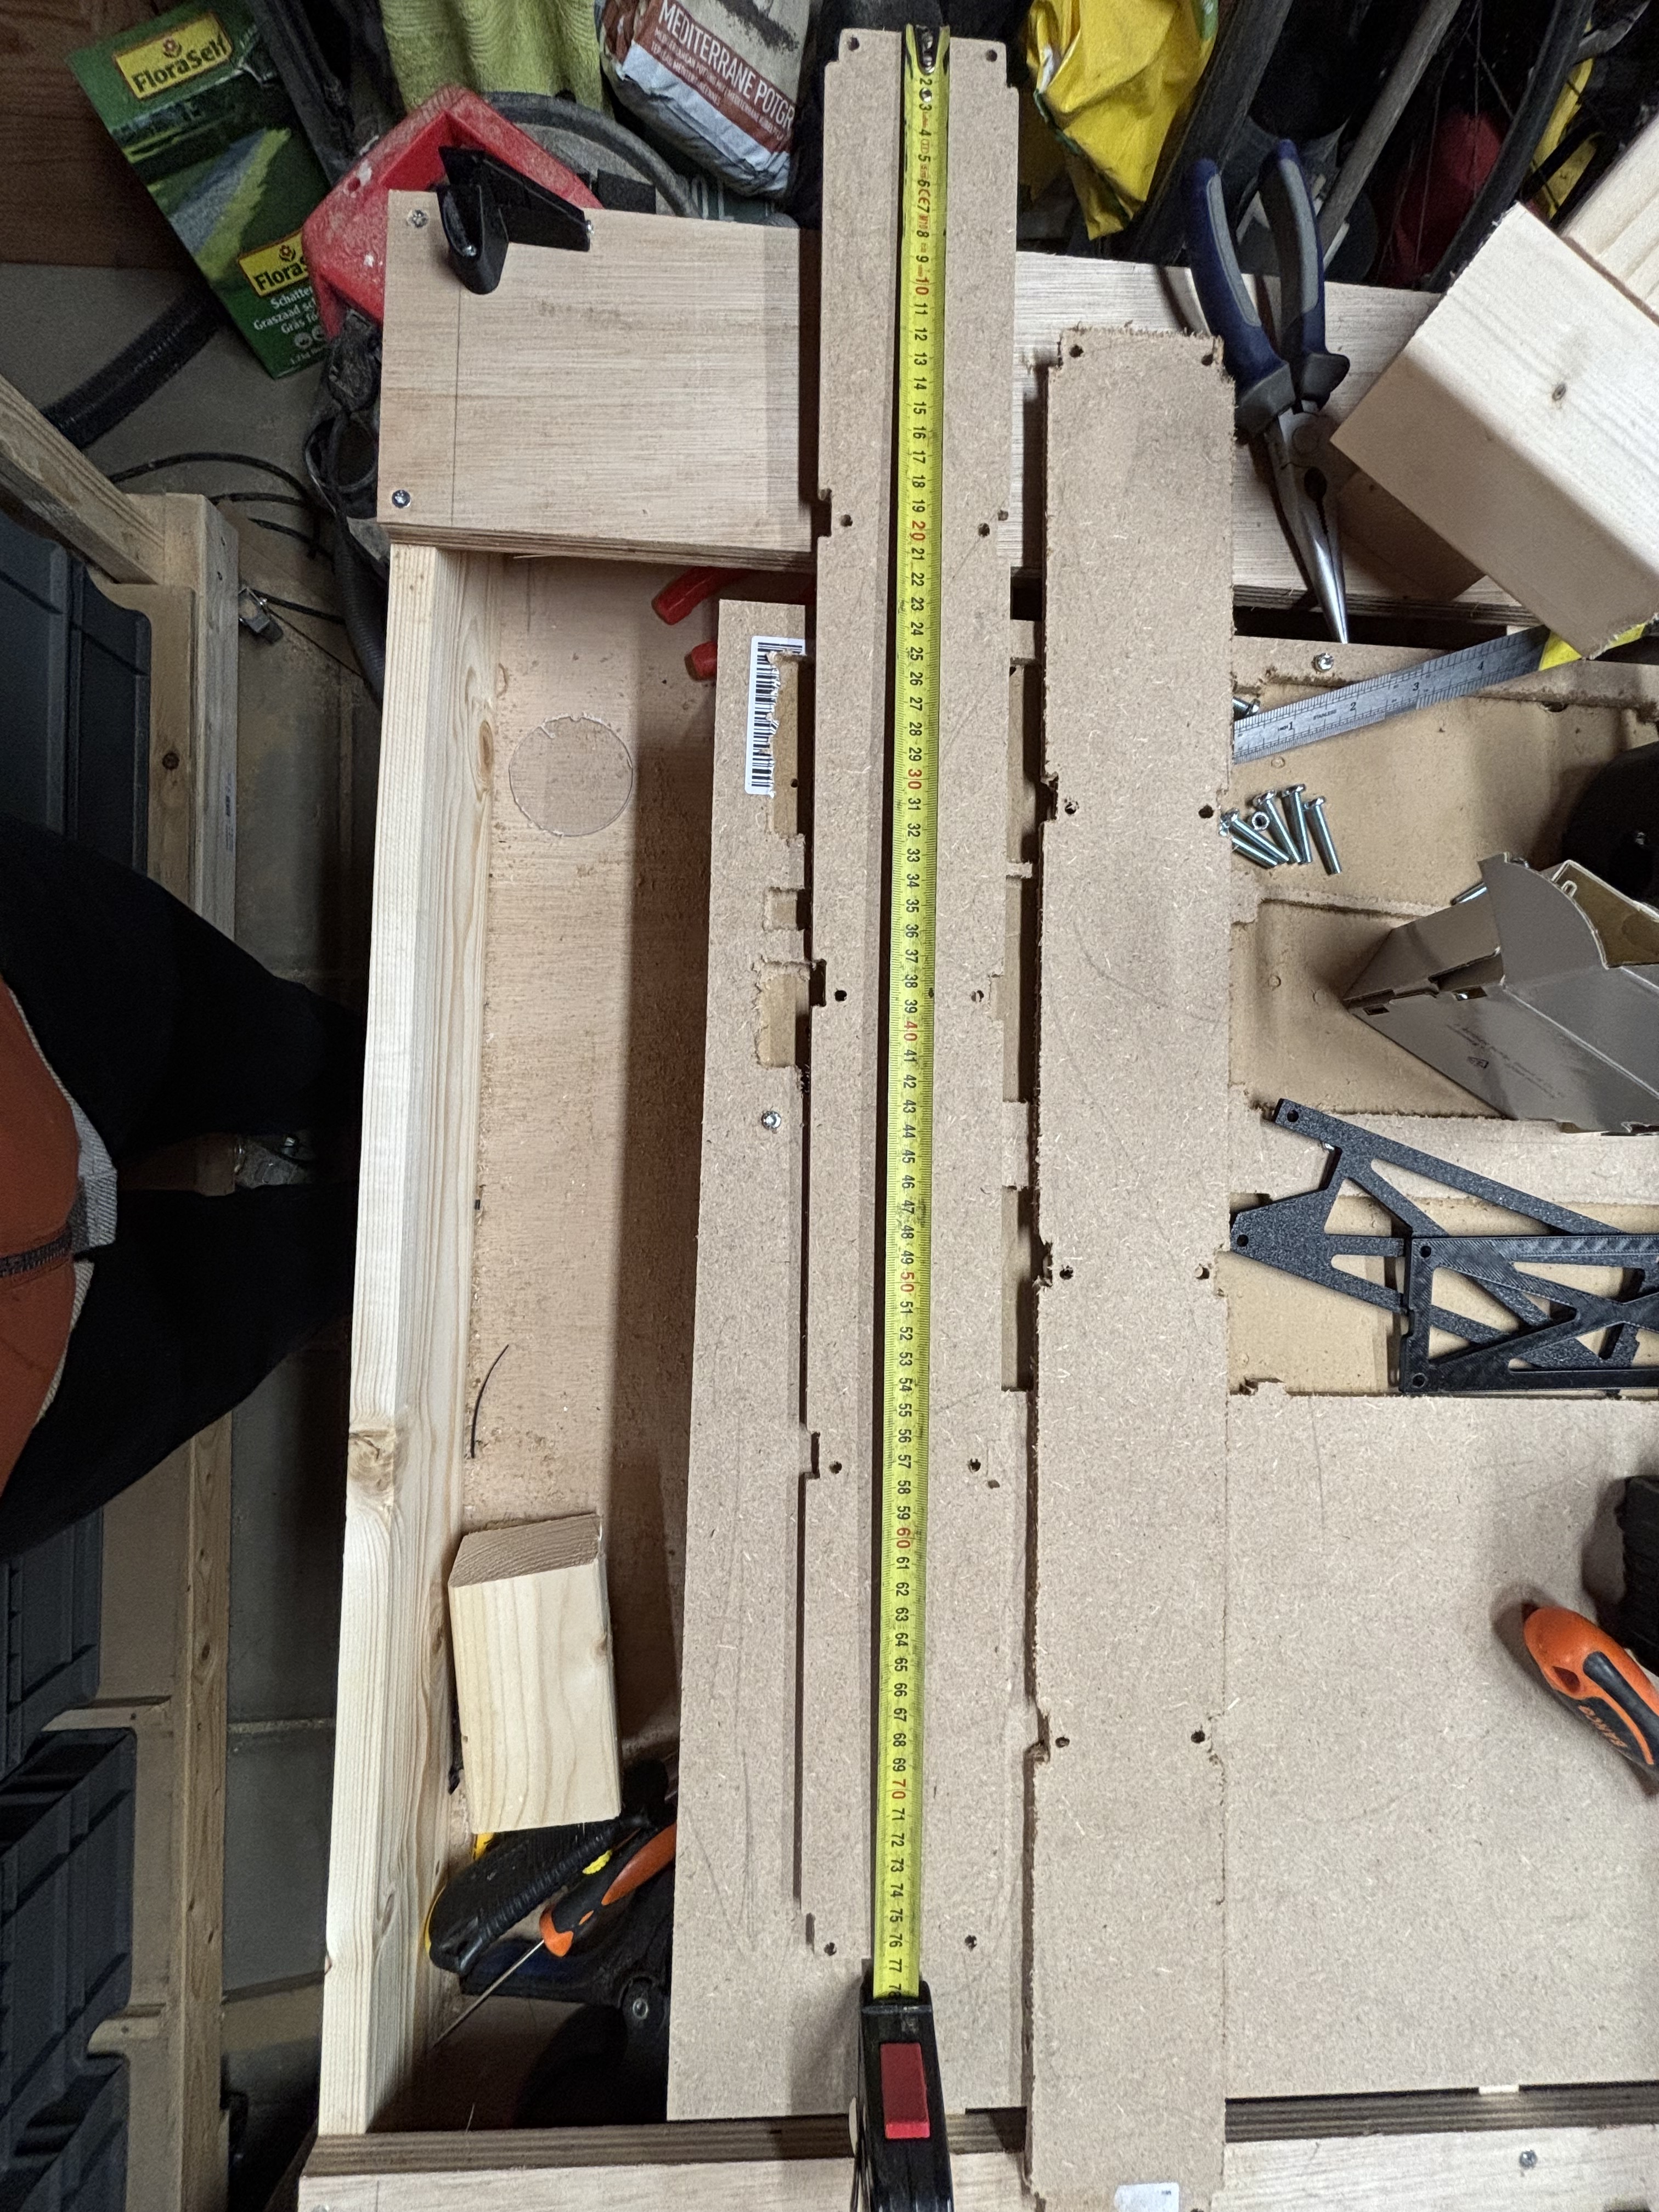
Ok did some measurements today. The holes seem to be correct, they line up exactly the same with every plate. Also the length and width seem correct. It is the notches that are off, but the amount differs per strut, so I think I can rule out the CAM (made same one twice). I now will put back the temp struts, check the wiring, redo the squaring and then I’ll draw the struts with pen insert first to see if there is an error somewhere.
Today I finally had some time to troubleshoot. After reading some other posts with issues, I first wanted to check the grub screws. And yes, some were loose. So I added some loctite and fasten them. Resquared the machine and cut one strut plate again. It looks to be so much better now.
I’ll try to make a suggestion to the manual, as at the step of grub screws the loctite is not mentioned (only mentioned at list of materials).
It was taken out because sometimes it is more trouble than it is helping. I think the solution was not to use the red bottle but some other colour that does not bind that well.
No these were my first cuts. But now that I checked the grubscrews, and especially the y0 was loose, the strut plates came out with correct dimensions. When I have the time again I’m going to fine tune squaring and make some dimensional cuts.
I’m using estlcam and all in mm. Cnc has a skr 1.2 pro board. For the correct struts I did make new gcode files (change in depth and speed, and router bit) but for the rest the same process. So for now I hope it is solved with the grub screw fix!