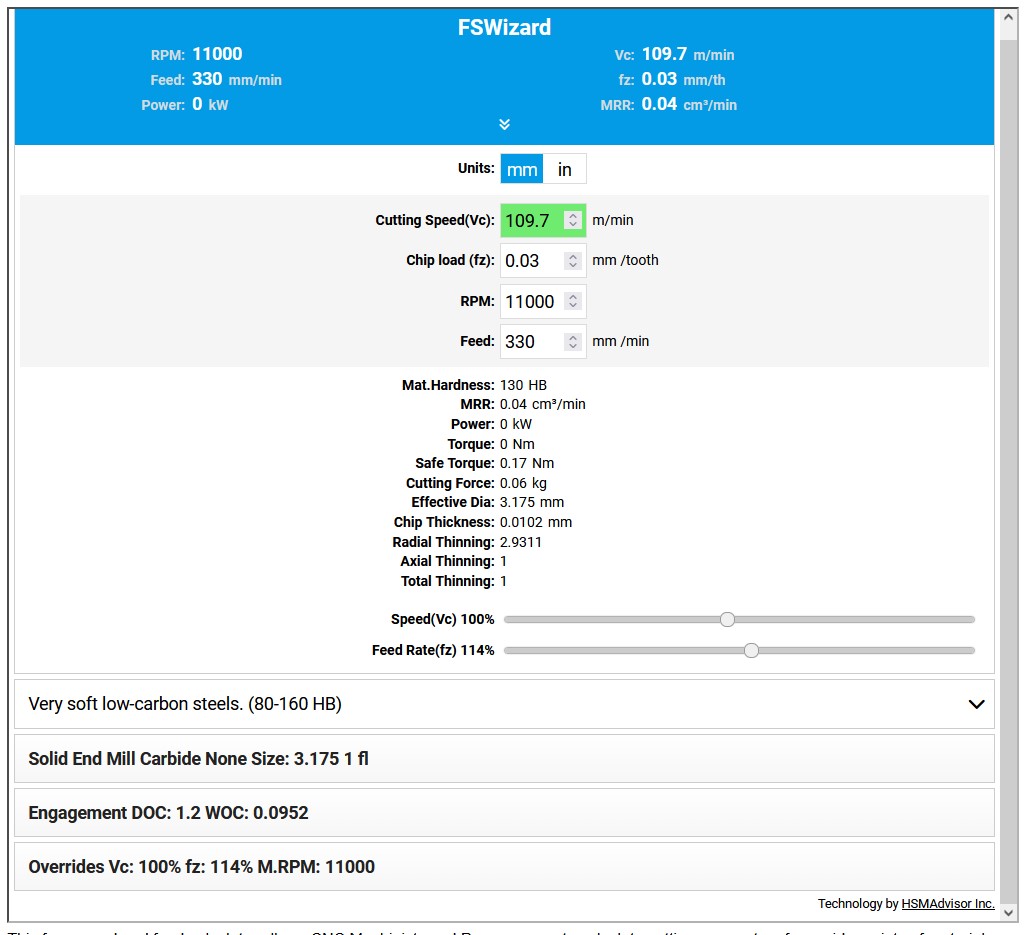
Did a few test cuts today in mild steel. Although not perfect this is a good cut and with a few minor adjustments I think this can be a decent recipe to do it again.
The Makita 700 series router was at a speed of about 1.25
00:00 - The finished cut closeup
00:17 - Initial plunge, should have ground off mill scale
00:54 - 1.2mm DOC, 5.5mm/s, 3% step over
08:30 - Cleanup walls
08:54 - Second plunge
09:35 - side milling
13:02 - Pushing a tiny burr, needs slower rpm or faster feed rate
17:10 - cleanup walls-hear how uneven it is means less than ideal cut.
17:33- more pictures
For the next time I would decrease plunge angle a half a degree and speed up plunge feed rate. Grinding off the hard mill scale would help the initial plunge. I also had a better cut with a 1mm step down and a bit faster feed rate, that also allows for a bit slower on the router RPM. No pushing burrs.
When you are in the ballpark there are a few key things you can pay attention too.
Broken- Too big or too small of a bite and you break an end mill for different reasons.
Burr- Making any sort of burr means you are pushing material instead of cutting it=you need a bigger bite. That means slower RPM or faster feedrate.
Chatter- means you need a bit more router speed or slow down the feedrate.
Heat- The steel should not get hot, hot means you are rubbing and not taking a big enough chip to disipate the heat.
If you are going to try this yourself. Use the same numbers with a 0.2mm DOC, work your way up. Always use trochoidal, slotting is not easy. If you do not need to plunge through the material and can start in a predrilled hole or off to the side, much deeper cut can be had and at that point adjust the feedrate.
There is a minimum step over and minimum DOC, I am thinking 2% and 0.2mm are pretty close to the lower limit.
Great results! I am wondering about the burr implying that the bites are too small. I thought that some amount of burr is going to be normal under most conditions. Is it because you are trying to avoid the burr itself, or it is an indicator of the chip load, or something else?
I broke a handful of bits messing with feedrate and rpm on the fly trying to dial things in. In wood there is very little feedback in steel it is very clear when you increase 10%. So a burr means you are pushing the metal, not cutting. I tis very clear when you are cutting if that tiny burr starts to form you decrease the RPM or increase the feedrate a tiny bit and after a few passes it goes away.
Also I need to add in there Touching the metal is a very good indicator as well. just above room temp is good, hot means you are rubbing more than cutting. That last cut was not much above room temp. My first cut was too hot to touch. You can see the quality difference in some of the last pictures and see rubbing and burrs.
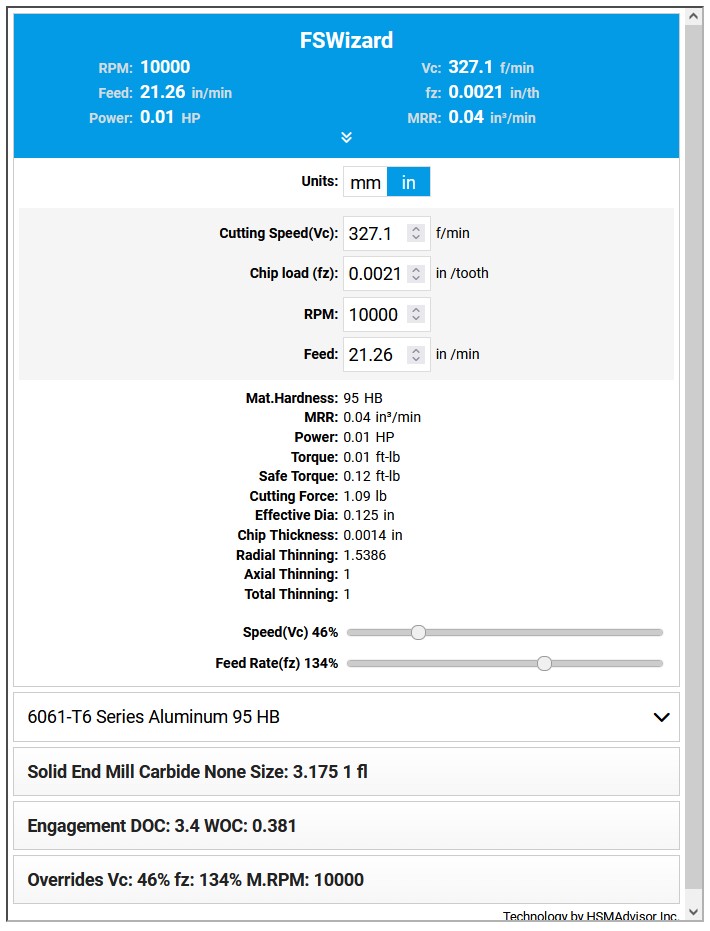
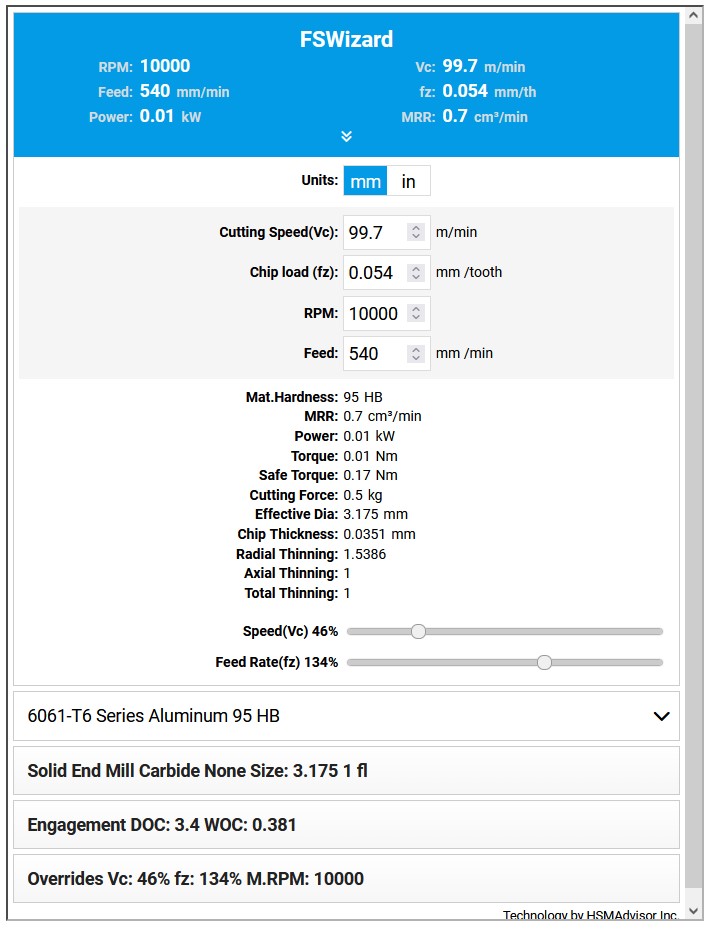
I think I can use this to go into Aluminum and get much faster results.
Oh and the other single flutes I have chip too easily, the Kyocera work best. In aluminum the other ones I think work better as the Kyocera have a smaller chip channel.
Firstly, thanks for doing these tests, it show you are constantly pushing and upgrading your products.
(i guess so does the fact you released the LR3, but you keep going)
My question revolves around the AIR Assist / cooling.
I plan on cutting a bit of Aluminium for part for the brothers race car parts and other things like engraving of aluminium. So I noticed that in this video you use it for chip evacuation, but I have noticed that you don’t really use cooling or air assist for Aluminium.
Clearly the bigger machine can take bigger bites and hence more heat, So with steel being much harder than Aluminium, does that mean you choose to take smaller bits to not use cooling?
I will add that i understand the use of flood cooling is not simple cos of its nature and most of us use a wood surface. But mist like the one you linked too does not seem like it would affect the surface too bad. (we can put aside the fact that aerosolized coolant does need to be enclosed and evacuated so you are not breathing it in, as a given.)
I didn’t show it in the aluminum clip I just did because I wanted to see how it went without it. I can tell you with it and spraying the tinest bit of IPA (I had 90% but I bet 70% is fine) Works wonders on aluminum. The next round of testing I do will be with aluminum and the the IPA mist. For ~$12 it really really helps with aluminum and evaporates before it makes a mess.
Aluminum is still lighter, (cheaper shipping) easier to do, corrosion resistant, and plenty rigid enough for these parts. Makes more sense, but steel is pretty bad-ass! (Which is why I bought the steel XZ plates for my LR3, even though the aluminum is excellent.)
I don’t see myself using the LR3 for steel, unless I build a plasma cutter one (tempted, not gonna lie.) But there are some 3D printer parts that I could 100% see wanting to try in aluminum.
I think I am happy with where this sits currently. I am sure I could eek out a bit more MRR, but really I am not planning on milling much if any steel. I should calculate the numbers for this to see where it is.
Now I think I am going to set my sights on Aluminum again, that and see what if any changes I might be able to make with the LR3 itself. I enjoy this kind of stuff the most. It is frustrating, kinda expensive (I broke a lot of endmills), but in the end it is awesome and I can use these numbers to test other ideas and machines to see if they are better. For example, can I do better in steel with my considerably smaller MPCNC? I should be able to…but that is not proven.
99% would be plasma. If I needed any Z features, then milling would come into play. Even then, usually you can get away with bending the steel along a plasma perforation, or welding something on.