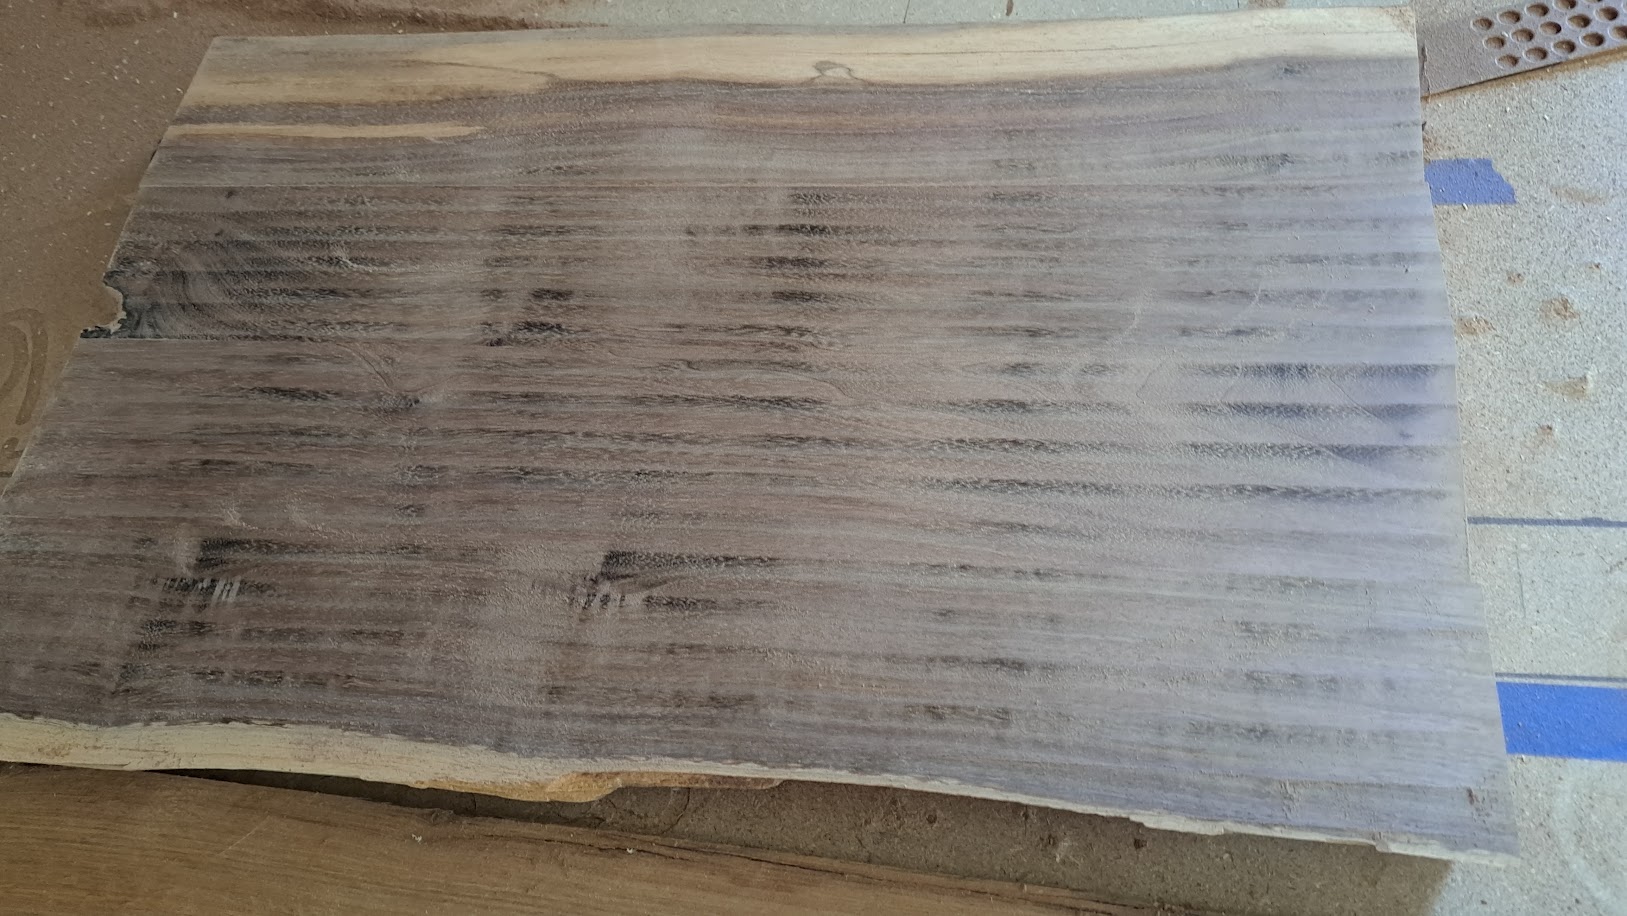
Walnut is too pricey for trial and error so I figured I might benefit from someone else’s experience. This is my first time using this surfacing bit (1 in) I am running my spindle at roughly 75% so estimating 12,000 rpm. Surface speed is set at 90 in/min. Overlap is set at 35%.
I am getting these burn marks. Is my surface speed too slow or is the spindle speed too high?
I’d also turn the speed down. I think I had mine on 3-4 for surfacing hardwood. Alsso, if you are only taking off a tiny amount, the burn marks are there faster because there are no chips to transport the heat. At least in my observations. Take off 1-2mm, everything is fine, take of 0.2 with the same settings, it burns.
This is beech and larch (the second one not being hardwood), you can see that it takes of like 2mm and the beech does not have any burn marks: Planing a board prototype - YouTube
Im thinking the same thing. After reading some of these answers and thinking about it more, I was getting a very fine saw dust (which I saved for wood filler). I agree with your chip comment. I think my spindle speed was too high for the surface rate and it was making the chips way too small. I have a couple more to do so I will test it and post results hopefully this weekend.
It can actually be beneficial if your spindle is not quite trammed perfectly. If you can figure out which side is the low side (cuts slightly deeper) and you only cut one direction where the deep side is leading, then the bit will only cut radially and not touch axially. If the high (shallow) side leads, then the bit rubs axially.
Or just make a square and observe empirically if some sides are burned and others aren’t.
@jamiek thanks for the pointer. That makes total sense now that I think about it and would explain why it is showing up more with wider bits. I will have to check into that more.
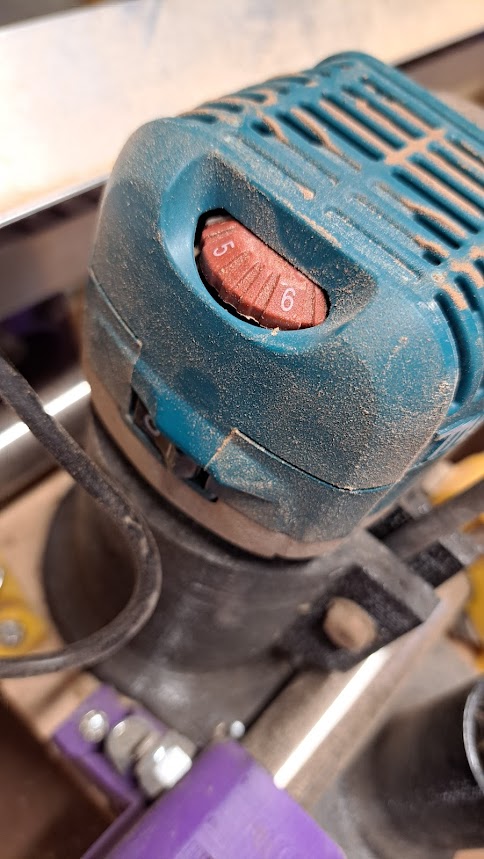
I dropped the spindle down to 4 and pushed my surface speed up to more in the 90in/min range. To @truglodite, The spindle actually seems to handle the 1" bit just fine. Doesn’t bog down at all, however, I am also taking very shallow 1 to 2 mm passes trying to save as much thickness as possible on these boards.
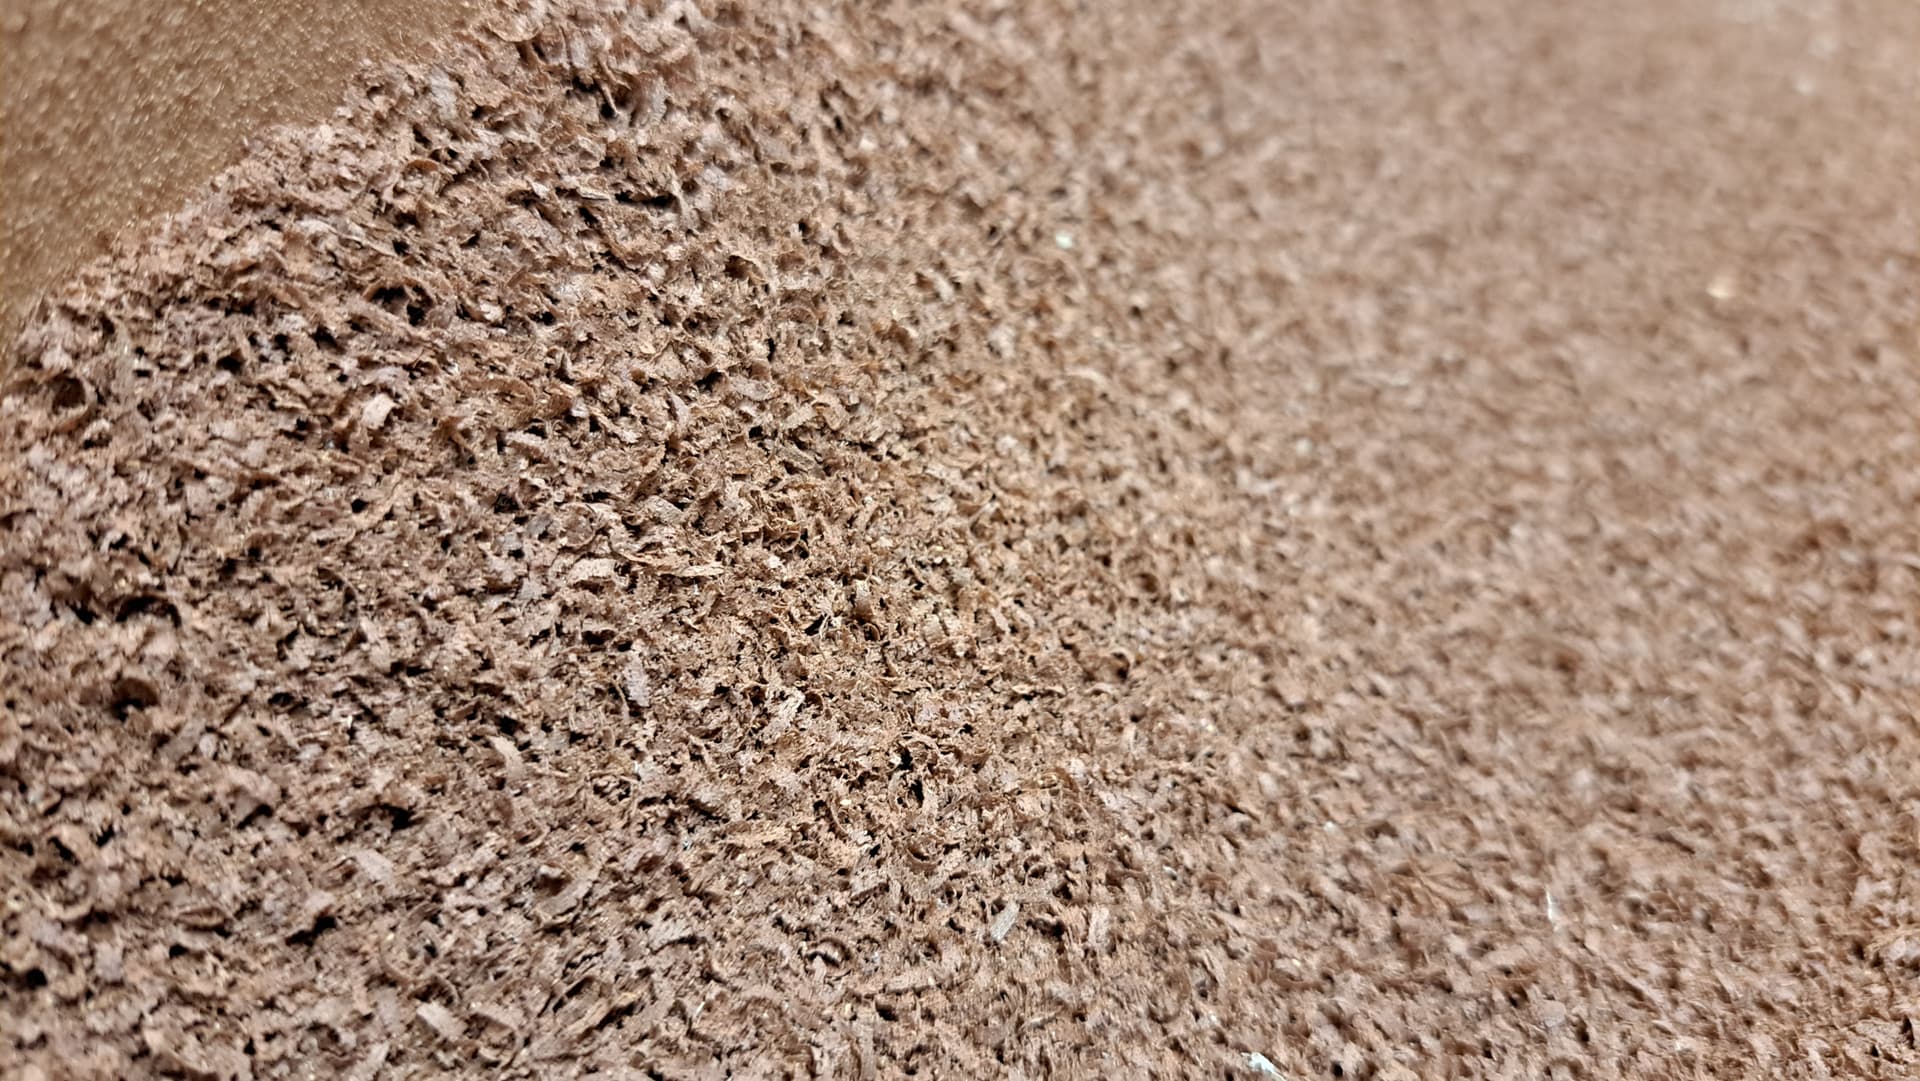
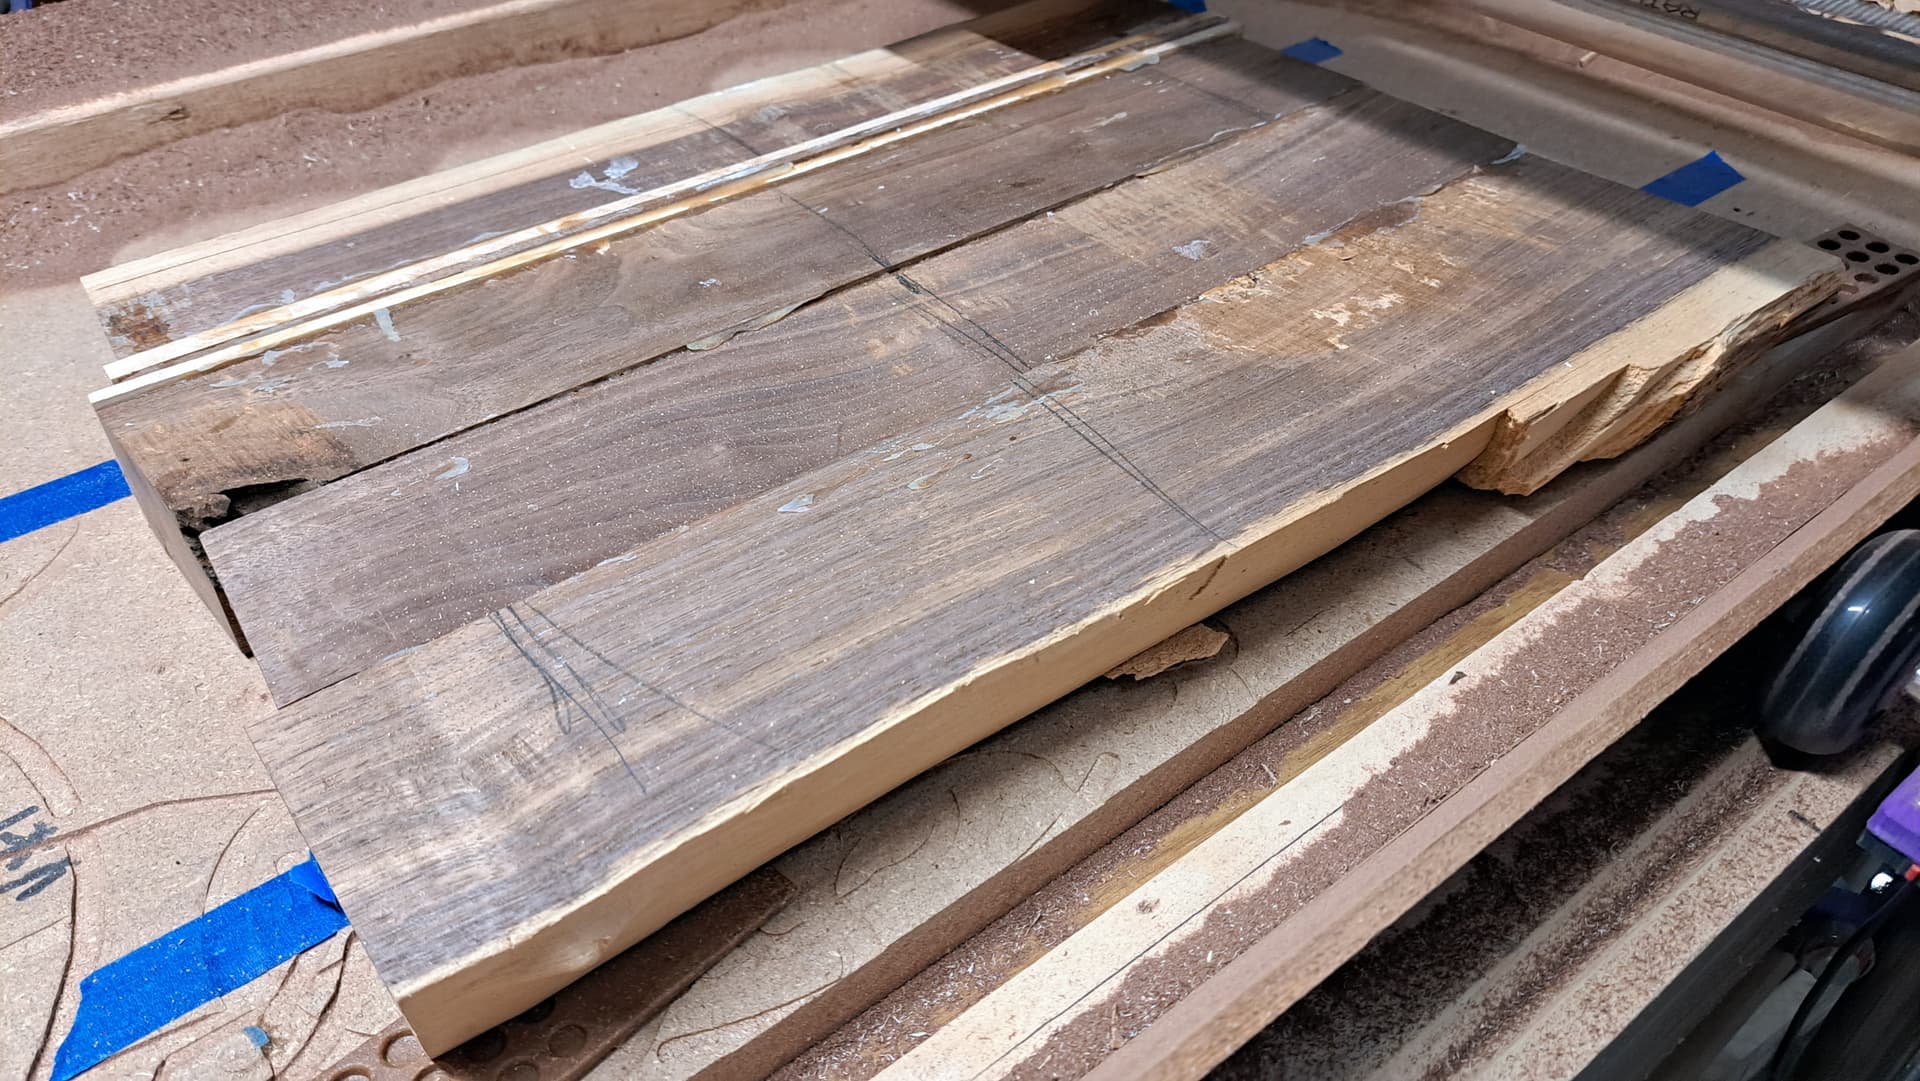
Anyway, I am now getting actual wood chips instead of wood dust and the burning seems to have completely stopped. Now on to figuring out the ‘tramming’ @jamiek mentioned because there is a noticeable, not horrible, height difference from one side of the pass to the other.
Those chips may be short, but they’re plenty thick… looking good!
Adjusting tramming is actually one of the easier parts of tuning. You just need a rod or bit that fits the collet, and a printer to make a tramming tool for it (even a coat hanger would work if you could chuck it up hehe). It doesn’t have to be huge, but the longer the arm is the more resolution you get (~4" is plenty). Then you just rotate the tool over the spoil board to see what side is high, and shim the router mount until it is level. For example say the tool barely touches the spoil board at 9 o-clock, and is highest off the board at 3 o-clock. Then adding shim(s) low in the mount at 3 o-clock, and/or a shim high in the mount at 9 o-clock should provide tweak you need to get it squared up. I use strips of brass shim for this, and a bit of blue painters tape to tack them in place.
Once it’s trammed, it may still leave lines due to gantry flex. Not much you can do about that, other than cutting one direction. It is also very likely your machine flexes differently depending on the direction of cut. So it may be worth while to experiment with cutting direction and see if one way works better than others.
[edit: Just realized I may have got ahead of myself there. Before adjusting tramming with shims, you first should do everything you can with the core itself to get it as close to trammed as possible. Adjusting the core clamps and z bearing wedges can make a difference. Do that type of stuff first before adding the shims… that way you minimize any xy errors as z changes.