Hi I have a Rambo 1.3 board running a dual end stop MPCNC setup. Been working absolutely fine for a few years. I use a trim router with it and currently I manually turn the motor on and off. I have just completed an automated z height calibration routine and now want to control the router on/off from gcode. This means that when the job is ready to go I can press start and it will auto z probe, turn the motor on and begin the job for me. I cut a lot of ABS lids and to enable this level of automation would be a nice time saver for me.
I would do this through an SSR and am hoping there is io available. Does anyone have any links to info on controlling the io of this board through gcode command? Maybe I can use the the Extruder outputs or the heatbed FETS somehow?
I am using Estlcam and do everything through a gcode startup script.
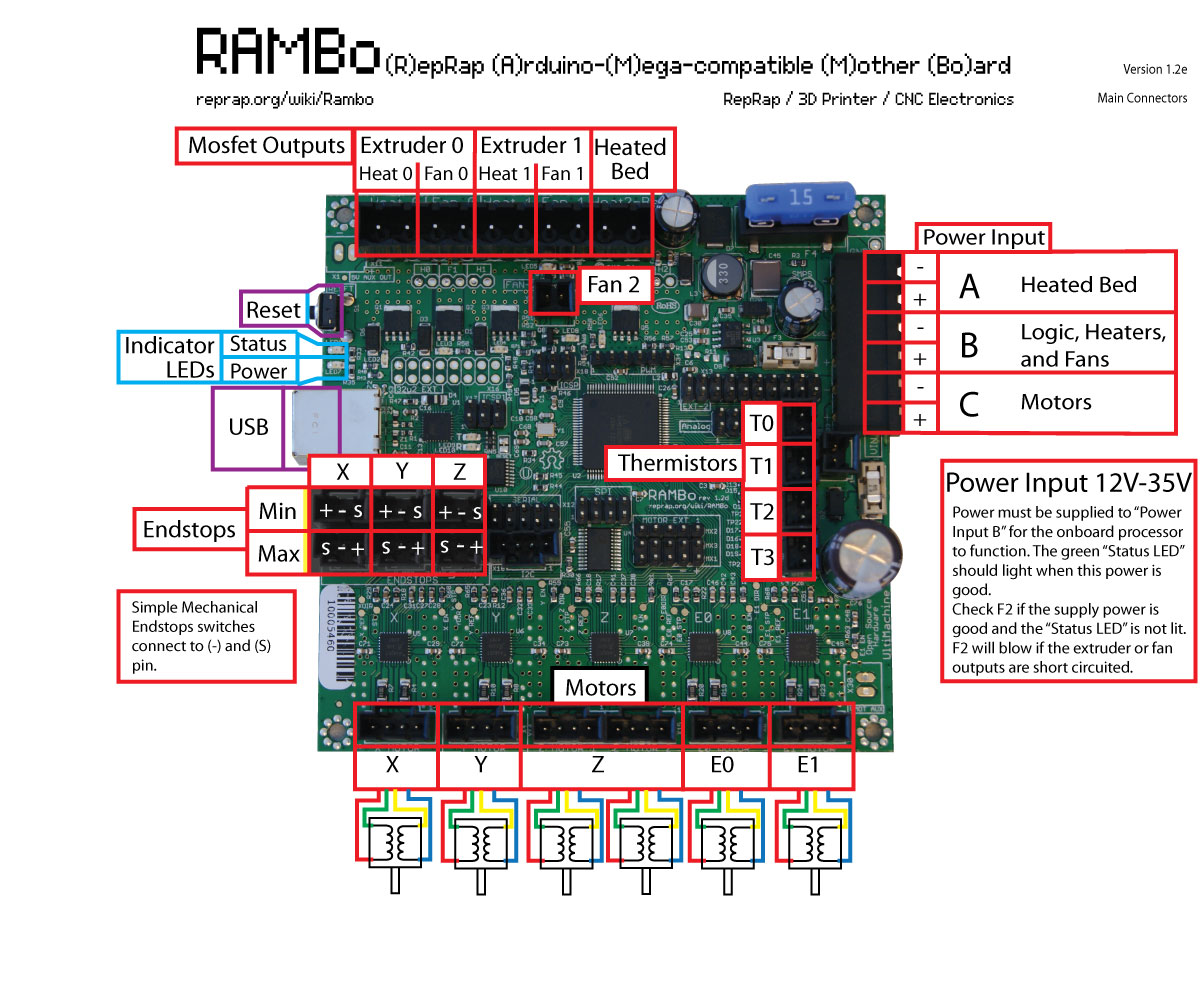
The Rambo uses pin22 for mist and 44 for flood by default but there is nothing stopping you re-defining the heater bed pin for this use. HEATER_0_PIN is currently pin 9 so changing to - (in marlin/src/pins/rambo.h)
HEATER_0_PIN 7
and
COOLANT_MIST_PIN 9
should allow you to use M7 to turn the heater FeT on and M9 to turn it off.
Hi Mike, thanks for the reply. I do not use any cooling options. I use something like this to blow the chips away.
I was hoping there might be something I could do without the need to recompile the code but if there are easy instructions somewhere on the site to show how to do it I might be willing to give it a go.
I assume the MPCNC Marlin code removes the extruder code? There are fan outputs on Extruder 0 and Extruder 1 that would do the job maybe with M106 and M107 commands.