How are you creating multiple .gcode files for each bit type from a single EstlCam project?
One approach is:
- Create a ‘master’ EstlCam project file with everything
- Save that project
- For each bit type
- Selectively delete toolpaths for the other bits
- Save .gcode for the remaining path(s) you kept for the current bit
- Reload the ‘master’ project
Am not churning out the same parts again and again. Am doing more one offs, and end up spending more time editing. So, I may as well do that well…
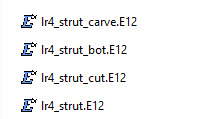
My process feels suboptimal (stupid), I create a ‘master’ file with everything carves/cuts/contours/whatever… Save that project, then save variants of that project with just toolpaths by a specific type.
Something conceptually like Adobe Photoshop layers would be nice. Export by layer… I understand EstlCam has layers, but don’t understand them, yet. Maybe that’s the solution?
@christian-knuell Would be nice if EstlCam supported saving .gcode by bit type instead of single file with everything. For example, consider extending the Save CNC Program popup to render treeview with checkbox selection for tool types…
Personally prefer to run separate files rather than a single file containing change tool prompts and Z probe macro, especially after losing XY reference in the past when the router was nudged during a tool change.
Also, is there a way to change XY orientation in EstlCam to better match a stock portrait build? Would like Y+ to be horizontal (left to right), X+ (top to bottom)? fwiw my “Landscape” LR3 rendered on landscape monitor very nicely. My stock LR4 build being “Portrait” oriented doesn’t render as nice, and, my monitor is too large/cumbersome to turn vertically.

Maybe people use a postprocessor to split gcode by tool type, and/or transpose .gcode between Design oriented coords and machine oriented coords? Or, just change XY coords in FluidNC config to match landscape design?