I am in the process of finalising my crown testing and thought I would get set up for the Strut Plate cuts - exciting stuff - and so wanted to confirm I am doing and thinking about this right.
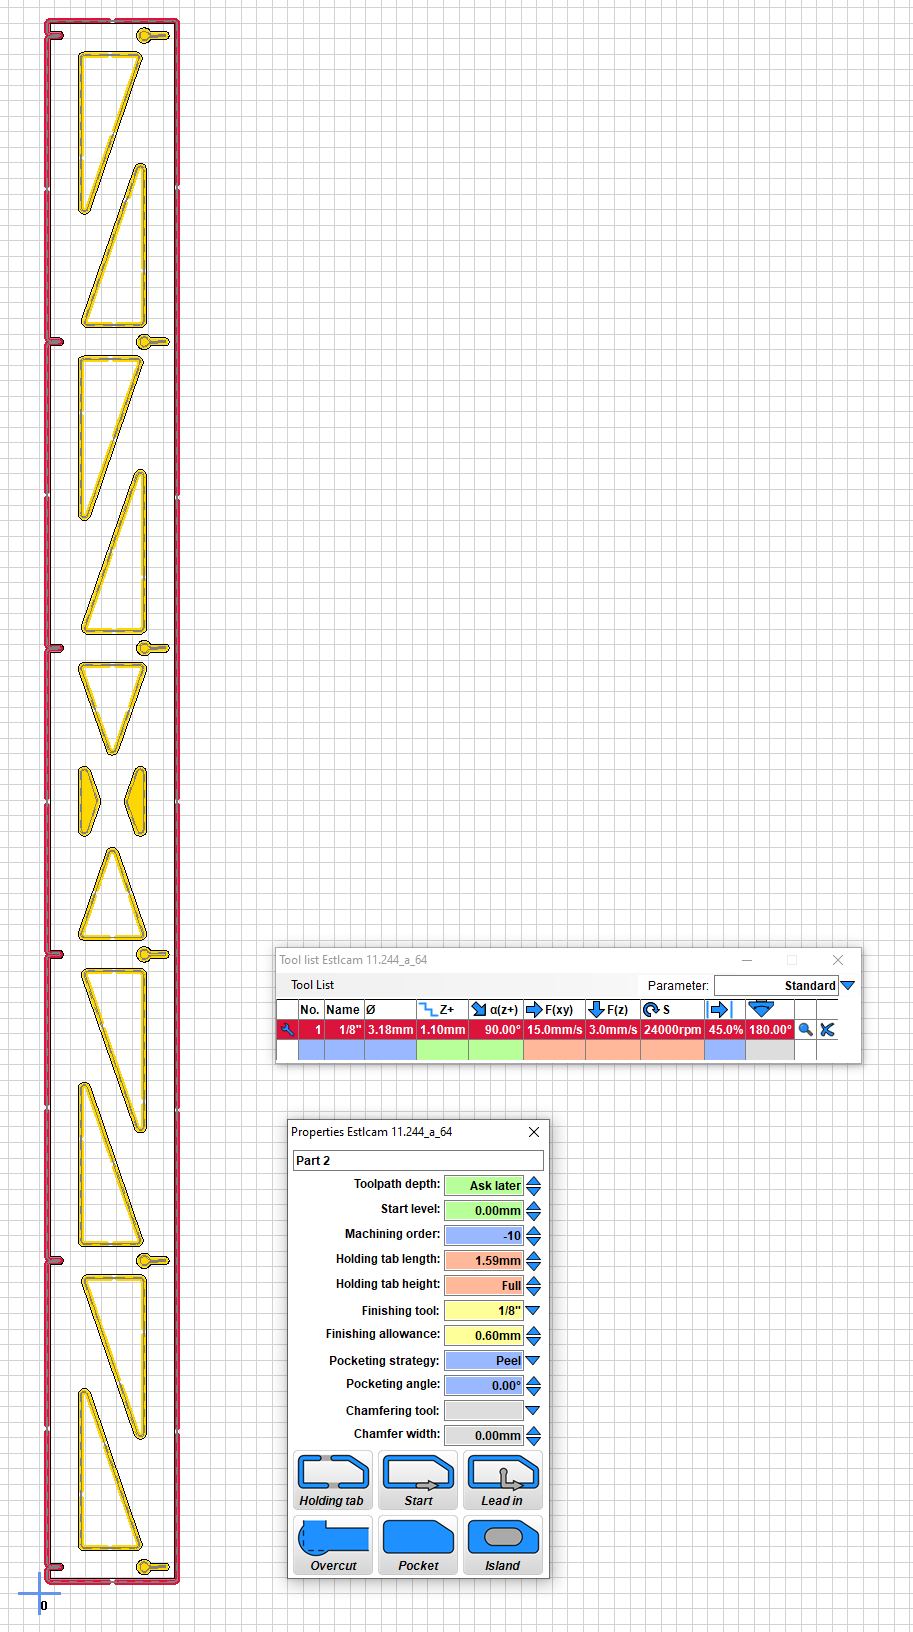
So I have followed the tutorial on Estlcam to do the crown and am now working through the milling. For my Struts they are exactly 1m in length (to match the X poles).
I have brought them in to Estlcam and rotated ready for cutting vertically to follow the side of the Lowrider as suggested and then set up the cuts. I decided on having the entire piece as a “Part” which is cut last and has holding tabs between each section.
The smallest holes and two triangles also are done as full pockets with the remaining large triangles as “Holes” with 3 tabs per triangle.
Finally, the wood I’ll be using is Marine Grade Ply 6mm. The cut depth I have set to 1.1mm, and so the depth of the cut in Estlcam I have set to 6.6mm?
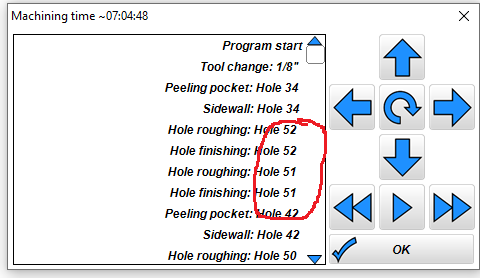
When I then go to export/preview - it is telling me the cut time will be roughly 7 hours - is that correct, or have I gone too conservative somewhere?
Full pockets do take time, you could probably up your feeds and speeds, though. 900mm/min (15mm/s) is still fairly conservative. a DOC of 1.1mm also means that it needs Also check your stepover for the pockets.
For the screw holes, pocketing shouldn’t be necessary.Just cutting it out will do fine.
The biggest thing that you can do for the cut time is increase the depth of cut. 1.1mm is super conservative. I have mine set to 3.5mm, which means for anything thicker than 2mm my cut time would be less than 1/3 right there. While you’re cutting your struts isn’I would set the depth of cut to 3.3mm, to reduce the number of passes.
Oh, and though these bits are nominally 1/8" cut a few small squares and measure with calipers. I find that my 1/8" bits (from the V1 store) cut a kerf that is somewhere between 3.00mm and 3.05mm depending on material.
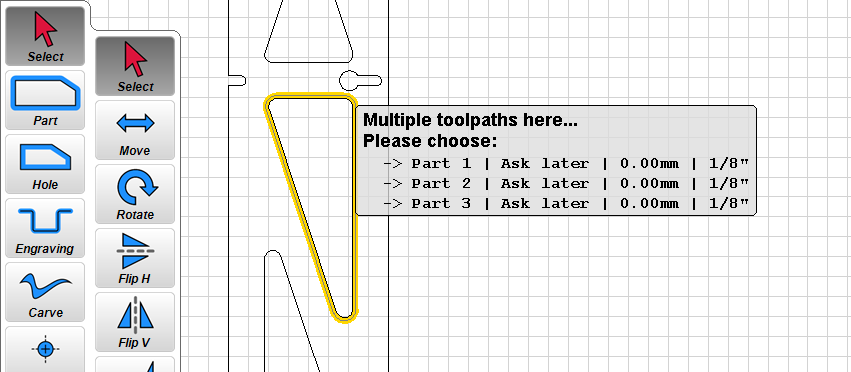
Beware that EstlCam will happily let you define multiple (redundant!) cut toolpaths for the same hole/contour. Wondering if this is the cause since your strut doesn’t have 50+ holes.
You can easily end up getting into this situation if you have “Part” or “Hole” selected in the lefthand toolbox, during a moment when you were actually trying to select a profile. Instead of selecting, you end up unwittingly adding more toolpath definitions. Happened to me a few times…
One way to determine if you have multiple redundant toolpaths selected it to ensure “Select” is selected. Then click on the profiles, you’ll see a popup if there’s multiple toolpaths. Delete the redundant ones if you have any.
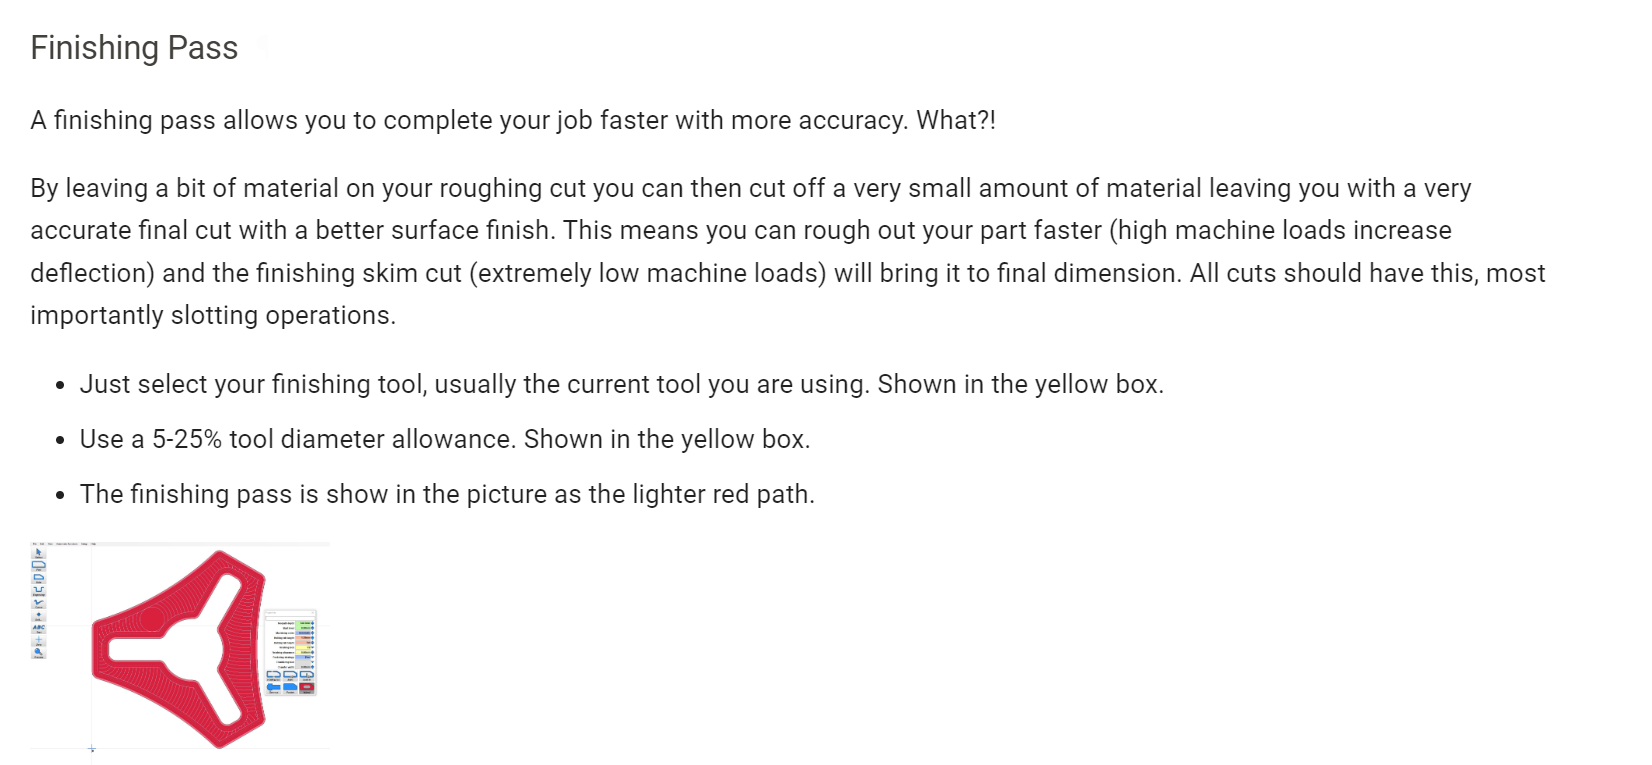
Finishing pass is recommended wherever size tolerance is important. For the holes in the strut plate, I would call that unimportant, and I didn’t use finishing passes for mine either. I did use a finishing pass for the outside, to get a more accurate 80mm width, but not for any of the holes (Including the keyhole screw holes) as the precise sizing seemed unimportant to the fit and function of the strut plate. (The screw holes might have been, but since they were small, the tolerance deviation was also small enough not to matter.)
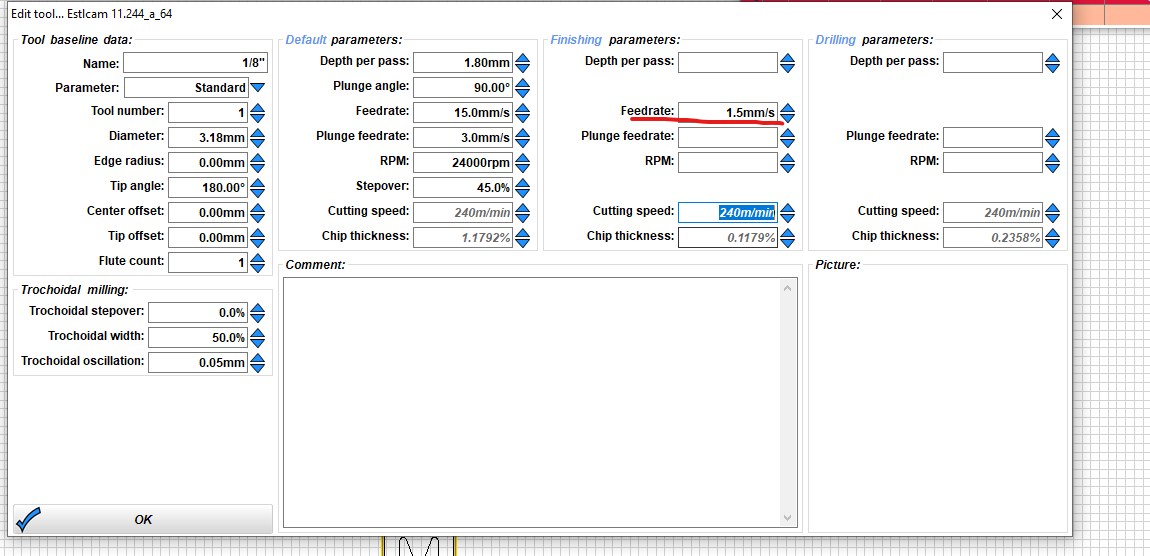
Interesting. I went back in and checked my file and it looks like the finishing pass (which I applied to all the cuts) were what were adding a tonne of time (I have have got the stats wrong):
I have the feedrate at about 10% of the default paramters - is this correct? Or is the 10% to be applied on a different setting?
As an example, just cutting the outside of the strut with these settings is about 10 min, whilst adding the finishing pass brings it up to just shy of 2 hours.
I must have a setting incorrect on my Estlcam Tool…
And it should be able to cut at full depth. So if you were doing 2-3 passes for a roughing cut, leaving 0.2mm of material, the finishing pass should come through on the line in one pass and make everything precisely the right size.
I’m not sure if anyone mentioned but your final depth does not necessarily have to be an exact multiple of your depth of cut per pass (DOC). If you set it different such as 6.1 mm final depth then the last layer will be a little less on its DOC.
0.6 mm more than the thickness of your material seems like more overage than needed. If your table’s lack of flatness is pronounced then you might need to do that. Otherwise you will have gouges in your spoil board.
No stones to throw. My table’s lack of flatness has been pretty pronounced and I have some gouges!!!
Cool ok that makes sense. Going over my settings I misinterpretted this section on the FAQ and went with a 10% speed instead of 10% of the router bit diameter, which means it would have been moving externaly slowly around the cut.
In a finishing pass, yes, it can handle full depth.
A roughing pass is the first pass. The roughing pass cuts the full width of the bit (3.175mm for 1/8" bit). The finishing pass only has a few tenths of a mm left. So it can handle a full depth cut. Even 3/4", if the bit has that much cutting length.
You can hear it doing something. But you really can’t see it, it is such a small amount of material getting removed. It is just kissing the surface to bring it into dimension, while keeping the bit straight, with almost no load.