Selekta_andy's LR3 Build

I got my first spool loaded, tunes spun up, and my shop manager watching the prints. Here. We. Go.


The soundtrack for this post is a UK ragga jungle banger from 1994 by M Beat & General Levy called ‘Incredible’. I think it’s fitting for the start of the build of this incredible machine.
https://www.youtube.com/watch?v=mL2Bgj-za5k

5 Likes

The first layer of the first part on your first build…Frame that picture!

4 Likes

I got a little lift on the one side of the core piece. Should i kill it and start over? Or is that not going to matter?

If it lifts any more cancel it. Where it is at should be okay.

2 Likes

It lifted a little more last night, so i killed it. Noticed the bed was a little wonky… This is a Ender3 i got stupid cheap that was an Amazon return, and i apparently didn’t pay close enough attention to square when i slapped it together a few weeks ago. It was close enough for my small test prints, but apparently not for larger stuff. At that point i was about 4 beers in, and didn’t feel like ripping it apart.

Got up this morning and tore the whole thing down. Re-squared everything and it looks much better now… Just kicked off the core, so… Here. We. Go… Again! lol…

https://www.youtube.com/watch?v=dTAAsCNK7RA

8 Likes

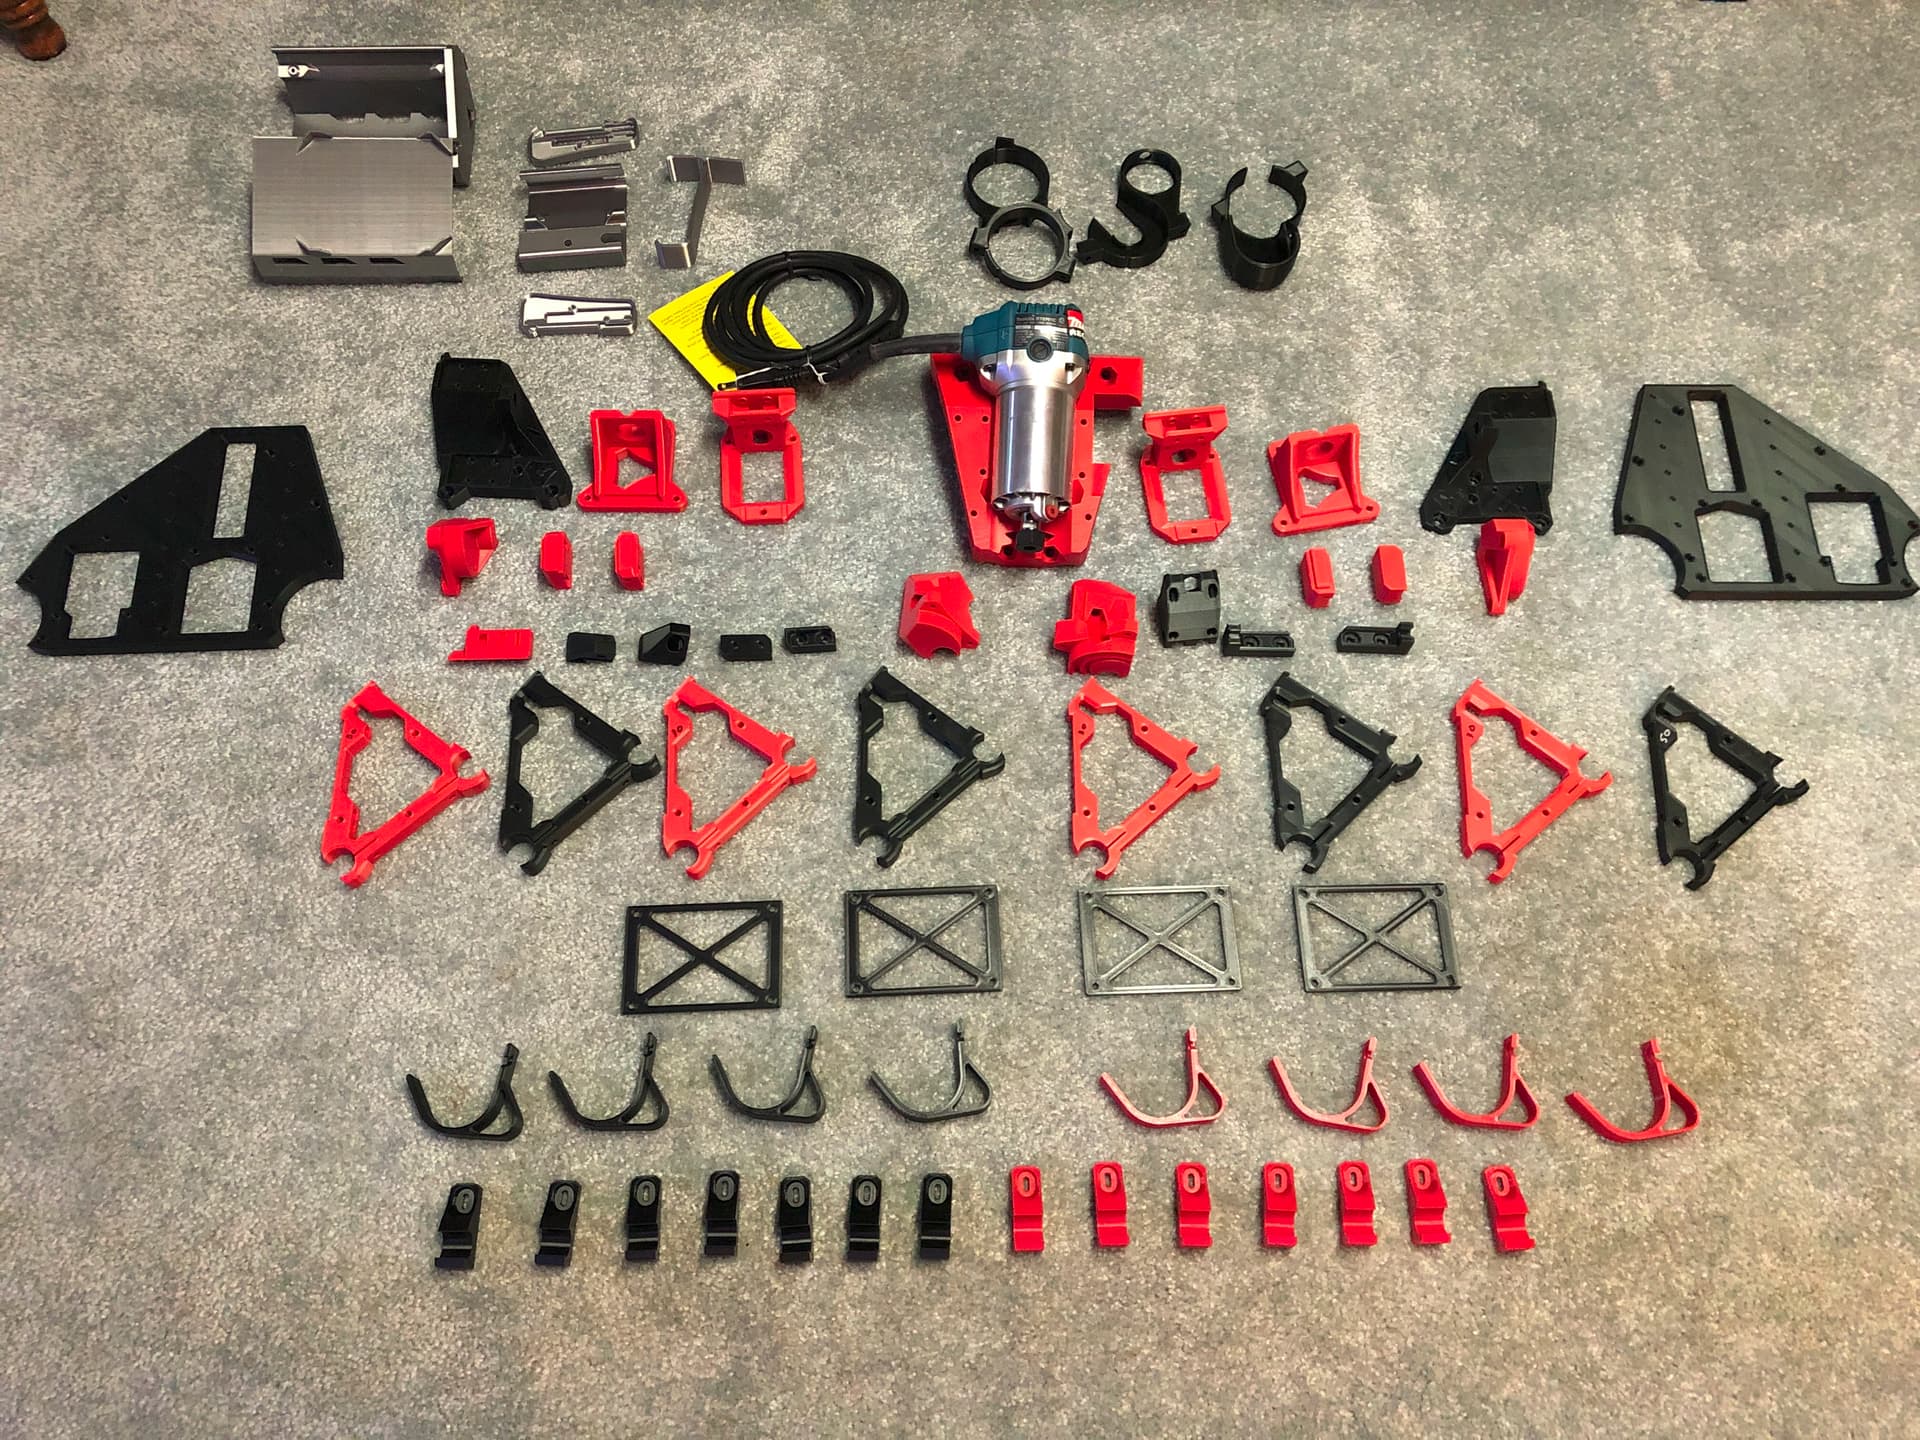
Okay… I’m pretty sure i have all my parts printed. I’ve included print times below in case that helps anyone plan. My SKR, screen, stepper drivers, and Makita router showed up while i was printing, so i think the only thing i’m missing (besides a table) is the EMT, and a vacuum hose for the dust collection.

I think i’m going to go with the knock down style table @Mcunn made in this thread:

Has anyone adapted the cradle for a full size LR3 build yet? I think i’m going to try to tackle that next week or the week after, depending on how assembly goes.

3 Likes
Part # pieces Time/piece Total Color
LR Core 1 01:10:11 01:10:11 Red
X Drive Mount 1 00:04:04 00:04:04 Black
Y Drive 2 00:05:26 00:10:52 Red
Z Drive 2 00:06:09 00:12:18 Red
Temporary Strut 4 00:01:45 00:07:00 Black
Front Rail Roller 1 00:05:23 00:05:23 Red
Rear Rail Roller 1 00:06:01 00:06:01 Red
Bearing Wheel Bracket Front 1 00:03:56 00:03:56 Red
Bearing Wheel Bracket Rear 1 00:04:07 00:04:07 Red
Z Stop 1 00:00:54 00:00:54 Black
Z Stop M 1 00:00:54 00:00:54 Black
Brace 8 00:06:38/50% / 00:05:47/30% 01:23:58 4 red/4 black
Hose Hanger 8 00:01:41 00:09:28 4 black/4 red
X Tensioner 1 00:01:24 00:01:24 Red
XZ Plate Left 1 00:13:10 00:13:10 Black
XZ Plate Right 1 00:13:10 00:13:10 Black
Front Y Belt Holder 1 00:01:21 00:01:21 Red
Front Y Belt Base 1 00:00:46 00:00:46 Black
Front Y Belt Holder Right 1 00:01:21 00:01:21 Red
Front Y Belt Base Right 1 00:00:42 00:00:42 Black
Y Tension Block Rear 1 00:01:24 00:01:24 Red
Y Tension Base Rear 1 00:01:04 00:01:04 Black
Y Tension Block Rear Right 1 00:01:24 00:01:24 Red
Y Tension Base Rear Right 1 00:01:04 00:01:06 Black
Rail Block 18p1 14 00:01:08 00:16:20 7 Black/7 red
YZ Plate (optional) 2 00:21:55 01:19:50 Black
Makita Tool Mount 2 00:02:59 00:05:58 Black
Makita Vac Top 1 00:03:33 00:03:33 Black
Makita Vac Lower 1 00:04:46 00:04:46 Black
SKR Bottom 1 00:15:36 00:15:36 Silver Silk
SKR Lid 1 00:15:35 00:15:35 Silver Silk
TFT35 case body 1 00:05:30 00:05:30 Silver Silk
TFT35 case left side 1 00:01:51 00:01:51 Silver Silk
TFT35 case right side 1 00:01:43 00:01:43 Silver Silk
TFT35 case clip 1 00:02:39 00:02:39 Silver Silk
3 Likes

Total print time? In the beta I think we varied from 90-250 hours.

3 Likes

If my drunken math is right, i’m at like ~233 hours, on craptastic $69 Ender3.

3 Likes

That sounds about right, was that with the
ender 3 standard quality print settings?

It was about 3 weeks for me, I didn’t count the hours but 3d printing stresses me out and I’m now feeling the relief!

1 Like

what infill do you recommend for the yz plates? 70 like the xz? or 100? thanks for the help

It is specified here, LowRider CNC V3 - V1 Engineering Documentation

Yea, that was with standard print settings at the infill densities called out in the instructions. The only pieces i didn’t print on the Ender3 are the end plates… Did those on my LK1 just because of size.

Progress!

6 Likes

So kind of bizarre… Maybe I’m just missing something? It looks like this part printed wrong and I’m hoping someone can just verify for me. Trying to attach the X tensioner and it looks like there should be a lip in this hole for the screw to grab onto, but it’s just a straight through hole. I double checked the models in Cura and it does seem like there’s a lip there… Just making sure I’m not an idiot and completely missing something.

1 Like

Yeah there should be. Is that from me? How the heck does that happen? That actually looks like the small hole is just missing and you have a counter bore all the way through.

1 Like

LOL… no idea how that happens. Like i said, the model looks right in the slicer. I’ll just re-slice, and re-print.

Thx for verifying!

1 Like

So i just went back and checked the gcode file i printed, and it doesn’t have a lip in that hole. I re-sliced, and now it does…so I’m not really sure what happened there. About all i have is that i somehow had it aligned below the print bed plane when i sliced and just didn’t notice… I’ll compare the two once i get the new one printed. This has to just be user error…

1 Like

Just a quick follow up to close the loop…

Definitely didn’t have it lined up with the build plate when i printed, and completely missed it in the slicer. 100% user error. Side by side pic of old and new:

3 Likes

Well that makes sense now

1 Like