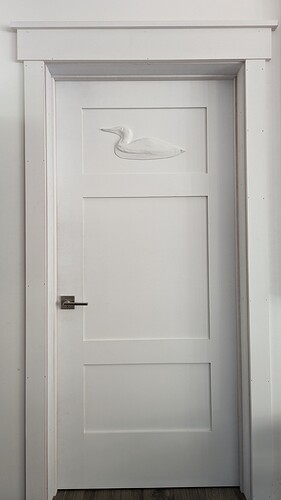
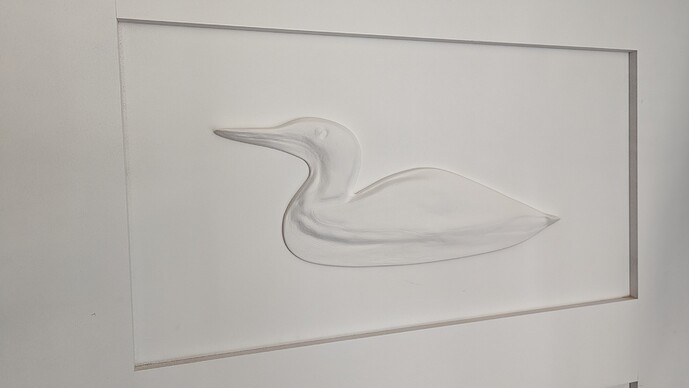
Thought I would share my process of creating relief carves without purchasing expensive software. I found a few older threads from members exploring similar ideas, so I thought this might be of some value.
I wanted to add a unique decorative feature to some interior doors in a house I am building. Since I love listening to the loons call back and forth to each other on the lake, I thought a relief of a loon would be the perfect touch. After an exhaustive search of the internet for a 3d mesh I could download (for a cost or for free) I came up with nothing. I found a few for sale, but none of them were close to what I was looking for. So, here is what I did, and I might add that if you are interested in carving reliefs, especially wildlife, you should check this out.
The process involves some image manipulation, but once you figure it out, it is fairly easy and can be done with open-source software.
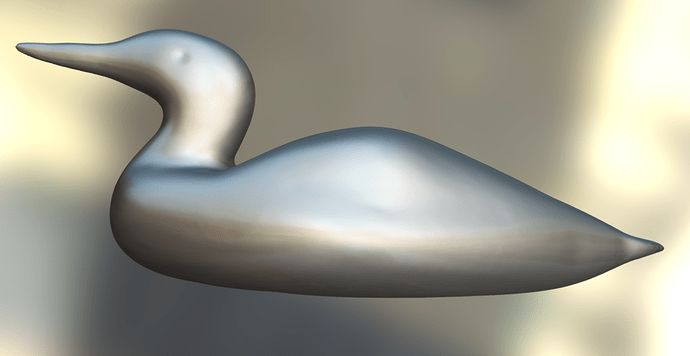
Step 1. Sketchfab - Sketchfab is a site for 3d modelers to show off what they have created. Go to the site sketchfab.com and search for the subject matter you are interested in. Once you find something, open the “Model Inspector” and select the “Matcap” option. The model will be displayed as a metal statue. Orient the model to the desired viewpoint, minimize the Model Inspector menu, then select the Fullscreen option. In my case, I get the following:
Now you need to get this image into your favorite image processor (Photoshop, Gimp, etc.) To do this (on a Windows PC) press CTRL + PrintScreen to copy it to the clipboard, then you can paste it wherever you need to.
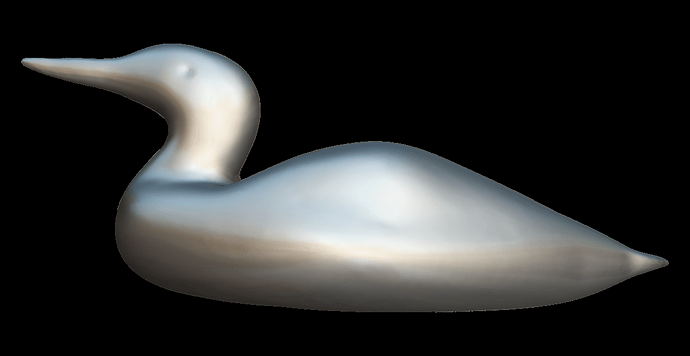
Step 2. Change the background to black. If you don’t have Photoshop, I recommend Gimp. It is free (Open Source). Open a new file (preferably the same resolution as your screen) and paste the image from step 1. There are several ways to remove a background (search for “remove background using Gimp”). I find the “Fuzzy Select” tool to be the best. After removing the entire background, I fill it with black using the “Bucket Fill Tool”. Save the image as a .PNG file. If using Gimp, this is done using the Export option.
NOTE: It will really help you out here if the edges of your model blend perfectly into the black background and there are no visible pixels that are lighter in color than those on the edge of the model. More on this below.
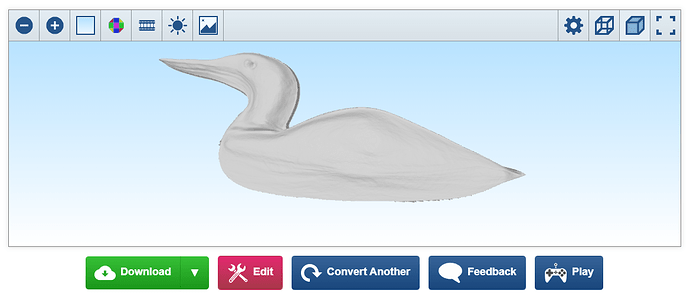
Step 3. Go to the website ImageToSTL. I’m not going to get into great detail here, but you can play with the different options to get the mesh you want. As a minimum, set the Width and Height (X and Y) and the Depth (Z). I wanted to carve this out of a 3/4" piece of poplar, so I set the Depth to .75". Also, you probably want to Enable Smoothing in the Options menu. Here is the result:
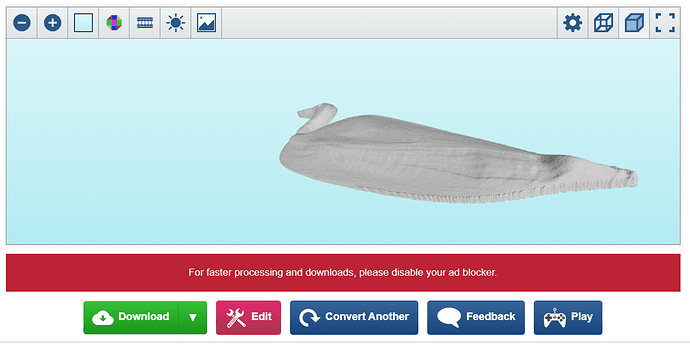
In order to get the best result, it is important to understand what is happening here. We are importing a grayscale image into the ImagetoSTL converter. The color/shade of each pixel represents a different height (Z). Black is zero and white is the “Depth” you set in the converter’s Tool settings (.75" in my case) and the different shades of gray are everything in between. Technically, for a relief mesh, the “Depth” setting is actually “Height”. There is an “Invert Output” option if you want the opposite. So getting back to the note in step 2, notice the single rows of slightly lighter pixels on the loons bottom rear edge (you may need to zoom into that image to see them). As I mentioned, the lighter the pixel, the greater the depth/height, so here is the result (I have oriented the model in ImageToSTL to get a better view of this area.
Notice how those lighter pixels cause a jagged edge. You can decide to go back and spend time editing the image, or in my case, I determined that it was good enough and I spent the time sanding the rough edges after the cut. If you know your way around Photoshop or Gimp, or have a free afternoon on a rainy day, there are tools that you can use to get a really nice edge. You might also consider using a mesh editor to smooth things out and also simplify the mesh (it may reduce the cut time significantly).
Step 4. Download the STL file and import it into your favorite software to create the tool paths / g-code. I used Fusion 360. What makes it good for generating g-code is the same thing that makes it bad. Fusion has a zillion options in its CAM (Manufacture) feature. Very, very steep learning curve and can be really frustrating and time consuming if you don’t use it on a regular basis.
I’ll upload some pics of the result in my next post…
