Problem: Wall separation. Cause: Under extrusion due E-Steps reset

Any suggestions/advice? Hoping this is something others have seen and fixed before? And/or writing this out will nudge my brain towards a fix.

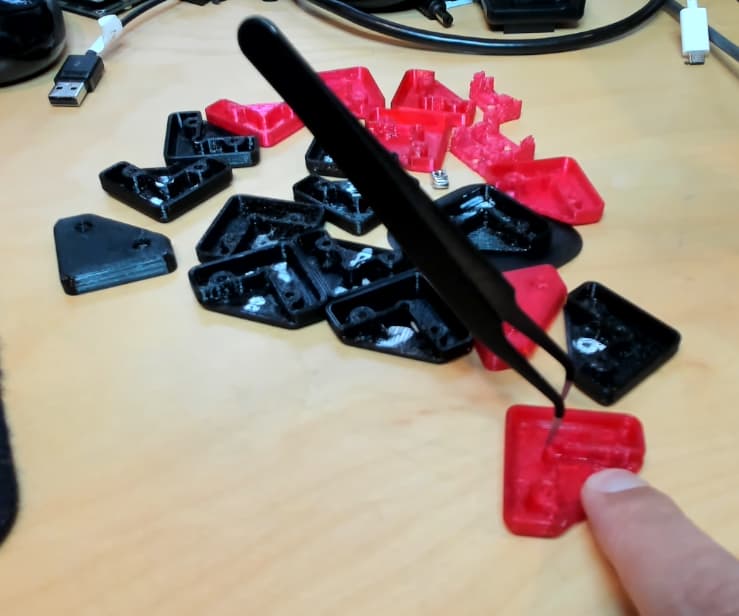
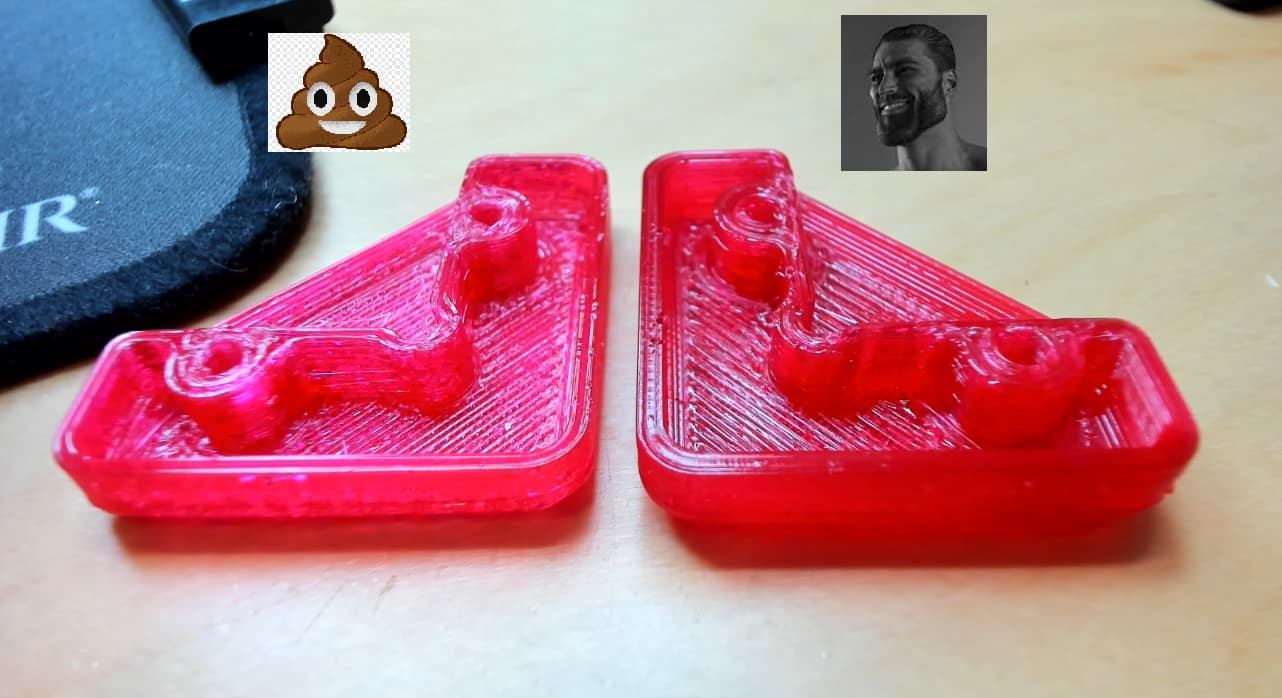
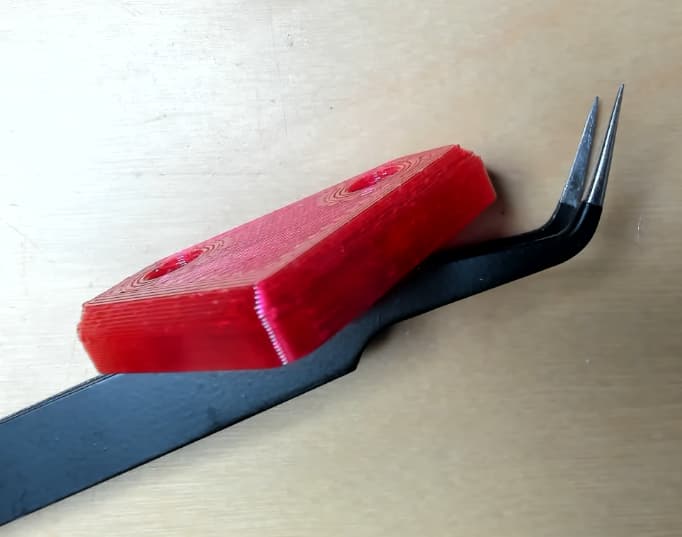
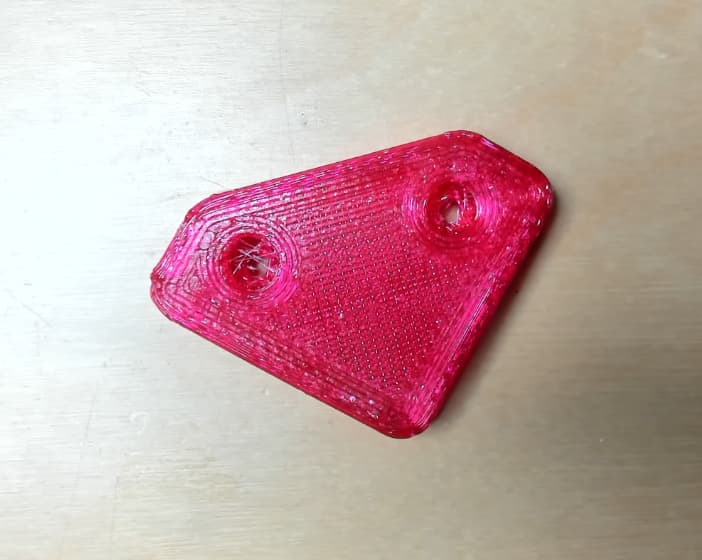
Started noticing adjacent walls not bonding. Vertical layer adhesion ok. (Overture Transparent PETG). Still have my first MP3DP prints from several months ago, they were fine and don’t think settings have changed, but I could be wrong of course… [23-08-05 Edit: Foreshadowing… ]

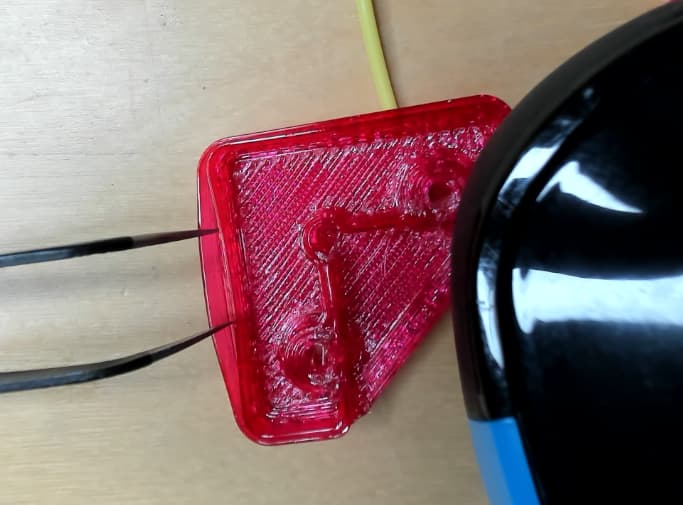
Other than walls not sticking/bonding/adhering, am otherwise happy with the print. If the material was a great thermal conductor I could probably make some great heatsinks.

Setup:

  • Ender 3 Max, mostly stock, including stock bowden hotend.
  • Dual gear extruder.
  • Cura 5.4.0
  • 0.6 nozzle, 0.32mm layer height

Observed:

  • Prime line doesn’t seem as smooth (blobs), or have as much material volume as a few months ago. Maybe under-extruding is an issue.

Tried :

  • Searching the web, youtube, etc… Guess I need to try harder.
  • Ensured extruder gears are clean.
  • Several Cold pulls, PITA with bowden, PTFE to hotend isn’t easy to access, have to remove fan guard/mount.
  • Cleaned nozzle with brass brush and damp cloth while hot.
  • Poking hot nozzle with those needle cleaners.
  • Same result at 250C, and 255C. Usually print at 245C without issue, historically picked 245 based on Temperature Tower results.
  • Double checked manually leveled glass bed using via the slide paper test.
  • Flow was set to 95% based on calibration cube results. Have temporarily increased all the Flows to 120% until this is resolved.
  • Used filament dryer for 6hrs+ per day for several days, lives in a dry closet.
  • Tried Skin Overlap seemed promising, but trying different values didn’t seem to make visible difference in slicer preview (tried default 0.08 to 0.6mm).

Not yet tried :

  • Different PETG filament. IIRC Black Overture PETG prints easier, at lower temp too.
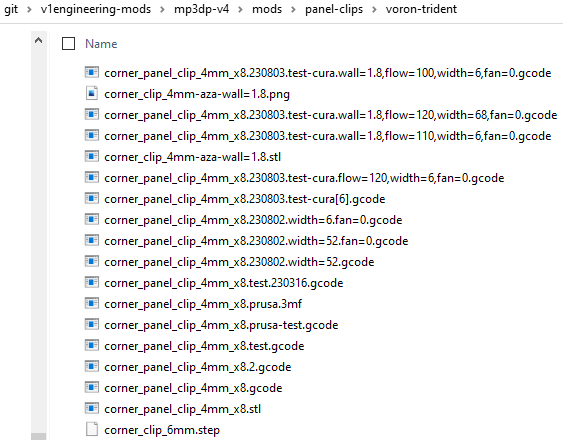
  • Dig around for .3MF in my notes repo from several months ago, diff those settings against my current ones.
  • Double check extrusion rate, per Teaching Tech, i.e. mark and extrude 100mm
  • Lower layer height to help better squish horizontally, e.g. 0.24mm instead of 0.32mm.
  • Workaround via design changes to model, e.g. Make inside walls ripple causing varying wall thickness between layers that’ll interlock and bond stronger.

Currently trying:

  • Writing this out has reminded me to try 0% Fan, was 25%, except for initial 3 layers which are always 0% Fan.

Cheers!

1 Like

Perimeter looks under extruded to me where it isn’t bonding.
What slicer are you using with this? Aside from overall flow rates, some slicers can have settings that impact extrusion of perimeters.

1 Like

This is where the internet says “your first layer is too low” and runs off to troll someone else.

Sorry about some of these naive questions, I am sure you’ve already asked them but I have to get my head around it.

Have you sliced the model recently or are you using the original g-code?

Coincidentally I’ve been looking at vertical walls a bit lately on the plate covers on the LR3 and the arachne engine can do amazing things varying perimeter thicknesses to eliminate - but I wonder if this is just somewhere between too many and too few perimeters. I was going to ask if you have Arachne turned off in Cura, but I see that you can’t do that.

Is there a setting in Cura to make the layer thickness thicker (or is that skin overlap?) I’ve been watching guys in PrusaSlicer printing vase mode at .8mm wall thickness for a .4 nozzle. Assuming you have a 1.2mm nozzle is there a chance that the slicer isn’t fattening the layer enough even with overlap checked?

3d printing - so many variables so little time…

1 Like

When you printed the calibration cube, was this a single wall type or a closed cube? I had some issues with wall thickness and found a process for calibrating the flow. You probably have already done this, but just in case take a standard cube and slice it with 0 top layers, 1 wall layer and 0% infill. Measure the wall thickness and adjust flow to get your expected thickness (slightly higher than the line width set in your slicer). Make sure you check all the flow settings. I had an issue once where I was changing the overall flow, but there was a different value set in the wall flow, so it was not updating that parameter. The other thing that can help line adhesion is bumping up the temp.

1 Like

Thank you for the various pointers, they definitely helped. Even trying out different slicer (Prusa) and seeing the same behavior helped rule out some causes.

Cause of Under extrusion was my e-steps being factory reset to 93. No idea when/how that happened. Haven’t updated firmware, and don’t recall reseting settings for any reason. I don’t see M92 commands written to any of the gcode files I’ve printed (yeah, I cache them…). :man_shrugging:

Fix was to set esteps back to ~141, something I did June '22 back installing Dual Gear Extruder before kicking off my LR3 prints. E-Steps change is needed since the gearing is smaller, bonus is higher torque. Followed info from Teaching Tech (and others).

Symptoms I should have paid attention to earlier :

  • Prime line at start of print was much thinner than usual, with some blobbing.
  • Skirt was pathetically skinny.
  • Wall separation (delaminating, not sticking, bonding, etc…).

Ideally, earlier on, should’ve :

  • Check configured esteps, use M503 in terminal. For me, my Marlin output should contain E141, e.g…
Recv: echo:Steps per unit:
Recv: echo: M92 X80.00 Y80.00 Z400.00 E141.00
  • Check 100mm extrusion was flowing as expected, was actually 65mm instead of expected 100mm. Discovering this earlier would’ve avoided unrequired nozzle/ptfe related changes, a distraction which I’ve rationalized as overdue maintenance.

Had no reason to suspect esteps had unexpectedly reset, so I ended up doing many pointless things before discovering Ender firmware setting. Tried various things to troubleshoot and figure out cause(s):

  • Changed many temp, flow, layer height, nozzle width, fan and other settings. Cloned profiles with date in the name to use as reference, and undo/revert regressions.
    image

  • Multiple cold pulls.

  • Completely cleaned out heatsink and hot-end using scrap PTFE. Wiggle 'n push PTFE through several time while 240C, wiping off plastic remnants. Required removing nozzle, PTFE and PTFE end fitting. Did this process twice…

  • Changed pneumatic fittings for the PTFE ends. Stock ones were being trashed by tubers.

  • Changed to new 0.6 nozzle.

  • Changed to new Capricorn PTFE. Friction of the original seemed ok, but changed anyway…

  • Tried two different PETGs, even tried PLA once I realized extrusion distance was the problem.

  • Carefully lubricated moving parts of gear extruder.

  • Ensured gear extruder mesh in contact with filament was thoroughly dry/clean, no debris/flakes/oil/dust/etc…

  • Verified Extruder Gear Grub screw wasn’t loose. Used fine permanent marker to draw line on Stepper shaft and gear. So easy to visibly spot slippage.

  • Adjusted gear extruder spring tension, several times. Enough to grip, but not overly crush, using subjective naive judgement of course.

  • Finally mentally clicked to check esteps when I noticed extruding 100mm was consistently wrong by ~35mm. A huge amount that made me suspect some serious blockage was happening, except the distance was consistently wrong… So, I finally checked esteps, calculated correct value, double checked Dual Gear Extruder product page which suggests e-steps be 139, then had the aha @$%* moment of cause and fix. :man_facepalming:

At one point, to eliminate possible causes, had completely removed PTFE, pneumatic fittings and hotend from possibly dragging/blocking extrusion…

Finally have strong walls again that refuse to separate, even when shanked…

While troubleshooting, to rule out arachne, I modded the original Voron clip to have 1.8mm wall instead of 1.6mm for my 0.6 nozzle back when wondering whether arachne was a factor. fwiw - Shared slightly stronger clip on Printables.

Hope this helps/entertains, cheers!

6 Likes

It seems the simple things are the ones that trip me up.
Glad you got that sorted out.

2 Likes

Thanks for the update, I was actually wondering how you were going with it. Just tucking away all that info for future reminders.

Which brings me to my 16 year old grandson’s Ender under extrusion issues. Try as I might I can’t get him to follow any defined trouble shooting path.

He’s fixed the problem (in his mind) and admittedly does get occasionally reasonable results by: slicing everything with a hypothetical .25 nozzle and printing with a 0.4 at .15 layer height. When he works out why all his prints take forever I’ll let you know.

2 Likes

Having a methodical troubleshooting path is really important.

I’ve burned myself multiple times by ASSuming that I had everything fully tuned and calibrated, then when facing some obscure issue and folks tell me to go run some fundamental test… and realize that I was a dunce.

The good news is once your grandson gives in to following some kind of repeatable methodology, he will have developed a very valuable life skill.

3 Likes

Couple of Extrusion/Nozzle videos I found helpful…

Yep…

3 Likes

I used to have a bunch of bookmarks of random tuning videos all over. I took a bit of a break from 3D printing and have just recently been ramping up again while I get my shop in order.

Upon searching and recalibrating, I came across Teaching Tech’s new site he put together that puts all of his calibration in one spot.

Here’s his one-stop calibration site:

https://teachingtechyt.github.io/calibration.html

I just recently took my Ender 3 Pro and changed my 0.4 nozzle for a 0.6, changed Creality board to SKR Mini E3 v3, upped Marlin to 2.1.2 and enabled Linear Advance and Input Shaping, Dual Z upgrade, and Z stabilization bars…so finding that site helped a lot in getting it dialed back in.

Just an FYI. Seems it’s been around for a while, but just in case someone hasn’t seen it (like me).

3 Likes

Glad you got it sorted out!