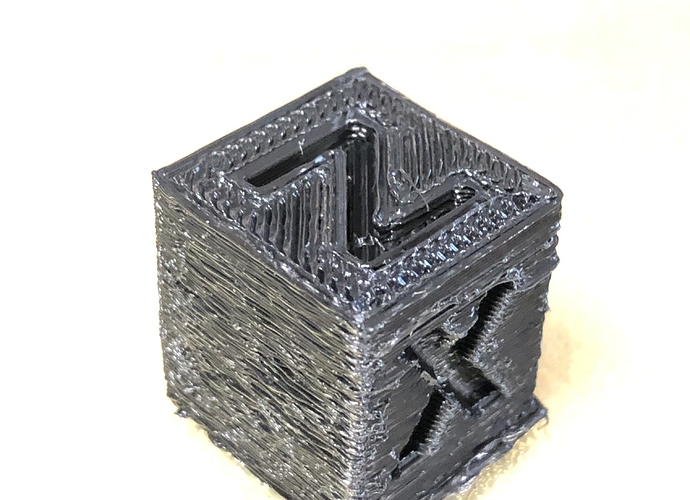
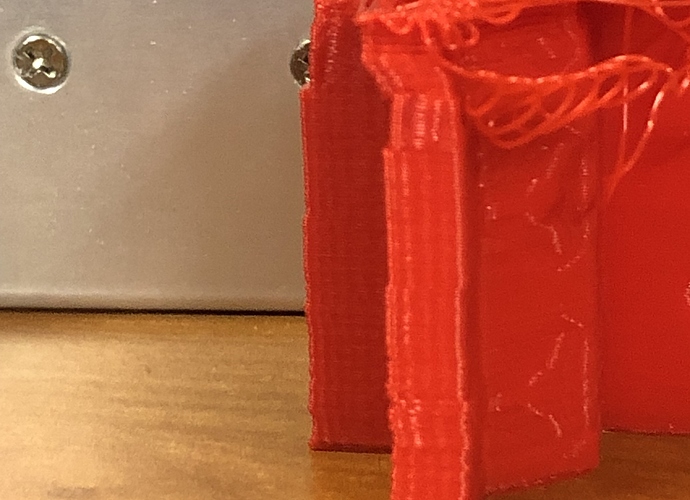
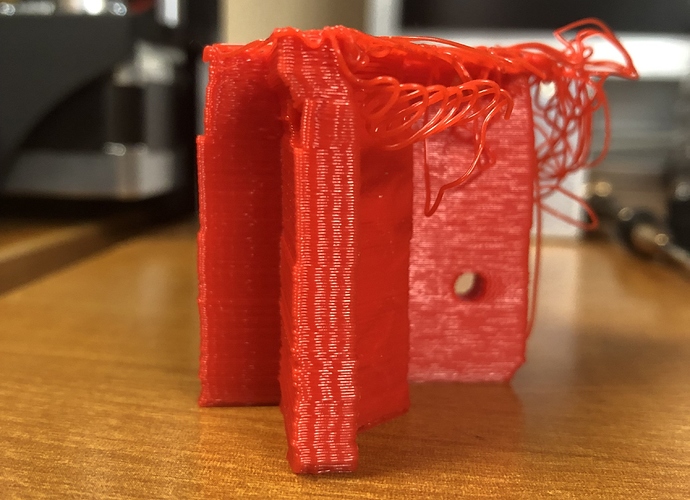
Couple of more tests run. First one midway through I dropped the Flowrate in Repetier down to 95 and that seemed to have fixed the problem I’m having with the head bumping over the previous layer on the infill. Next test, I put that back to 100 but did as Bill suggested and set my Retraction from 1mm to 2mm and I “THINK” that might have fixed the issue I was having. I’m in the middle of another test cube now and so far it seems to be running smoothly without any of the bumping along that I have been seeing. Once this print out finishes I’ll post some pics of it to show you all what it looks like.
Face Palm
I guess I see a UPS in my future… Twice in 2 days we lost power in the middle of a print. Ug. Nothing earth shattering but what a pain in the butt!! I only need a UPS to be able to power my printer and PC for about 15 seconds - the backup generator kicks in after 10 seconds of no power…
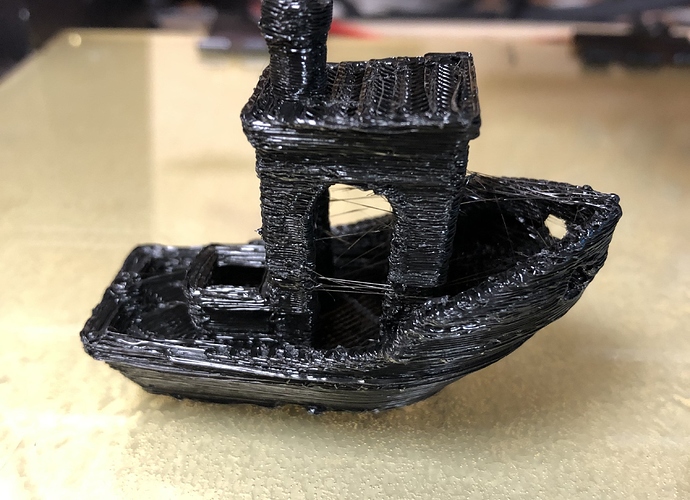
So, Boaty McBoatface didn’t come out so good (Which I kinda knew would happen, I just wanted to see what happened when I printed it). Here are some pics and I’m hoping you guys can point me in the next direction for figuring out what is going wrong. My bed is moving smoothly, the “bumping” I’m getting it the extruder tip hitting previously laid down filament. I think I’m either over-extruding or over-heating maybe? I’m also wondering if my 0.4mm tip is defective (or just damaged in some way). My next test will be to swap it out for a brand new one (that I will be pilfering from my buddy’s MP3DP that is sitting next to me right now and has never even been powered up, lol). Any other suggestions from the guru’s of all melty plastic thingys???
Hahaha! Nice find!
I knew it was a broken tip all along, I just wanted you yo figure it out on your own 
?. You suck!! For a few days I’ve been thinking there was something wrong with the tip because whenever I extruded filament with the Z raised up, the filament wouldn’t go straight down but squish out to the left side. This explains why the left side of my prints was jacked up. The funny thing is (and what threw me for a loop) was it was only the Outside of the left side that was really messed up. If I did a hollow cube, the Inside face of the right side of the cube (so the “left” side of the right side, if that makes sense) seemed to be fine.
I looked at the tip and couldn’t see anything wrong with it. It wasn’t until I took it off and looked at it through my jewelers magnifying glasses that I saw the damage. I’m pretty sure that happened in the second test print I ever did when the tip ran across one of the binder clips I have holding my glass plate onto the heated bed. Over a week struggling with this and it was probably a bad tip all along (with some minor other tweaking needed).
Just goes to show, the build is at least as important as the software. ?. I bet I didn’t need to route out new front and back plates either. Gonna try to put my old ones back on and see what happens.
The new tip output looks great! One suggestion is to check the z-axis homing as it looks like you’re getting elephant feet at the bottom (the first layer is too low). Now that you’ve replaced the nozzle, maybe your first layer issues can be completely removed.
I noticed the elephant feet myself. I have to look into all my settings now with the new tip. I’m pretty sure I have my first layer too fat (which I did on purpose during testing) and I don’t think I ever set it back to default.
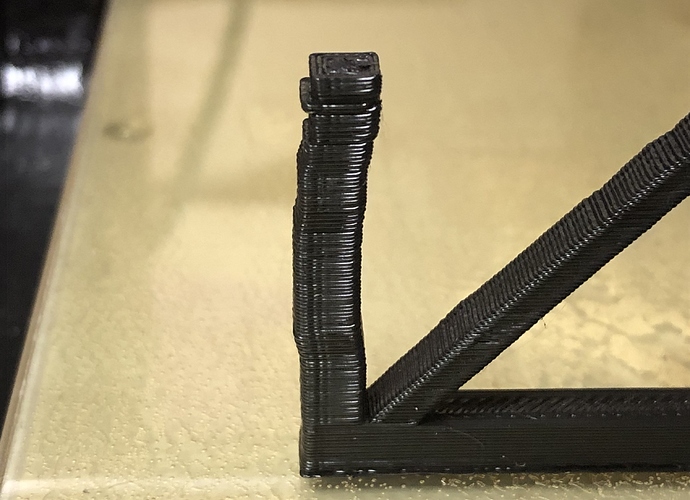
So, Y Axis looks like it is tracking perfectly now. Z and X are giving me a little bit of problem. I did (or tried to) a print test of a calibration square https://www.thingiverse.com/thing:2563185. The horizontal one came out ok, but the vertical one came out bad and got so bad that that print head hit it and knocked it off the bed (I had left the printer for a bit). In the pic, you can see where the X is going wrong. The Z was hitting the previously extruded filament. I think I might be over-extruding. I ran this test with default settings, guess I need to go back to the ones that gave me the good cube from before. Any other suggestions? The Z doesn’t have me so worried, I think I know how to fix that, the strangeness in the X has me a little concerned though - unless that waving is coming from the Z hitting the previous layer…??
Really tall parts pop off more often. There’s more torque on the bed when you’re that high up. On tall parts, I like to add a brim to increase the surface area on the bed.
Parts thay don’t have much in one layer sometimes don’t cool down enough before the next layer and that can lead to sloppy parts.
Parts with overhangs are very sensitive to temperature. The ends tend to get pulled back up if they aren’t cooled down enough.
My guess is just looking at the part that the small area is making your layers too hot. The overhangs are curling from the temperature. The nozzle hits the curls and has enough torque to pop off the print.
That’s a pretty tough part. If you wanted to print it, you should look at a brim, more cooling (fan on for 100% after the first few layers).
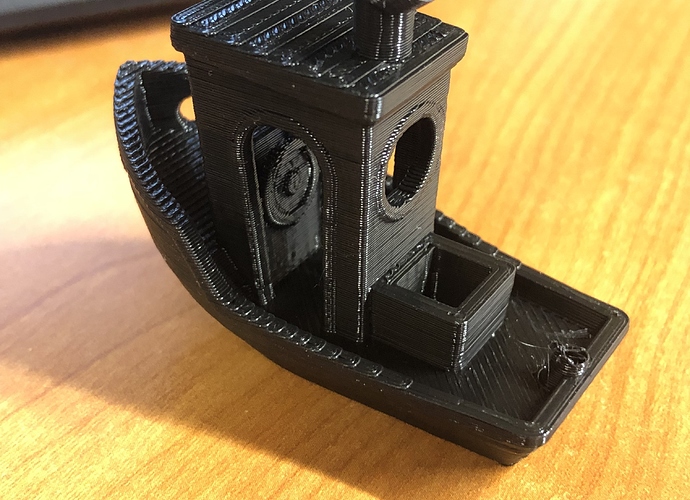
Thanks Jeff. That all makes sense. I’m still runnin my extruder pretty hot, 205 for th first layer and then 200. Now that I figured out my big issues were with a jacket up nozzle, I can spend some time figuring out temps and printing speeds and things like that. I was able to print out a nearly flawless 3DBenchy (or Boaty McBoatface) this afternoon after I changed the tip so at least I know I’m going in the right direction now.
That’s not hot at all.
I always run mine between 210 and 220 and don’t have those problems. Do you have a part cooling fan?
Dui, I do have a Parts fans but need to check my slic3r settings. It’s not on all the time and for that part I was printing it probably should have been on the entire time.
I’ve said it before and I’ll say it again - trust in Ryan… lol. I just did another 3DBenchy test using his default slic3r settings and it came out perfect!! Ignore the smoke stack - I screwed up my Gcode and had my machine goto Home without lifting the Z Axis first…
Nice result, congrats.
Your first layer is just a tiny bit too high, you can lower it slightly.
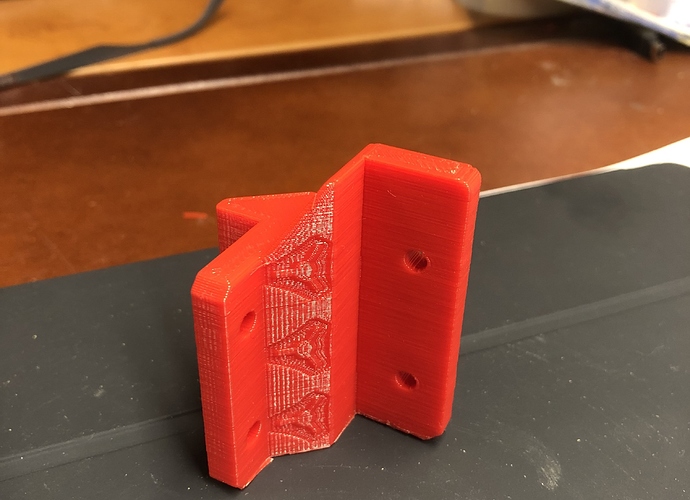
Thanks Dui, I’m still trying to dial everything in. On smaller parts, things seem to work well - on taller ones, not so much. I just tried to print a CornerL (the front left corner of the MD3DP) and things went a little sideways. It seems that my X axis is tracking perfectly, it seems to be aligned just the way it should. My Y and Z, something is wrong with one or both of them. As the print goes on, the Y axis starts to get out of alignment. I’m not sure if this is from the Y axis itself or something wrong with the Z causing the print head to hit the print and throwing off the Y. If this is the case though, I would expect both the X and Y to have issues but it is only the Y (and the Z as well). About 3/4 of the way through the print (I had stepped out of my office) something went very wrong and the print got knocked off the bed. I’m guessing my Z steppers aren’t lifting properly with each step but I’m not sure and I don’t know how to really check it with a high degree of accuracy. I can move the Z up and down and measure with my calipers but the amount it seems to be off is in the 0.01mm range and that’s hard to measure with any degree of accuracy. I’m hoping the following pics will help you all help me figure this one out. Thanks once again all…
So this is what’s good print looks like!!
[attachment file=91189]
I think I finally got the bugs worked out. My GT2 bearing on my Y-Stepper had become loose and that was causing some of my problems (maybe all of them in the past day or so). I also realigned by Z-Axis as they were off compared to each other by about 0.2mm.
Anyway, I then did a test print that came loose from the PEI sheet so on my next one I went a little overboard and did a 5mm brim. Lol. Needless to say, that print didn’t move and came out great! Now I can start pulling in that brim until I hit a happy medium.
Thanks Everyone for all your help during this adventure. I’m sure I will be needing more help in the future but at least I’m on the correct path now!
YES!!!
Life is too short to not use brims sometimes!


