Printing TPU parts

Curious whether MP3DP owners, or anyone with BIQU V2 has advice for printing TPU?

Gears keep clogging. One nice thing is that the Smart Filament Sensor is able to detect the clog and auto pauses the job.

Tried a few things, currently slowed down walls and infill to slothfully 40mm/s, 0.6mm nozzle, 0.2mm layer height, 75% fan, disabled retraction, increased temp, trying to print some Overture TPU (new spool) wheels for my RMRRF enclosure project…

I printed some TPU last time home. It was on the stiffer side. But still have to slow WAY down. 40 mm/s is still pretty fast if its real soft. I believe you want to cap your mm^3 around 3.5-4. That should keep your speeds low enough to come out a lot better. Also make sure your temps are high enough. I think I was printing around 230º-240º

1 Like

Cheers @Jonathjon! Just increased temp for latest attempt, unfortunately the model’s overhangs are really excessive, and am ending up with a sloppy print.

:face_vomiting:

TPU would be nice to have. But am increasingly leaning towards fallback plan of using PETG. Will improve model to have less silly extreme overhangs and try TPU another time.

EDIT: Ended up using PETG…

1 Like

I’ve printed TPU a few times. I disabled retraction and ran it at 20 mm/sec.

2 Likes

I think I turned off the fan, turned up the heat, turned off retraction and only tried it on a direct drive extruder.

1 Like

I haven’t finished my repeat, nor do I currently have the Biqu extruder running in any of my printers.

I don’t print a lot of flexible / soft filaments- but, I do have a little experience that might be helpful.

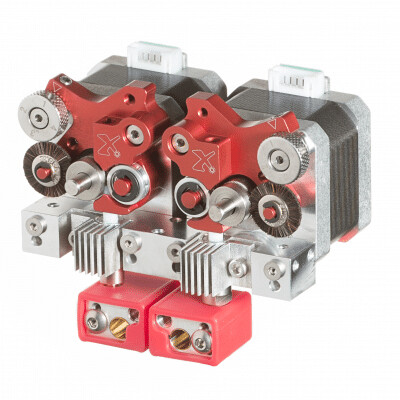
I have a pair of Flashforge Creator Pro printers, on which I replaced the stock extruder with a Diabase Flexion extruder pair. (One regular Flexion, one Flexion HT [High Temp] - but that’s a different story.)

Diabase, sadly, has folded and isn’t operating any more.

The Flexion extruder modified the filament path, had a cam and a set screw to set the clamping distance for the filament drive gear, and used a clever wiping wheel that cleaned the drive teeth as the extruder operates.

It had a bunch of other modifications.

I think the old shop page is still online at the link below, if you want a peek at what that extruder looked like.

image

[Side rant- Diabase also made a really awesome tool changer additive/subtractive multi-axis machine called the H3, which was impressive.]

When I was printing flexible materials, I printed those on Kapton tape atop the metal build plate on the FFCP printers (I removed the factory applied print surface and put the Kapton over the metal.)

As others have noted, no retraction and moving slowly worked for me.

I also remember it being really, really sensitive to getting a good first layer. I aborted a lot of prints to fiddle and adjust every time I wanted to print with a flexible material. Here I seemed to have success with a bit more heat, slow, and a relatively thick first layer.

I remember that I turned off the cooling fan with flexibles, except on very thin layers, bridges, or overhangs because the flexible materials seem to like more layer bonding time. Any kind of overhang, though, are REALLY hard to print without cooling and the right speed.

It’s really important to fully constrain the filament path through the extruder. Flexible materials will find any chance to kink and go somewhere you don’t want. That usually ends up in a clog or bound up extruder. Direct drive is the way to go.

I also recall the flexible materials didn’t like really high acceleration and jerkiness in motion. Smooth and steady worked better.

I’ll look around to see if I have a profile for it- to start from.

What I remember was that if you have a metalic filament path through the hotend, the path needed to be well polished during manufacturing and if not it liked to jam.

I also remember the settings that worked for me on my FFCP didn’t work on others’ machines.

One community member at the local makerspace needed retraction and a lot more heat, and didn’t slow down. E.g. completely opposite all the advice and guidance that you find when searching.

It’s a reminder that when the base material changes, you may need to re-run a bunch of the calibration tests because your machine may surprise you with what settings it wants to be happy with that material.

1 Like

One other thing to add- when printing on Kapton, it had to be CLEAN. I’d spend time wiping down the Kapton with IPA and making sure there was no fingerprint or adhesive/release agent residue left from the tape application.

Flexible filament HATED to be on a surface with any kind of contaminate that made the build platform to first layer adhesion less than great.

1 Like

Cheers for all the speed, temp, acceleration, tight extruder path and other info. Will be trying TPU again after RMRRF.

Between the textured PEI plate, “Bed Weld” and Bed Temperature I’m using… Have been needing to wait for cool down and use a scraper to free printed PLA/PETG/TPU parts. Bed cooling fan to reduce time between prints (risking bed warp?) would be nice.

A trick I learned from one of the Diabase folks- I’d add a small brim (which, yes, needed to be trimmed).

You can use the brim as a peel start layer (works great on NijaFlex and TPU). If you’re really clever, place a small cylinder on the build plat that can be encapsulated in the brim. You now have a pulling lever for peeling the part off the build plate. For NijaFlex and TPU, this actually worked better for me on a hot build plate than a cool one.

Edit to add- they suggested a cooler build plate overall (slightly warm), but I never really made that work well for me.

Seems like a good place to remind everyone to NEVER print TPU on a PEI sheet bed. Unless, of course, you want to replace your PEI sheet. Fantastic adhesion, it just doesn’t come off.

I have tried printing TPU one time, resulted in a clogged nozzle and a bad print.

I’ll echo that again… can’t believe I trauma blocked that memory. I was able to get it off the PEI sheet, but it wasn’t a simple matter. This is where blue, green, yellow, or orange masking tape and glue stick or something, anything other than PEI as the build surface is ok.

Have been using Bed Weld on the PEI sheet. My hope was that cooled Bed Weld is the weakest layer and will give before the PEI rips/delaminates?

Do you have a magnetic spring steel build surface?
If so, get an un-coated spring steel sheet, or maybe an old smooth PEI that no longer works well.
Put Kapton on it.
Clean the Kapton well to remove contaminates.
Replace the Kapton occasionally when you can’t make stuff stick.
Light (LIGHT!) scuffing with a mild abrasive can help prolong the life and adhesion of the Kapton.

Alternatively, put Kapton on a smooth PEI sheet.

Provides a nice finish on the first layer, easy to replace, easy to maintain.