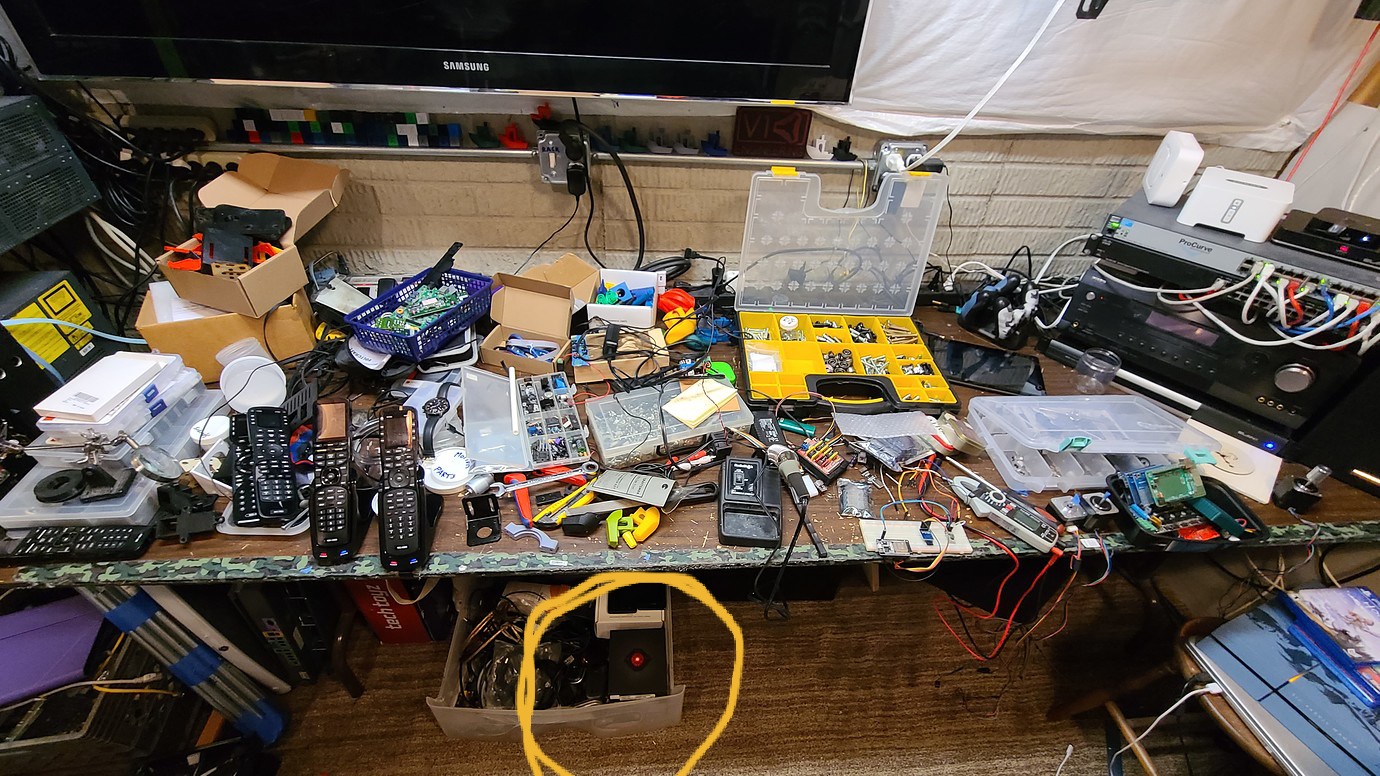
I just added another 8’x2’ bench on the ‘dirty’ side of the shop 
Spent part of today moving my 8" vice from the corner of the shop to the new bench.
I just added another 8’x2’ bench on the ‘dirty’ side of the shop
Spent part of today moving my 8" vice from the corner of the shop to the new bench.
Just don’t drop it on your foot!
If you get rid of half of your remote controls the bench is clear. 
I think you should be more worried about the geth, Cylon or whatever other AI is building itself underneath the table before it takes over the world.
Ahh, that’s just HAL, he’s harmless…
Weather is warming up, cars are back in the driveway, and the Primo is back in the garage. Time to make some man-glitter.
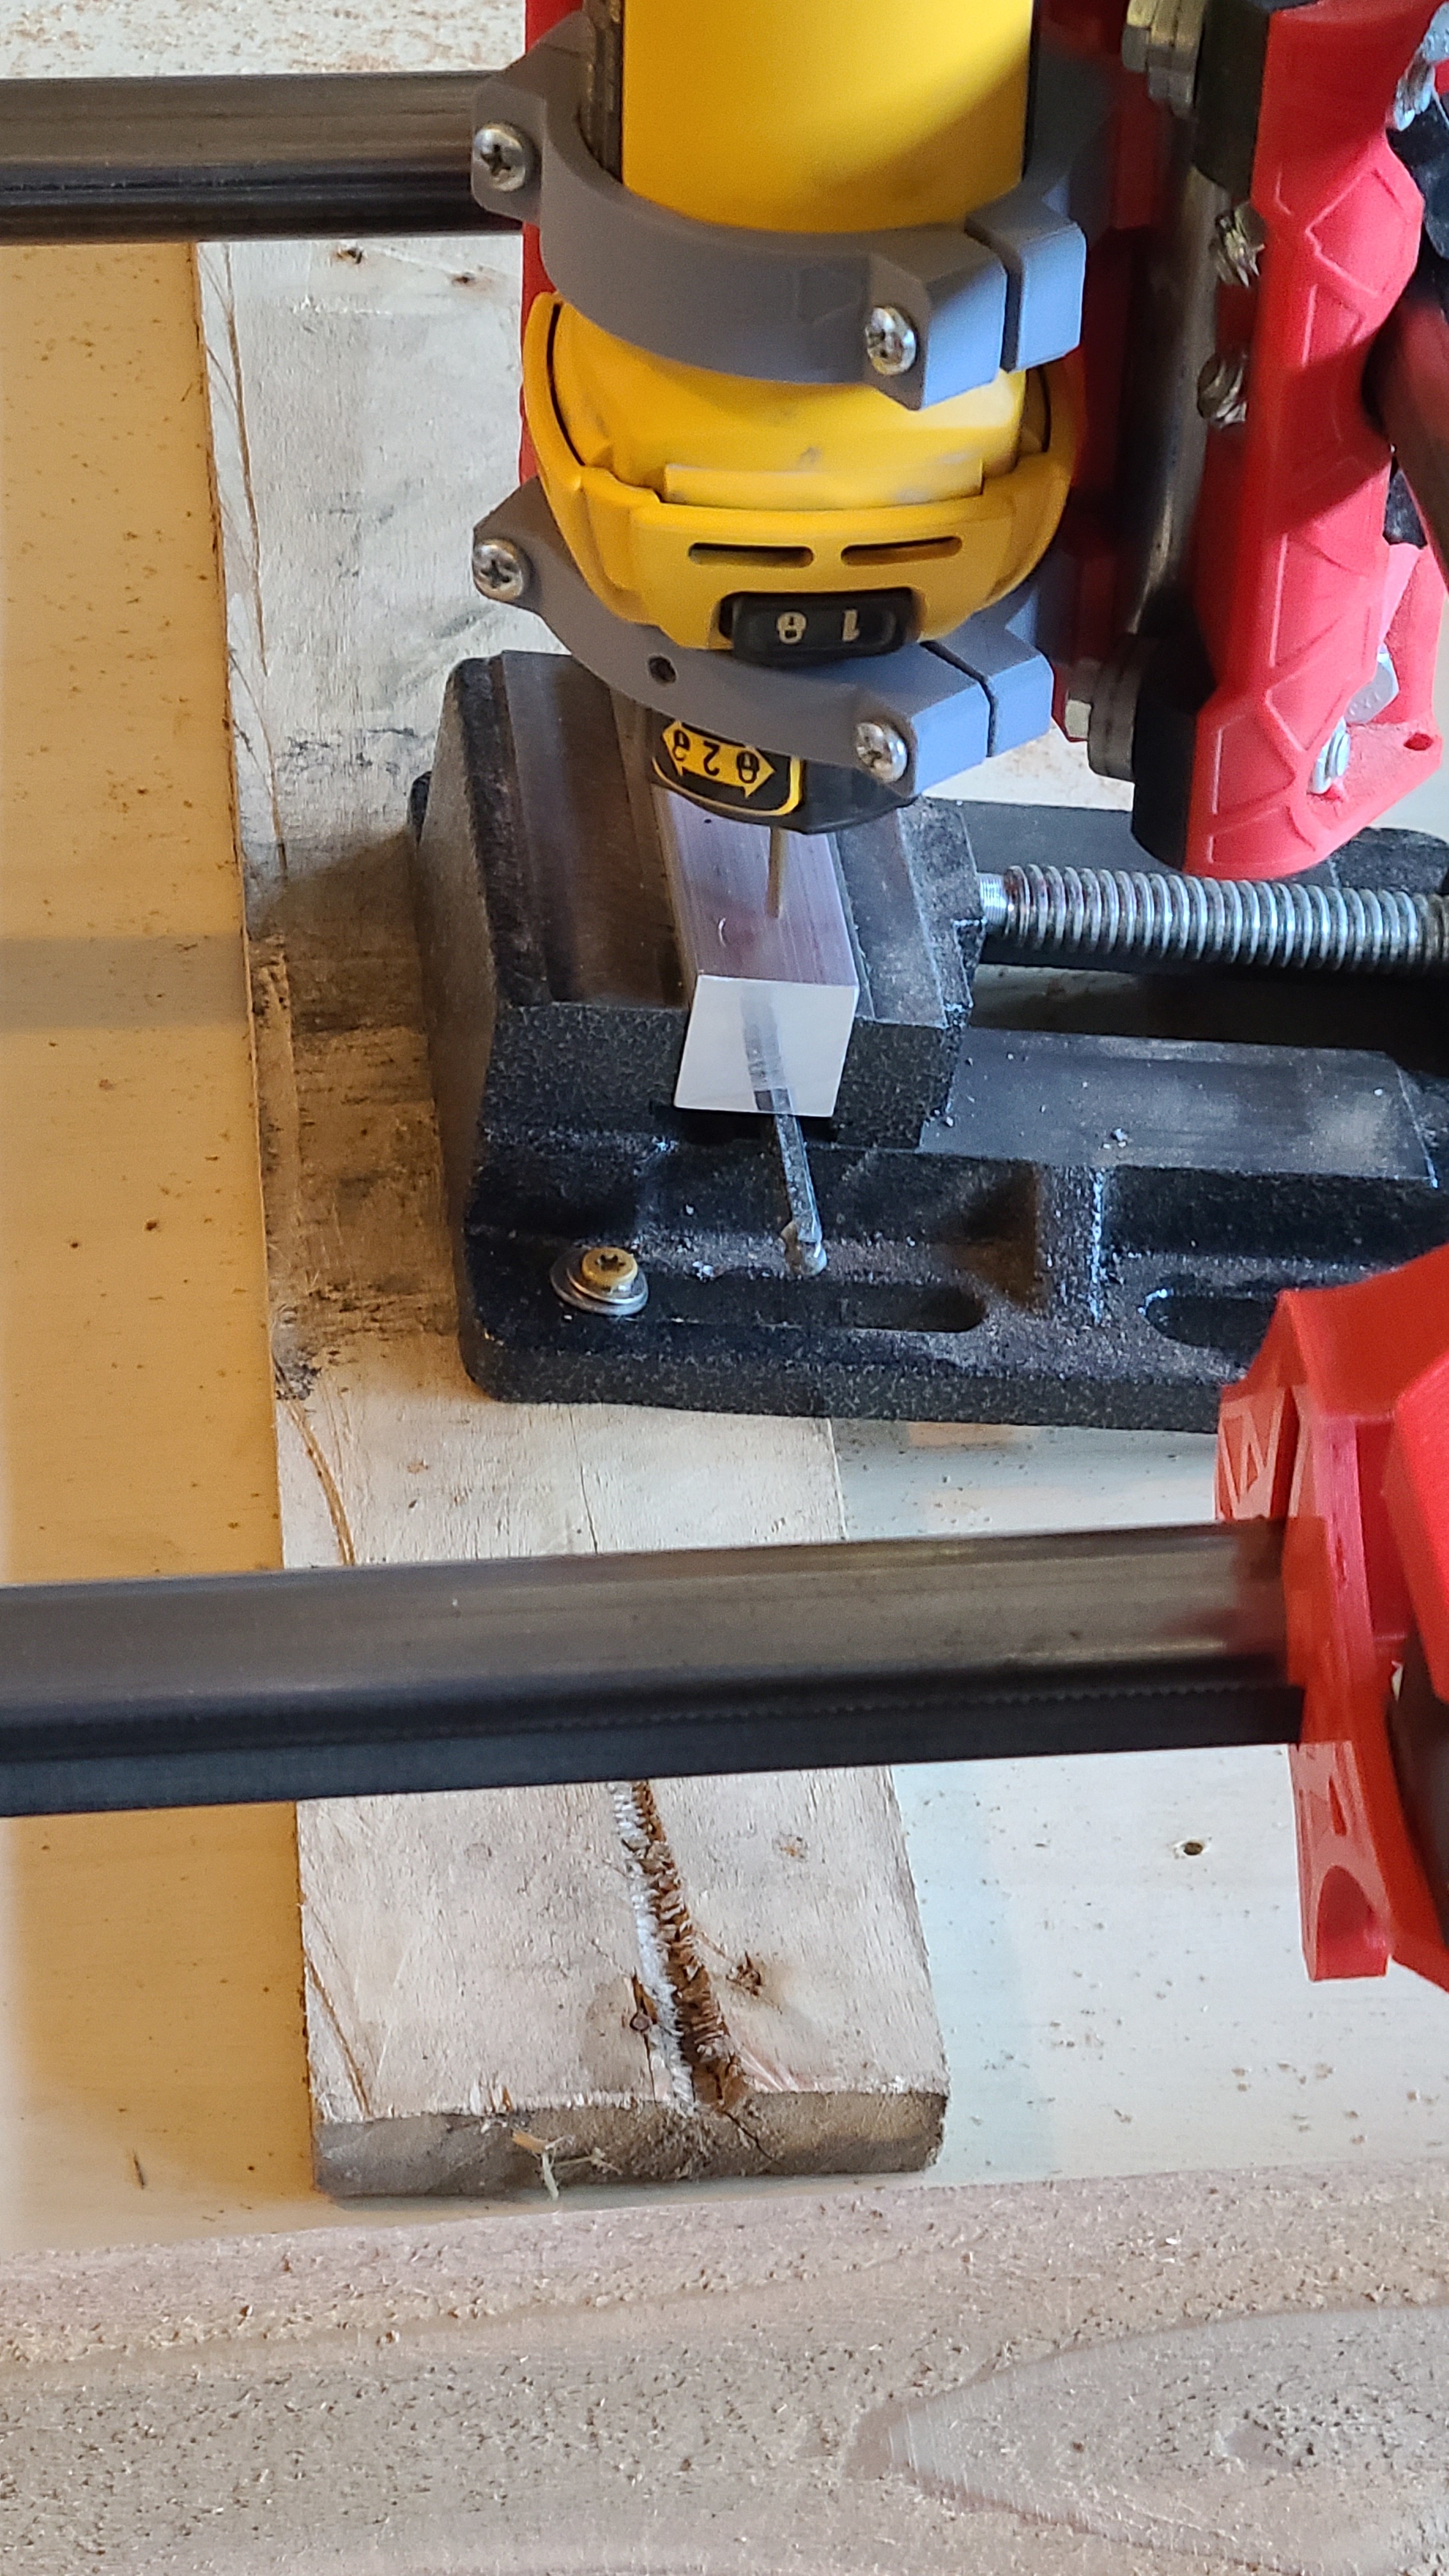
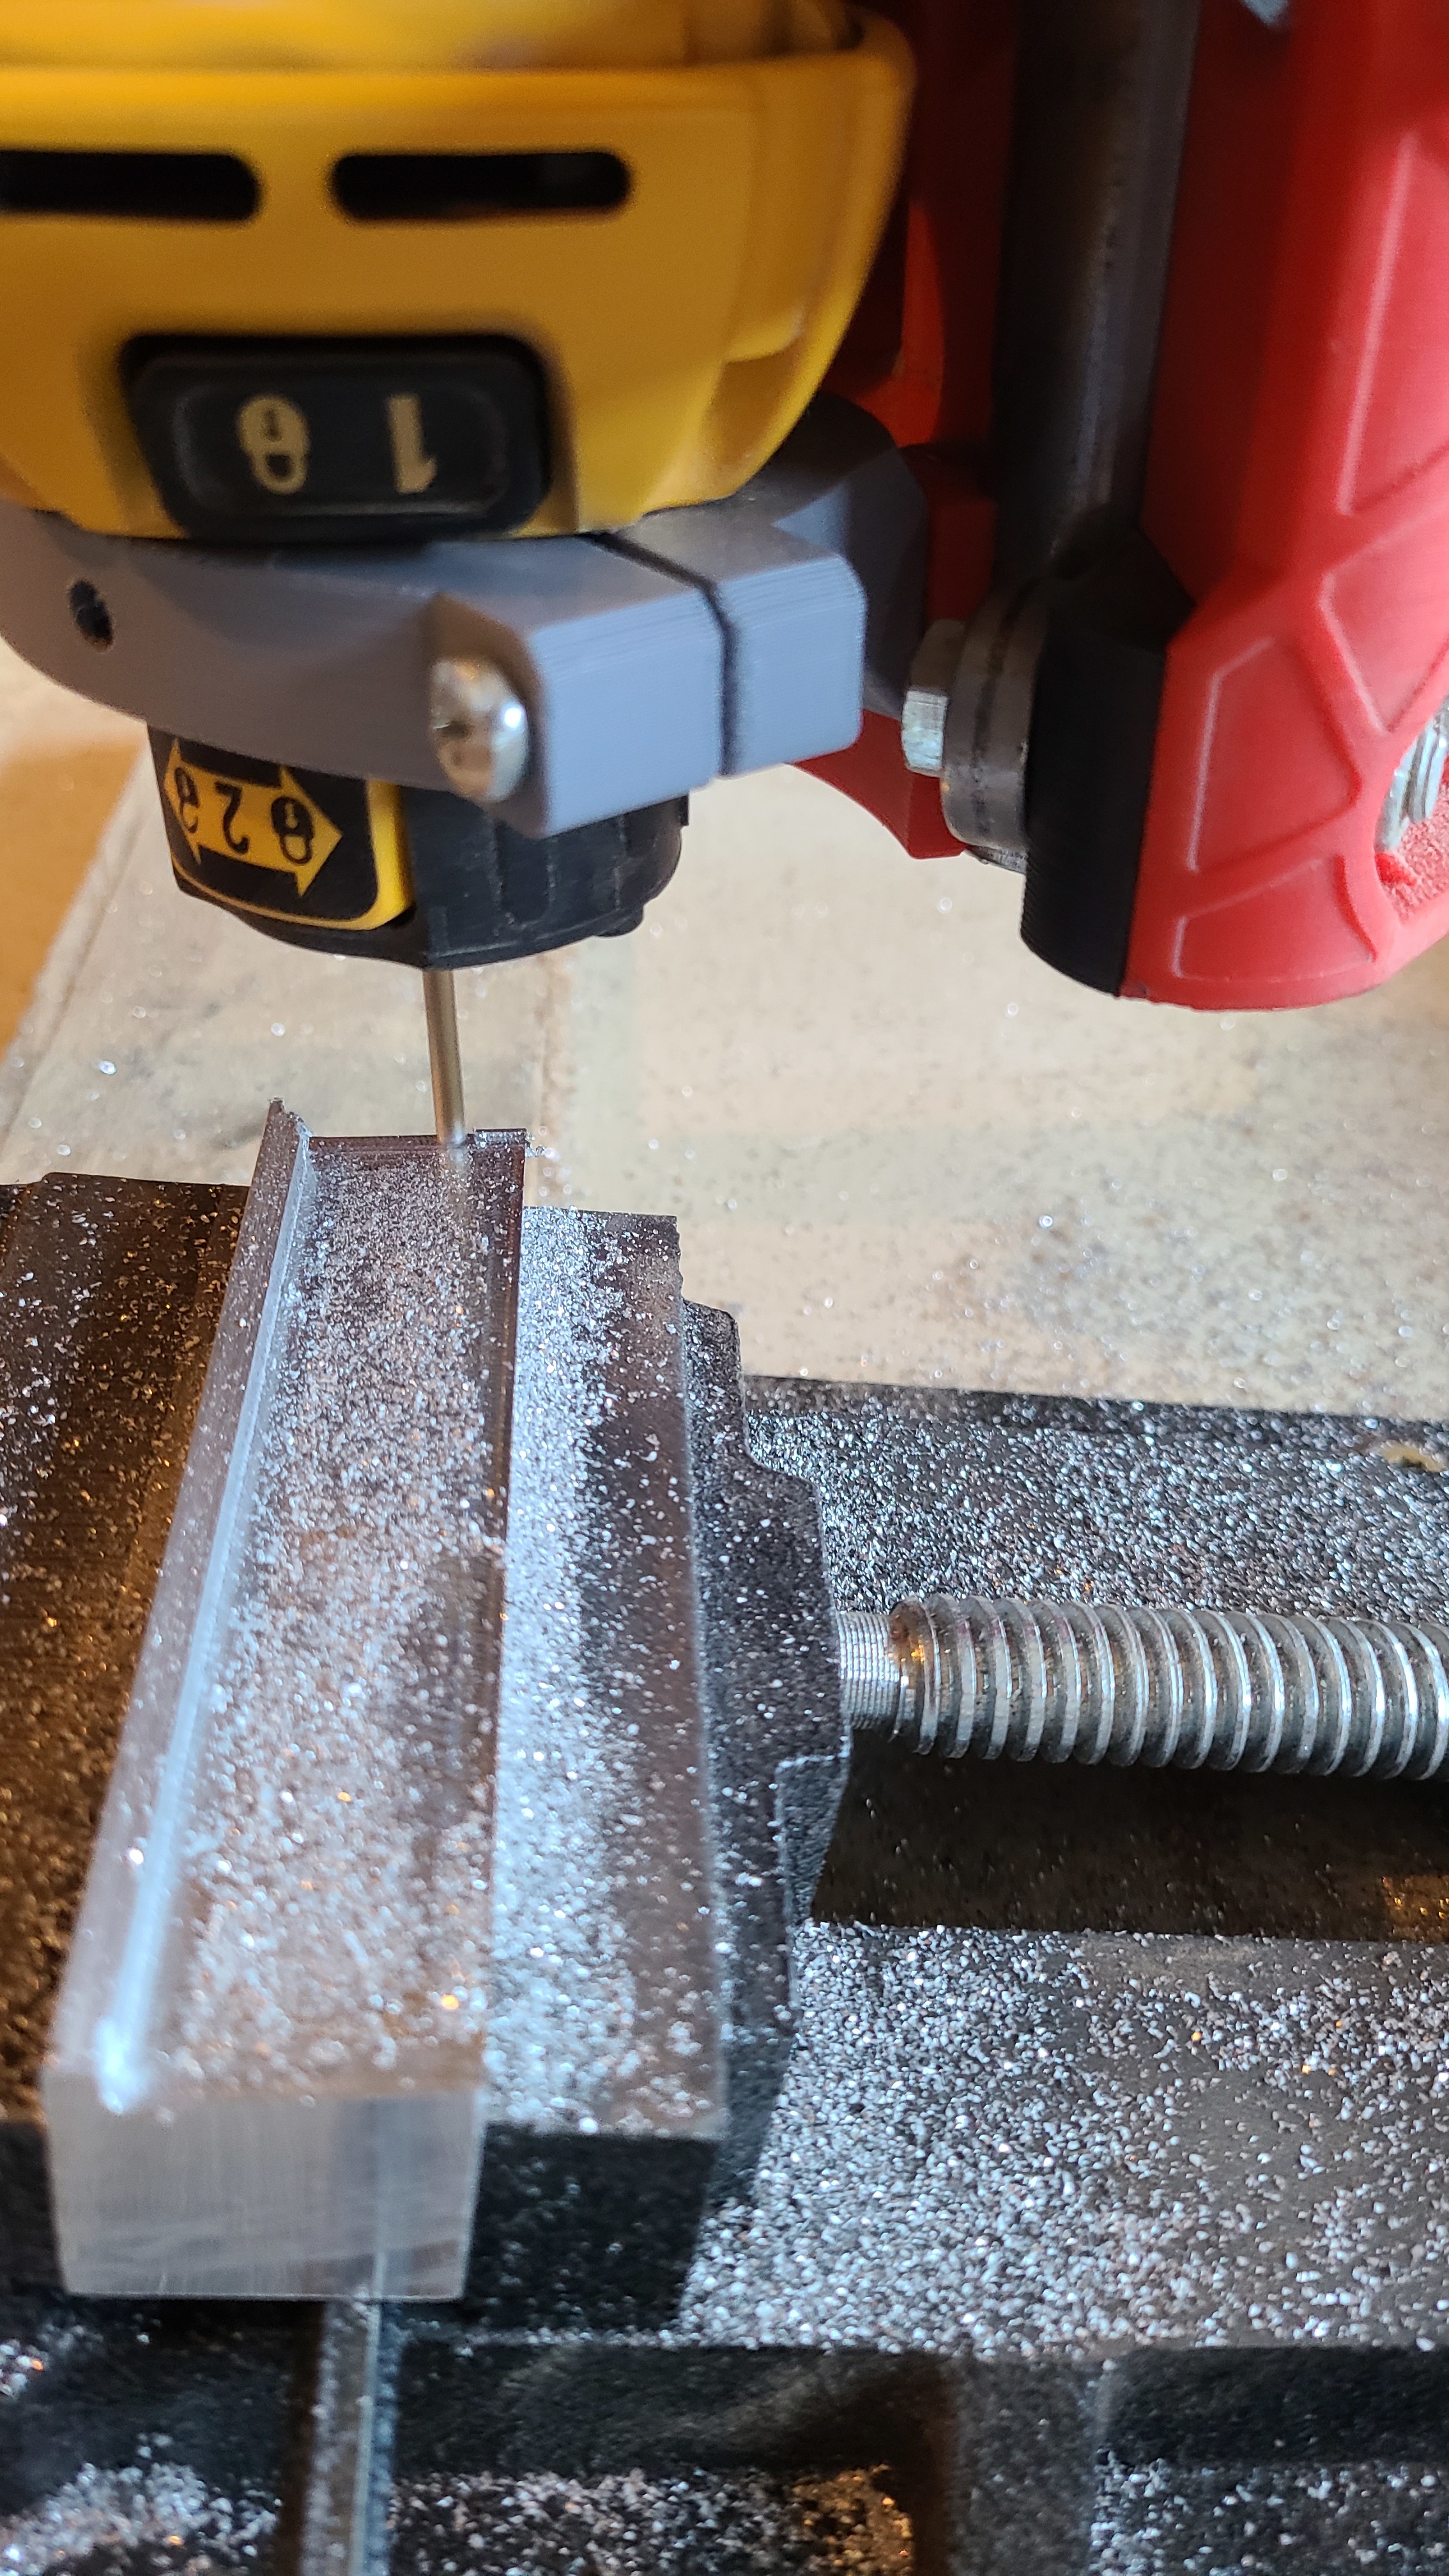
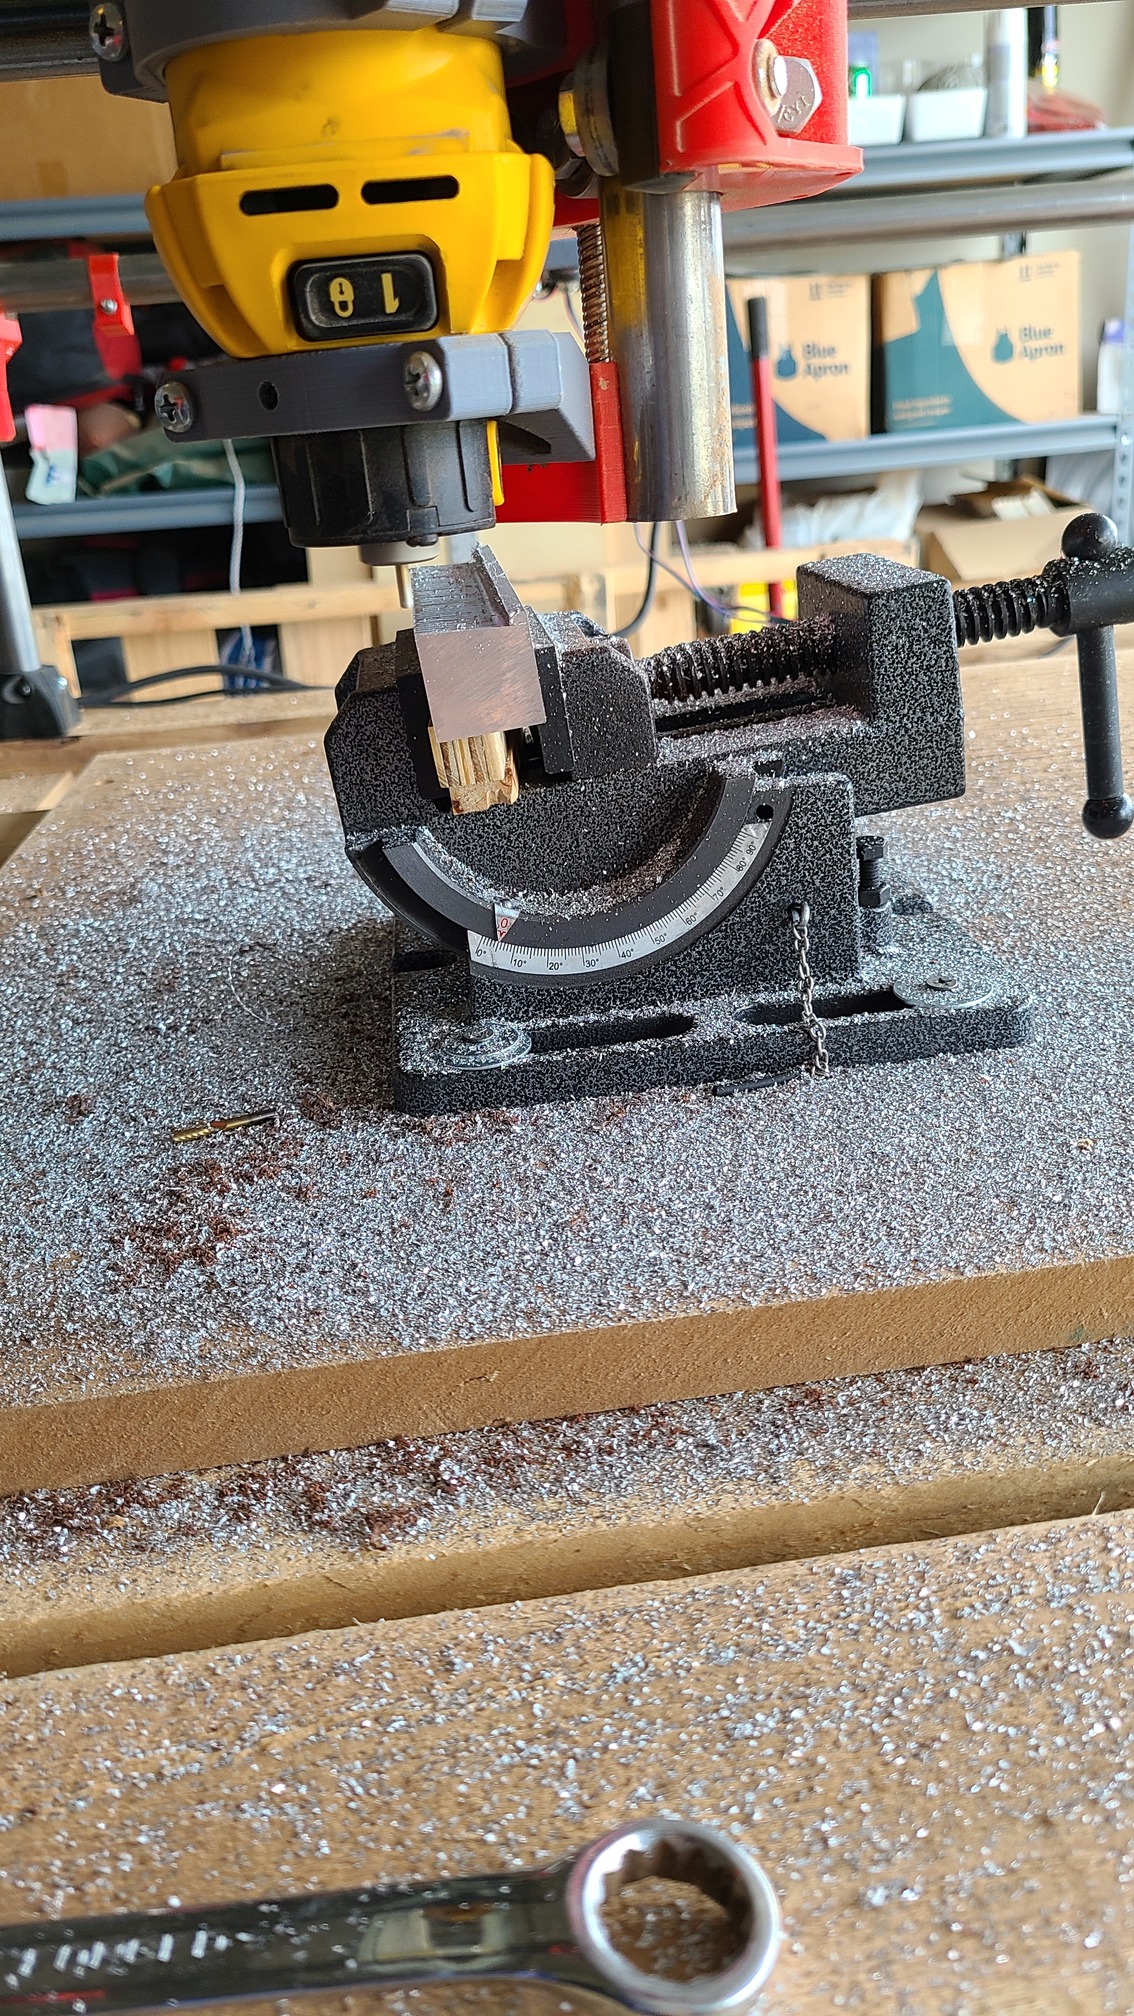
Best way to cut a 7 degree slope in a block, mount the vise at 7 degrees and cut the pocket flat.
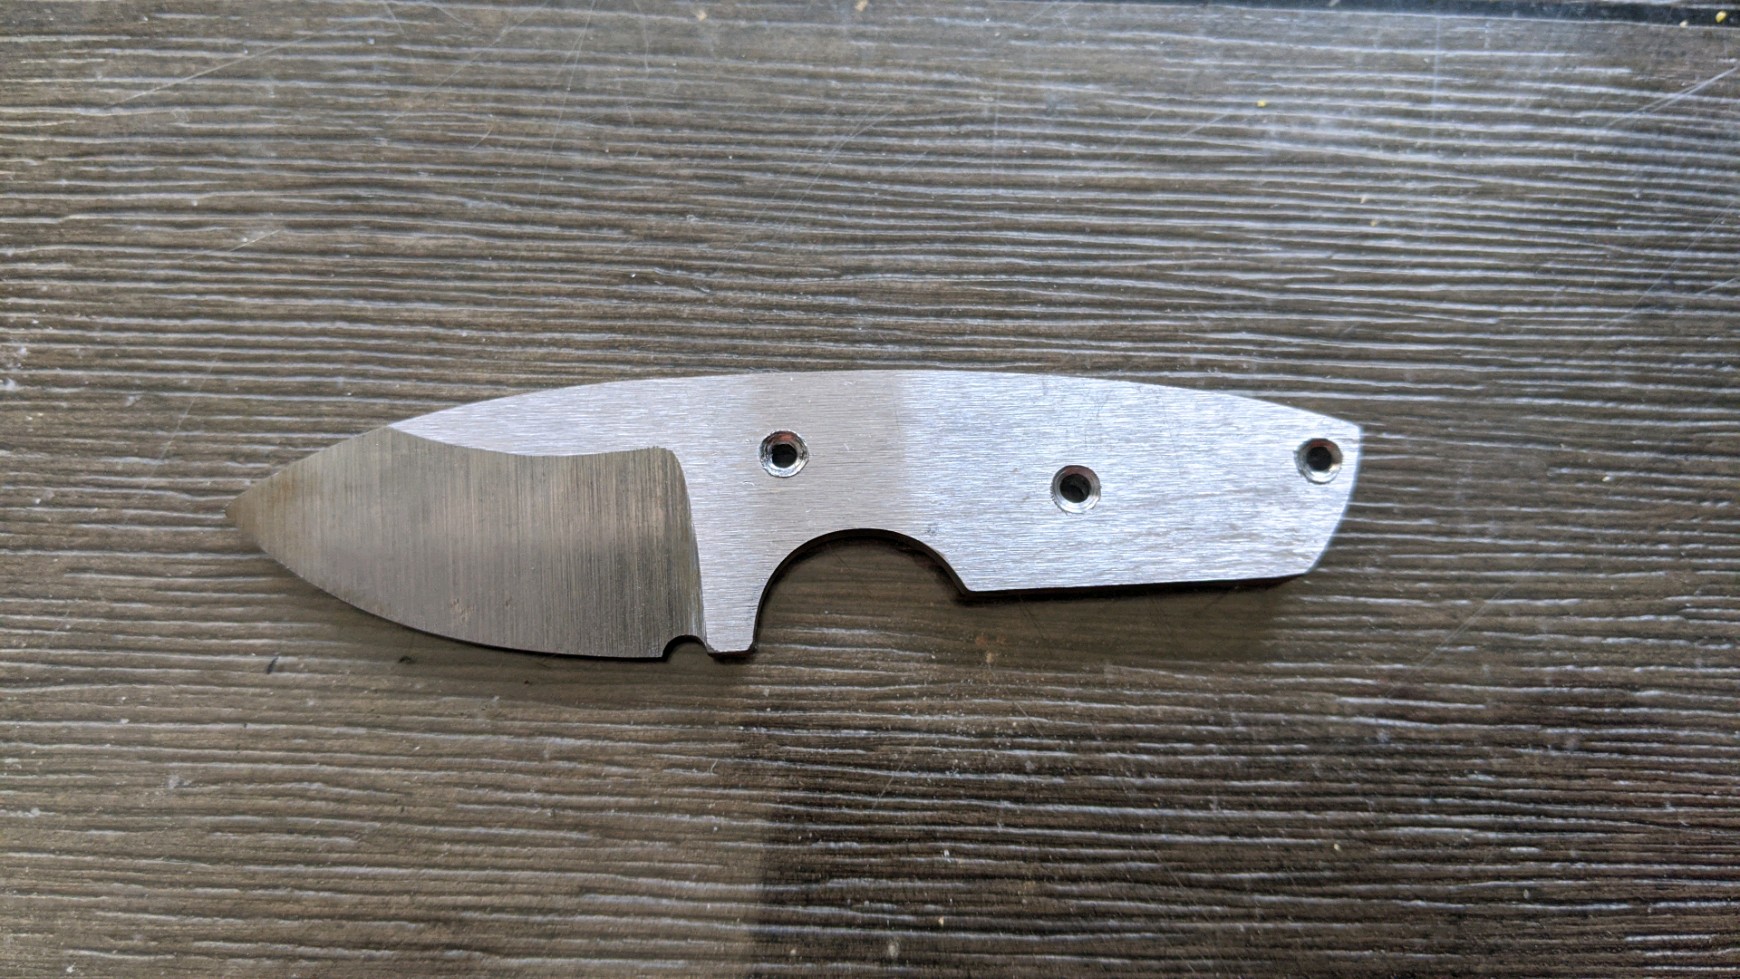
My brother-in-law asked me if I could make a knife jig for him to bevel some blanks he’s making. I said I’d give it a try. Second time attempting to mill aluminum. I think it turned out OK. 1/8" bit, 10mm/sec XY, 5mm/sec Z, .5mm DOC, trochoidal stepover 20%, width 50%, oscillation .05 mm, peel pocket strategy. Took about 4 hours.
Looks great!
Hi Tim,
Your regular experimentation is awesome. I am just about to purchase my first laser and was wondering what mount you used for your laser to the Primo, or did you make your own?
Thank you
Thank you for the kind words! As for the mount, I originally used THIS mount, made for the 525/Burly, then printed the burly tool mount plate, partially anyway, just enough to attach the laser mount.
Later, I just drilled a hole through the center of my Dewalt660 bracket and screwed the metal laser mount that the laser comes with to the bracket. Sorry, I don’t have a picture from that iteration. Not the best way, to be sure, but worked OK for me, and I didn’t have to change the tool mount to attach the laser. But I ended up building a dedicated laser machine so I haven’t really tried anything else since.
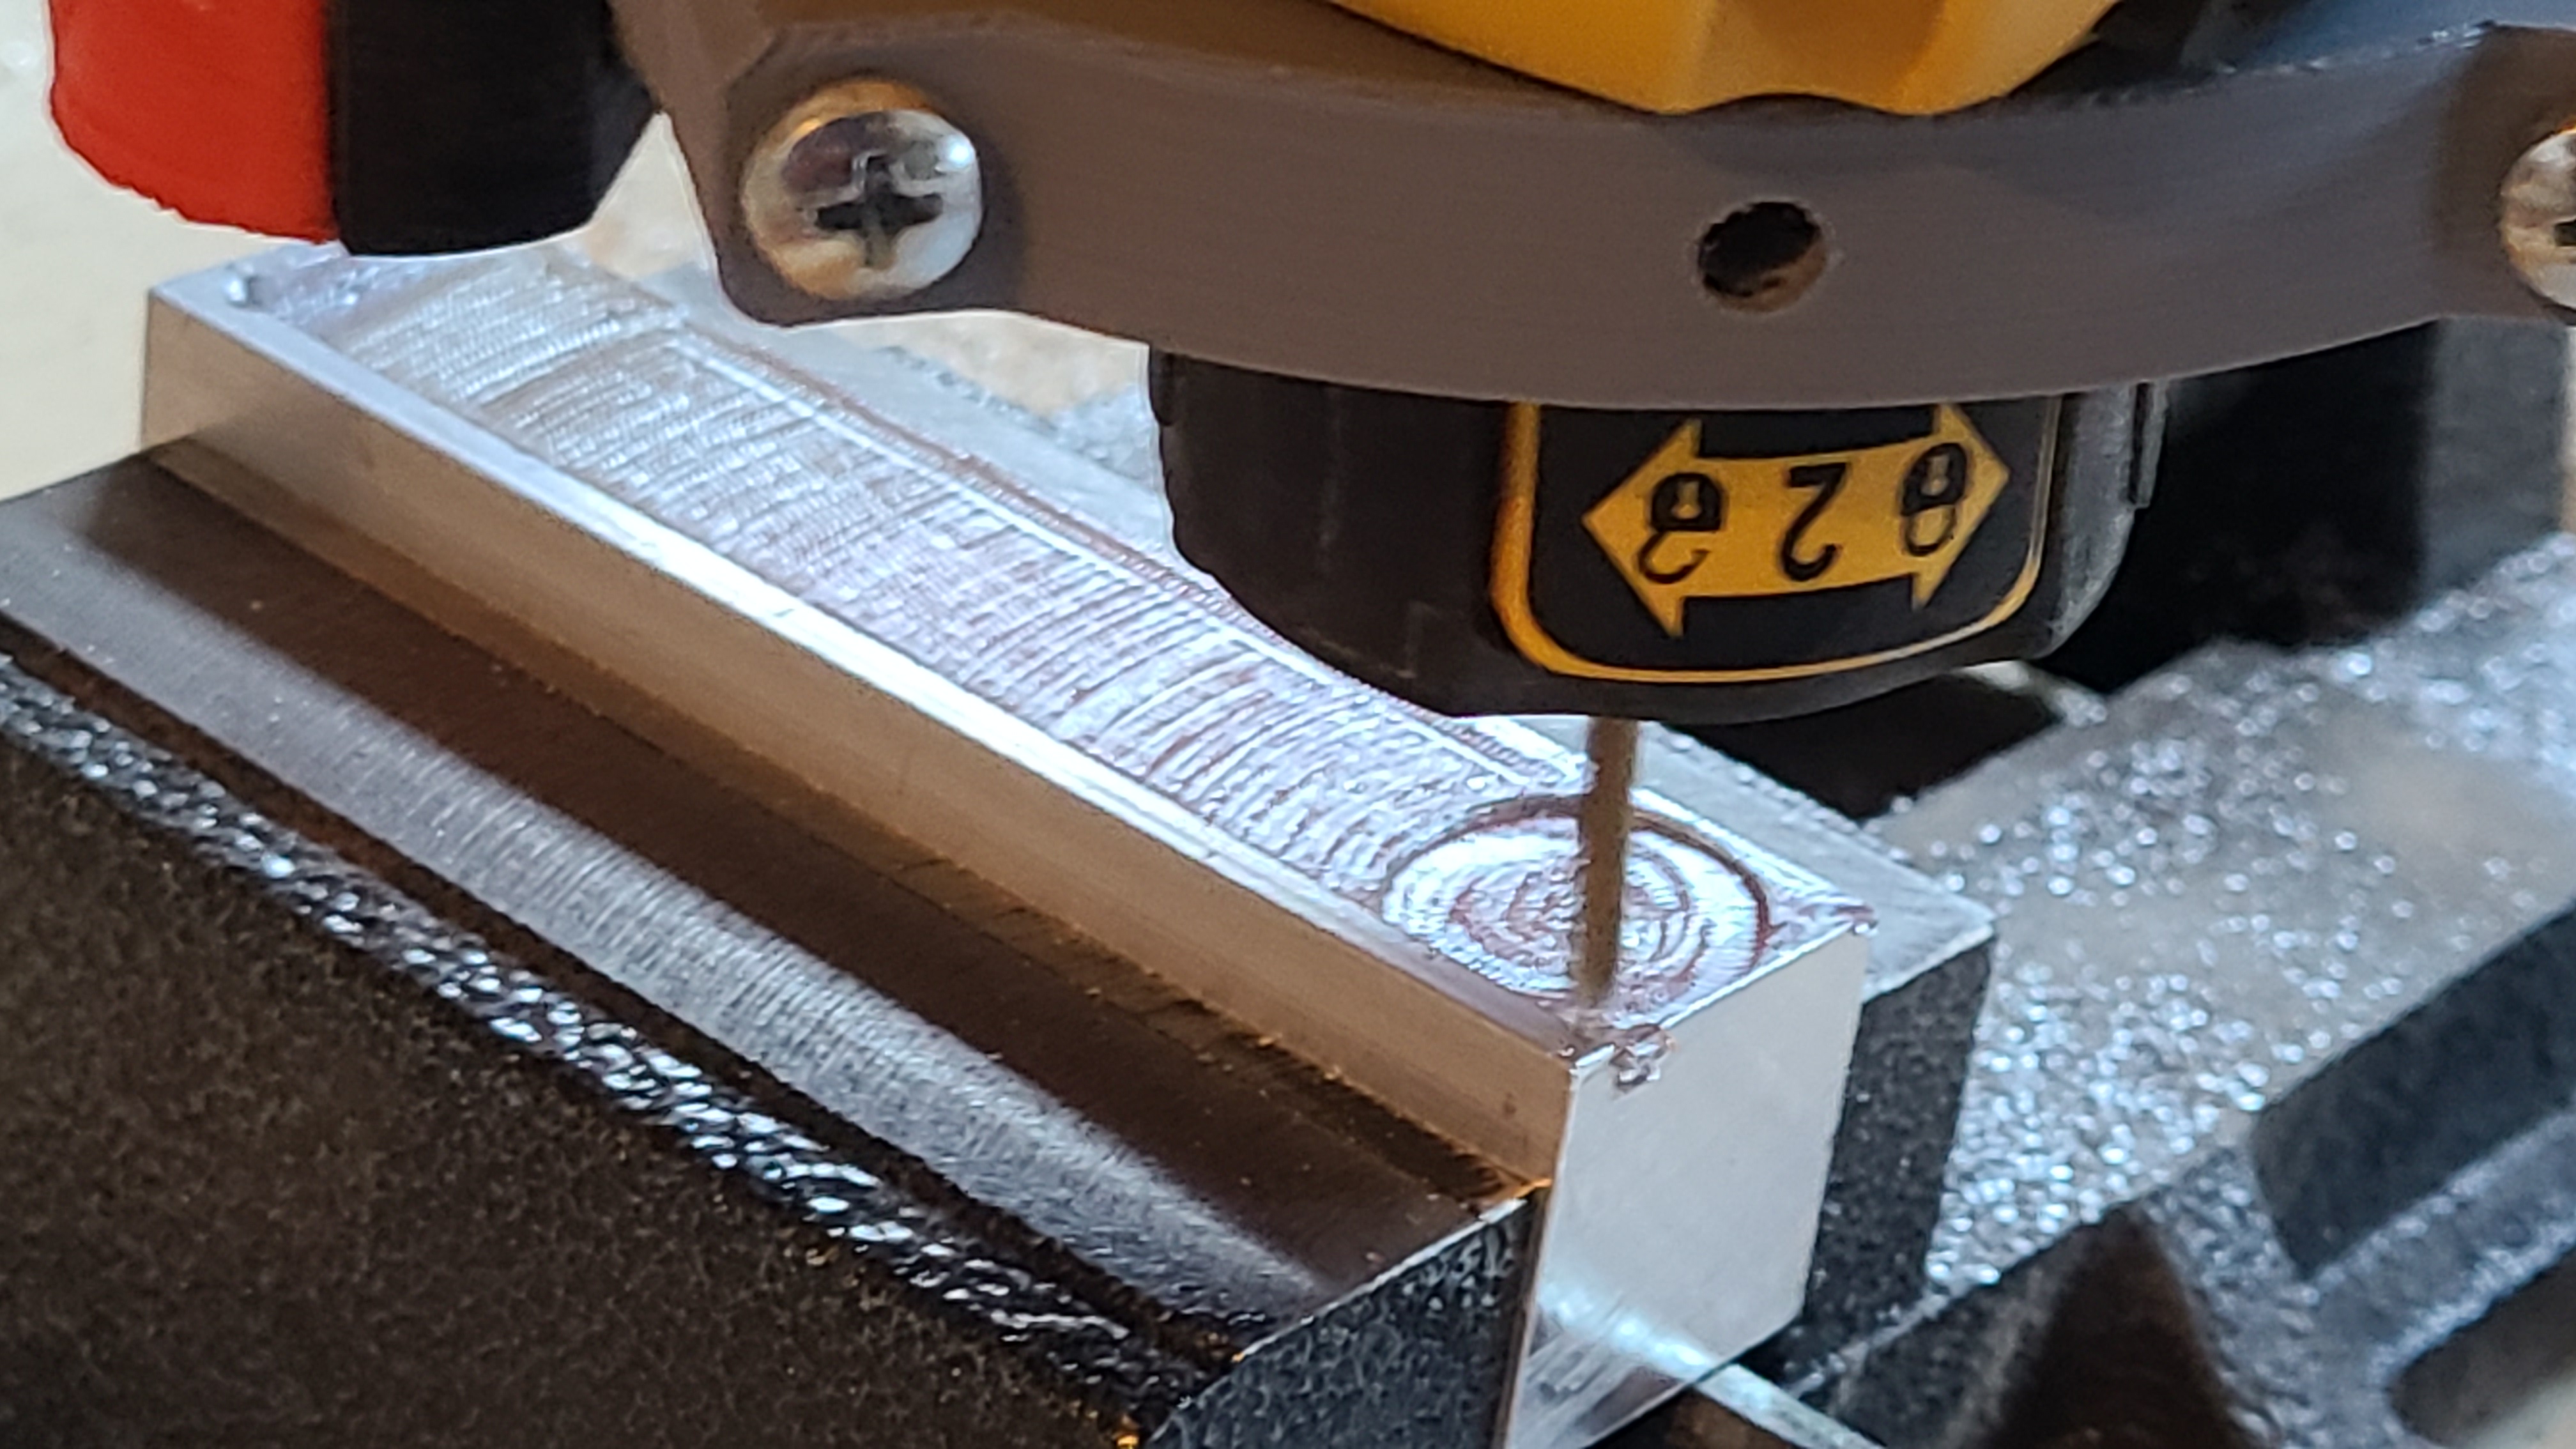
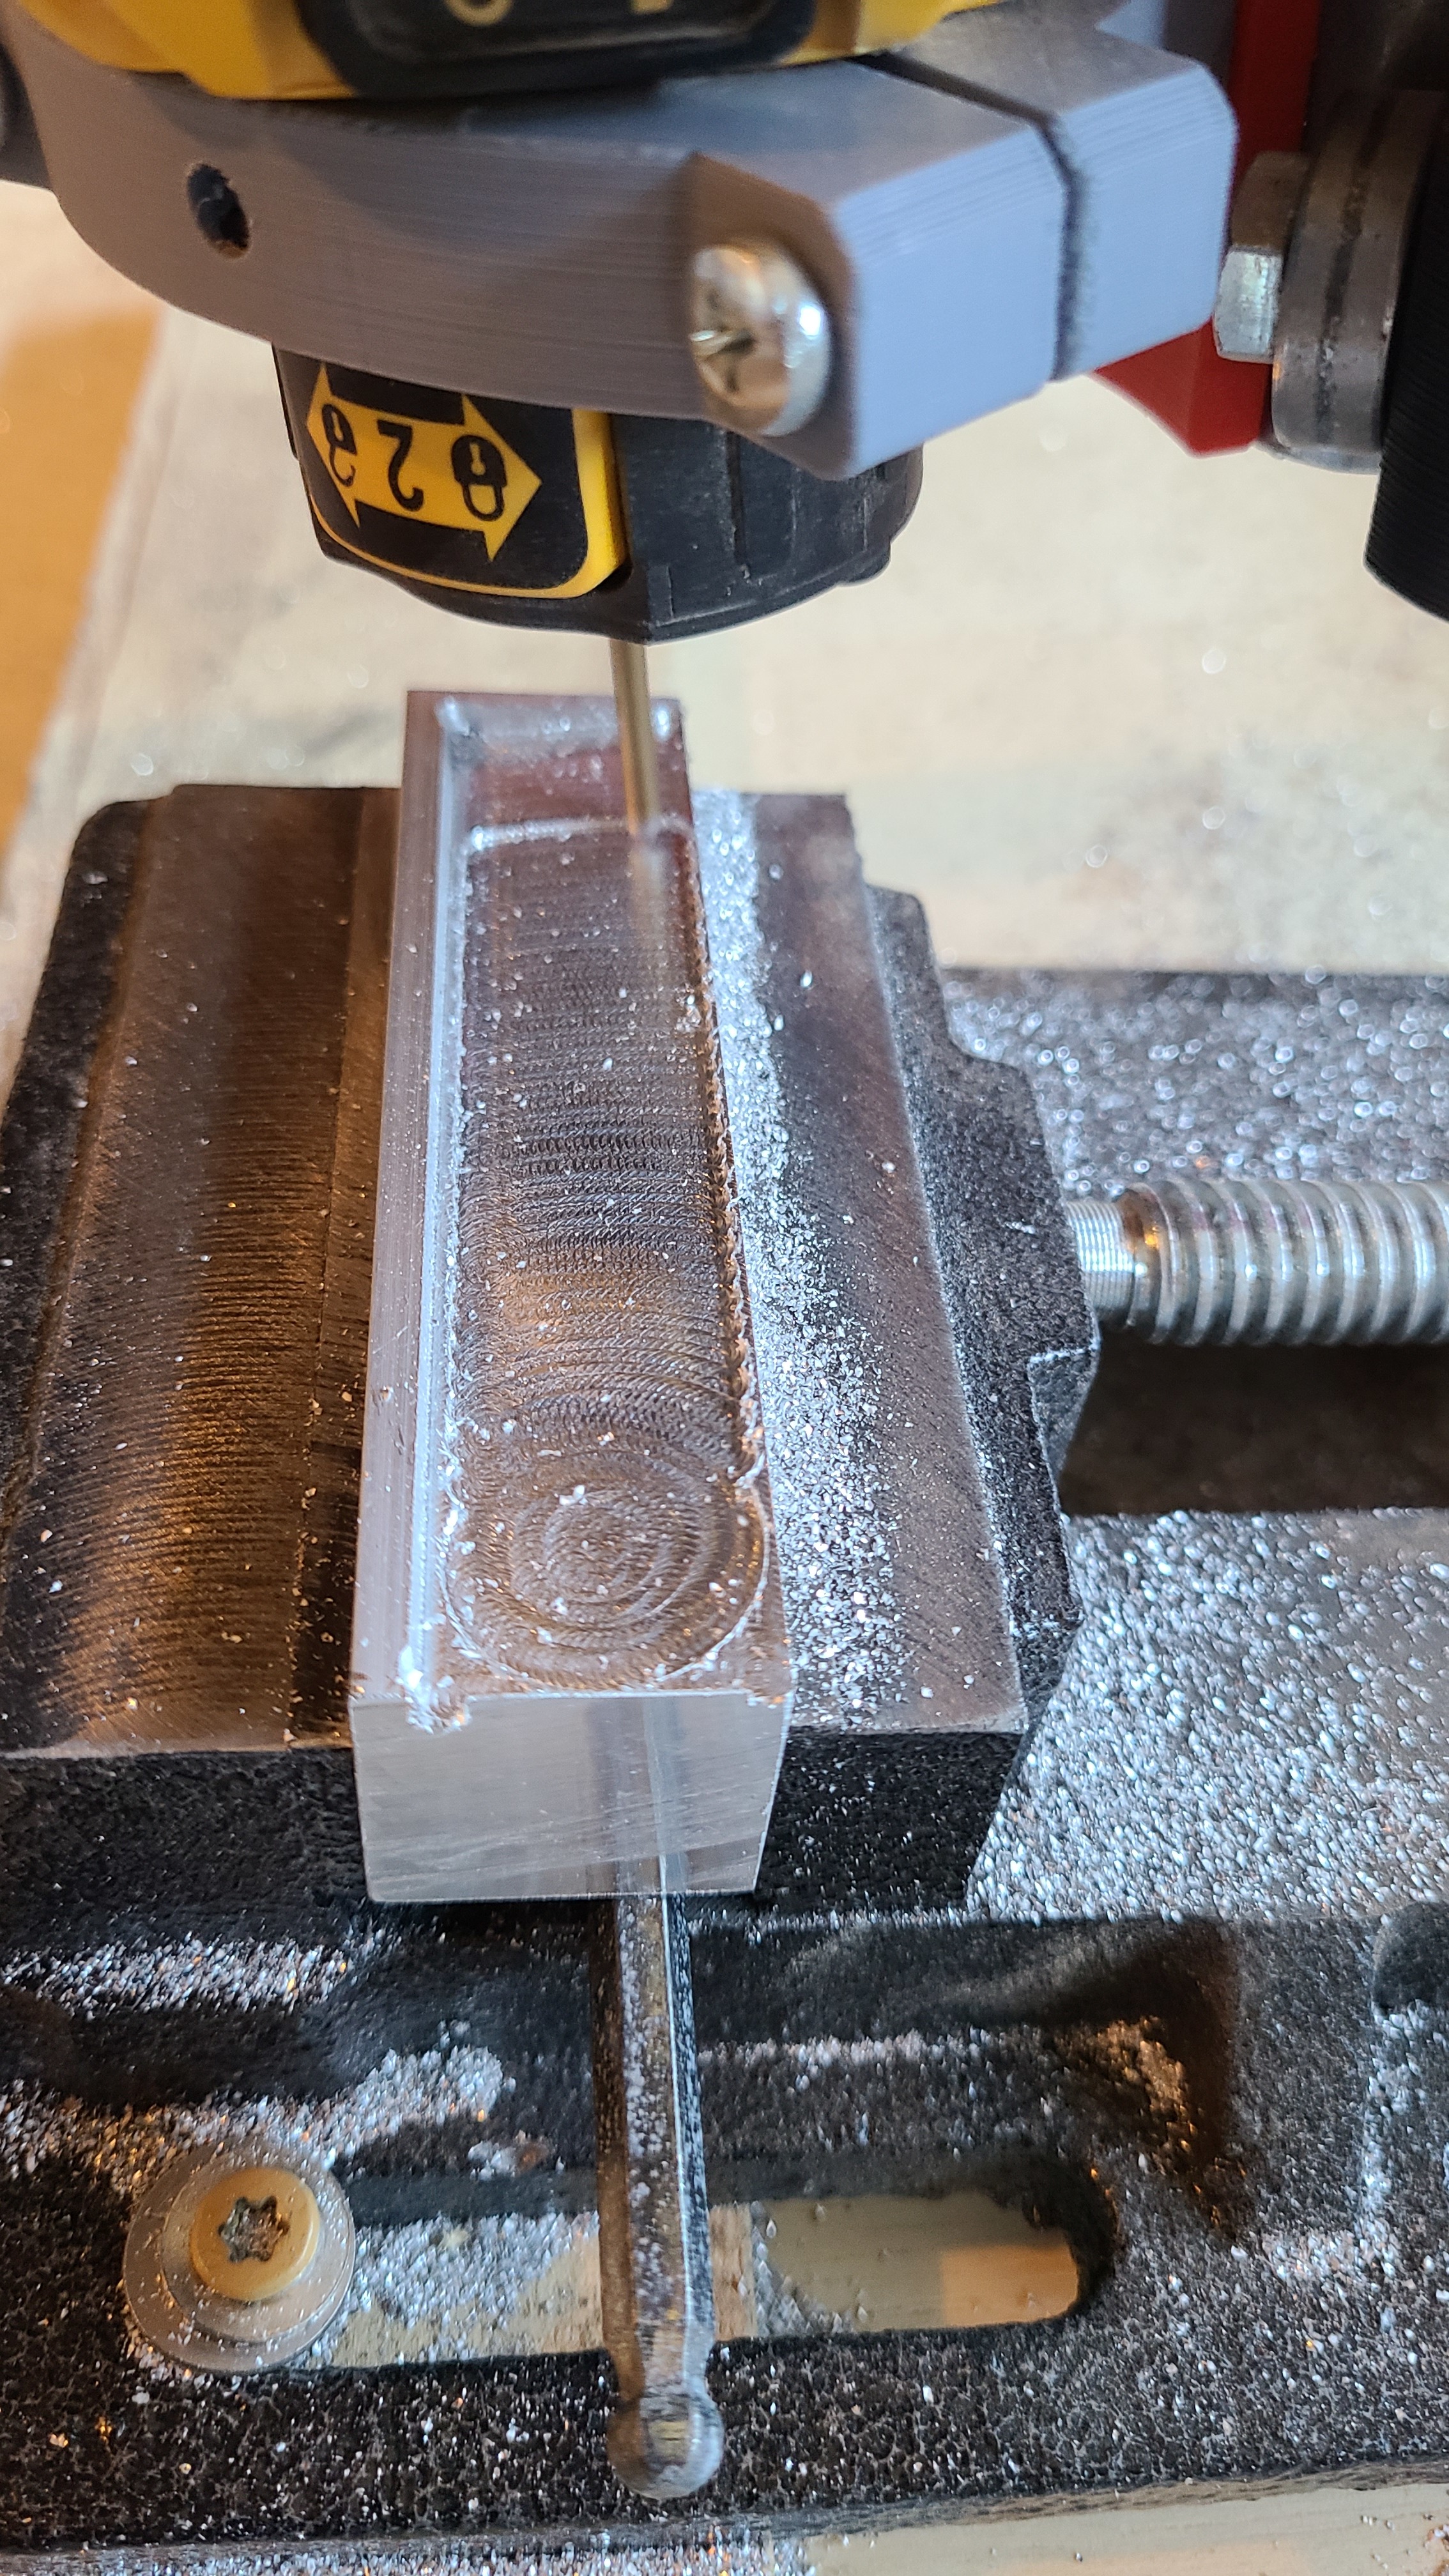
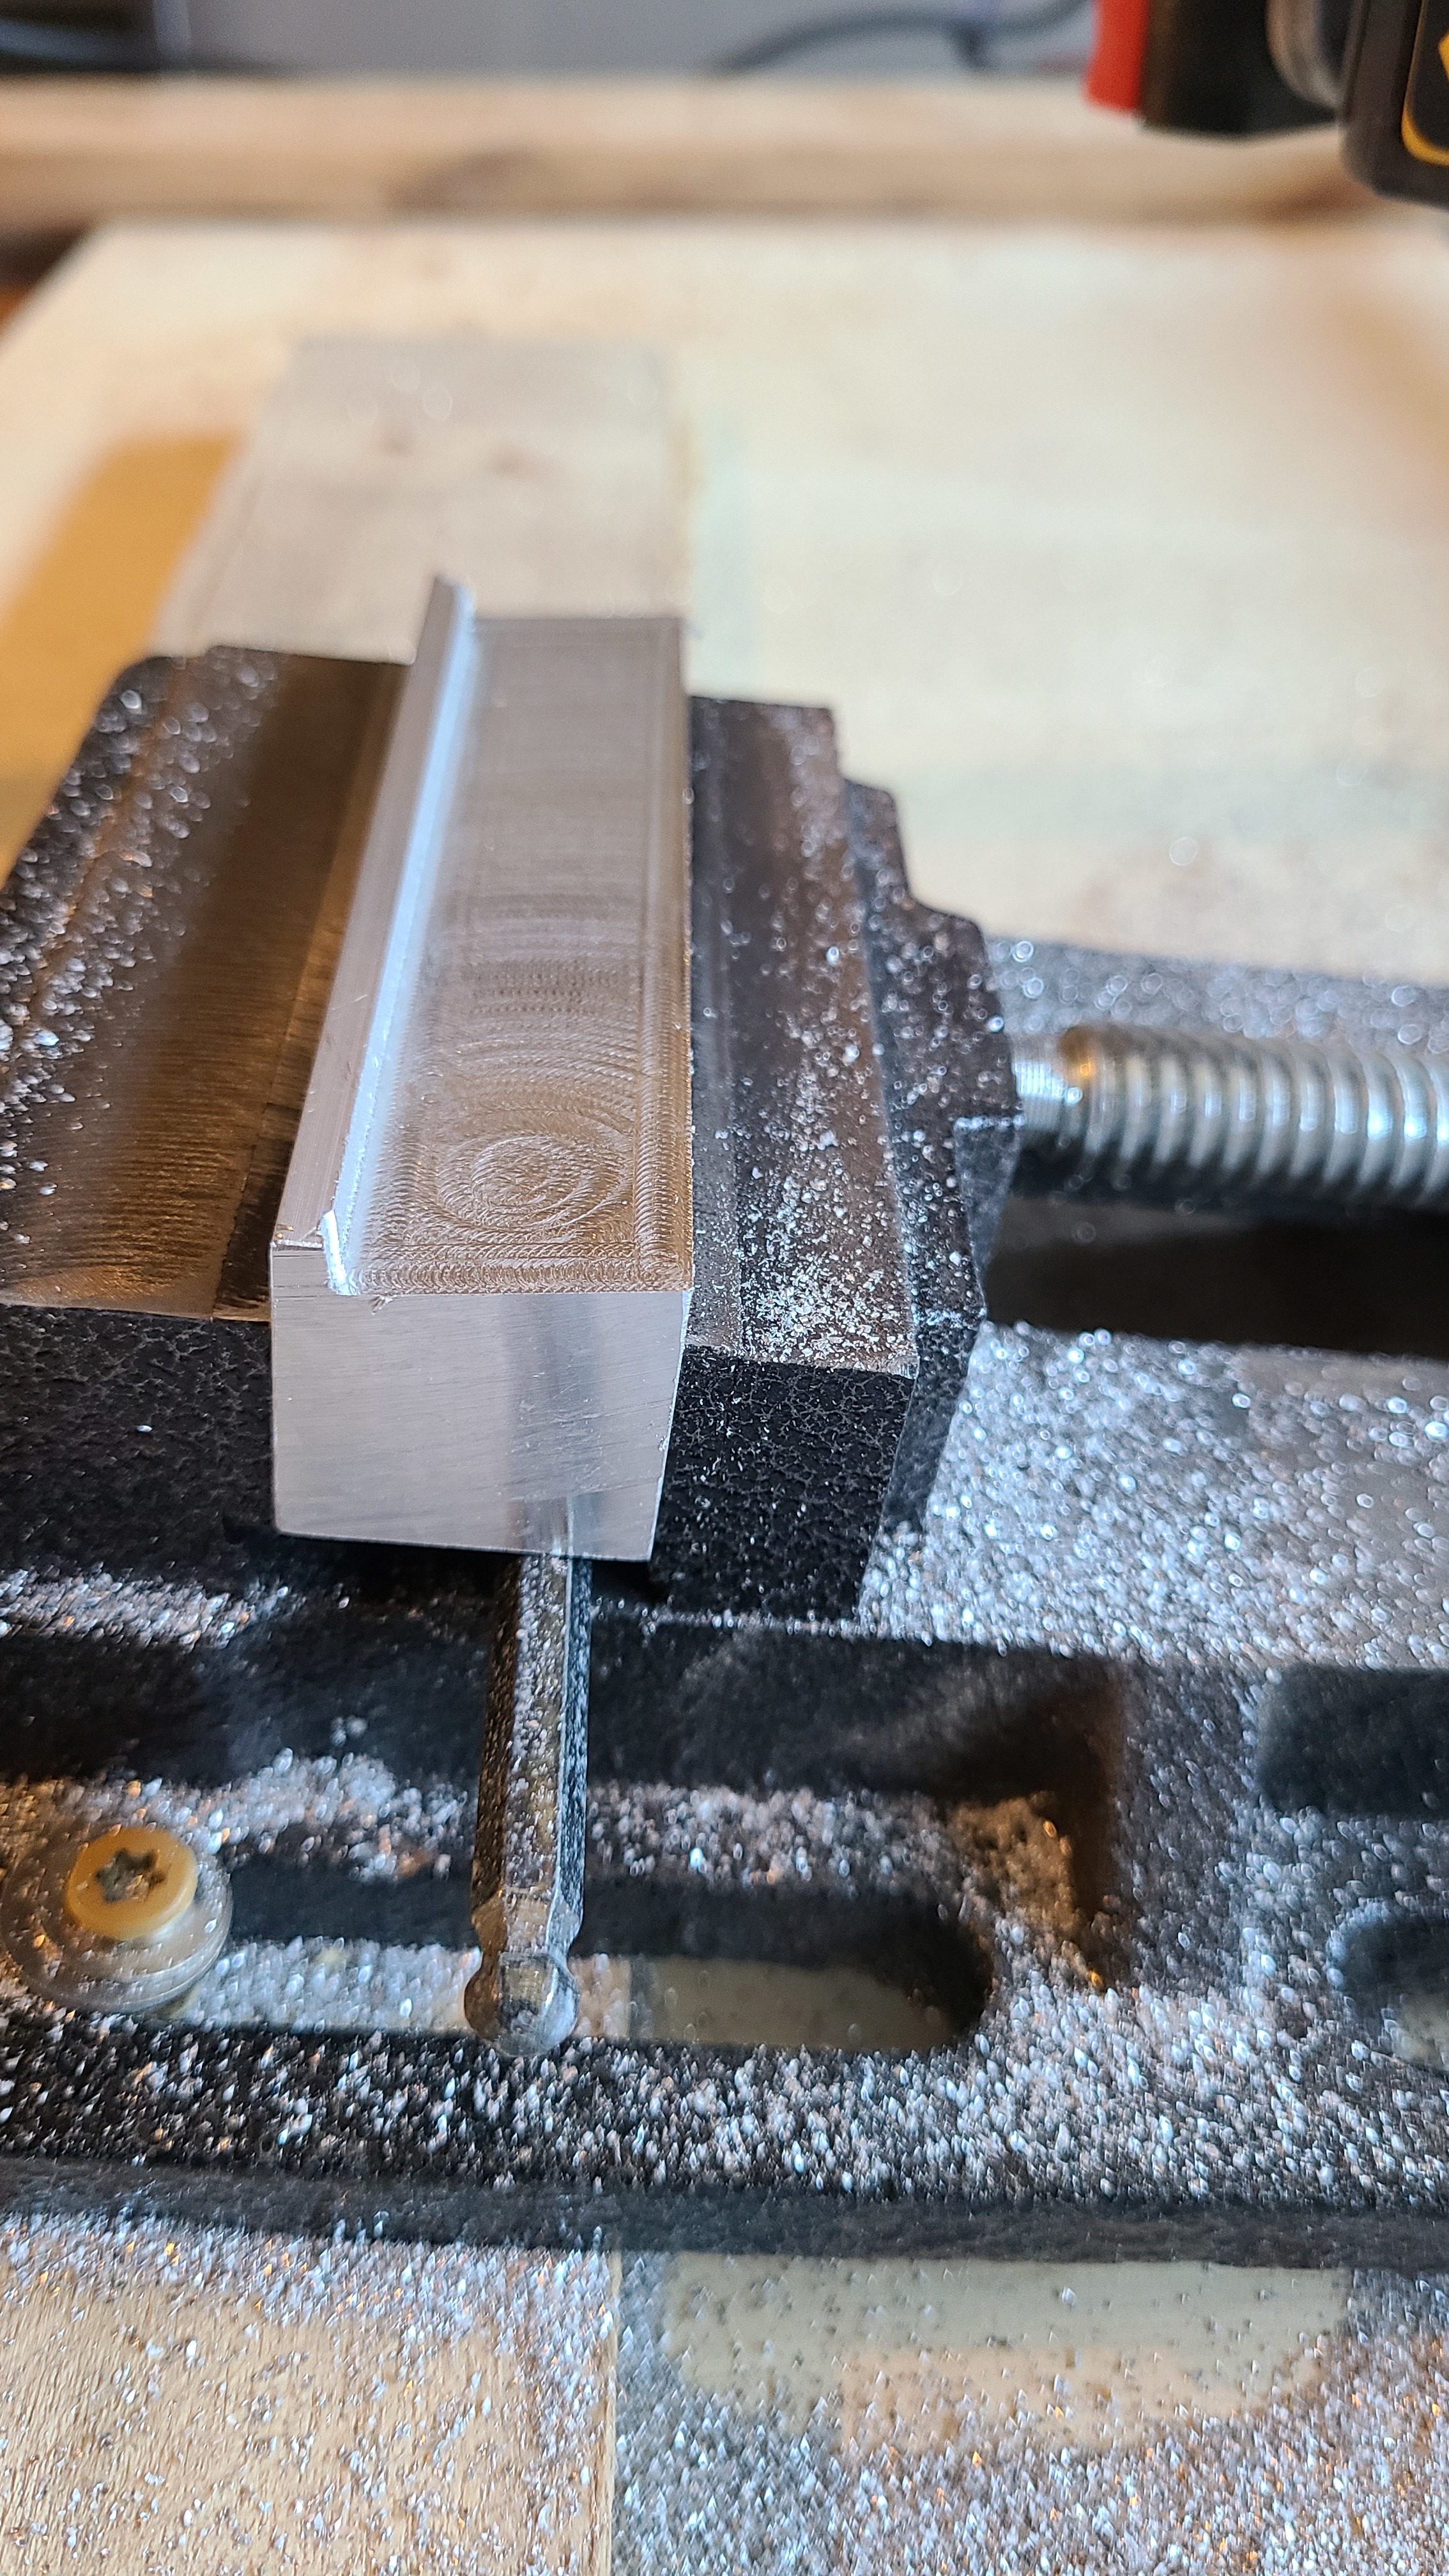
Made another jig, 5 degree this time, 150mm long. Bought me a fancy tilting vice. Way easier. Also changed things up a bit with the CAM. 300mm/min , 0.5mm DOC, non-trochoidal, linear pocketing strategy. Way faster, 45 min.
Cool toy, I want one now!
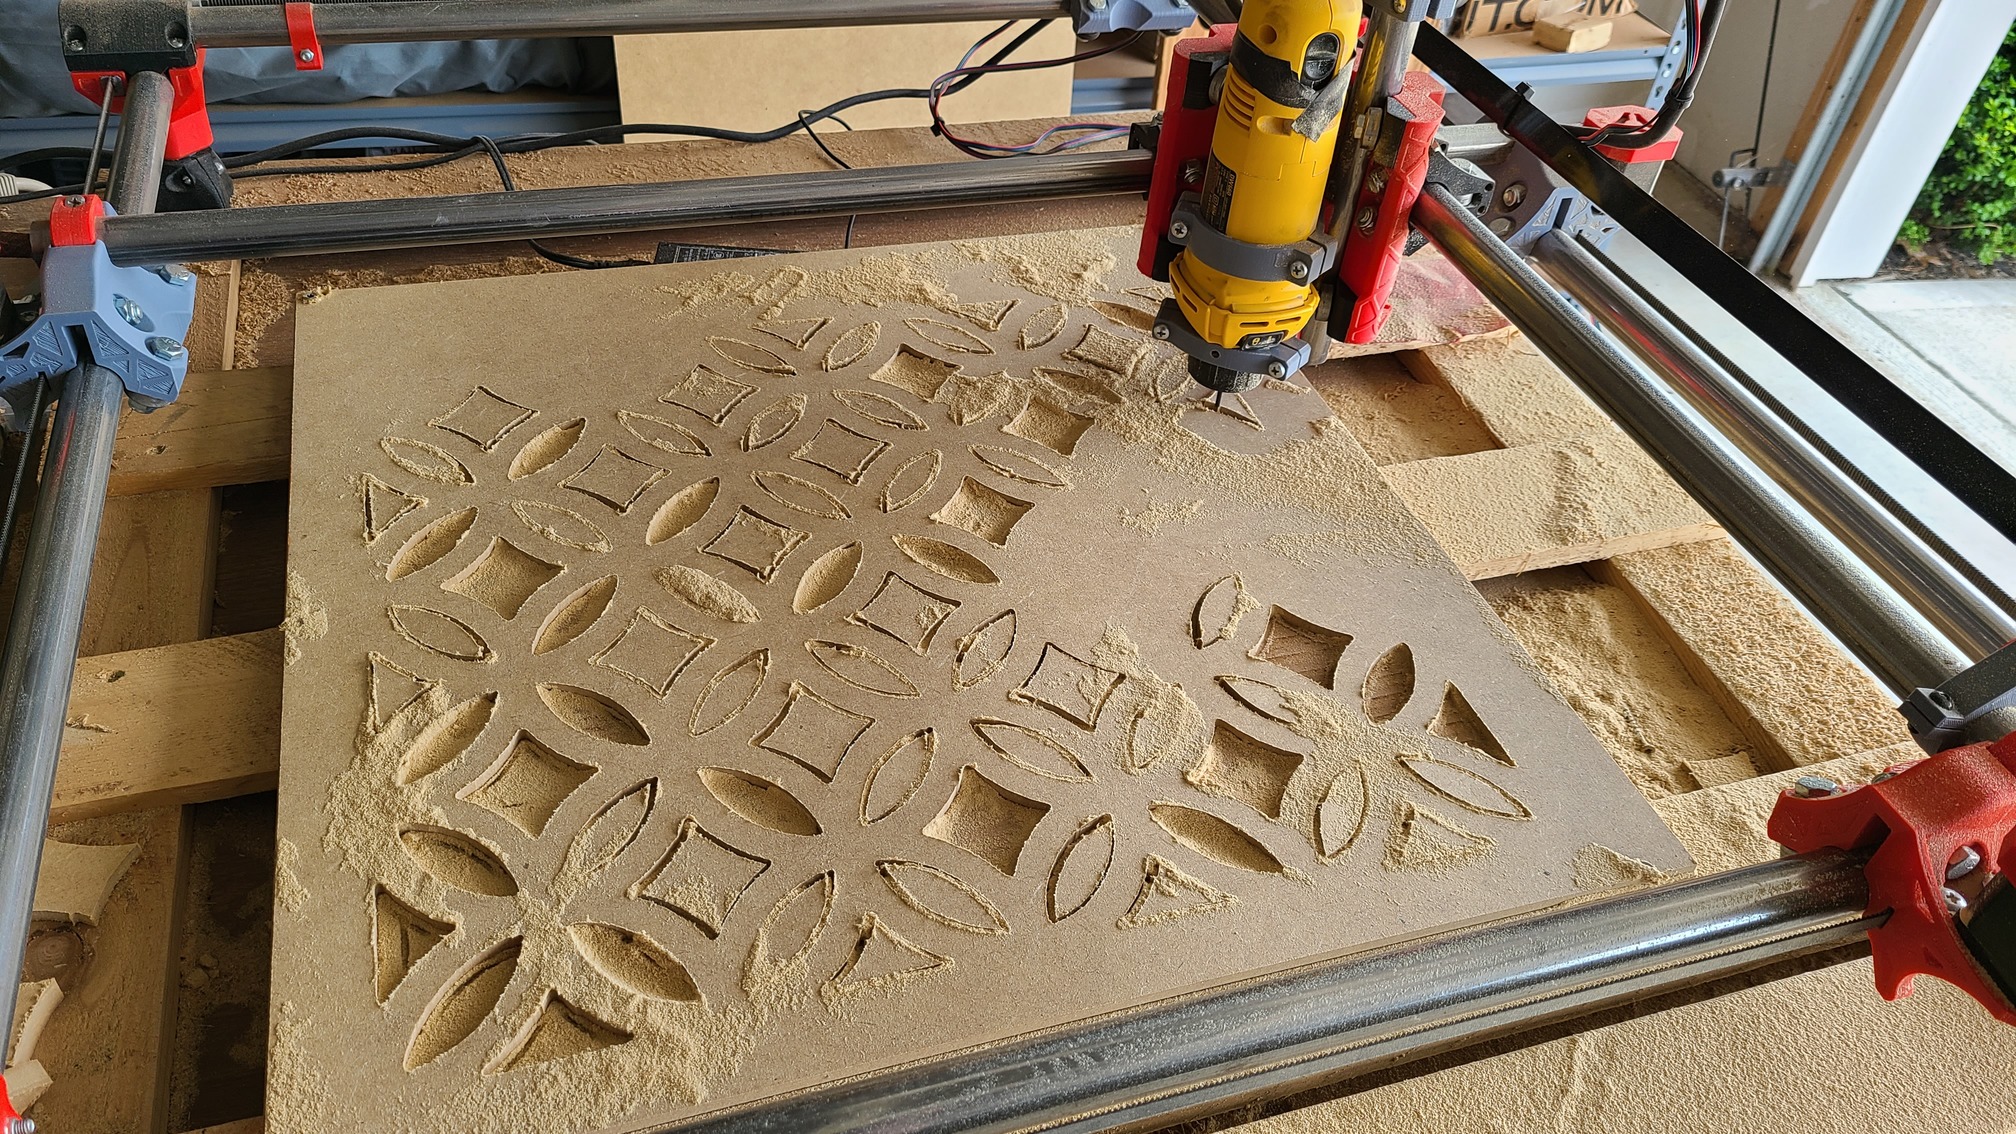
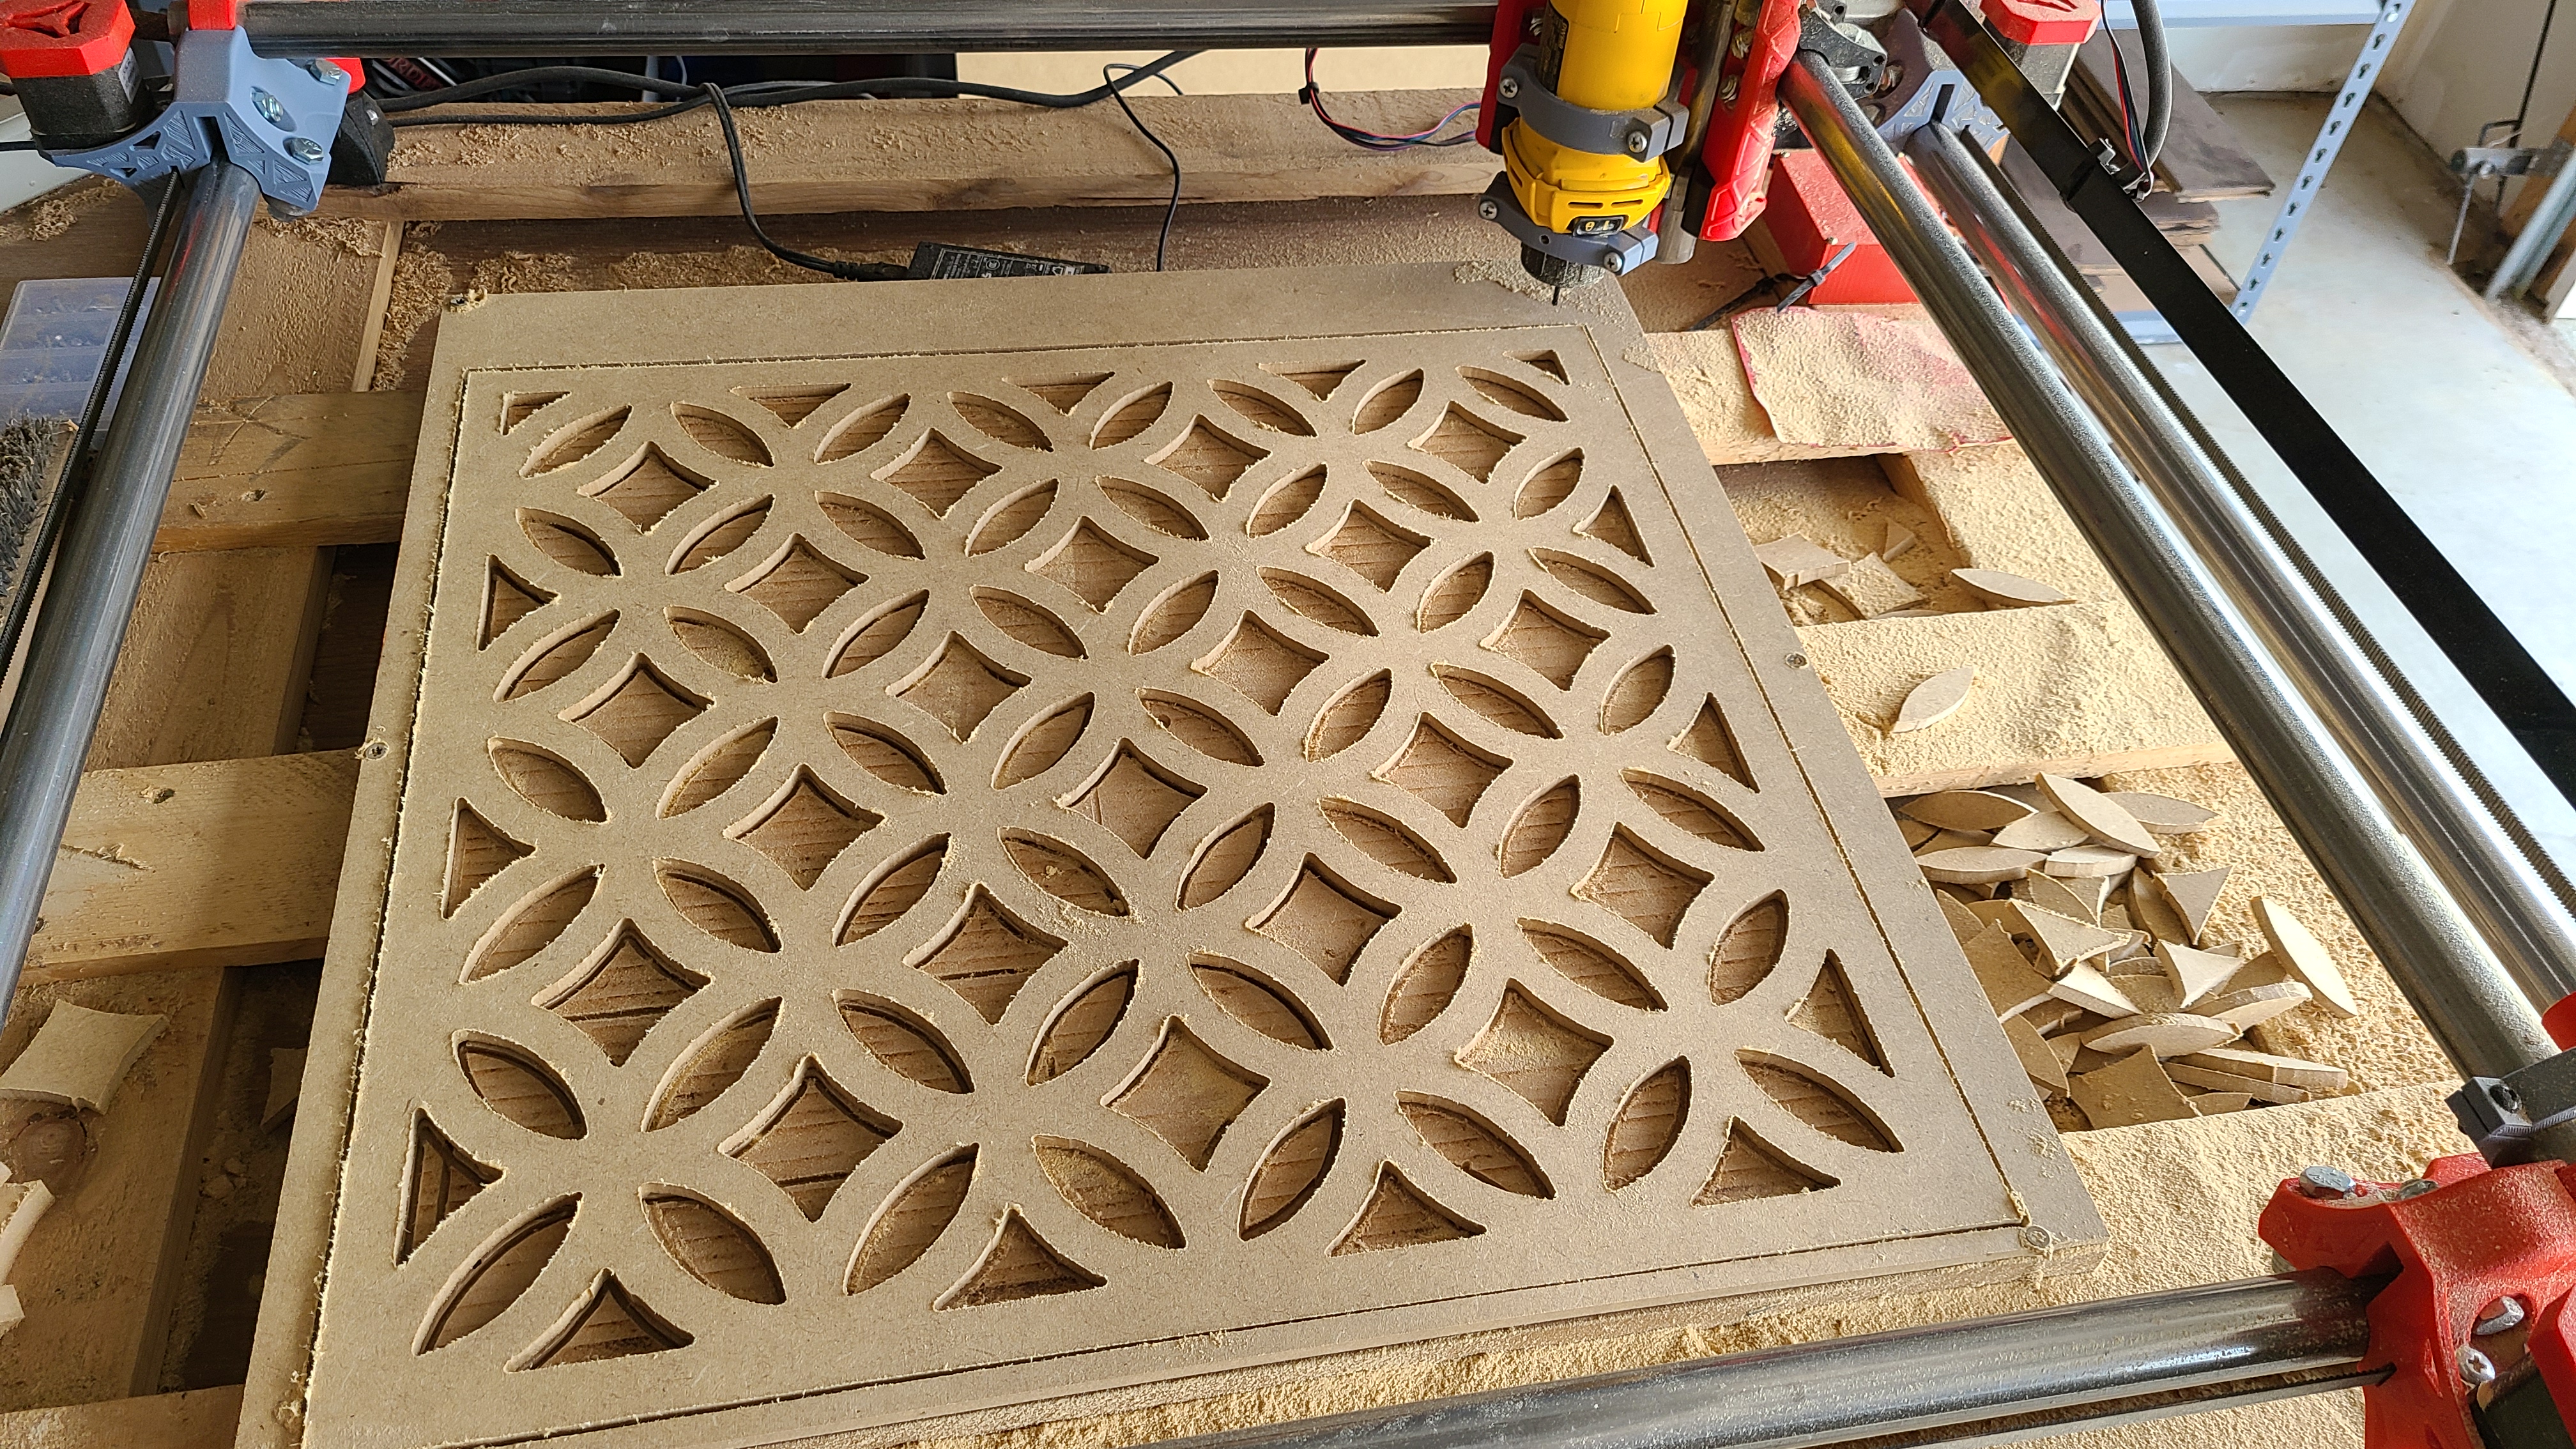
21"x22" air return grate. 1/4" MDF. 1/4" DOC,1/8" 4-flute, 1800mm/min XY, 300mm/min Z, 30 degree Z lead-in.
Still need to sand and paint.
Not seeing a dust collector/enclosure I have to ask: I’ve been reluctant to play with MDF after reading stories of it creating horrible amounts of dust when cut, is it actually reasonably tolerable? And will a few coats of shellac or water-based polyurethane adequately seal it from moisture issues?
Well, it’s out in the garage with the doors open, and I had a fan blowing accross it. I didn’t notice too much fine dust in the air. That being said, I could still probably use a good nasal lavage. 
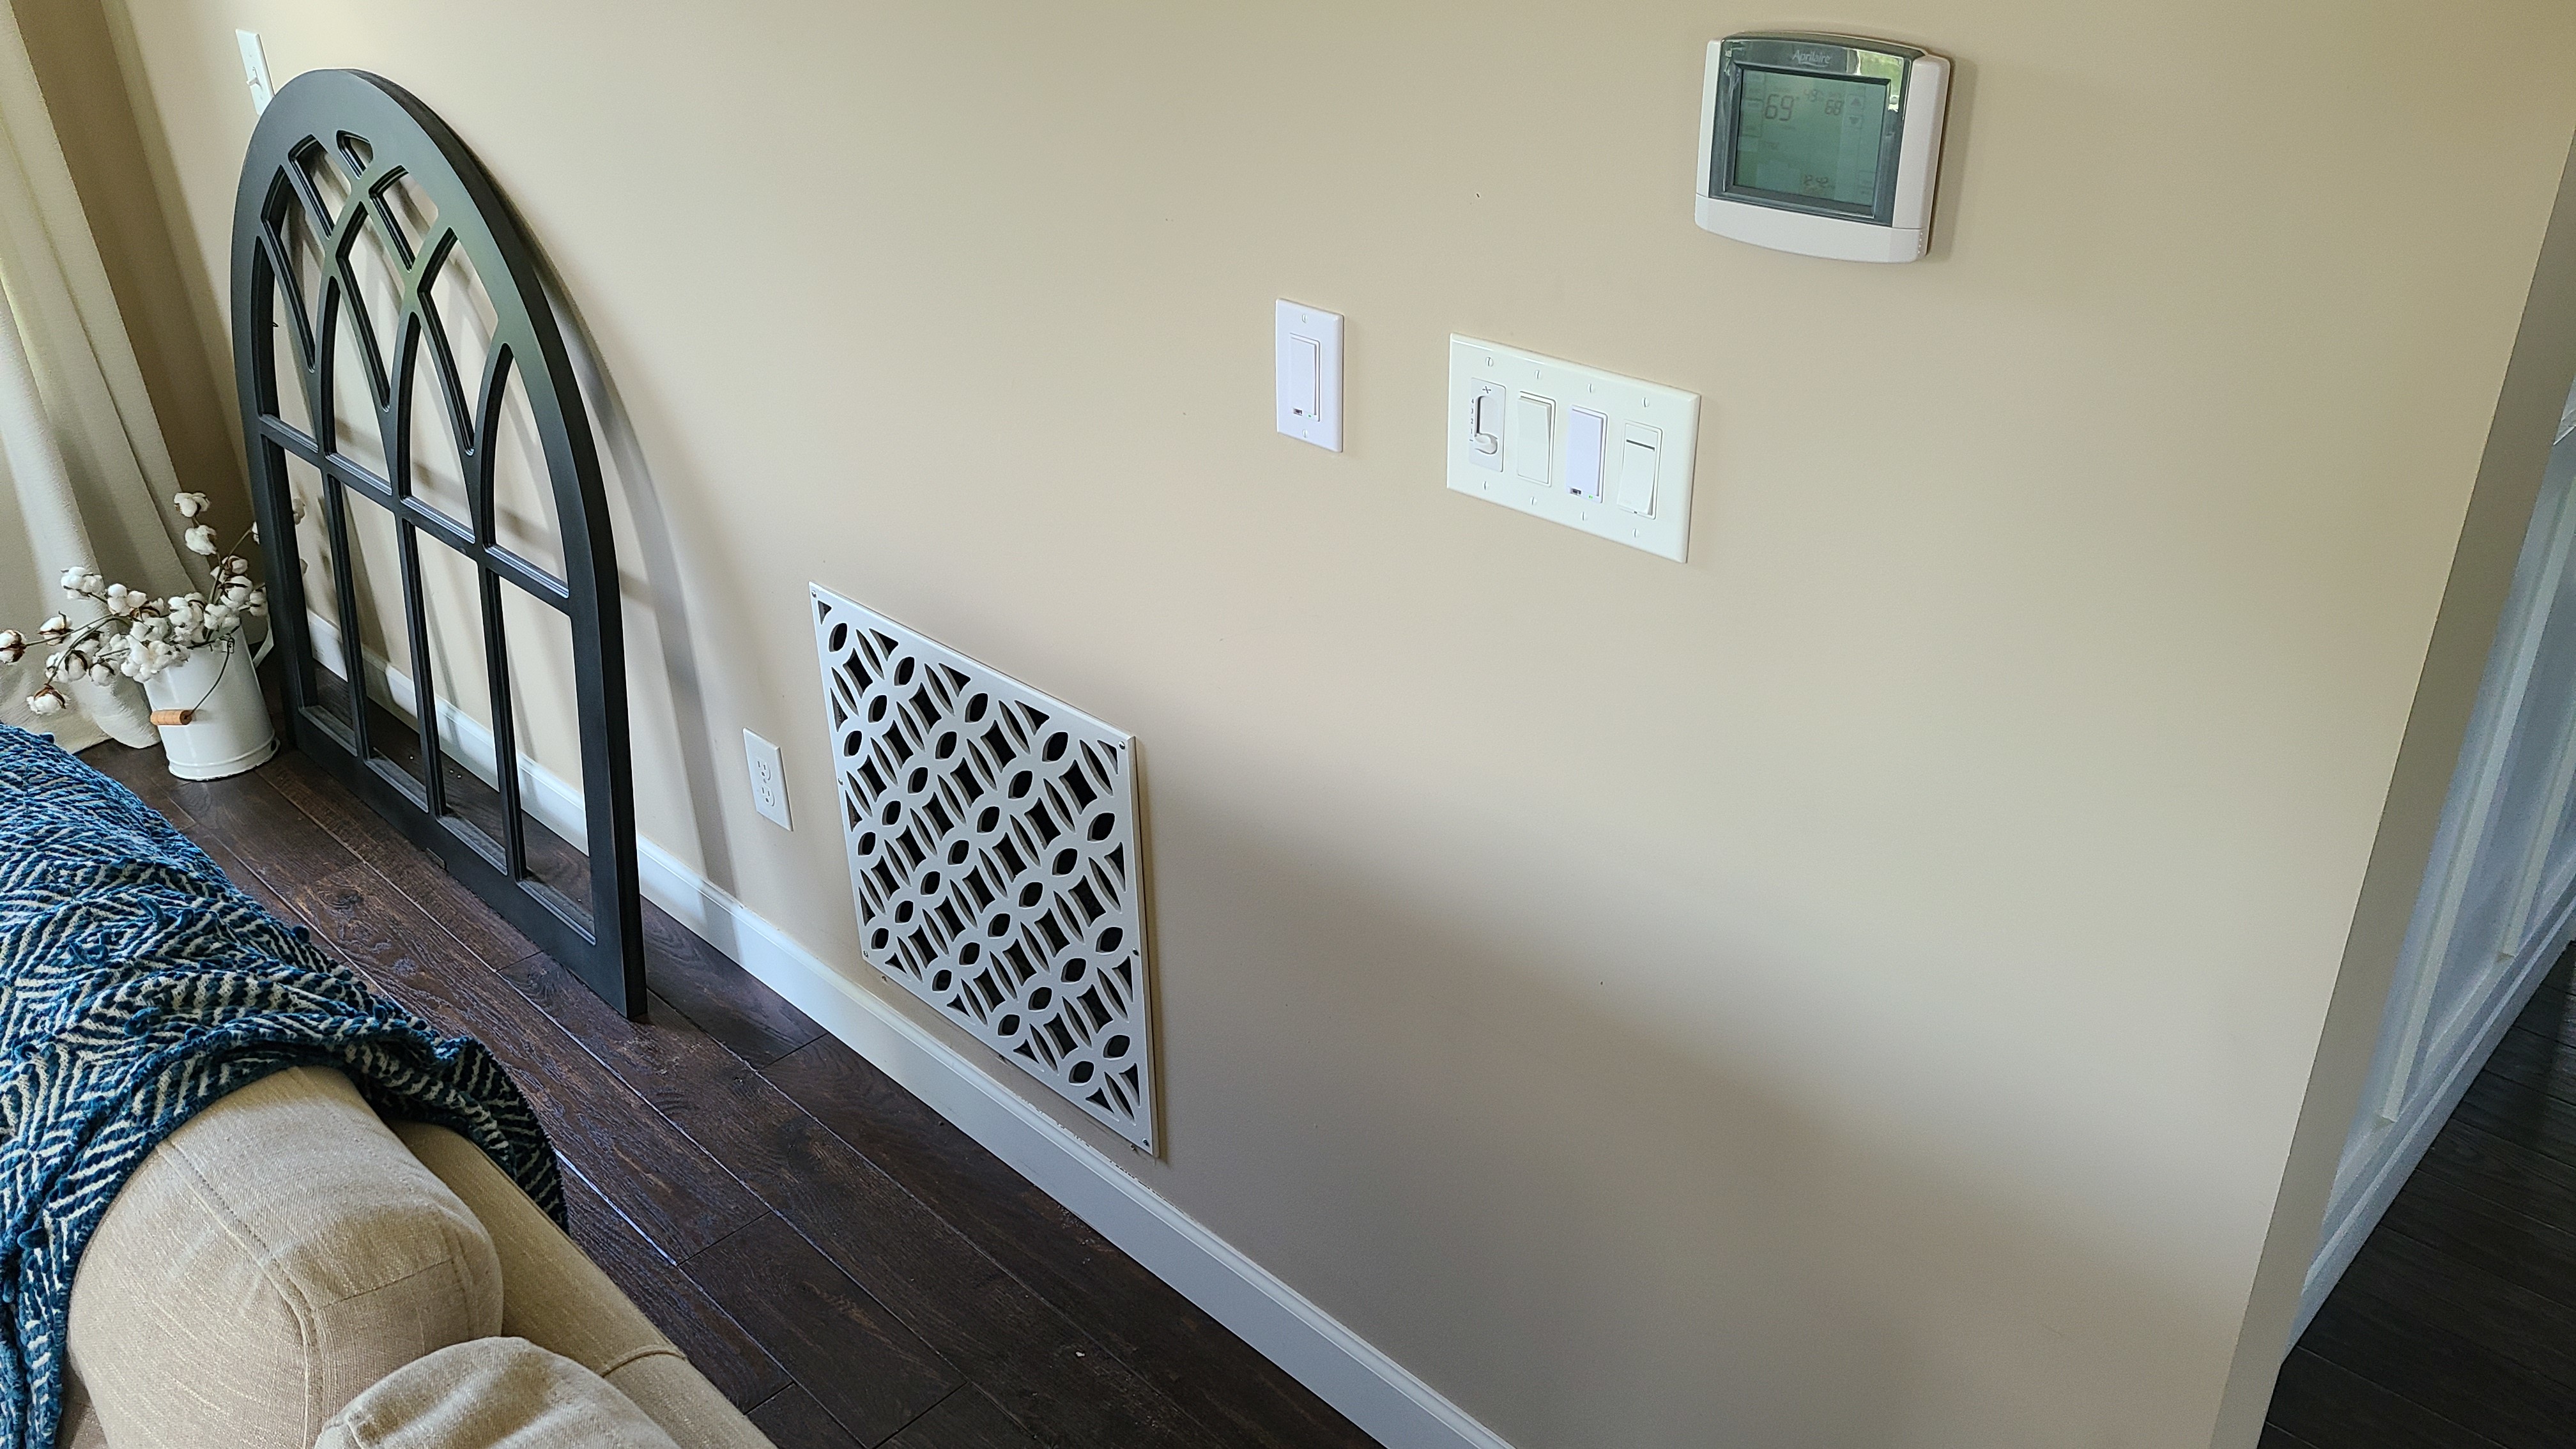
As for the finishing, I’m not quite sure how yet. I know the final color will be the white trim paint that matches all of my moldings.
Thanks! I may have to roll the burley out onto the screened back porch and give it a go. although it’s been so refreshing not wearing a mask for a while I may wait a bit. ![]()
A-men to that!
It does depend somewhat on your tolerance level. It does create a LOT of dust, and it will be dust, not chips. I don’t have dust collection other than a shop vac where I point the nozzle in the general direction of the tool now and again while cutting. you will most certainly want to wear a mask, and things will accumulate a layer of MDF dust. It doesn’t stay in the air too long though, it settles out reasonably quickly. I’m thinking though that I may use a box fan and furnace filter to clean the air in my CNC room though.
Or a coat of primer. MDF is really porous, but any good sealant will plug it up and keep it safe from reasonable moisture levels.
For indoor uses, polyurethane is most certainly adequate, and with some caveats for UV damage, is probably fine for outdoors. I have used polyester resin (Fibreglass resin) to seal it for outdoor use, and it’s lasted several years out in the elements. The trick is to not leave any gaps in the coat, because once moisture gets past that, the MDF will swell and crack the surrounding coating. Once that starts, it’s all over.
A good coating of latex primer and paint will also seal it very well. Outdoor grade latex paint will protect it for a long time, provided that it’s kept in good shape. Latex paint doesn’t last forever, and it can’t be allowed to peel, but there are MDF trim pieces that I’ve seen last decades on outdoor deck railings.
Well, I hit it with a couple of coats of Rustoleum 2X paint+primer. Not my best work, but the 6-foot view looks good to me. I gotta touch up the wall at the bottom because this was a little undersized in one dimension. And paint the screw heads.
I like it. Did you do the pattern yourself or cut and paste?
When I do patterns I feel like I am brute forcing it and there must be an easier way.