Hey All, I’m getting started on a new build and want to get some details written down here so folks can tell me what I might be doing wrong before I start! I have a half working lowrider that’s too big for my space and I never really got the plane off the ground… So I’m downsizing and attempting to increase build quality to get something useful for me.
I have a project in mind - a sort of electro-mechanical board game that needs to be in a nice wood body, and I’ll undoubtedly make some hardwood cyberdeck cases, keyboard plates, maybe aluminum ebike parts, etc.
MPCNC:
Targeting 14" x 24" usable space, but using a dewalt 611 router that I already have, so figure I need to build for 15" x 25" work area to accommodate that. Sound correct? I use the router a lot for other stuff, though, so maybe I should buy a spindle…
What’s the best option for lower-priced spindle that there’s a good dust manifold design available for?
Using 1" stainless or DOM tube.
I already have a Tinybee and a Bumblebee (more built in end-stop pins) control board to use, probably with FluidNC.
Does the total machine footprint on the calculations page include all of the belt parts, etc, that stick out the sides?
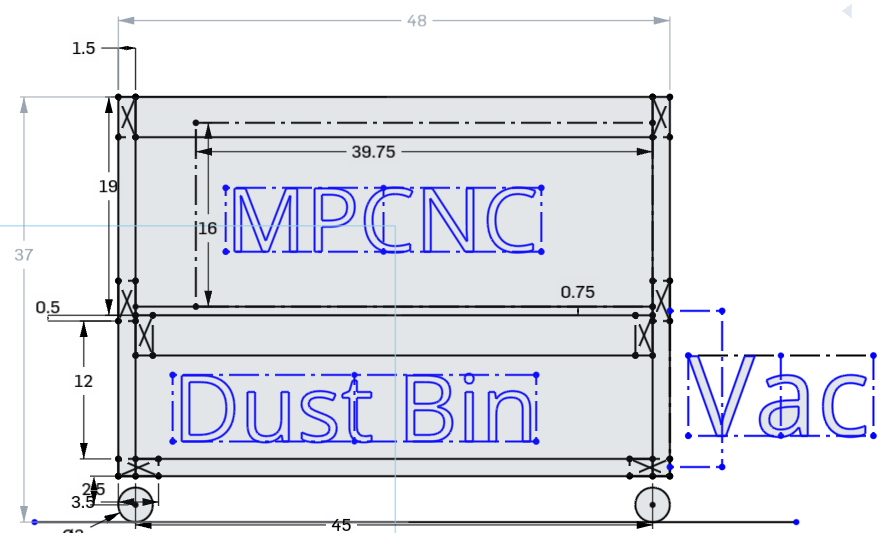
Cabinet:
Noise Control with fold up door.
Slide out piece of MDF for the MPCNC that I can take up to the office to work on.
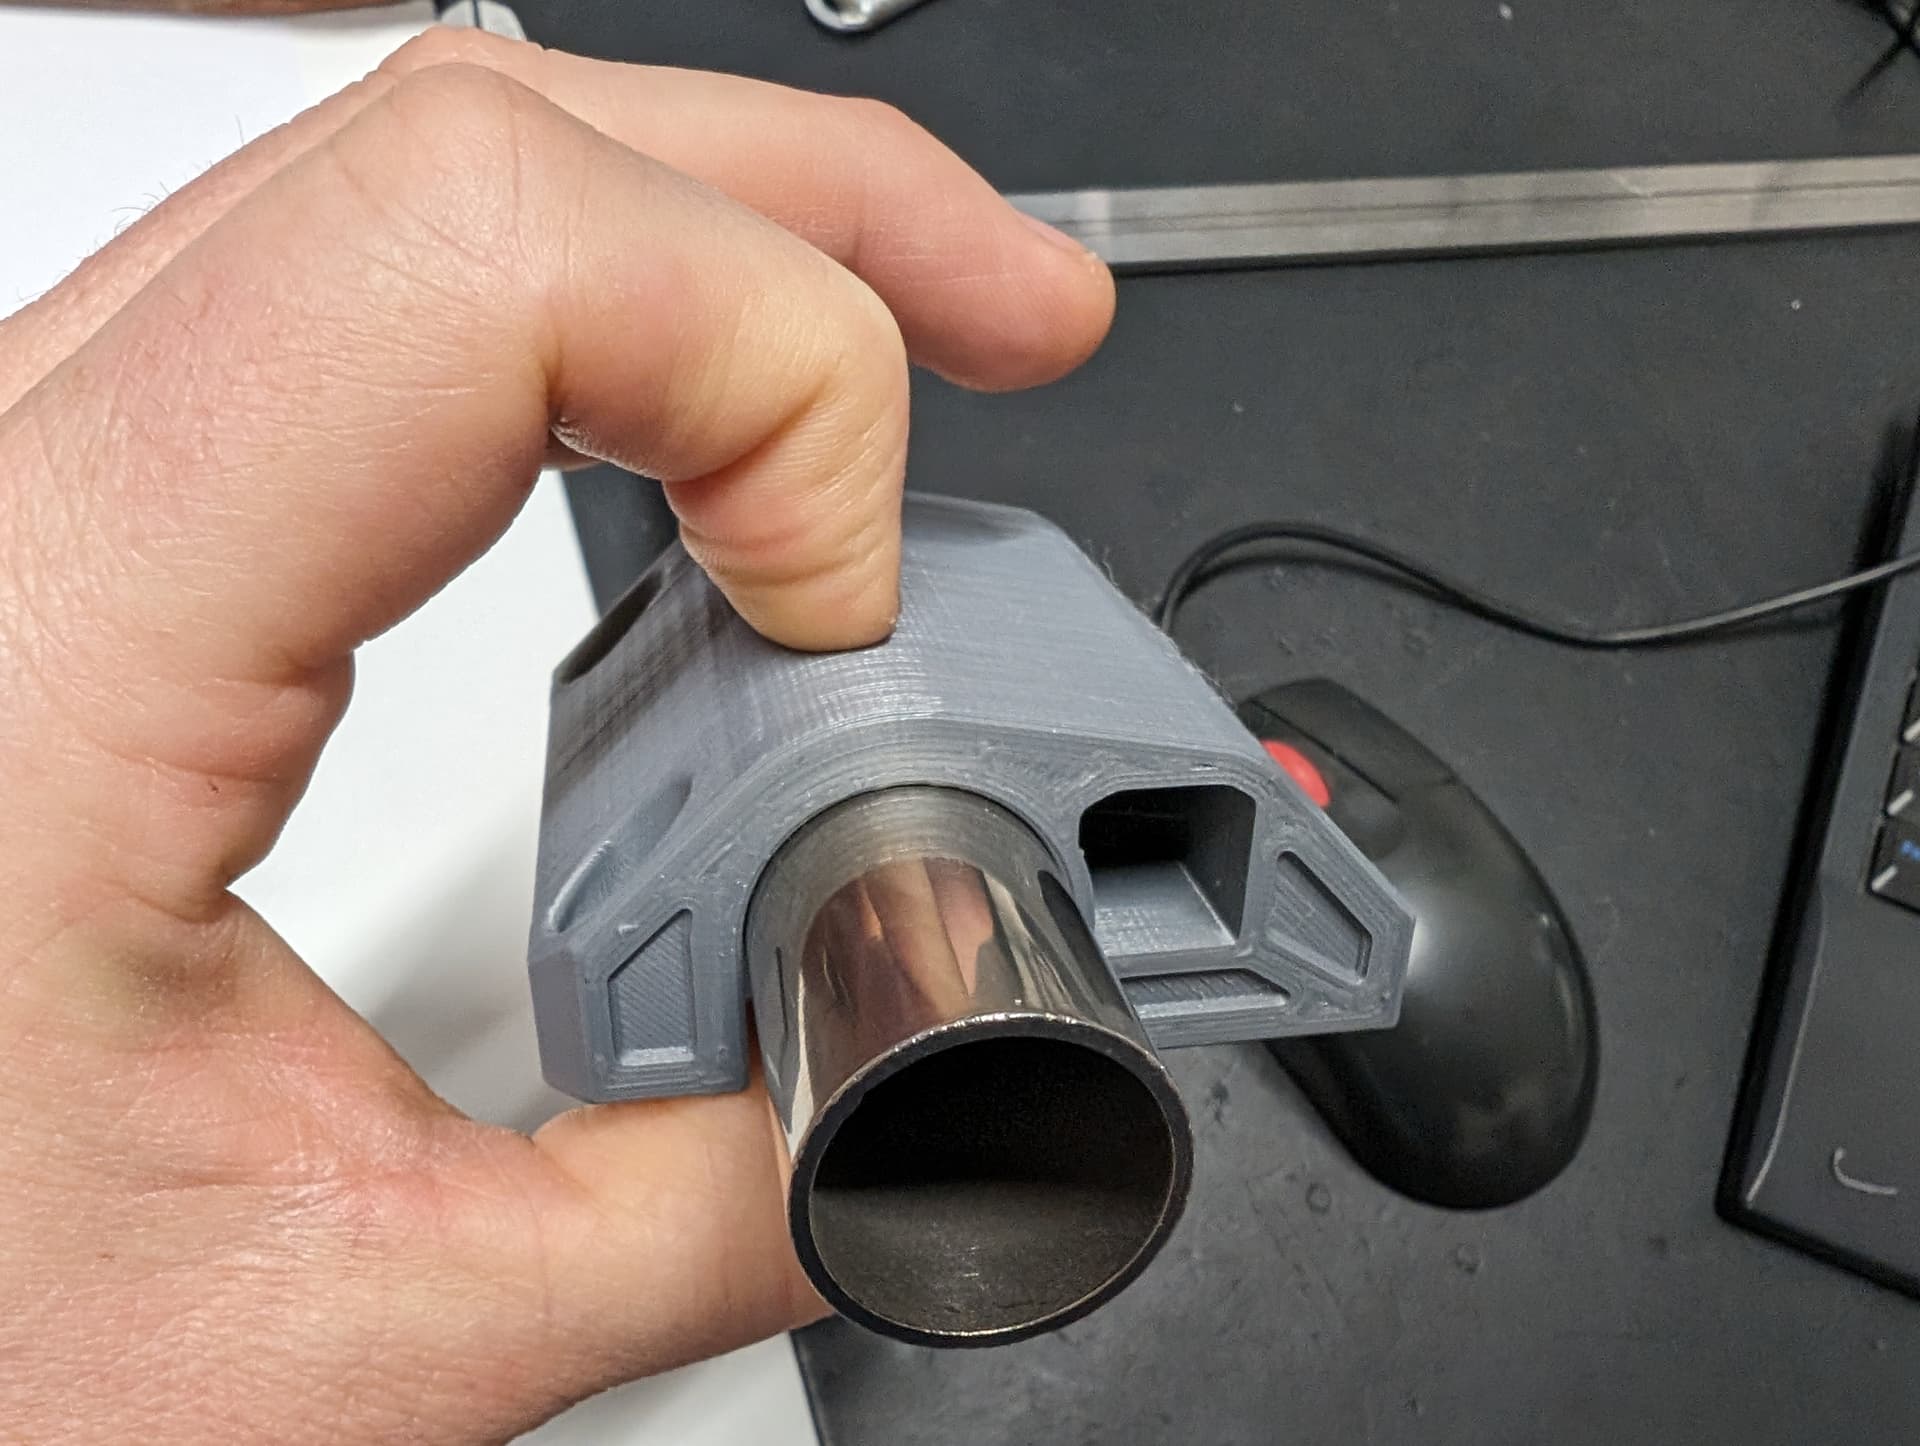
Dust collection will be a compartment in the bottom of the cart with one of these things sticking out the side, and a tube running up to the top shelf with the CNC.
Hey! Welcome to the forum, I have found everyone very helpful and nice, so this is a great place to ask questions. In regards to your planning, your build sounds very similar to mine.
-I planned my build around using a 2x4ft sheet of mdf as that is very easy to get at hardware stores locally. I cut it down to 2x3ft so I only had to cut it once. I built my MPCNC with the feet on the edge of the corners, meaning the “table size” according to the calculator is 24”x36”. My build area works out to about 12.5”x25”, however I could probably get another inch maybe because I have the end stops a bit short just for safety.
-Not sure about the total machine dimension, but looking at mine I would say they are pretty accurate
-As for spindle/tool, I have the Bauer router (harbor freight), and it seems to provide all the power I could need. I mainly work with hardwoods (walnut, maple, etc.) and as long as I try to not push it very fast I get perfectly fine cutting power. It’s only $45, you can get a no questions asked warranty for it (not sure how much), and it fits all of the printable modifications/dust boots that I have seen for them Makita router.
Feel free to ask anymore questions and good luck with your build.
I have a feeling I’m a little over-kill on the prints… I’ve been slicing with three perimeter layer, 1.95 mm top/bottom, 50% infill, with .6mm nozzle and .15mm layer height. It’s taking maybe twice as long to print than in the assembly instructions and I’ll probably be closer to 4 rolls of filament than 2. But at least the parts feel really strong!
Slowly… I can’t make an mp3dp v5 until the mpcnc is done and can cut parts.
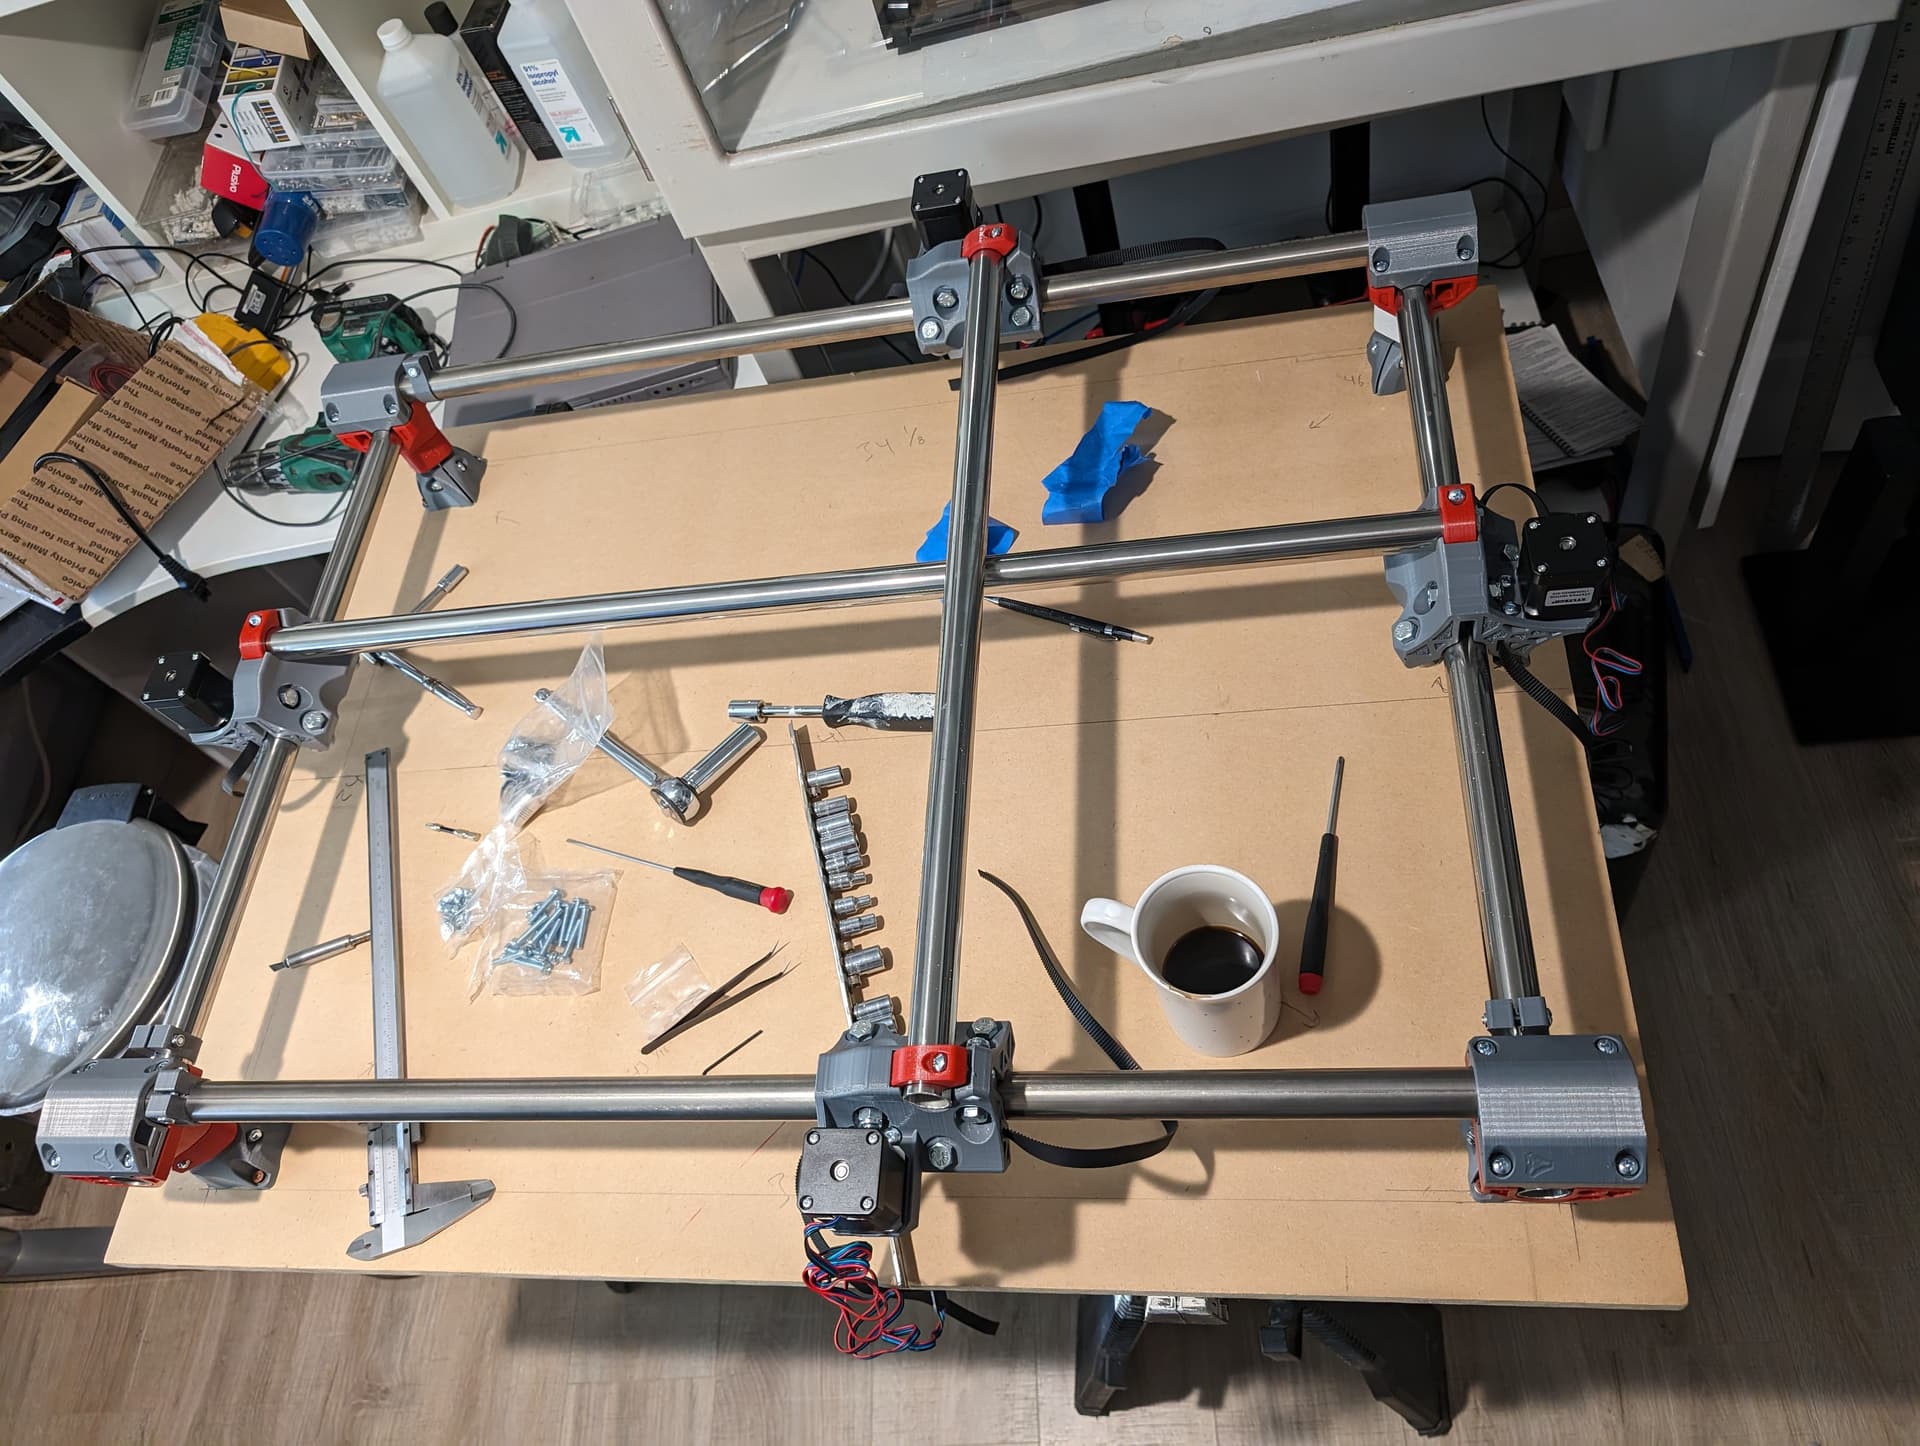
I got the legs leveled today to within 0.5mm. I used an angle grinder to cut them, not the best tool for a precise cut. After rough cutting, I clamped then together and used the grinder to flatten the ends as close as I could.
Only one was off when I measured today, so I cleaned it up with a file and turned it in its corner to grind away a bit of mdf below it. This worked great.
Checking the diagonals and sides looks good, so onto the trucks next!
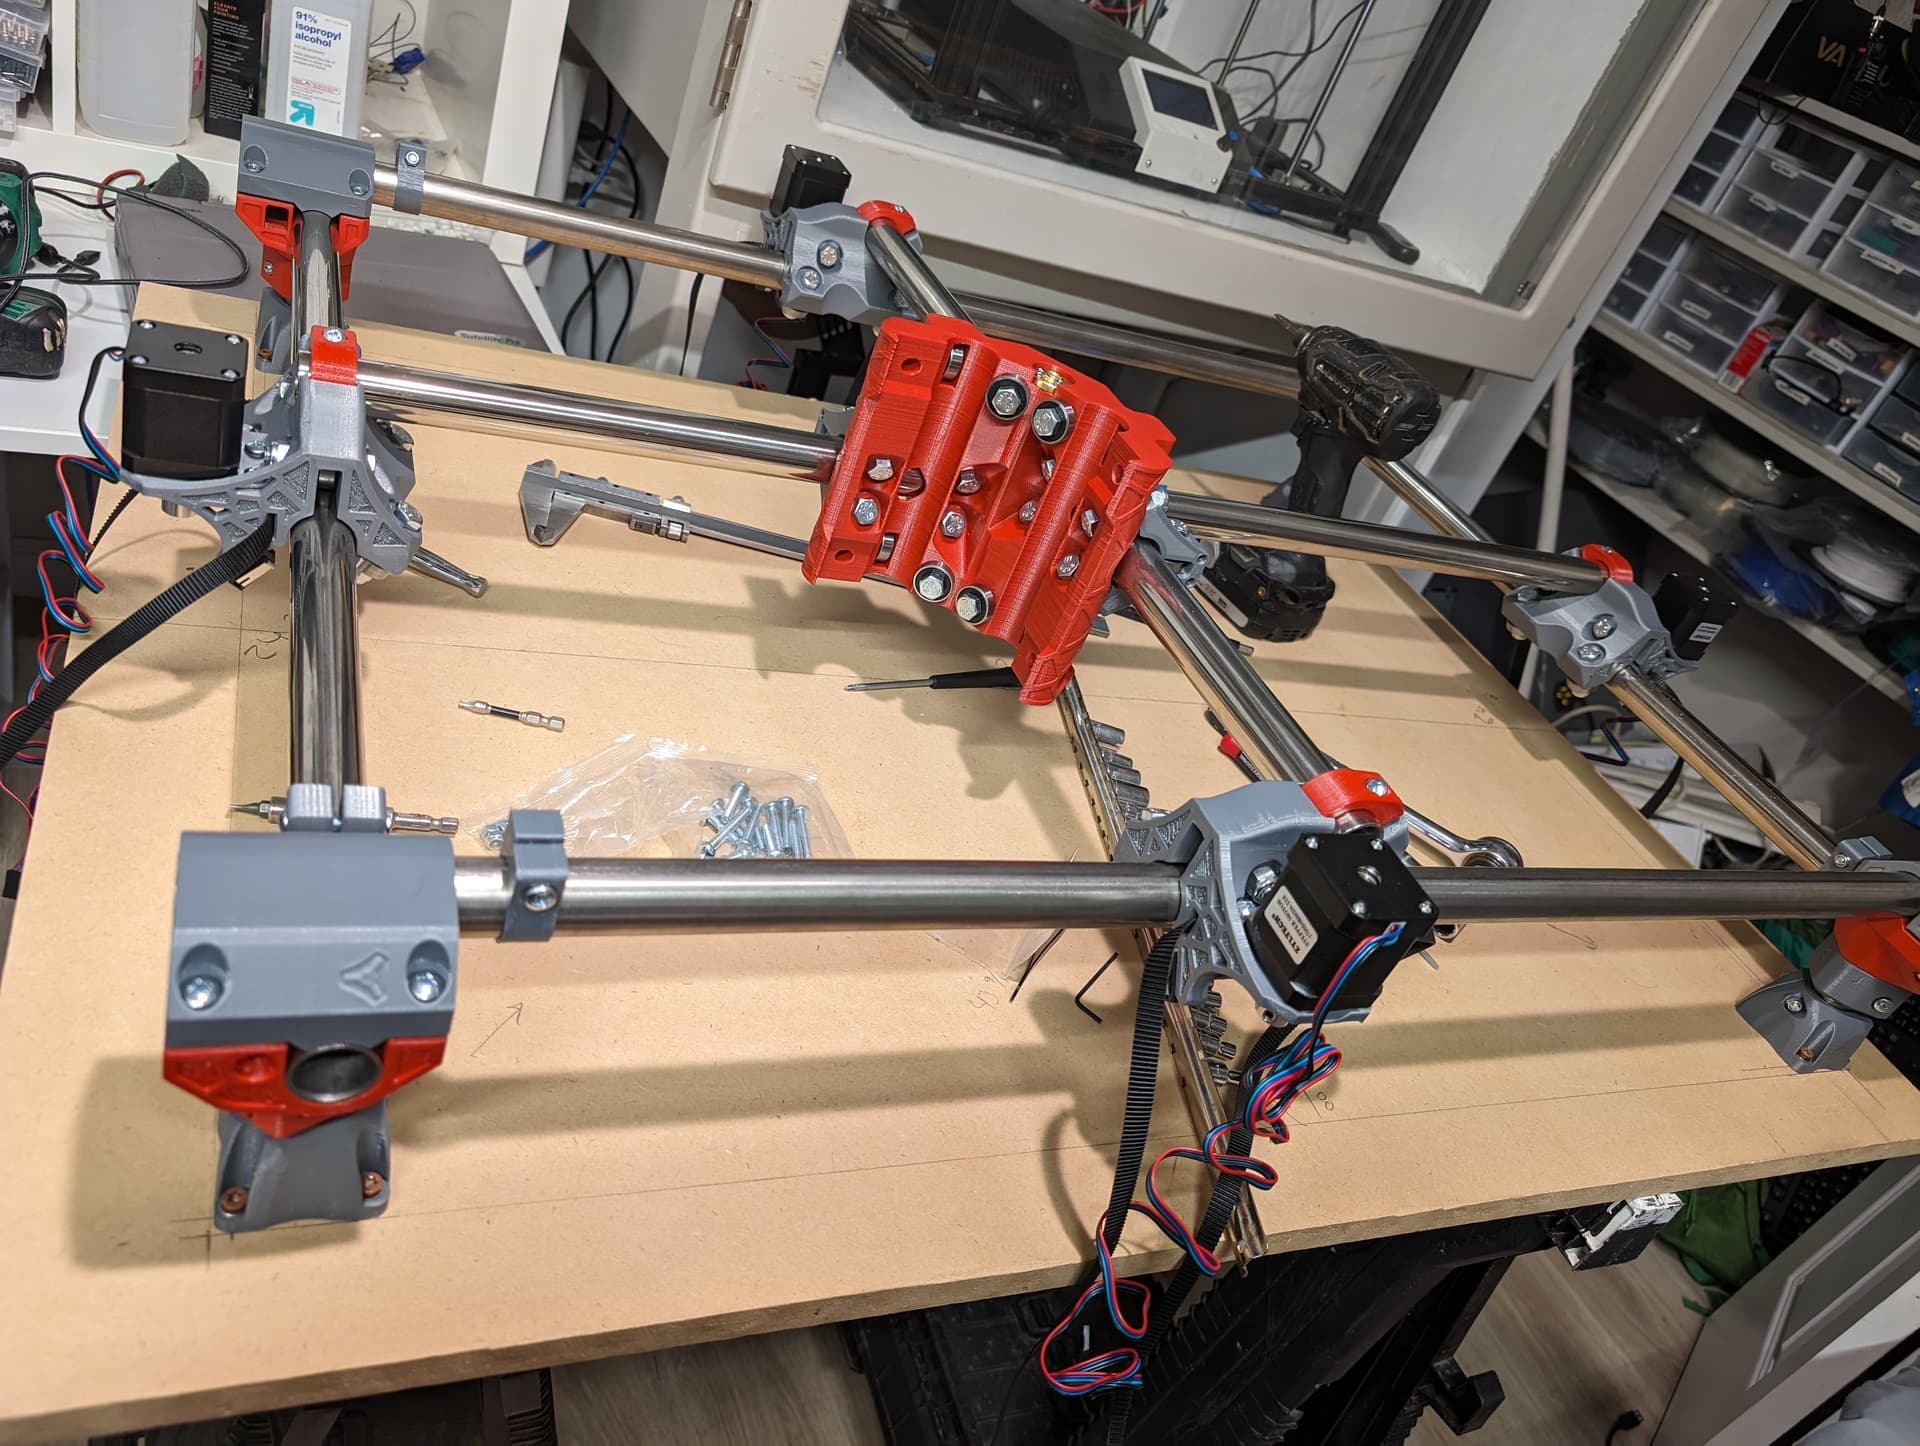
Squaring has been a little bit of a struggle. I figured out after I installed the core that one or two of the trucks needed tightening, so I tightened the trucks, and then couldn’t get the core to square up.
So I loosened up all the bolts in the core and reset all the bolts on the trucks and have just about gotten the trucks square. One axis is still a couple mm out on the trucks and I’m worried about over-tightening, so might leave it as-is and move back to the core to get it as good as I can.
Pretty sure the only time my unpowered Primo is square is when it’s passing through to skew the other way. Powered on and homed, it’s really good though.
Good. Worry about that because it’s the way that most of these get broken. Just tight enough to have bearings touch the rails is best. You will likely need to tighten once in a while, but better that than broken plastic parts.
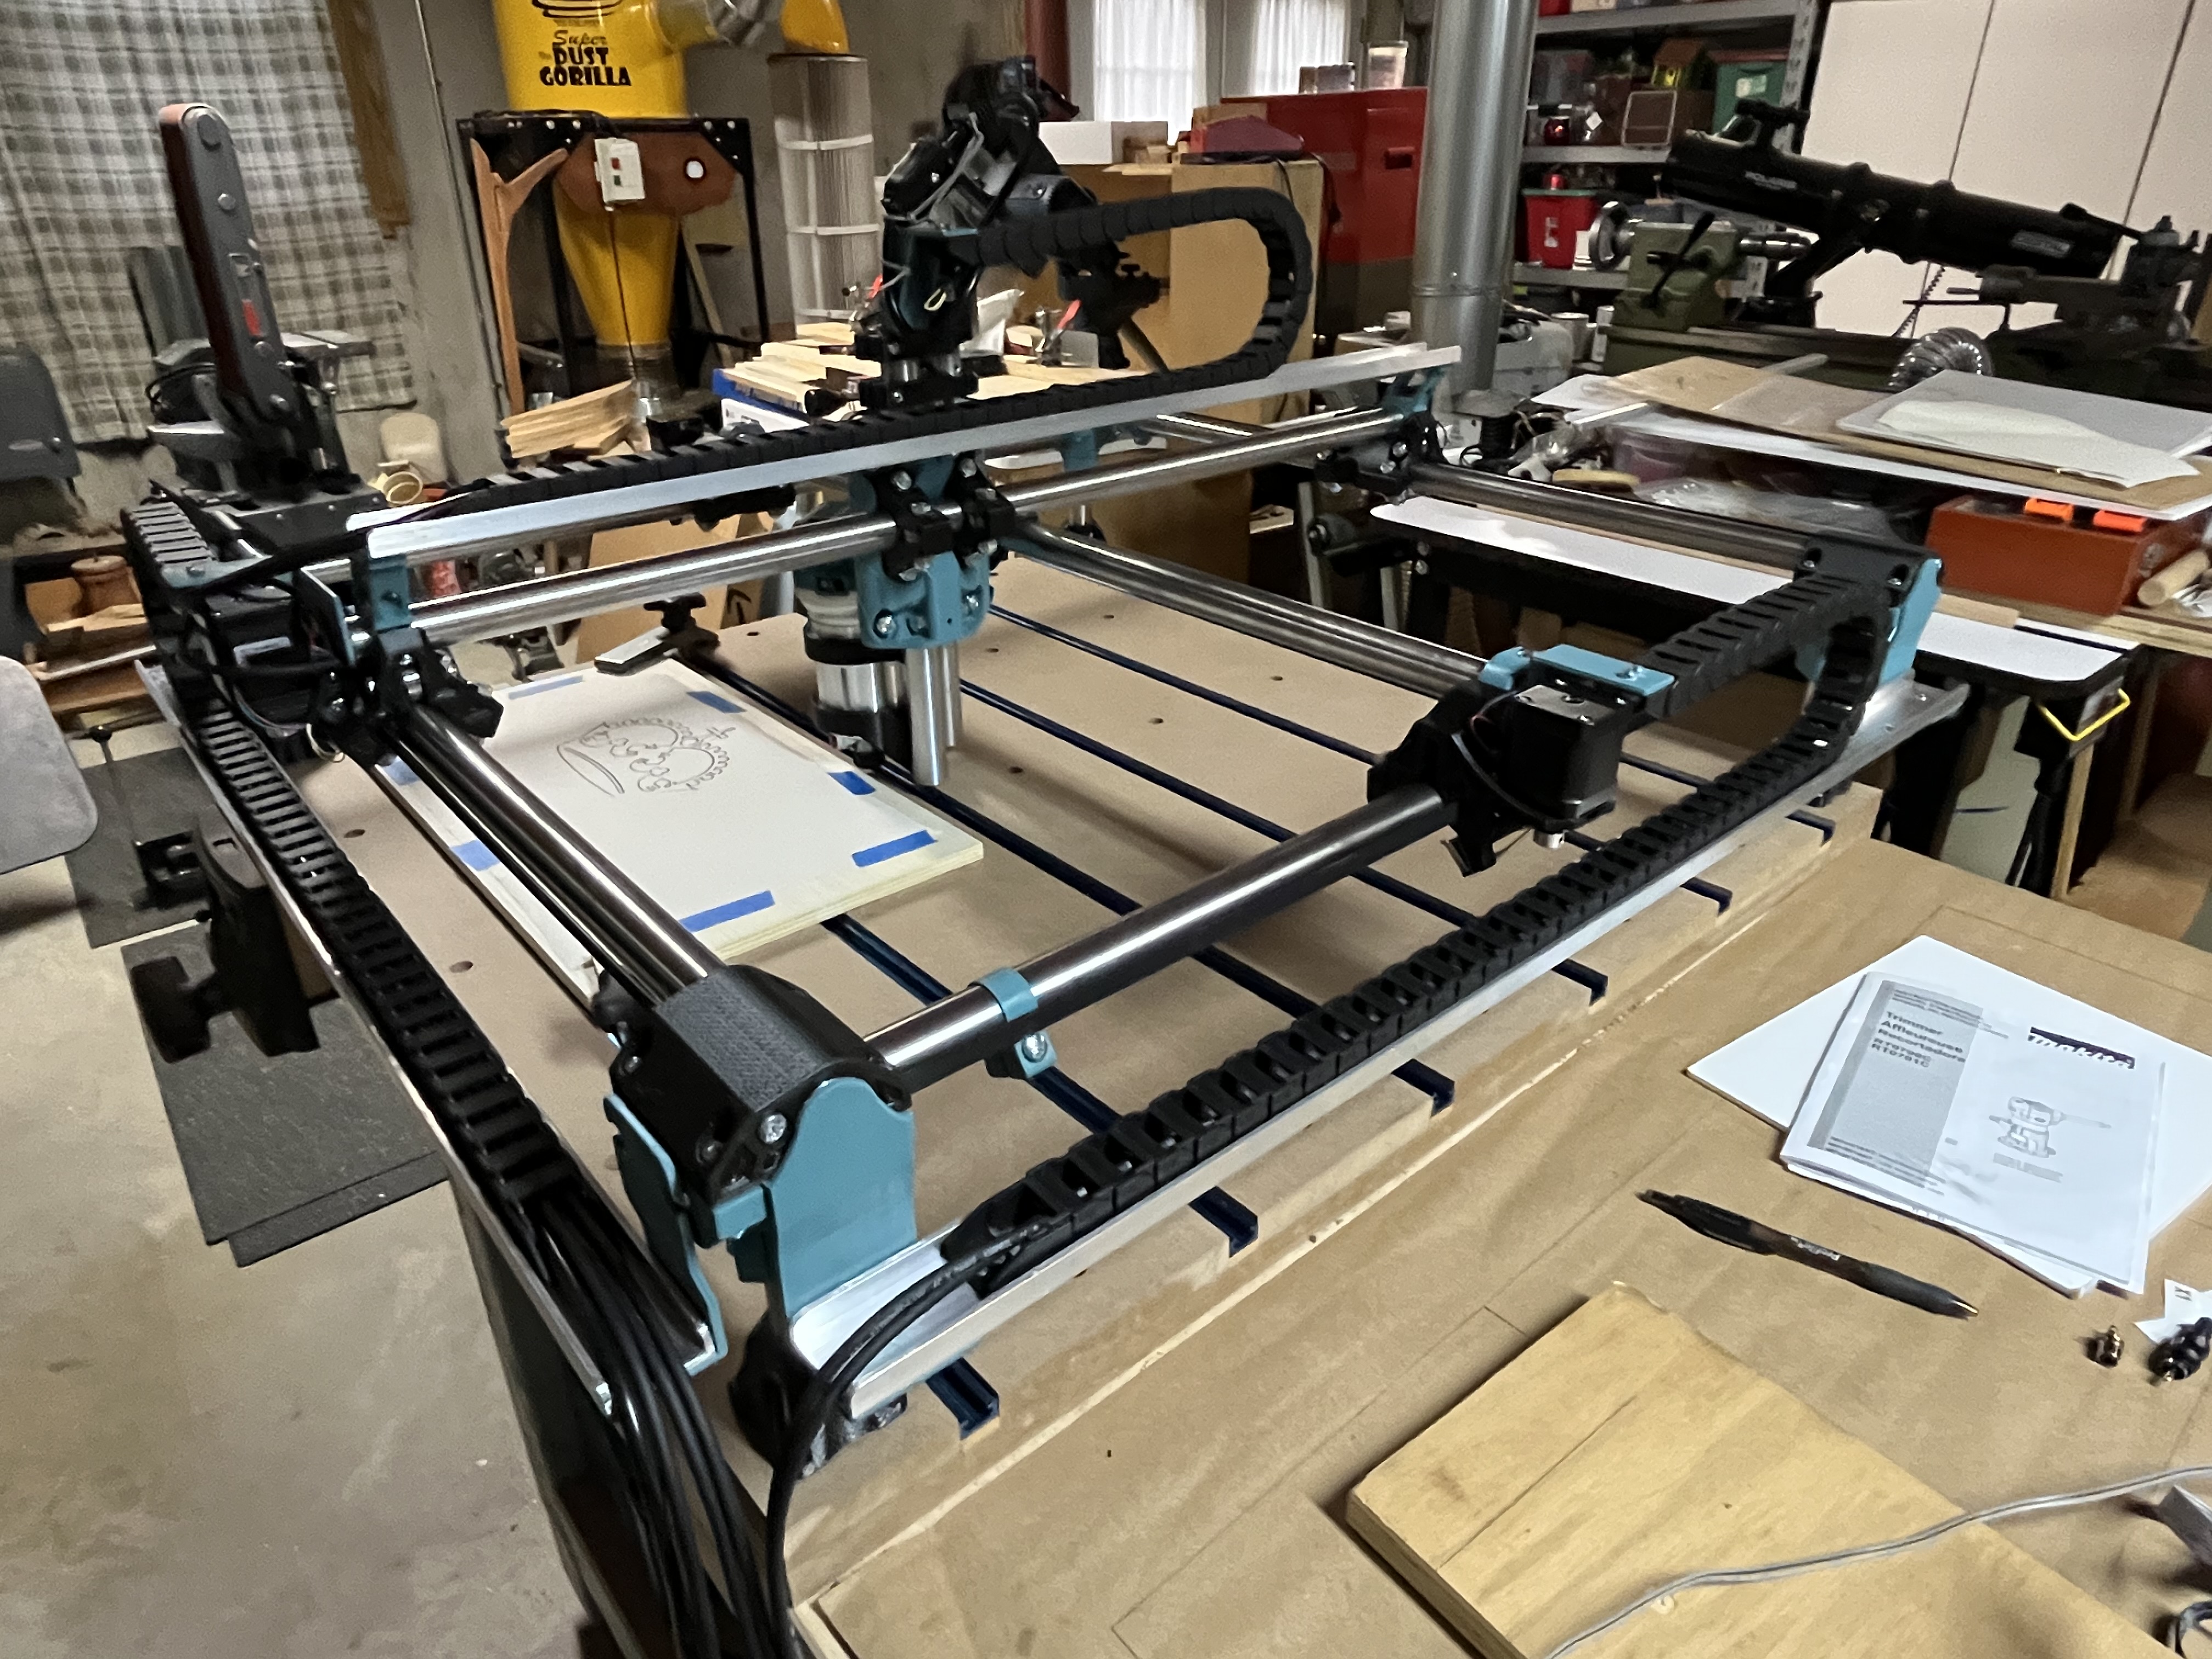
Cool, I got it as good as I could and installed the belts. I’m thinking I’ll do the tape measure wire routing. It crossed my mind to bend a length of EMT to make a half hoop over the top of the whole thing to hang at least the vacuum and tool power from.
I ordered some wire wrap and am going to sabotage a tape measure in a couple days for wiring. Anyone know the best parts to print for mounting the tape measure on 1" stainless tube?
I am almost finished with my Primo build (all that remains to be done is print an enclosure for the controller). My machine is also built with 1” Stainless tube. I printed some supports for the drag chains that plug into the ends of the rails, and so far they have been working well. I could send STL files if you are interested.
That looks like a nice setup! You should post a build thread w/ the stl files to share. Pretty clean setup with the hangers for the cable trays. Is there room under them to slide in a board if it’s larger than the workspace?
I’m doing the same thing with strips of mdf between the t-track.
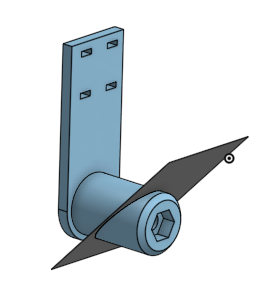
I should have the wire sleeve for the tape measure setup arriving in the mail today, so am pushing forward with that setup. First draft simple brackets:
Are you using a jackpot controller? What kind of enclosure?
Thanks for the compliment. Your setup looks like it’s shaping up very nicely too!
The reason for installing the drag chains the way I did was specifically for the purpose of being able to fit oversize workpieces under the rails. I am using an SKR Pro controller and I am modifying the enclosure that is on Thingiverse to accommodate D-Sub9 connectors because I want to connect the MPCNC to the LinuxCNC controller that I use for my Sherline mill and lathe. I wired the steppers and end stops to those connectors to match the wiring of the Linux controller. I’ve been using LinuxCNC for a long time and I really like it.
Your first draft brackets look like they’ll do the trick, I was going to include my STL files here, but the forum won’t accept that file type.
Is LinuxCNC sort of like using Klipper for 3d printers? I’m going to try the FluidNC route this time.
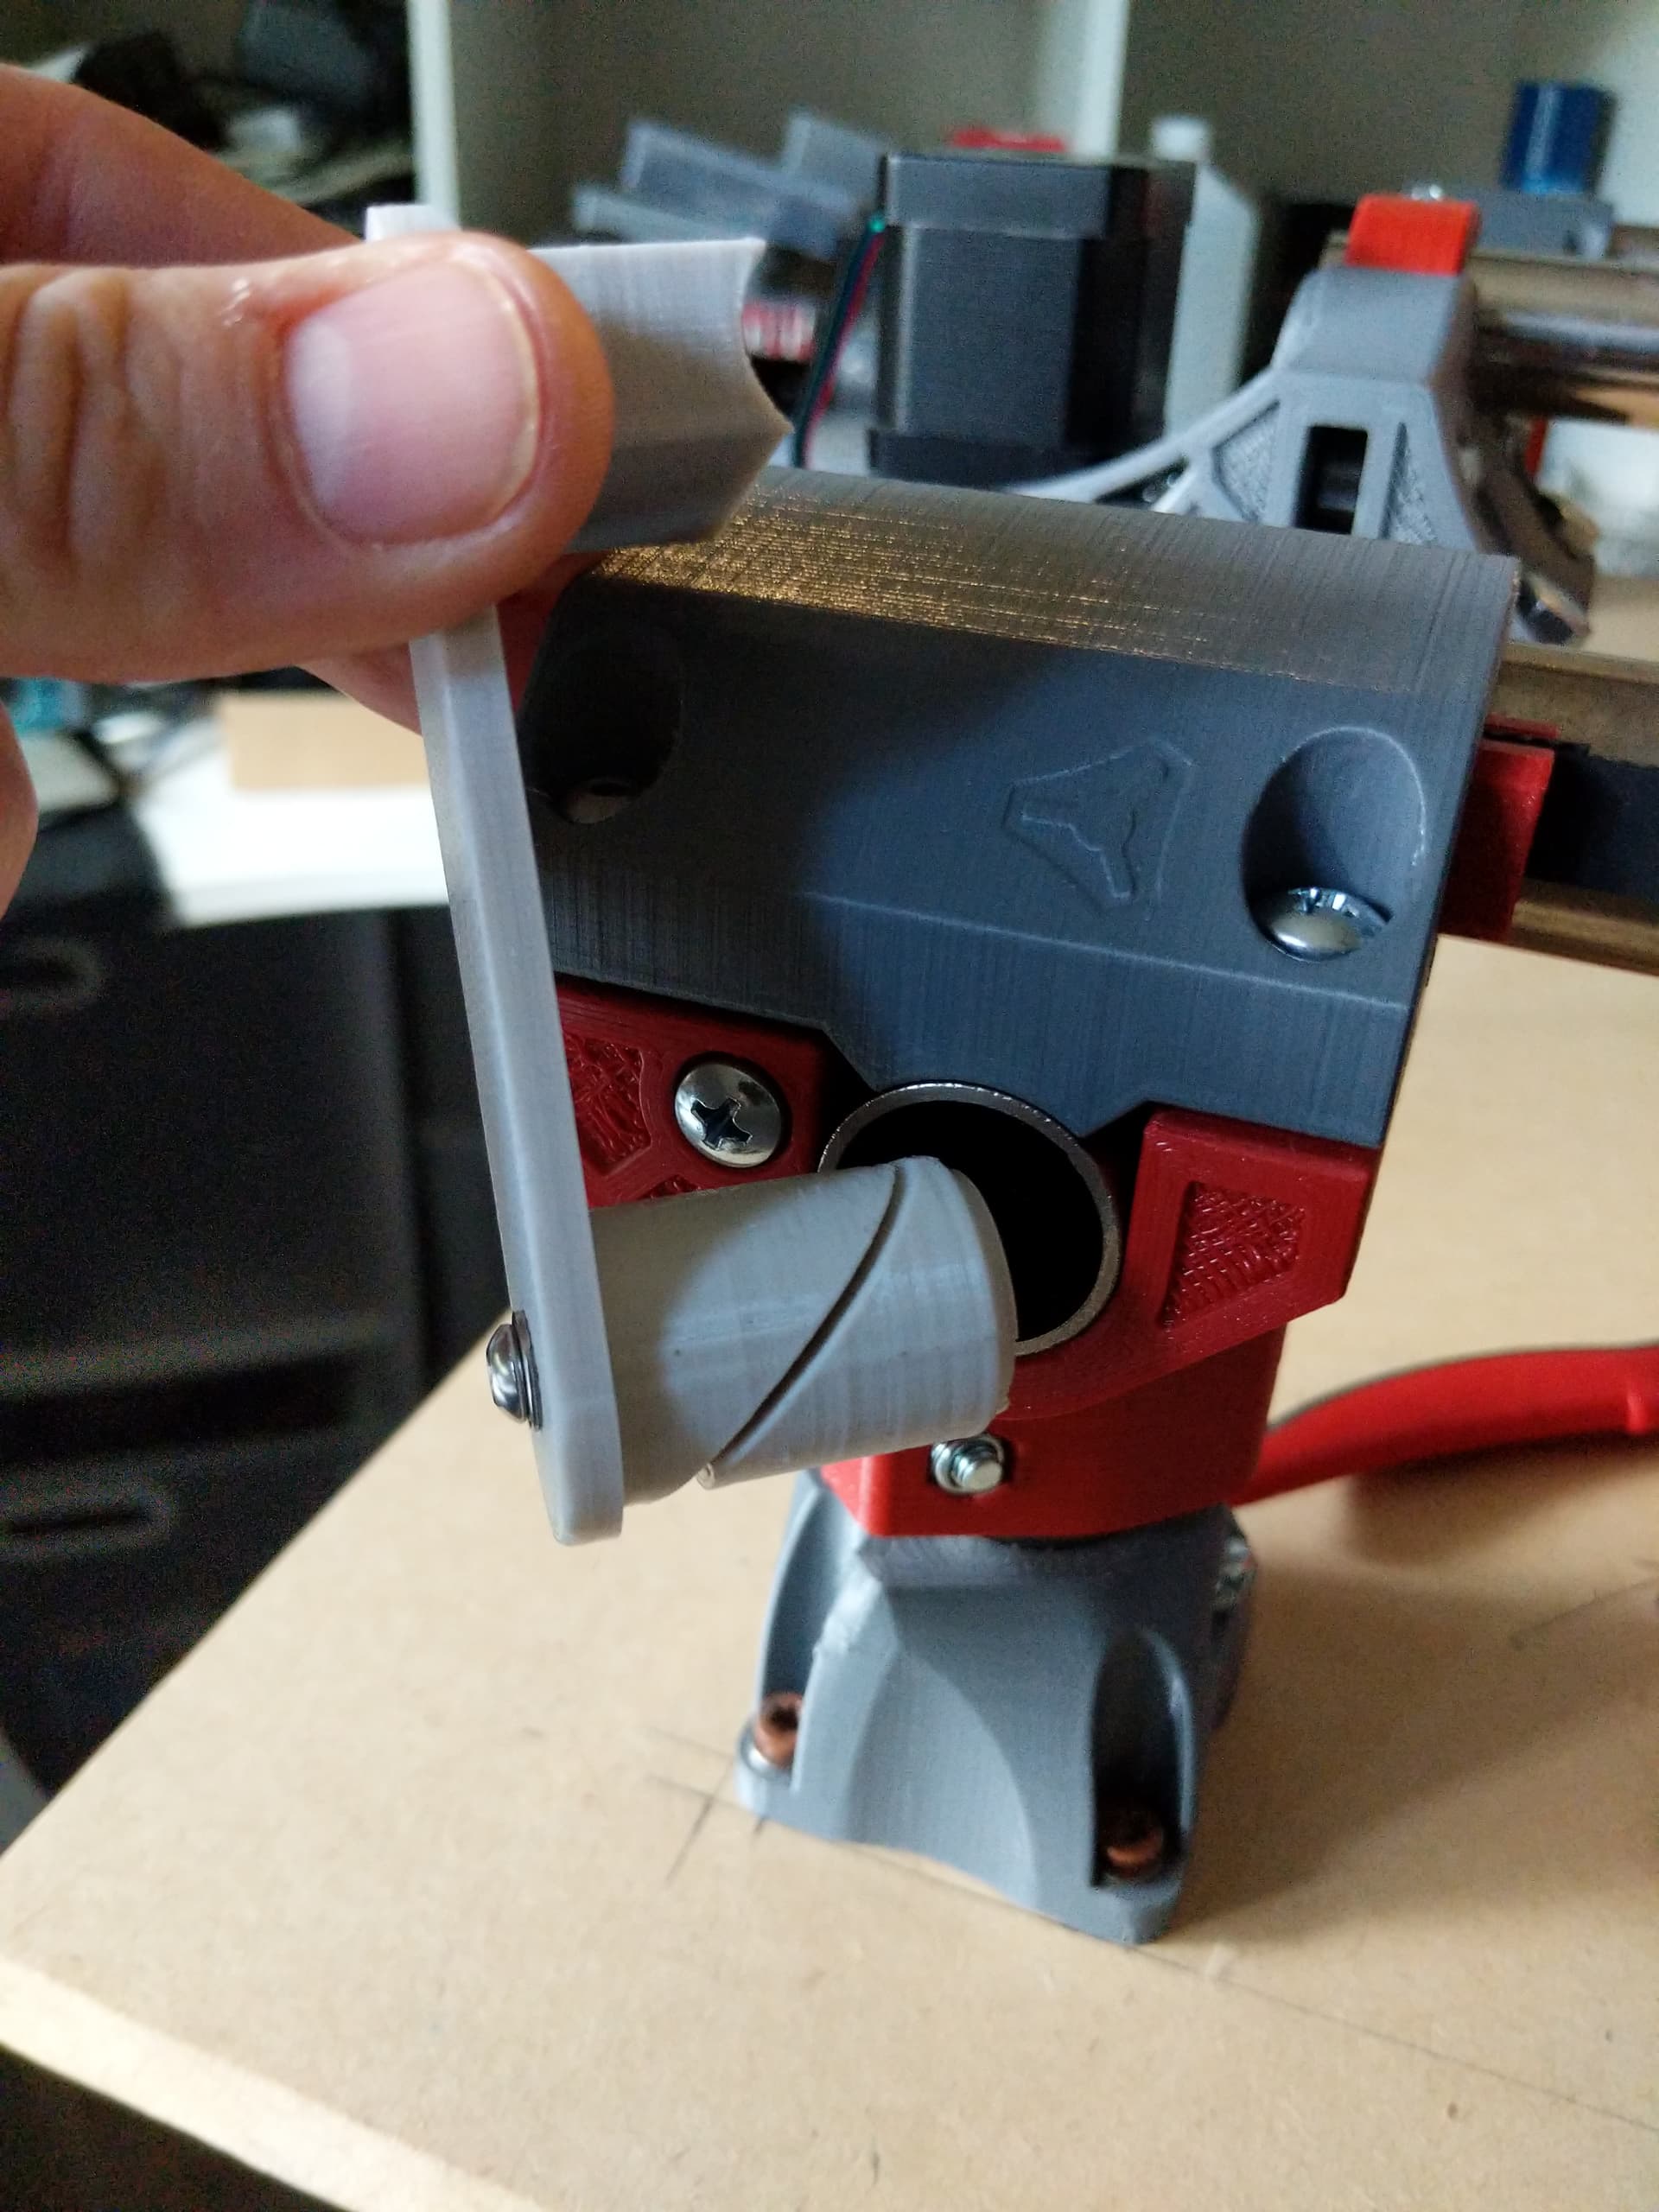
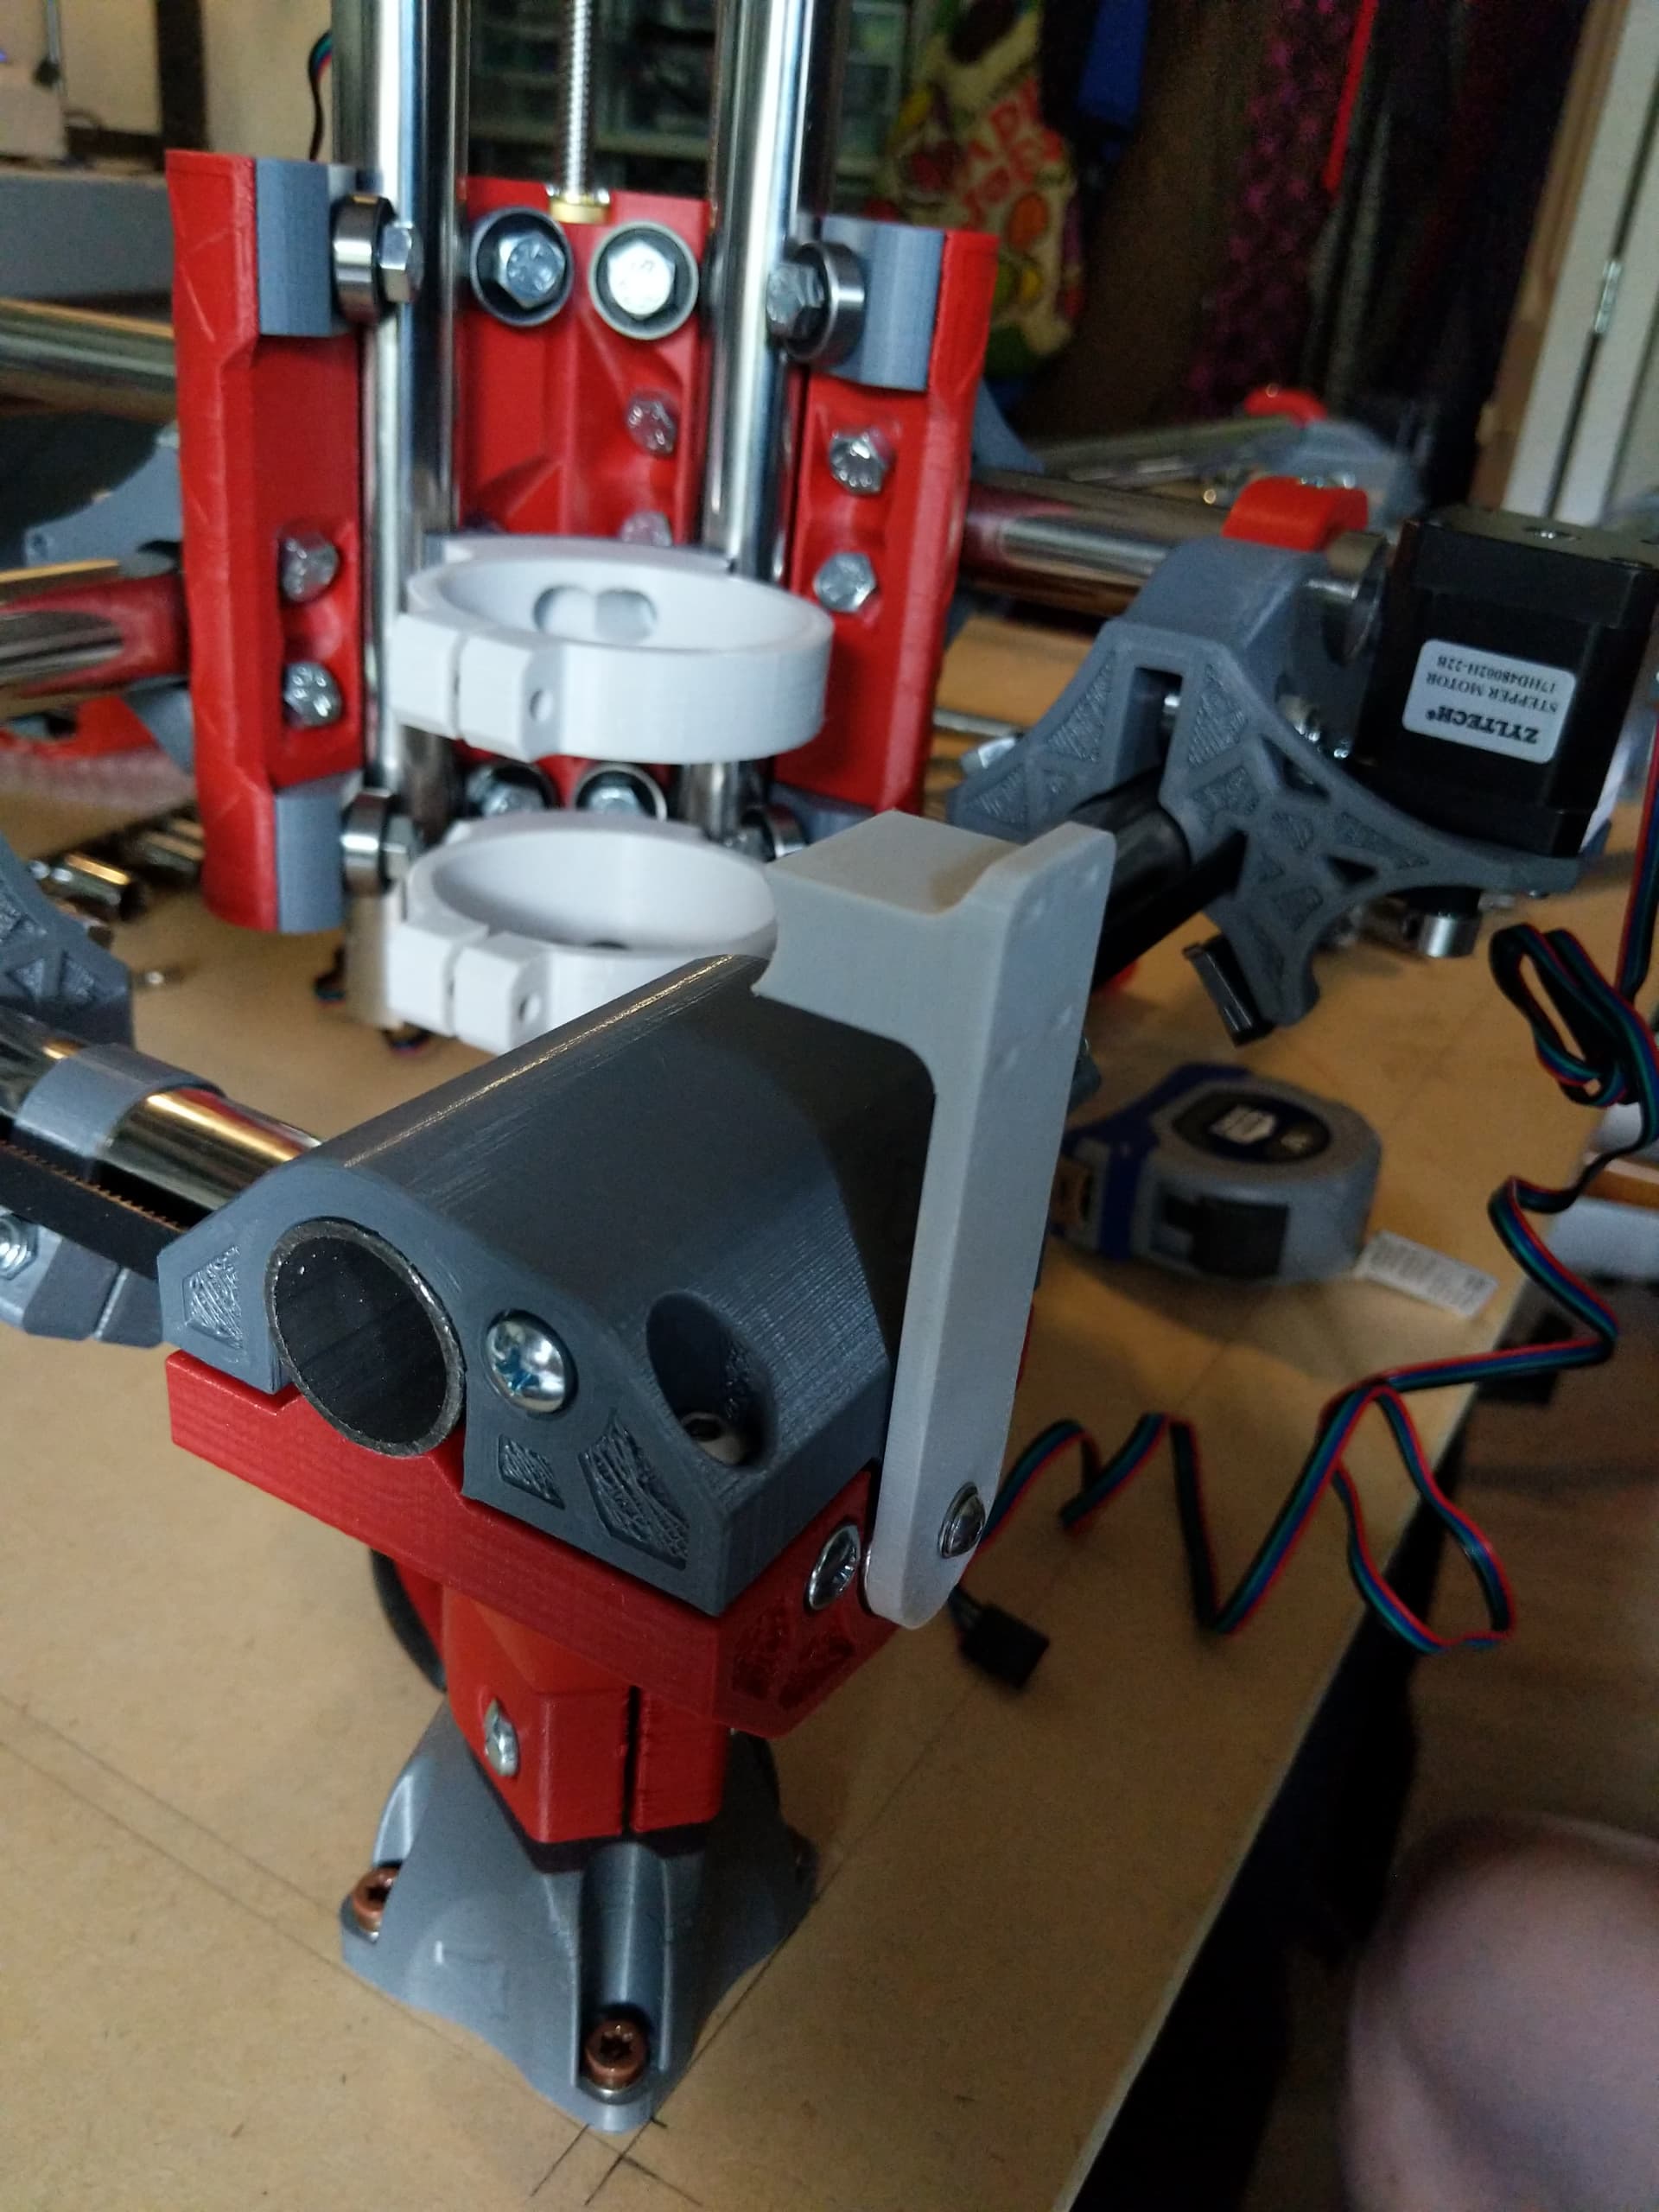
The bracket turned out well. Just needs a couple little tweaks to fit exactly. It’s totally solid with the wedge clamp. I’ll post this up on thingiverse later and add a few different permutations with different sizes.
Your bracket looks great. The wedge clamp is a very good idea. Mine are just press fit, but they stay in place.
I’m not familiar with Klipper, but from what I’ve read about it, LinuxCNC is similar in that it can control many different kinds of CNC machines with many different types of kinematics, but it is also a complete or, as complete as you want it, operating system. It also has a number of GUI’s to choose from that include preview plots of files and a lot more. LinuxCNC is also supported by a large and helpful community of developers and users.
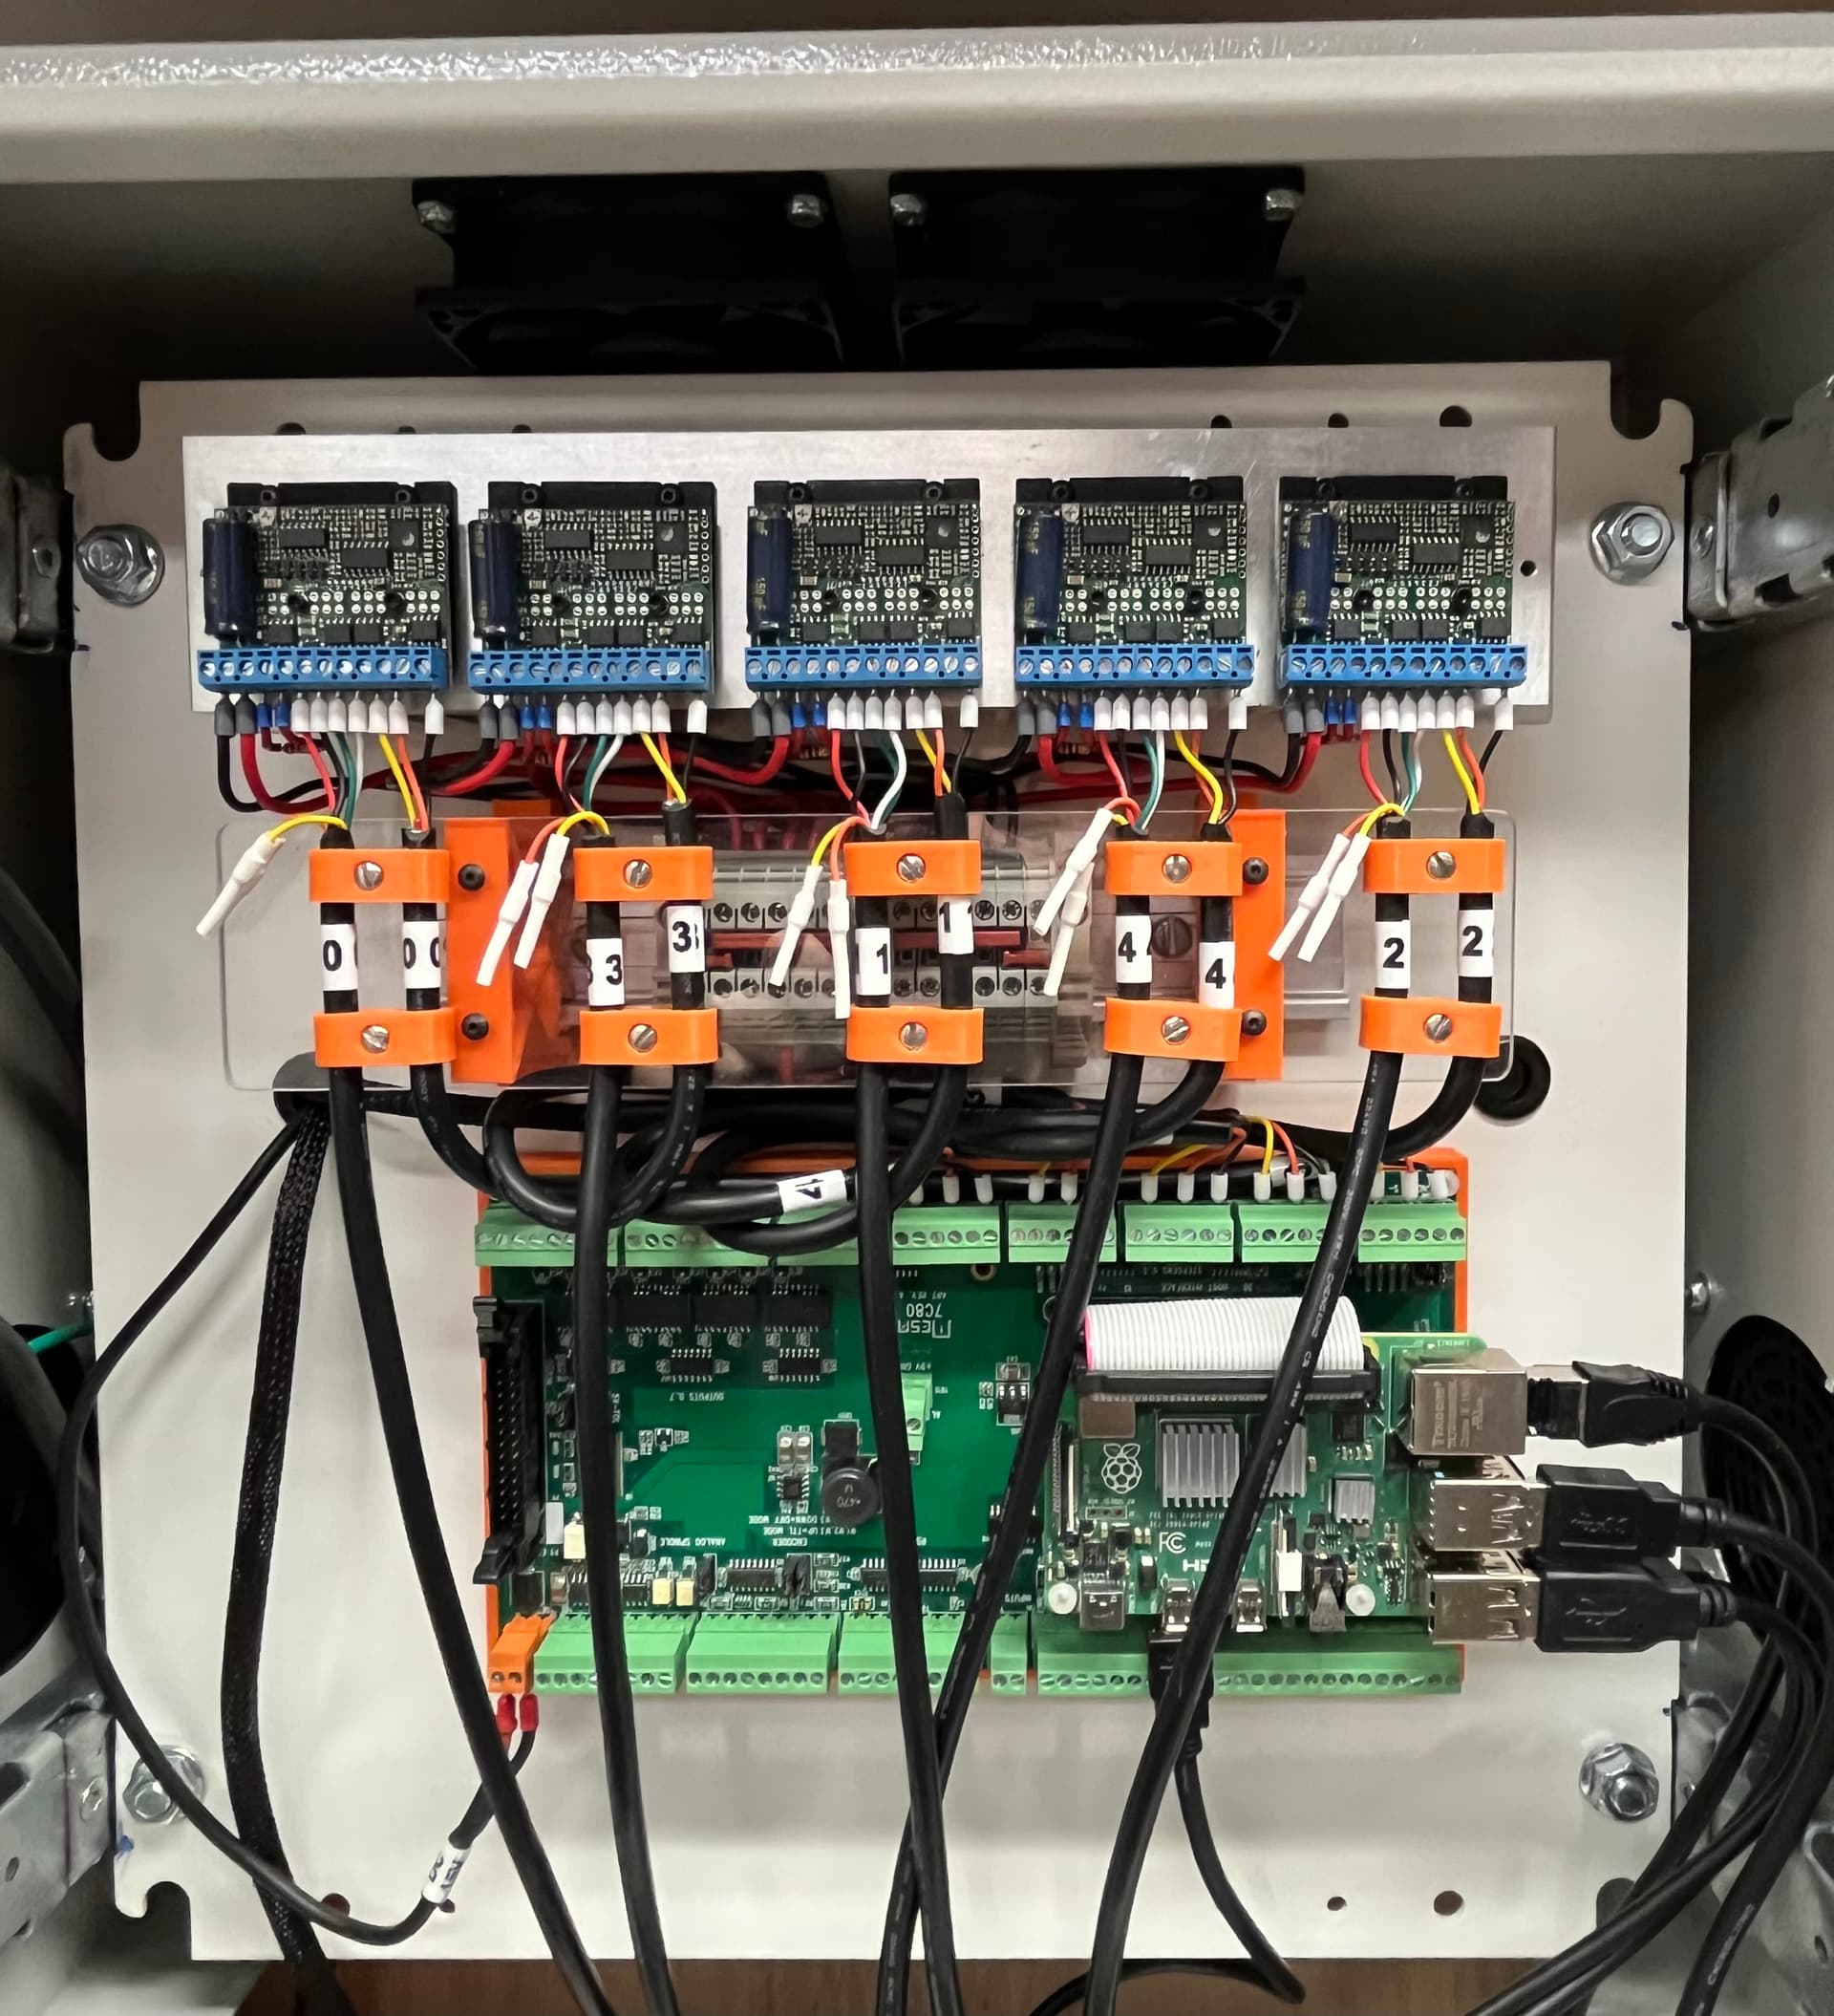
Here’s a shot of my Linux controller.
Not totally. It is more like a free open source version of mach3, which is a common professional standard.
Klipper decouples the real time microcontroller from the linux OS. LinuxCNC has more strict timing requirements because it is still doing the fast stuff on the Linux machine.