One is not enough, on my way to LR3 number 2!

All,

Well that was fun, I printed this box of part in about the same amount of time that it took to print my original LR3 core:

Today I got most of the rest of the part (except for the V1E order coming tomorrow) for the build:

I’m going to start the assembly tonight, after cutting the gantry rails from the DOM steel left over from the Primo I didn’t build!

I also chose to buy some acrylic to make the YZ plates. These two pieces were cut-offs at the local TAP plastics store: less than $6!

Wish me luck with my first acrylic routing. I’m glad to see the various recent posts that describe how to do it.

I have several controllers I can choose from but what the heck, I’ve got a Jackpot! Does anyone want an SKR 1.2 with screen?

I was going to use those y-rail clips from my first build, but they look so out of place I think I’ll make some new ones from either the blue, or blue-grey filament. I have a piece of Conduit that was for my ZenXY (not yet started) that can become the Y rail.

I love it when a plan comes together!

Mike

2 Likes

Those are some really nice looking parts. Very clean.

Is that core the same core as your post a few days ago? It looks like a different color now (love it).

1 Like

Same core, different light. The build was an attempt to match Kobalt colors, without using silver…

Ok. What are your thoughts on the smaller size of your second build?

I am building to fit in a particular storage space and was not worrying too much about the size. EXCEPT I do have a few 10x20 inch projects that would be more easily cut on a smaller machine so I designed to that cutting area to be a little bigger and still fit into the storage slot.

Mike

Current status:

The post office delayed the delivery by one day (scheduled today) so I didn’t get as much done yesterday. (and I wasn’t up to wiring limit switches :rofl:)

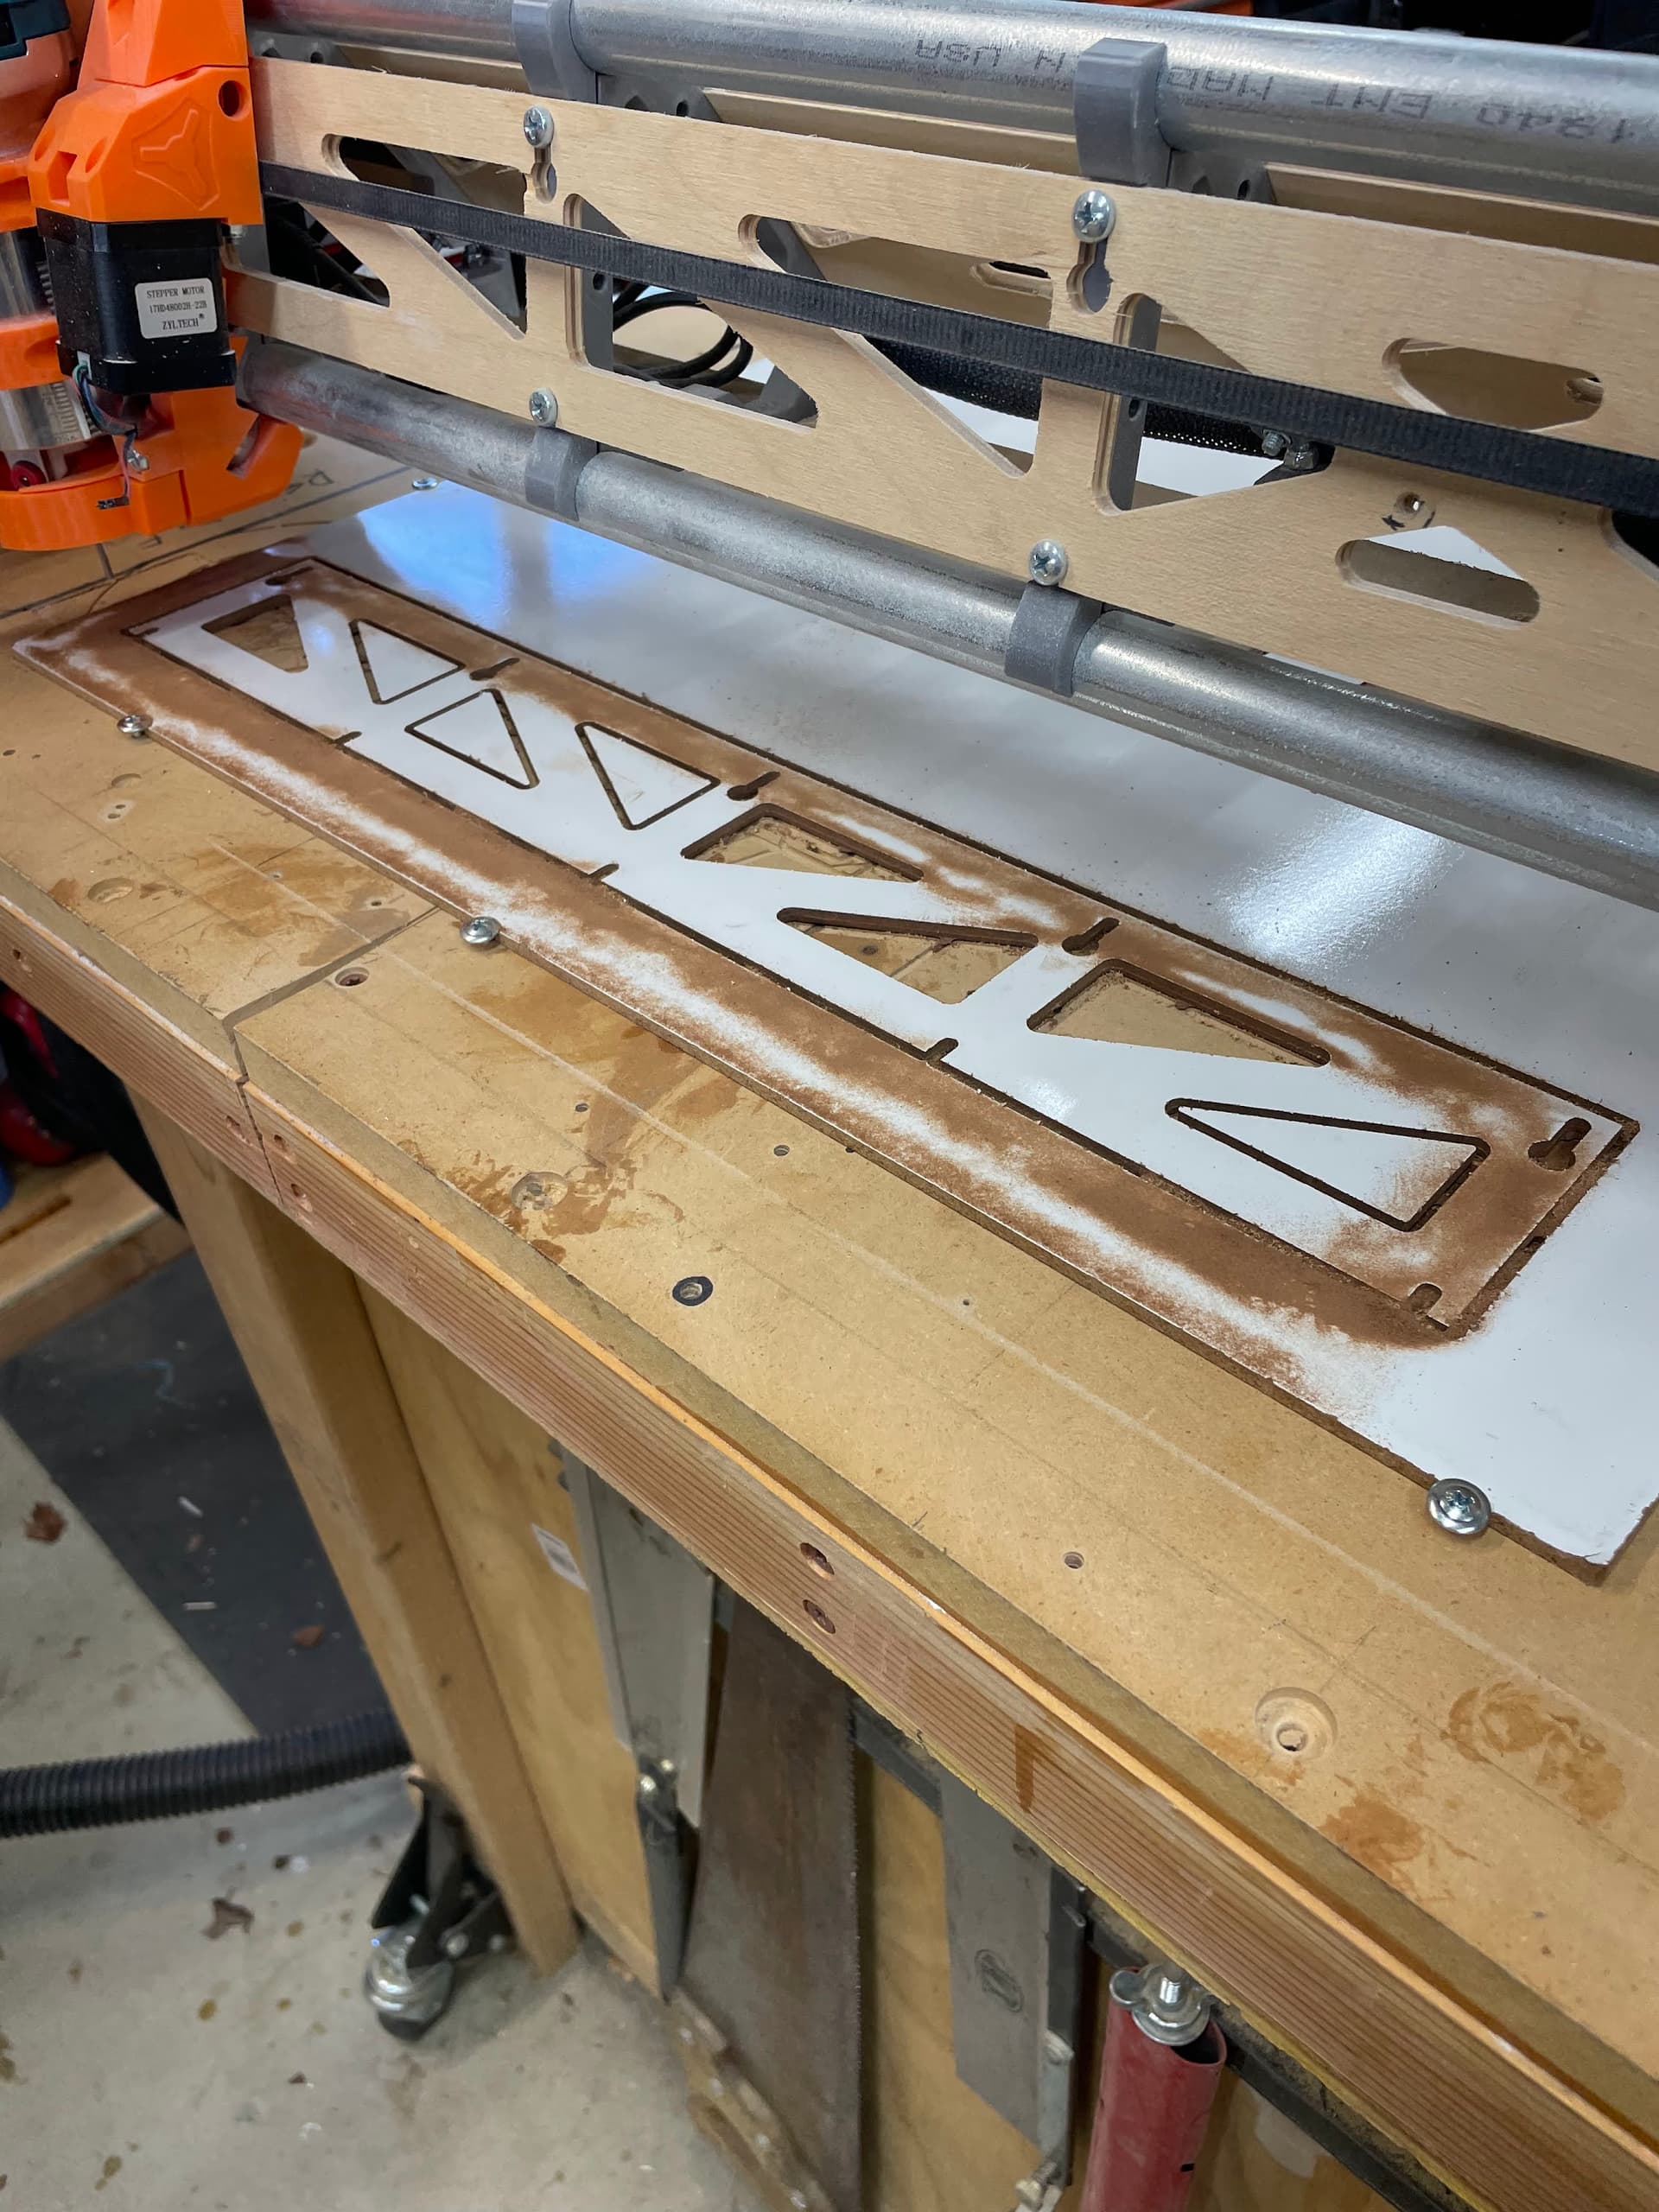
But today I got the bigger LR3 out to start cutting all the flat parts: struts and YZ plates.

Here are a few pictures of the current state of the build:

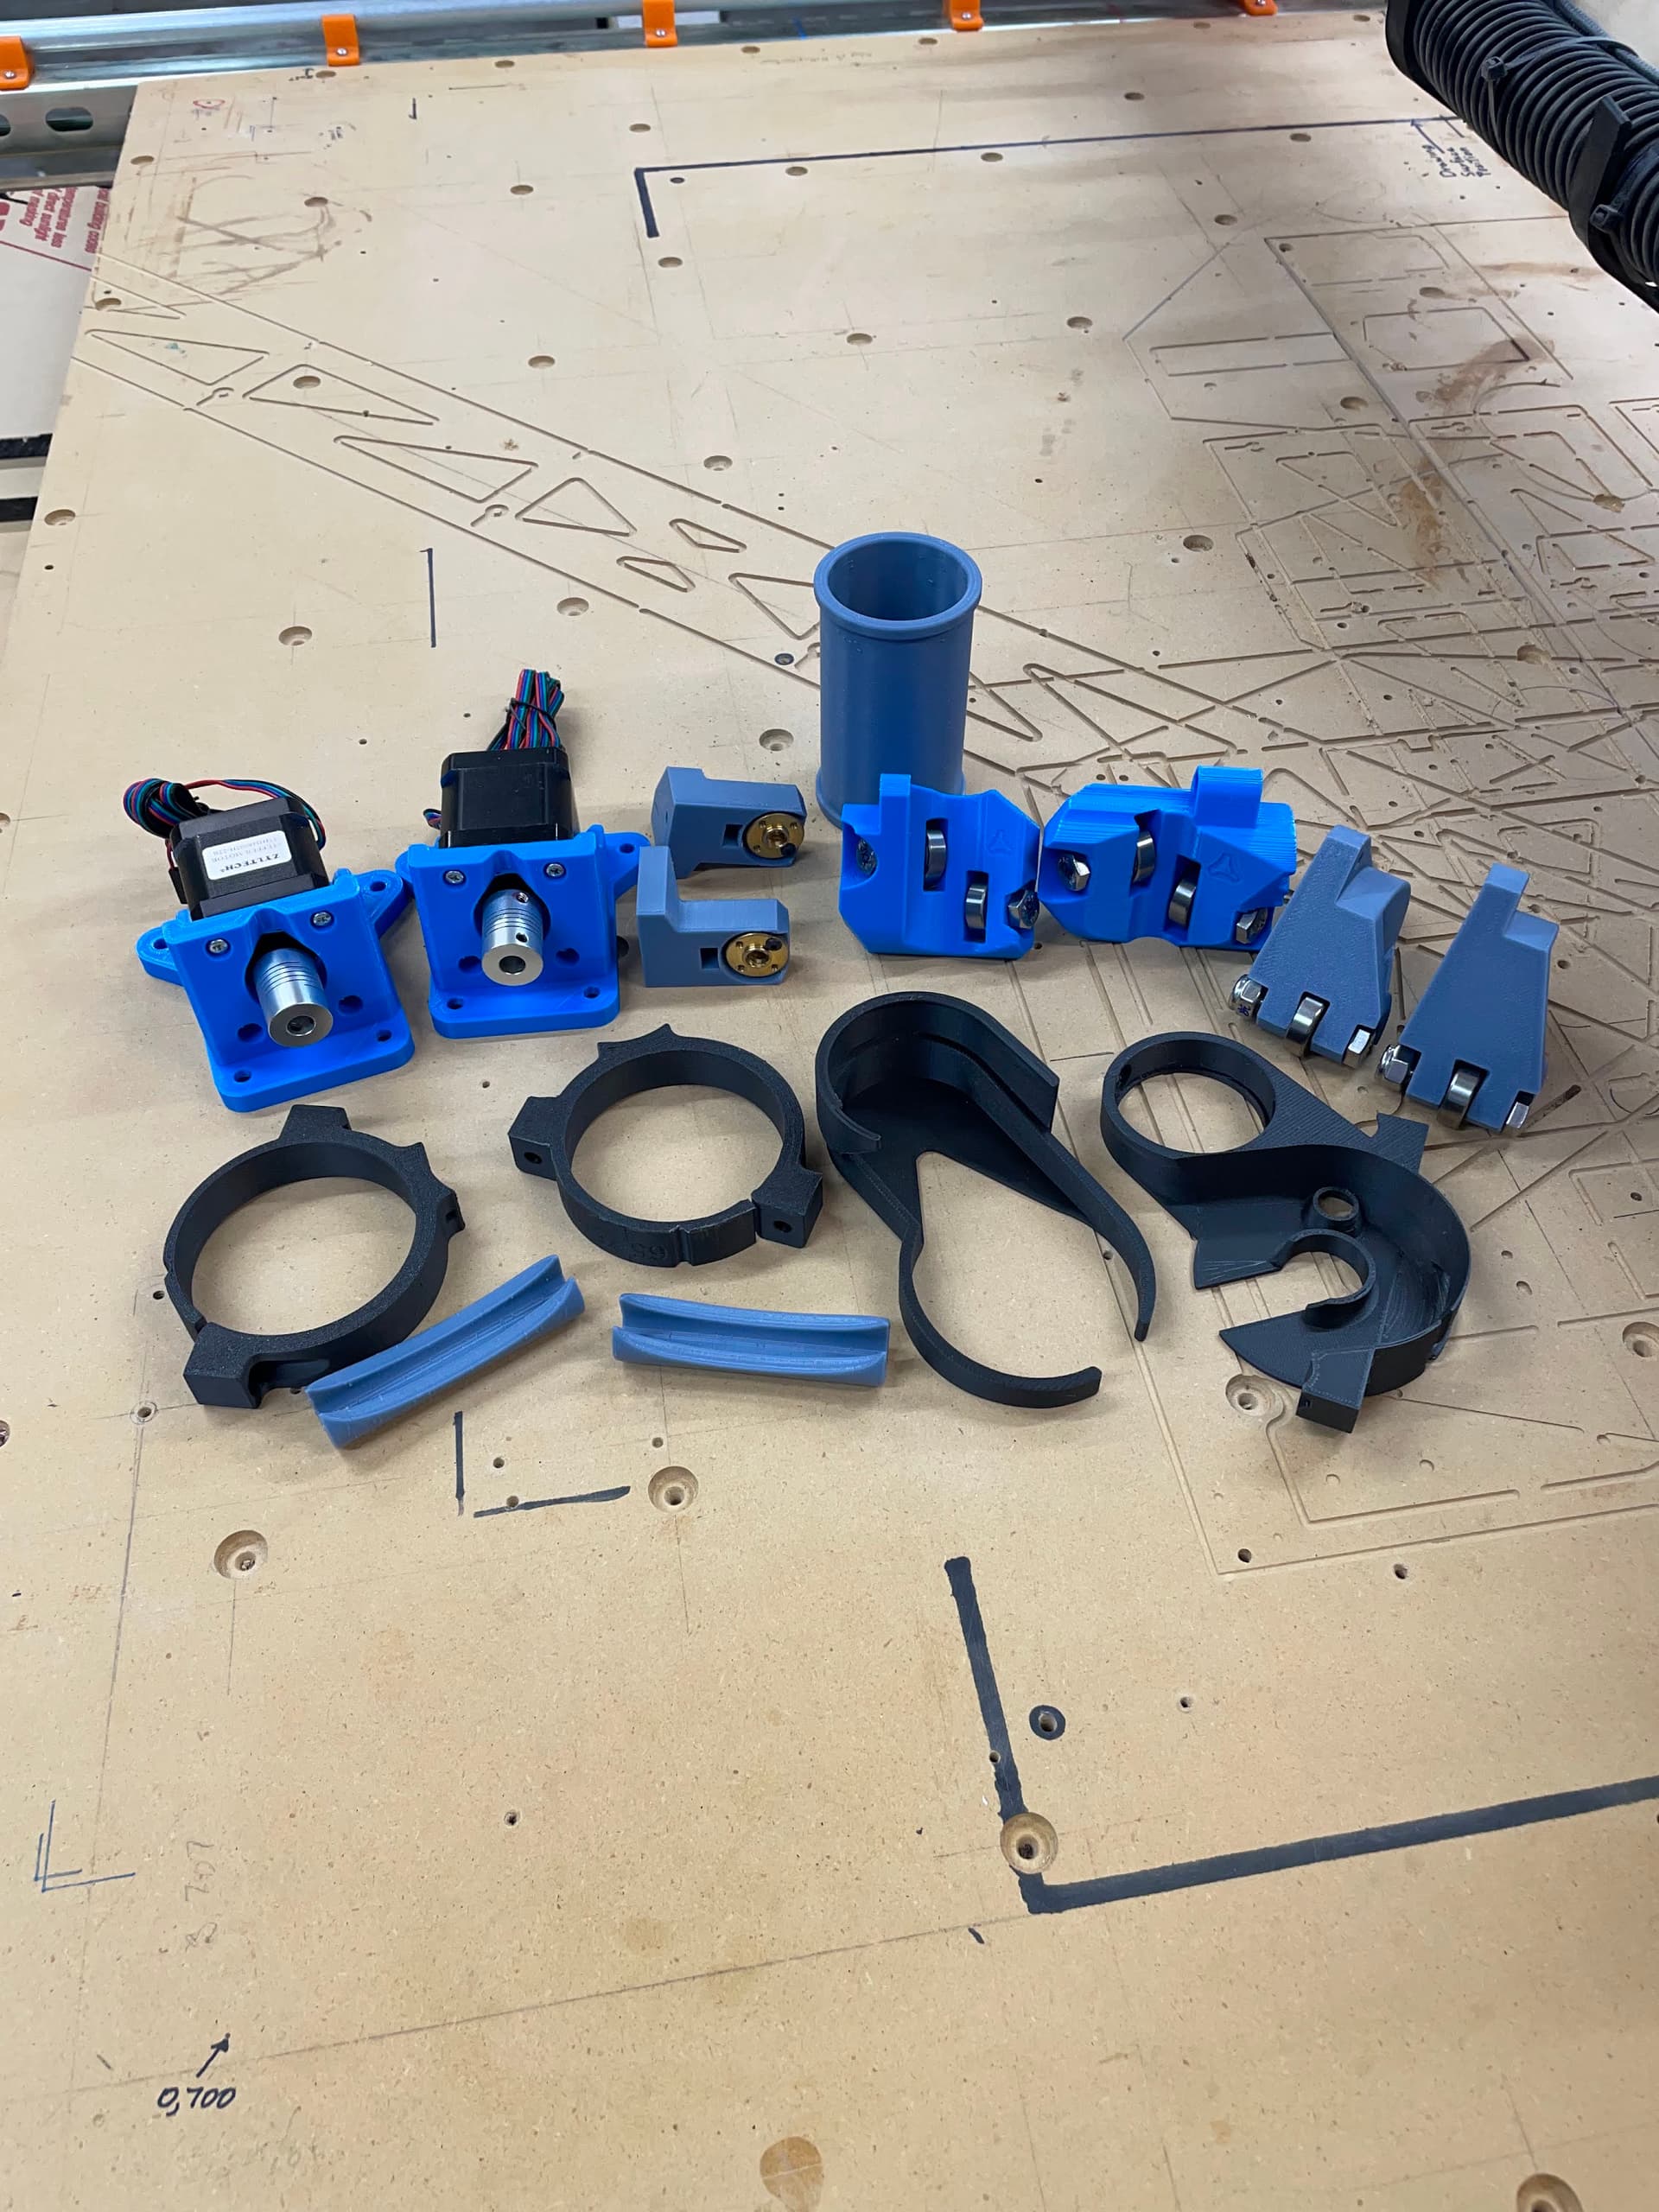
These sub-assemblies are complete and I reprinted the Kobalt mount in HTPLA with Carbon fiber, because it’s cool.

New strut plats in progress.

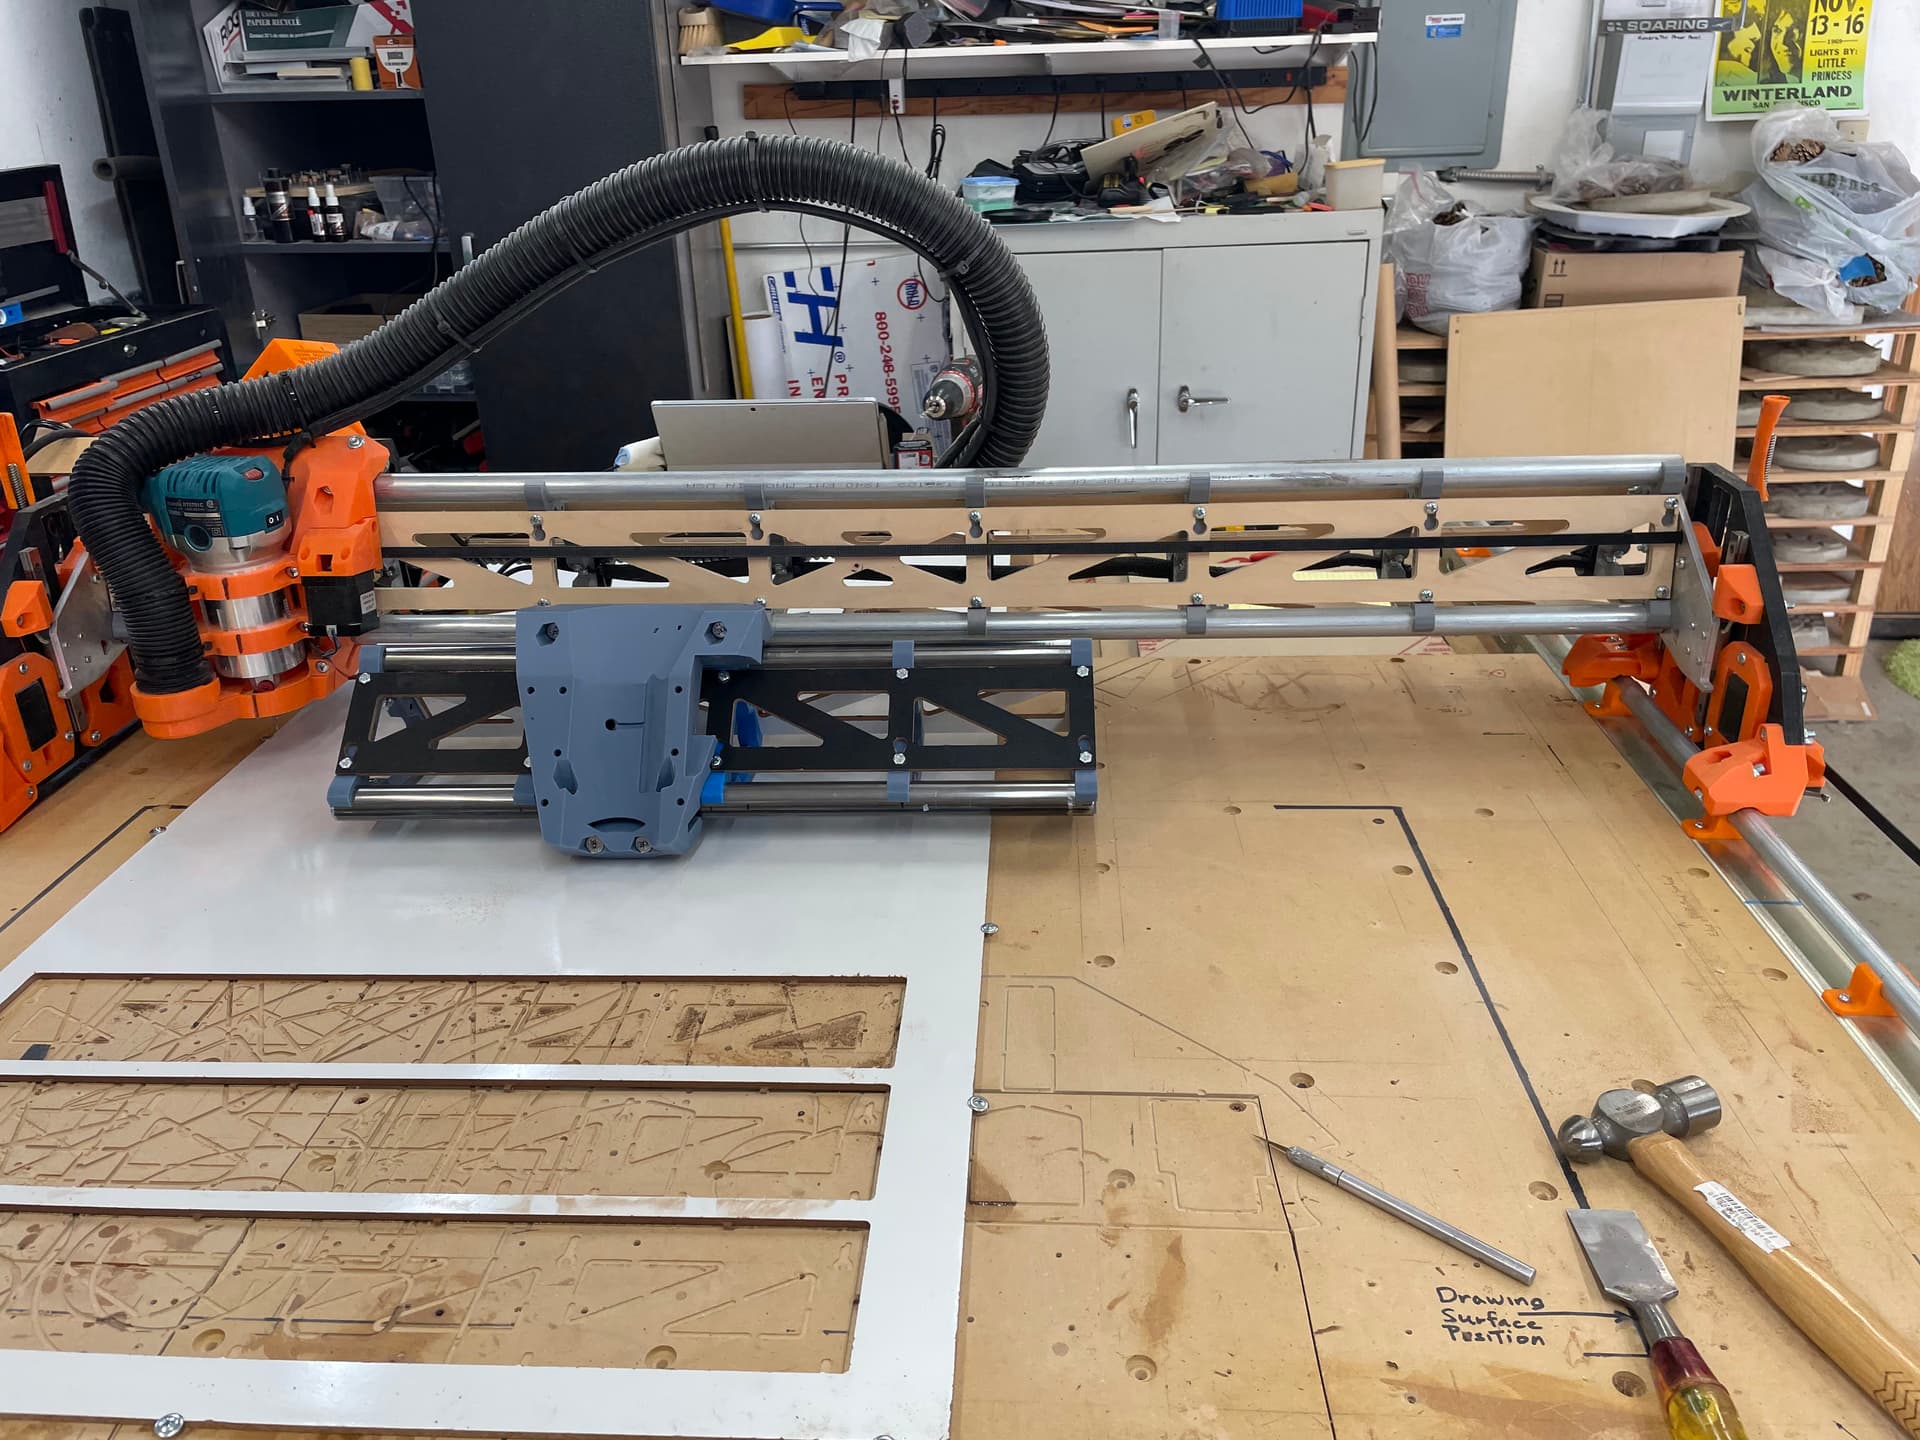
Little LR3 compared to my larger one.

Dang, the mail doesn’t get here until after 3PM, I guess I’ll have to wire up a couple limit switches :face_with_diagonal_mouth:

Mike

2 Likes

Price is right (<$230!?) on that 500 mm/s printer! I need to go back in time and order one! New baby LR3 is looking great! Your approach is the opposite of mine, I build first, worry about storage later. Your approach makes more sense and is why my garage is a hoarder’s paradise!

[Edit: Ordered. $219 shipped with coupon! Now to travel back in time…]

Looks cool and small! What size is the workarea?

The "table"size is 27 by 42 inches. The available work space is roughly 10 by 24 inches after subtracting all the side plates and lost area due to the actual center of the tool not reaching the edge.

Mike

Many sub assemblies are done. Now I need to cut the YZ plates.

I bought some 12mm, black cast acrylic to use for the plates. After reading all the challenges with milling acrylic I was seriously considering just doing them in MDF. But the black Acrylic would look so nice.

After reading all the posts about techniques to cut it I decided to just jump in with the best ideas I could find: sharp tools, low RPM, slow feed, smaller DOC, Spray IPA, and be patient.

Here is a picture of the part after all the holes.


Good sized chips, clean holes and accurate.

I cut the three holes where you see the deck screws first and then installed them to really hold it down. The rest of the holes were done in a single program.

I’m now going to do the three large cut-outs and it that goes well, the outline. These longer cuts I’m going to take as 3mm total DOC with holding tabs on the last pass.

More to follow.

Mike

1 Like

Latest pictures:

Good chips, the long slices are the finishing pass with the 1/4 inch mill.

Ready to take off the spoilboard.

I still need to drill and tap the 3mm holes for the linear rails.

A word of warning to future Acrylic workers: The edges are brutally sharp :frowning_face:

I might wait a day to make the other one to let my hands heal a bit. (one cut while installing the 1/8 inch mill and another while cutting the holding tabs off).

Mike

2 Likes

The black sure looks good! One word of caution. If that truly is acrylic then be careful with the IPA. It will cause splinter cracks. I’ve had it happen to me and seen others with the same issue. If it’s polycarbonate then I think you are good with the IPA

Alright, The fingers have healed some and I’m going to cut the second plate.

1 Like

Well the two plates are cut.

They were made from this material

I have drilled the holes for the linear rails and trying to tap them. I can’t seem to get them to tap cleanly.

I go slow and frequently clear the chips but the hole comes out over sized. I am using a matched set of drill and tap and have not had a problem using them on other materials.

@Jonathjon what did you do for mounting the linear rail? Did you use threaded screws or self-taping? I’m worried that if I use self-taping they might crack the plastic.

Mike

3 Likes

I used the wood screws Ryan sends in the kit but I did have to drill the hole a little larger. I tried it without doing that on the first one and it didn’t work out. But that ended up creating a large burr on the surface that caused me problems until I found it. I can’t remember what I ended up going up to.

In the second set I programmed the cut in Estlcam and used the 1/8” to drill. That was a mistake. It was too large of a hole. Went back and forth with that. Anythjnf large enough to grab in the hole was too large for the rail. I ended up cutting a small piece of filament and sticking it in the hole and that gave enough to grab securely.

My suggestion would be to take some of your scrap and see what size hole works good for your screws. You’ll be able to see if it makes any burs or if they don’t grab enough. And if you crack it that won’t matter in the scrap lol.

1 Like

@Jonathjon

Thanks, I just got back from buying some #4 screws. I’ll see what I can do with them

Thanks for the input.

Mike

1 Like

If those don’t work, maybe you could use heat set inserts. They might be a nice fit since you already made your holes too big.

I’ve never tried them though

No problem and good luck!!!

Huh. Never thought about trying heat sets in acrylic. I love using them in 3D prints. So much easier than captured nuts!! Might have to give that a try in some scrap and see if it works

Please do and give us a report. I’m sure I’m not the only one here curious about that.

1 Like

I didn’t use the threaded inserts, but decided to try again with the 3mm tap. I ended up using a slightly larger drill, 2.87 vs 2.77mm. that allowed a easier tap run into the plastic without getting it too hot. The drill was actually a fractional inch not mm, but I don’t remember the size. after I get back into the shop I see what it actually is.

I’ll get the last 6 holes drilled and tapped then do a partial assembly to verify that my limit switch cables are long enough.

Mike

2 Likes