Just got the Jackpot control board and would like to add a on/off switch. are the any recommendations?
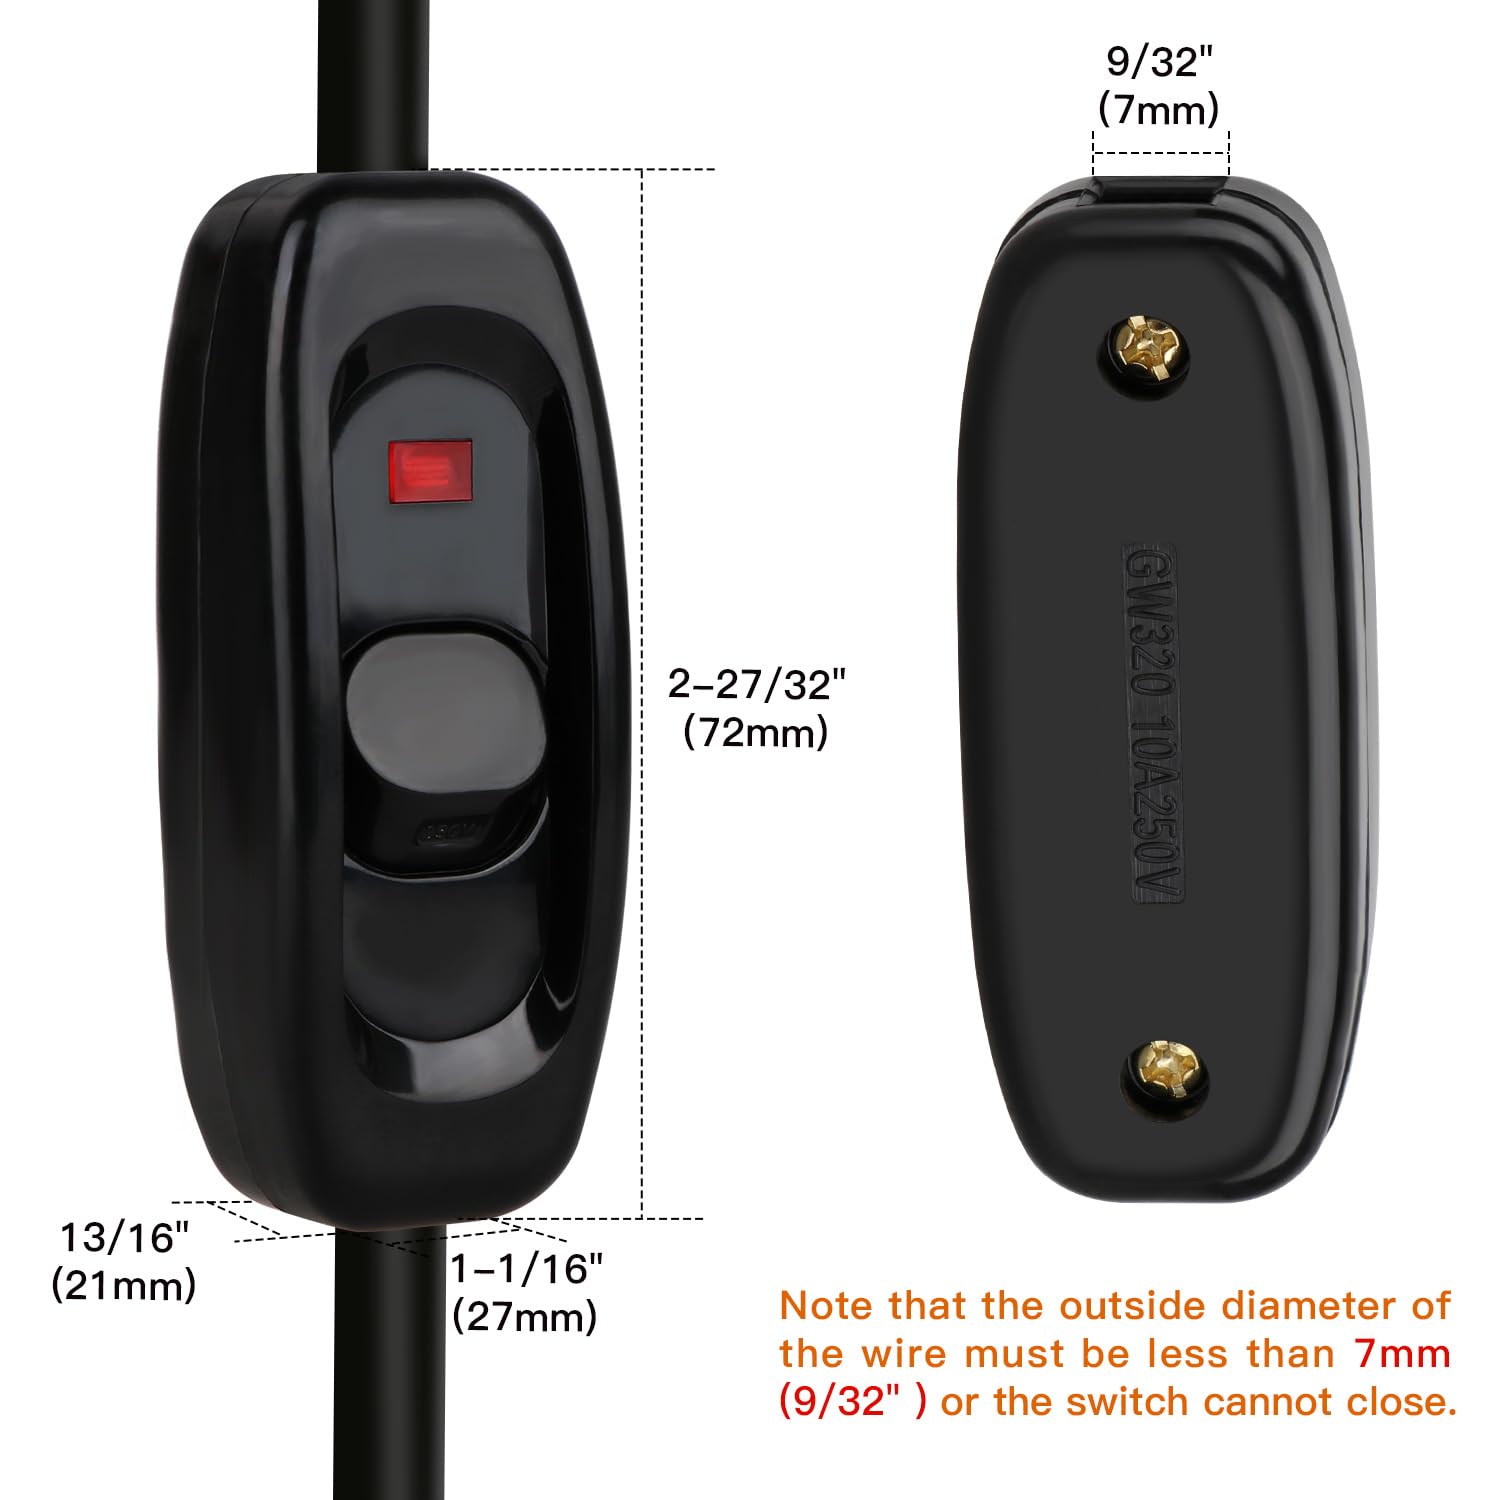
I bought a batch of these (they come 5 to a pack) and I installed one on my LowRider, and I’ve been happy with it.
https://amzn.to/3S6AtXj
I actually wanted to instal one because i saw a couple of your videos and liked the idea. Thanks for the help!!
1 Like
The little light in the switch (described as LED) — I never got it to work, but the Jackpot lights up like a Christmas tree when it’s on so it does not matter to me. These switches are nice and I like them. One reviewer made some of the same points about it that I like:
Quote from a review:
Went through multiple other in-line lamp switches before finding these
By Reviewer in the United States on January 11, 2020This review is for the black switch. To clarify some contradictory info in the Customer Q&A section:
– The black switch does NOT have an LED (in my case good)
– The back of the switch is bowed, not flat – yet, I’ve had no problem with it sitting upright and flat on a surface such as a night stand, desk, or even sofa arm.
I ordered a bunch of other in-line lamp switches, and these are the only ones I kept. Here’s why:
– HOUSING –
The 2 housing pieces are screwed together with 4 screws, instead of just snapping together permanently. This means the switch can be disassembled, re-seated, removed, or reused. Because of the screws, the housing also clamps the housing together much stronger – you’ll need this if the plastic sleeve of the lamp wire is slightly hard or slightly/thicker over-sized for the hole at each end of the switch (which happened with 2 of my lamps, all low-current devices rated for 60 watt or less bulbs, so I’m not talking about heavy gauge wire – just a plumper sheath).
– WIRE TERMINALS –
The wire terminals also have screws. This assured a tight fit and the wire can be re-seated or redone with ease, and easily adjusts to different gauges. Not necessarily the case with crimp or snap terminals.
–TACTILE FEEL–
These switches just feel nice to hold and use. The shape is sculpted instead of being bland and rectangular. The varying matte/smooth finish feels nice.
For my application, all of these features made this switch feel higher quality in every way than others I tried. Glad I found them and would expect no problems going forward unless the actual rocker switch mechanism develops problems, in which case I’ll update this review.
I’m too lazy to wire my own.
I use these. They’re a little pricey, but you get a small extension cord to go with the switch.
I use something like these, similar to your computer power supplies:
https://www.amazon.com/dp/B07RQV2NPN/
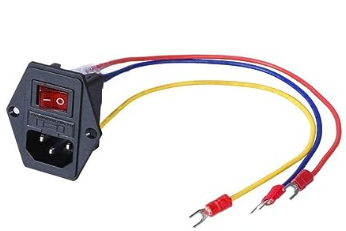
Any monitor or computer power cable will work. And it has a fuse built in
1 Like
Those work great if there’s an AC/DC power supply inside the machine.
The one I posted also works with external power bricks.
1 Like
good point. That isn’t really the best option just to switch 12 or 24 V power. I use 12V automotive rocker switches for that.
2 Likes
I just realized another option I use is to just plug everything into a surge protector that’s mounted so you can reach it. I do this on my MPCNC. I use the on/off switch on the surge protector to turn on the entire machine.
The 3d printer has a surge protector too, but it’s on the back of the machine. That one is plugged in to the wall through a wifi switch. I can tell Alexa to ‘Turn on 3d printer’ from anywhere in the house. If something goes horribly wrong, I can just yell ‘Turn off 3d printer’ and it kills power to everything.
I went overkill on the 3d printer and also have one of these mounted to the front that all the AC power goes through. I can kill the entire machine by turning it to off as well.
And now that I really think about it, I’m using the switch on the surge protector to turn the laser engraver on/off too as it has both the machine and a raspberry pi that has to be turned on/off.
Oh, and a few of my machines have these switches on them:
So… yeah… I guess there’s a million different ways to put a switch on some of these devices ![]()
1 Like
I use a power strip with a switch to power off everything at the same time, router, vac, CNC, LED’s. Great E-Stop and very robust.
2 Likes
Woodstock D4151 110/220-Volt… https://www.amazon.ca/dp/B005W17FRS
I like these. Easy enough to use and quick to hit for “oh crap!” moments.
2 Likes
I ended up putting two power switches on both the mpcnc and on the mp3dp. One is master power for wall into the system. The other is just to the control board so the rpi doesn’t risk sd card corruption on instant power down while the board on/off switch will immediately stop any motion. On the MPCNC, this second one works well to “home” the system (only if the x and Y are square) and allow some manual z motion. When first learning how to use the system, I used that switch a lot, but have since learned the software to not need to do that except when something is wrong.
1 Like