I’m originally a software guy who just recently ventured into the strange and wonderful world of machine engineering. Let me give you a bit of a background (and a bit of prose!)

When my wife turned 40, I converted a corner in one of our outhouses into a studio for pottery and installed both a kiln and a throwing wheel (she had no idea what was happening for several months, which was an achievment in itself). Since firing pottery is a time consuming process, she wanted a way to monitor and log temperature using a phone. I’m definately not a programmer, never will be, but I saw an opportunity to spend some time with learning some basic arduino and start making useful stuff. Flash forward a couple of years and my wife has since grown out of the studio and started a very small company for art and ceramics and I’ve become a bit more aquanted with electronics and IOT.
The picture above is me converting the pottery studio to a workshop, but keeping some of the artsy stuff, because why not!
It dawned on me that I needed to start making enclosures and other things for my gadgets and the 3D printing space had been in my rear view mirror for a while, so it was time to do the transition and become a maker.
A world of possibilities then exploded! I immediately started printing parts for the MPCNC not really knowing what I was going to be machining or if I would pull it off in the end. For a while, I have had some unusual ideas of combining electronics and ceramics in some artistic expression but I am not comfortable with working with my hands, so I rather have a machine do it  The MPCNC sounded like a great start for someone like me and a perfect learning process. Also, the community is fantastic!
The build was pretty slow and sourcing (affordable) parts in Sweden was hard, so I turned to eBay Germany, as I often do, for electronics and some hardware.

Steppers and bearings arrive! These are the Nema 17 2A 59Ncm(84oz.in) steppers.

I could almost stop here! The middle assemby was way cool to put together and while Ryans design was impressive when they came from the printer bed, it became apparent that there are hours upon hours poured into every single detail in how these parts interlocks. A wonderful piece of engineering!

Some parts take most of the day to print. Why not make some sourdough bread while waiting! 10 hour rise, no-knead and baked in a cast iron pan with lid. You’ll never go back after trying this method. Artisan bread made easy!

Cutting 3 mm thick pipe with a pipe cutter. It was doable but my first cut was not entirely straight, so I made a quick and dirty guide for the cutter to follow.

Parts are printed and most hardware are gathered. Time to make a table. My build is 600x600x85mm and the MPCNC calculator was very helpful! I wanted a sturdy build but I think I could go with a bit longer Z axis.

I made some end caps for the rails. It looks nice and I thought maybe they will dampen the noise somewhat. :-


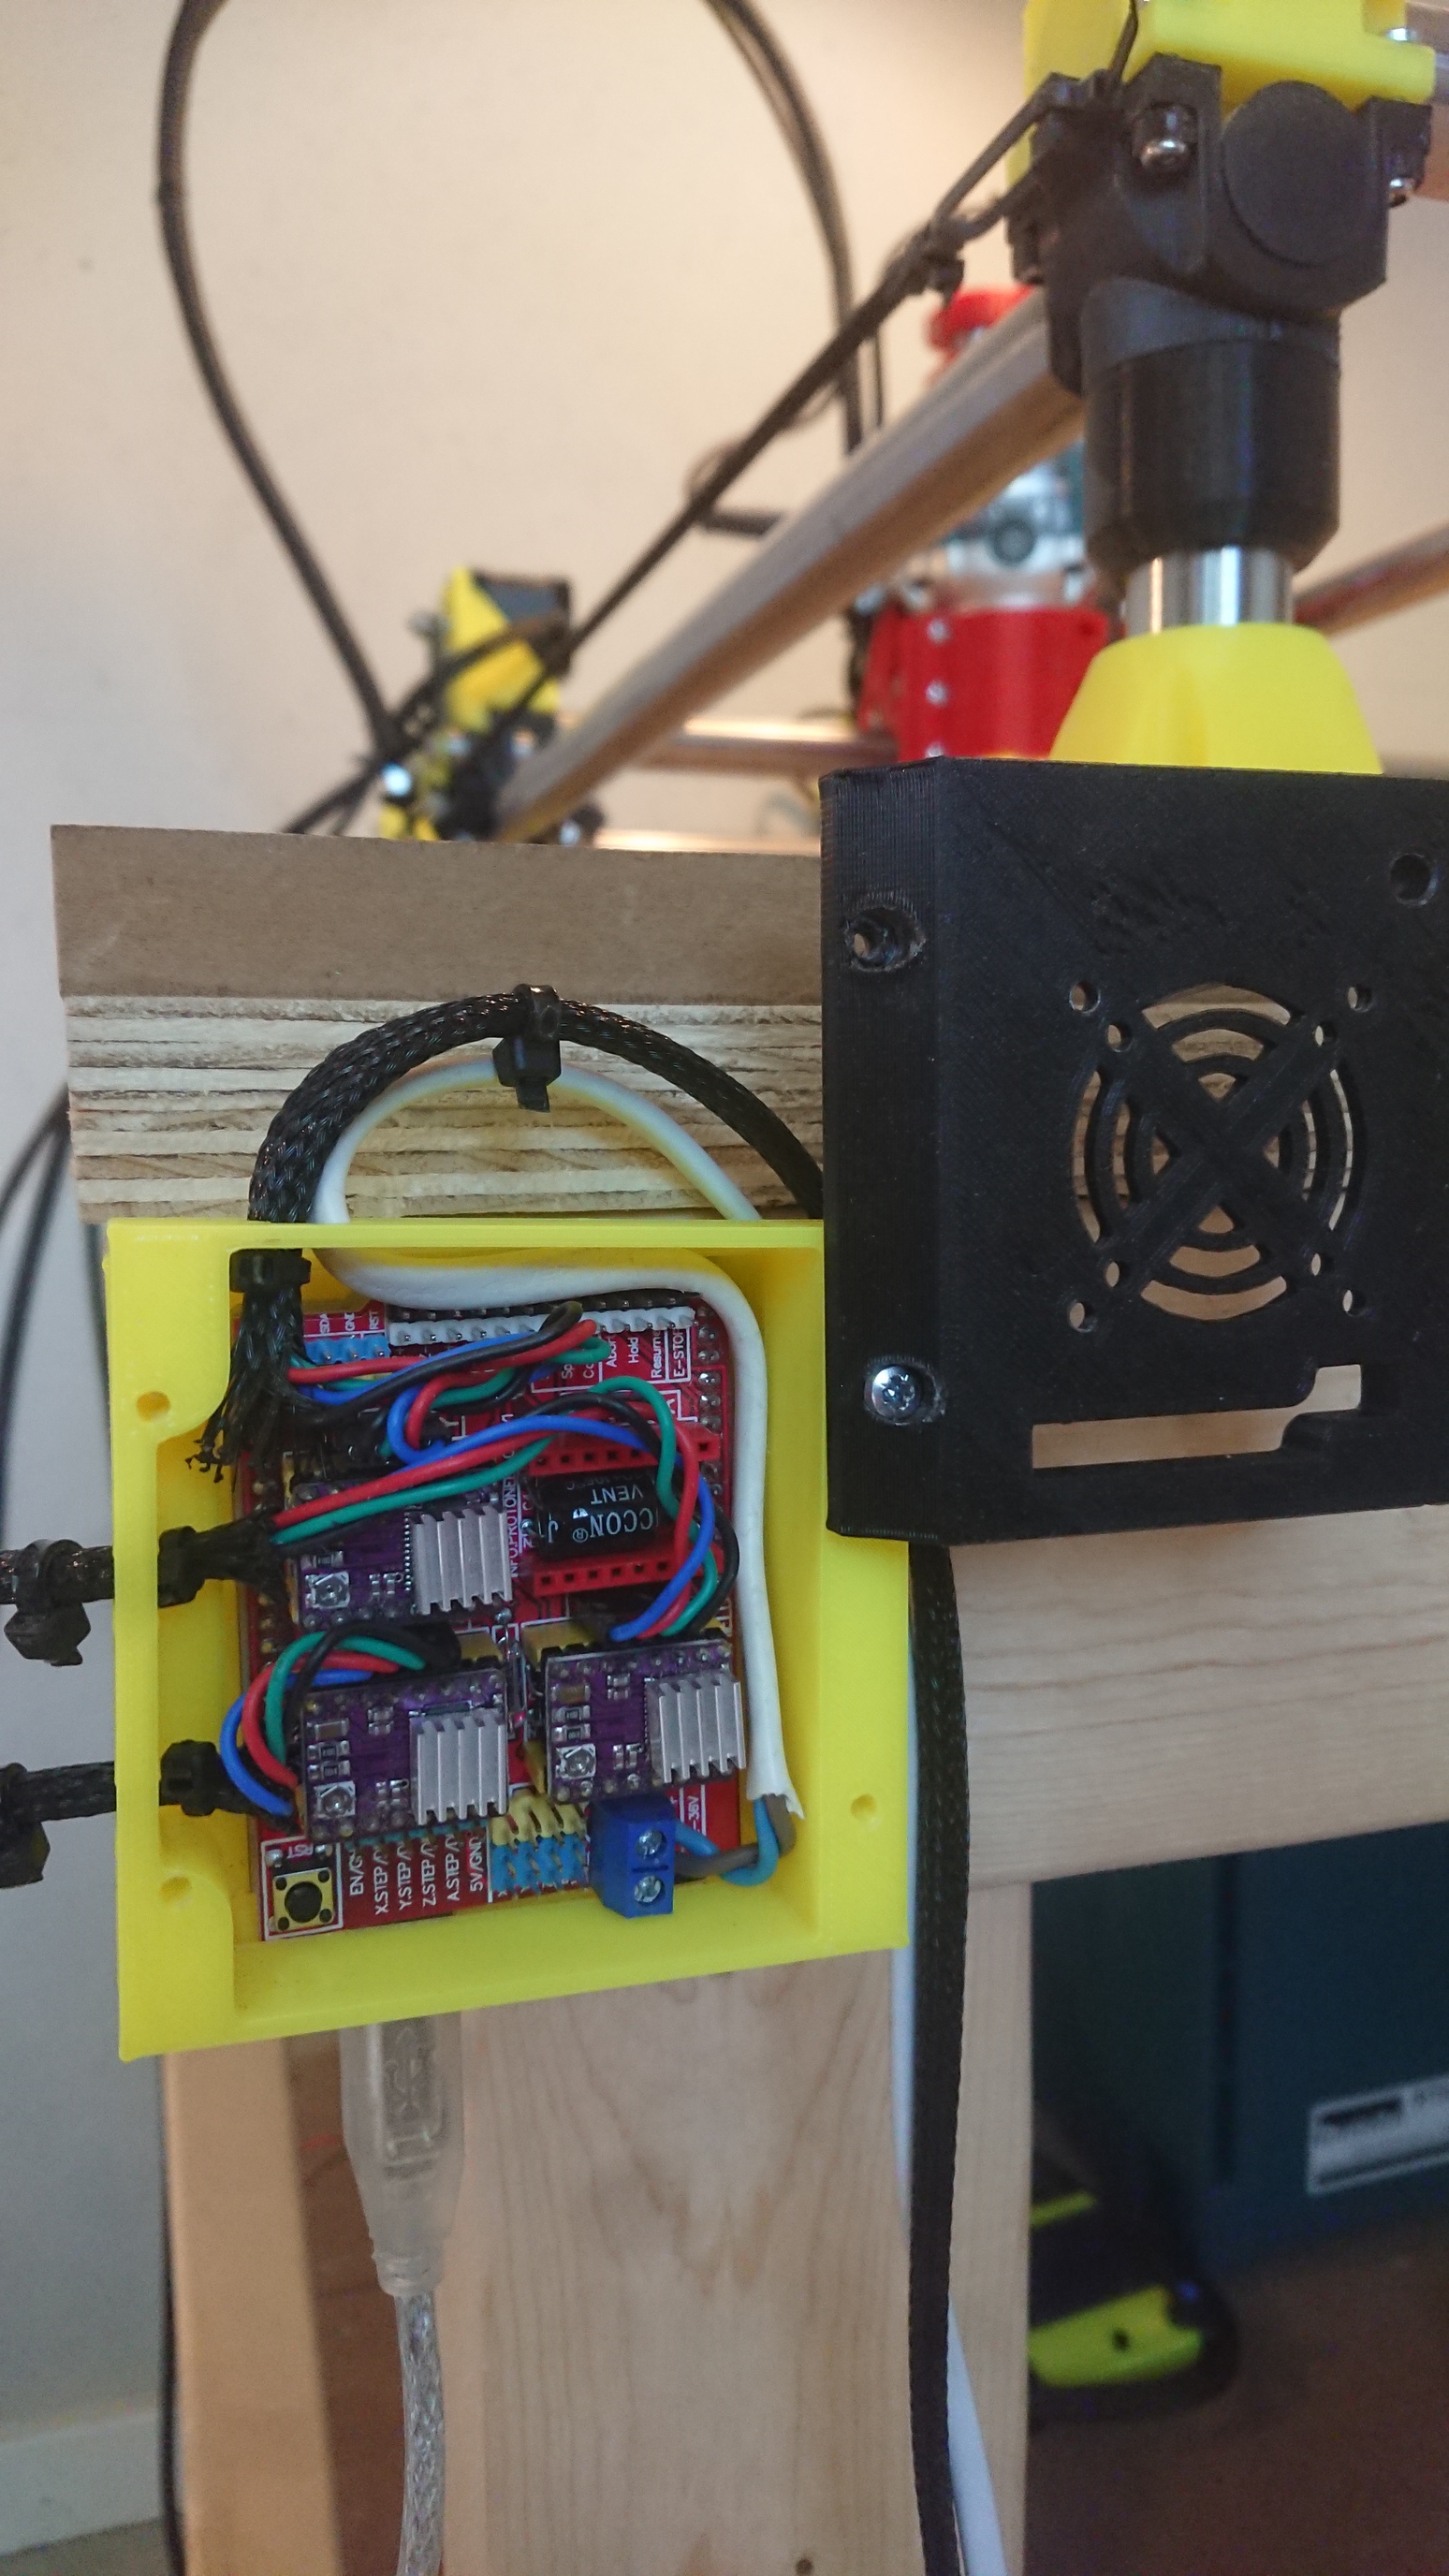
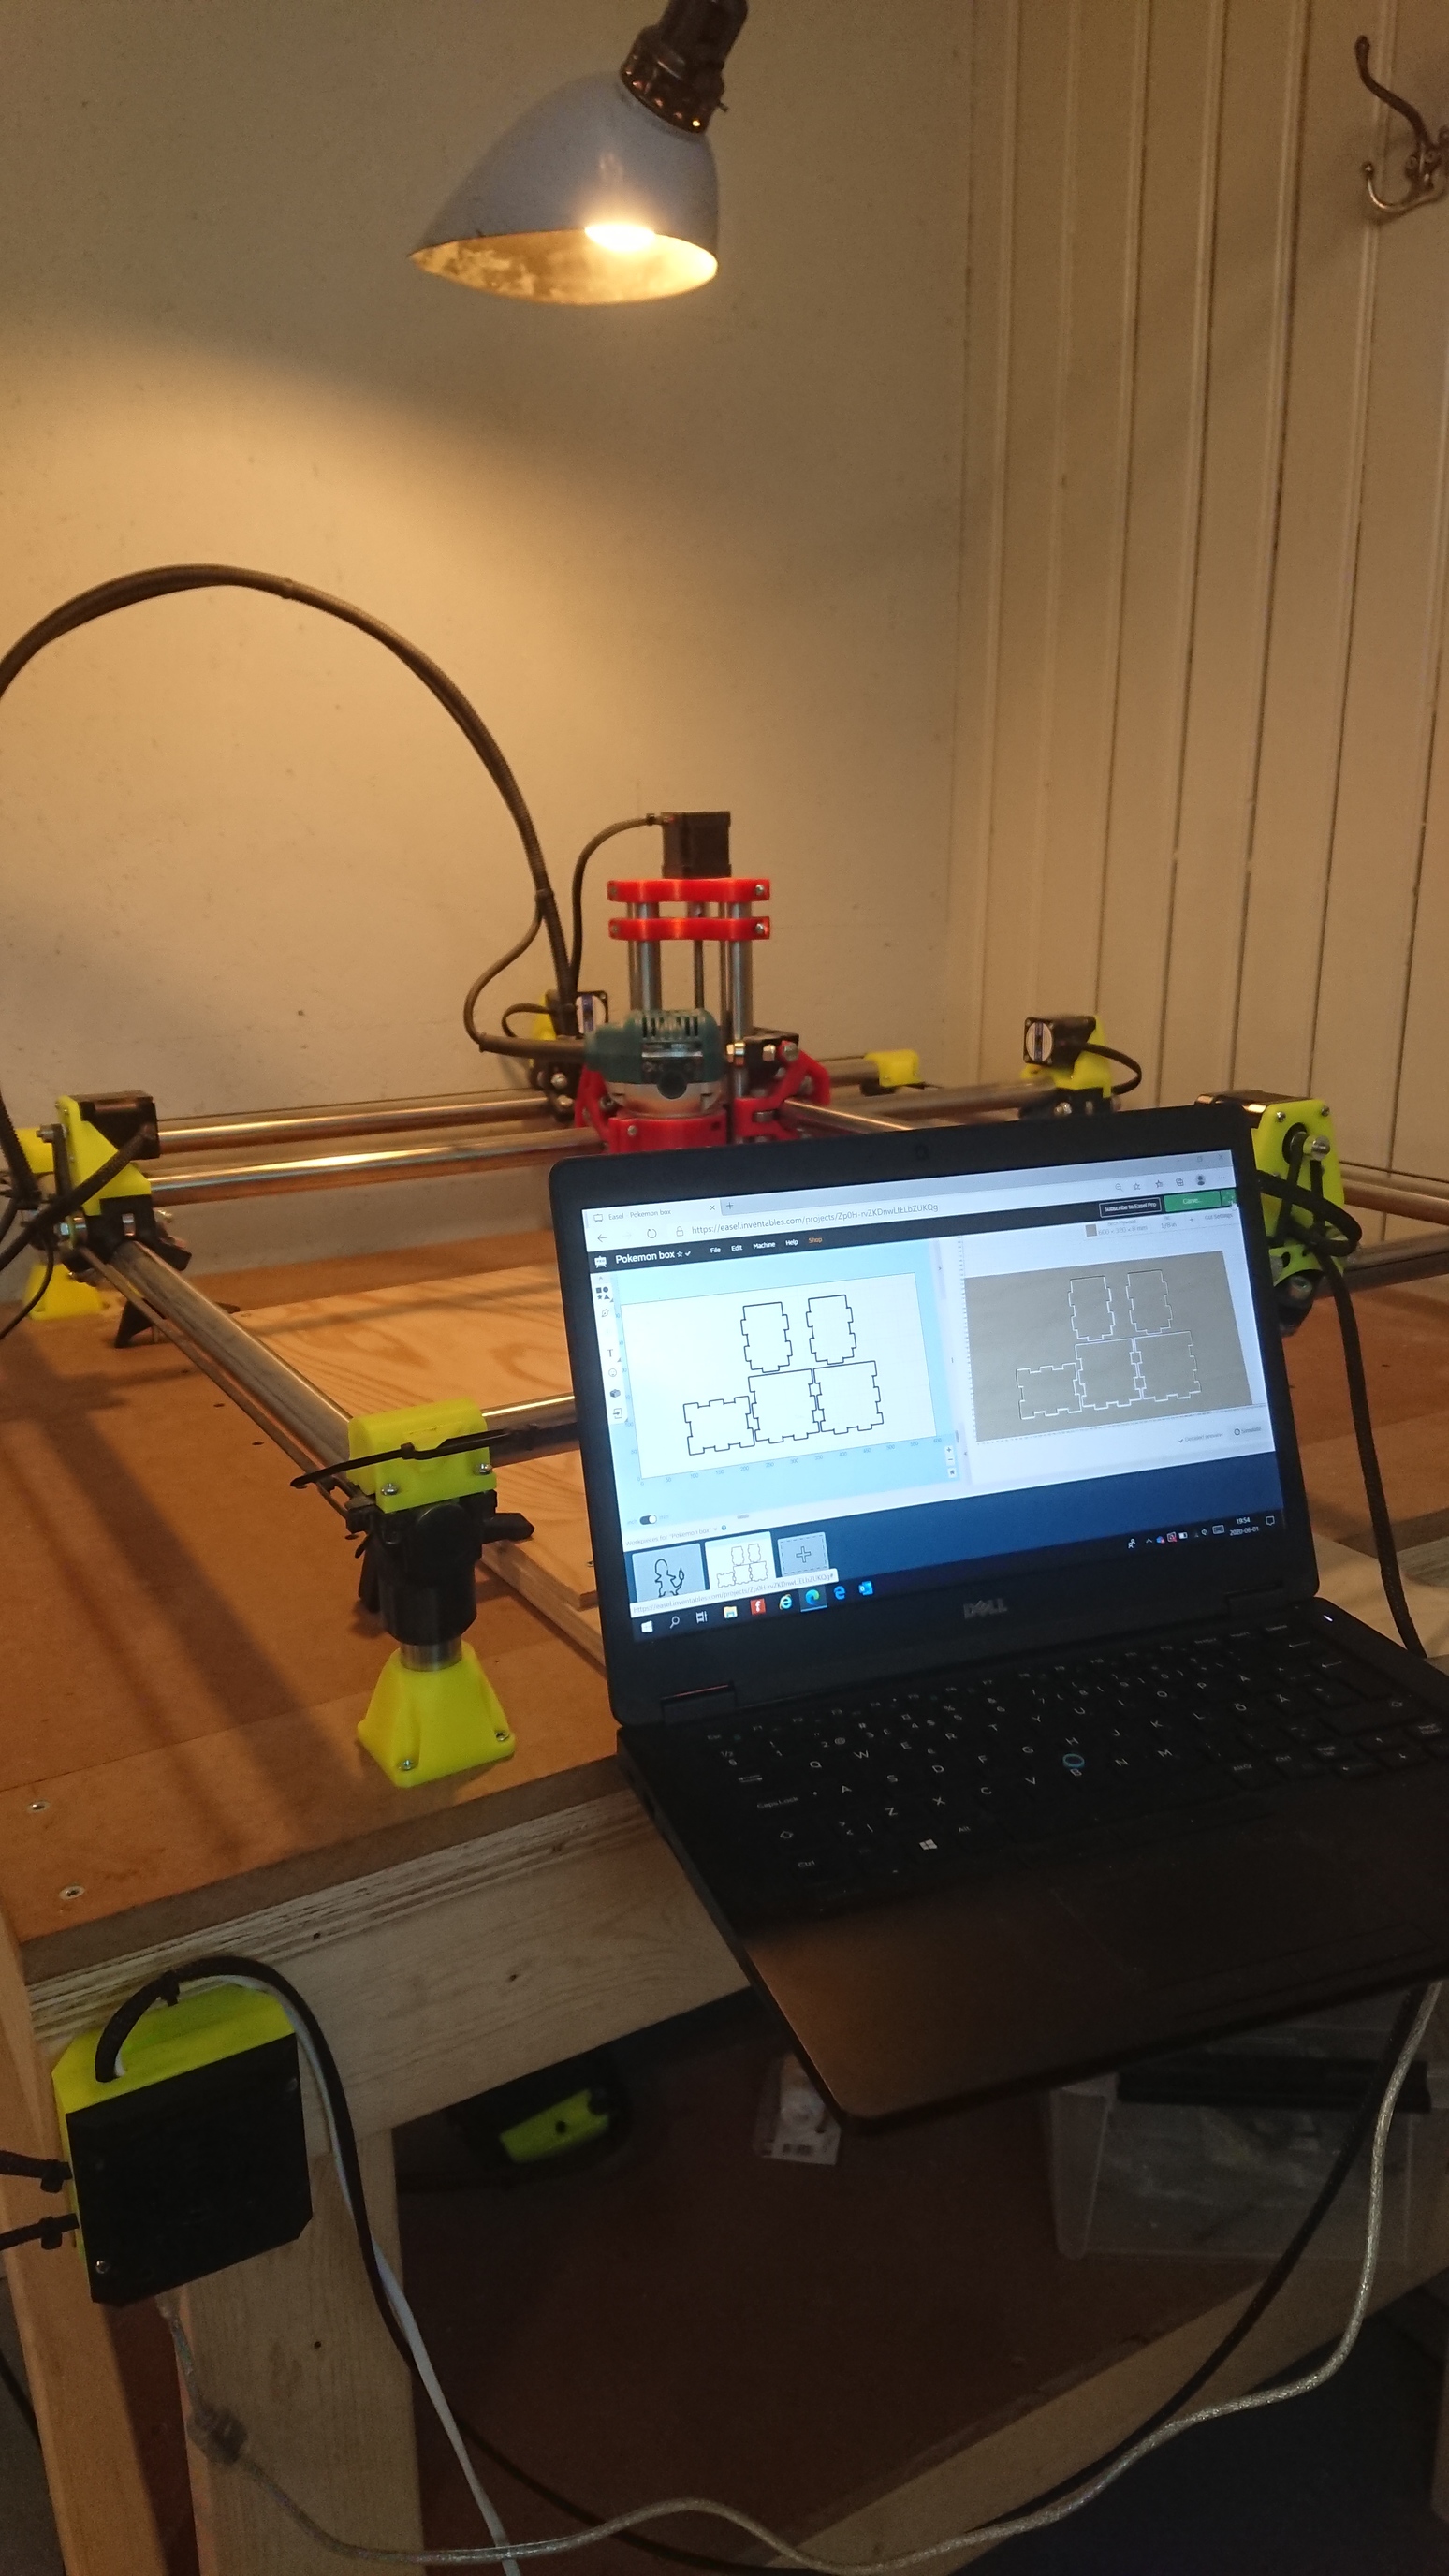
I used RAMPS 1.4 for control board and put it in this pretty nice case. The LCD display case is Ryan’s design. Note: I have since (temporarily?) moved to a Arduino Uno + CNC Shield + GRBL setup because I really wanted to try out Easel for carving. I will make a separate update for that (it was worth it!).

The moment of truth! It’s alive!!

The Makita RT0700CJ 710W was easily sourced and has probably more power than I’ll ever need. I like it!

I have not done much in the area of cable management, but I wanted to at least have the gantry neat and tidy from the start. The loop is made out of a piece of drain cleaner coil (the flat metal type) inside a regular flexible cable tube. The metal is springy and bends only one direction and it holds both the router cable and the stepper cable. Cable chains are nicer, I agree, but this was a fast enough solution.

First real CNC project! Drilling out holes for clamps on the wasteboard and hammering down M6 nut inserts. The wasteboard is of course upside down in this picture.

Wanted to try out some V carving and found this pretty tree. I do however really need to source some harder wood. This is carved in pine and while the end result is fine, the time spent with a Dremel was a bit too much. Also, why did I pick a piece with a branch eye knot?! :-

Well, that’s it for now! The build has been a lot of fun and a pretty smooth ride so far. I have just dipped my toes in the CAM area of things and I have much to learn and many projects in my head. I’ve not yet tried milling clay (prior to firing), but I’ll get there eventually. The machine is working as intended but it’s not perfect. My XY axis is not completely square and there are some tension issues on the steppers making the tool mount to vibrate slightly when moving (I don’t think it’s the tension of the belts), but I will deal with that in an update.