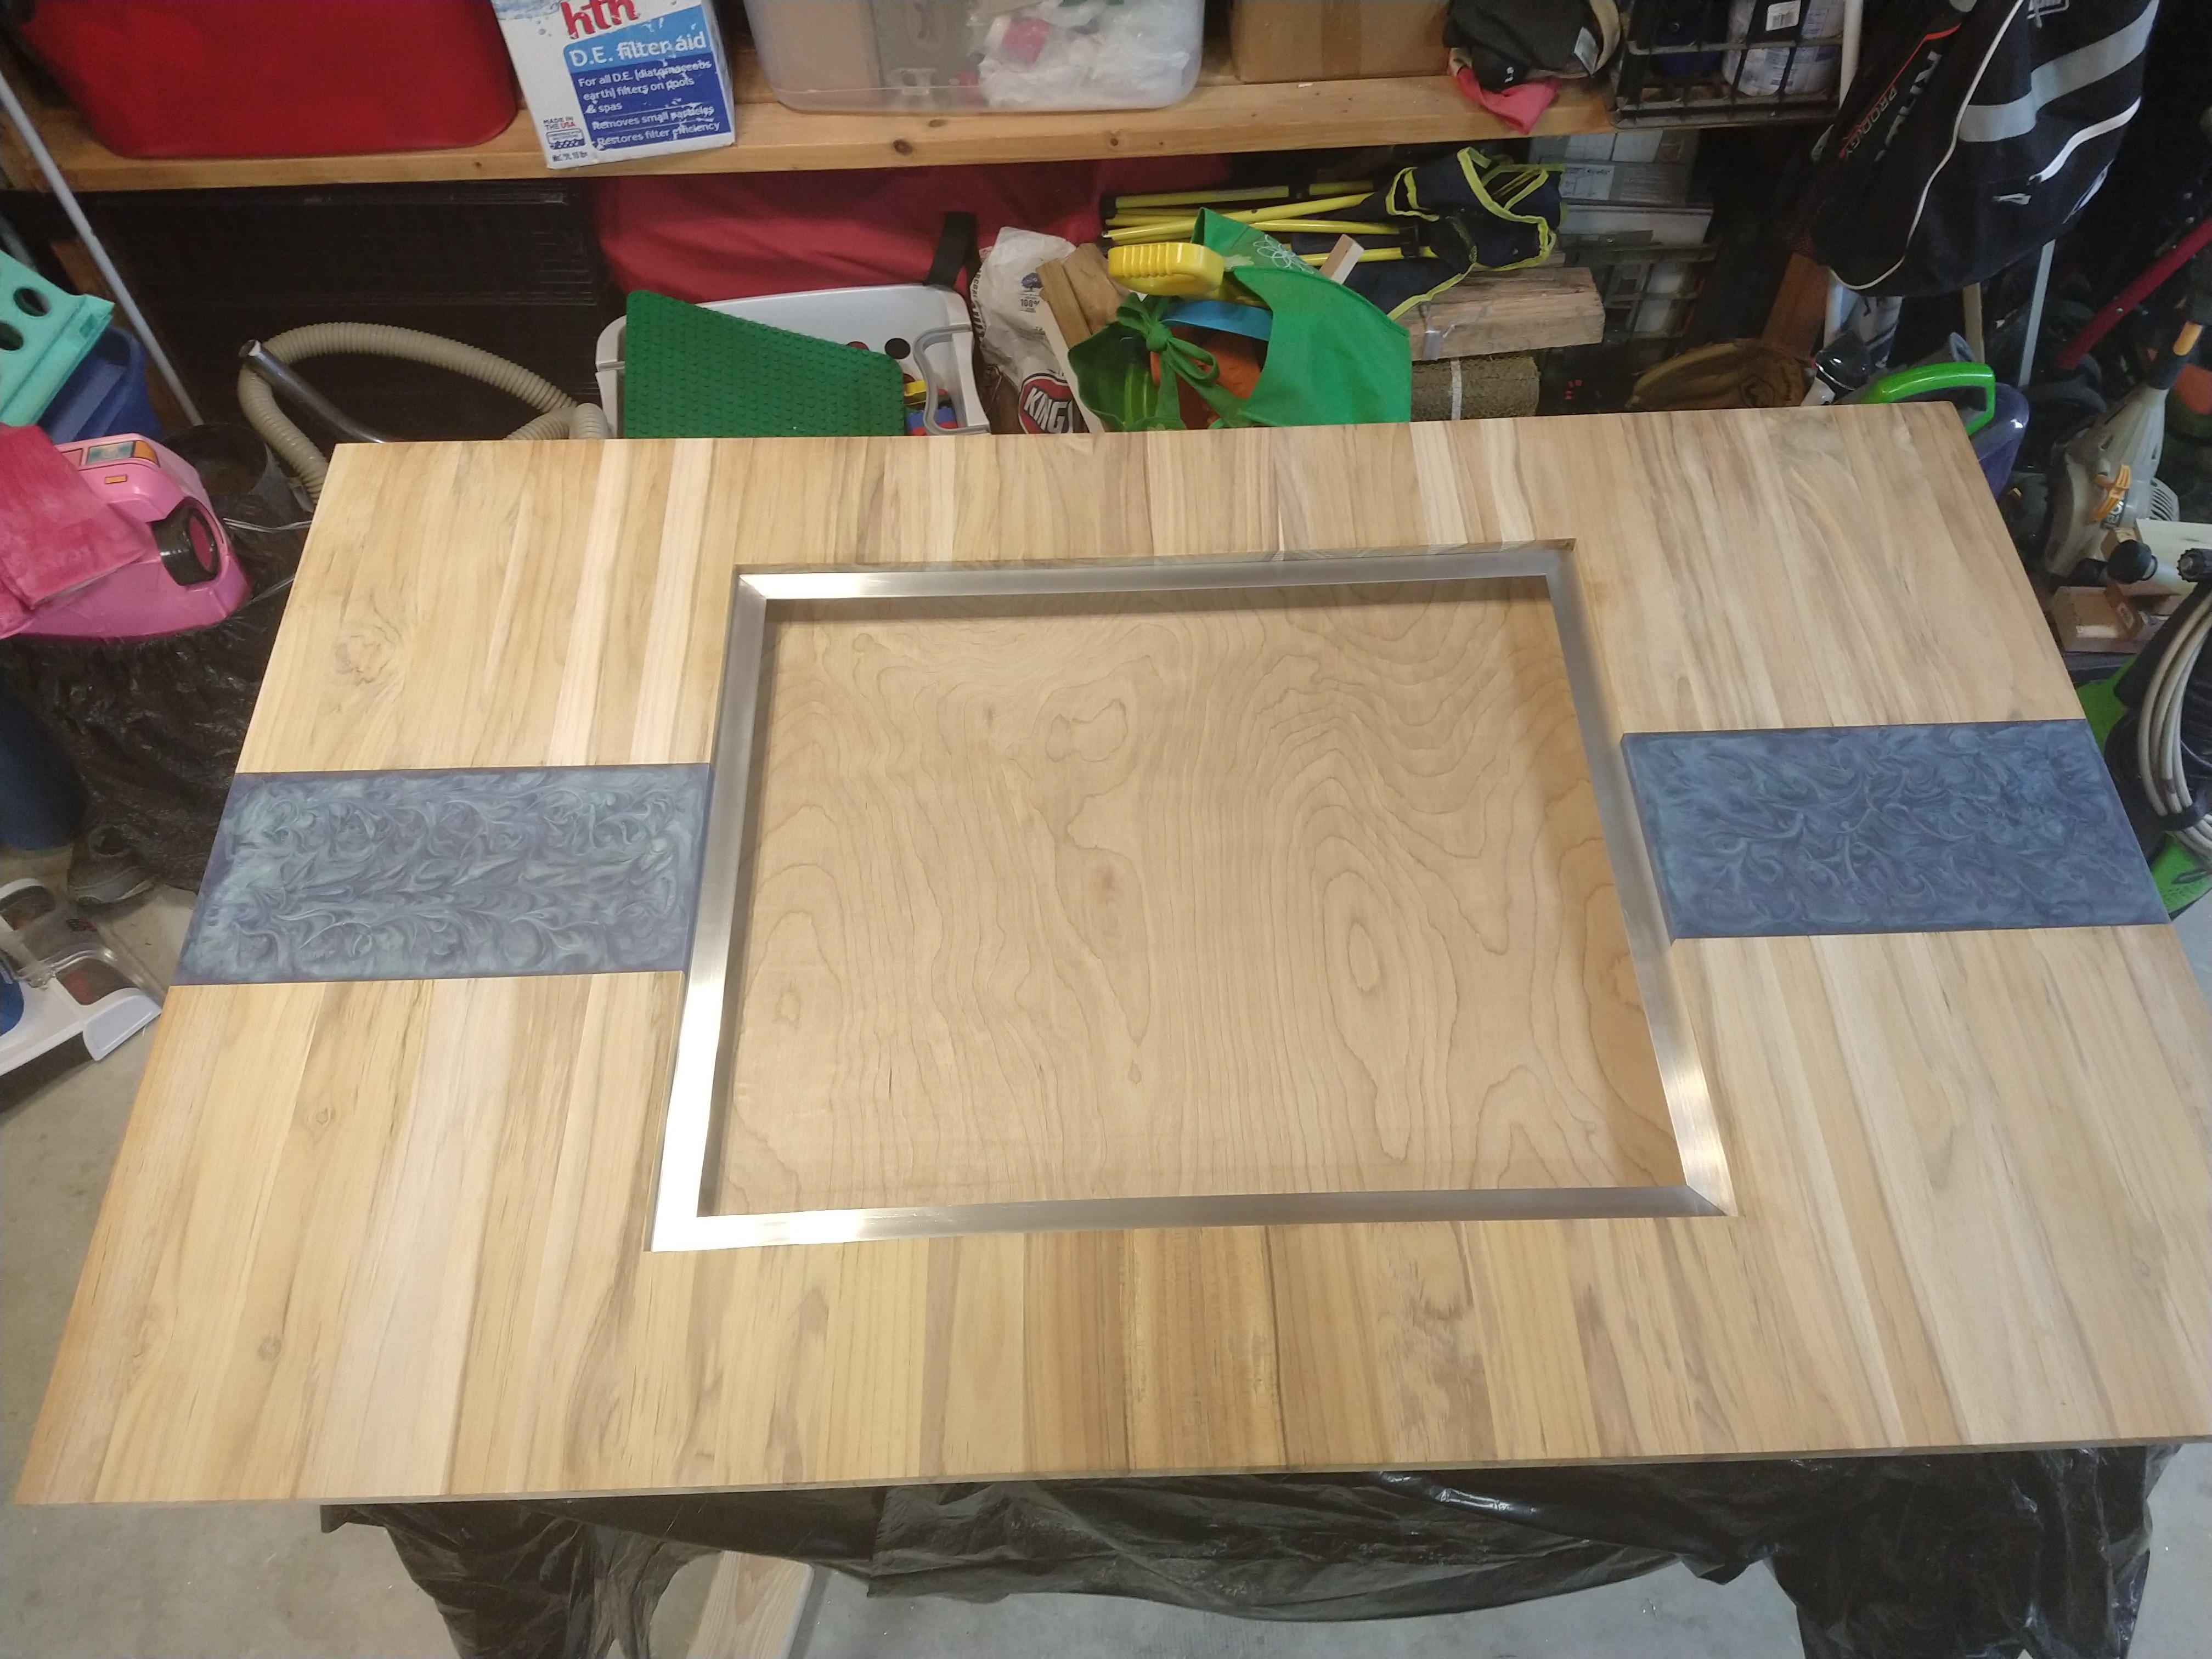
Work continues. Most of the primary cutting and assembly is done, moving on to the more technical aspects of the build. I cut the aluminum angle and test fit it.
I bought JUST enough to make it work…one piece is a just a bit shorter than optimal, but I think I’ll fix it with shims. Before installation I have to cut the metal flush with the poplar frame, and pilot drill screw holes.
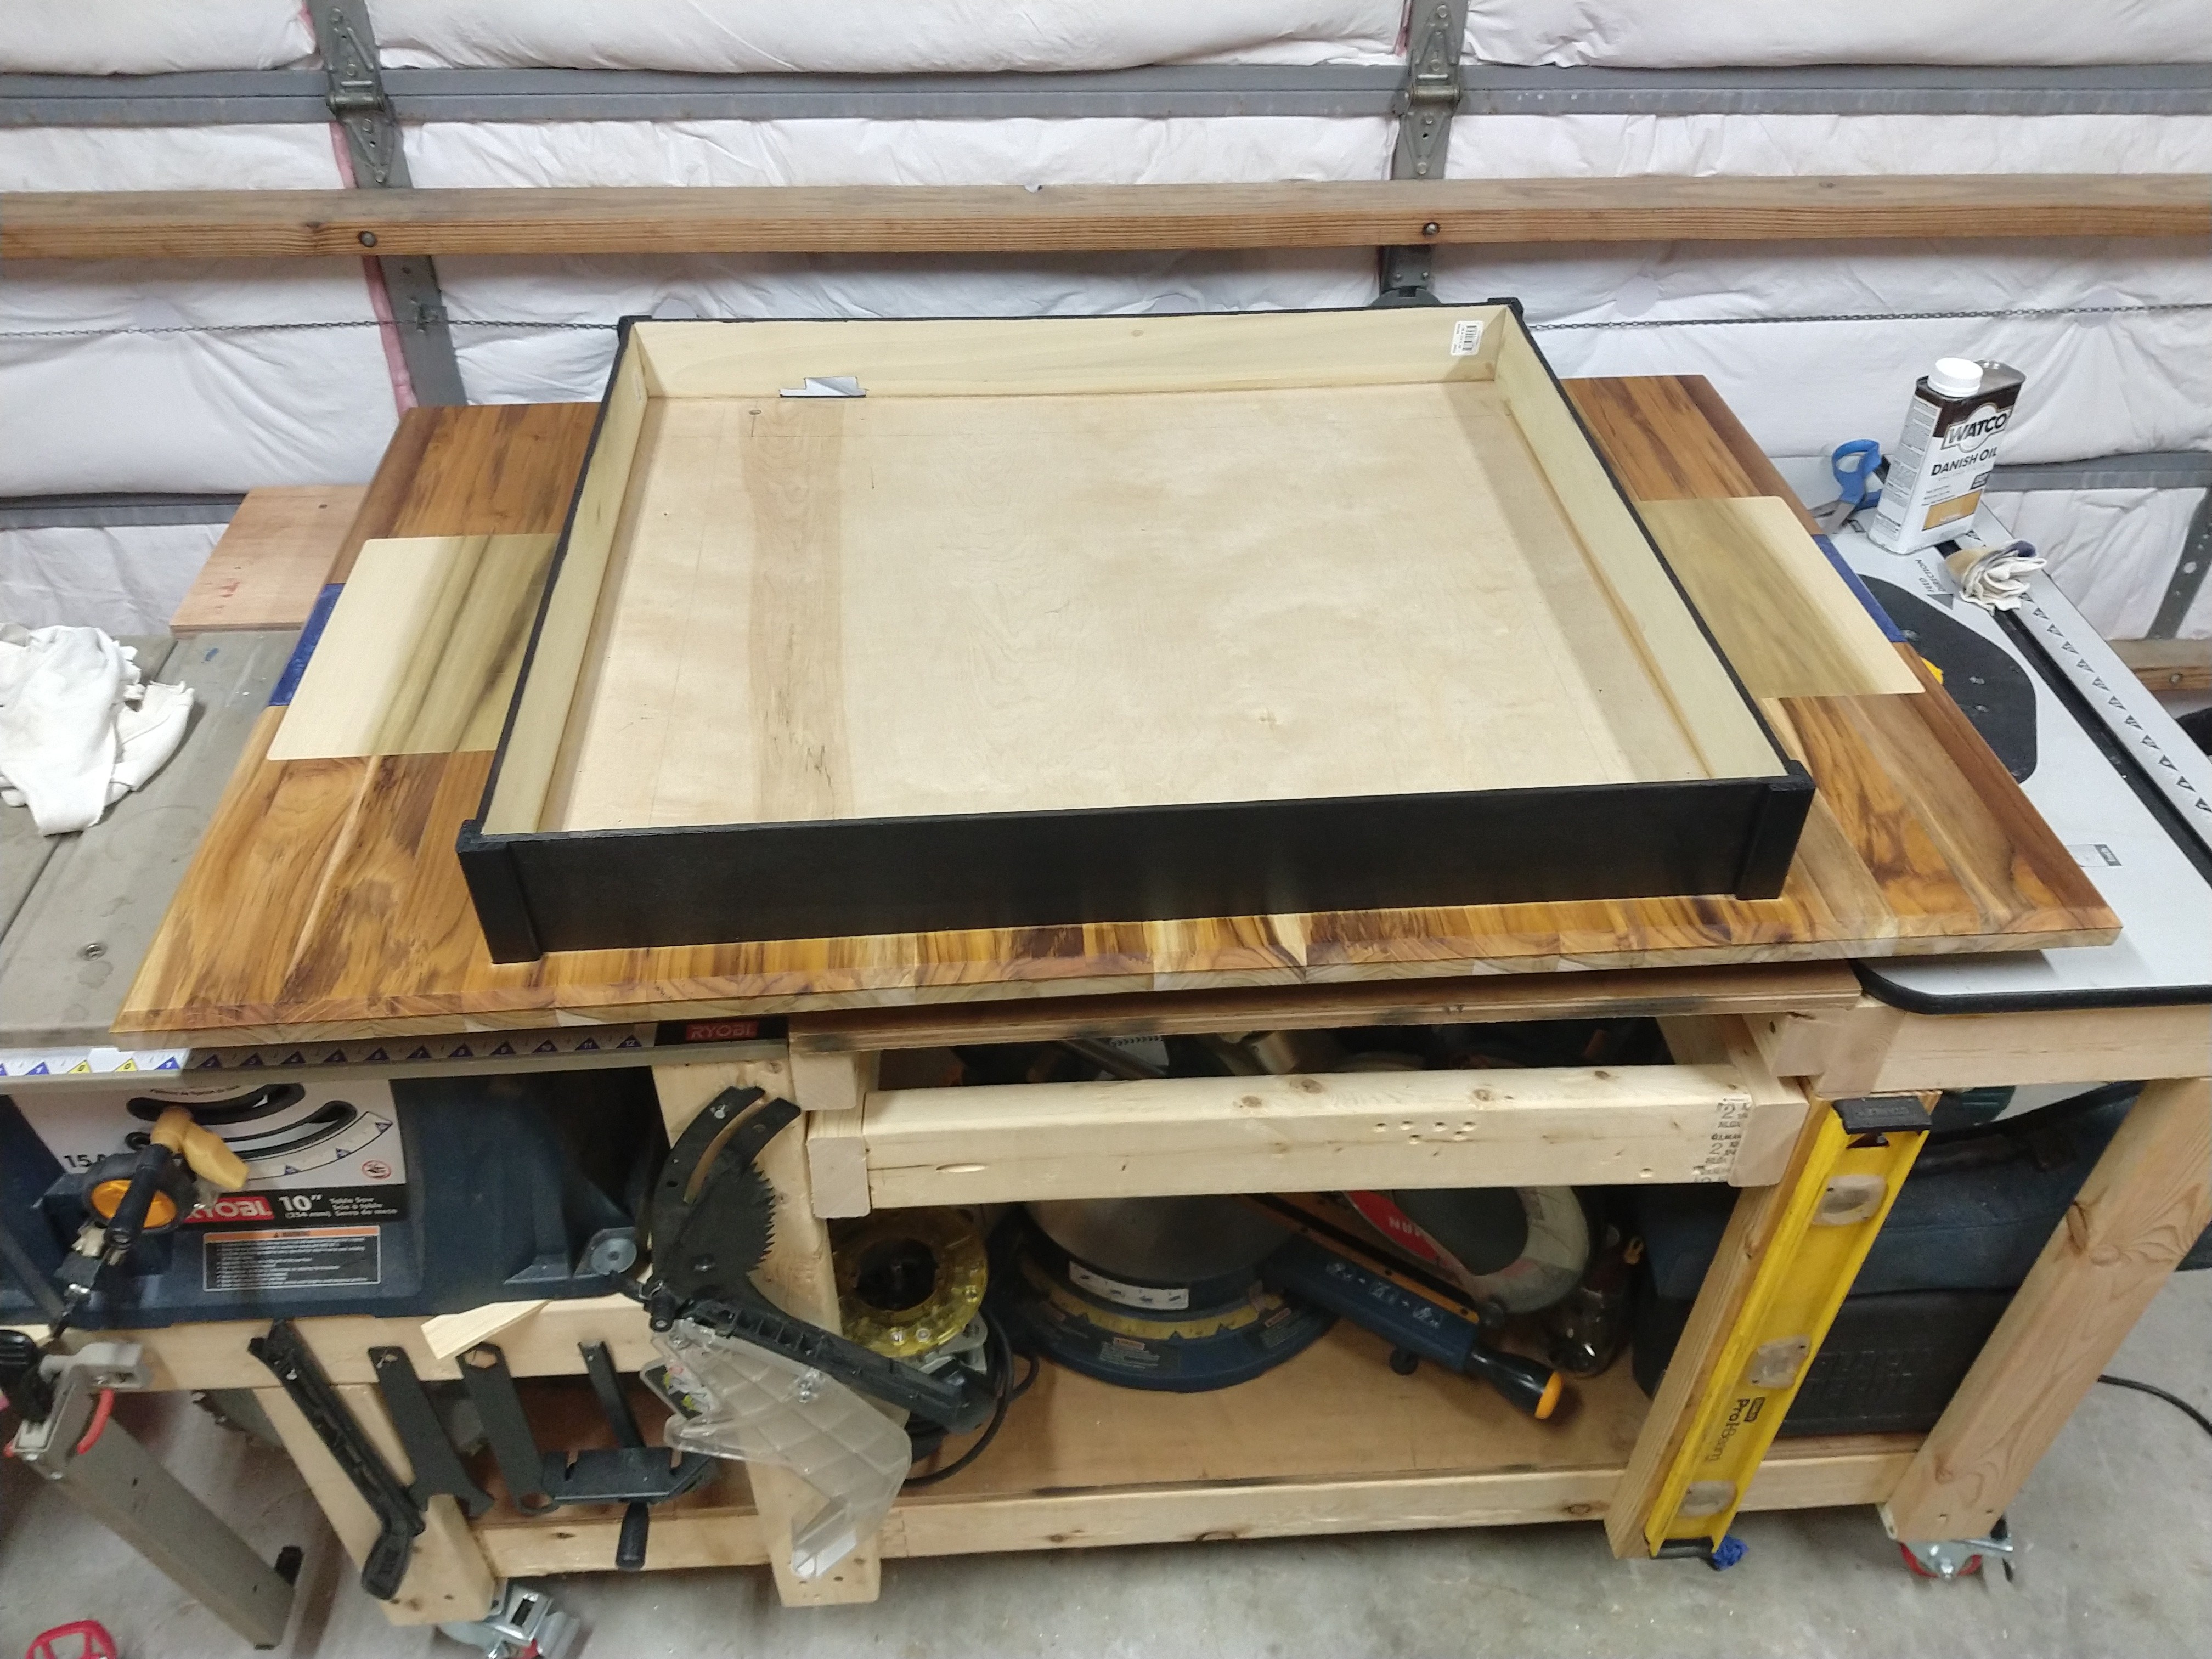
I put a 1/4" “skirt” around the machine mounting surface. Hit it with some black latex paint. Then I applied two coats of Watch Danish Oil which really makes the teak pop. Tomorrow the top surface will be ready to sand out and oil. Then all that will be left is to install the machine, LEDs, legs, then test!
Was a little “liberal” with the cutout for the controller. In hindsight, perhaps with some more careful planning I could have cnc cut this opening. Oh well.
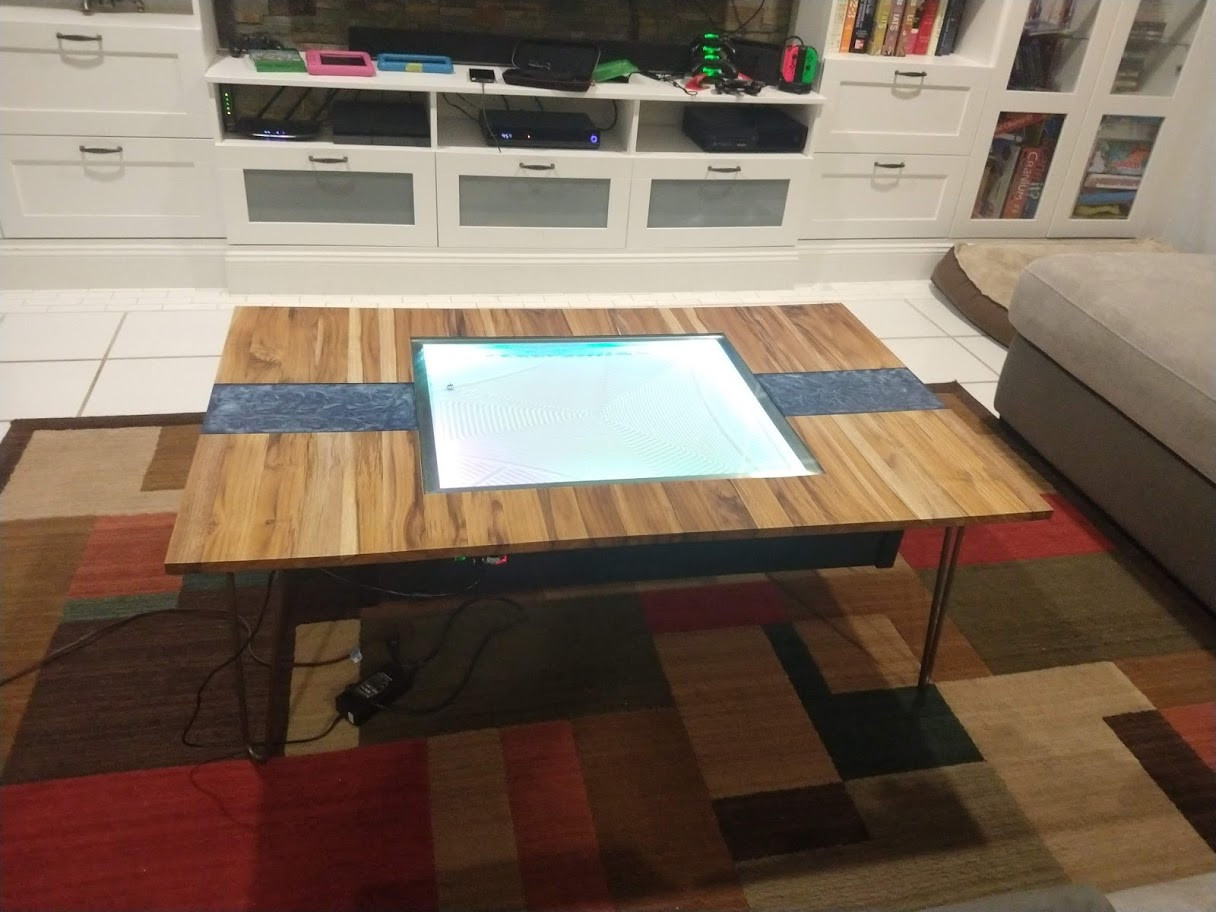
Just finished the top. Wondering if it needs a stronger top coat like polyurethane to hold up to the kids? It certain LOOKS great with just the oil. Durability is my only question.
A coat of wax can make it a bit more durable, but a really plastic like finish of a polyerethane or polcrylic is really more durable and water proof. I think you may have trouble adding a coat of poly on top of the other oil though. My gut is telling me the oil based poly would stick better. But I am no chemist.
Definitely test it before trying anything on that table. And maybe carve out some coasters
Ok, I’ve been slacking on updates as I have been so anxious to get her done. Also had some problems along the way. Still have one lingering with my ESP8266 running wLED rebooting every now and then. Also still weighing the polyurethane decision. I think I am test driving the oil finish. If I DONT poly, I may want to explore polishing the resin a bit. It looks nice, but I would like it shinier.
Other than that, SHE’S DONE! I must say it is AWESOME, and everything I hoped it would be! I cant stop playing with it. Ryan, I cant say enough what a good idea and well executed design this is. The machine is the only part of the build that DIDN’T give me trouble. It just worked from minute one!
Thank you! And thank you and the community for the help and advice along the way. I had alot of questions, especially in the next zenxy ideas thread, and you were always quick to respond. Much appreciated!
My next step in my build is a cordless power tool battery mount. I am confident one of those will last a significant amount of time (LED’s will be the real drain). I don’t have a good way to hide a cord so I need cordless, at least enough to last a couple of hours.
I hear you. Hiding the power cord is my last struggle. As a coffee table, not alot of good options. I am negotiating with the Mrs. the possibility of poking as small a hole as possible in the area rug right by the table leg.
This way vacuuming and trip hazards won’t be an issue. On the other hand, we could never rearrange the room. I just don’t see a way to have it on top of the rug and still looks good.
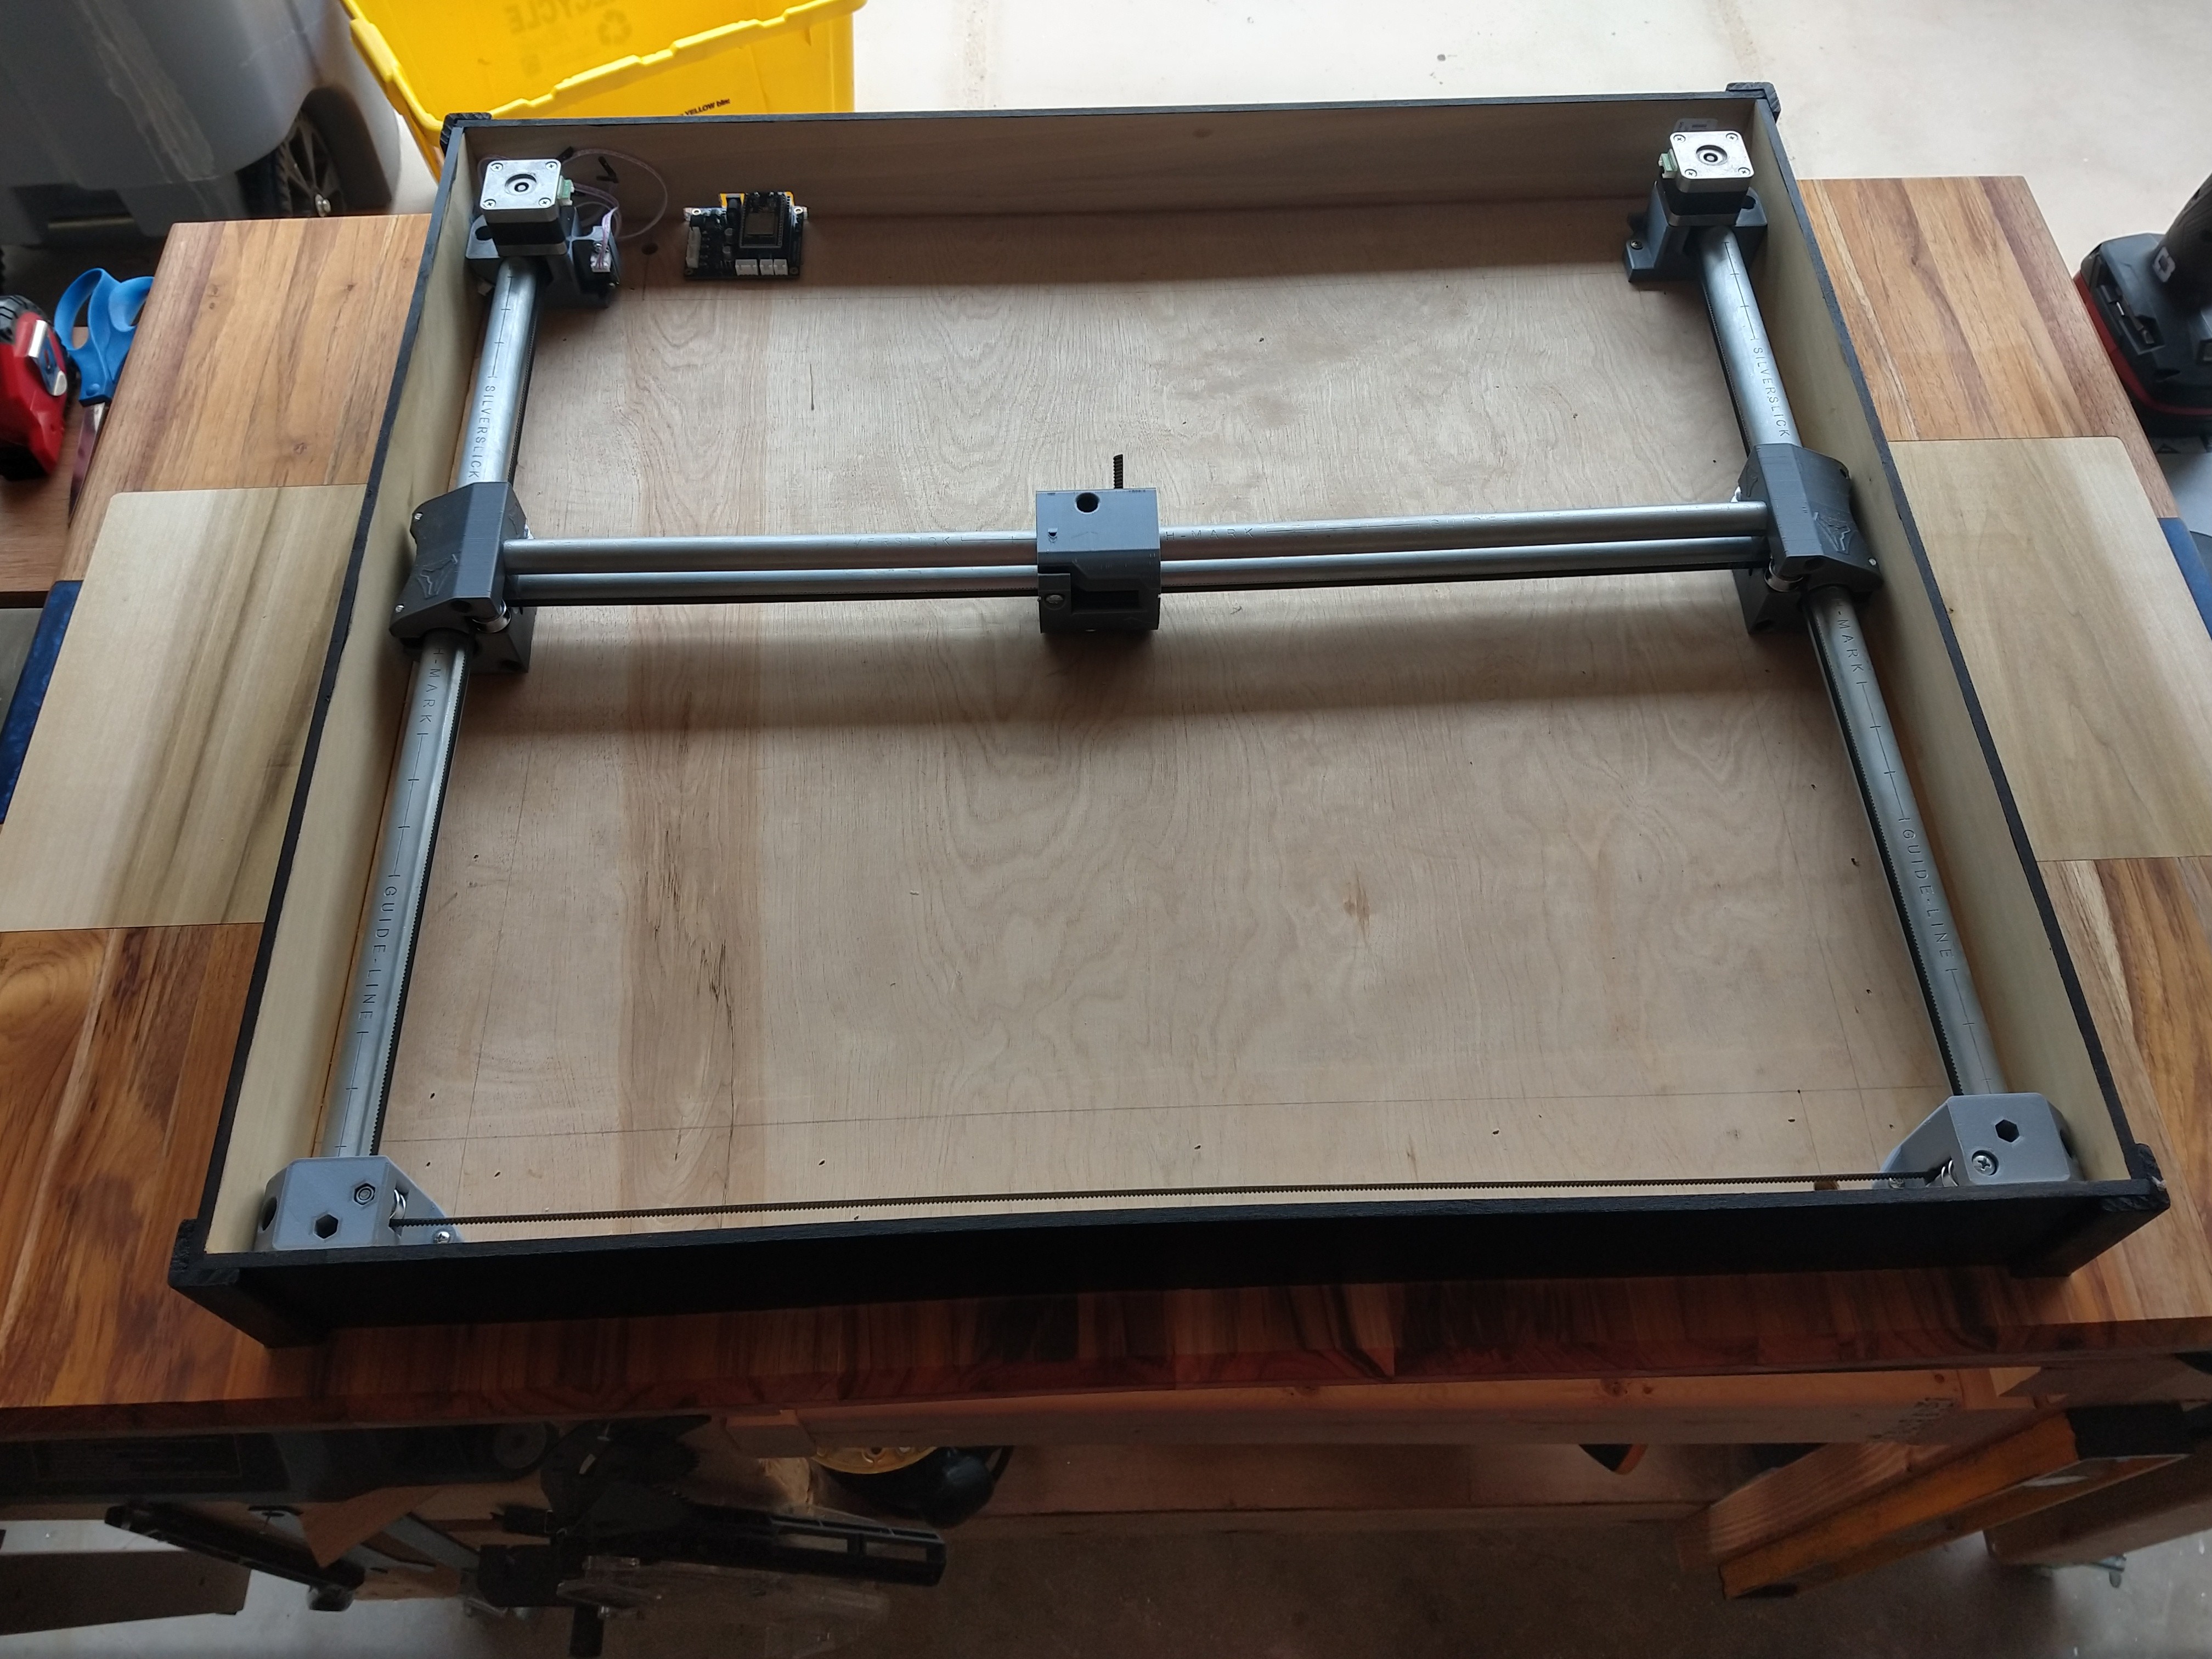
For what it is worth, I put an ammeter on the table and got about 1.5 amps with the LEDs at a comfy level and both motors moving. Of course I used my smallest steppers, at the lowest drive voltage. I am limited to 4000mm/min before skipping, but that appears to be plenty for a table my size. I can do a nice pattern in 10-20 minutes
I was getting about 500-600mA without the lights. I never could coax more than an amp out of my LED strip. Luckily it’s light output is good for my size table