It has them, The blue connector are all limit switch / end stops
1 Like
Hello all - I noticed that the talks with this new Zenxy stalled. I am very interested in building another Zenxy table as I really enjoy my current table. I want to build the new one with your new creation. Please keep the conversion going as it is very interesting and good knowledge . Thank you Ryan for creating such cool things.
Wade
Sorry I am working on a minor fix/change. But I only have time for it at the end of a week / weekend. I spent a little time last night and 1/2 issues was an easy for the next issue is a bit more involved. Close, should be soon.
I believe we are 99% there, enough that I have started to order parts for the shop.
Sweet! Not 15min ago I grabbed a 40"-ish by 8’ table off someone’s tree lawn that is earmarked just for this project. Its wood veneer, but not MDF so it’ll make something nice. Gonna test the limits on that 3/4" conduit!
1 Like
I’ve been held up with switch issues, and some.of the stuff that Ryan is fixing/adjusting that turned out to be a bigger problem than it looked like at the outset.
I’m still working, just had to backtrack because I can’t keep the pieces bolted to my table. I’d also like to see Ryan’s fixes, too.
I also have some ideas for optical stops… Speaking of which…
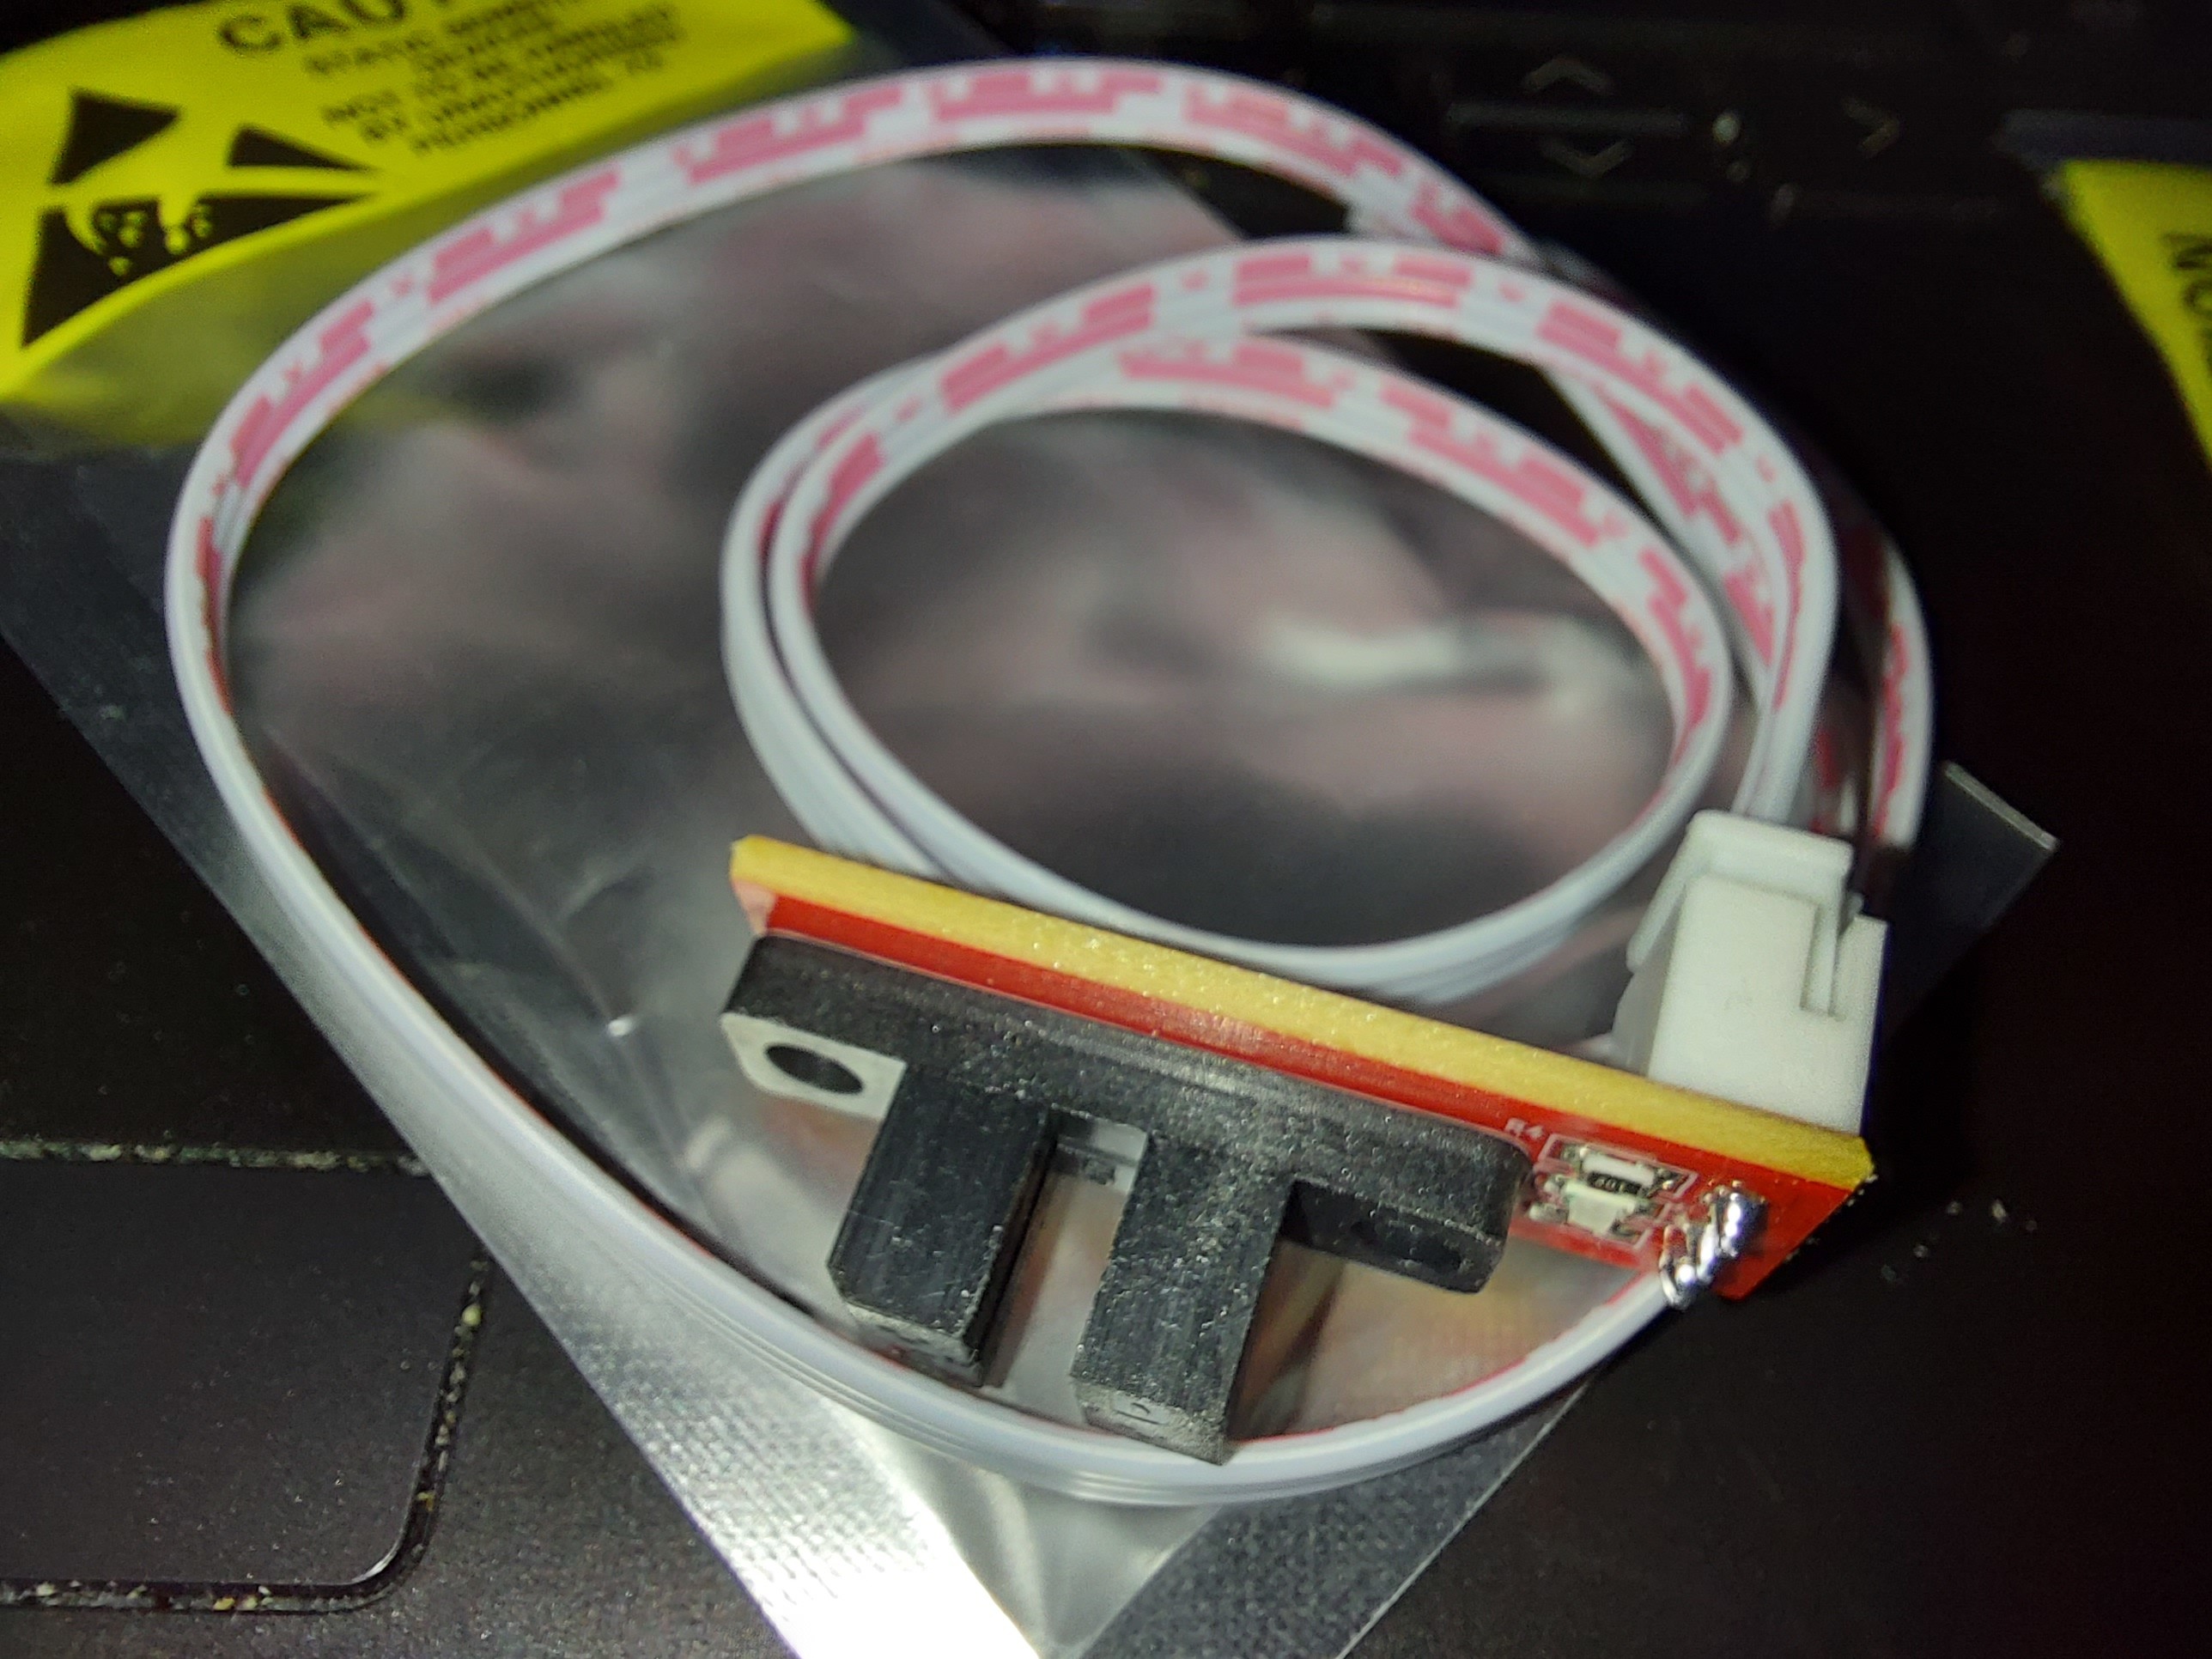
These just showed up, so I ought to find my bag of them any second now.
1 Like
I have been on the phone and emails all day dealing with late mail. Such a frustrating day. Half a dozen shipments are showing “late” the longest of which has been 8 business days in the US. of course they filed a dispute, then immediately changed it to a claim. I get several emails a day asking if the status has changed and will I ship another.
Covid and extreme weather are causing mail delays everywhere, 3-8 days domestically really does not seem that bad to me but jeez I have dealt with some very ugly emails today. Paypal seems to be on the same page as me but we will see. Yikes…I am not Amazon and their business practices of refund first ask questions later are really creating some extremely demanding customers these days.
So I will start to pack orders so I doubt I will get any CAD in tonight since I am starting 5-6 hours later than usual.
Sorry, done ranting/venting.
4 Likes
I have adapter parts drawn up, but forgot to account for the wiring harness coming out the back of the board, so I’ll be re-drawing adapter parts for the optical stops, though that’s probably premature, since I think Ryan will be changing the parts anyway. I think what I’m going to do for the re-draw will be to make separate pieces that hold the optical endstops but do not attach to the motor corner. They will just be stand-alone parts that work with the truck and shuttle (Maybe with the adjustment provisions for both.)
Meanwhile, my table is getting some epoxy treatment to make a new surface that I can bolt stuff to. I was thinking of putting in a threaded insert if I am going to be removing and reinstalling the parts (Which seems likely) but that does rely on keeping the mounting solution the same.
Hang in there Ryan!
There is an old trick for stripped holes in wood. You can coat some toothpicks in wood glue and jam them in there, then thread the screw in and let it dry that way. Might be the last time that work though ![]()
1 Like
lol.
Yeah, Jeff, I know the trick. My father is a general contractor, and has been a carpenter. I’m short circuiting that trick and just using epoxy resin.
That trick works when you want to re-use the same hole, not as good when the hole has moved, and even less so when the “wood” is ikeaite.
If the epoxy resin doesn’t yeild the results I want I’m going to epoxy some 3" 16 gauge sheet metal squares down and drill into that. If that doesn’t work… It’s a $29 table, and I still have the GCode to cut a new top.
1 Like
I am happy to report:
-
Epoxy as a new surface to hold screws worked perfectly.
-
92.5mm outside of “working area” is perfect. My table is able to address the whole area just before the shuttle hits the trucks, and just before the trucks hit the corners. I made it with an extra 0.5mm all around so that it could stop without hitting anything, and that’s exactly what it has.
I’m less happy with the limit switches, and while the Amazon package that showed up was supposed to have extras for me… It didn’t. I also haven’t found my optical switches, probably because they will be with the other limit switches that didn’t come today. I have different style switches, but…
Anyway… Changing the X switch to optical is super easy. The Y switch is a little less so on this model. Anyway, it looks like I’ll need updated files to test this further. As much as I’d like this to have been a rubberstamp beta test, there were some changes that will make this even better when it’s finally released.
And I still think you guys are going to love it.
1 Like
I can’t wait to sit down and finalize this thing. Mechanical switches first then take a look and see if there is anything we can come up with to make the optical an option as well. No one is going to want to hear the click click all the time.
Shoot maybe I am going about this all wrong. Dang it, I need to look at optical as the main switch, don’t I?
We can also try to fix the clicking in software.
- Sandify can specify the minx and miny.
- We can configure the endstops to be at -5mm. At least in Marlin. I bet there is something similar in grbl.
Well me being the boneheaded engineer, built my table to use ever possible millimeter so an offset would make my table not exactly perfect.  .
.
So the offset will work, but to me is not the perfect solution for new builds.
Optical might require less hardware and the cost diffence in bulk would be minimal, but it would be a new item for me to carry so there are always pluses and minuses.
The optical switches seem to have been changed as well.
My old ones, in use on my 3D printer had mount holes spaced 3/4" apart. I had started with mechanical ones spaced the same, and dropped in optical switches into the same mounting solution. The new ones that I got the other day, just put the calipers on, and the holes are spaced 20mm apart. It’s not a big change, but I could not mount the new switches directly onto the old mountings.
There are a couple of other differences, too. The sensors stick out a little bit further from the mounting surface.
Now I’ve got to go re-do all my CAD for setting these up.
The optical switches are nice, sure, but I don’t think that they’re a good fit for the CNC, because chips. So yeah, it’s not like you can just substitute.
As far as the software solution of “Y=-5” there is a problem with this. This is actually how my table was set up originally, and what I found was that there is a real tendency to lose the marble when homing. Because the magnet moves to that Y=-5 when homing, the magnet is out of the range where the ball can actually go. It gets pulled into the side of the sandbox, and is held more weakly. Then when the X axis is homed, the ball almost always got left behind somewhere. I resolved it by adding a sequence that moved the Y axis out 5mm (Well, actually 6.5 in my case) and then ran it from X=0 to X=337, then back to X=0. This would pick up the ball and bring it back to the home position, but it wasn’t exactly elegant. I’d rather just not lose the ball in the first place.Well, I suppose that instead of “G28 X Y” I could do:
G28 Y
G0 Y5
G28 X
So long as the X stop switch were configured to allow it to home at Y=5, and not get into trouble if it were already homed and then someone homed Y again… And there’s the trick.
Oh! A USPS flat rate box just got dropped off in my mailbox. I suppose it’s time to swap the build over to 10mm belts!
2 Likes
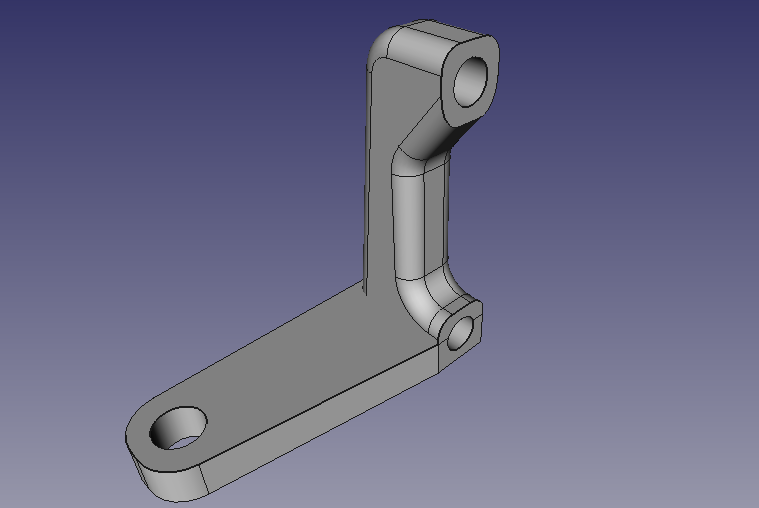
Ever feel like you just drew a 1985 era cell phone in CAD?
The idea is that it will hold the optical stop, allow it to pivot around the mount screw in the base to fine-tune the trigger position and trigger off of a flag on the magnet shuttle to signal home position. Right now, my solution is another of these triggering from a flag 3M taped to the truck for Y.
The 10mm belt is nice. It’s a lot tighter through the conduit, so be sure that you do a good job deburring the cuts. It’s clear that this is the way the parts were designed though. I’m getting lots of practice at stringing the belt. The tension block is fiddly, there’s not much room to work, but it’s worth it for the screw to tension the belt.
Anyway, the mechanical stops work with caveats. I believe that’s all in redesign at this point, so I’m going to fit my optical stops, and test them. It’s 2 more holes in the table, but small ones, since I’m using #4 wood screws to affix it. I think I might supplement it with the same 3M double sided tape that I’m mounting the flag on the Y truck with.
2 Likes
That’s where the camera mounts for future video-phone upgrade!
1 Like
I am not sure that the clicking of the end stops is a deal breaker. The steppers, belts and hollow tubes must make some noise. I get that TMC2308 stepper drivers with a good controller board configured correctly will quite down steppers tremendously. Even then you must still hear a some whining noise when circles are drawn. I do not hear my current table clicking the end stops.
Just my 2 cent’s
You do hear the rest of it, some, very little, if you are sitting at the table.
In a quiet room/house You can hear the clicks from everywhere, you would be surprised at how many hundreds of times it hits a switch in these patterns, on a small table.
Imagine someone sitting there and randomly clicking a pen for 3 hours.
The switch clicking was the loudest thing about my original build, even when I was running it at speeds higher than it should have been run. (And speeds that I expect the new one to run well.) That’s without the super quiet drivers, but with motor noise dampners.
Anyway, the optical stops are of course silent, which probably means that the drivers will be the next thing that I will want to hush up. Can’t do anything about the noise of the ball going through the sand/baking soda, and probably not much can be done about belt noise, but even with the old one, those were below the noise floor in my living room. I have too many computer fans going pretty much all the time in here anyway.
I have more or less debugged the X stop. I could just use the mechanical switch for the Y stop until there’s something better. I want to have it running to try some stuff…
I would think you could set the home offset so that the switches were only ever touched during the homing cycle. It would only be 2 or 3 mm, if that. Your max travel will be beyond the sand box, but the 0,0 point would be in it.