Okay, I think it can be merged to let everyone beat it up a little bit if I did not just break it adding 200mm to the belt.
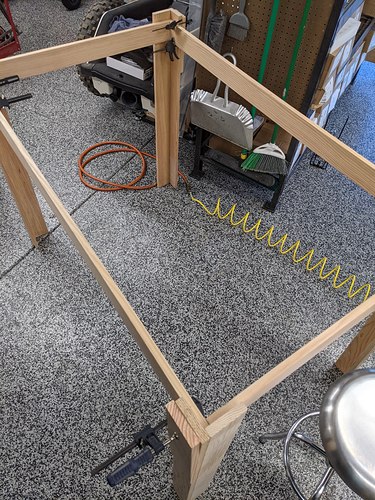
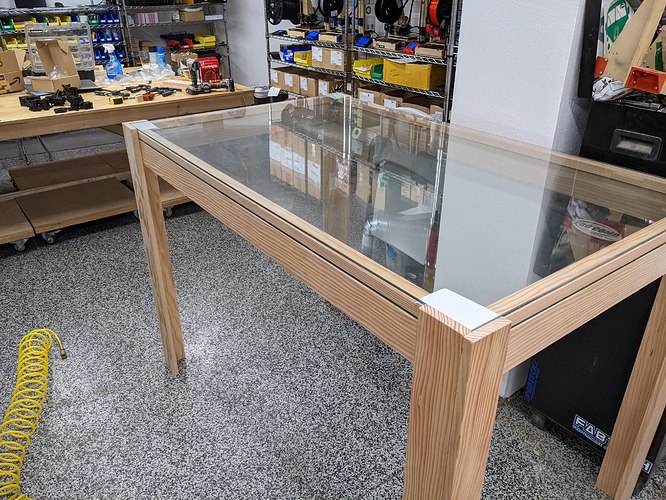
Mocking up the 3’x5’. I think I am going to take the easy way on this one and just use some black stain. I found some really really nice wood if I want to actually make a fancy one but I think I am going to run with this doug fir stained black for a while to see how it works out before spending the big bucks on the fancy wood.
I started a Onshape assembly but it was taking too long so I just started building it. Turns out the assembly process is very different from solidowrks. I can crank out the parts and even mate them but making it fully parametric, appearances, and file management is a bit wonky and I need to watch some videos instead of just sitting there getting frustrated.
I have a half way workaround for the CAD of a basic table just to get some files out there ASAP if it takes too long.
So I was just checking out the ZENXY v2 docs on the main site and didn’t see links for the STLs. Have they been released yet or is there still some details being ironed out? I’m not pressuring, just wondering. 
Almost there. I just got in my filament and was working on that big table. So I should be printing the last round and hopefully release them tomorrow or the next day…with no full build instructions yet.
Getting there. I think this is a great basic design to share. I will work on a complete parametric assembly so anyone can edit to suit their needs. This is bar height, and 3x5’ so I am confident anything smaller (or larger and shorter will be fine). It is pretty stout even without any glue yet.
I had fun, happy with the results after a minor redesign, and just happened to have very little waste. Next up is fit the printed parts that are still printing. Then LED’s! The Last step is stain or rebuild with nicer wood.
PS…See all the empty trays under the tables…shipping is messed up again. Inventory is uncomfortably low.
That looks nice.
I think paint like black or white would look pretty good. i bet you can still see the wood grain shape through the paint with that wood. What are you doing for the flashing?
Well I have been looking around all day for my little can of black stain to do a test. Of course, I can’t find it.
I think either black vinyl from the sticker cutter or mask and black paint. Unless there are some other suggestions.
I need an informal vote.
Put up the files before the instructions are even really started or wait?
Yes yes yes!!! Put them up!!!
Put them up  I built Version 1 and would love to get started on Version 2…
Post them with a disclaimer that they are for those pioneers willing to blaze the trail and share what they learn since the how-to isn’t ready yet. Similar to what you did for the PID solution.
I think you at least need some diagrams showing the orientations of the parts. It wasn’t always obvious. If you have a good order of operations to assemble it too, that would be helpful right away. Unless the order is, assemble everything and then screw it to the table.
But it takes a few days to print, so you could ship it and then have a deadline for the instructions 
Yeah I was just getting an outline together. And since I have all my parts printed, I might as well put in all my effort to get up a rough guide ASAP today. (gunna be tough, it is spring break for the little ones around here and they are getting a bounce house for the day!)
I think the instructions are going to be to assemble the trucks, check the tension.
Then assemble the Center and use the previously assembled trucks to locate the center bars so you can check the center tension.
Then assemble in order as you feed the belt through. Center, to truck, to power corner, through the tube…ect.
So I think I can get enough pictures to get that all up this evening. Work out the kinks as people start to build and find my errors.
Oh and the BOM is live.
Outstanding!
And another update I have the B.Dring PenLaser boards in and I flashed one with the standard firmware but included.
 #define CUSTOM_CODE_FILENAME    "../Custom/CoreXY.cpp"
#define USE_KINEMATICS      // there are kinematic equations for this machine
#define USE_FWD_KINEMATICS  // report in cartesian
#define USE_MACHINE_INIT    // There is some custom initialization for this machine
#define USE_CUSTOM_HOMING
That seems to be right so far, although I have not defined the homing and not tested this on a build yet. Just trying to get the CoreXY part. So far as per usual, love the boards. Dead simple. I can’t see any reason to recommend anything else, unless you have to have a screen.
Ryan,
I’m glad you’re doing the B.Dring board too, as I got one as soon as it looked like it would work for this build. I can be a proto tester too.
Mike
I have not put a ton of time into them but so far I would say nothing but stellar results and execution from all of them.
I was looking at that, but…
It’s a bit hard to swallow that with a $34.50 board. Different if I were making some sort of bulk order, maybe. (Okay, I see that it says that the shipping rates may be overestimated, but that’s still offputting.)
Still, even with that, it’s not a bad price, I suppose, if I just take the whole thing as “the cost of the board” and ignore that I’m paying over 40% of the cost just for shipping.
Dooooo eeeeeeet!

