Just saying hello… I have a new build on a Northwoods Customs LR4. This is my first CNC but I am an experienced woodworker/composites/electronics guy and started in 2015 with one of the early Airwolf 3D printers. I have been out of 3D printing now for several years though do more marine fabrication and precision joinery/woodwork. My day job is ocean/water.
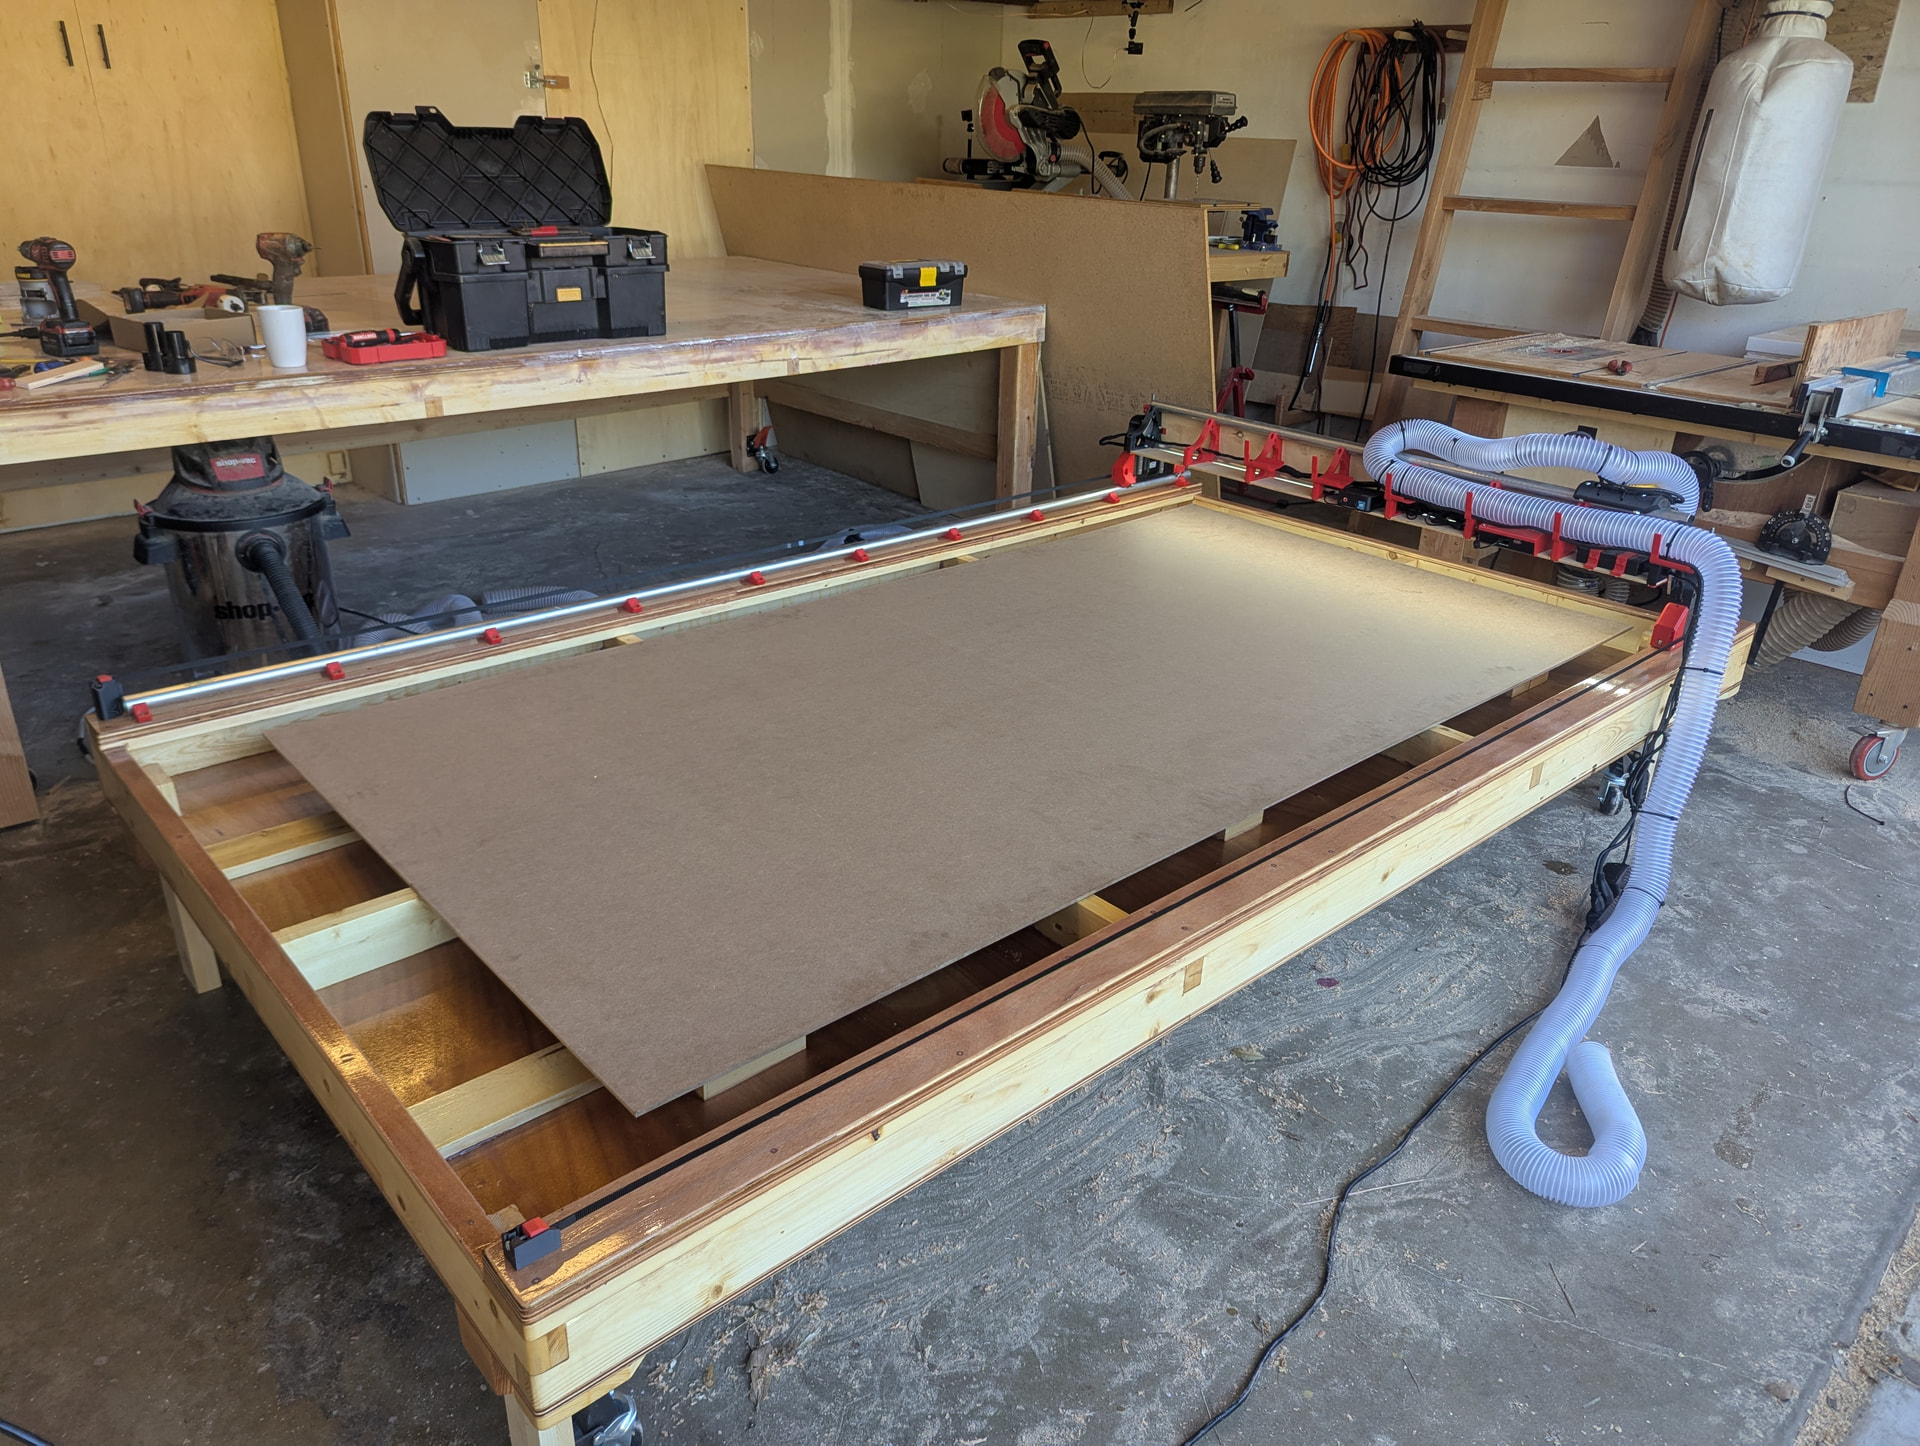
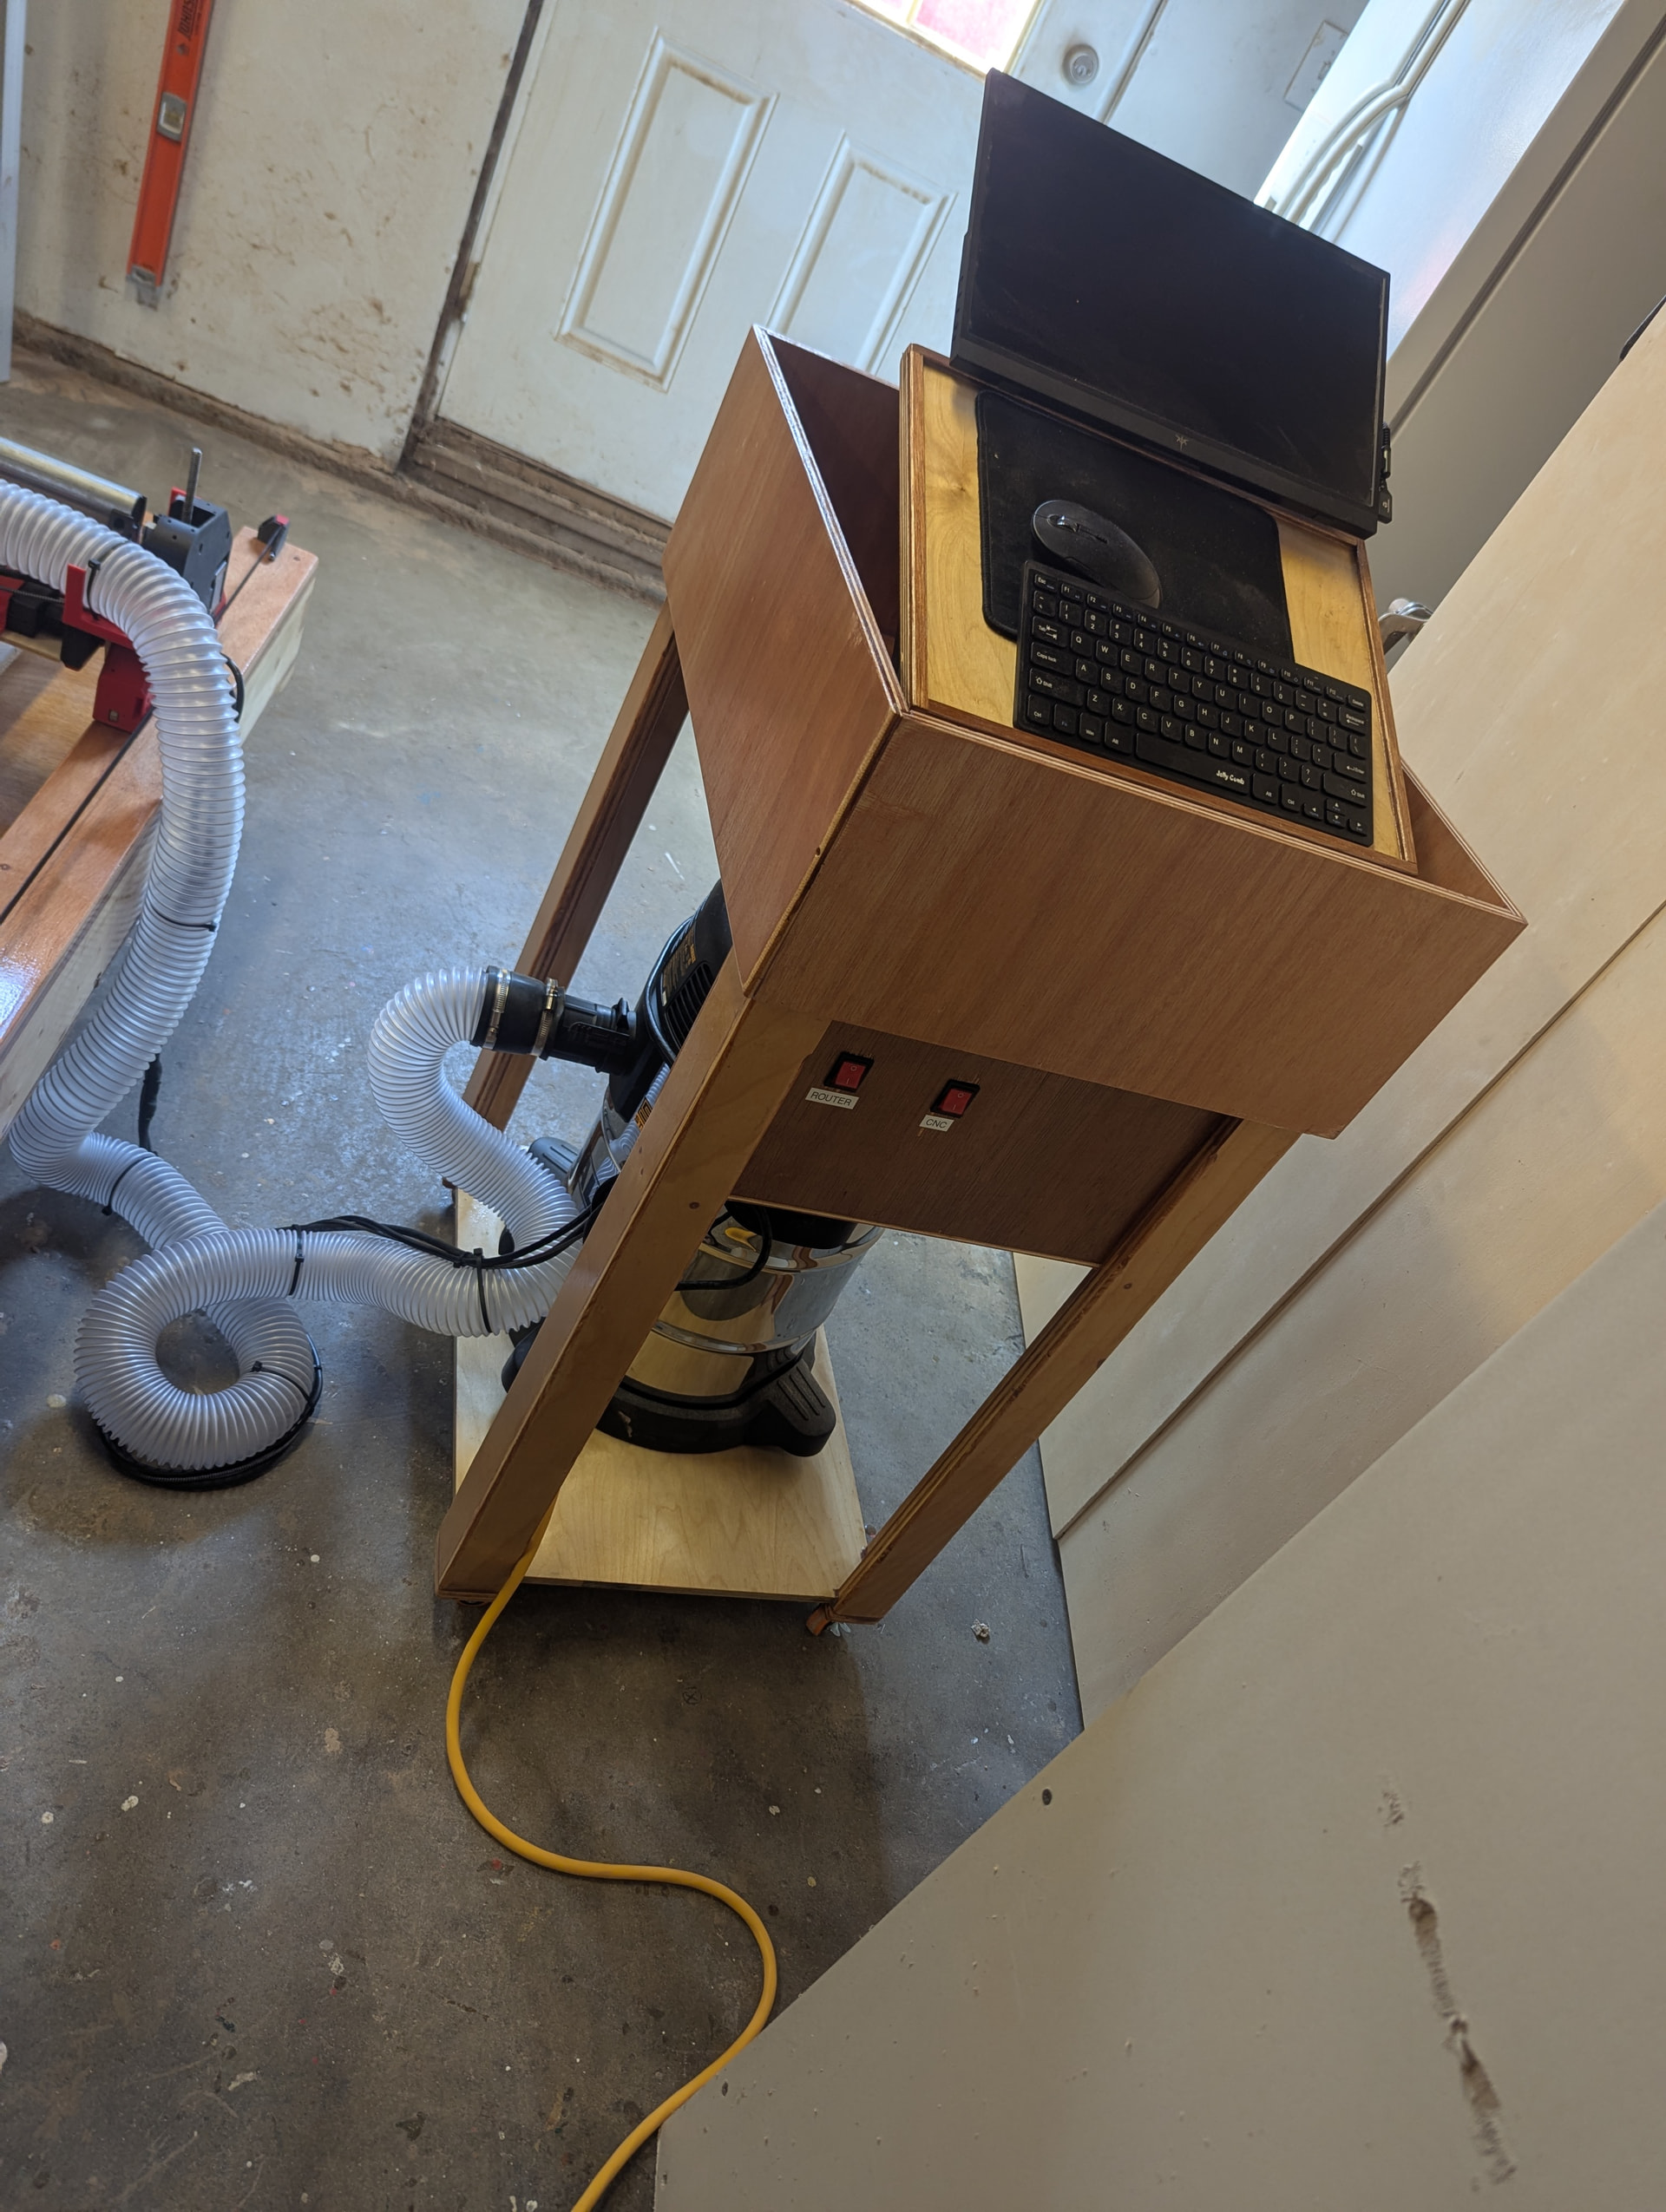
As for the LR4 I’m still getting it set-up and calibrated and figuring out a workflow as I’m a Fusion 360 user. I built a very robust wood/epoxy/urethane drop table for it that slides under my large bench to (hopefully) give it some protection from shop dust and impacts. Heavily over-engineered I’m sure but never have I had a workbench or tool where in use I thought to myself this thing is ‘too sturdy, too plump, or too smooth!’
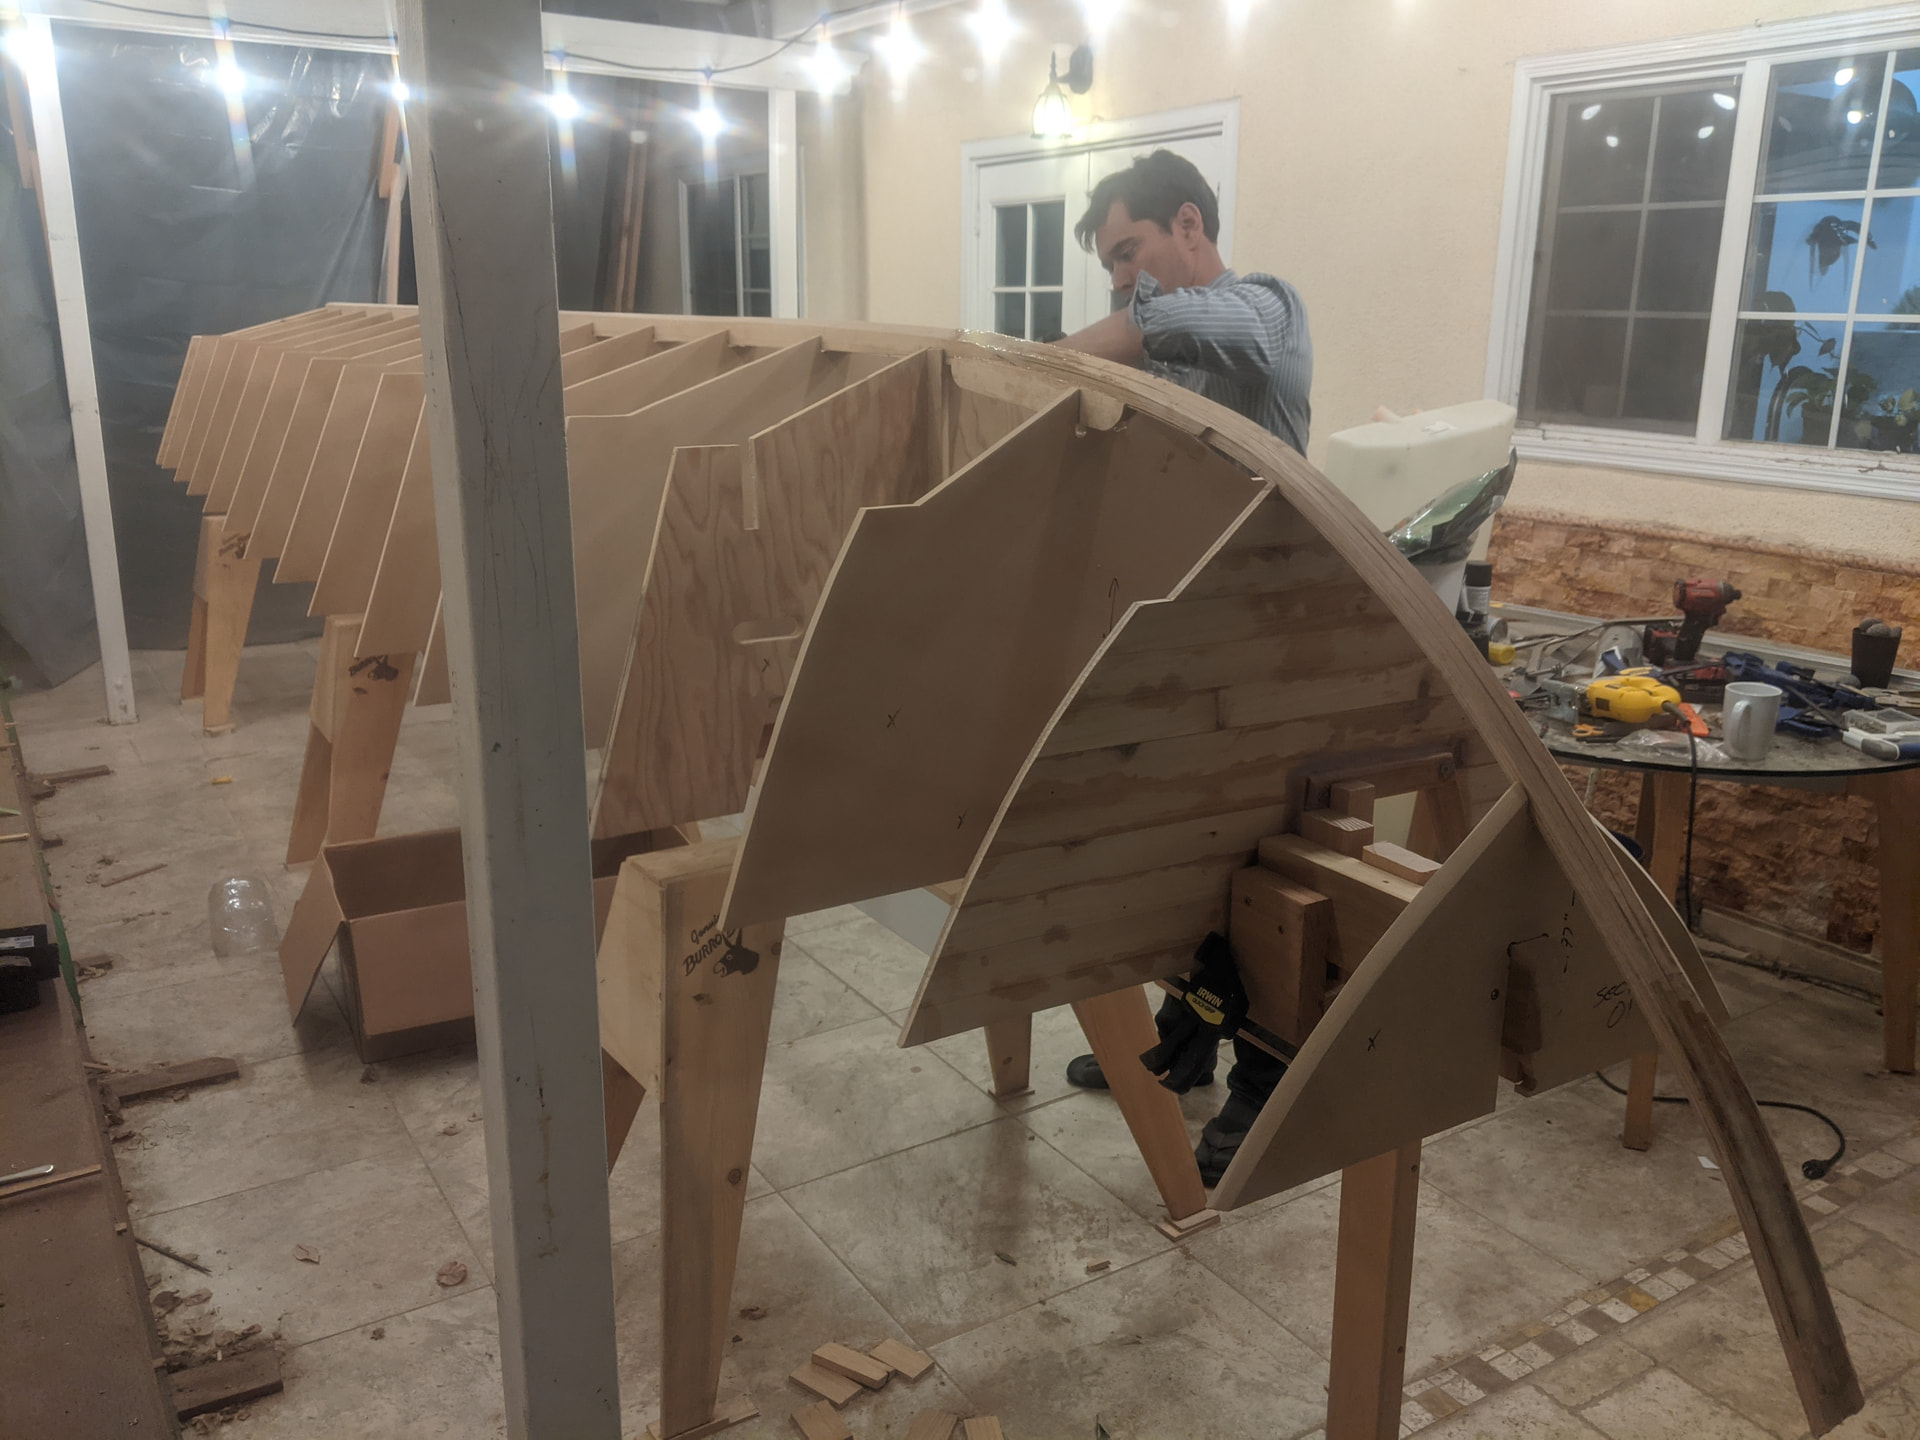
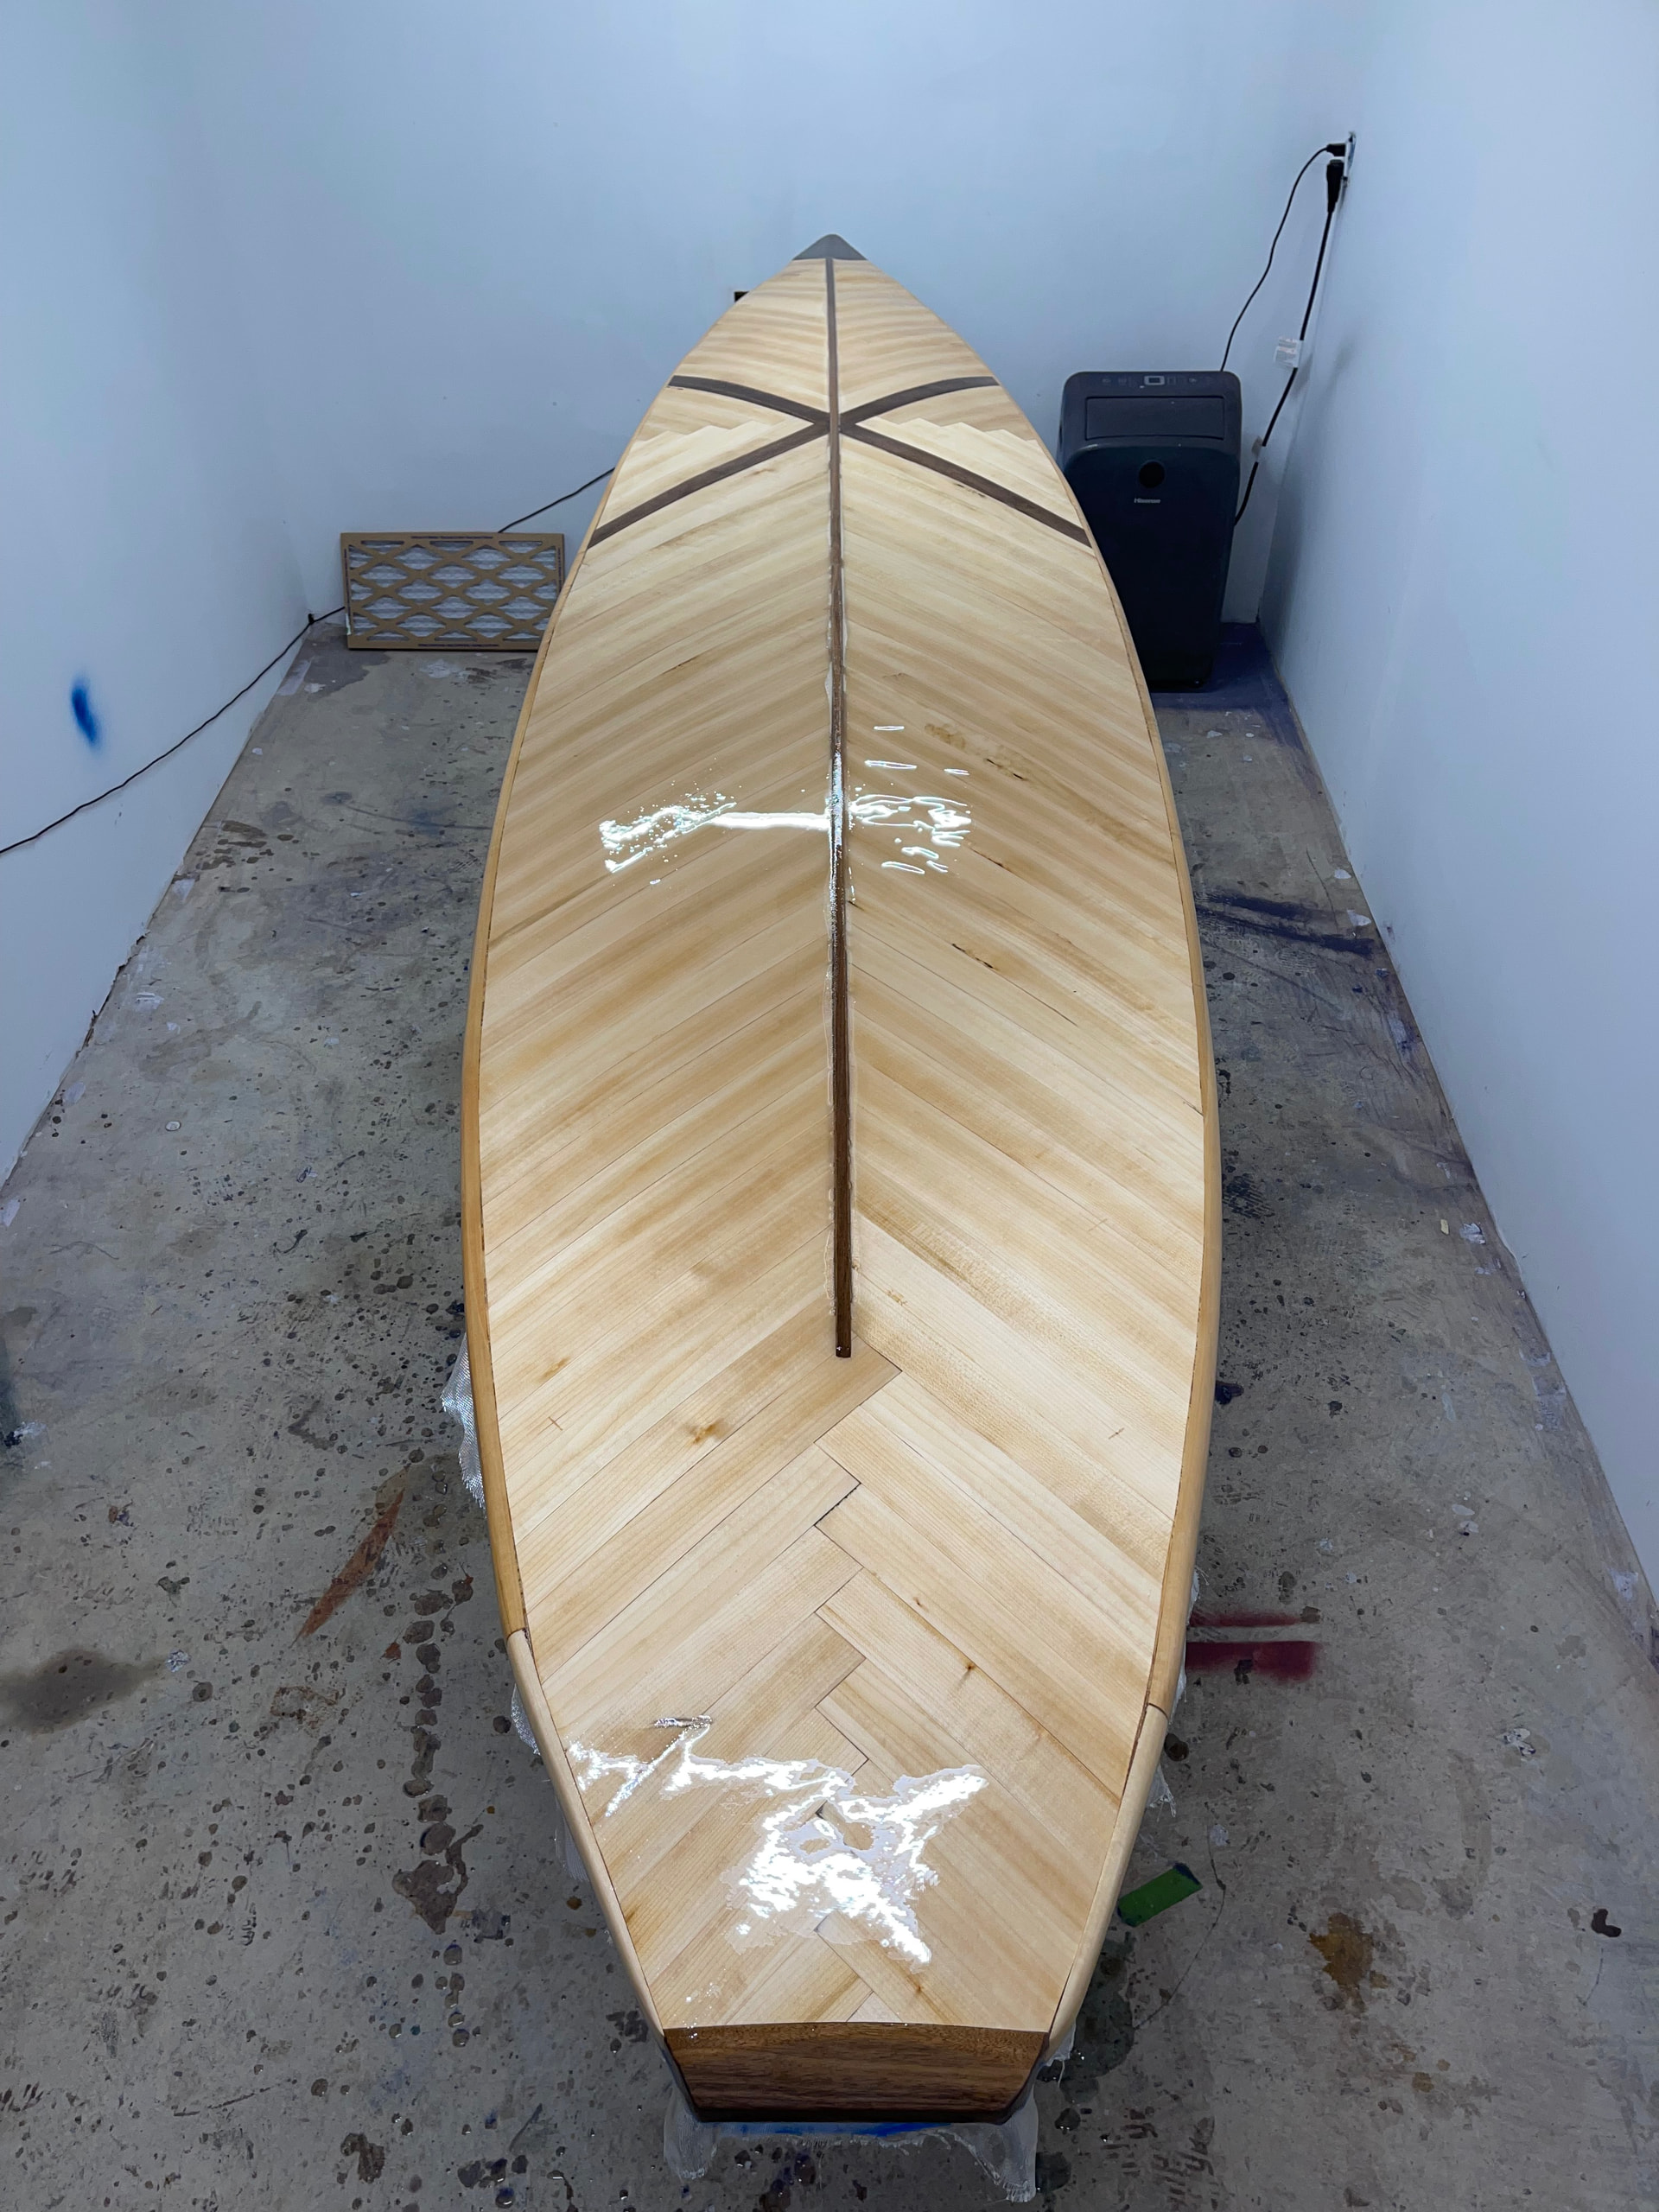
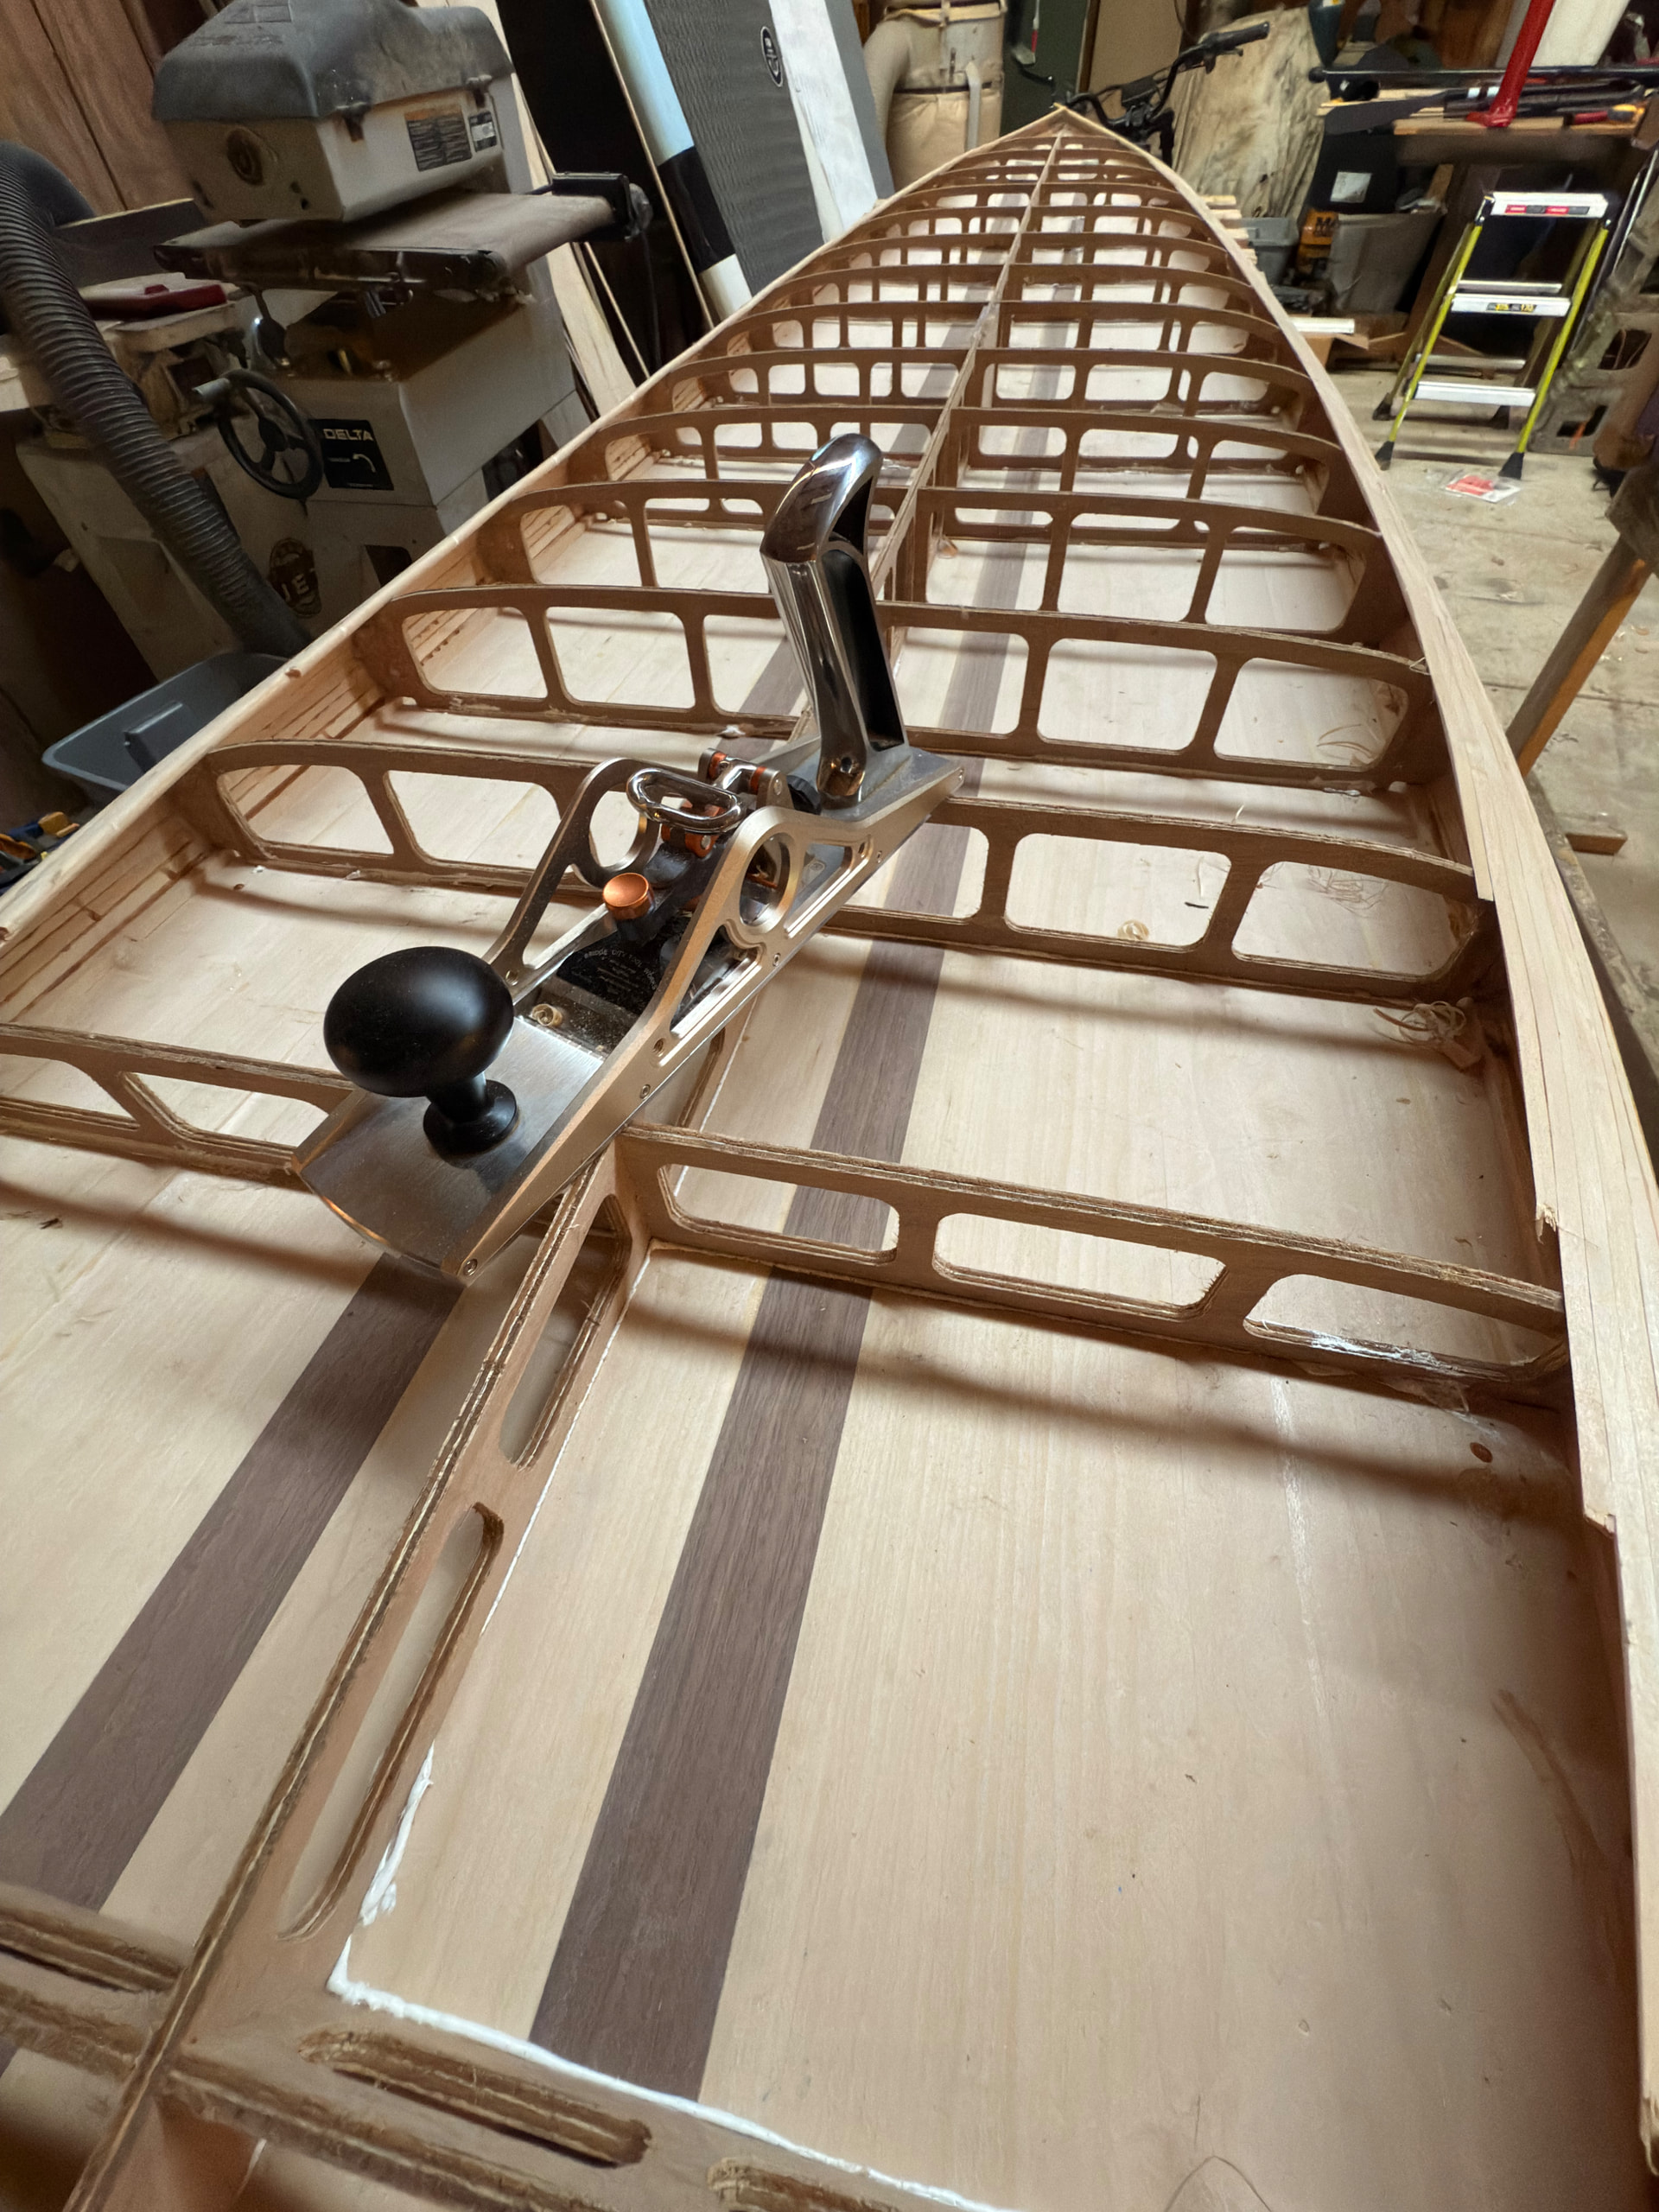
I’m planning to use the new CNC for one-off wood composite boats. This last one I spent 5 years building by hand, a strip-planked carbon fiber composite… those section guides I did by hand by porting DXF files out of Fusion 360 to PDF’s that were printed giant sized paper, 3M’d to MDF, and cut out with a jigsaw! After building I retooled my current garage woodshop to be more precise and specific to my use… the cnc was part or that. Looking forward to using the LR4 for faster section guides on strip planked boats, the odd small woodwork eff-around art piece for gifts, and hopefully some plywood stringer frame multi-hulls.
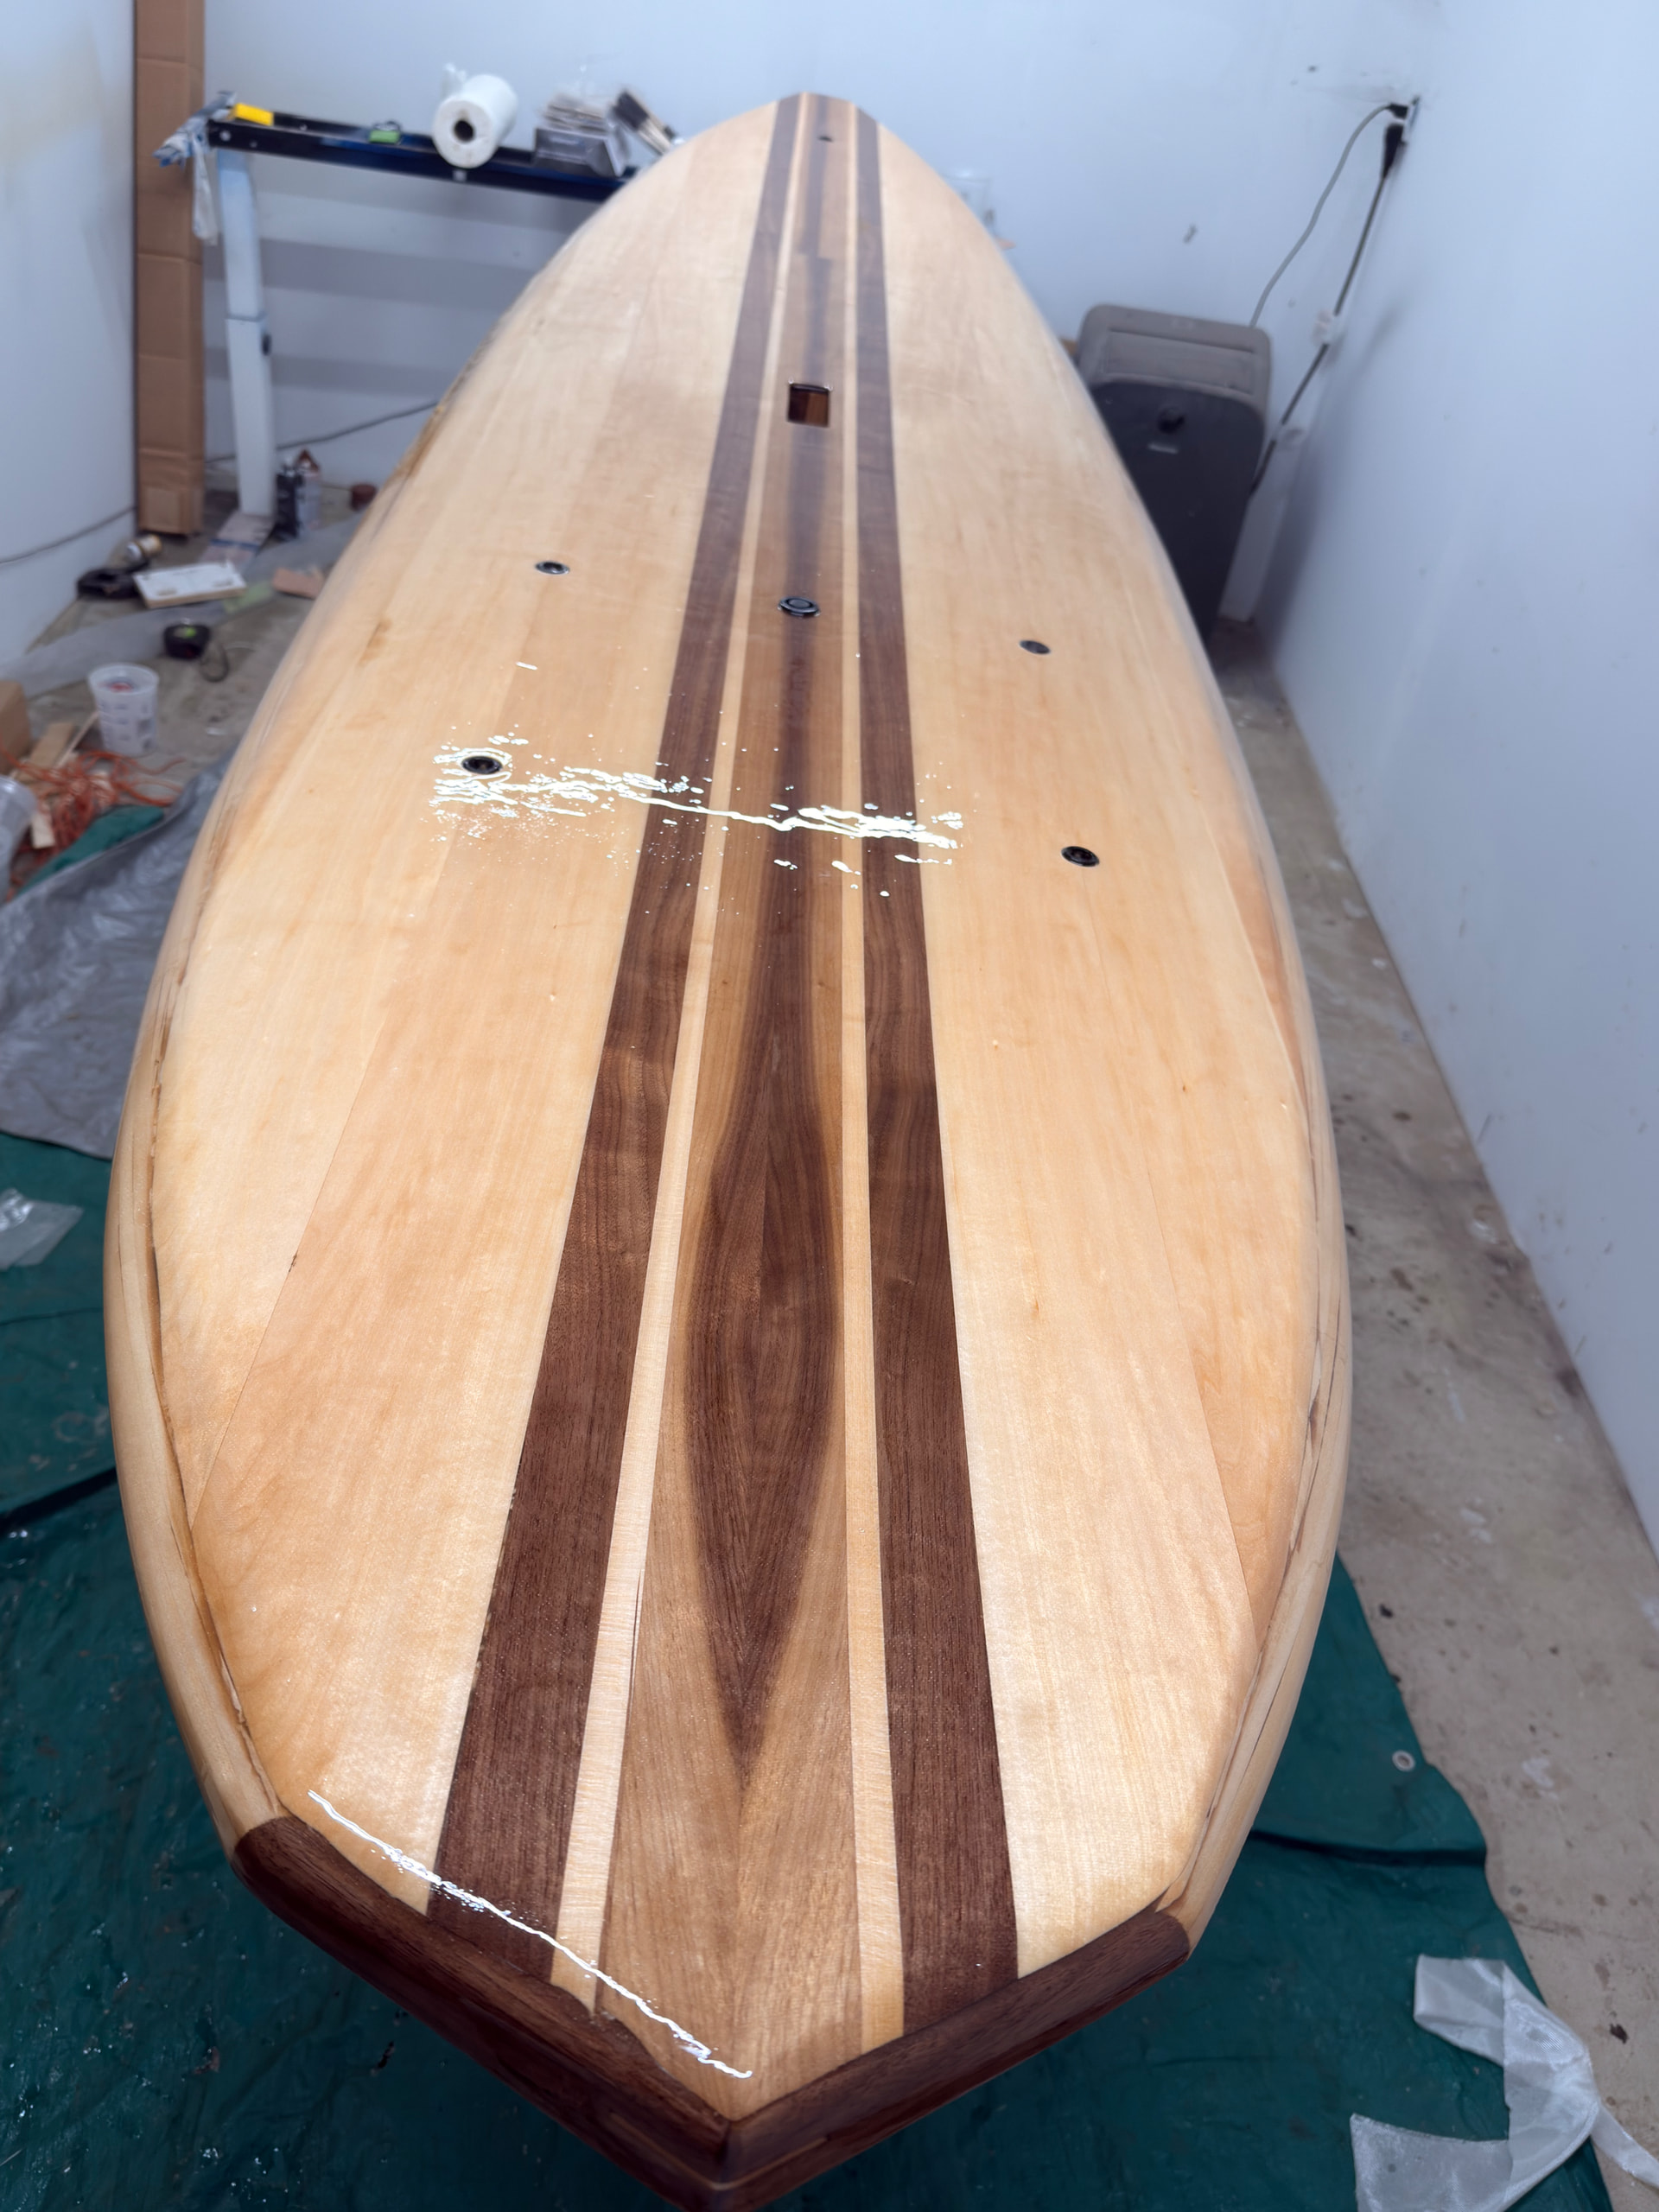
Hey, no way - I came across one of your build videos last year! I build hollow-core wooden paddle boards so YouTube likes to serve anything adjacent to that. The unique design stood out to me, do you have any videos of her in the water?
Welcome aboard, just finished my build too, there are a lot of good people here willing to help.
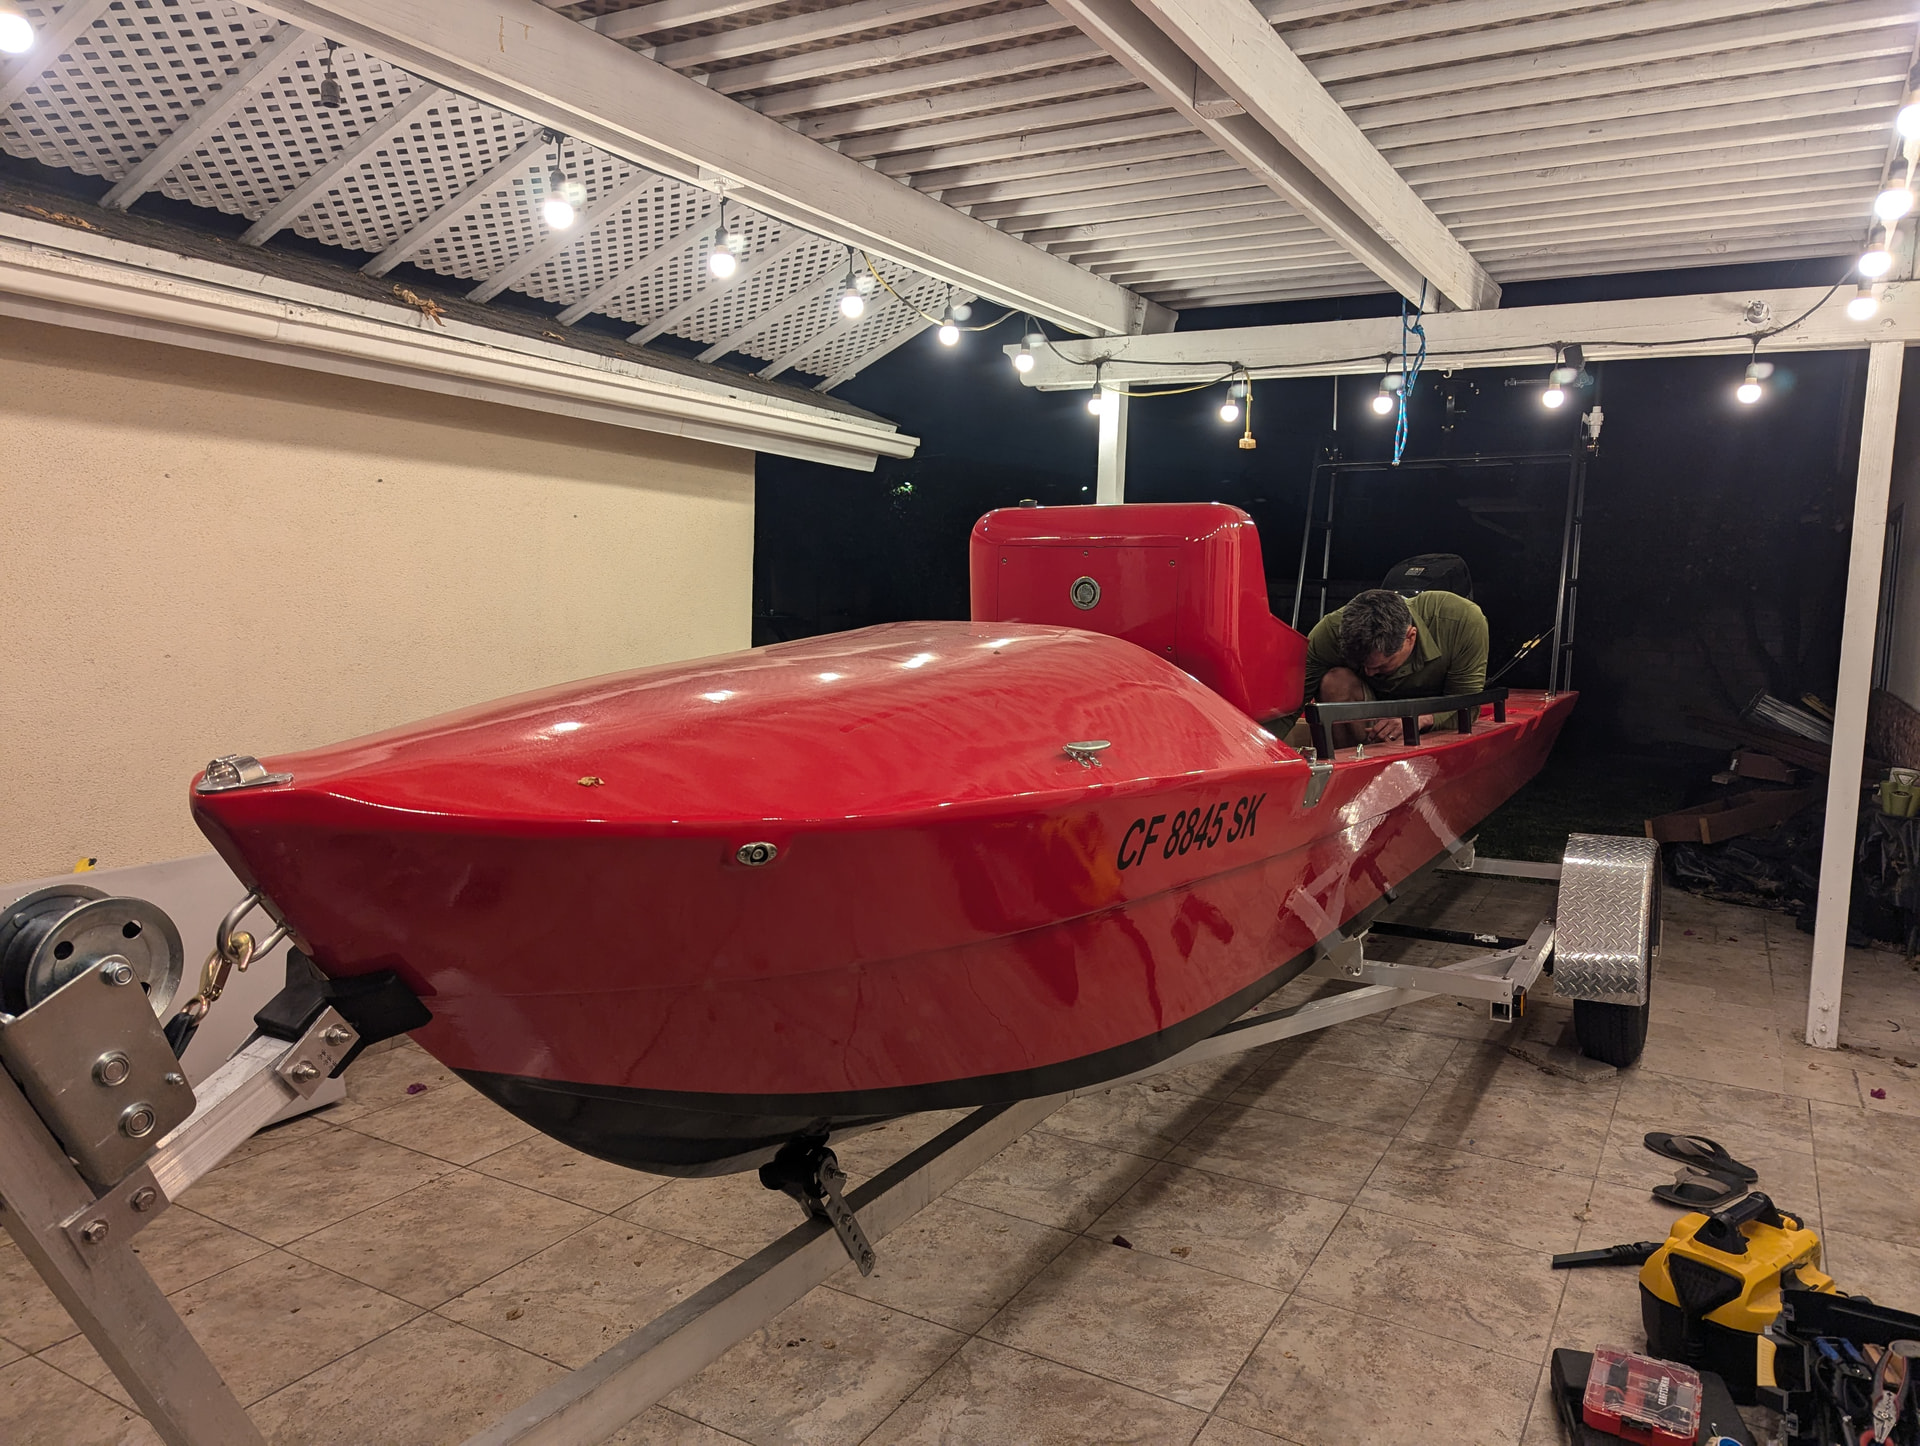
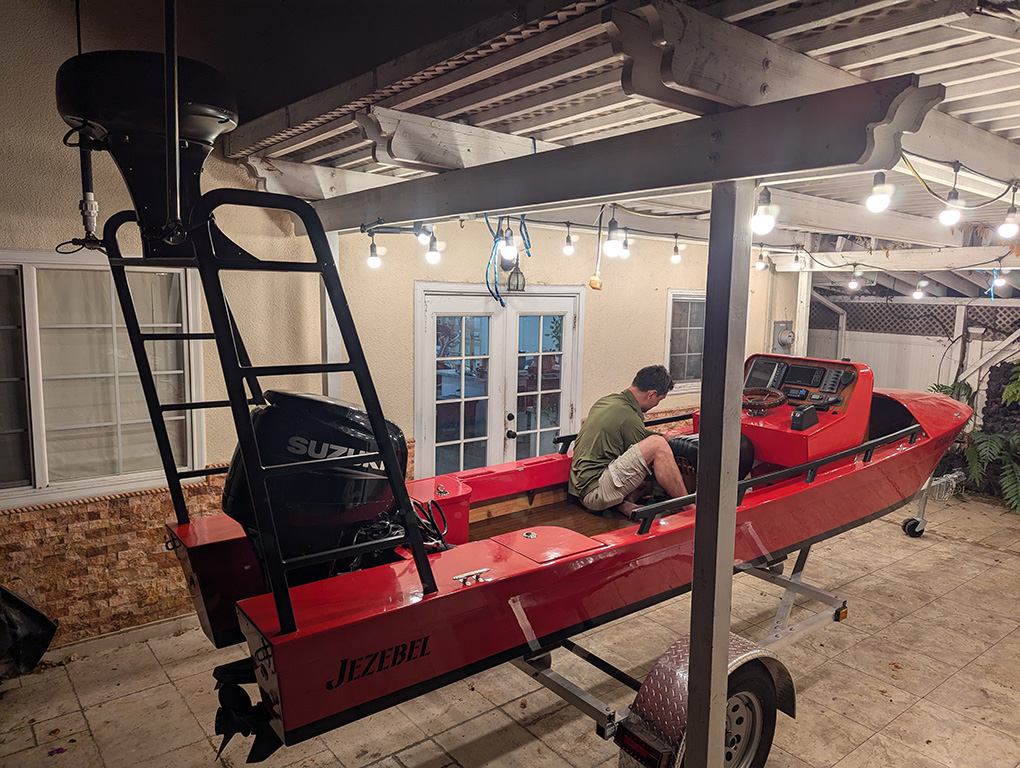
No, the split hull looking things are the rear airboxes, there for stern floatation. The vessel is VERY small so it will only fit one OB. It ended up being something of portfolio piece and proof of concept.. if I were to do that same vessel again, the LR4 would save me not even 1% time because while cutting the section guides out by hand was incredibly tedious, that vessel is so over-the-top detail and intricate that making those MDF section guides represented only a fraction of the build time and finish time. The hull itself takes a lot of time since strips of wood individually bent and glued (slow but extremely lightweight and allows any type of curved shape whatsoever at any scale)…
HOWEVER, that was a strip-plank hull design, which is ultra-premium and time consuming. There’s something more in the middle which is more doable on a large boat or multi-hull called ‘plywood stringer frame’. The time saved with the CNC would really collateralize there since the hull sides are not composed of hundreds of little strips of wood individually fitted and glued, but sheets of thin plywood. In theory the CNC could cut those but it’s mainly the horizontal members each unique which have lots of rounding and notches where I see it being most useful.
I think one other thing where the CNC may be really useful is building scale models for testing. large models could be built quickly and tested in the water.
Hello Ty, thanks! Do you use your cnc for your paddle boards? Are they wood stripper type type?
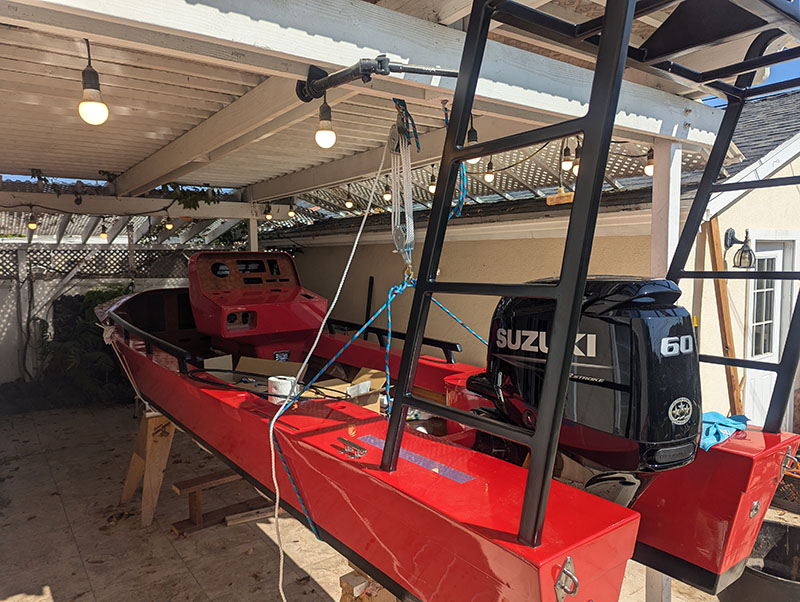
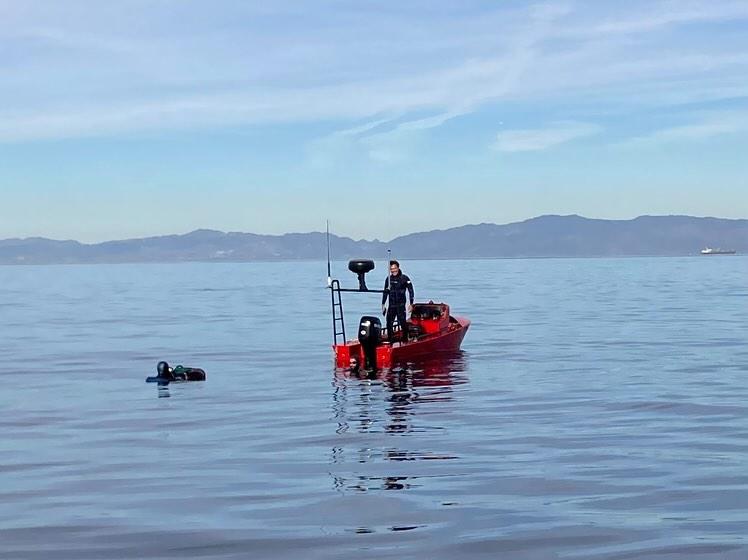
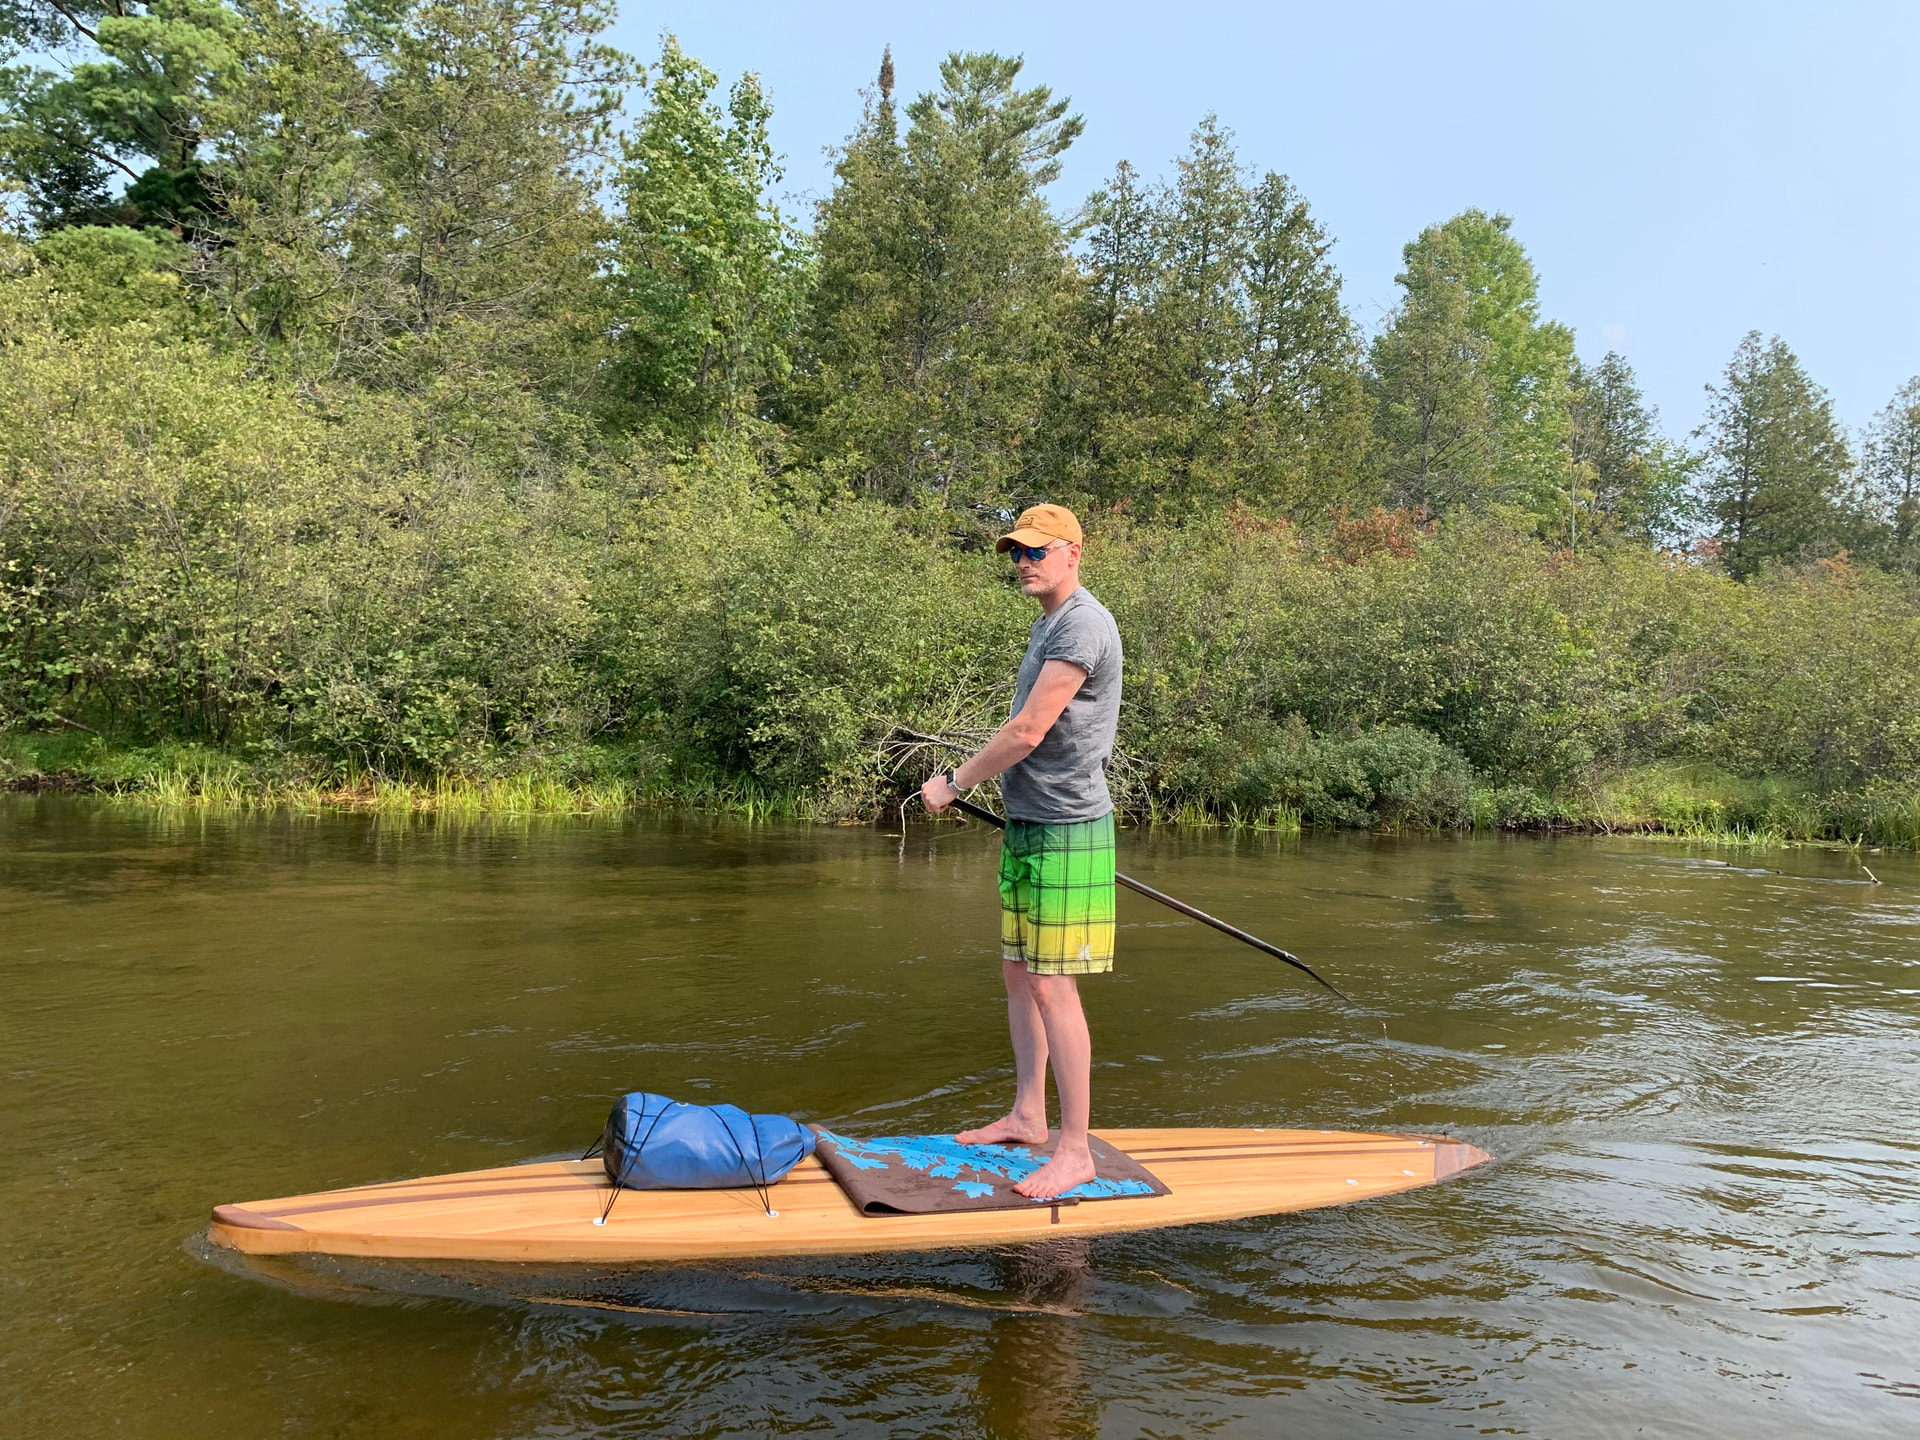
My youtube is sometimes years behind… I have stuff I want to edit but haven’t found time for yet. Here is a rough video of some of her very first sea trials: https://youtu.be/rTC7Vik1J-Q
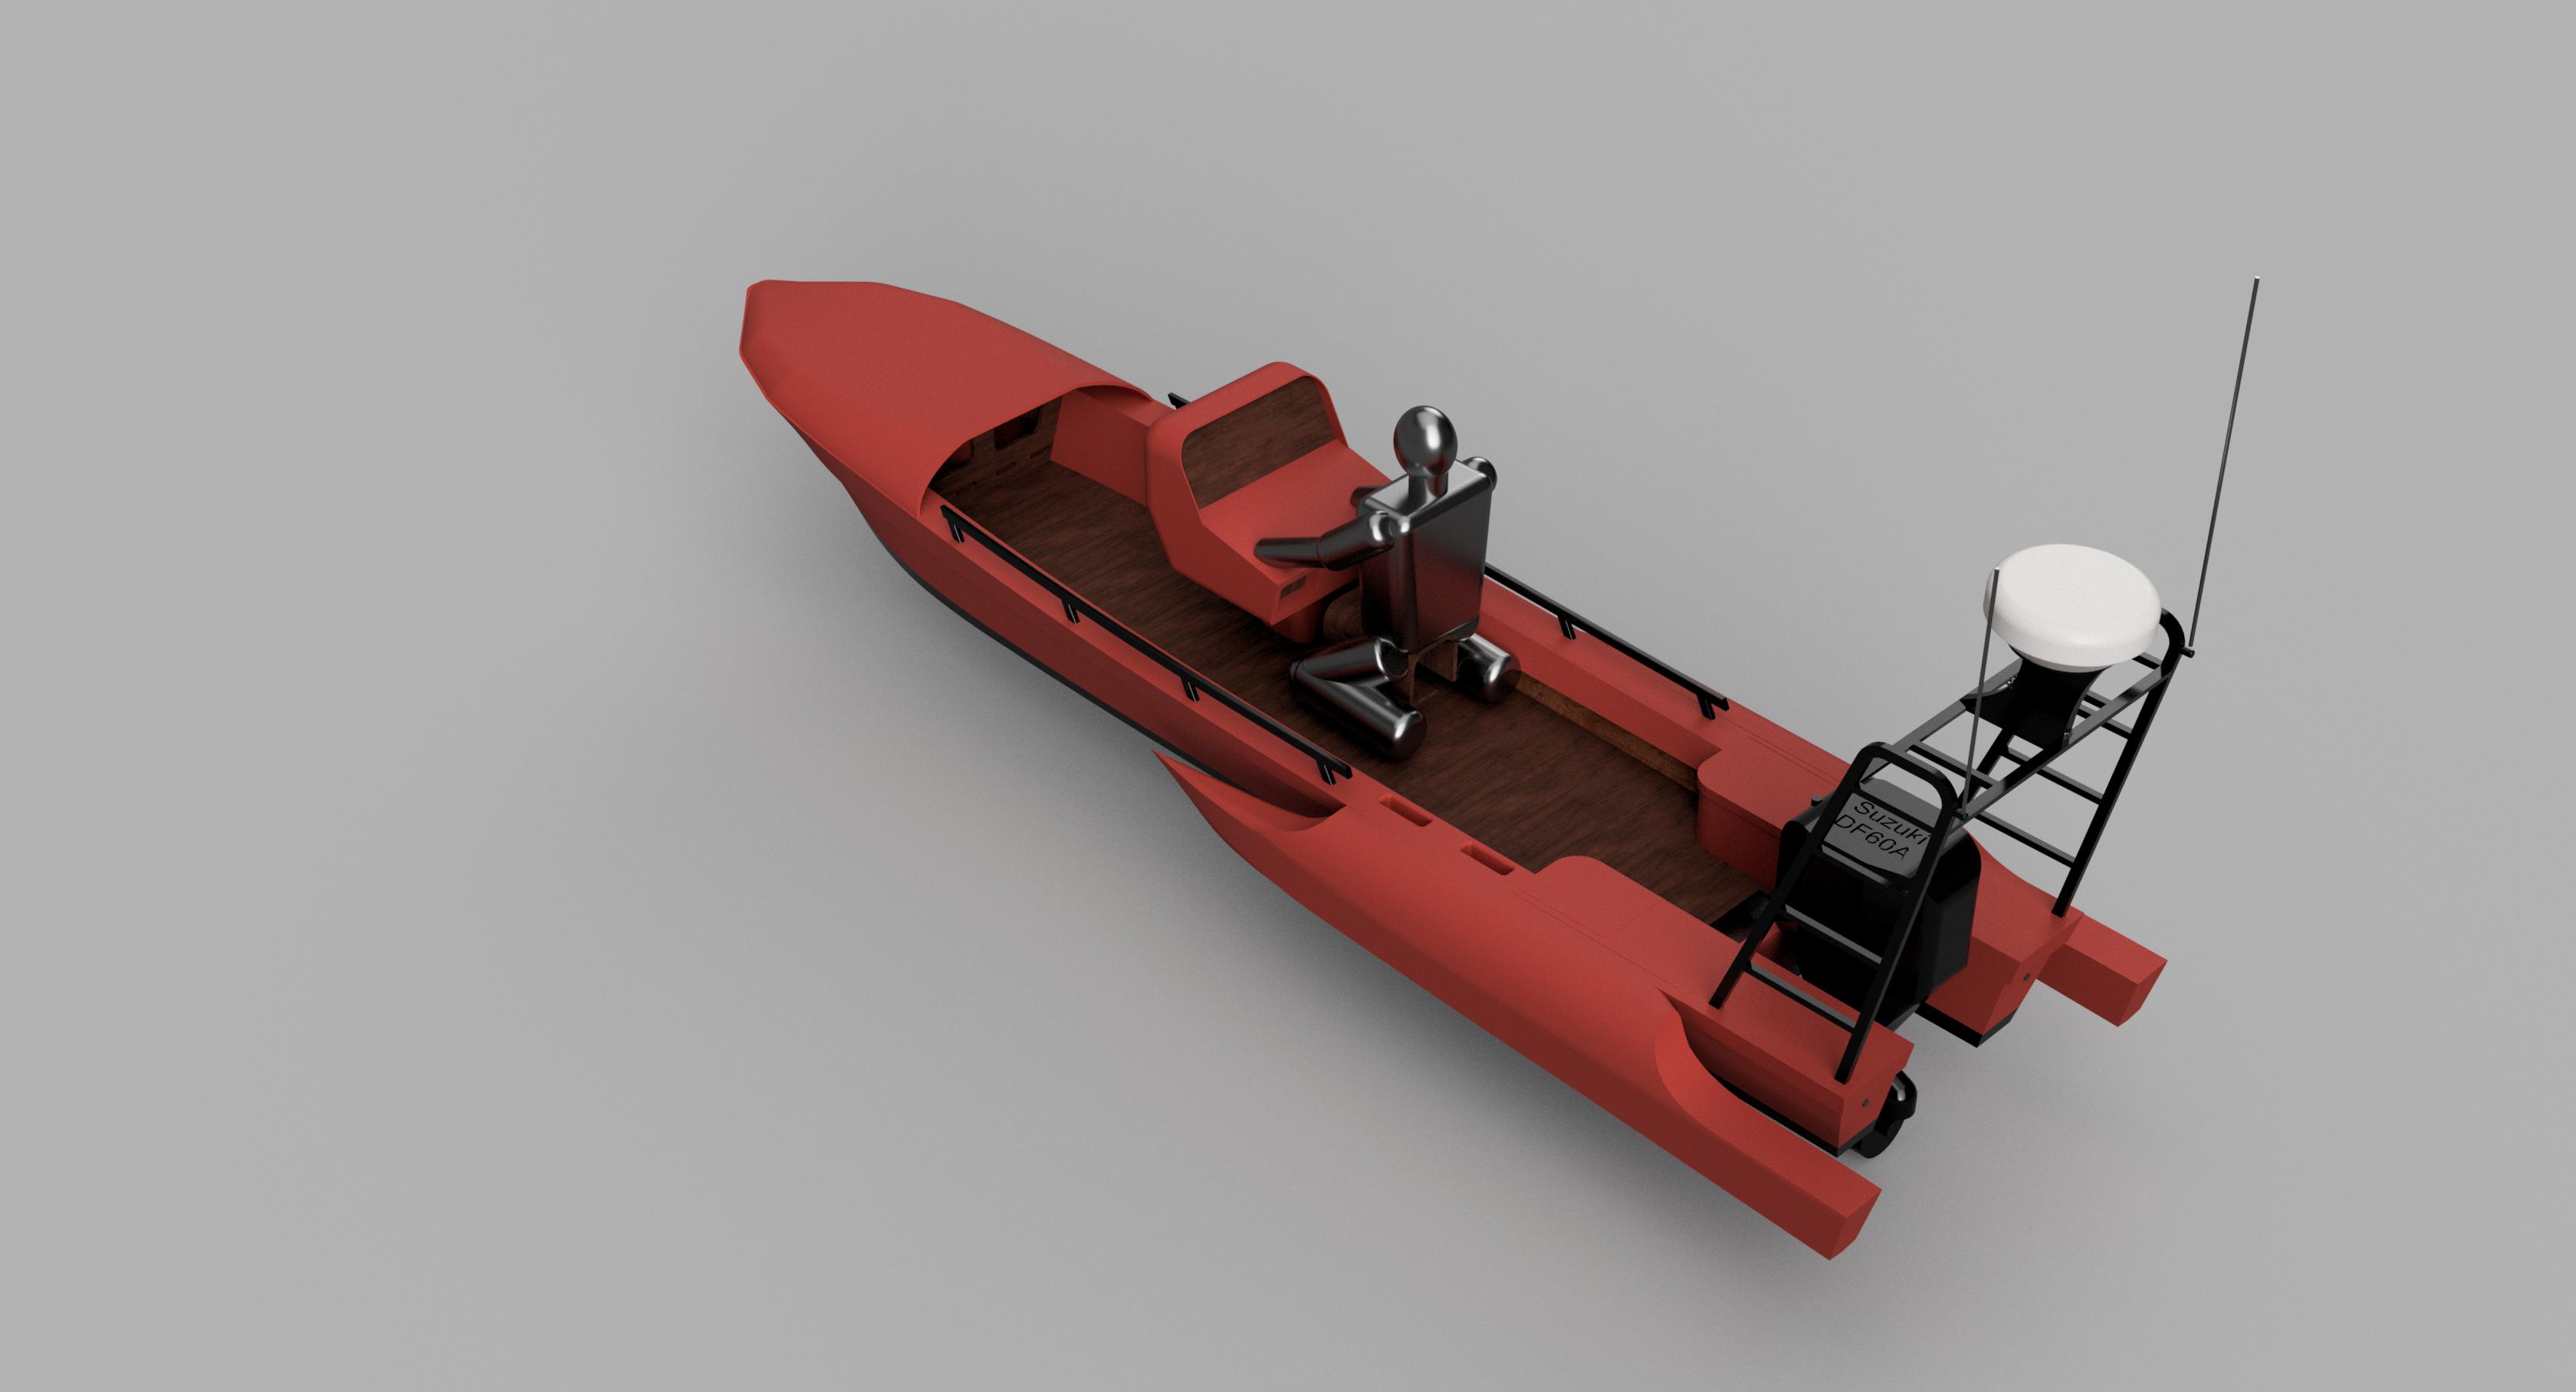
I actually wound up flogging her pretty hard back and forth to the islands in rough weather, much of which was too much to fly drones and mess with cameras. She’s a piece of work! Basically she runs incredibly smooth, quick, and fuel efficient in the wind and in heavy seas as designed but static stability, as you might expect is horrendous. I didn’t think the static aspect would bother me as much, and if I’d had her finished and in the water within 6 months of starting as I thought I would it would be fine. But over the course of the build and scope creep I realized that I wanted to use her for work (among other things I’m a six-pack captain) and the static thing would end up driving me crazy if the people on the boat were too novice. I’m actually planning to turn her into a trimaran. It’s not been done on a vessel of this size for a host of reasons (although not necessarily because it wouldn’t work) so it’ll be a cool proof of concept as I think for California motor-tris might be very practical, especially with a plywood cnc to make the hulls. After I do some basic projects, I’m planning to start modifying Jezebel’s hull using the LR4 to make amas:
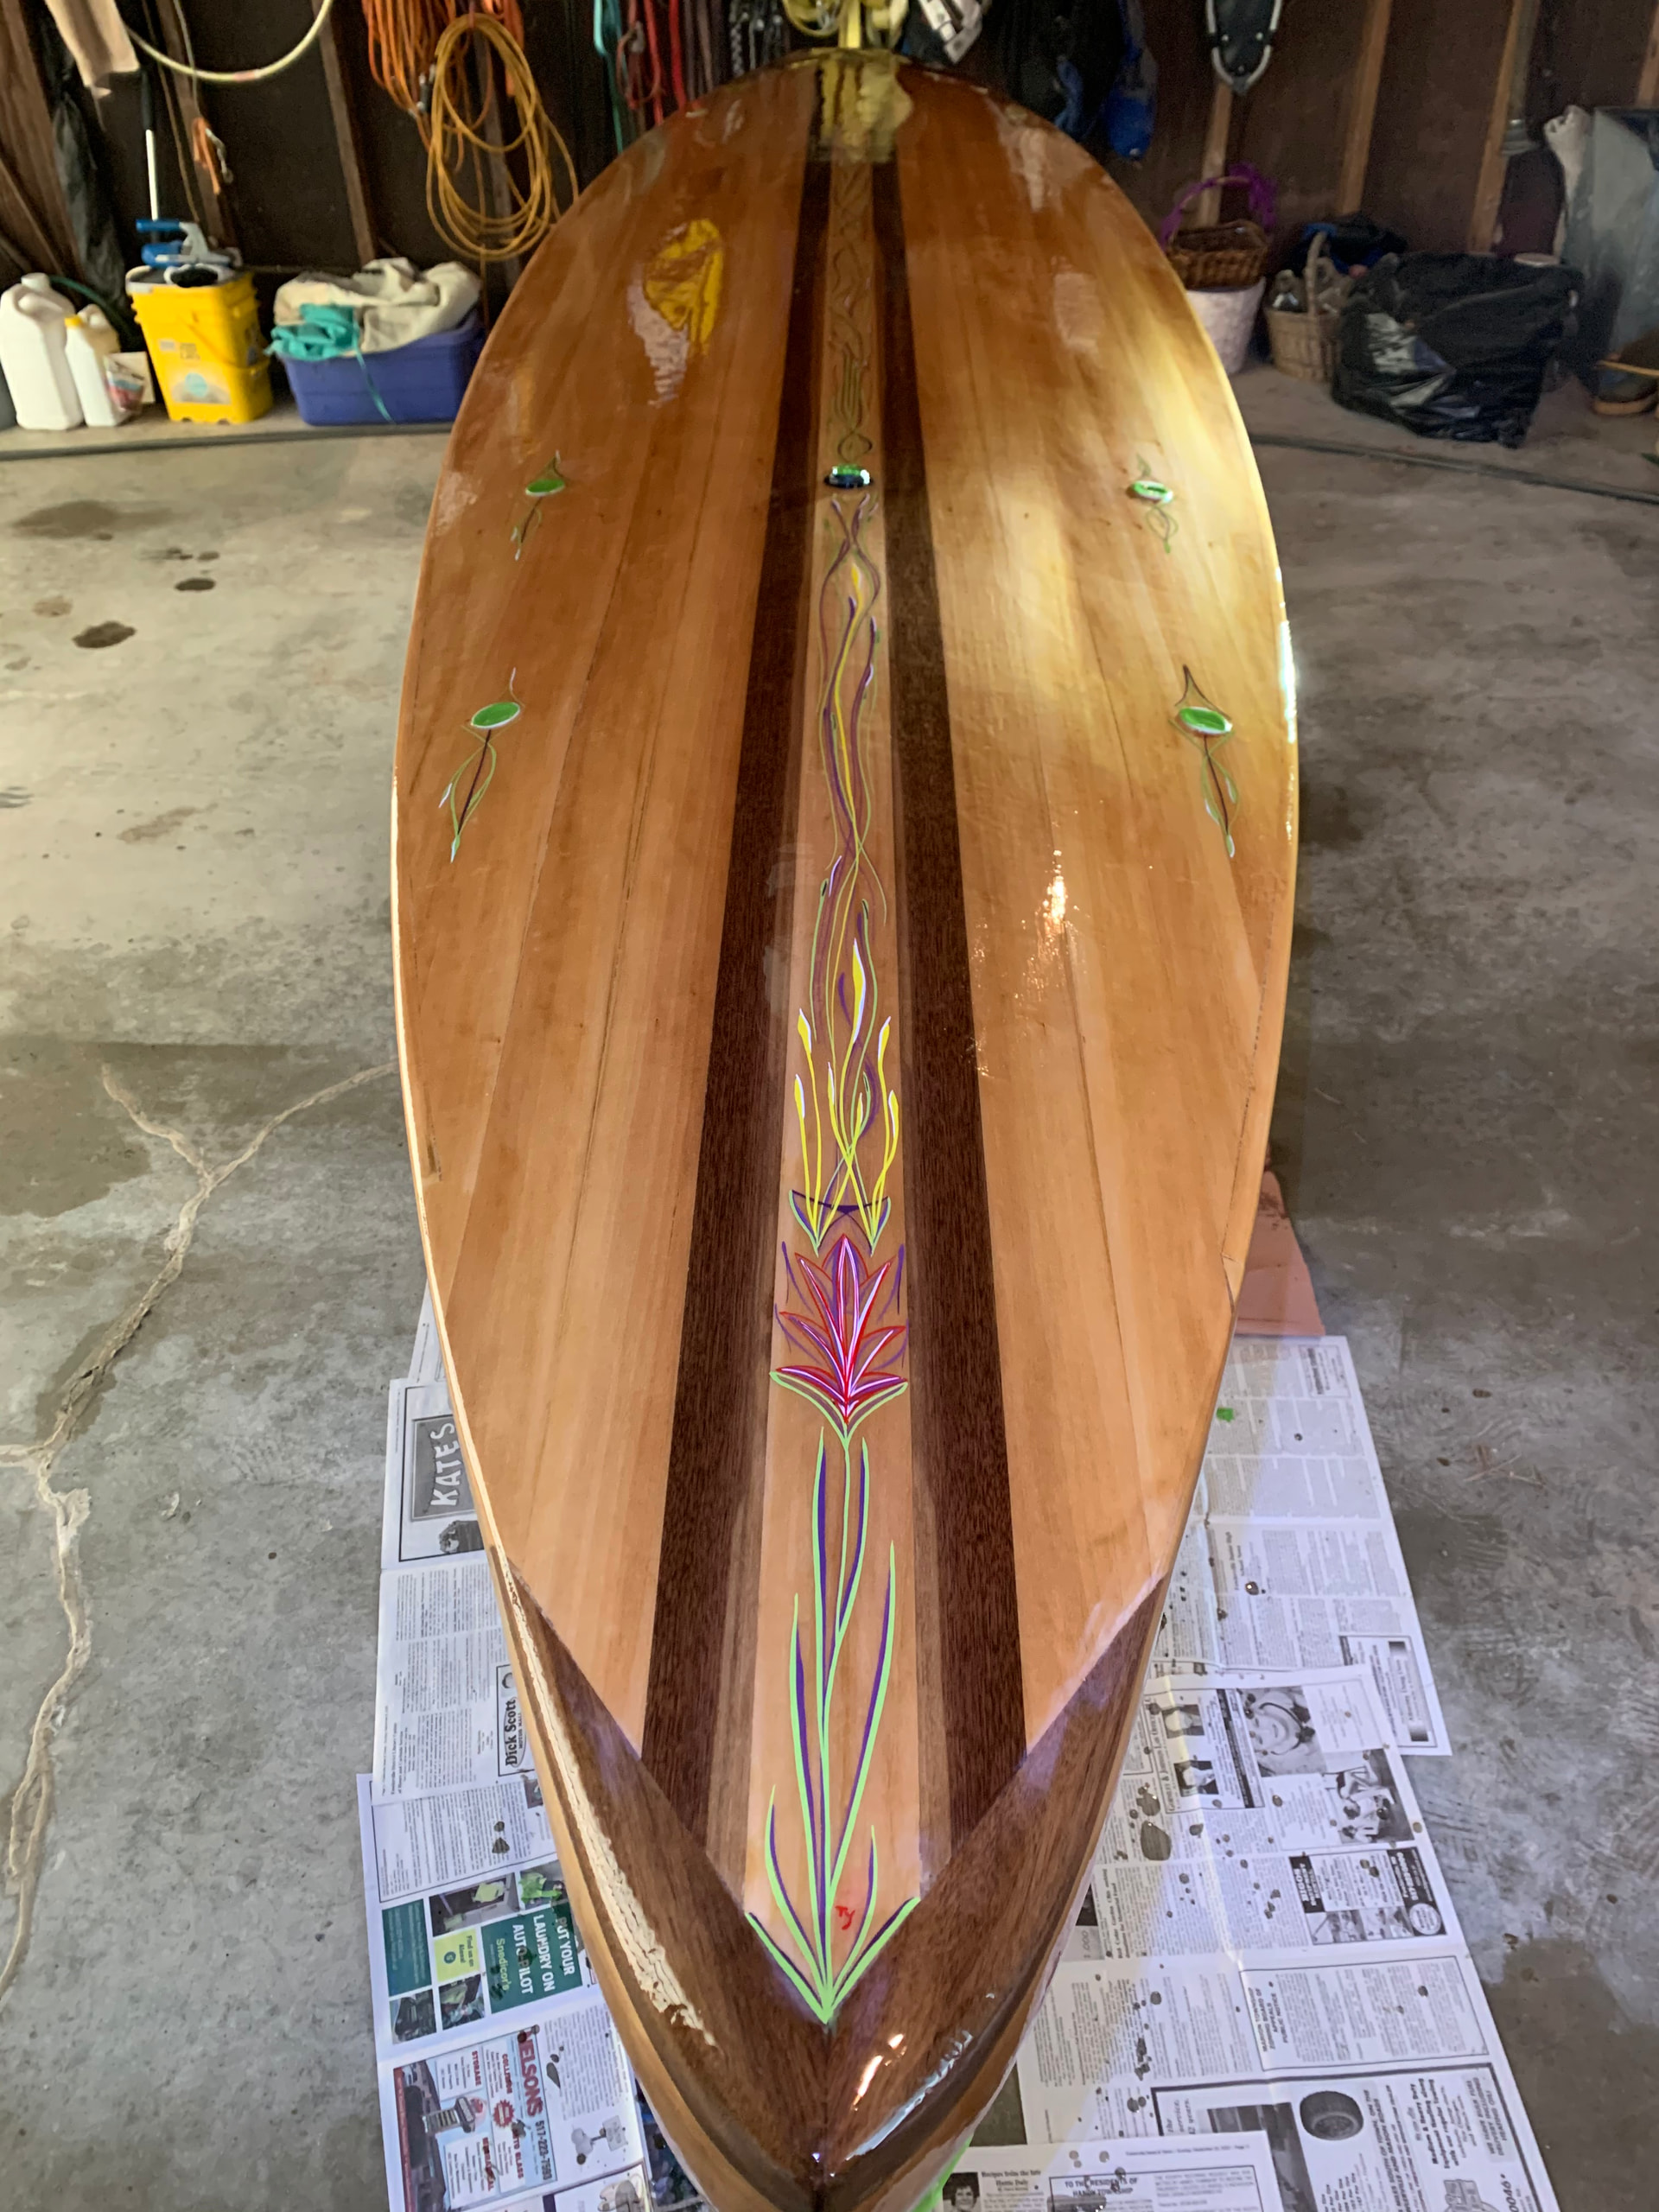
That looks pretty awesome, excellent paint job on that! She does look pretty tippy floating there, I saw you had to be pretty agile when your friend was walking forward the boat. Nothing us Michiganders can’t handle down a river in the canoe . I imagine that boat would cruise like a sports car on Lake Michigan, especially once you get your Bat-boat trimaran pontoons on. A boat build is definitely on the list, but need a couple more years until I have the time to dedicate to it.
Honestly I am just wrapping up my build now, got a bit of scope creep myself and working on some upgrades that I had laying around. The original impetus was to make a guitar for my nephew and friend, but a few more paddle boards this year is definitely on the radar.
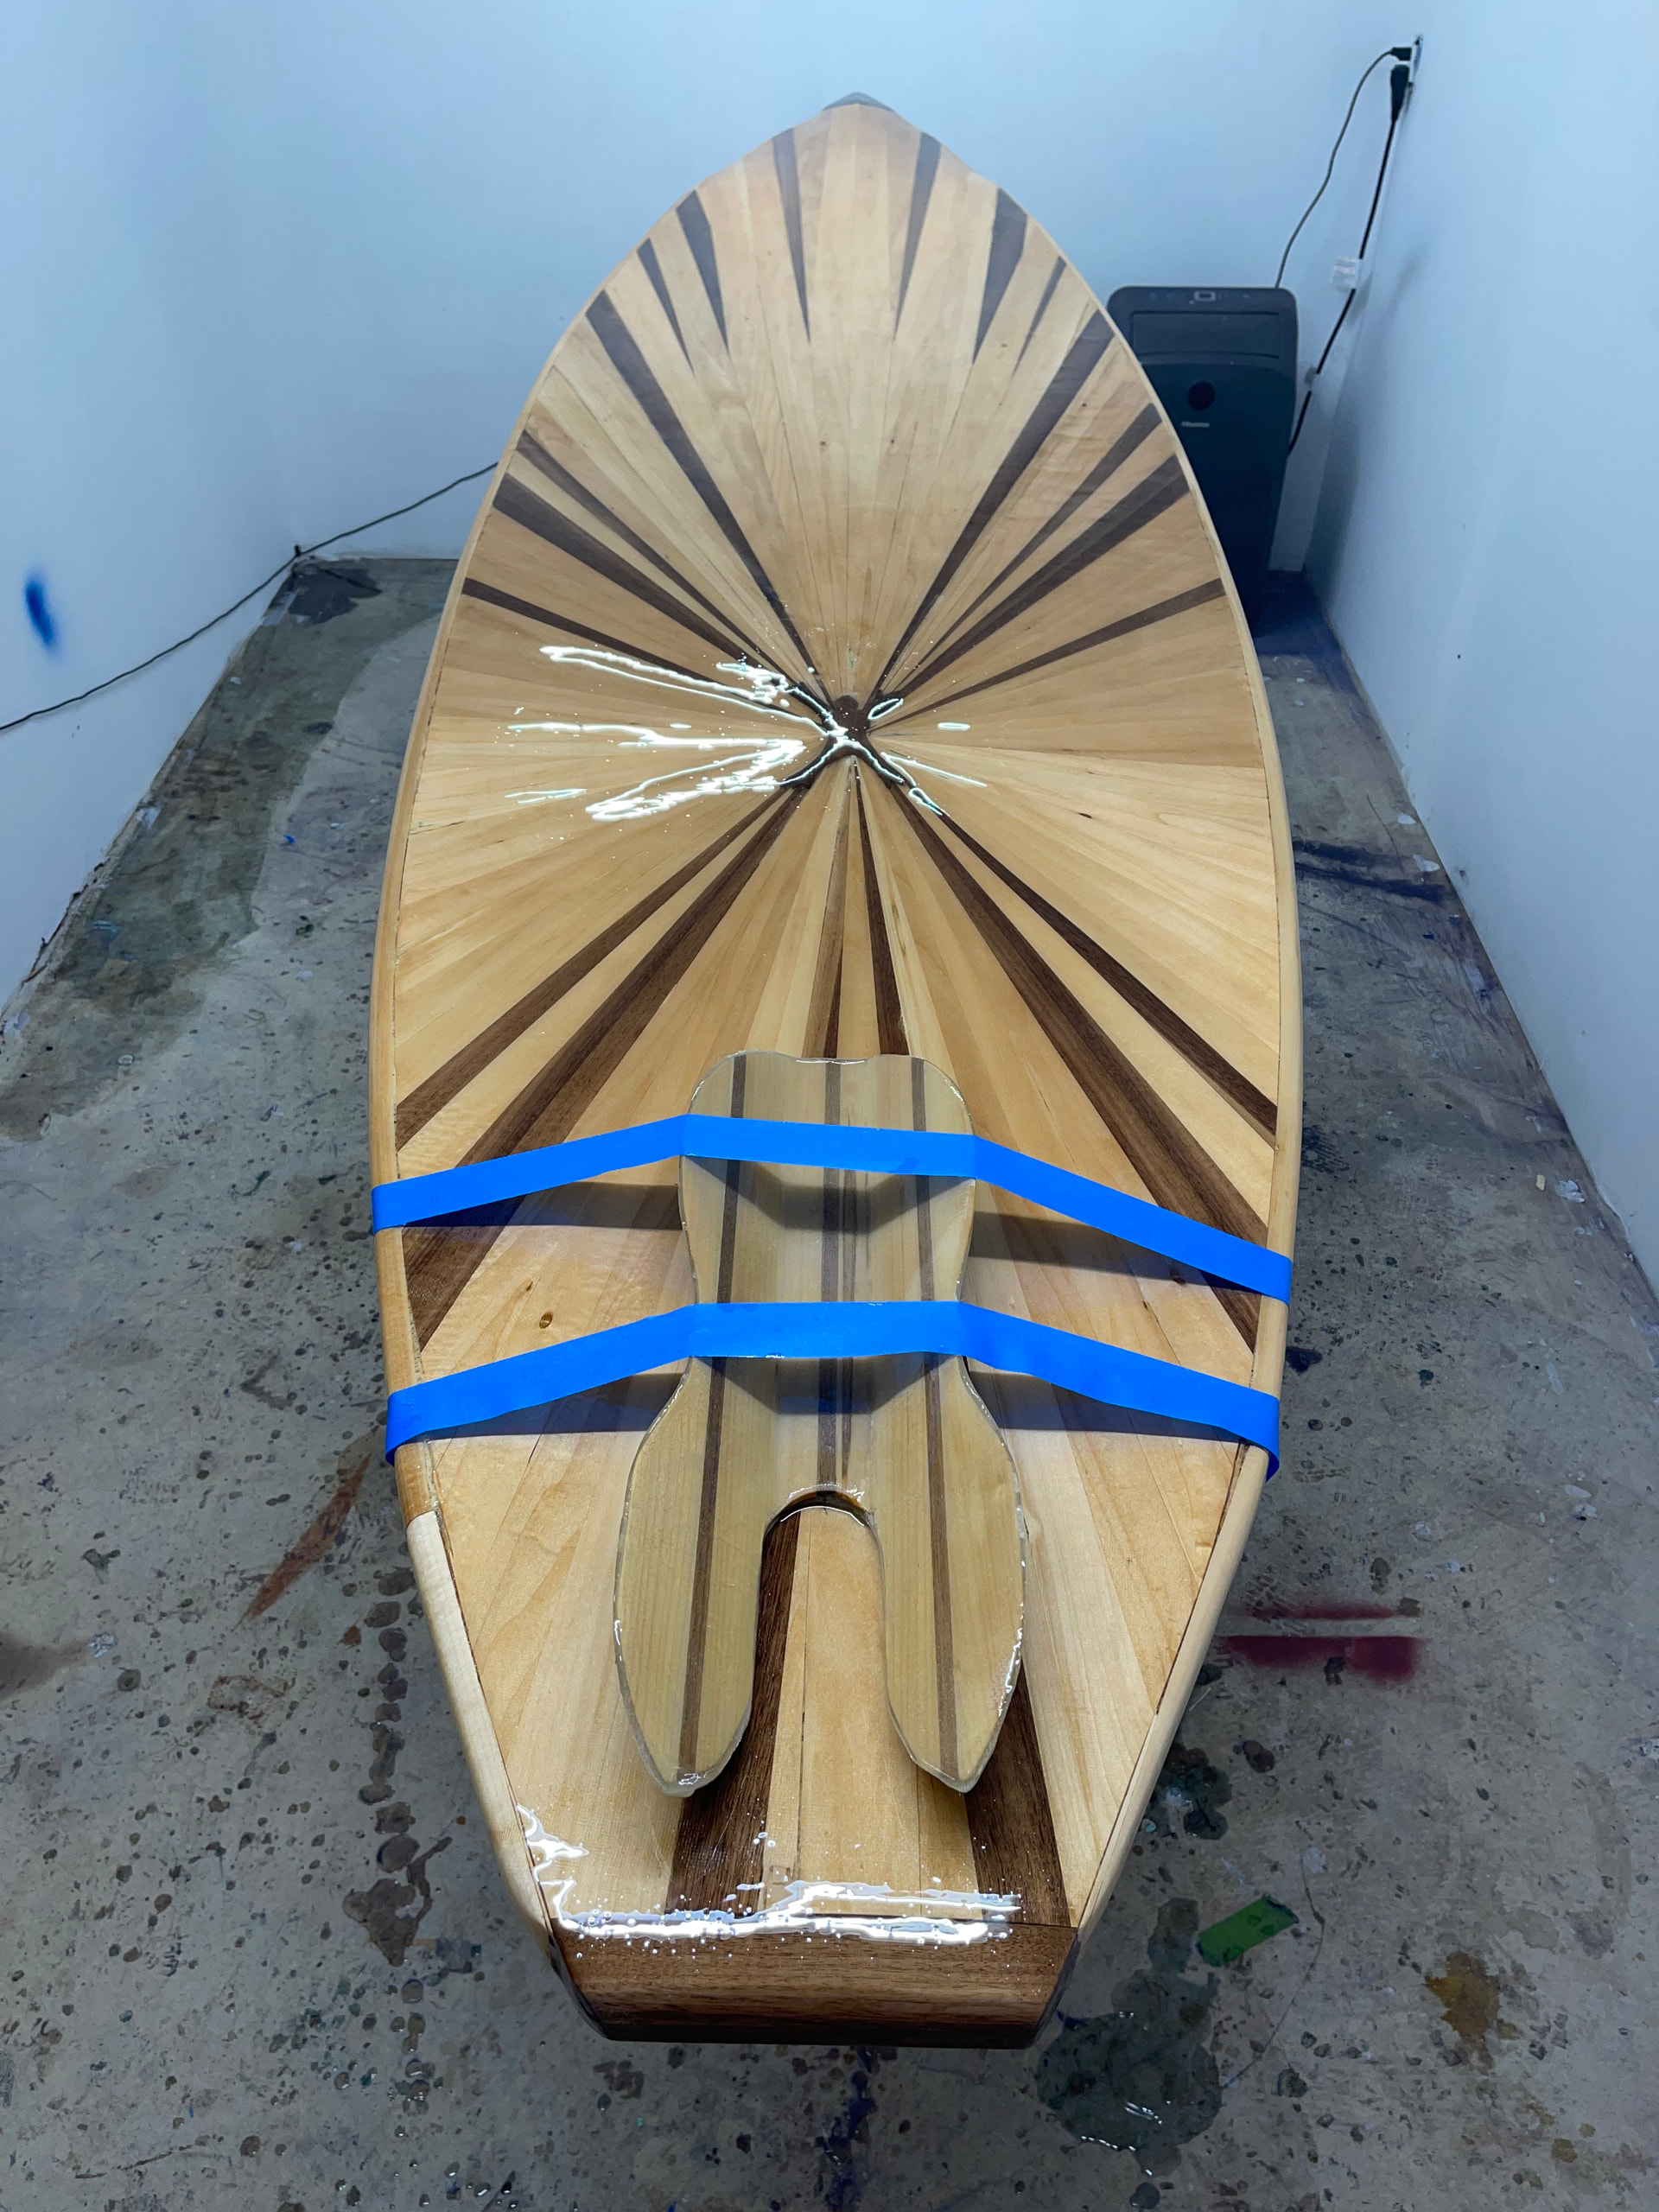
And yes, they are hollow core strip paddle boards all cut by hand. Here are few past boards:
Naw, they are meant to be used! We are river rats going up to the family cabin whenever we can, or the local lakes. If you’re ever in the Mitten I’ll take you for a float.
Those boards are really beautiful. Nick Schade’s book was one of my inspirations for Jezebel, but early on I realized that while the aesthetic advice was really good I was going to need much more solid engineering for her speed and all weather intentions so I relied a lot on the Gougeon Bros book. Her use profile is basically identical to a RIB but meant to be a more economical to run and nicer ride.
Your boards, you don’t fill them with pour foam or anything? For a paddle board I wouldn’t expect it to be necessary but the ama’s I’m planning for Jezebel will be similar trussed design internally, and I’m thinking to fill them with pour foam. I may even do the amas as stringer frame to save weight–make the interior, put a strip-plank bottom on them, pour foam, the scrape the foam off to be flush with the stringers and glass over that. The actual floating portions of the amas aren’t out of the ordinary but the bridge portions are going to take some thoughtful engineering because they’ll be subject to a huge amount of moment loading when she’s running fast in weather, especially where they connect to her main hull. I’ll be able to through bolt (hidden/buried) there and have a very large mating surface to take glue.
Thanks for the kind words. Yes they are hollow, I only put a little EPS in areas I will cut into, handle, lashing buckles, etc. My first board I left raw on the inside, but at one point someone sat on it on land and broke the skeg mount, imperceptible crack but enough to infiltrate water. Was able to the water out and repair, but the damage was done and rot set in eventually. Now I give the insides a run of epoxy so it’s less likely to happen, good piece of mind in exchange for an extra pound of weight.
With it being hollow I need to add a vent plug, the gortex ones work fine. For a paddleboard I think that is the way to go since weight is the biggest concern - won’t be going 30 knots unless I catch one bitchin’ wave !
For your application I would stick to some form of foam so you don’t have to deal with as much pressure changes and water infiltration. With a large solid air pocket you either have a perfectly sealed balloon that could pop, or a pocket that can breathe but can also accept water. The pressure/temp changes can be so drastic I almost cracked open one of my builds putting on a more exothermic than normal epoxy seal - if I didn’t have a drill on hand to make the vent it was going to be bad.
At your level I don’t have any other advice to give, but will be interested in which way to build it. The only other paddleboard type is a foam core, but it’s made from carving it out of open cell polystyrene. I don’t think carving would be a good path for you though.
Yeah, for a vessel like this you’d always fill secondary hulls like this with foam, unless working with metal hulls or a 100% racing application, in which case I’d do a drain plug. Salt-water+western red cedar or white oak I don’t have to worry about rot but still anything that might conceivably get wet is always epoxy coated. For Jezebel’s ama’s if I go coldmold/strip-plank wood I’ll do some 6oz glass on the inside then fill with foam. For your boards that’s likely overkill but the internal glass layer well help immensely against crush protection. I think I low density foam might add some miniscule stiffening but no real crush protection. I’m probably going to end up strip-planking the amas; stringer frame+glass would be faster but I think ultimately heavier. Currently any voids inside her– besides inspection ports or small mechanical housings and small bilge space–are foam filled. Foam below deck was just poured in and allowed to expand out the pourholes, then those holes plugged. Her gunwales were filled with foam while fully open, then excess was shaved down, and I capped them. For the amas I’ll probably do more of that process since it allows more control. Good point on thermal expansion and balloon effect.. her hull is vented in different ways but for the amas I will probably add some tiny vents at her sheerline, internally where the amas connect to the main hull, so they can vent. Similar to your paddleboards the amas have more potential to be fully airtight.
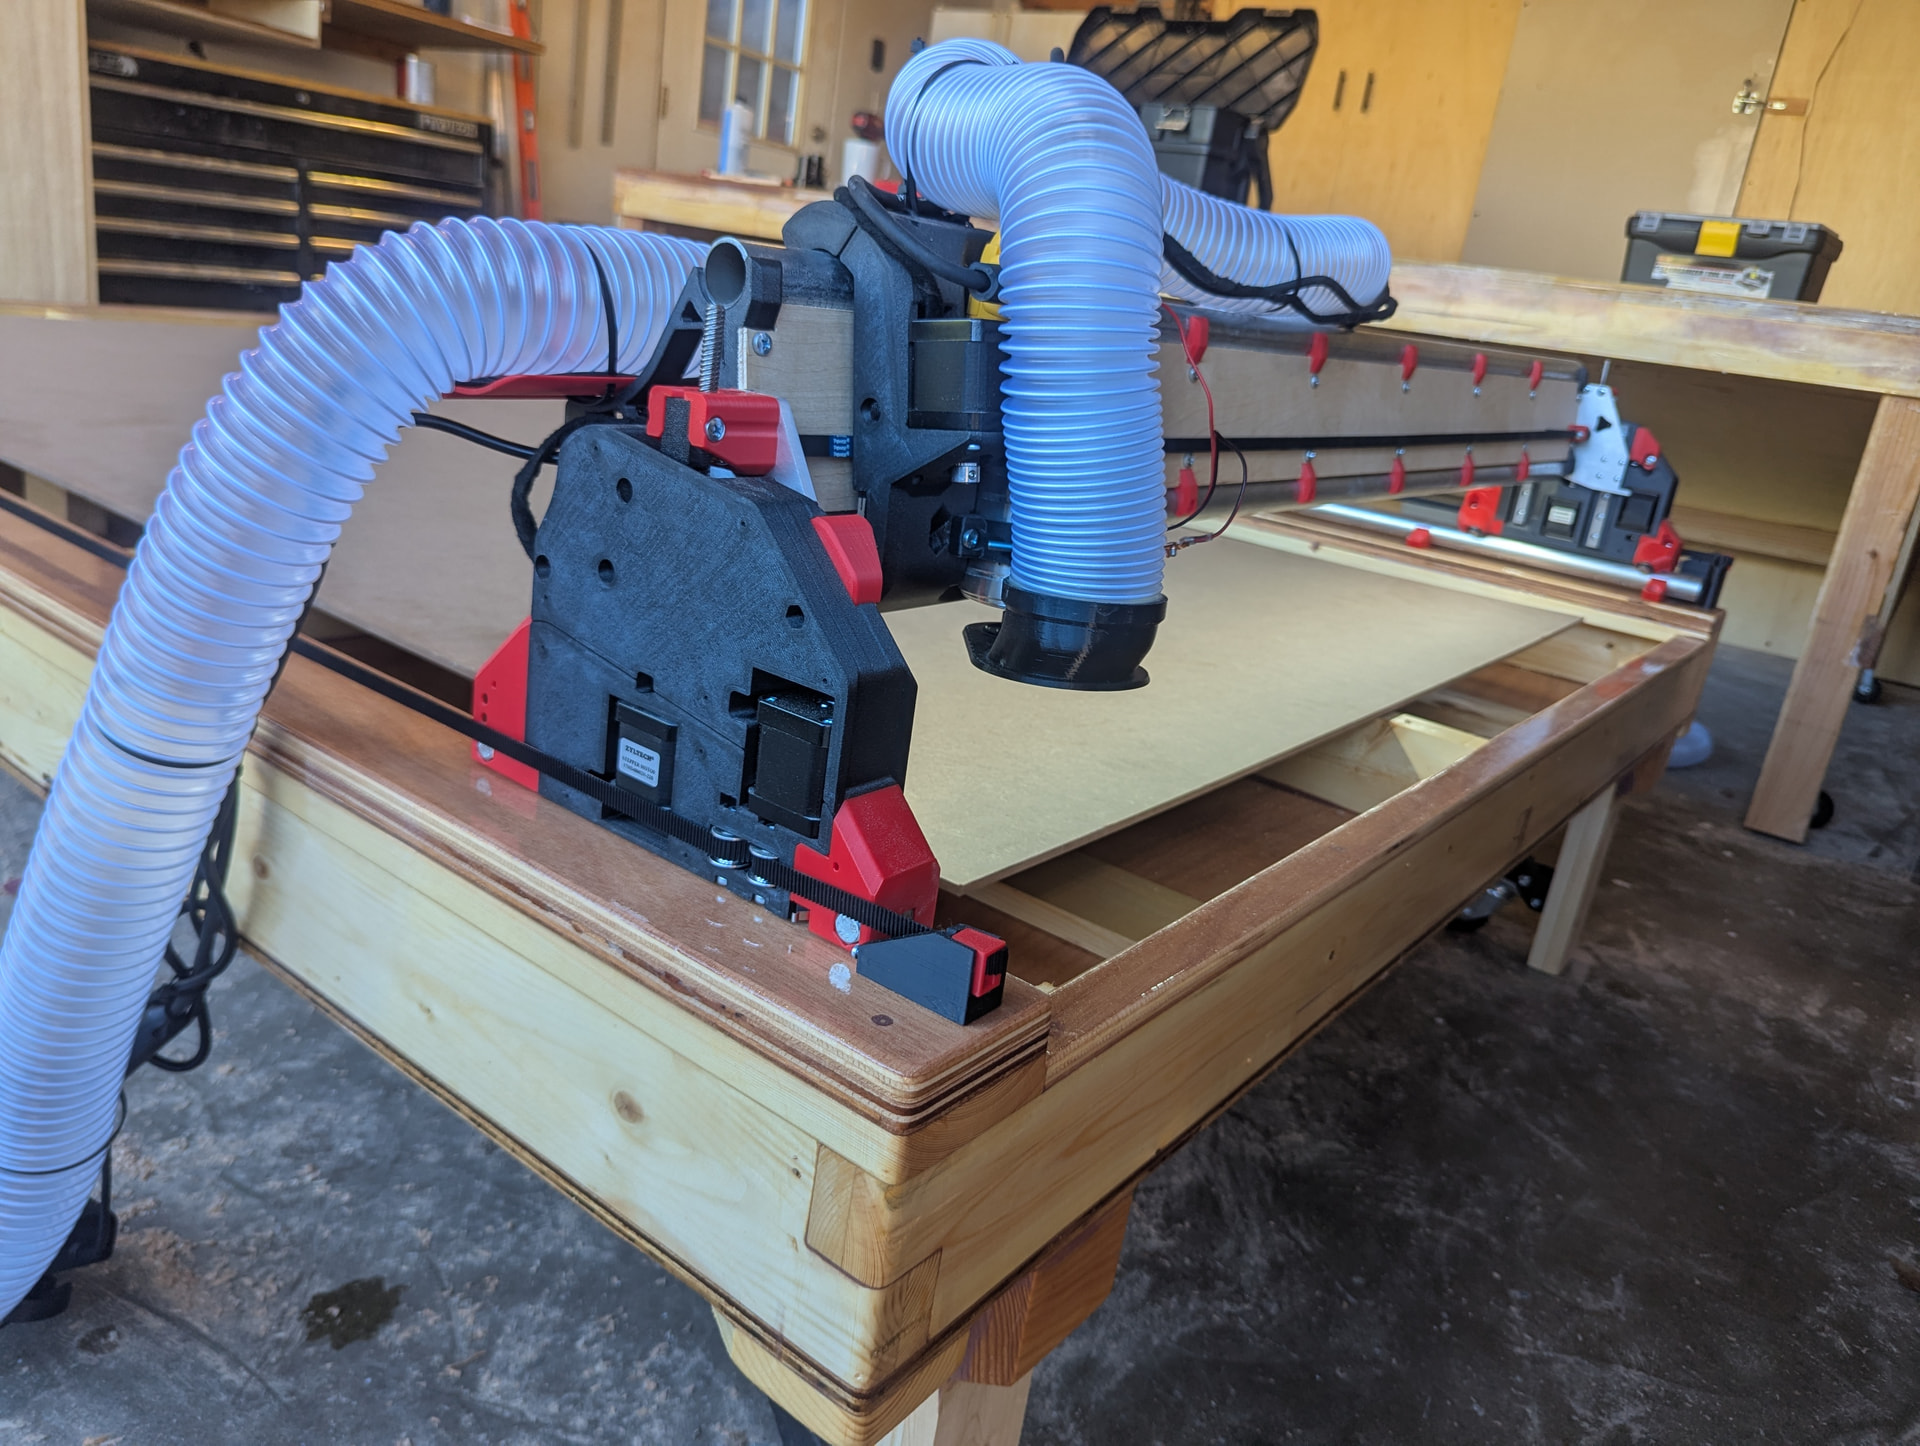
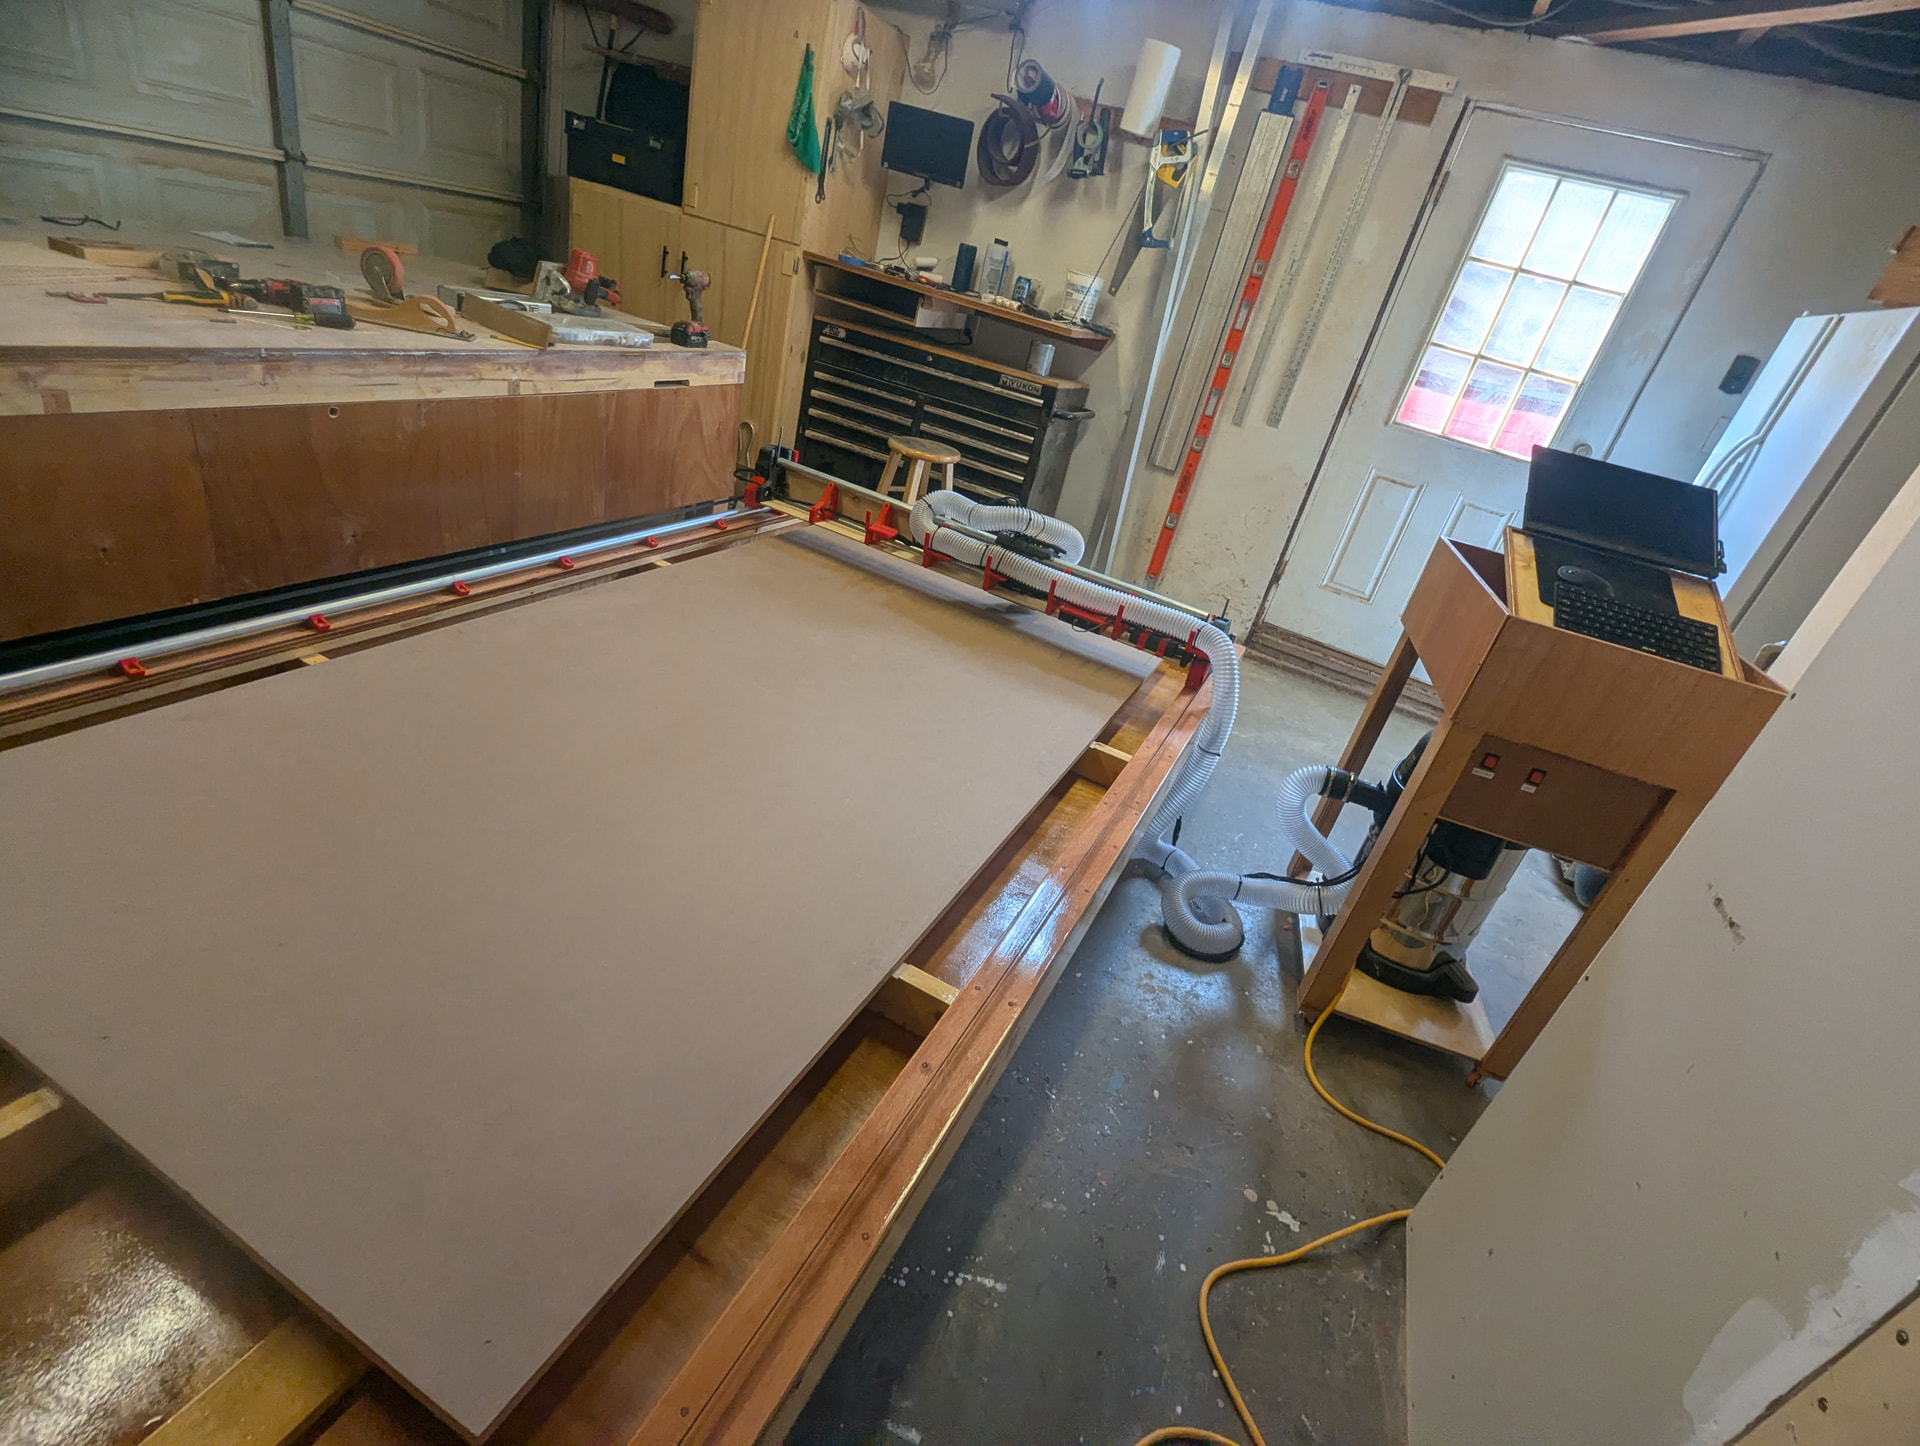
Tested the CNC successfully a little while back to cut the crown test, but only just yesterday got it fully integrated into my workspace with a control cabinet, etc. One of the sides of that giant worktable comes off so I can roll the LR4 inside it when not in use and give it some protection from dings and excessive debris if I’m in more traditional mode and running table saw and planer, etc. Unfortunately I just don’t have enough indoor space to have the CNC out and working while I’m using traditional wood bench tools; if the CNC is out then saws and bench tools have to be rolled up against the wall where they’re of limited use.
I’m going to start with some silly racks for shoes and home gym so I can learn a Fusion workflow before the boat projects but here it is ready for production :