New MPCNC build: Primo + Manta MP8 + Klipper in BC, Canada

I too am watching and waiting. I started trying to use Klipper and Mainsail (another Voron builder here). Ran into problem of pausing and resuming without diving into the work piece. So I’m very interested in your journey. I’d love to use mainsail and klipper with the machine.

2 Likes

Question for the group, what would be the closest to a convenient interface, mainsail or fluid?

I don’t have any experience yet as I don’t have out up and running. However, I plan to start with mainsail.

3 Likes

I would say it is a personal preference . Either works with Klipper. It’s like the Coke vs. Pepsi choice. Both are a cola drink, just a personal preference of which is better. My preference is mainsail. Seems to be very actively worked on and updated.

2 Likes

Ya personal preference for mainsail but honestly both pretty much the same and very capable.


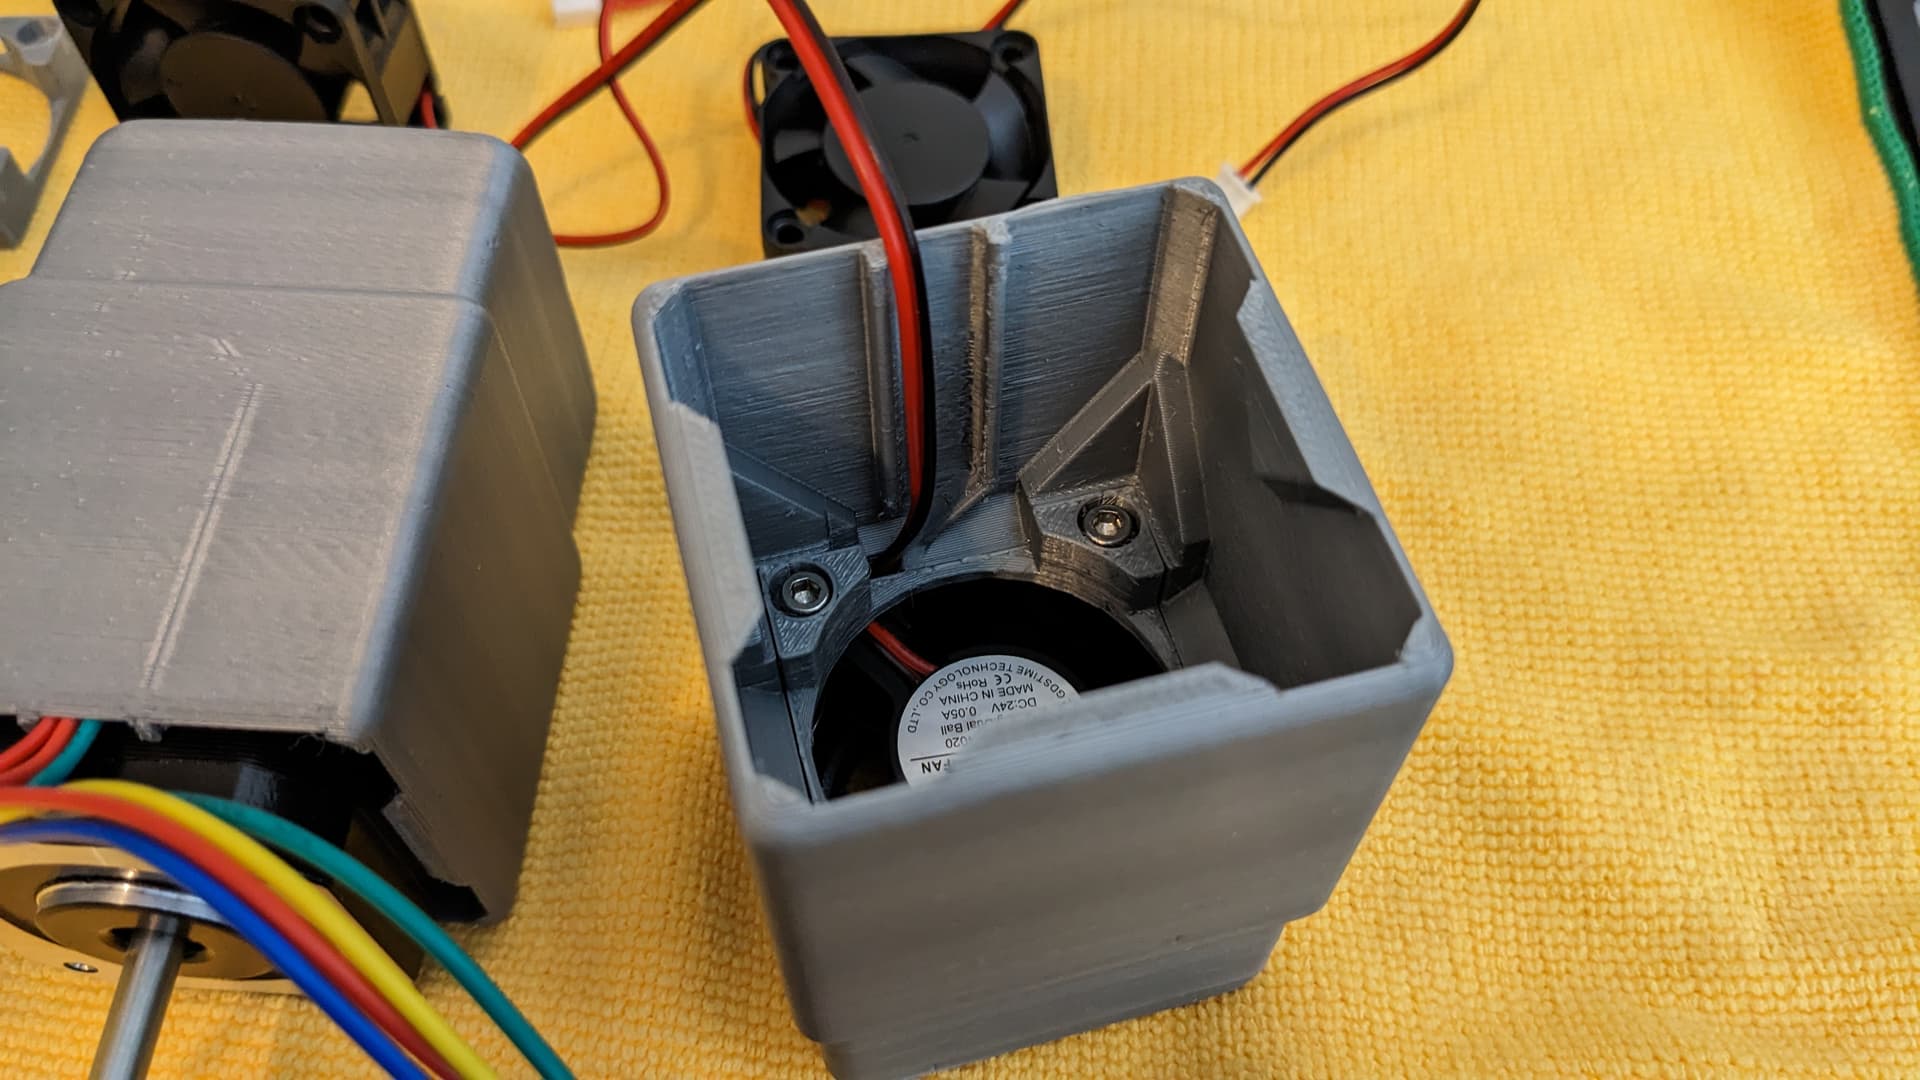
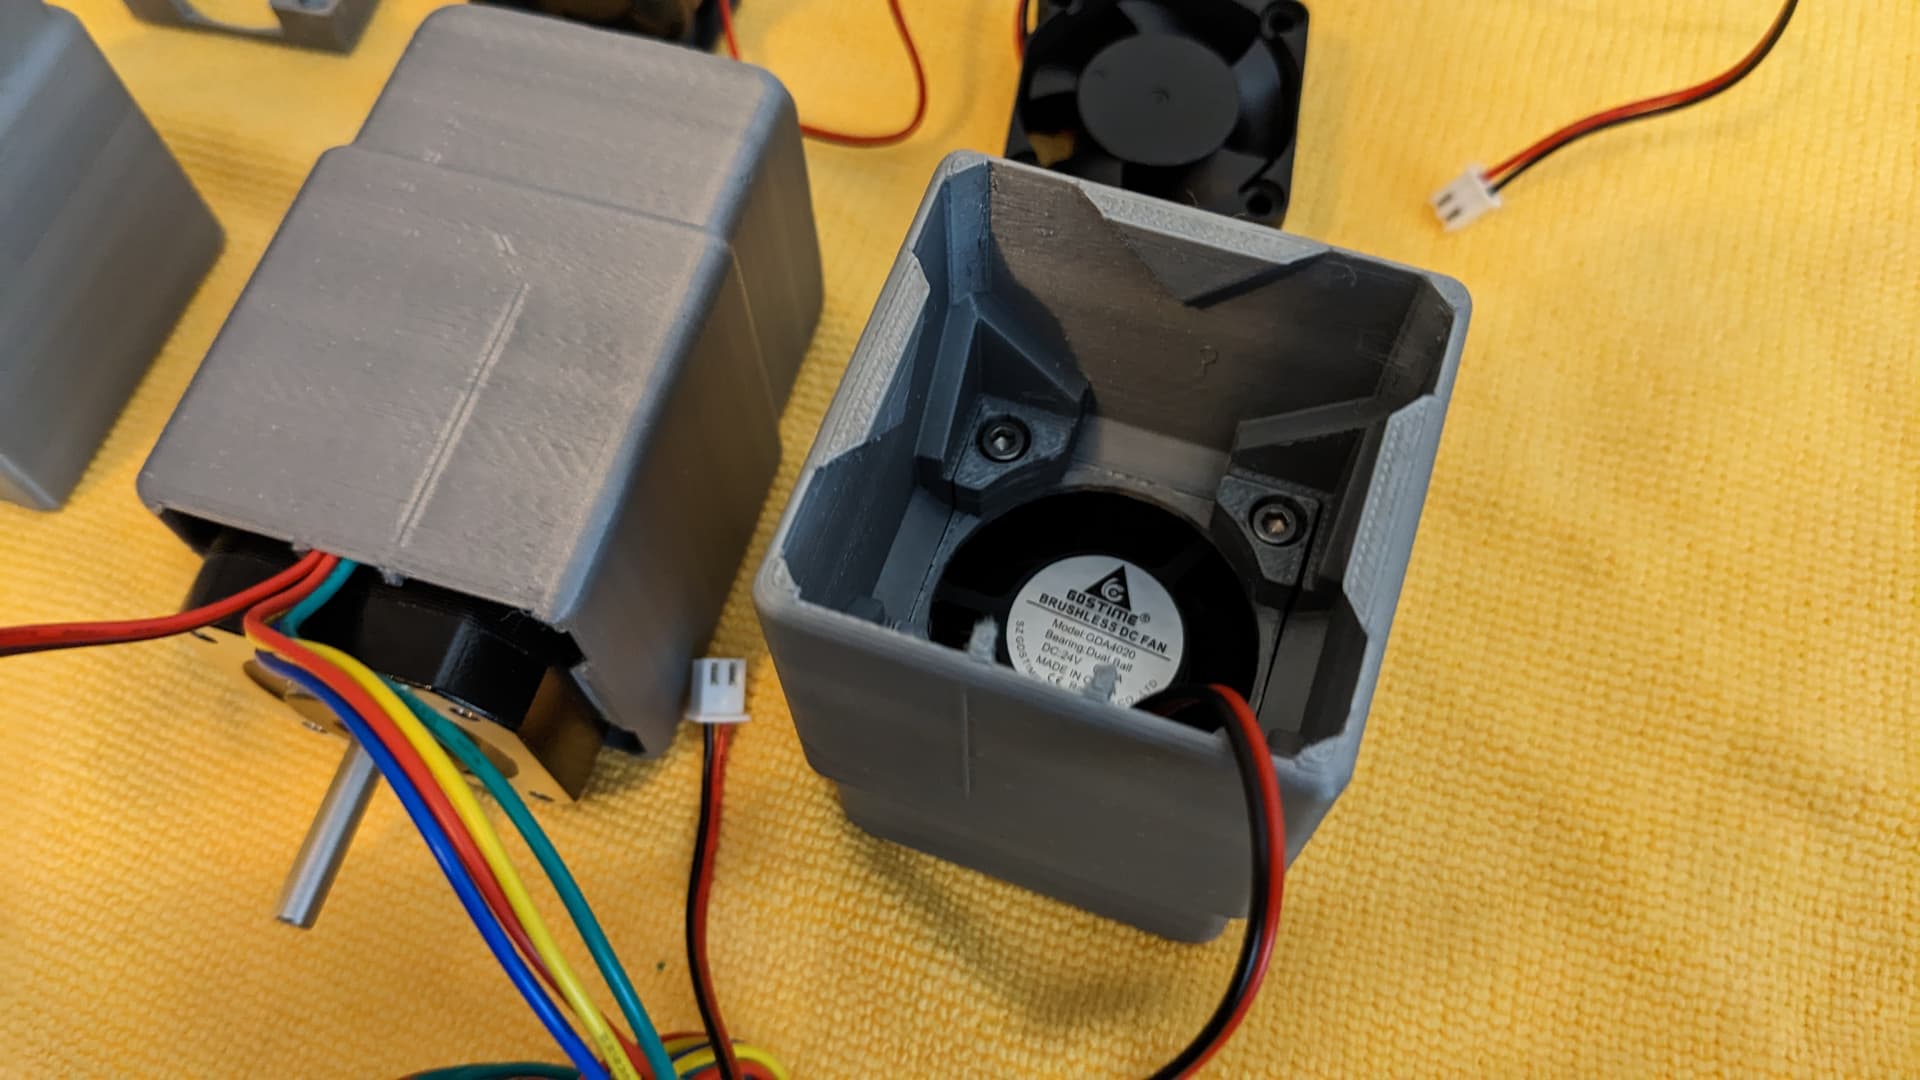
While still printing the main MPCNC parts, I designed a fan holder to slide on top of each stepper motor. It may be overkill if I don’t end up running them hot enough to skip a beat, or useless if they clog up with chips.

2 Likes

Steppers dont skip because of heat. The stepper drivers overheating might cause skipped steps, but not the motors.

That said, cooling the motors isn’t a bad idea, because what hot motors can do is deform the printed plastic parts. About 50°C is the hottest that you want the motors to get, after that point the printed PLA starts to soften.

My motors are pretty dusty, they seem to collect it, so I don’t know this would work for me, but my motors hardly ever crack 35°C. The fan that blows ofer the stepper drivers has remained clear though.

3 Likes

… learn everyday…

Maybe I merged my research around heat issues seen when people are pushing the speeds and feeds.
Designing this fan holder gave me another opportunity to learn more about designing Fusion and making parts, so not a complete loss.

I did plan to actively cool the driver board, although I think I’ll find a simpler solution for that.

1 Like

I used (and then modified a little bit) this BTT Octopus case BTT Octopus V1.0 & V1.1 Electronics Box by twhite0101 - Thingiverse, I didn’t look to see if the Manta has a similar or same mounting size.


The fan blows right on all stepper drivers for me.
My motors were running hot to the touch BEFORE I lowered the current to them. Haven’t cut anything yet to see if I lowered the current too much. If they get hot again, I’ll be looking for ‘fan covers’ for my motors :wink:

2 Likes

Physical build complete, glides like it’s on rails!
No play, and think I have the tension of the bearings pretty good.

Now for the klipper config…

8 Likes

That looks good!

3 Likes

Making progress!
I have unmodified Klipper running gcode generated by Fusion 360 and post processed by flyfisher, with a small amount of removing gcode that doesn’t yet work.
I’ve made short attempts to leverage klippy-cnc, but not yet worked out how to deal with the errors I get about not setting G28.1. Will walk through the macros to try and understand what it’s doing and how to use them. For now I’m getting use to the CAM process using Fusion, for instance how to set the origin to the bottom left of the model rather than in the center so you don’t get gcode three quarters full of negative numbers.

While I’m obviously not up and running yet, here’s the Klipper config I used to set up the steppers on my Big Tree Tech Manta 8 board. These settings are right for my wiring layout, so use at your own risk if you plan to blind copy them into a setup of your own.

I suspect the journey so far has been the easy leg of the journey, turning this into a simple workflow like I currently have with my 3D printers will be the challenge. I don’t plan to get “dirty” until I have this working the way I want.

[endstop_phase]

# Motor 1
[stepper_x]
step_pin: PE2
dir_pin: !PB4
enable_pin: !PC11
microsteps: 16
rotation_distance: 32
endstop_pin: ^!PF3
position_endstop: 0
position_max: 620
homing_speed: 40
homing_positive_dir: false

# Motor 2
[stepper_x1]
step_pin: PF12
dir_pin: PF11
enable_pin: !PB3
microsteps: 16
rotation_distance: 32
endstop_pin: ^!PF4

# Motor 4
[stepper_y]
step_pin: PD3
dir_pin: PD2
enable_pin: !PD5
microsteps: 16
rotation_distance: 32
endstop_pin: ^!PC0
position_endstop: 0
position_max: 345
homing_speed: 40
homing_positive_dir: false

# Motor 5
[stepper_y1]
step_pin: PC9
dir_pin: !PC8
enable_pin: !PD1
microsteps: 16
rotation_distance: 32
endstop_pin: ^!PC1

# Motor 6
[stepper_z]
step_pin: PA10
dir_pin: PD15
enable_pin: !PA15
microsteps: 16
rotation_distance: 8
endstop_pin: ^!PC2
position_endstop: 1.40
position_max: 90 # 90 when legs are in first wooden board
position_min: -5.0
homing_speed: 3
second_homing_speed: 3
homing_retract_dist: 3


########################################
# TMC2209 configuration
########################################

[tmc2209 stepper_x]
uart_pin: PC10
run_current: 0.800
stealthchop_threshold: 999999

[tmc2209 stepper_x1]
uart_pin: PF13
run_current: 0.800
stealthchop_threshold: 999999

[tmc2209 stepper_y]
uart_pin: PD4
run_current: 0.800
stealthchop_threshold: 999999

[tmc2209 stepper_y1]
uart_pin: PD0
run_current: 0.800
stealthchop_threshold: 999999

[tmc2209 stepper_z]
uart_pin: PF8
run_current: 0.650
stealthchop_threshold: 999999
6 Likes

Looks really good. That silver filament is sweet looking! Keep us posted on your motor currents. I found at 0.5 my z was skipping even with a pen. Seems ok at 0.75 for now.

2 Likes

Thanks, I really like how the silver has turned out, I wanted the only contrasting colour to be the teal of the Makita router.

I haven’t done any kind of tuning yet and haven’t noticed any skipping on the test draws so far. Motors are warm after a minute of movement, but not hot.
I played around with the velocity, and while obviously not practical I had it upto 12500 before I heard any unpleasant sounds, currently have any pen activity at 2000 and expect to be cutting even slower.

The workflow I’m currently going with is

  1. Create a 3D model in Fusion 360
  2. Switch from “Design” to “Manufacture”
  3. Choosing the Trace option from 2D milling
  4. Select the simple “pen” tool I created already (it’s just a ball end mill)
  5. Choose the curves I want to follow and “OK”
  6. Double click on Setup in the browser side menu
  7. Choose Stock Box Point as the origin and click on the bottom left corner of the model and “OK”.
  8. Then select Post Process from the the Actions menu
  9. With MPCNC selected (I previously installed flyfisher604), I enable G92 and turn off probe on start and “Post”.
  10. I edit the gcode, removing M84 and upload through Mainsail.
  11. Use the Mainsail interface to home X,Y & Z (using the V1 Eng metal touch plate for Z)
  12. Again with Mainsail controls, I position the pen to the bottom left corner of the paper.
  13. Then print the file, since it performs a G92, it sets the corner of the paper to 0,0,0.

I’ve listed the above for others to comment on a better process, as I’m new to CNC’ing I’ve got plenty to learn but this is working for me at the moment. I walked some of the macros from klippy-cnc, and couldn’t wrap my head around how to make it work without modifying to take advantage of the endstops, so I removed references to it for now and may revisit once I have a better understanding of how to CNC.

In addition I commented out 2 sections in mainsail.cfg which reference an extruder, this now allows me to pause, resume and stop without errors. This parks the head by raising then moving to the rear corner, however when resuming it starts to return to Z at the same time a X & Y which will be a problem when I start cutting so I’ll have to make further modifications.

Next steps will be to install the stepper fans (again, possible overkill), then a drag chain solution.

1 Like

This is where i got stuck with Klipper. Your workflow seems good. Since I went back to Marlin, I have a good workflow that works for me now. I’m still willing to switchback :grin:

1 Like

Looks great!

1 Like

I didn’t spot an immediate fix for this, but feel it shouldn’t be too difficult, expecting it to be another modification to mainsail.cfg… but will see.

Agreed, If I knew anything about programming I would help but yes looks like you somehow just need to have the resume go to X and Y and then Z. Shouldn’t be that difficult but way over my head! I’ll ask in the voron nad mainsail discord. Some sharp folks there.

So I looked at it a bit and definitly not just something in moonraker config straight away. Someone pointed me to this which shows more the details of the resume. I think the trick will be figuring out how to parse absolute coordinates into X,Y,Z into seperate references rather than just all three called but you’ve pretty much hit my coding knowledge limit :slight_smile: Here is something just to get you thinking it at least shows how restore works in klipper. moonraker-timelapse/timelapse.cfg at main · mainsail-crew/moonraker-timelapse · GitHub

1 Like

Thanks for the link, that makes sense and should be able to work with that when I put time into reading the code later in the week.

I have the stepper fans wired up so next I’m looking at cable chain solutions. I’ve had a look at what others have done, but want to keep all the drag chains clear of the workspace. So I’m thinking of using the inside of the tube ends as a mounting point.

Like you, i know enough to get myself into trouble so I’ll leave the coding to someone with better skills :laughing:.
I think the pseudo macro code would be something like this:
Change tool time

  • Move Z up to safe location to avoid work piece
  • store current X, Y location
  • execute Klipper PAUSE command (to move to the desired X and Y park location)
  • perform manual tools change (don’t forget to turn off rotation of router/spindle)
  • restore and move back to X and Y location (when the PAUSE command was executed)
  • turn router/spindle back on
  • execute Klipper RESUME command (at this point it should just lower Z to continue the cut job since X, Y is at the ‘resume’ location already)

We’re here to support you Neil. I can try to test this weekend if need be (I’ll have to put my Klipper setup back in but shouldn’t be a problem). Let us know if you need any aid with this. We’ll help were we can.

1 Like