New build in Orlando Flmo

Hi all, first post. I thought I would post my initial experience in MPCNC world. This started out as a long term project when I discovered V1 Engineering maybe 3-4 months ago. I build vintage race cars as a hobby and noticed people were cutting aluminum with this thing so I jumped on it. I am forever getting aluminum water jet cuts made at a supplier and thought this could be a good solution to bring it in house.

As a background, I am a Mechanical Engineer by degree, extensive background in manufacturing, and have been 3D printing complex shapes and materials for 2 years. Even played around with Marlin some. So although I needed to learn a few things along the way, most of this was intuitive to me.

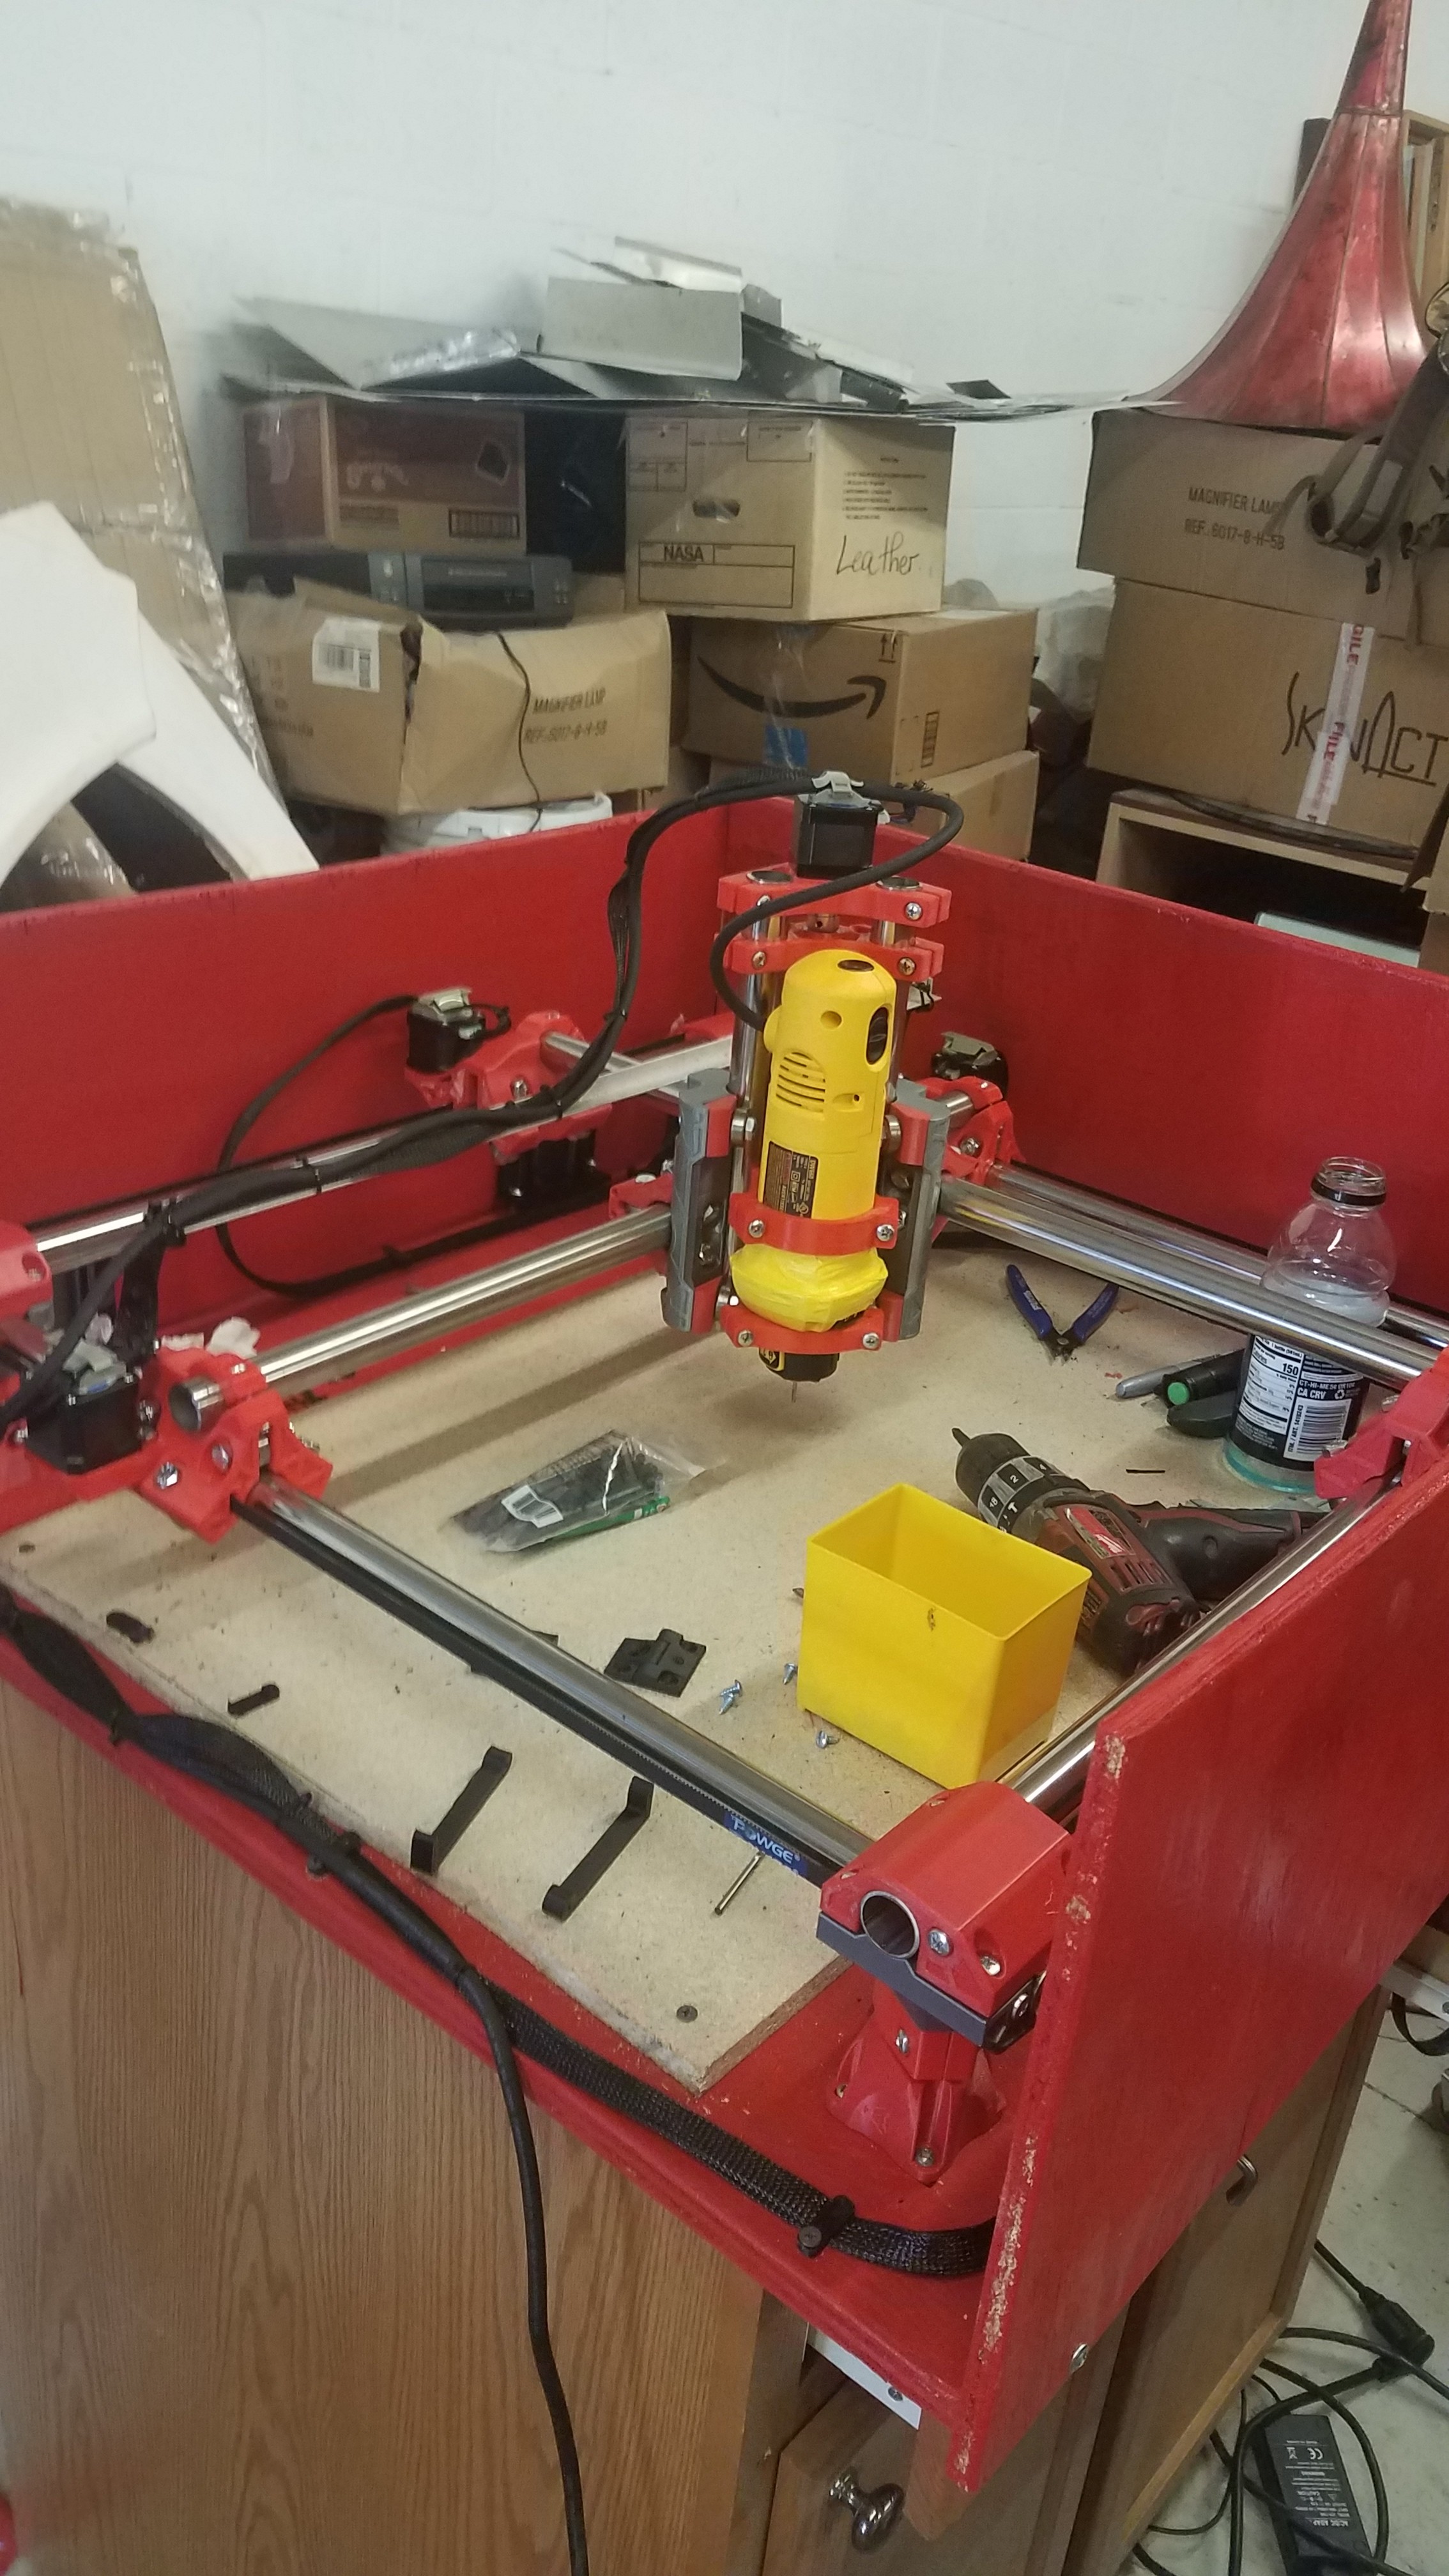
First off, this is about the coolest thing I have played with. I cant sent enough gratitude to Ryan and this community for making this possible. The assembly was fairly straight forward. I bought 1" s/s tubing off Ebay along with a Rigid tubing cutter. Printed all the parts and assembled per instructions. The only thing that threw me off was trying to square the x and y gantry. I had a roughly 5 mm difference in the y axis when measuring distance from truck to foot. So I began adjusting every damn bearing on the thing trying to pull it in. I was able to take maybe 1mm out, but that was it. I realized I had to live with it unless I reset the entire machine. But the bigger problem was the bearing adjustments were all over the place now and the core had play in all directions. So I spent another few hours trying to locate the play and adjust bearing to eliminate it. I just kept twisting the core and adjusting bearings until it felt solid. Are some of the bearings too tight or too loose? I dont know, it works.

After getting the steppers going in the correct direction, I jumped right in. I did 1 pen drawing then went straight to wood. The machine worked great, but programming in Estlcam was and still is a little challenging.

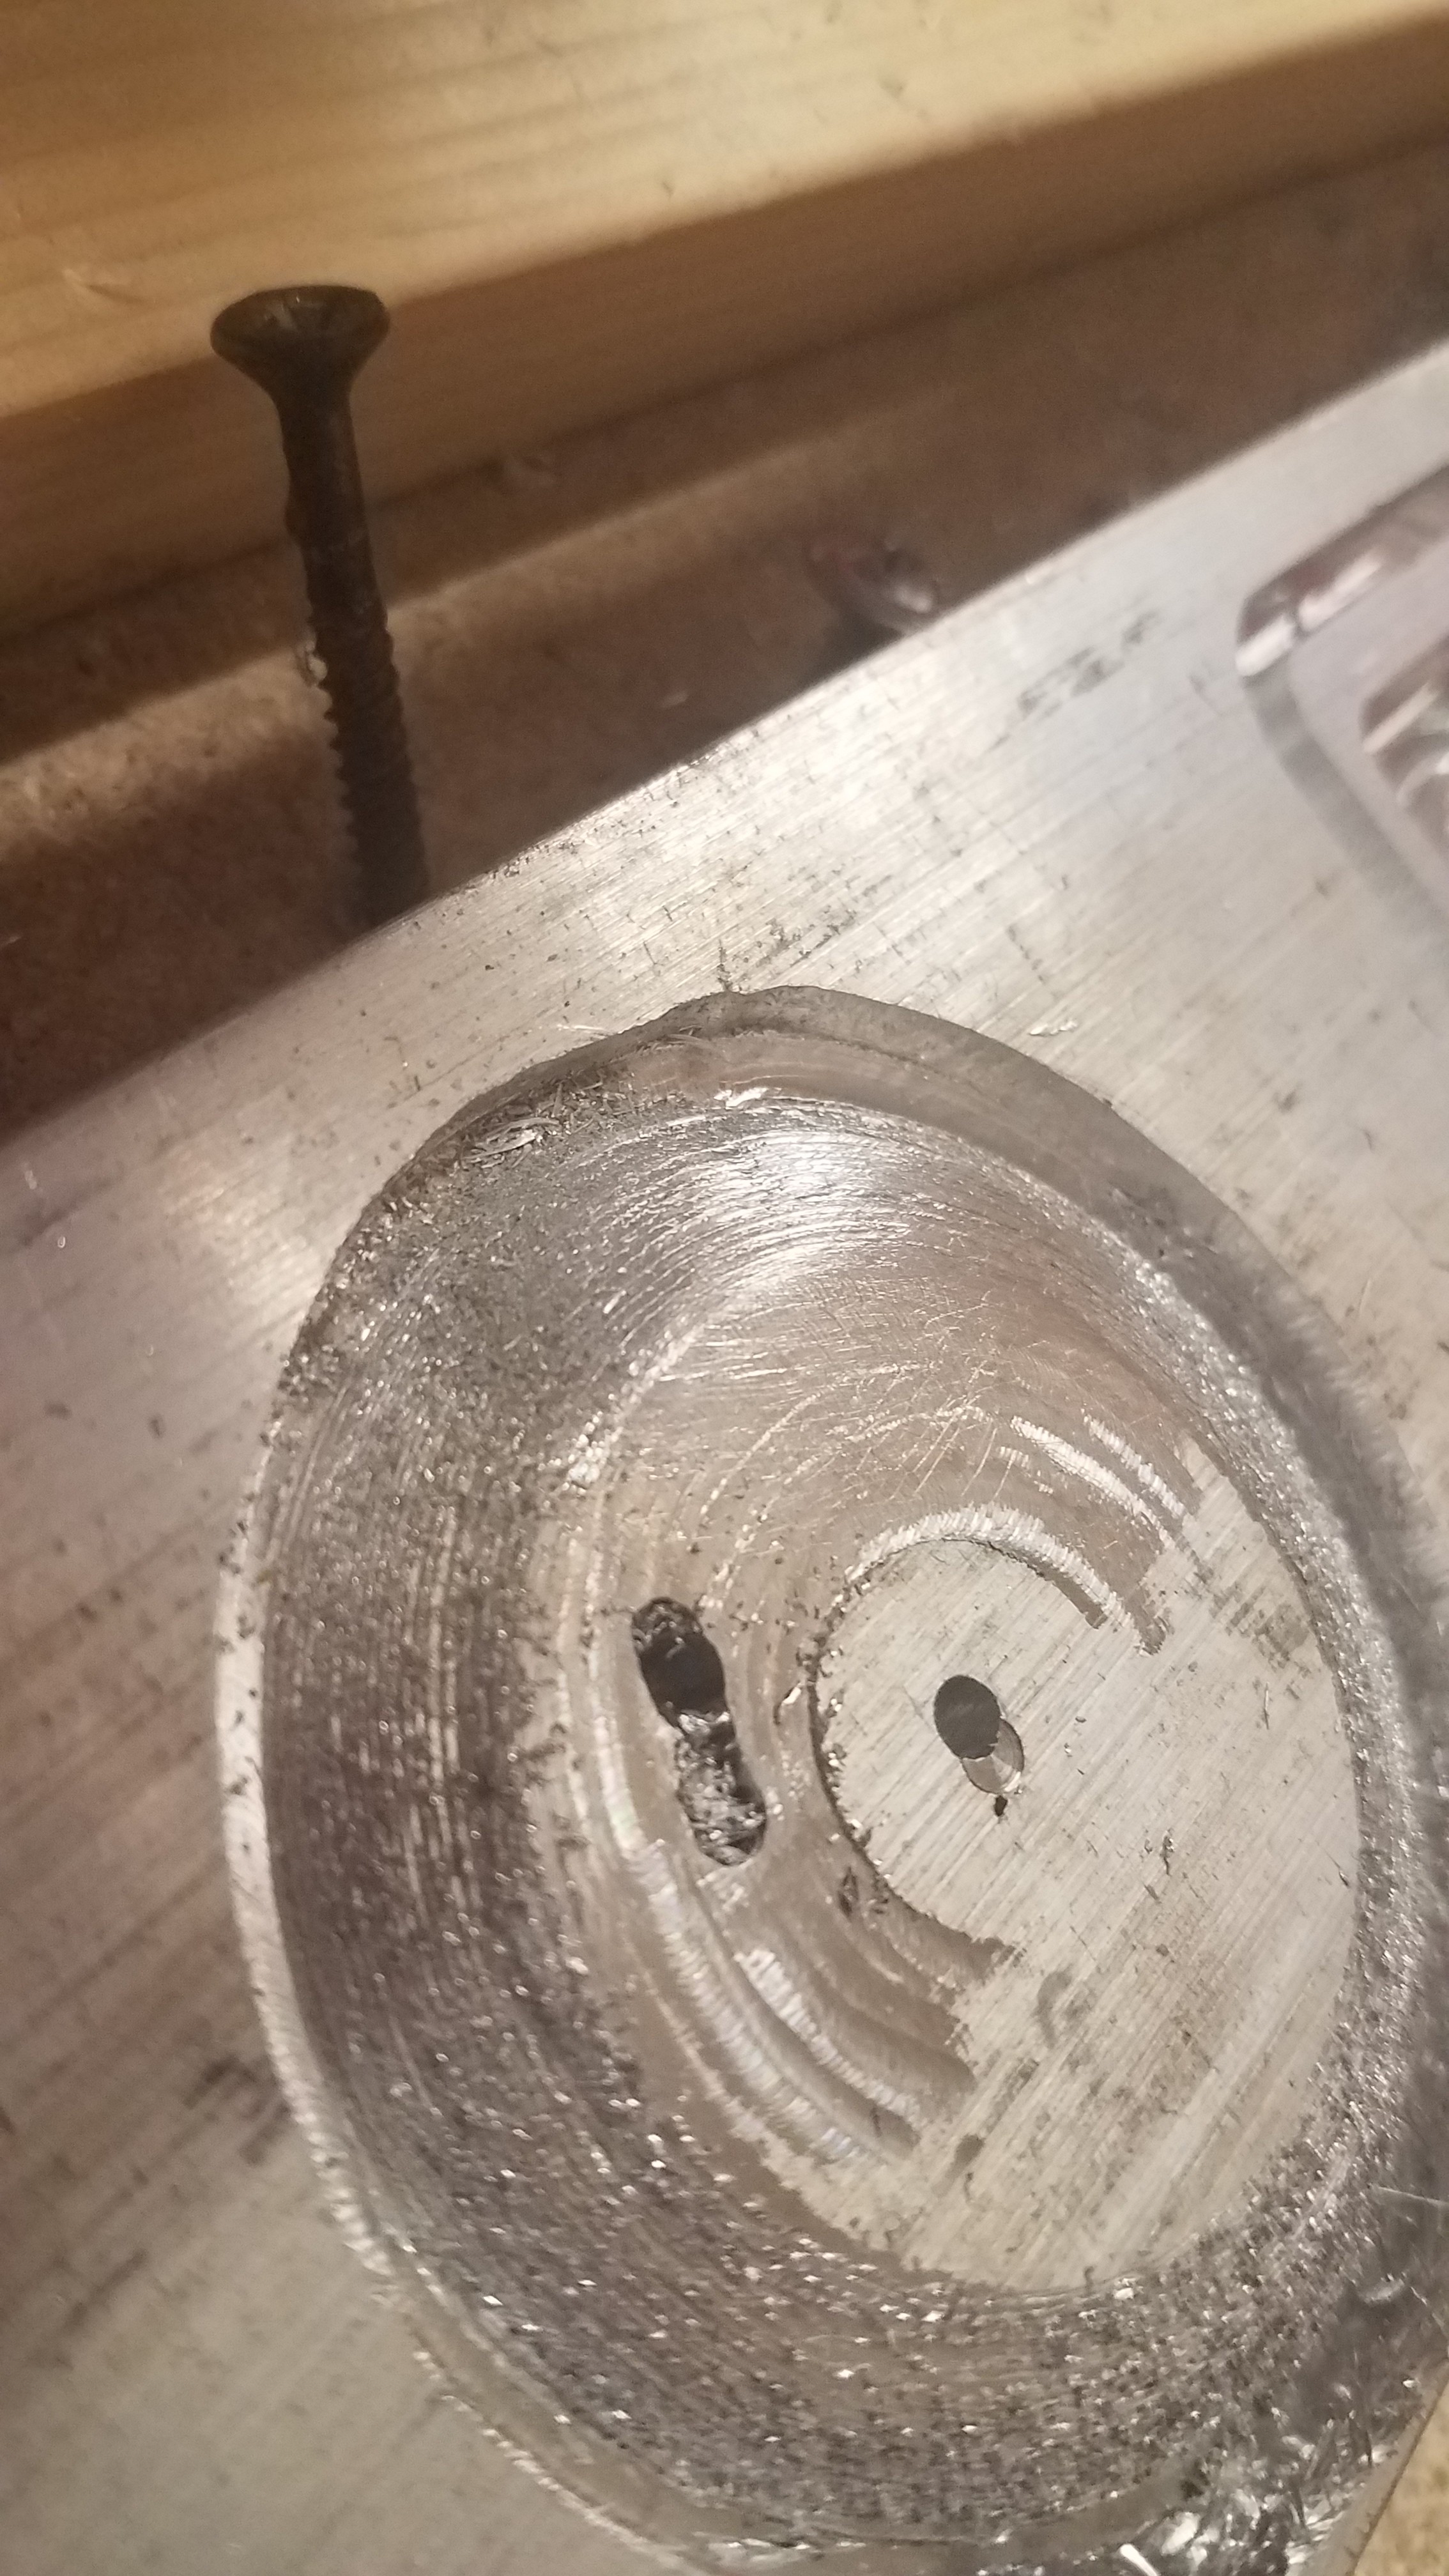
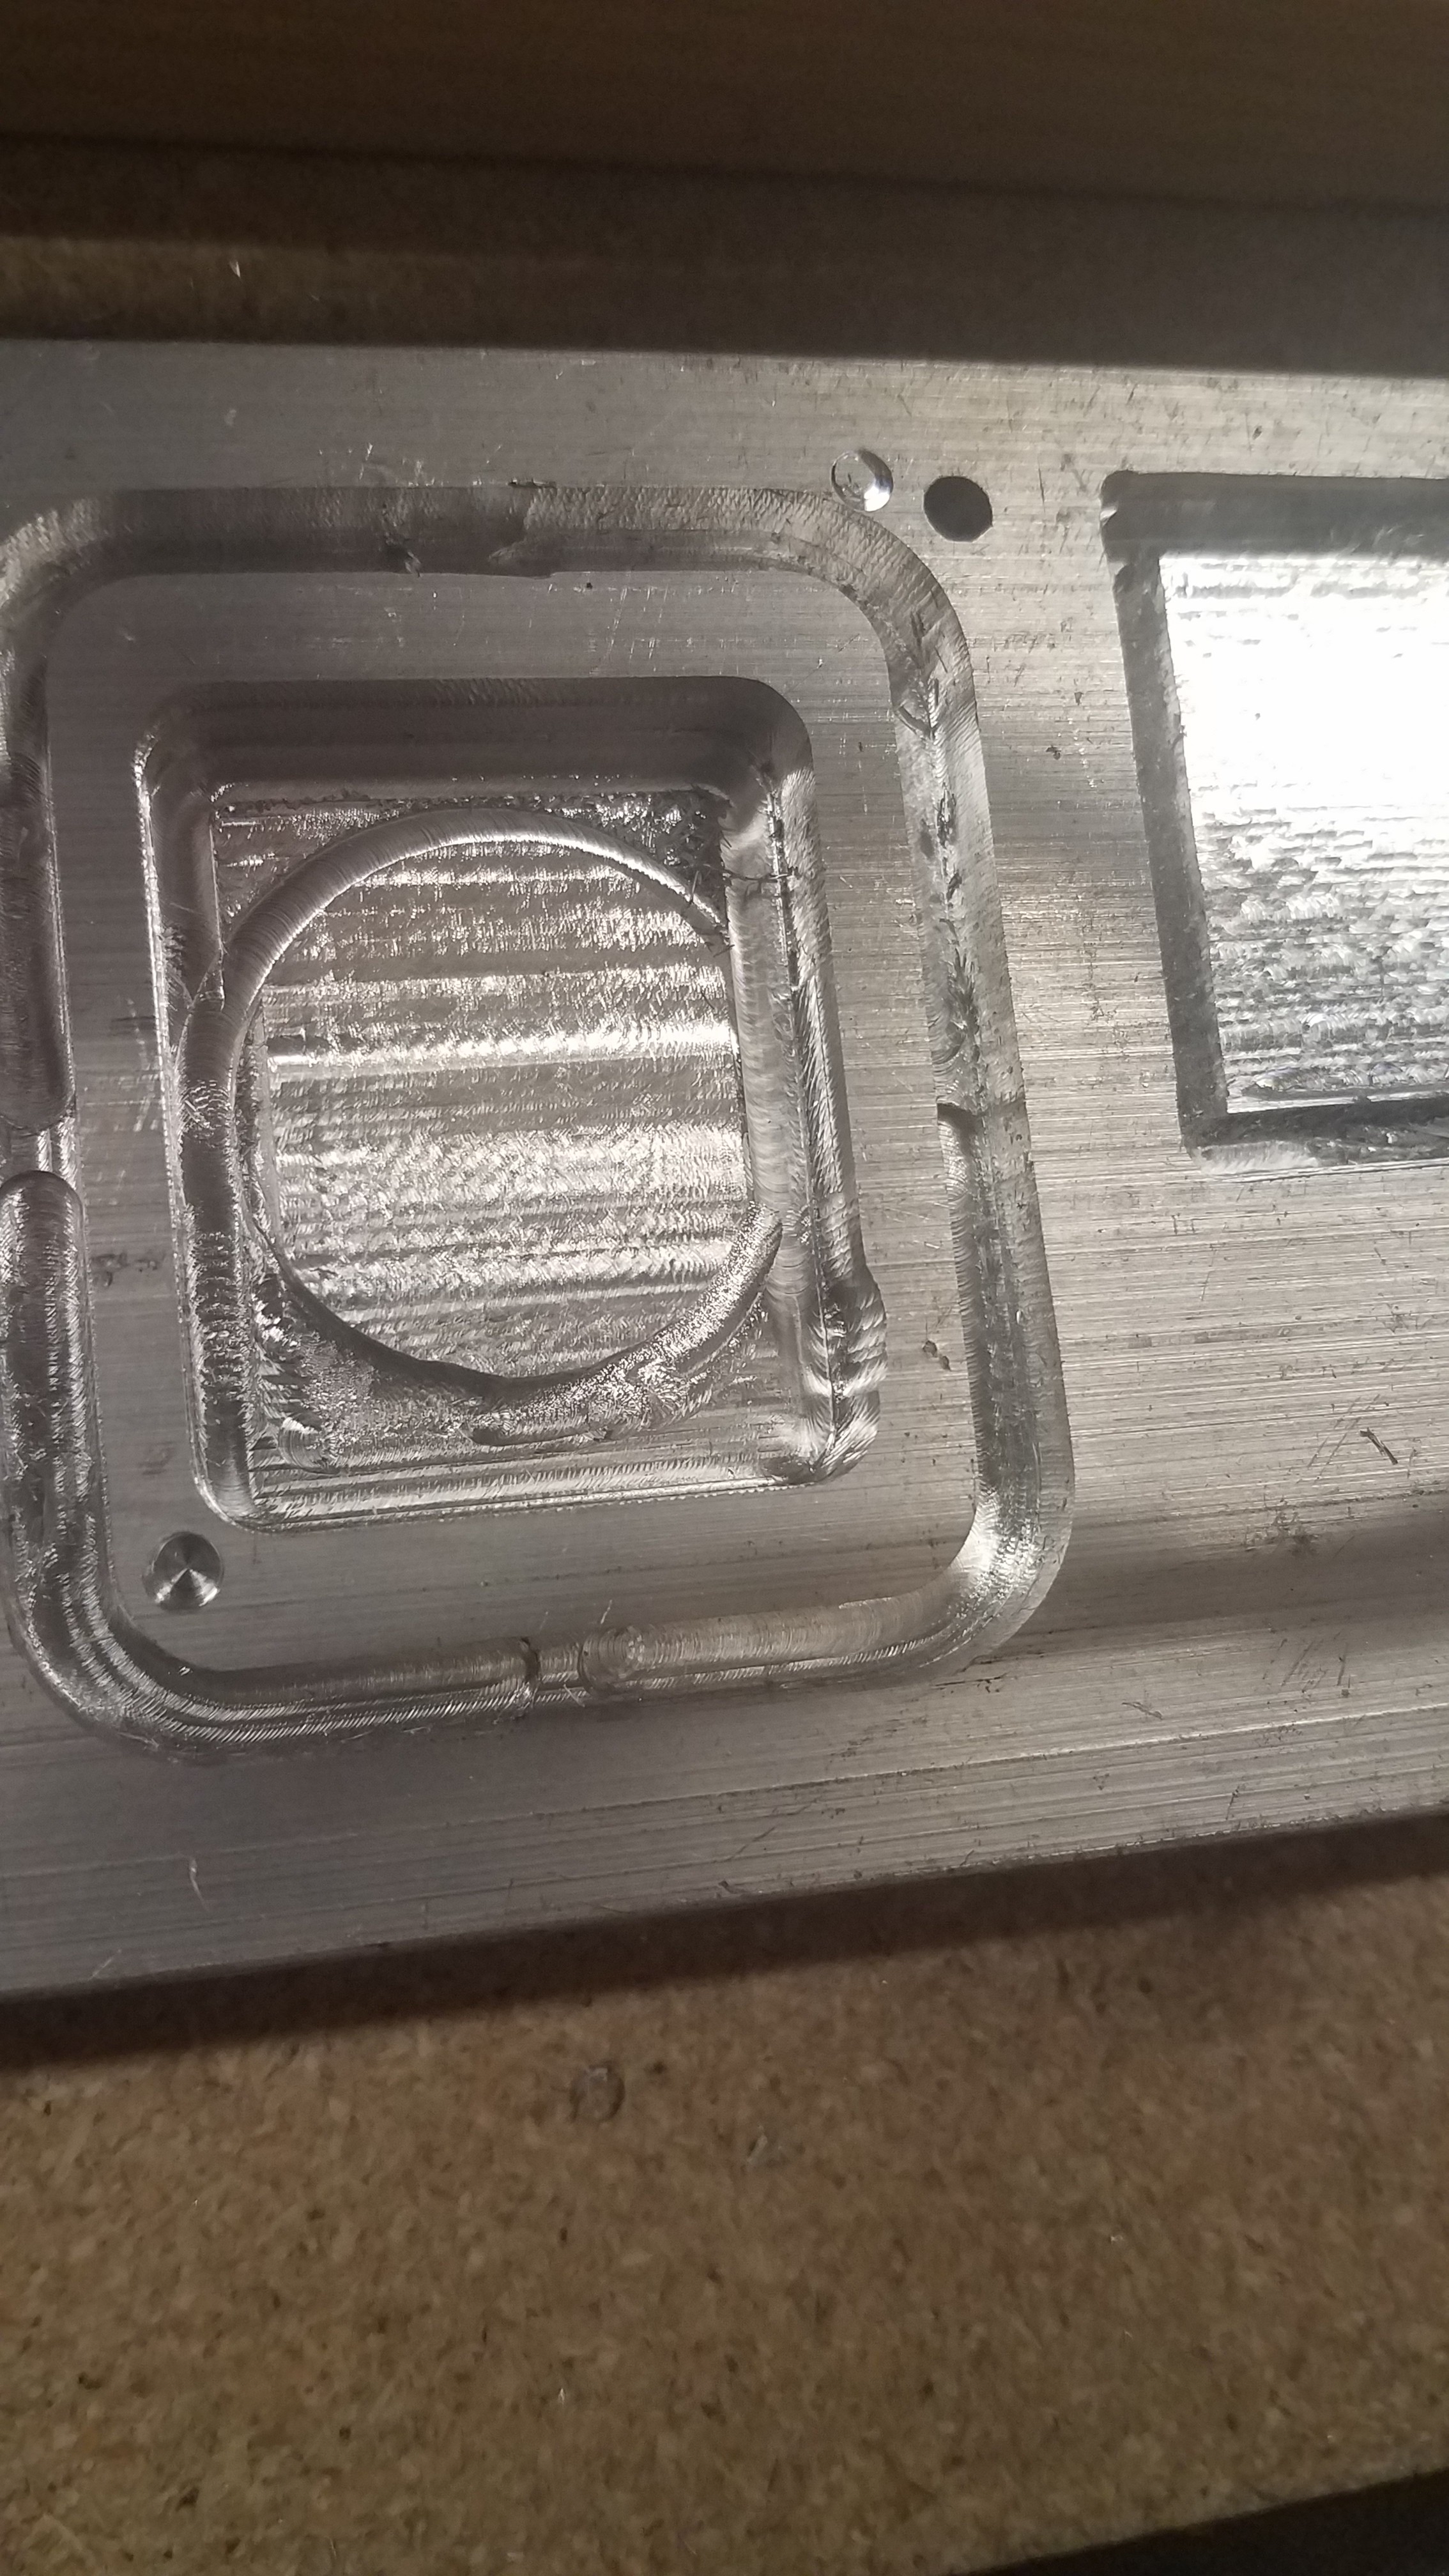
Since my ultimate goal here is cutting aluminum and mild steel, I went ahead and threw a block of aluminum in after 3 or 4 wood cuts. Why not? Set up Estlcam using settings I gathered from lionkev’s posts. Loaded a 1/8 single flute and let it RIP! It went through like butter! 3, 4, and 5mm depth cuts. Unbelievable. And I thought this was going to be difficult.

The secret sauce is basically trying to program Estlcam so the end mill is never more than 50% in the material. I can’t say I am very good at it, but I am learning. It is not the easiest software to work with, but there are ways to trick it. And I do need to do some minor G Code editing prior to cutting.

Anyway, the only problems I am having so far is a loss of communication with Repetier Host during deep cuts. It doesn’t happen with wood, but drops out when doing Toroidial cuts 4mm or deeper. I assume it is some kind of vibration or electric interference. I have not spent much time troubleshooting yet.

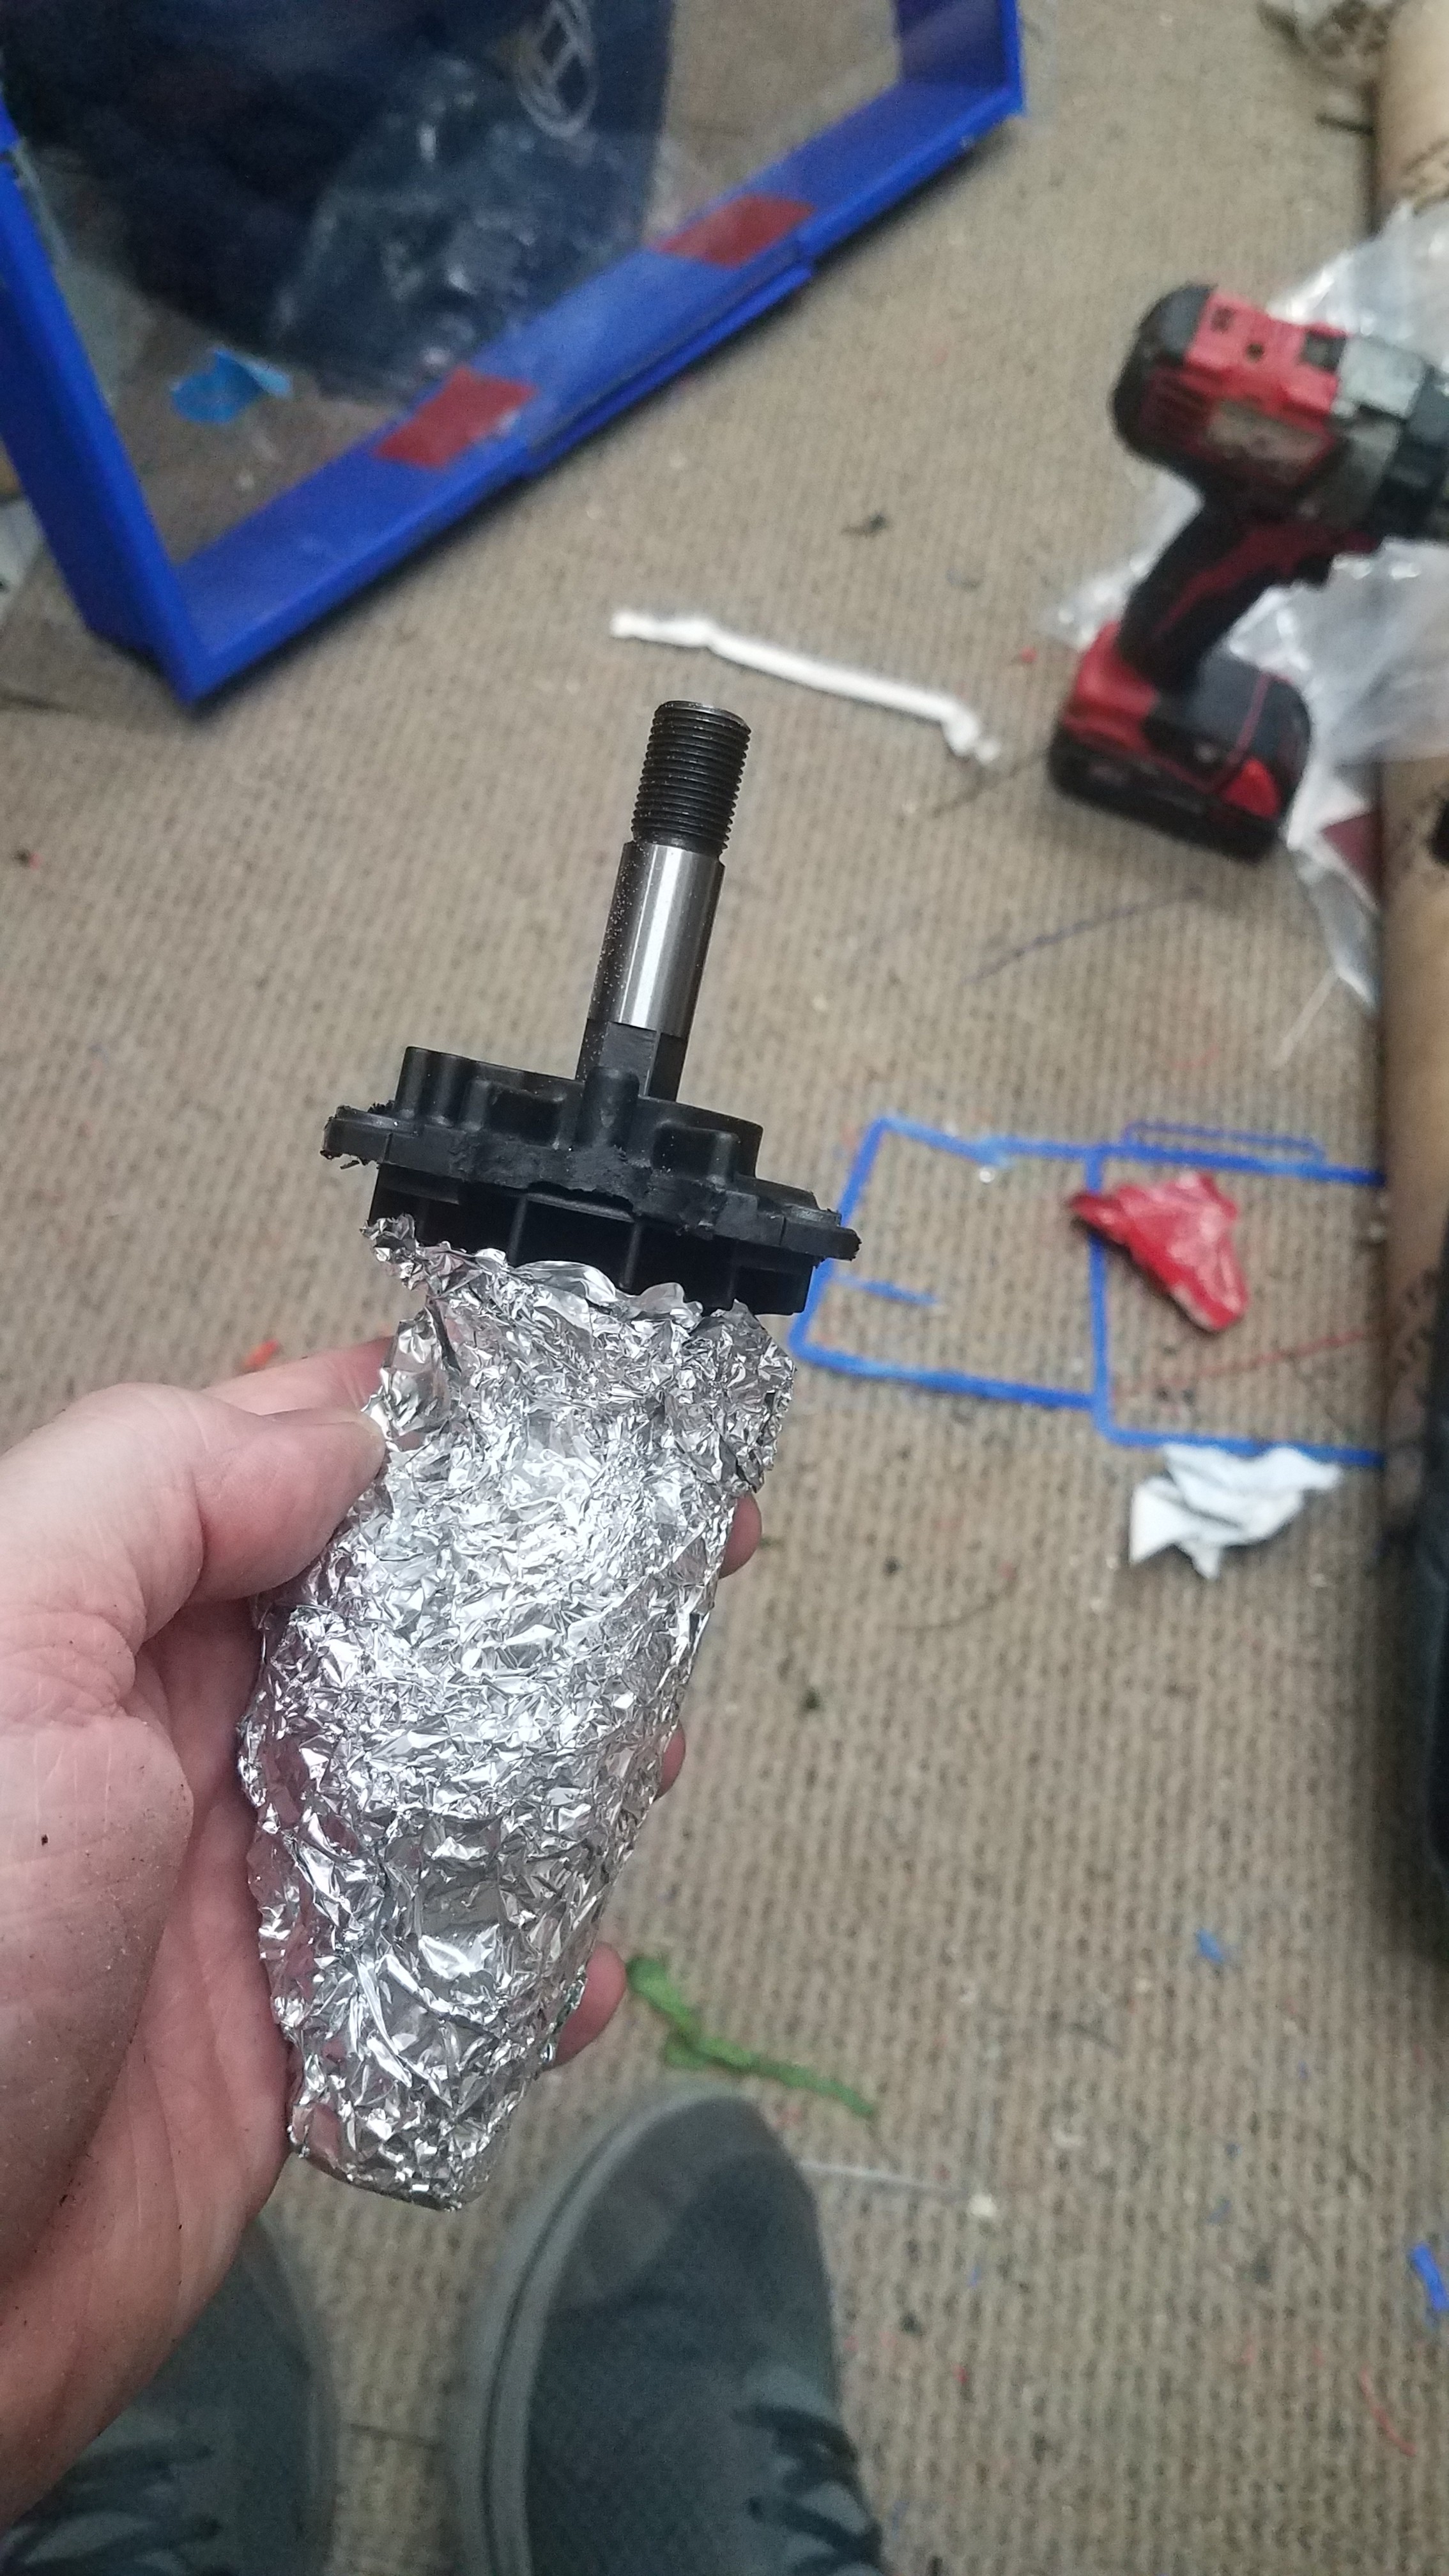
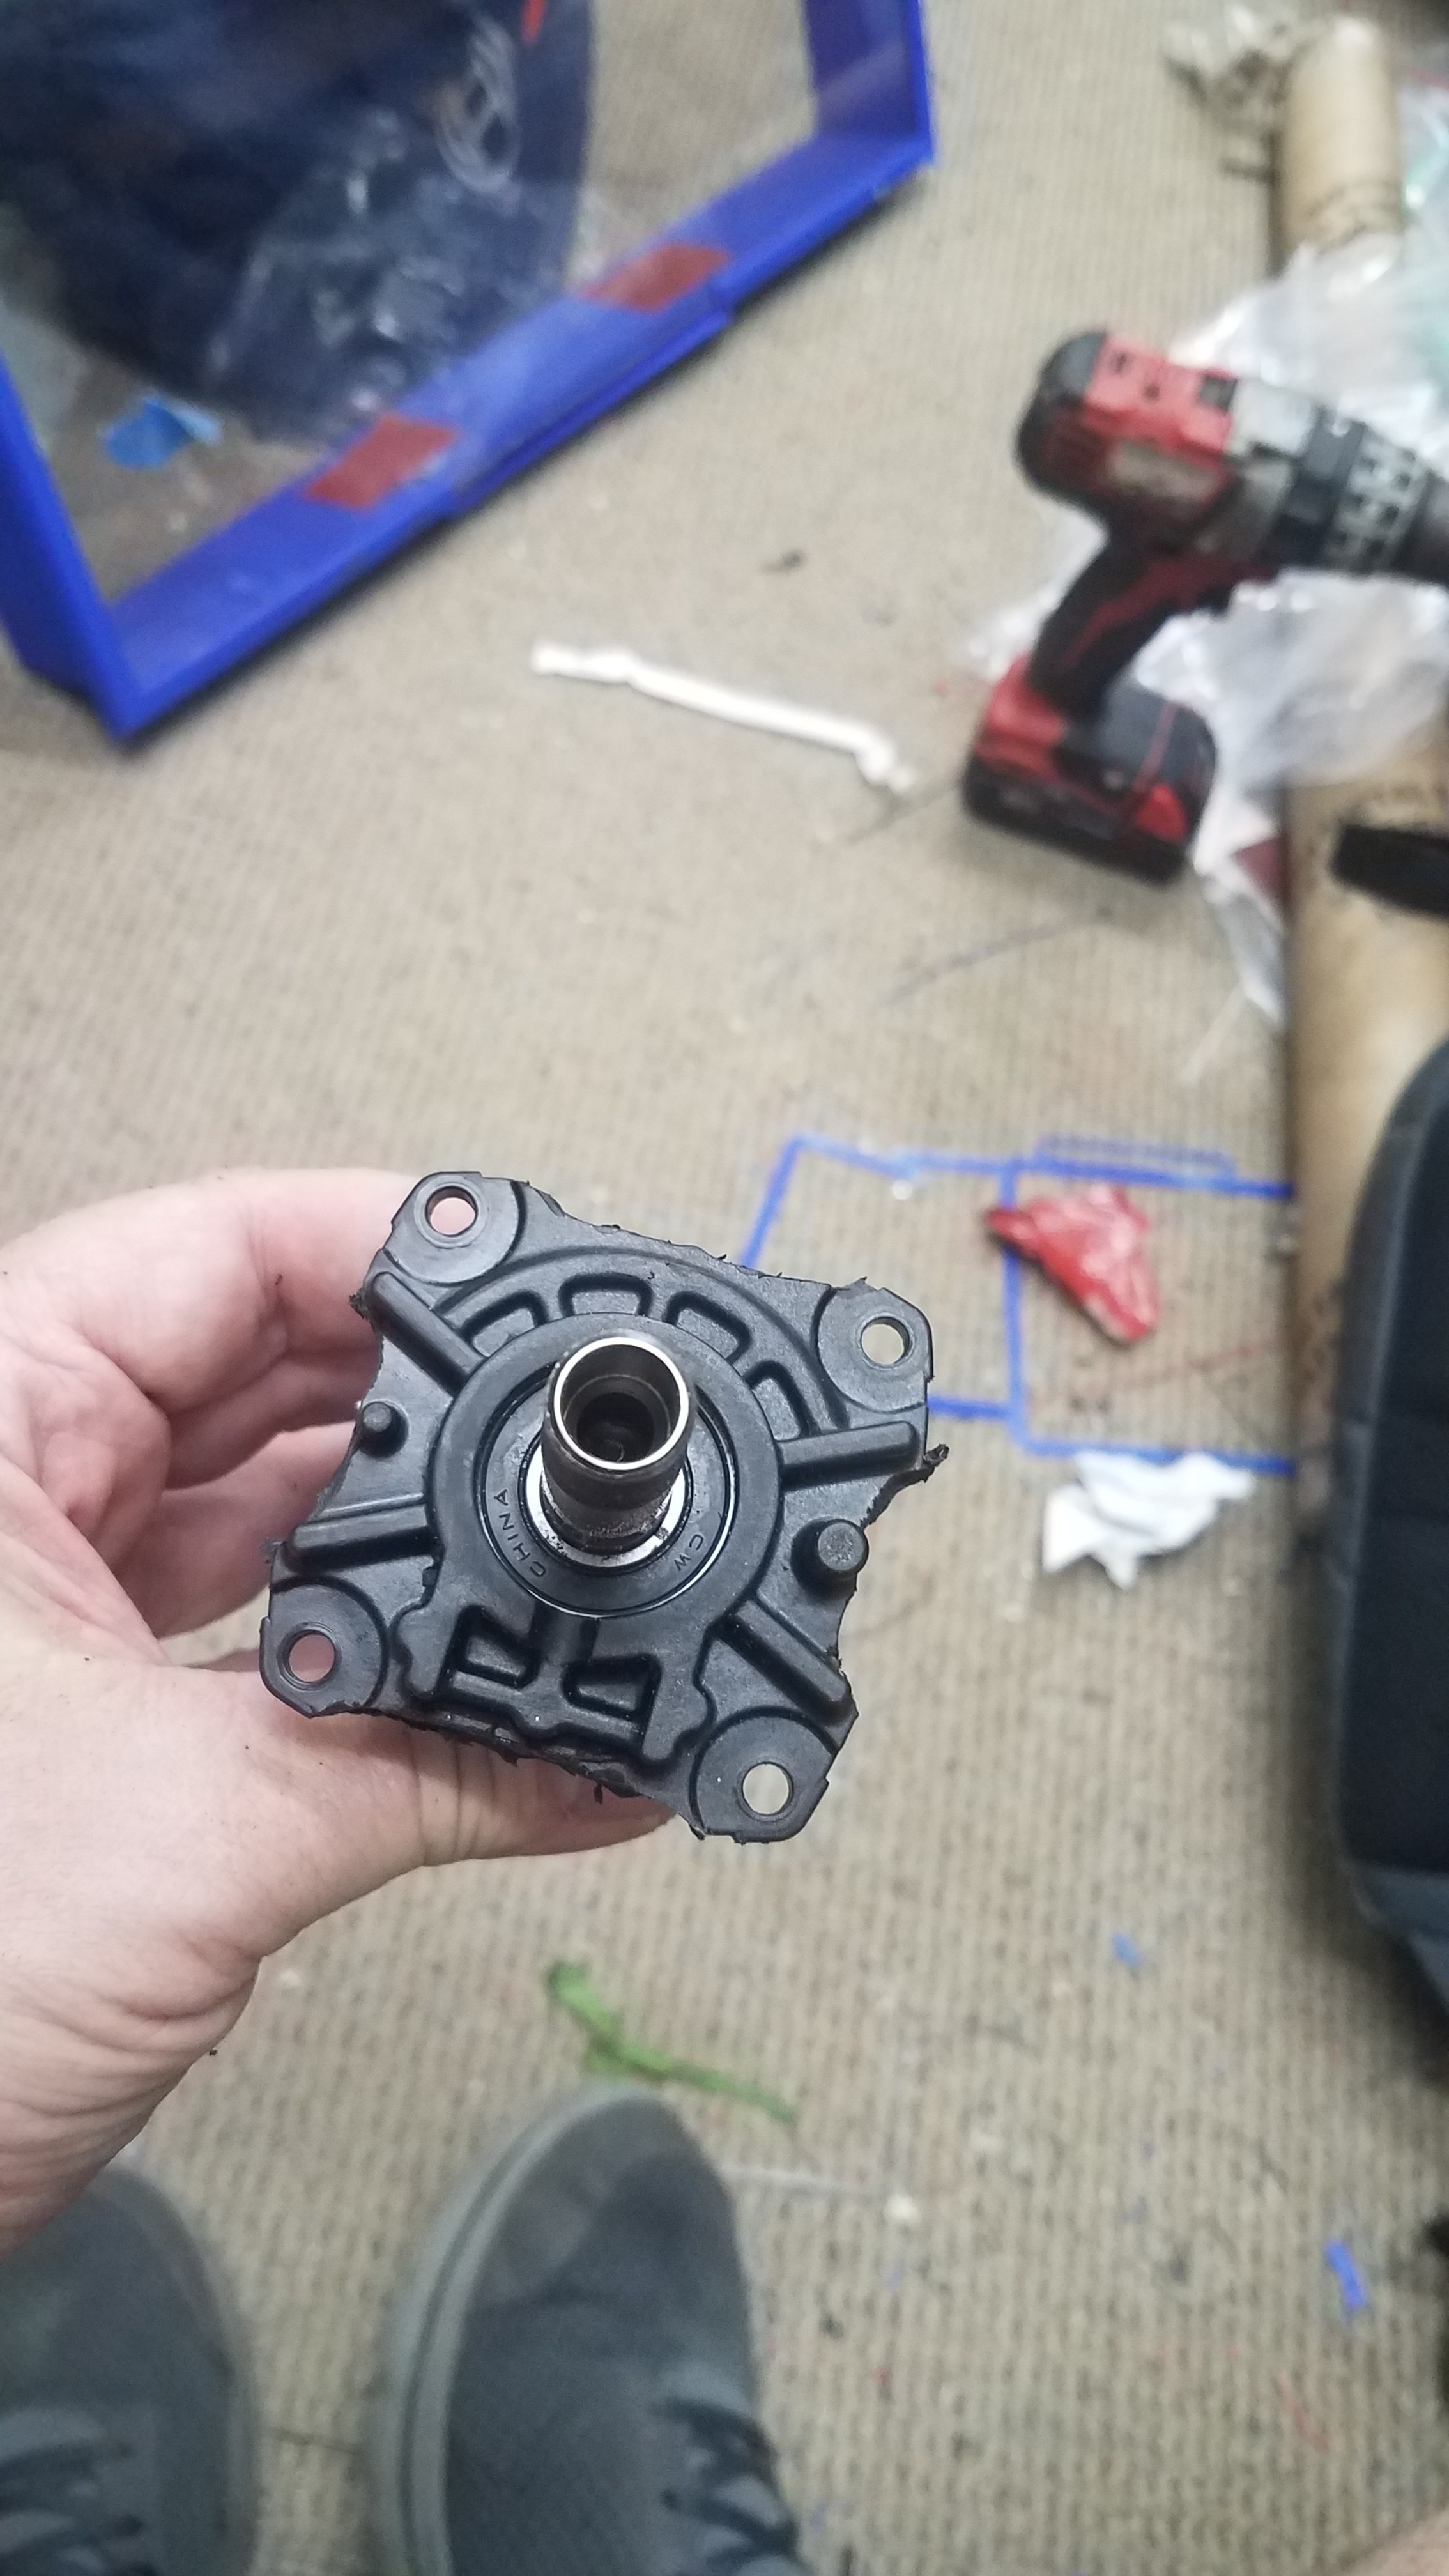
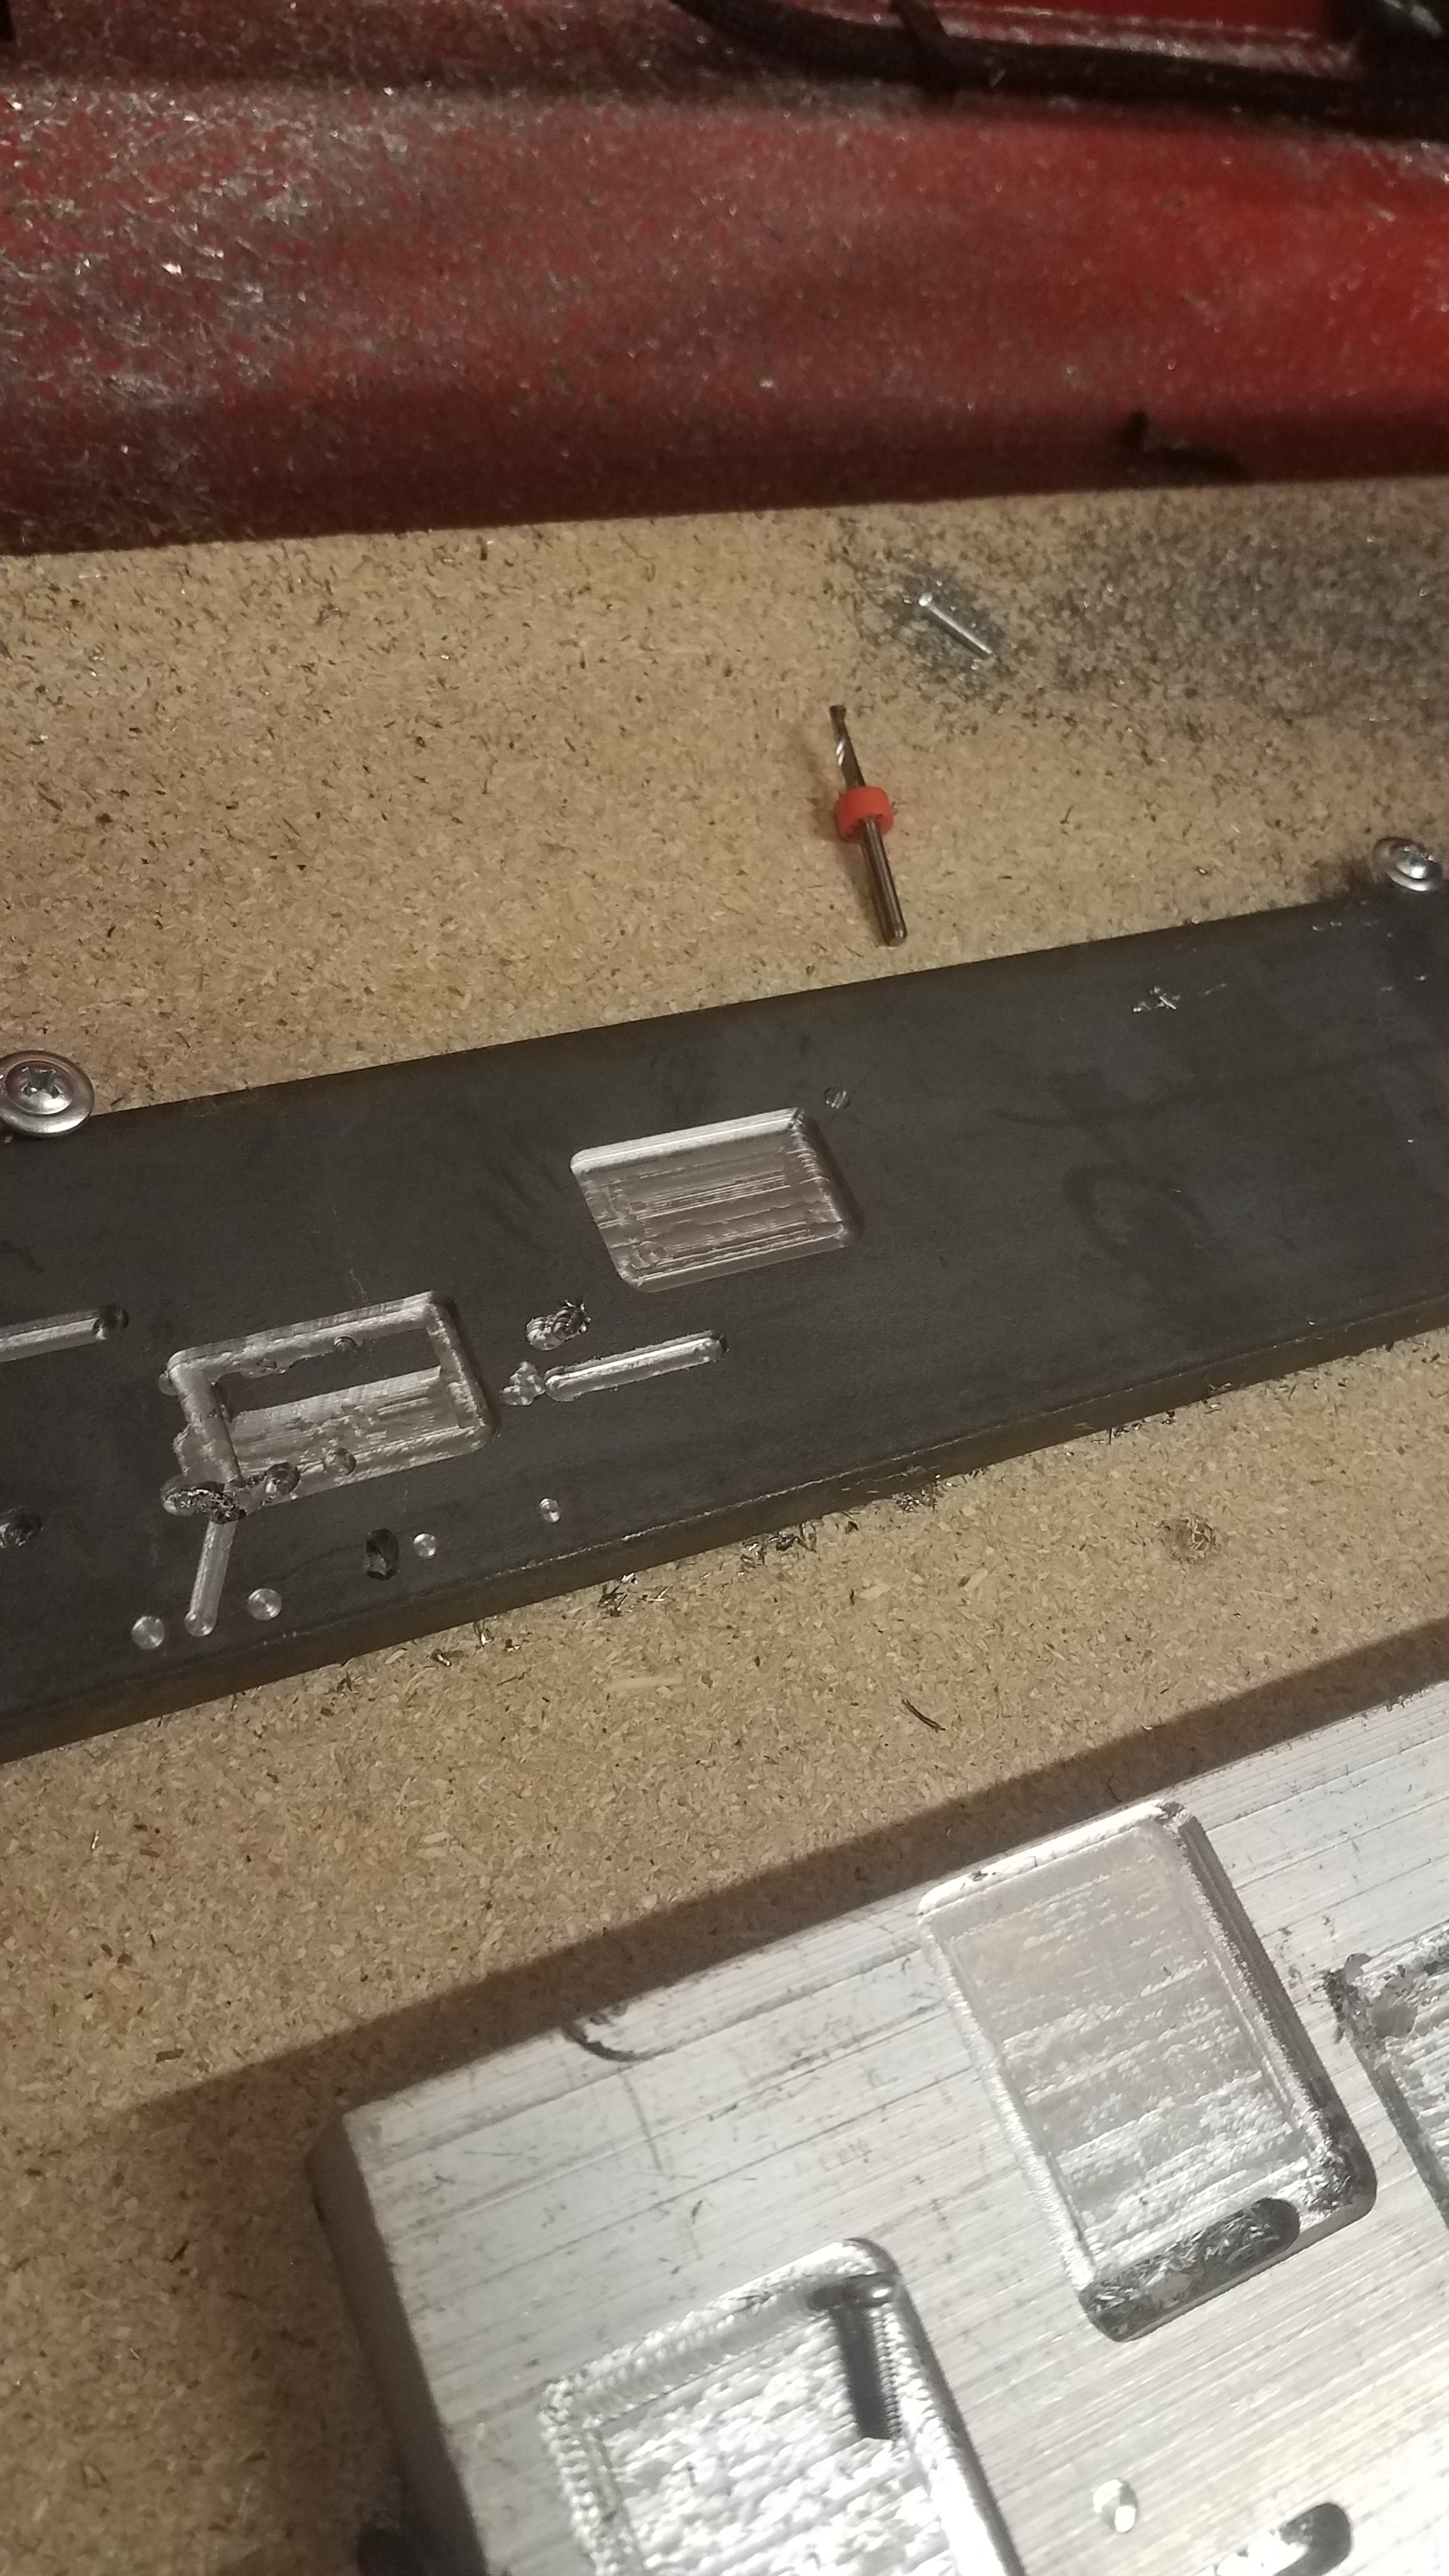
And for my contribution back to the community I found a nice trick to keep the cutting area clear of debris. I noticed the Dewalt 660 blows a tremendous amount of cooling air. I disassembled the head and ground out some cooling ports in the plastic bearing holder to allow the air to flow down through the collet hole. I then taped off the side cooling holes. Some of the air still escapes around the shaft lock button so I added a little tape there also but still allows the button to be pushed. The air blows around the bit keeping everything cool and clear. I shelved my plans for a air purge system.

4 Likes

Since it has 2motors for each X abd Y, you can engage the motors in a square position and it will hold it square. You can install some clamps to give you a repeatable reference, or use dual endstops firmware to square it on a home cycle.

Great post. Welcome!

1 Like

Feel free to post some pix in the Off Topic section. :smile:

2 Likes

Yes I plan on adding the end stops later. I do not fully understand how to set them up yet. Is there a good instruction sequence on how to install and calibrate?
I just discovered how to get Estlcam to cut a 3d profile and a few more ways to trick it. I think my first project will be some aluminum spring top hats. Looks like I can get them done with 3 programs and 1 setup change. I will try to pop one out of wood first of course to prove the concept. No doubt the machine can handle it. This thing is amazing.

1 Like

You can see some of my projects on our Facebook page.

Good stuff! I do like vintage racing, if I could pick one race to see it would be the biennial vintage race in Monaco. Don’t know if they still do it but years ago I rode up to Loudon NH for a vintage car and motorcycle weekend, had something for everyone.

https://docs.v1engineering.com/electronics/dual-endstops/

Sounds like you’re climbing that learning curve.

1 Like

As an update, I seemed to have solved my dropped communication problem. Routing the router power cable separate from the motor wiring and out the back of the machine did the trick.

After a few hours of aluminum test cuts, everything loosened up considerably and there was visible movement of the core during cuts. I disassembled the entire machine and tightened everything up making sure that all the bearings had full contact. The cuts look much cleaner now and I cannot detect any unwanted flex.

I tried a 3d profile in aluminum and that turned out ok. Think of a small 2" diameter x 1/4" high dome. It smoothed out with a little 100 grit sandpaper. I am curious just how smooth a finish I can produce.

1 Like

Acomplished my first pocket cut in steel! I backed down the feed until it made chips and then increased steppover to get the chips bigger. So far only 2mm depth. Not sure what type steel it is, looks cold rolled and almost no rust from sitting in my shop for years in the Florida humidity. Definitely trickier than aluminum. Every crash resulted in a dull bit. But once I got the recipe right, it was really smooth and didnt seem like it was loading up the machine that much.

Here are some pics of my aluminum and steel samples. Just trying to get my confidence up to start some production parts. Nothing planned in steel for now, but damn that is seductive.

5 Likes

Can I mention again this is by far the coolest thing in my garage! I am obsessed with it. The potential is amazing. I am cutting nice profiles in aluminum now and will post results soon. Just wish I had more time to dial it in for speed. Again I will say for newbies, the programming is much more of a limitation than the machine. So if you are going to challenge this machine with complicated metal designs, better plan for many trials. Eventually I will post what I have had success with, but I still have many runs to optimize.

1 Like

Thanks for all the kind words and the excitement you are conveying is rad!

On my end I never know which part will be the hard part for someone, assembly, programming, firmware. Everyone has the learning curve to climb, just never know which curve it will be.

When you do go for endstops it isn’t all that hard, we can get you through it for sure. I bet a quick rebuild at that time will get you way more square than 5mm. Just one step at a time through the instructions, and the second time around it usually works very well. The adjustments are very subtle. Seems to be working great for you, and it only gets better with experience.

IMHO you have made the hardware and firmware wonderfully simple with clear easy to follow instructions. Combined with ability to purchase all the components from your website makes this it available to just about anyone. And if you are just cutting simple flat pattern shapes and pockets, the software is not to difficult to master. I have already gone way overboard with multi-setup 3d shapes with masked sections.

3 Likes

Are you still using the Dewalt tool for the milling? What bit are you using for the AL as well?
One of the end goals for my current build is to cut/mill out aluminum parts and I’m trying to take in as much info as I can. I still have a ways to go before my MPCNC comes to life, but I’d rather buy the correct parts the first time around! :grin:

That’s the brilliance of the project though, everyone has different backgrounds so almost everyone will have some obstacle to overcome. You’ve done a great job laying everything out from A to Z, so there is plenty of information to fall back on. That’s the big reason that I decided to give this design a shot, I’m terrible at everything so I’m learning a LOT :rofl:

1 Like

Standard Dewalt with the internal mod I outlined above to blow away chips. 1/8 single flute end mills are all I have used to date and is your #1 go-to tool. Buy mutiple. Once I install end stops I plan to try ball mills for some nice radiused corners. I am really interested in trying some threading with a dove tail some day.

After I built the machine, I checked the +/- directions were correct, starting cutting wood, then ran some aluminum all within an hour. I’ve had a few crashes, but never broken a bit yet. Just follow all the directions, I did plenty of things backwards on assembly but it is quite easy to break it all down and start over if required.

Just let me know when you are ready to hit aluminum and I will post my latest settings. They are still changing so no use posting at this point. I plan to post a comprehensive setting chart someday so people don’t have to dig around on the Forum. But I am not even close to where I want to be.

I will keep trying to list my lessons learned on this thread. Two more I just thought of after thinking about broken bits:

  1. Before starting any program I always disconnect from the software, unplug the USB, plug in USB, and reconnect. Depending on how I shut down the last program it will sometime want to crash as soon as I start a new program. Almost started a fire 1 time when the Z drove straight down. No problems since I started following this procedure.
  2. I am always careful when starting the router. If the Z motor is not energized or I am not holding the coupling, the vibration from the router will allow the Z axis rod to free spin and drill straight through what ever is below it, quickly.
3 Likes

Grrr. I spent probably 6 or 7 hours dialing in my aluminum settings, speeding up, slowing down, more step, less step, only to end up where I started. Then i noticed my pockets were all odd shaped and found huge flex in the NW/SE quadrants. Screws had loosened in the tool holder and 1 of the brackets had a crack. Now I dont trust any of my work and will start over all the trials trying to get the most speed out of this thing. Will reassemble with lock-tite and seriously thinking about aluminum tool holders.

1 Like

I think almost as important is the community that he’s fostered here (and even over on the book of feaces). We’ve got a bunch of well-intentioned, overly-educated (both schoolin’ and in various real-world situationals) folks who are willing to share ideas, give and accept honest criticism and comment, and are patient enough to help people who come in from the rain, even when they’re climbing the same hill that the last 100 folks have been struggling with. And they keep forgetting to purge my login information, to boot! :wink:

3 Likes

Still having some issues with communication loss and program stop. I replaced the USB cable from the control board to computer with a longer one so I could move the laptop where I wanted it and it dropped out within a couple minutes. I went back to the short cable, maybe 24in, and it finished out. But when I ran a part in the SE quadrant of my bed, which is closest to the control board it dropped again. Anyone know how to shield this stuff?

USB cables should be shielded already, unless you are using a really cheap one.
What is your setup for the electronics? You say you’re using a laptop, but what did that connect to?
Sometimes using a USB port on a laptop can go into power saving mode and drop connection. USB is always handled by the host (your laptop) so I would check out your computer settings and disable it’s option to power down.

2 Likes

Definitely not the laptop software. Normally runs fine for hours most of the time. Laptop is connected to a generic Amazon Ramps board with a short 18" USB that came with the board. It is shielded. The longer cord I purchased may not be.
Something really really weird happened today. Ran it hard for 1.5 hours then stopped to flip the part, loaded a new program, then it would not communicate at all. Unplugged cables, power, rebooted, over and over again. It showed connect in Estlcam, but could not energize the steppers. Then suddenly for no reason it started communicating again. I was thinking bad cable or socket on the board, but could not duplicate. Ran another 1.5 hr program no problem.
Until today it would only lose communication when driving a 6mm+ cut in aluminum near the board/computer. Vibration is not an issue at the board or computer.

That would be my first issue, as there are a lot of fakes on Amazon. Or at least the build as a whole is lower quality than a name-brand build.
You said your laptop is well away from the MPCNC, what about all the other electronics? Where are they placed?
You said you separated the DeWalt power wires from the stepper wires earlier and got better results. If you are only really having issues while cutting metal and deep cuts, I’m thinking this is an issue with EMI.
Make sure your power supply is well suited for the power demands + a good 20%. Current spikes are horrible with stepper motors, and if your system has a brown-out from a sagging power supply, you can have the exact problems you’ve described.
Heat and humidity is also always an enemy of electronics. You might consider a fan blowing across the whole board.