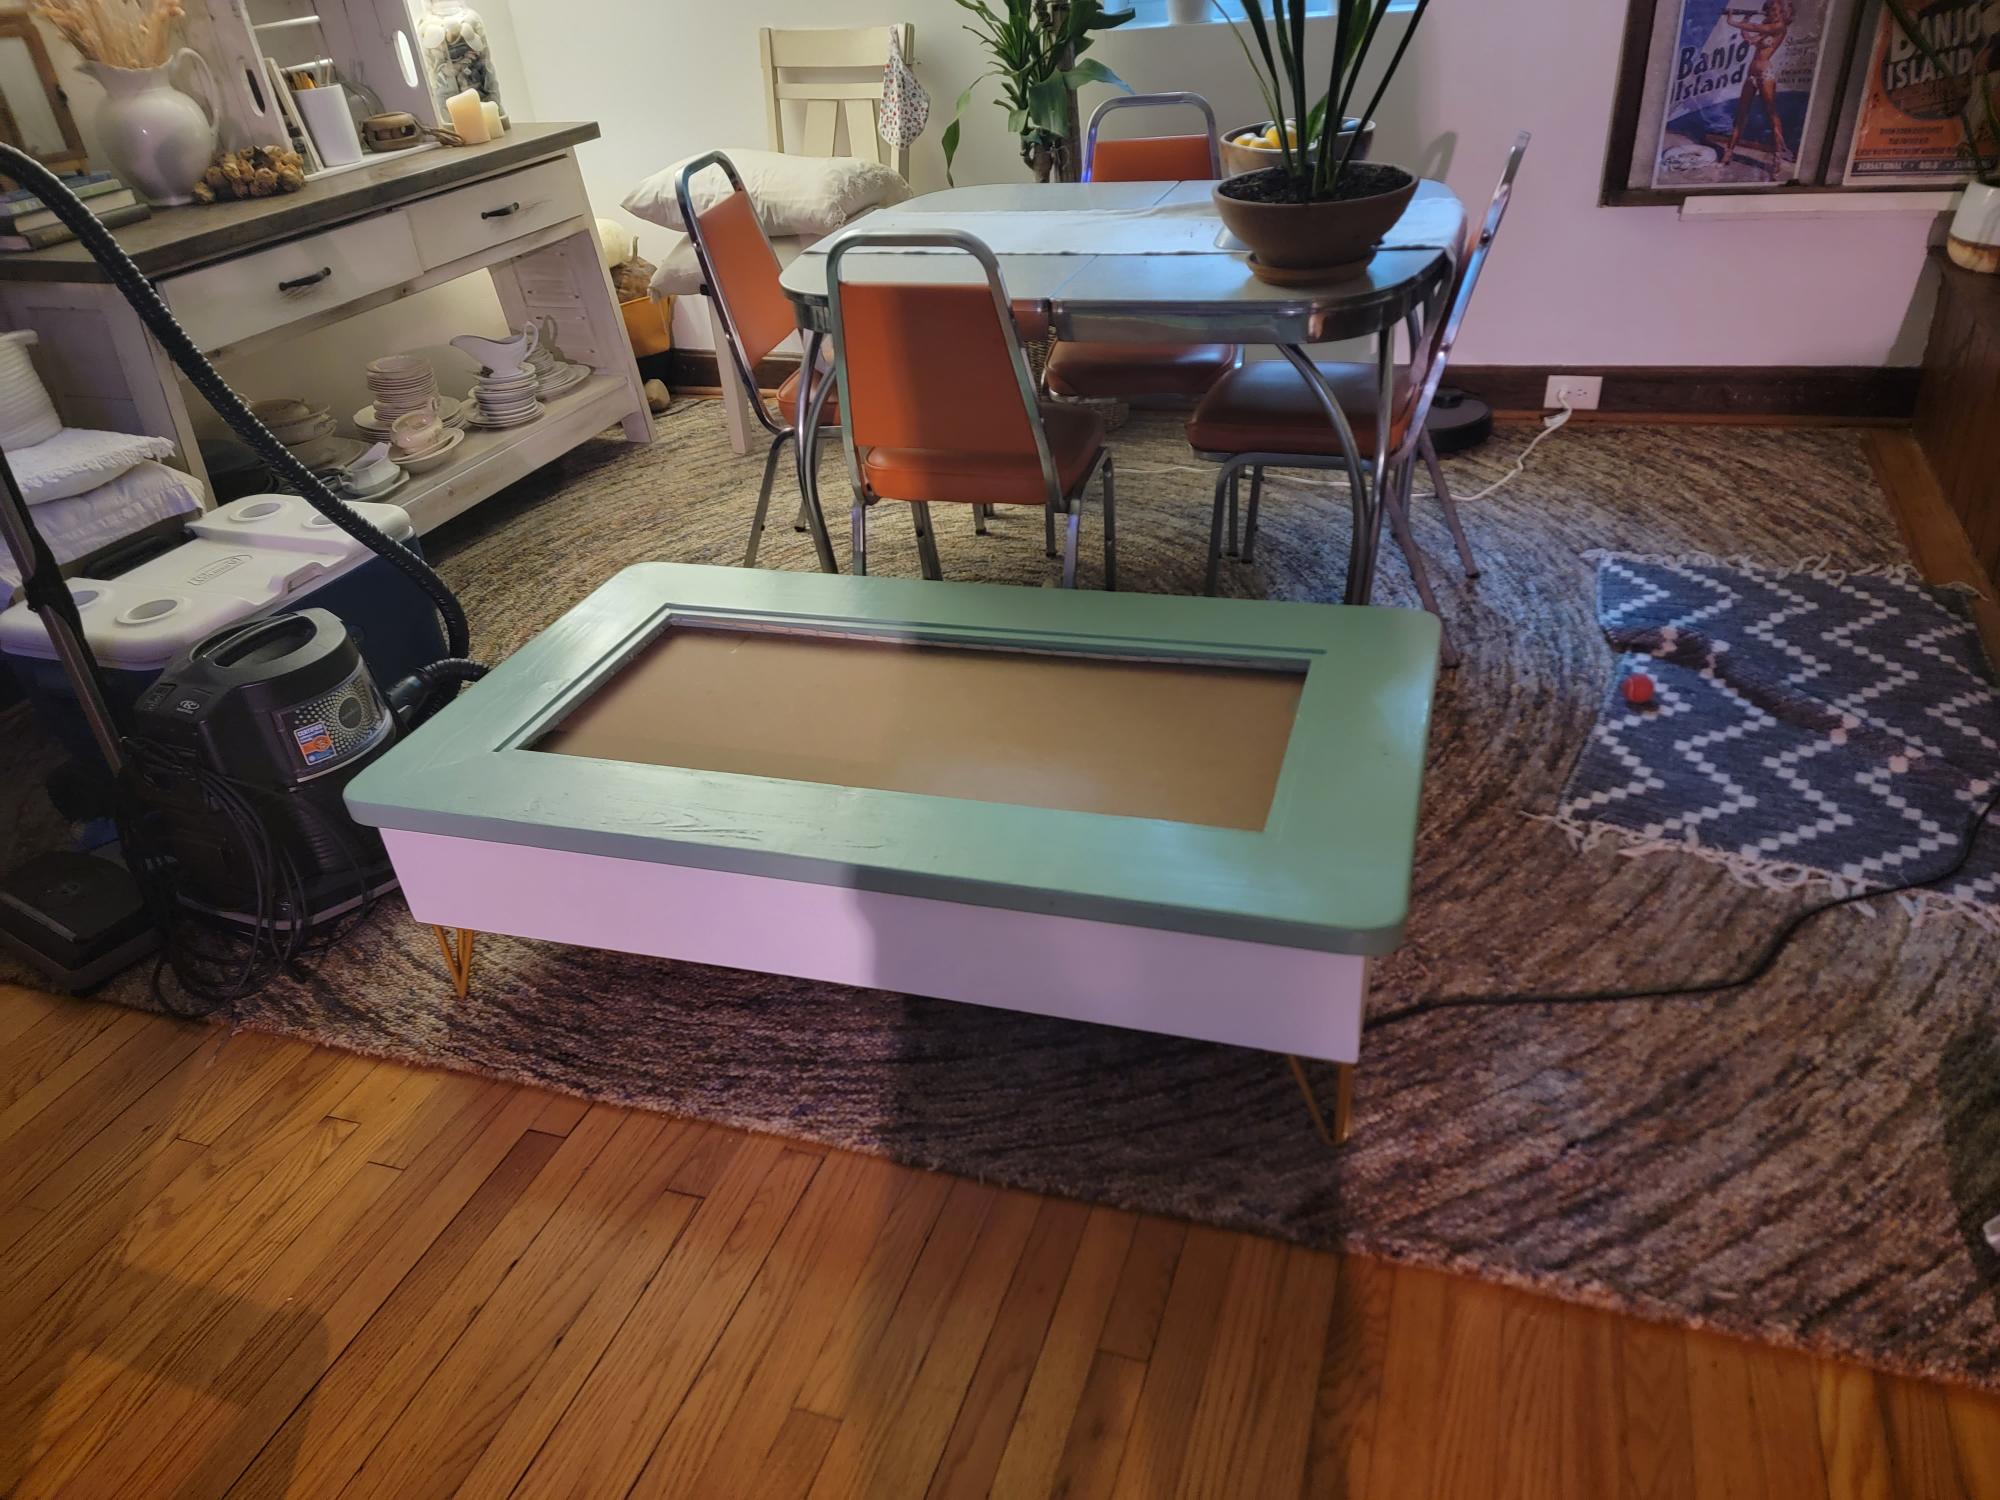
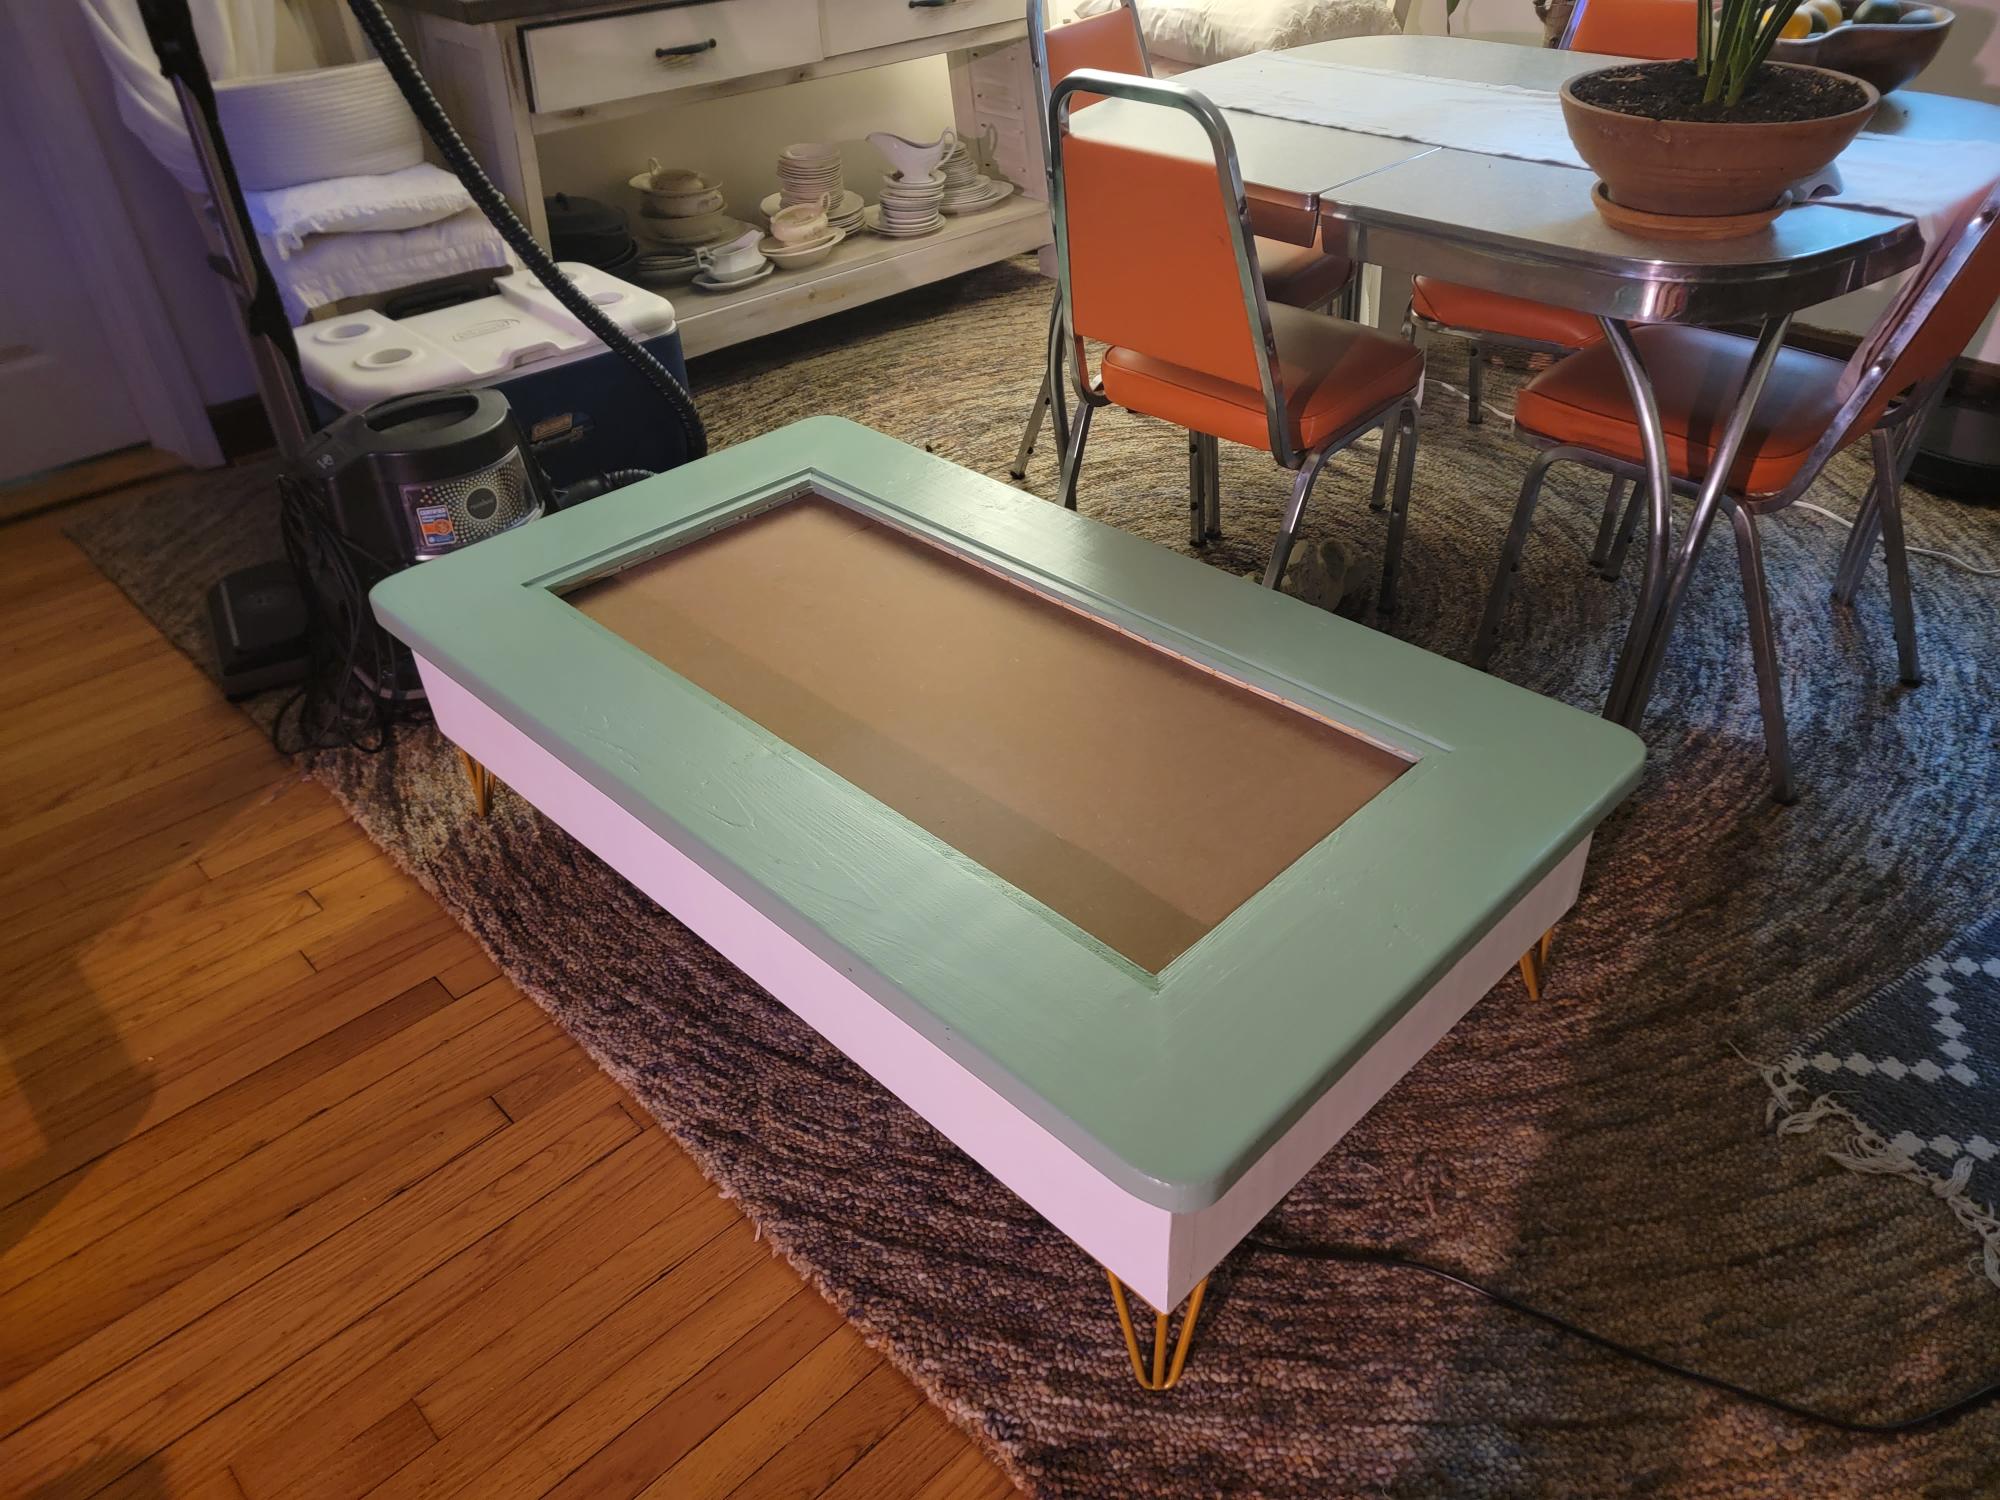
Here is my table.
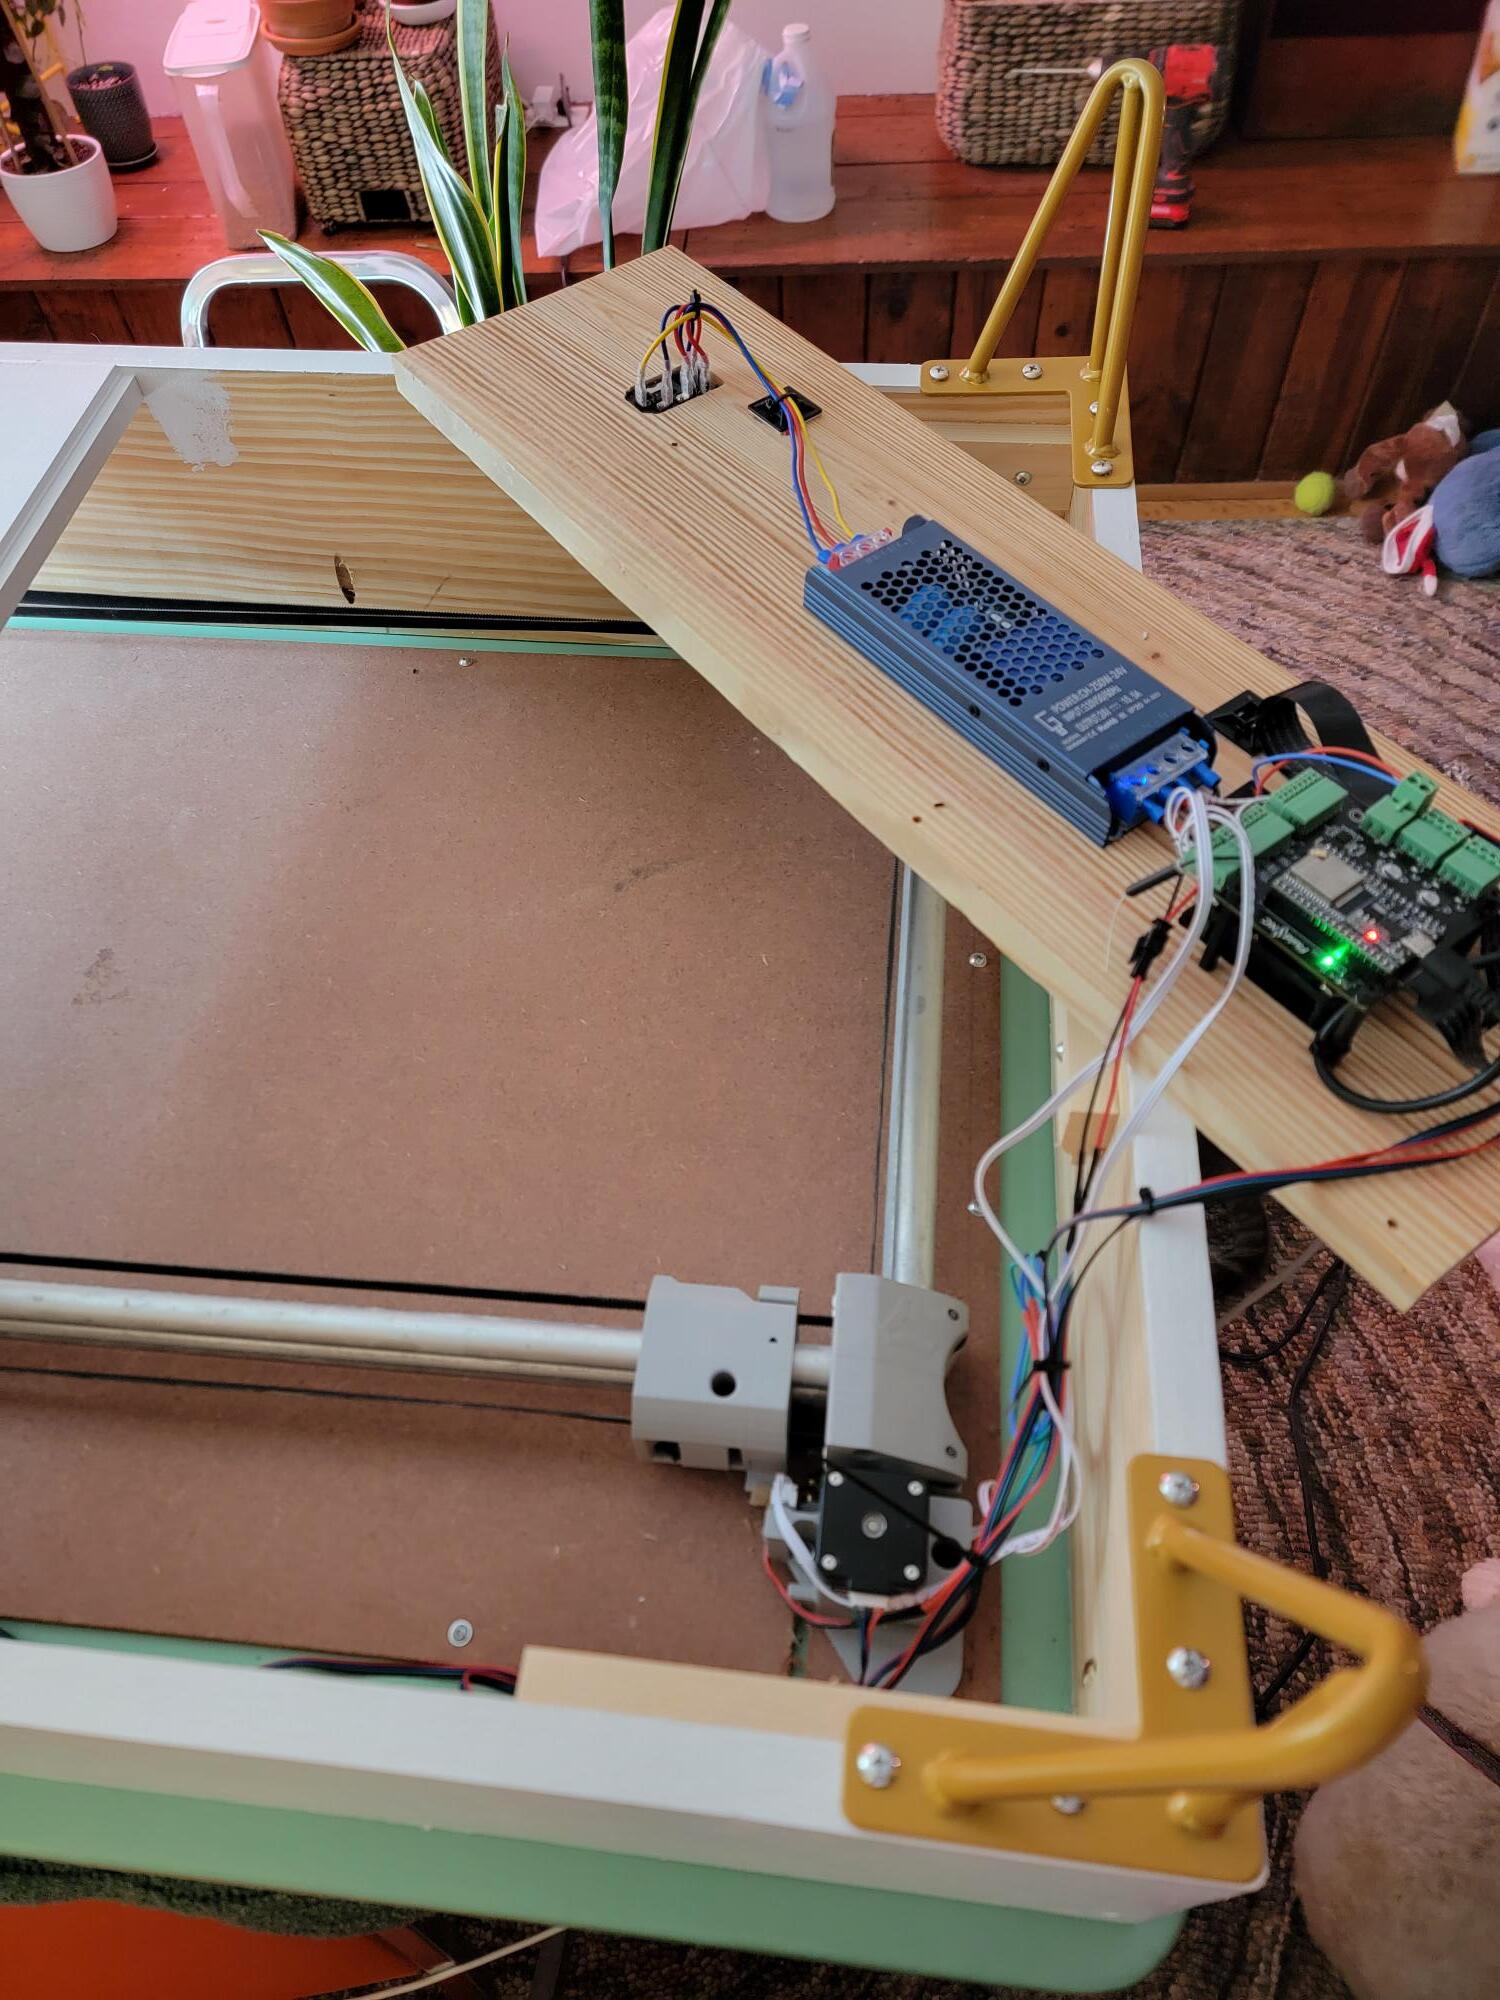
FluidNC 2209 2 axis board, I got mine witht he ESP32 board and antenna - $70
Heat Sinks for the stepper drivers, more for when I had a fan, but they do keep the board cool
https://www.amazon.com/dp/B08PFWMB3J?psc=1&ref=ppx_yo2ov_dt_b_product_details
24v power supply. it is a bit overkill, but I wanted to have something that would last.
https://www.amazon.com/dp/B09MJHCZ28?psc=1&ref=ppx_yo2ov_dt_b_product_details
Steppers - These have plenty of power and are little, set them up at .5a run and .25 hold originally, but the CoreXY needs a little more on the hold, I upped them to .375amp and it seems to be happy.
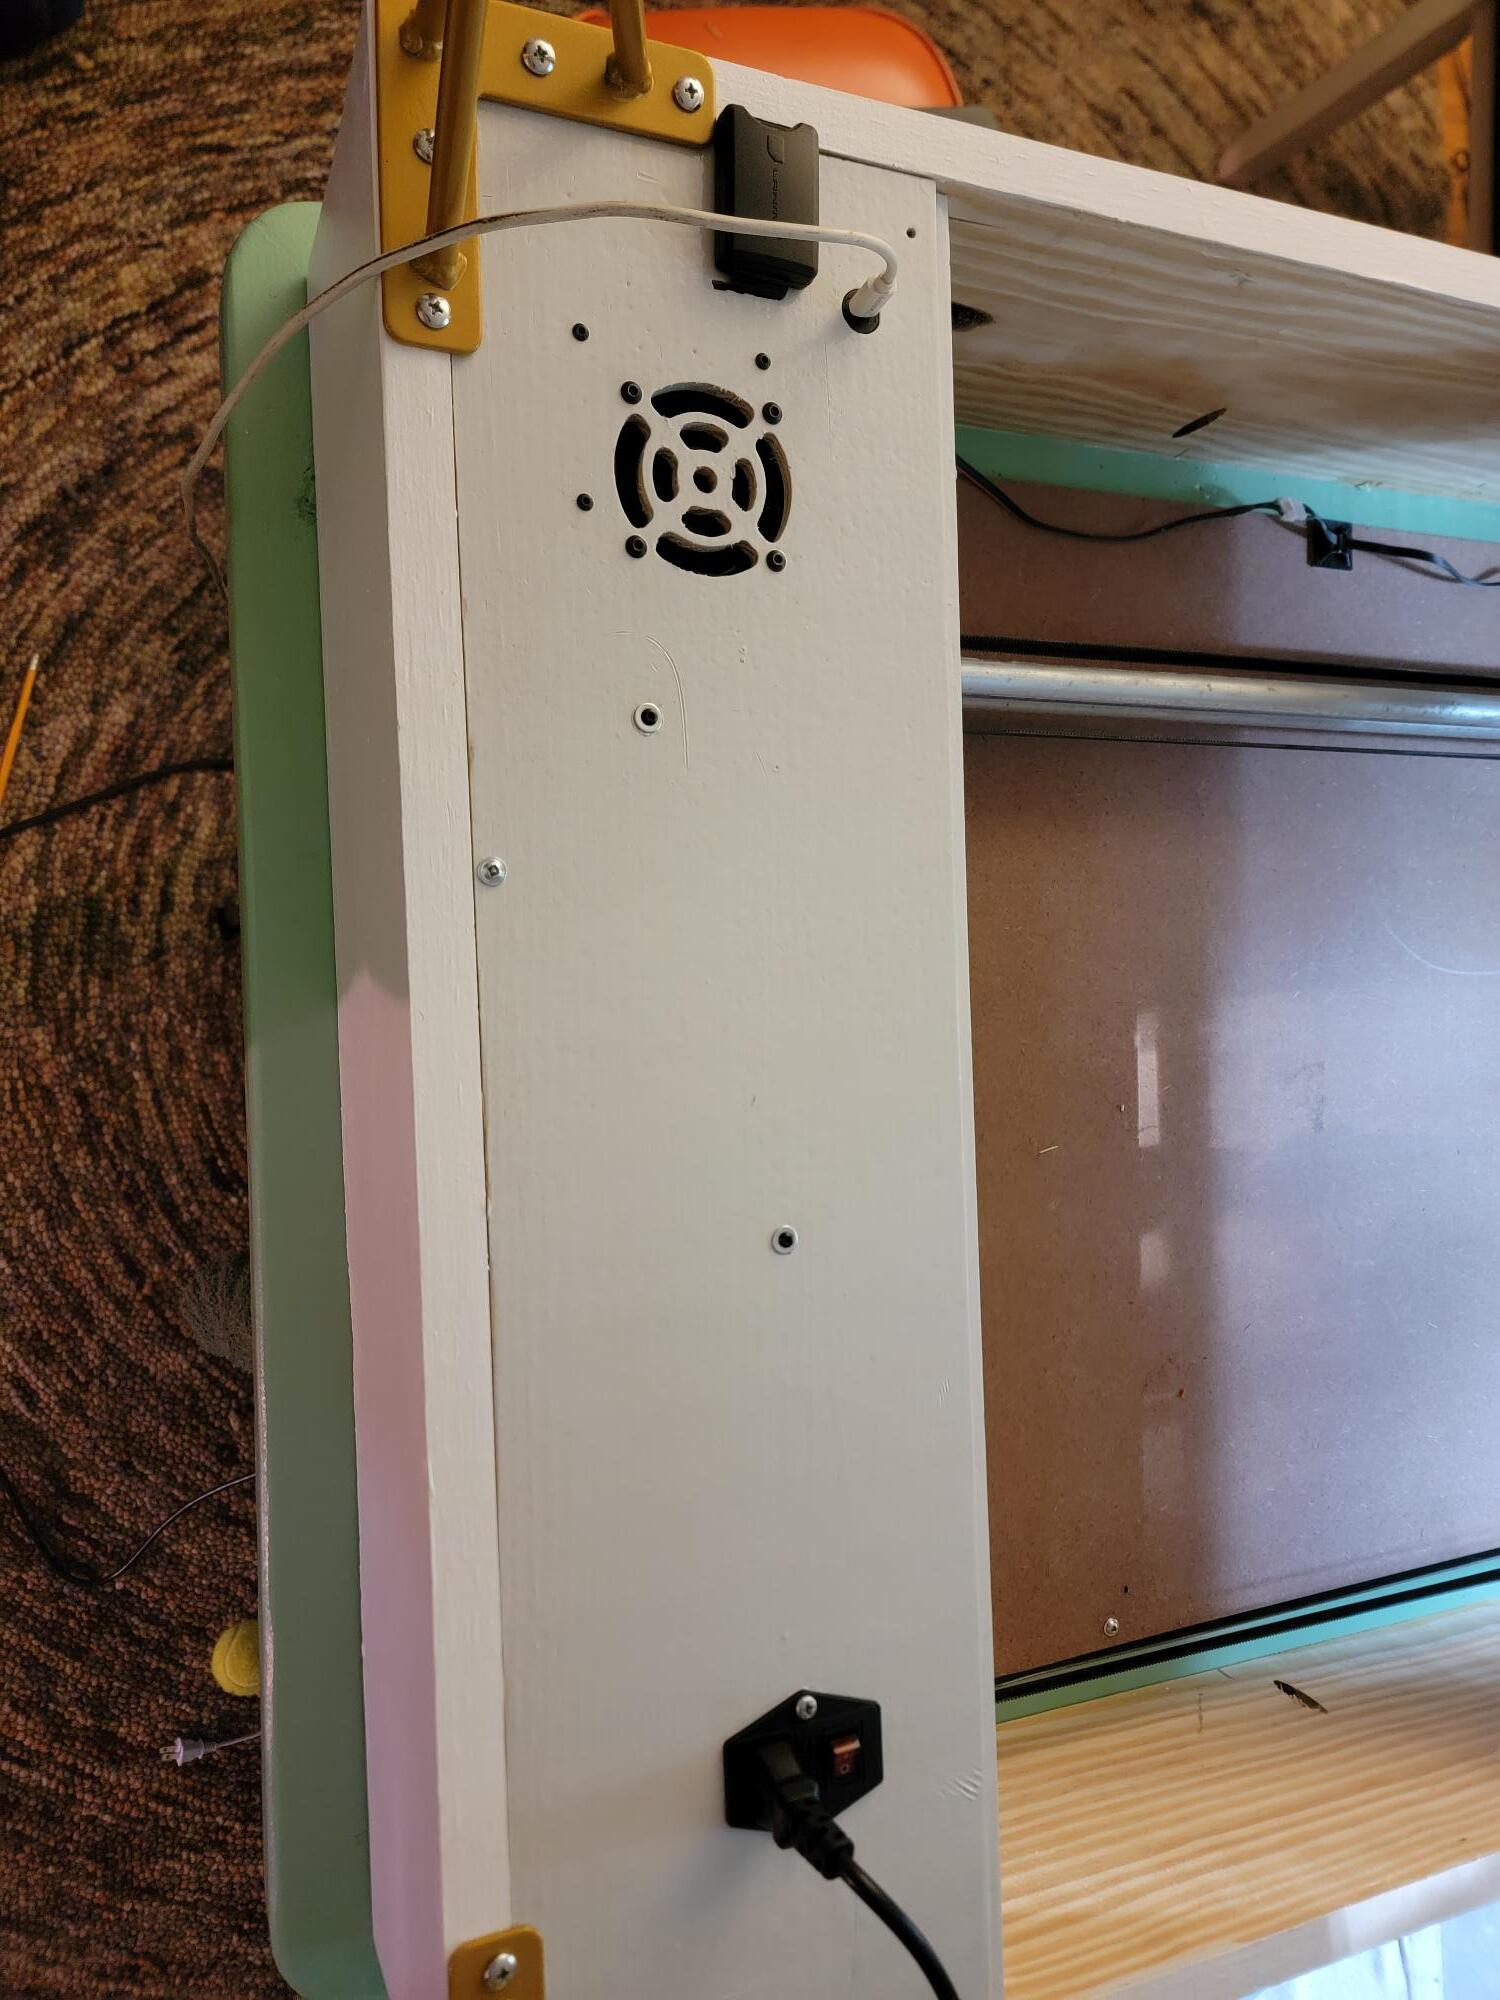
Extensions for the usb and sd card. I wanted to bring these all tot he outside to make things accessible.
https://www.amazon.com/dp/B082HZKVP1?psc=1&ref=ppx_yo2ov_dt_b_product_details
https://www.amazon.com/dp/B085HLSD6P?psc=1&ref=ppx_yo2ov_dt_b_product_details
Fan - I put this in to keep the board cool. Bad idea, I have disconnected since then, it is not needed at all.
Power cord - 6ft gets me under the rug and to the wall outlet.
https://www.amazon.com/dp/B00005113L?psc=1&ref=ppx_yo2ov_dt_b_product_details
And this for a fused power connection and switch.
https://www.amazon.com/gp/product/B08SK11V9C/ref=ppx_yo_dt_b_search_asin_title?ie=UTF8&psc=1
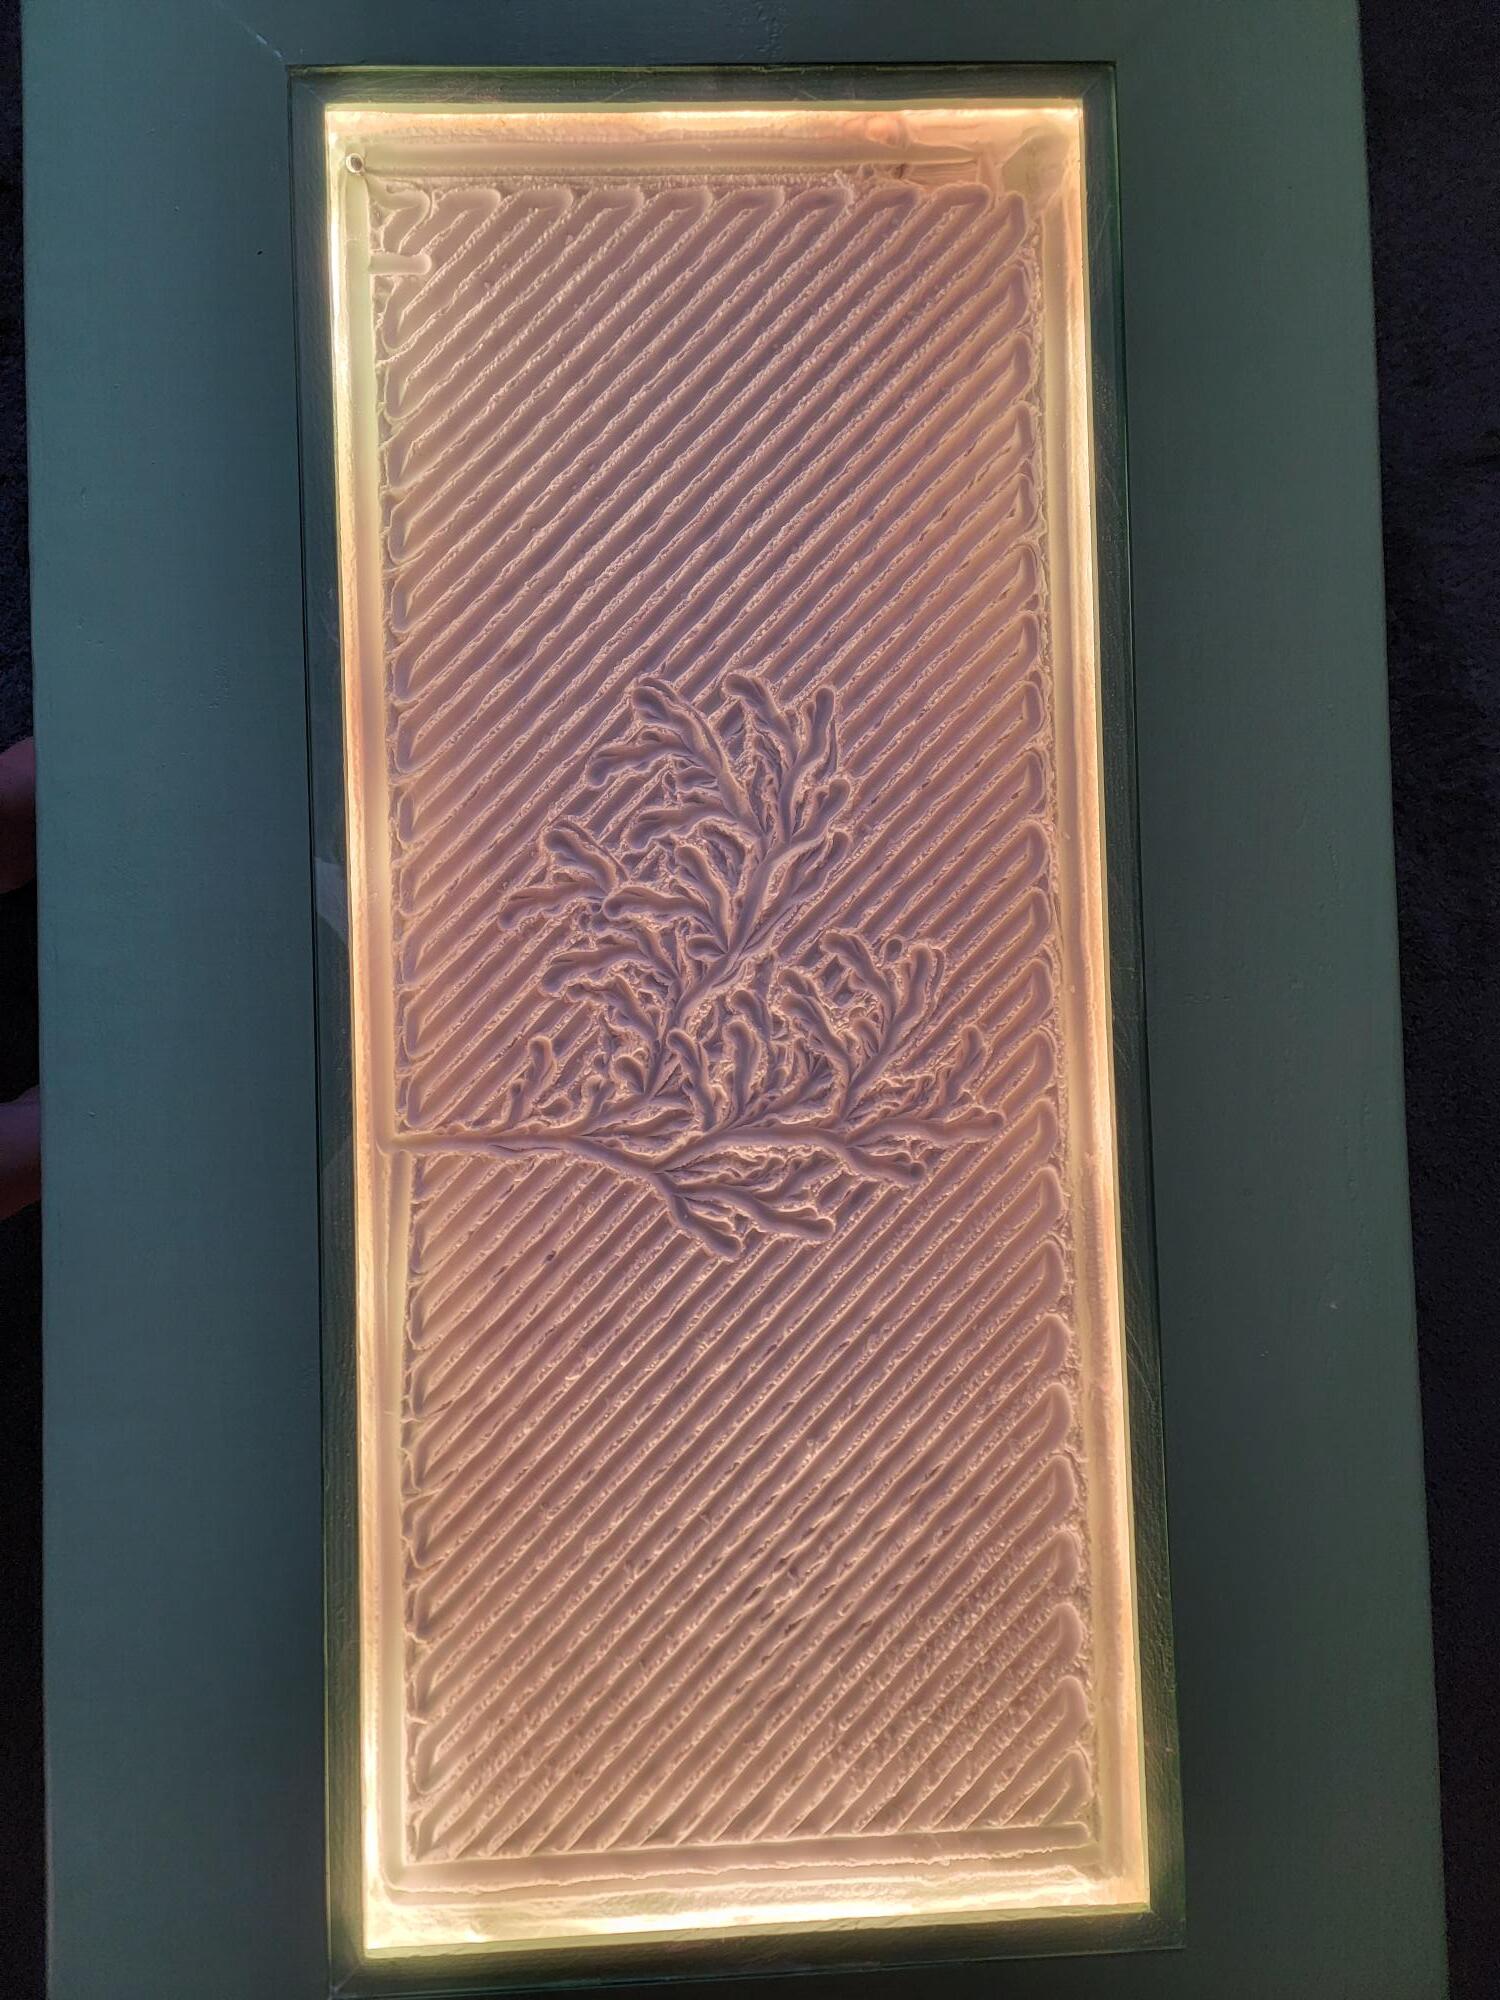
LEDs - I am too old to have RGB stuff flashing around. It was tough enough of a sell anyway to my wife to get this thing in the den.
https://www.amazon.com/dp/B0B5X3PB58?psc=1&ref=ppx_yo2ov_dt_b_product_details
I got the glass custom cut and tempered from a local glass place. One note, if you are dealing with a large piece of glass and want to avoid smudges inside the glass after laying it in there, get a set of these. They work great and are cheap.
https://www.amazon.com/dp/B09PG4W3NJ?psc=1&ref=ppx_yo2ov_dt_b_product_details
Hardware, belts, stops, etc was bought from V1 in their kit. I tossed the zinc plate hardware and used socket head button screws in black oxide, because I had them left over from my MPCNC build.
Lumber was bought at Home Depot, but everyone makes their own style, I used hairpin legs from Amazon. I used a 1/4" piece of Tempered Hardboard for the sand bed.
I had high hopes of using beach sand I brought back from vacation and yeah, no. it is like paste, stinks and never gets dry enough. So… I used baking Soda.
This took 3 boxes of Baking soda and I wish I would have only used 2 or a little over. I used a comb to even the layer out, seemed to work well.
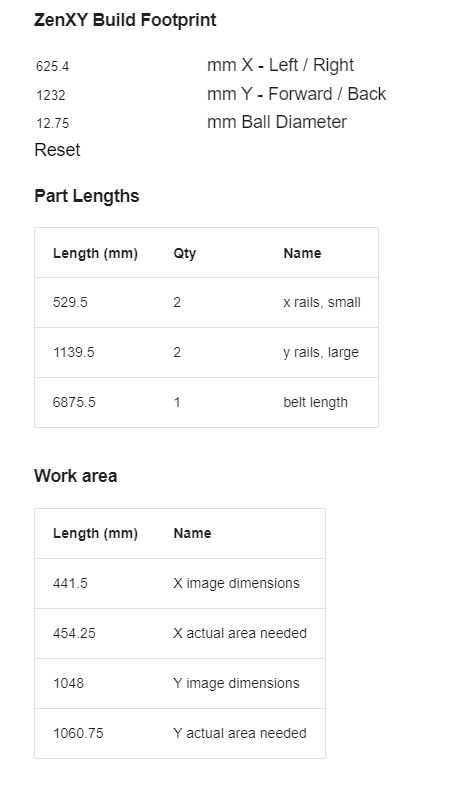
Here is my machine size calculations:
Here is my FreeCad design, the skirt I made from 1x8 yellow pine and put spreaders across and the control panel for the electronics:

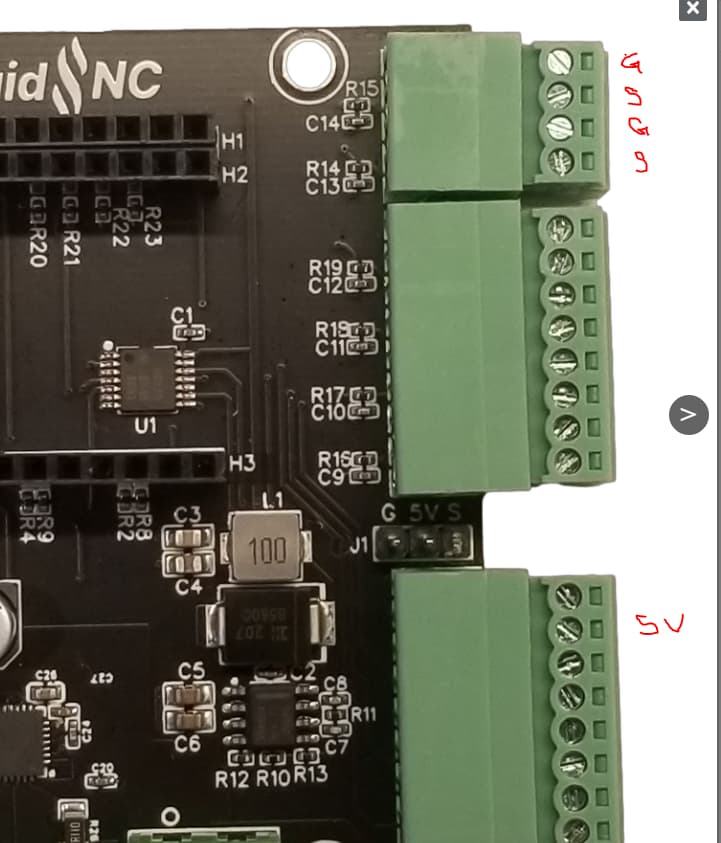
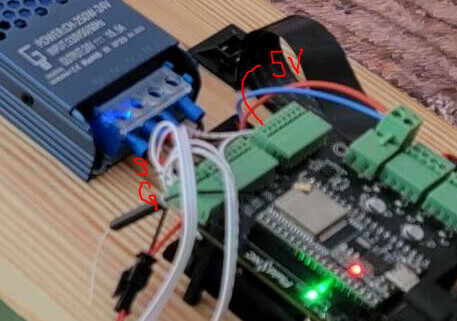
A note on the programming of the FluidNC board. I am truly sold on this. It is easy, feature packed, worked with little futzing around and the Wifi feature alone is fantastic. You need to read the entire Wiki. I tried to copy and paste stuff, but that was not working. I actually has to read and study the Wiki and all questions were answered. And in the end, it’s pretty simple. I posted my Yaml file earlier on another post, but this one is the final version and works well. Soft limits caused me headaches and I deleted them once
Here is the file:
name: "TMC2209 XY Zen Table"
board: "FluidNC Pen/Laser 2209"

stepping:
  engine: RMT
  idle_ms: 255
  dir_delay_us: 1
  pulse_us: 2
  disable_delay_us: 0

kinematics:
  corexy:

uart1:
  txd_pin: gpio.17
  rxd_pin: gpio.16
  rts_pin: NO_PIN
  cts_pin: NO_PIN
  baud: 115200
  mode: 8N1

axes:
  shared_stepper_disable_pin: gpio.13:high

  x:
    steps_per_mm: 100
    max_rate_mm_per_min: 2000
    acceleration_mm_per_sec2: 25
    max_travel_mm: 1000
    soft_limits: false
    homing:
      cycle: 2
      positive_direction: false
      mpos_mm: 0
      feed_mm_per_min: 200.000
      seek_mm_per_min: 600.000
      settle_ms: 500

    motor0:
      limit_neg_pin: gpio.36:low
      #Diag pin is gpio.34
      tmc_2209:
        uart_num: 1
        addr: 0
        r_sense_ohms: 0.110
        run_amps: 0.500
        hold_amps: 0.370
        microsteps: 16
        stallguard: 0
        stallguard_debug: false
        toff_disable: 0
        toff_stealthchop: 5
        toff_coolstep: 3
        run_mode: StealthChop
        homing_mode: StealthChop
        use_enable: false
        direction_pin: gpio.12
        step_pin: gpio.14
        disable_pin: NO_PIN


    motor1:
      null_motor:

  y:
    steps_per_mm: 100
    max_rate_mm_per_min: 2000
    acceleration_mm_per_sec2: 25
    max_travel_mm: 400
    soft_limits: False
    homing:
      cycle: 1
      positive_direction: false
      mpos_mm: 0
      feed_mm_per_min: 200.000
      seek_mm_per_min: 600.000
      settle_ms: 500

    motor0:
      limit_neg_pin: gpio.39:low
      #diag pin is gpio.35
      tmc_2209:
        uart_num: 1
        addr: 1
        r_sense_ohms: 0.110
        run_amps: 0.500
        hold_amps: 0.370
        microsteps: 16
        stallguard: 0
        stallguard_debug: false
        toff_disable: 0
        toff_stealthchop: 5
        toff_coolstep: 3
        run_mode: StealthChop
        homing_mode: StealthChop
        use_enable: false
        direction_pin: gpio.26
        step_pin: gpio.25
        disable_pin: NO_PIN
    motor1:
      null_motor:

  z:
    steps_per_mm: 320.000
    max_rate_mm_per_min: 1000.000
    acceleration_mm_per_sec2: 25.000
    max_travel_mm: 200.000
    soft_limits: false

spi:
  miso_pin: gpio.19
  mosi_pin: gpio.23
  sck_pin: gpio.18

sdcard:
  cs_pin: gpio.5
  card_detect_pin: NO_PIN

start:
  must_home: false
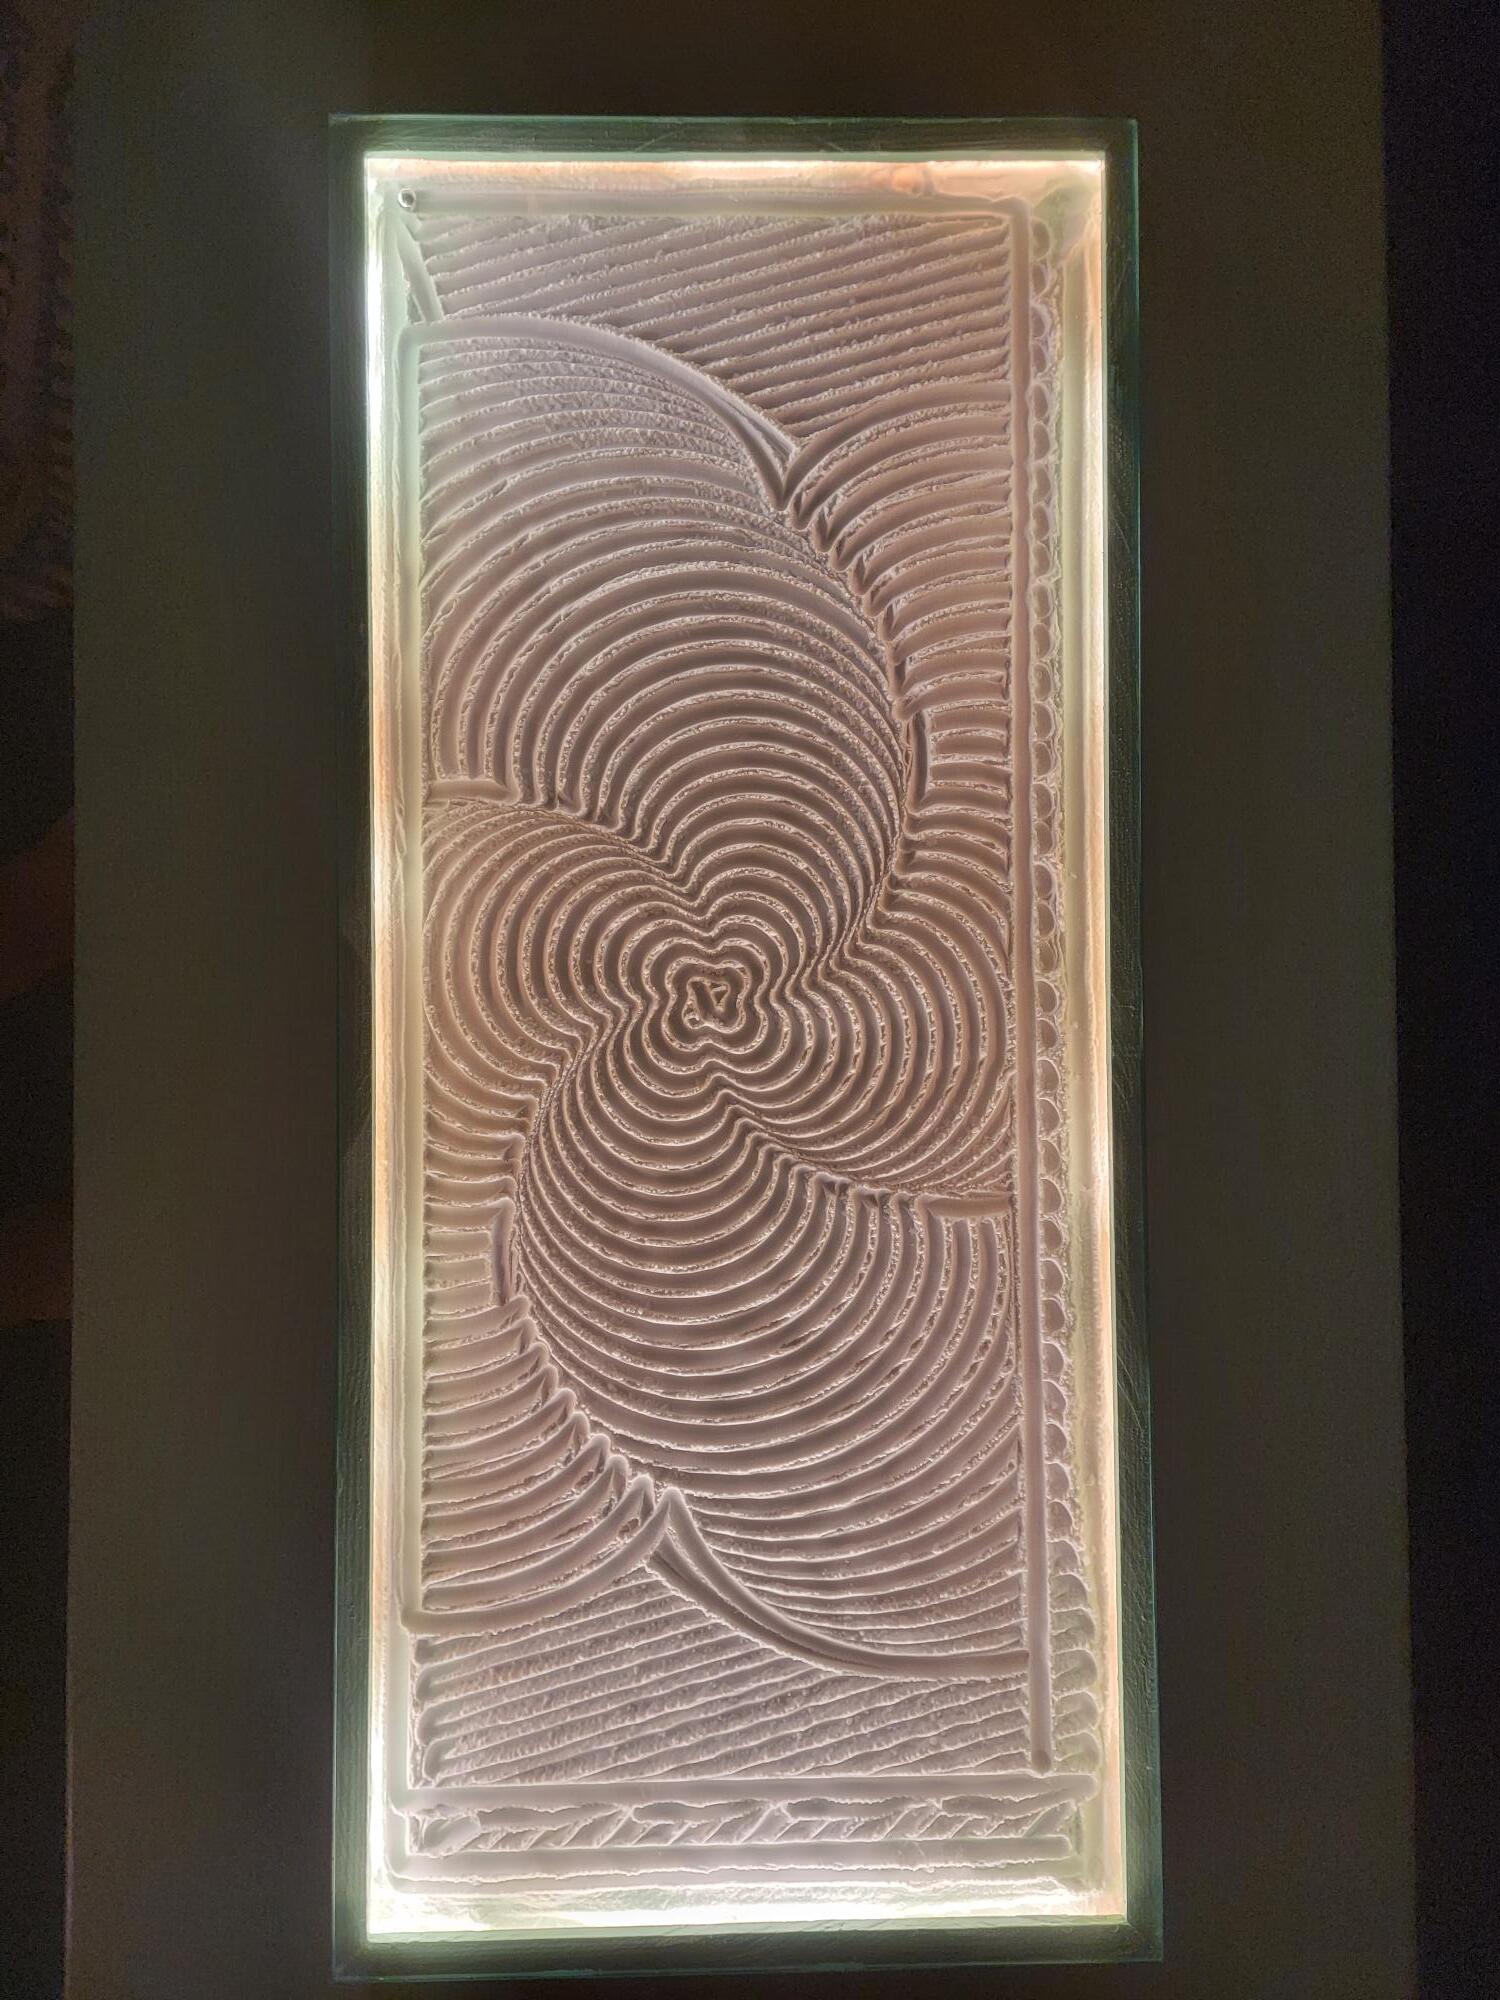
Here is the finished table: Works Great and thank you all for answering my stupid questions from before: