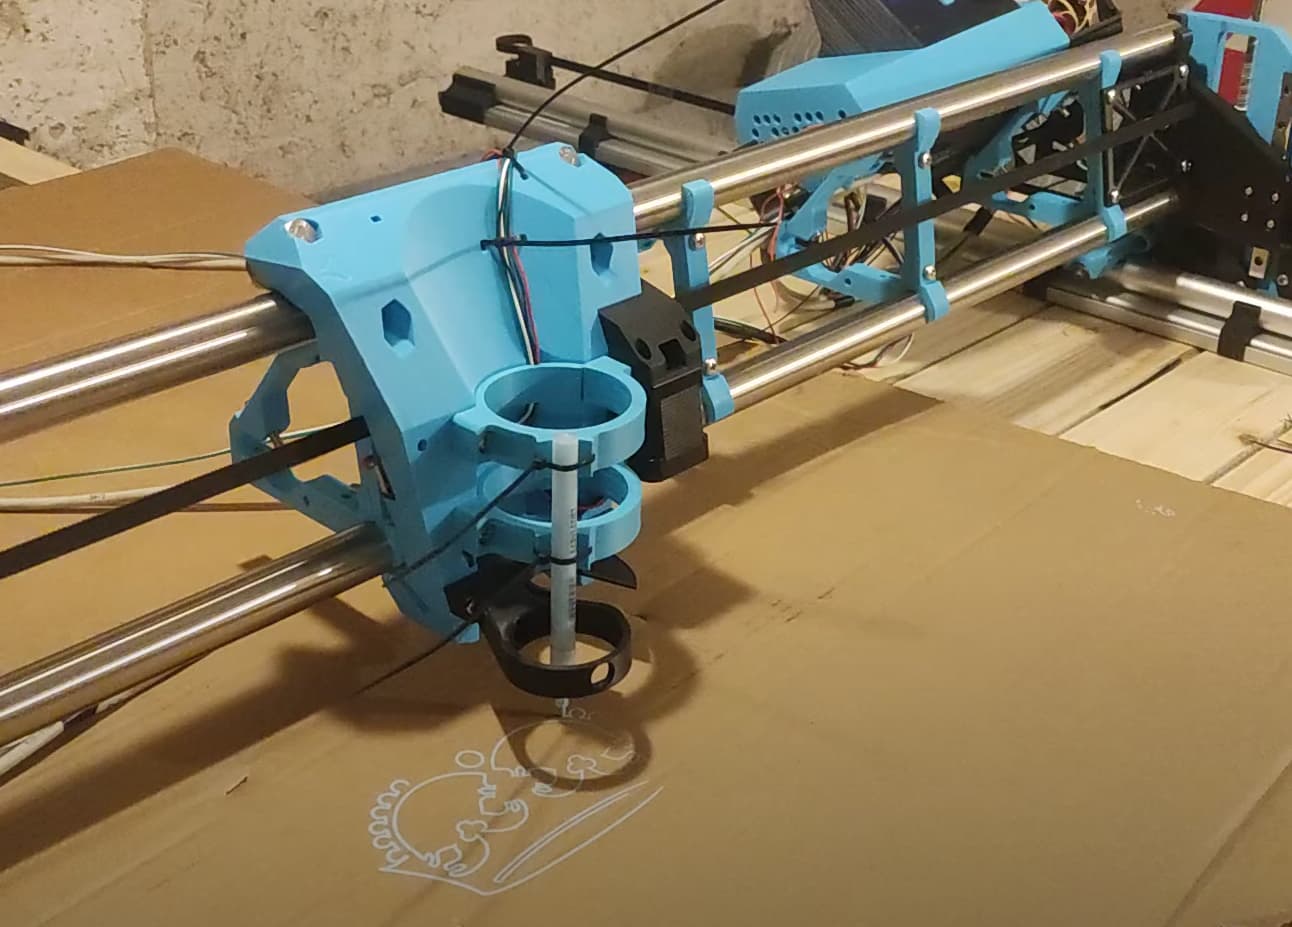
Some of you may have already seen the first picture of my machine in the Hardware dev topic. But after I drew my first crown yesterday, I thought I should also present my machine here to share my first success with others.
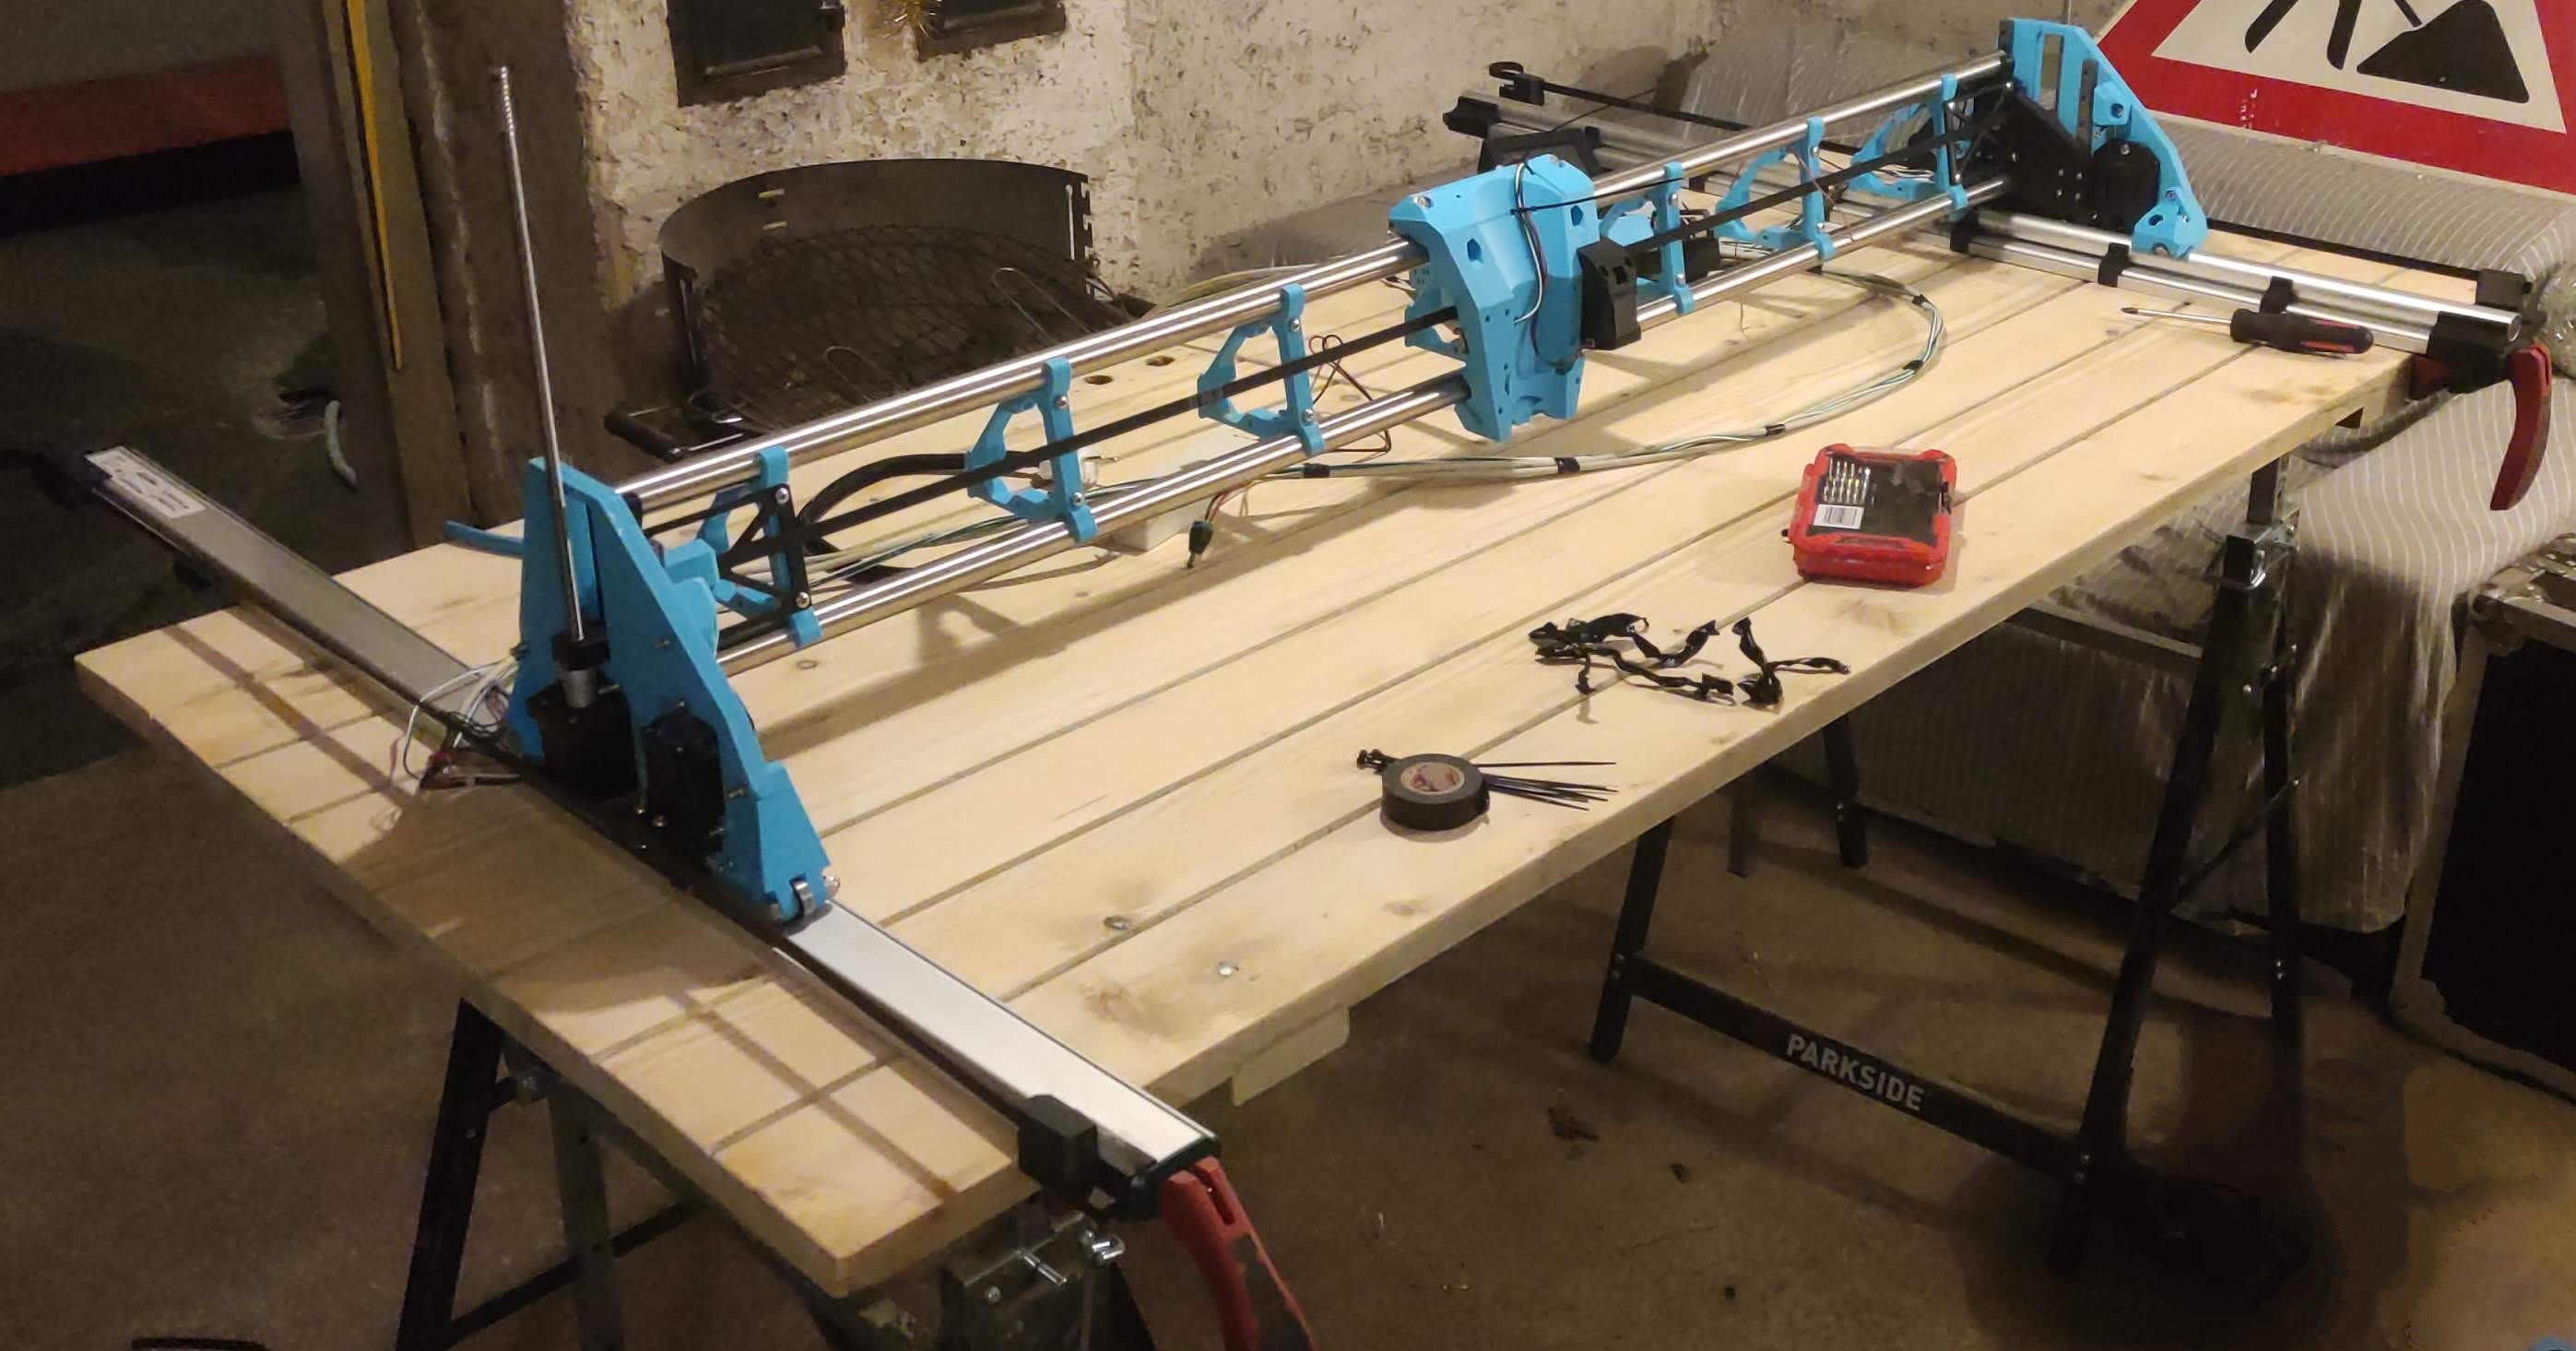
Due to the lack of space for a large milling table, I came up with the solution to make my machine (semi) mobile. I use “Clamp n Cut” type clamping rails to hold the Y-belts and tube, which also serve as a runway for the machine. For this purpose, I have modified the parts that were actually intended for mounting on a table so that I can use them with my rails.
When I want to use my router in the future, I can first attach the rails to any ordinary dining table (or board on sawhorse as shown in the photo), put on my lowrider and I’m ready to go within minutes.
At the moment there are still a lot of little things I want to do and add: cable management with cable chain (thanks to Doug for the models), new Z screws because the old ones of my broken Anet printer are scrap, the fenders that Peter H designed, the strut plates for which I have to build a temporary mount with a long Y axis and I still have to think about how I can design a spoilboard that can be compactly stowed and transported in addition to its actual function. As soon as I’ve achieved these goals, I’ll feel ready to take my first steps with a real router.
Until then, many thanks to everyone who has written important posts here in the forum that have helped me along, to all the developers in the background and of course to Ryan for the plans, instructions and tutorials for the machine!
That looks great! A clever solution to what I’m sure is a pretty common problem. Have you come up with an easy and effective way of squaring up the machine when you set it up?
No, not yet. I have simply ignored the topic for the time being with my first test setup. With the spoilboard that I plan to make to snugly fit in the space between the rails, the problem will hopefully not be too big, but I’ll put off thinking about it until the actual construction is mostly finished.
As far as squaring at set-up, could you fashion a couple of “gauge sticks” that slipped into the slots on the clamp rails? That would ensure you got the rails parallel each time, and if you had a stop or mark to butt them up against (maybe just the end of the slot itself) you should get pretty repeatable results.
Gauge sticks and the stops are good ideas but don’t completely solve the problem as that would not ensure that you don’t end up with an out of square parallelogram.