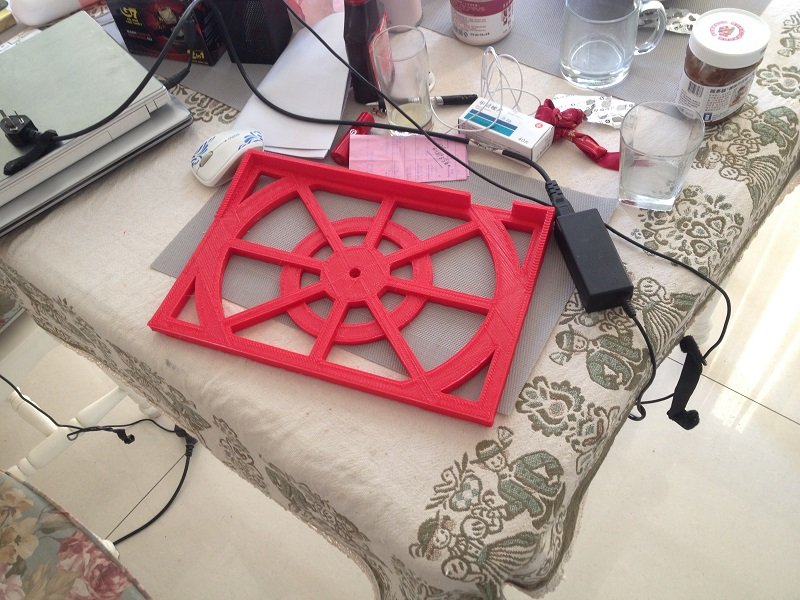
Digging the pvc frame!
Seems to print really well now that I’ve found the correct settings!
(keep in mind that this is a 1.2mm nozzle with 0.6mm layer height, of course you cannot expect the quality finish of a 0.4mm nozzle)
It took 3 hours to print the round part and 2 hours for the other one.
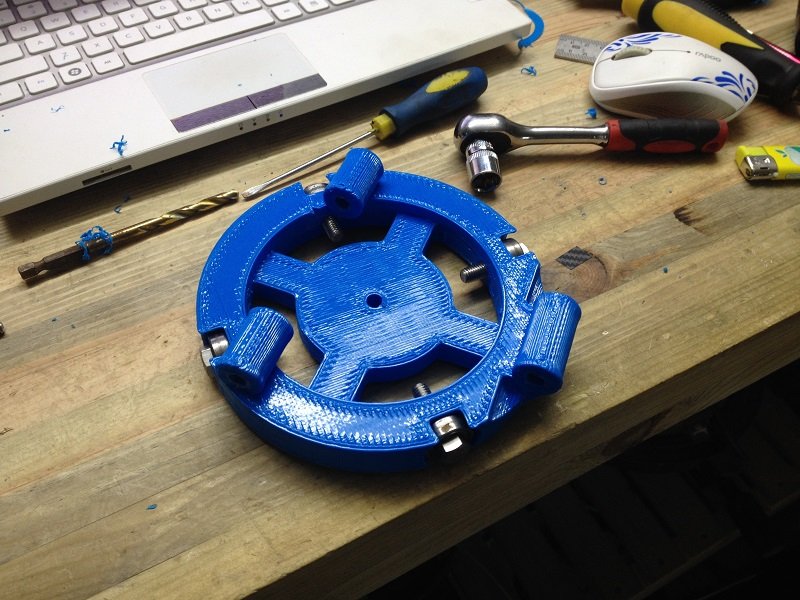
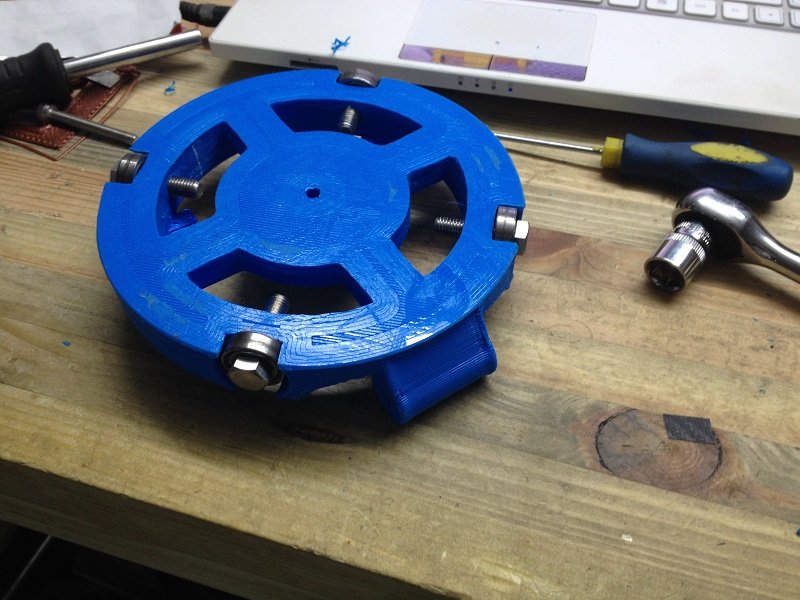
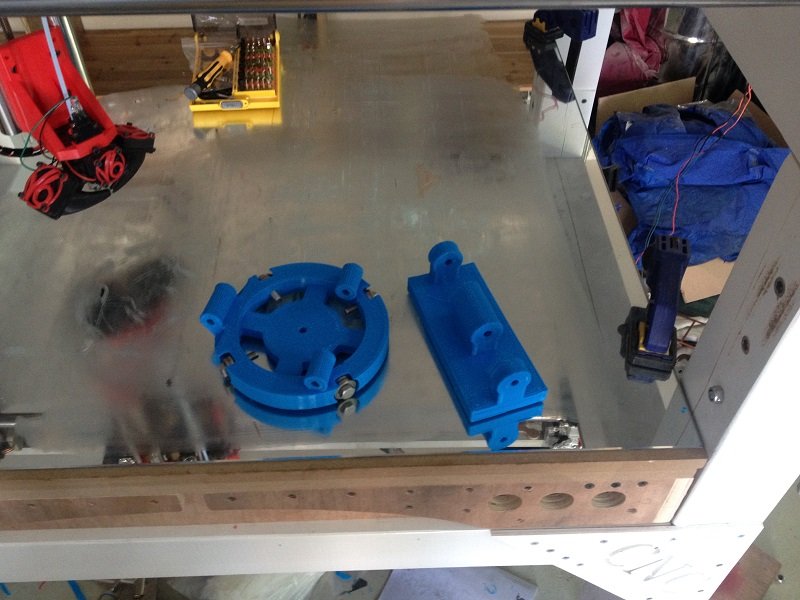
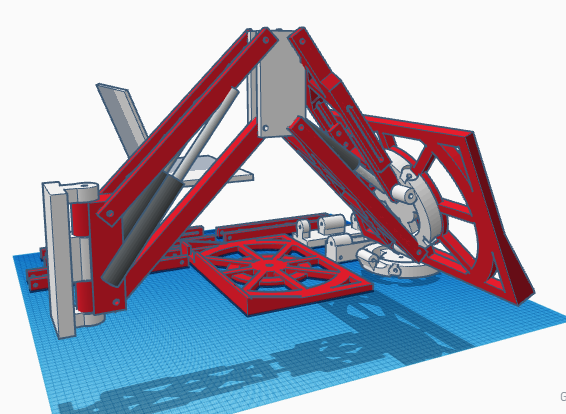
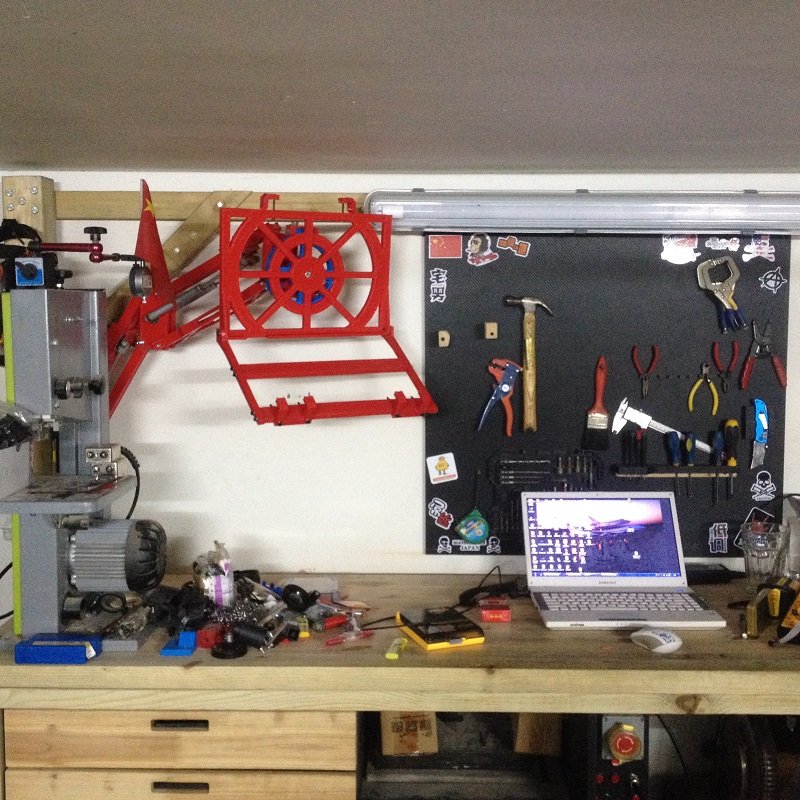
I’m building a mobile arm system for my laptop, those are the first two parts:
[attachment file=32273]
[attachment file=32274]
[attachment file=32275]
[attachment file=32276]
The only thing I have to improve is the sharp corners. For whatever reason, it seems that the nozzle leaves a bit more material in each corner, which makes them a bit bigger than they should be. I’m not sure what parameter I should tune up here, any advice is welcome.

2 Likes
Blobs at corners is usually an over extrusion byproduct. Anywhere else and it gets smoothed by the successive layers, but corners don’t have anywhere for the extra to go, so blobbing.
1 Like
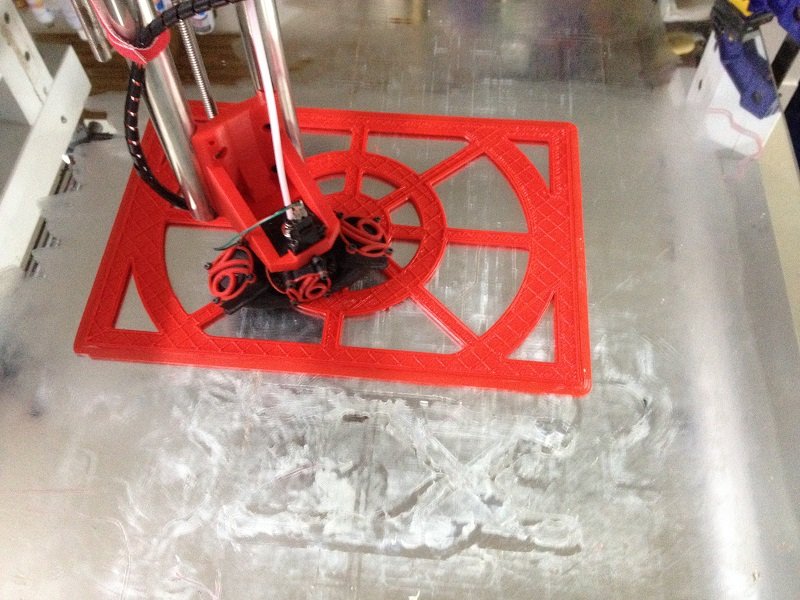
I made my biggest print so far: 350 mm x 250 mm x 30 mm thing.
This will be the laptop support.
It printed almost fine, but I do realize now that warping is unavoidable without having a heat plate. I now need to find an easy and cheap way to make one.
It took around 5 hours to print, 2 perimeters, 3 top and bottom layers and 20% infill.
I really love that big nozzle stuff, printing has never been so fast
[attachment file=32317]
[attachment file=32318]
[attachment file=32319]
[attachment file=32320]
[attachment file=32321]
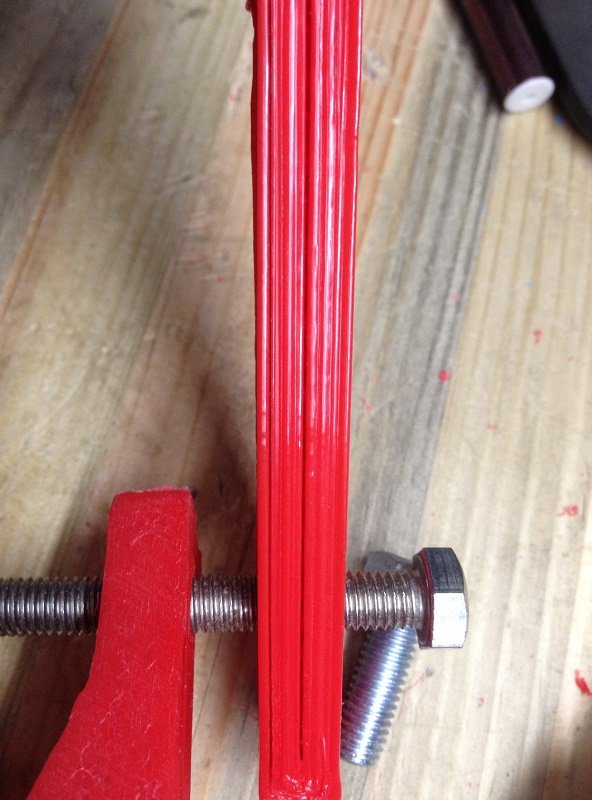
@Barry, I thought about that, but I’ m not sure, because whenever I lower the extrusion multiplier the corners get slightly better, but the perimeters won’t stick together and will leave some gaps (see pic hereunder)
I may need to check that it actually extrudes at 1.2 mm and not slightly thinner. Thanks for the advice !
[attachment file=32322]
By the way, I would like to thank again @vicious1 for the forum improvements, uploading pictures is now so much easier ! Big thanks!


3 Likes
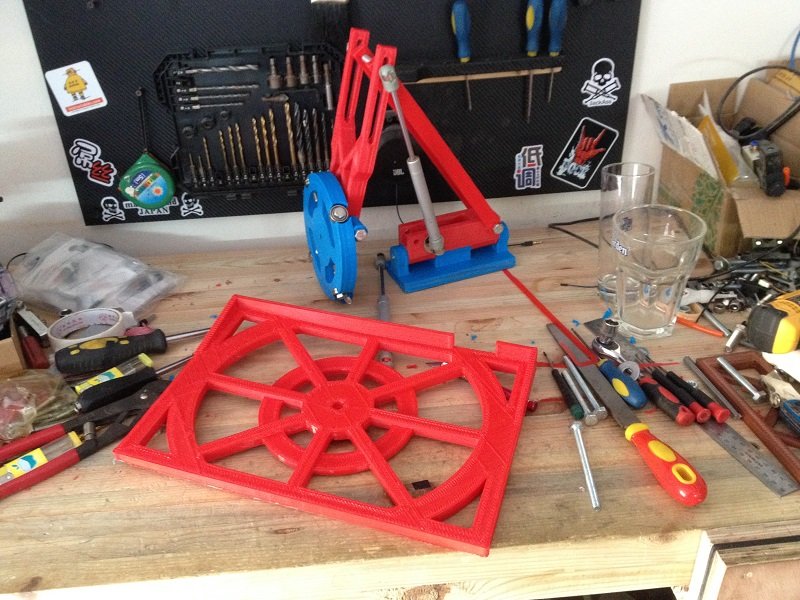
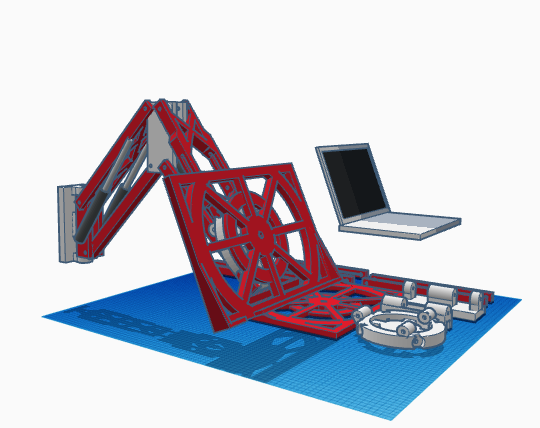
I just realized I forgot to put pictures of what I’m trying to do.
Should look like this if everything goes according to plan.
[attachment file=32326]
[attachment file=32327]
The goal is to be able to support my laptop. Maybe I will put it on the CNC or maybe I’ll hand it from the wall. Or maybe I’ll print 2 brackets and do an easily switchable system to be able to do both, I have to see if it works first.
1 Like
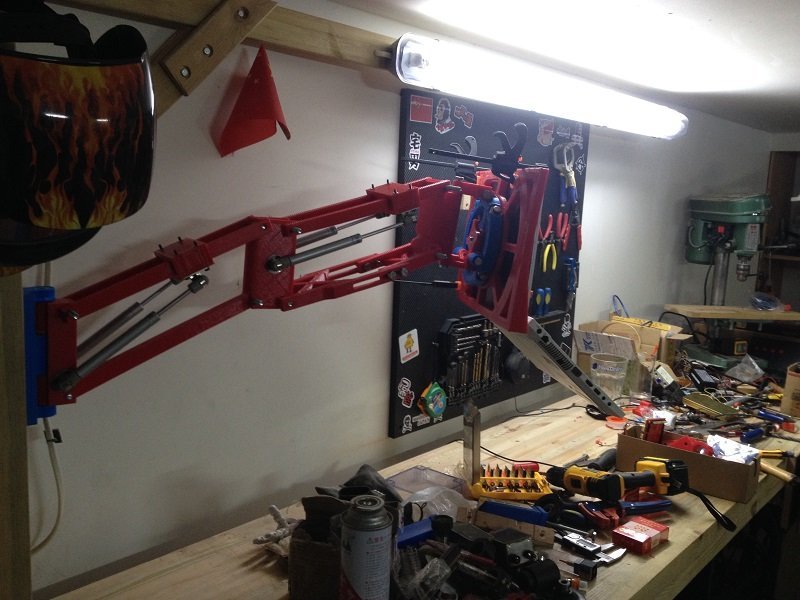
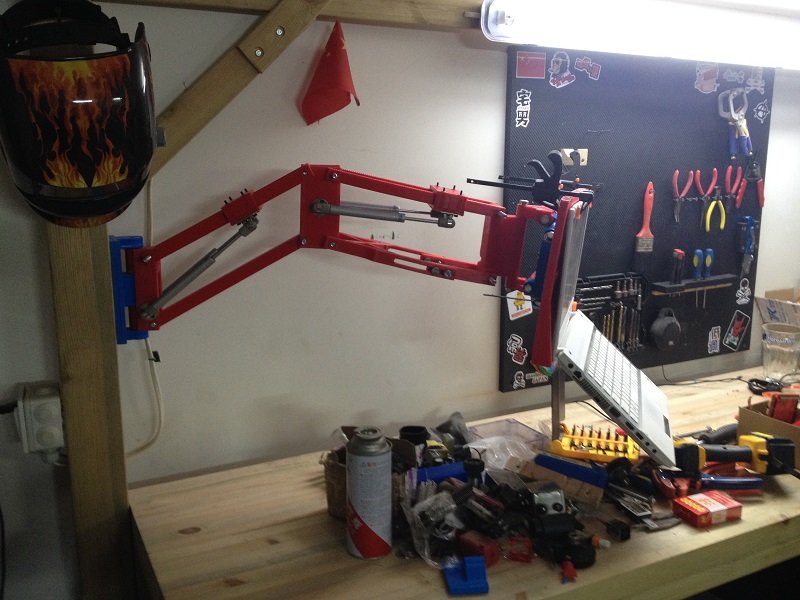
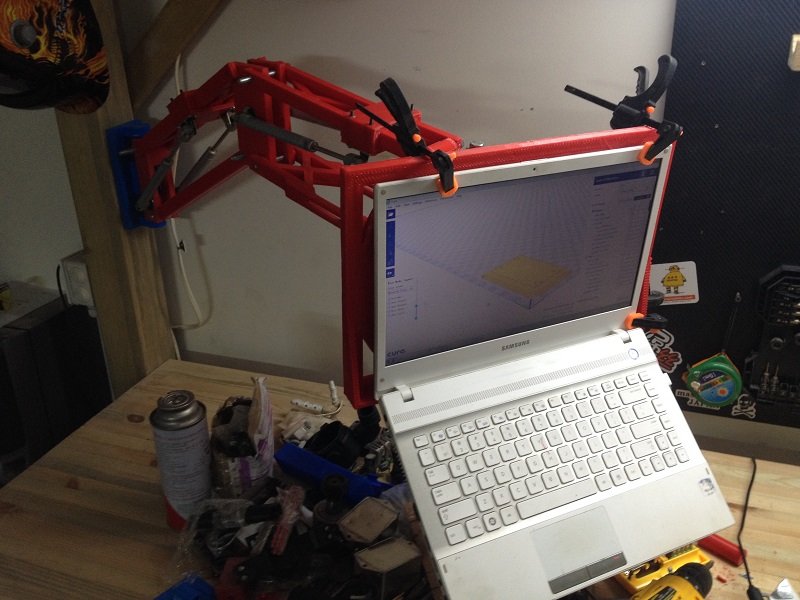
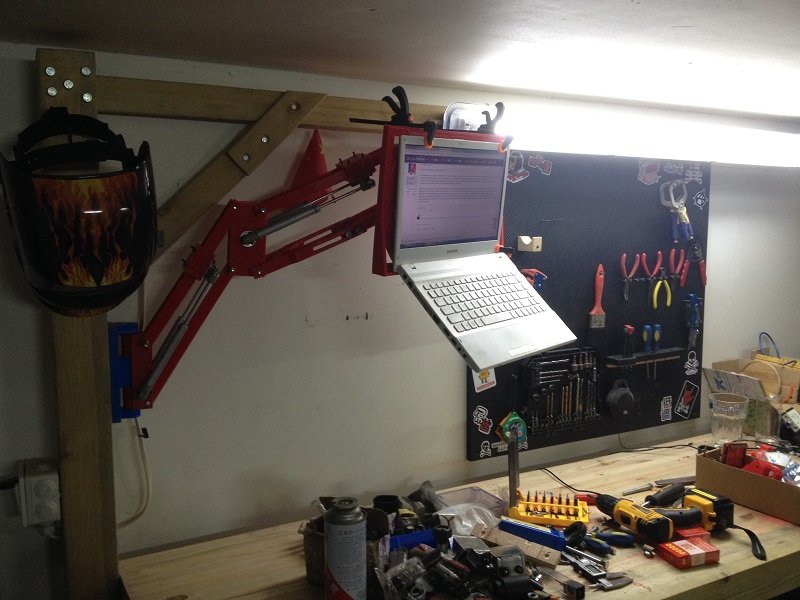
It’s working!
So as it turns out, It is possible to build quite sturdy things out of 3D printed parts. I’ve almost completed my laptop stand and so far it seems to work perfectly.
Just a few accessories to add and it will be finished.
[attachment file=32529]
[attachment file=32530]
[attachment file=32531]
[attachment file=32532]
[attachment file=32533]
[attachment file=32534]

3 Likes
That looks like it works great, very nice design!
1 Like
Great work! You have inspired me to start own one.
1 Like
That’s great, I’m very glad!
Wish you good luck with yours!
You’ll see, it’s an awesome machine
Pretty cool! Needs the pneumatics replaced with a couple linear actuators and an arduino controlling it. Then a camera so it can see you, and keep the laptop pointed in your direction!
4 Likes
Haha, not a bad Idea,
But creating the firmware would probably be very difficult, and programming is not really my strong suit… Mechanically it wouldn’t be a big matter for me though.
But even If I was making this mod, I would keep the pneumatics because they compensate for the weight, so it would assist the linear actuators during their work, much less stress on them so they could stay small, use smaller/cheaper/lighter motors and smaller/cheaper drivers.
I’ll post the 3D files of my laptop arm when it will be entirely finished, I just have to print a few parts to support and clamp the laptop in place securely.
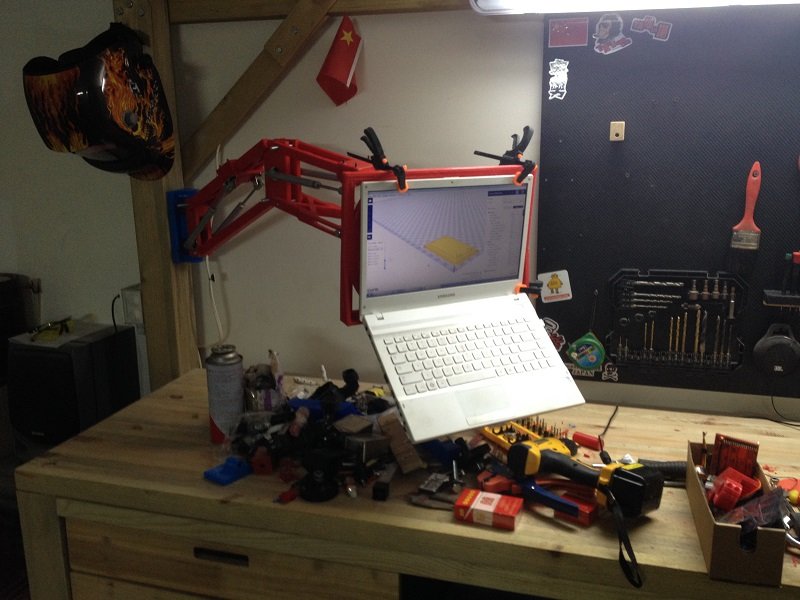
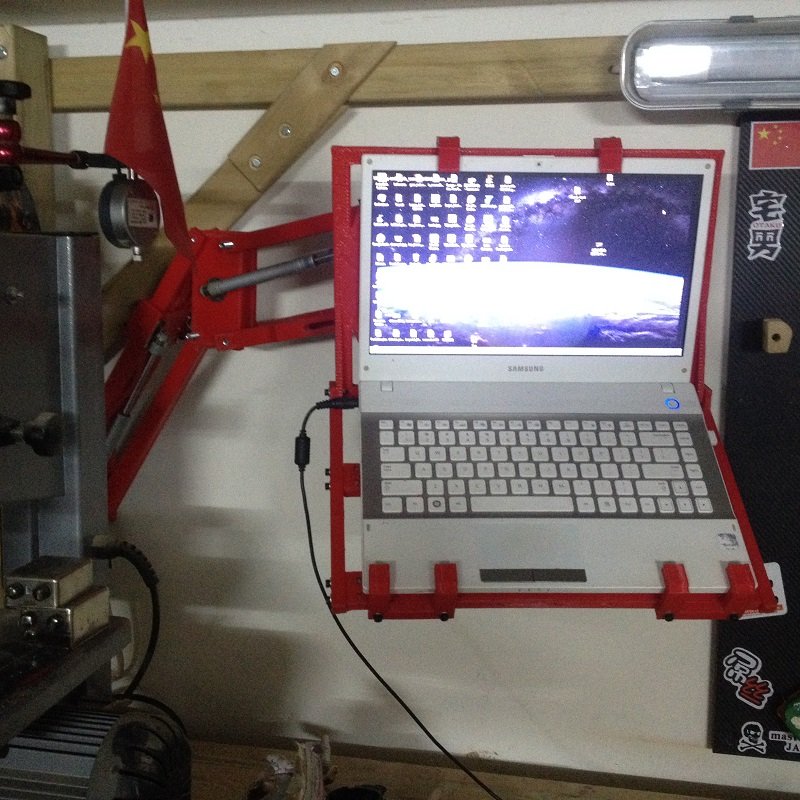
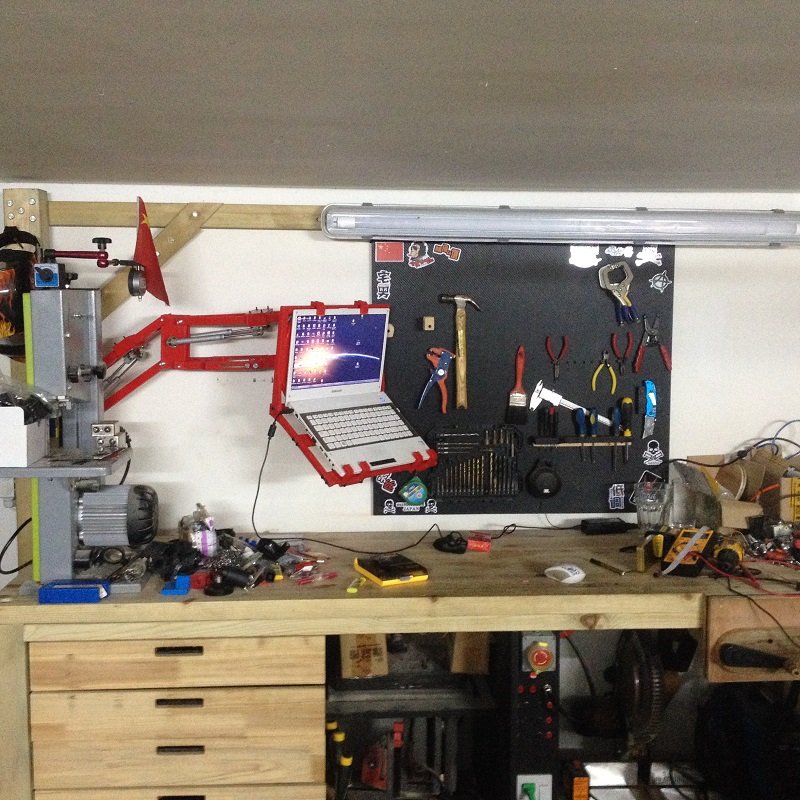
Well, I finished my laptop stand, it works fine, so I’m pretty happy with it. Just need to find some new bolts of appropriate lenghts and is should be all right.
[attachment file=33246]
[attachment file=33247]
[attachment file=33248]
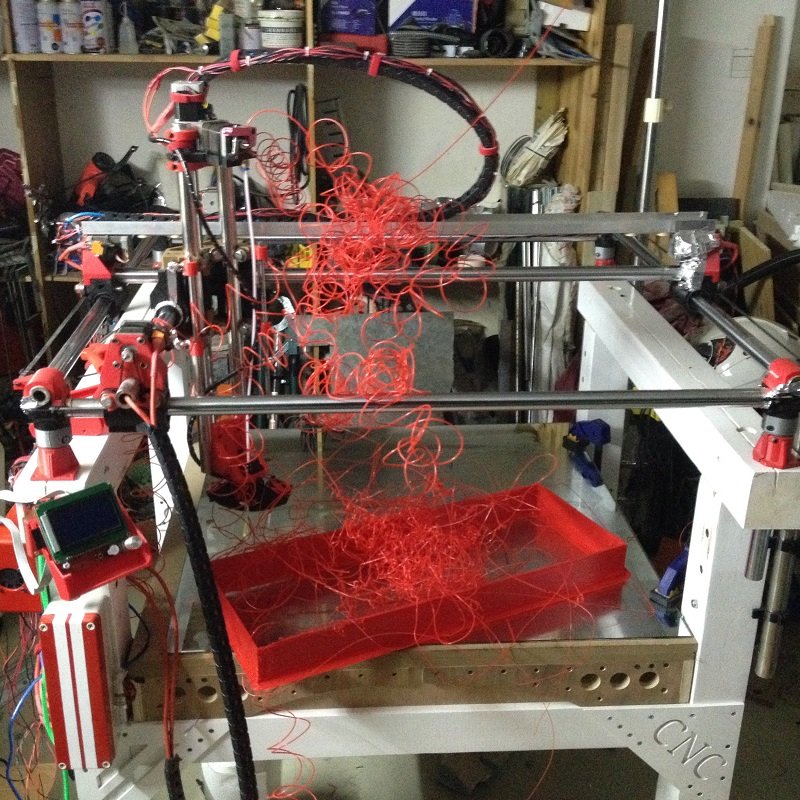
I had a few issues while printing a very huge part last weekend: the extruder was clogging during retractation. I narrowed it down to a too high temperature in the top part of the nozzle (the one that is supposed to stay cool).
I tried to lower the temperature of the nozzle, but it didn’t entirely solved the issue, and at some point it was a bit too low to keep a high speed flow and good adhesion.
Anyway, I wasted about an entire spool because of this issue. So I had to do something about it…
That was my biggest part so far… too bad it ended up like that…
[attachment file=33249]
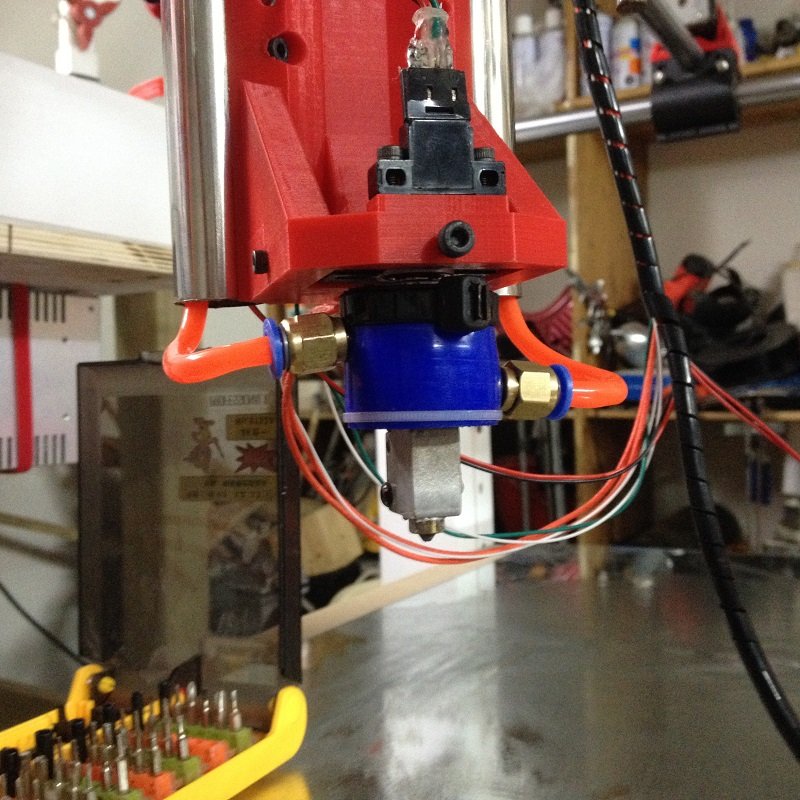
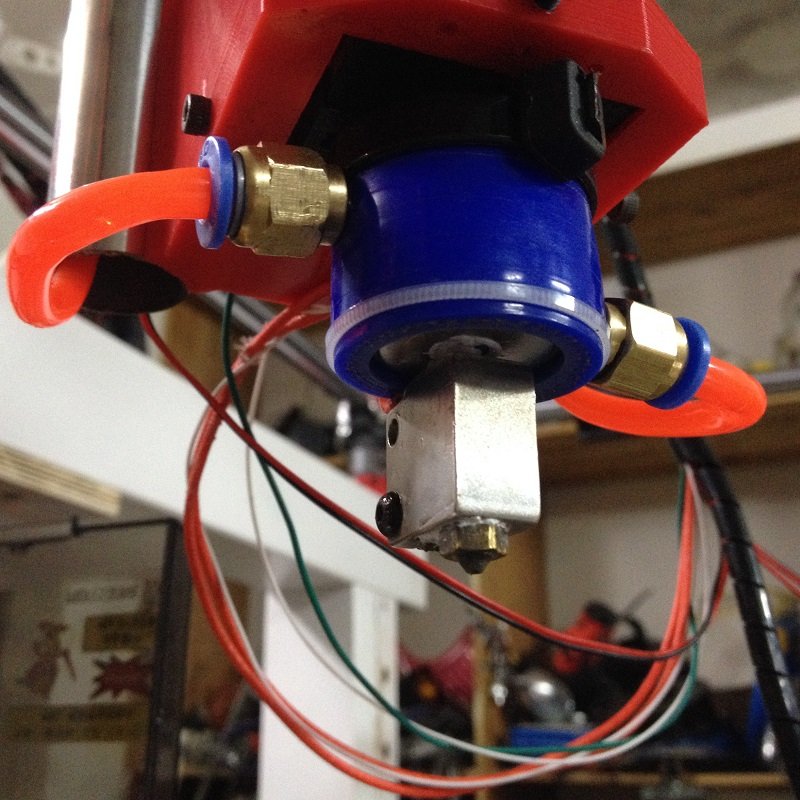
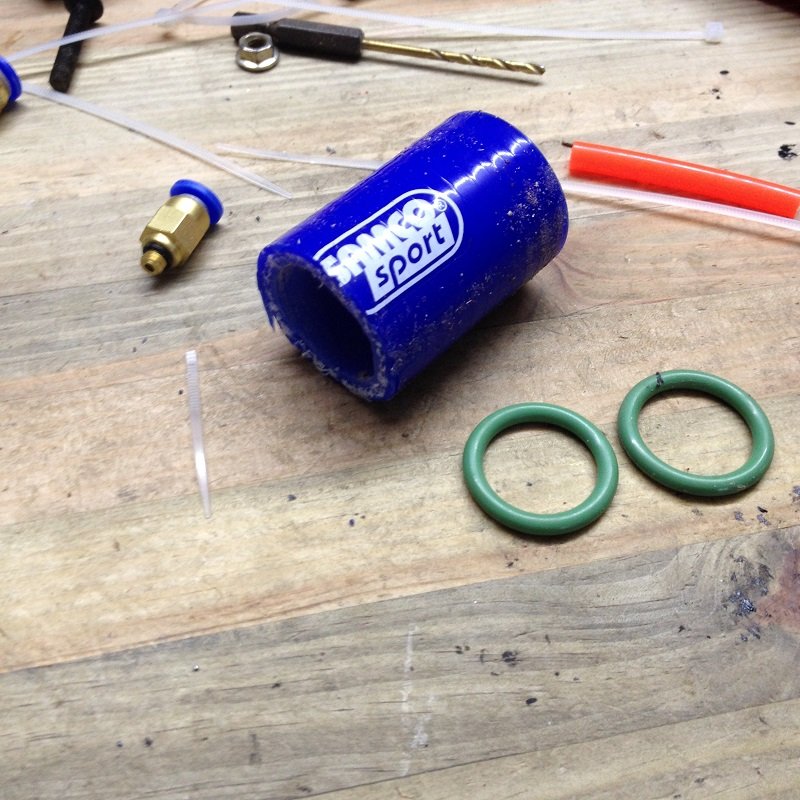
So, the only option I’ve got now is to move to a more efficient cooling system. I decided to try to build a watercooled nozzle.
So far, I’m experimenting to see if this works, before maybe building a more reliable thing (unless this one turns out to be reliable enough).
I’ve just used two O-rings, an automotive silicon tube, a few couplers a pump and some tubes.
[attachment file=33252]
I did a quick test yesterday and it seems to work fine so far. I manually tried to simulate lots of retractions with various parameters (retractation speed, retractation distance, time between retraction and prime, etc) and I never managed to clog it up. So, if this doesn’t leak I suppose it will work fine.
Strangely, it seems that there is no available water cooled nozzle system available in China, I’ve searched for hours and nothing…
Anyway, here is how my current prototype looks like:
[attachment file=33250]
[attachment file=33251]
[attachment file=33253]
If anyone has experience with watercooled printheads, any advice or tip is welcome 
3 Likes
I was going to suggest using copper brake line wound around the heatsink in a coil but looking at your fix i think yours is cheaper and if it doesnt leak it probably is more effective at cooling since the water will get between the vanes of the heatsink.
I wonder whether if you made the heatsink vanes spiral or remake the heatsink like a spiral whether you might get better cooling as you wouldnt get water static in between the vains as it would direct the current of the water.
Just want to say as well, love your work here, truly inspiring.
1 Like
Thanks!
Actually, the heatsink is just a normal E3D v6 one, I made not change to it whatsoever.
I used 2 O-ring, one on top and one on the bottom, they have two functions:
-Seal, of course
-Act as a spacer, so that there is space between the big silicon tube and the nozzle for the water to flow, about 1 mm all around.
Then, I have one inlet on the very bottom of the heatsink (which is the part where having the best cooling possible is the most important) and an outlet on top of the heatsink, so the water is forced to go everywhere, and even if there could be some static water in the middle it wouldn’t matter so much since the bottom is cooled directly.
The cooling fan it came with wasn’t keeping up?
Apparently it wasn’t enough.
When you print with a big nozzle, you need to crank up the temperature. Usually, when I print with a 0.4mm nozzle I print at 208 degree Celsius. But if I try that temp on the 1.2mm nozzle, the extruder motor cannot keep up and tend to miss steps, because it has to run much faster, thus lowering the torque (and currently I use the beefiest motor possible for this size). In which case I have two solutions, either run the printer at lower speeds (which is not the point of having such a big nozzle, because what I want is printing speed over quality), or setting a higher temperature to increase flow. So, I usually set the temperature at 220-225 degree celsius, which allows a very good flow, perfect adhesion and relatively correct quality.
I tried a bunch of other things, like disabling the retractation, setting a very small retract distance value, tried different acceleration prime and retract parameters, different speeds. It sometimes made the problem less frequent but it always ended up happening at some point during long travels.
This was a severe issue during my first prints, like the shifter bracket that I printed a few weeks ago, I managed to limit this issue quite a lot with fine parameter tuning, but I believe I reached the limit of what can be corrected by the software, since I print bigger things now.
For example, on the big part on the picture above, travel distances can be as long as 800 mm. My travel speed is set up at 120mm/s which is about the maximum the Arduino can manage, but it is still a bit too long. And It probably won’t be the biggest part I’ll print in the future, the maximum theoretical travel distance should be around 1100 mm or so.
Higher temperatures works very well to reduce load on the extruder motor whenever the printer is actually printing, but during long travels the heat is not evacuated by the filament anymore, the temperature rises so it melts the filament higher than it should inside the heatsink. Then when it primes again, the pressure applied to the partially melted filament makes it clog inside.
Maybe a bigger fan could help, but I think the sure way to overcome this issue is to go for watercooling. I also plan in the future to use nylon filament, which requires even higher temperatures, so watercooling will probably not be an option at that point.
Plus, it’s a fun experiment XD
About the over extrusion in the corners, have you put an eye in the linear advance feature of marlin? It’s supposed to solve this kind of issues.
Are you using 3mm filament or 1.75mm?
Yeah, I red about that last week and I even thought of creating a new thread to ask questions about this feature.
I didn’t find any tutorial who explains clearly how to activate it.
I suppose I just need to enable in Marlin and define a K factor, but I was still a bit unsure and I try to avoid reflashing my arduino every time, especially when it works fine already.
Do you, by chance, know a good guide for this function?
Hey man, new here and really impressed by your build and its versatility, it’s awesome and i want one
I have a suggestion for your heated bed problems that might work;
Use a hot air gun to preheat the surface.
Or, have a look at electric floor heating such as this;
http://www.xagalaxycable.com/carbon-heating-film/infrared-carbon-floor-heating-film-thin-film.html
Also i’m wondering if you could use it to mill a surface lower than the base, or will there be too much forces going on for accurate milling?
Looking forward to seeing what you will pull off next, how’s the plasma cutter coming along?
2 Likes