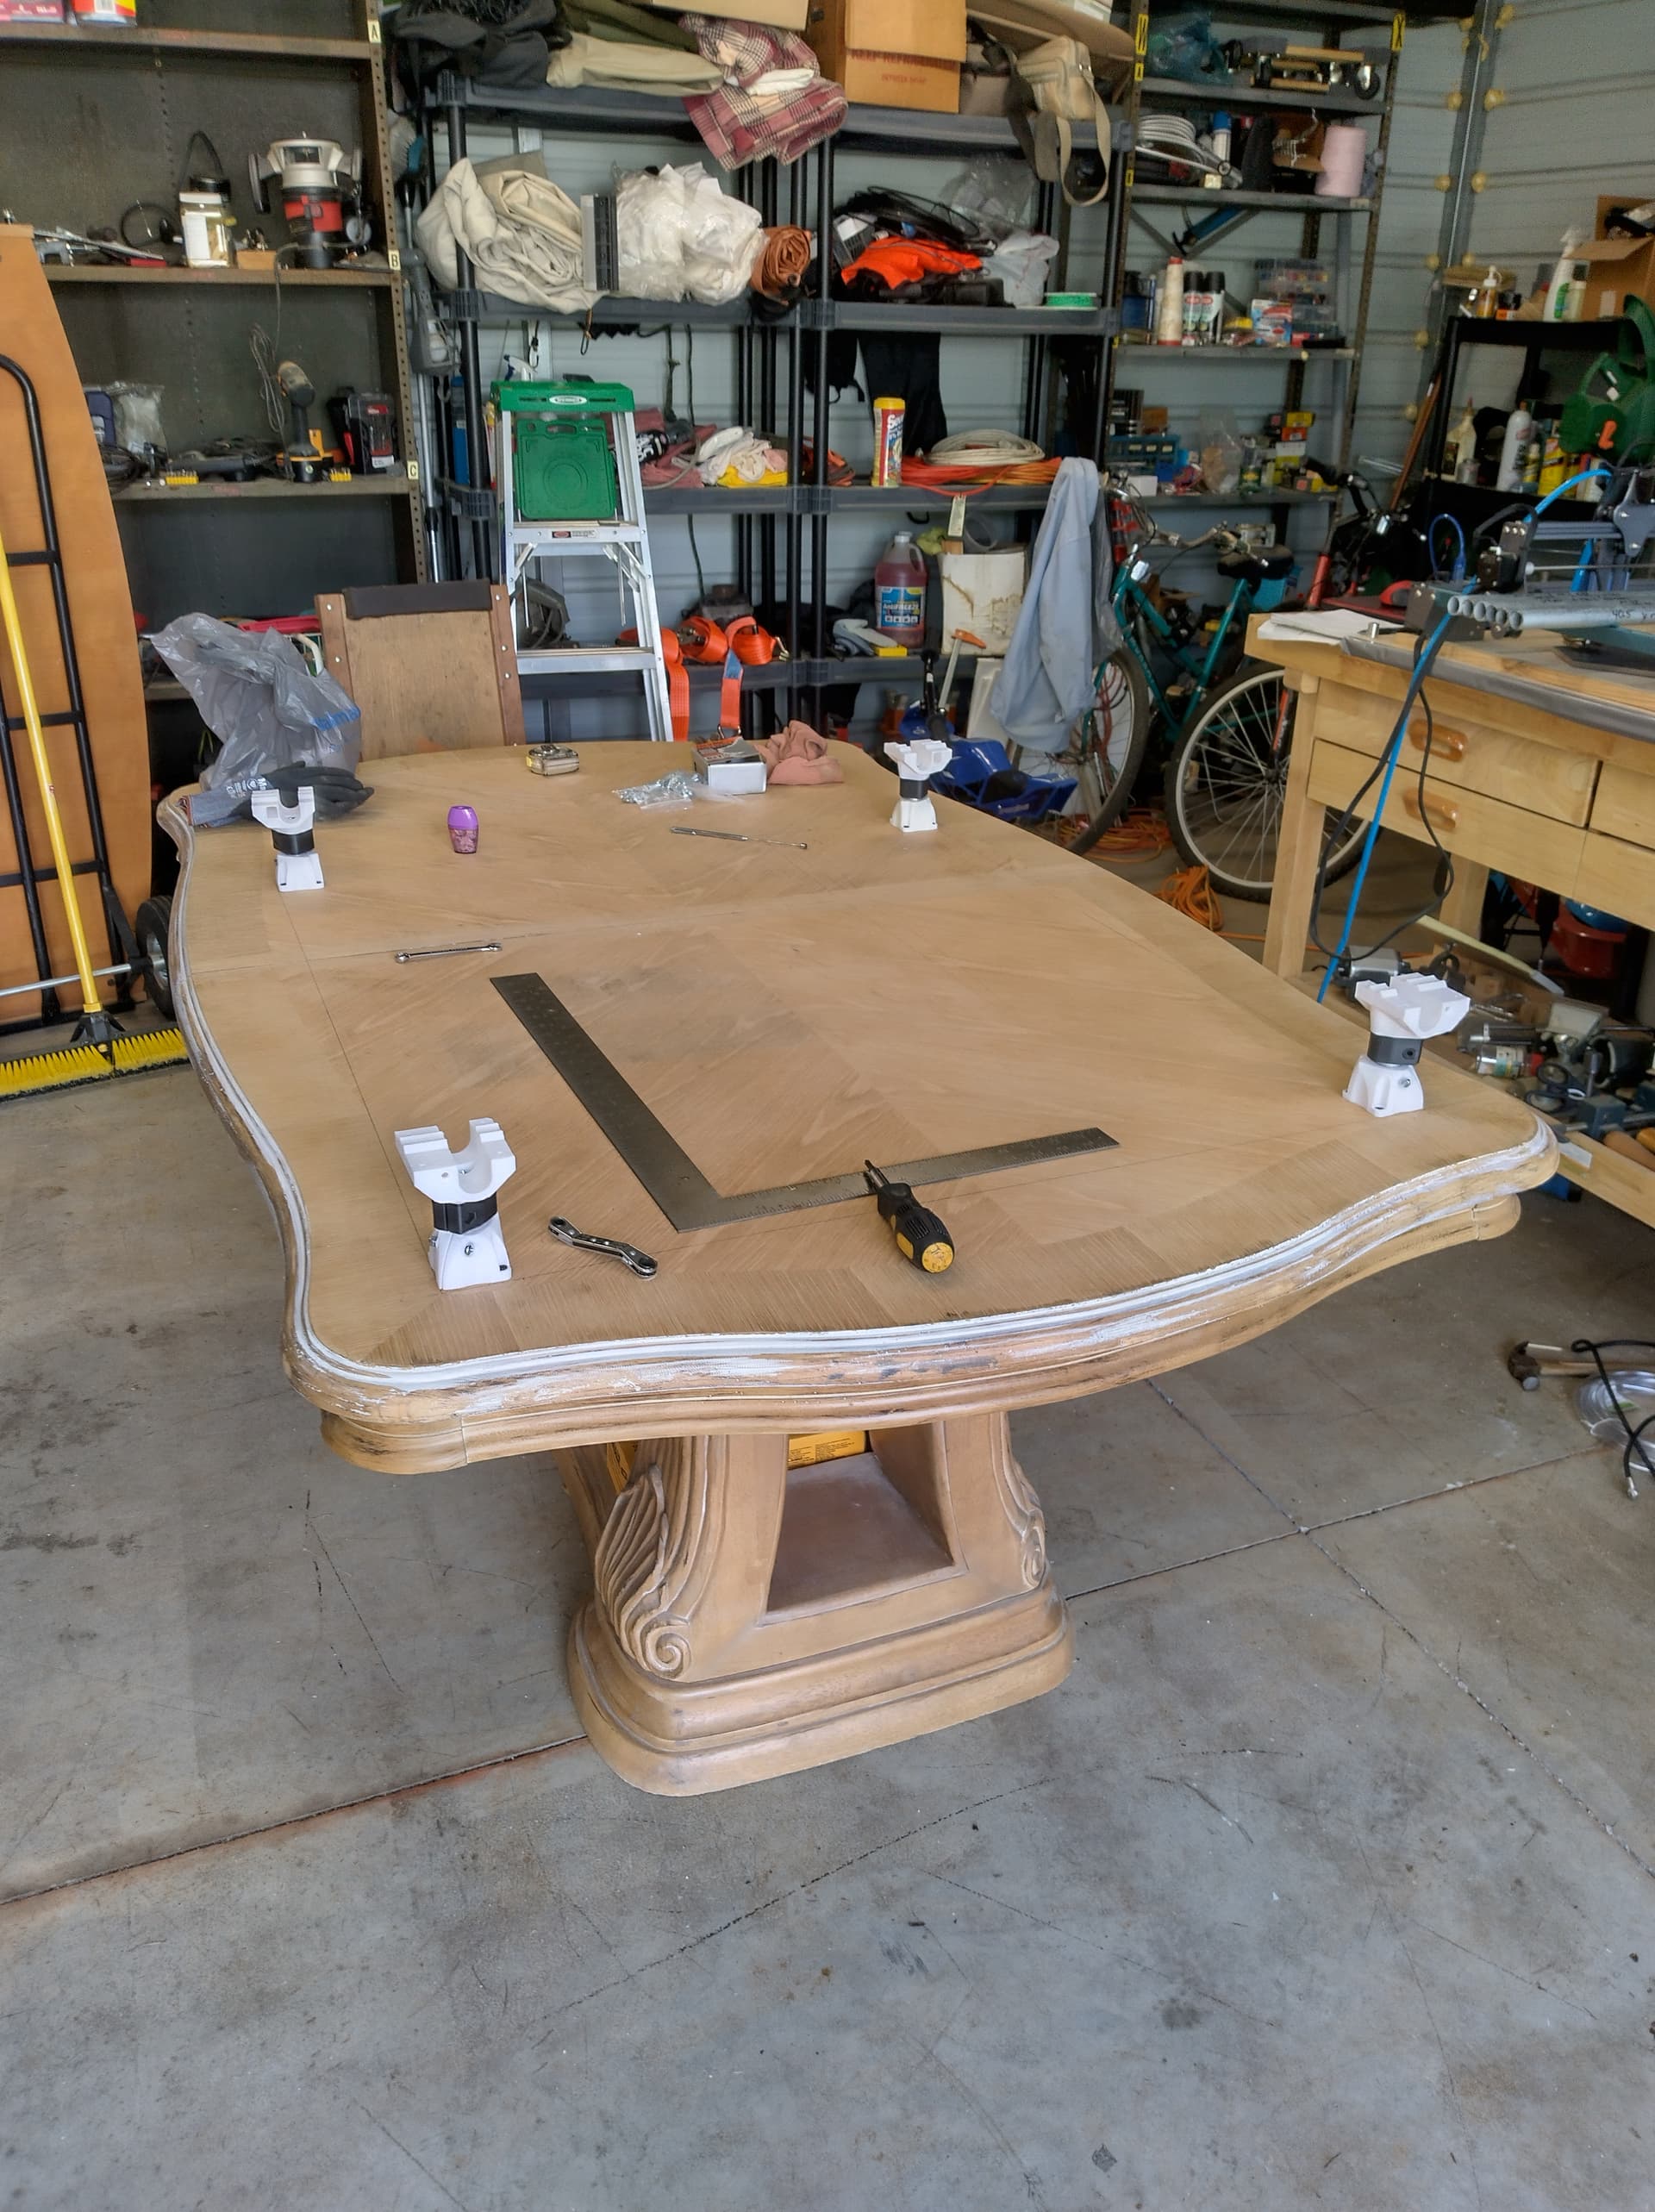
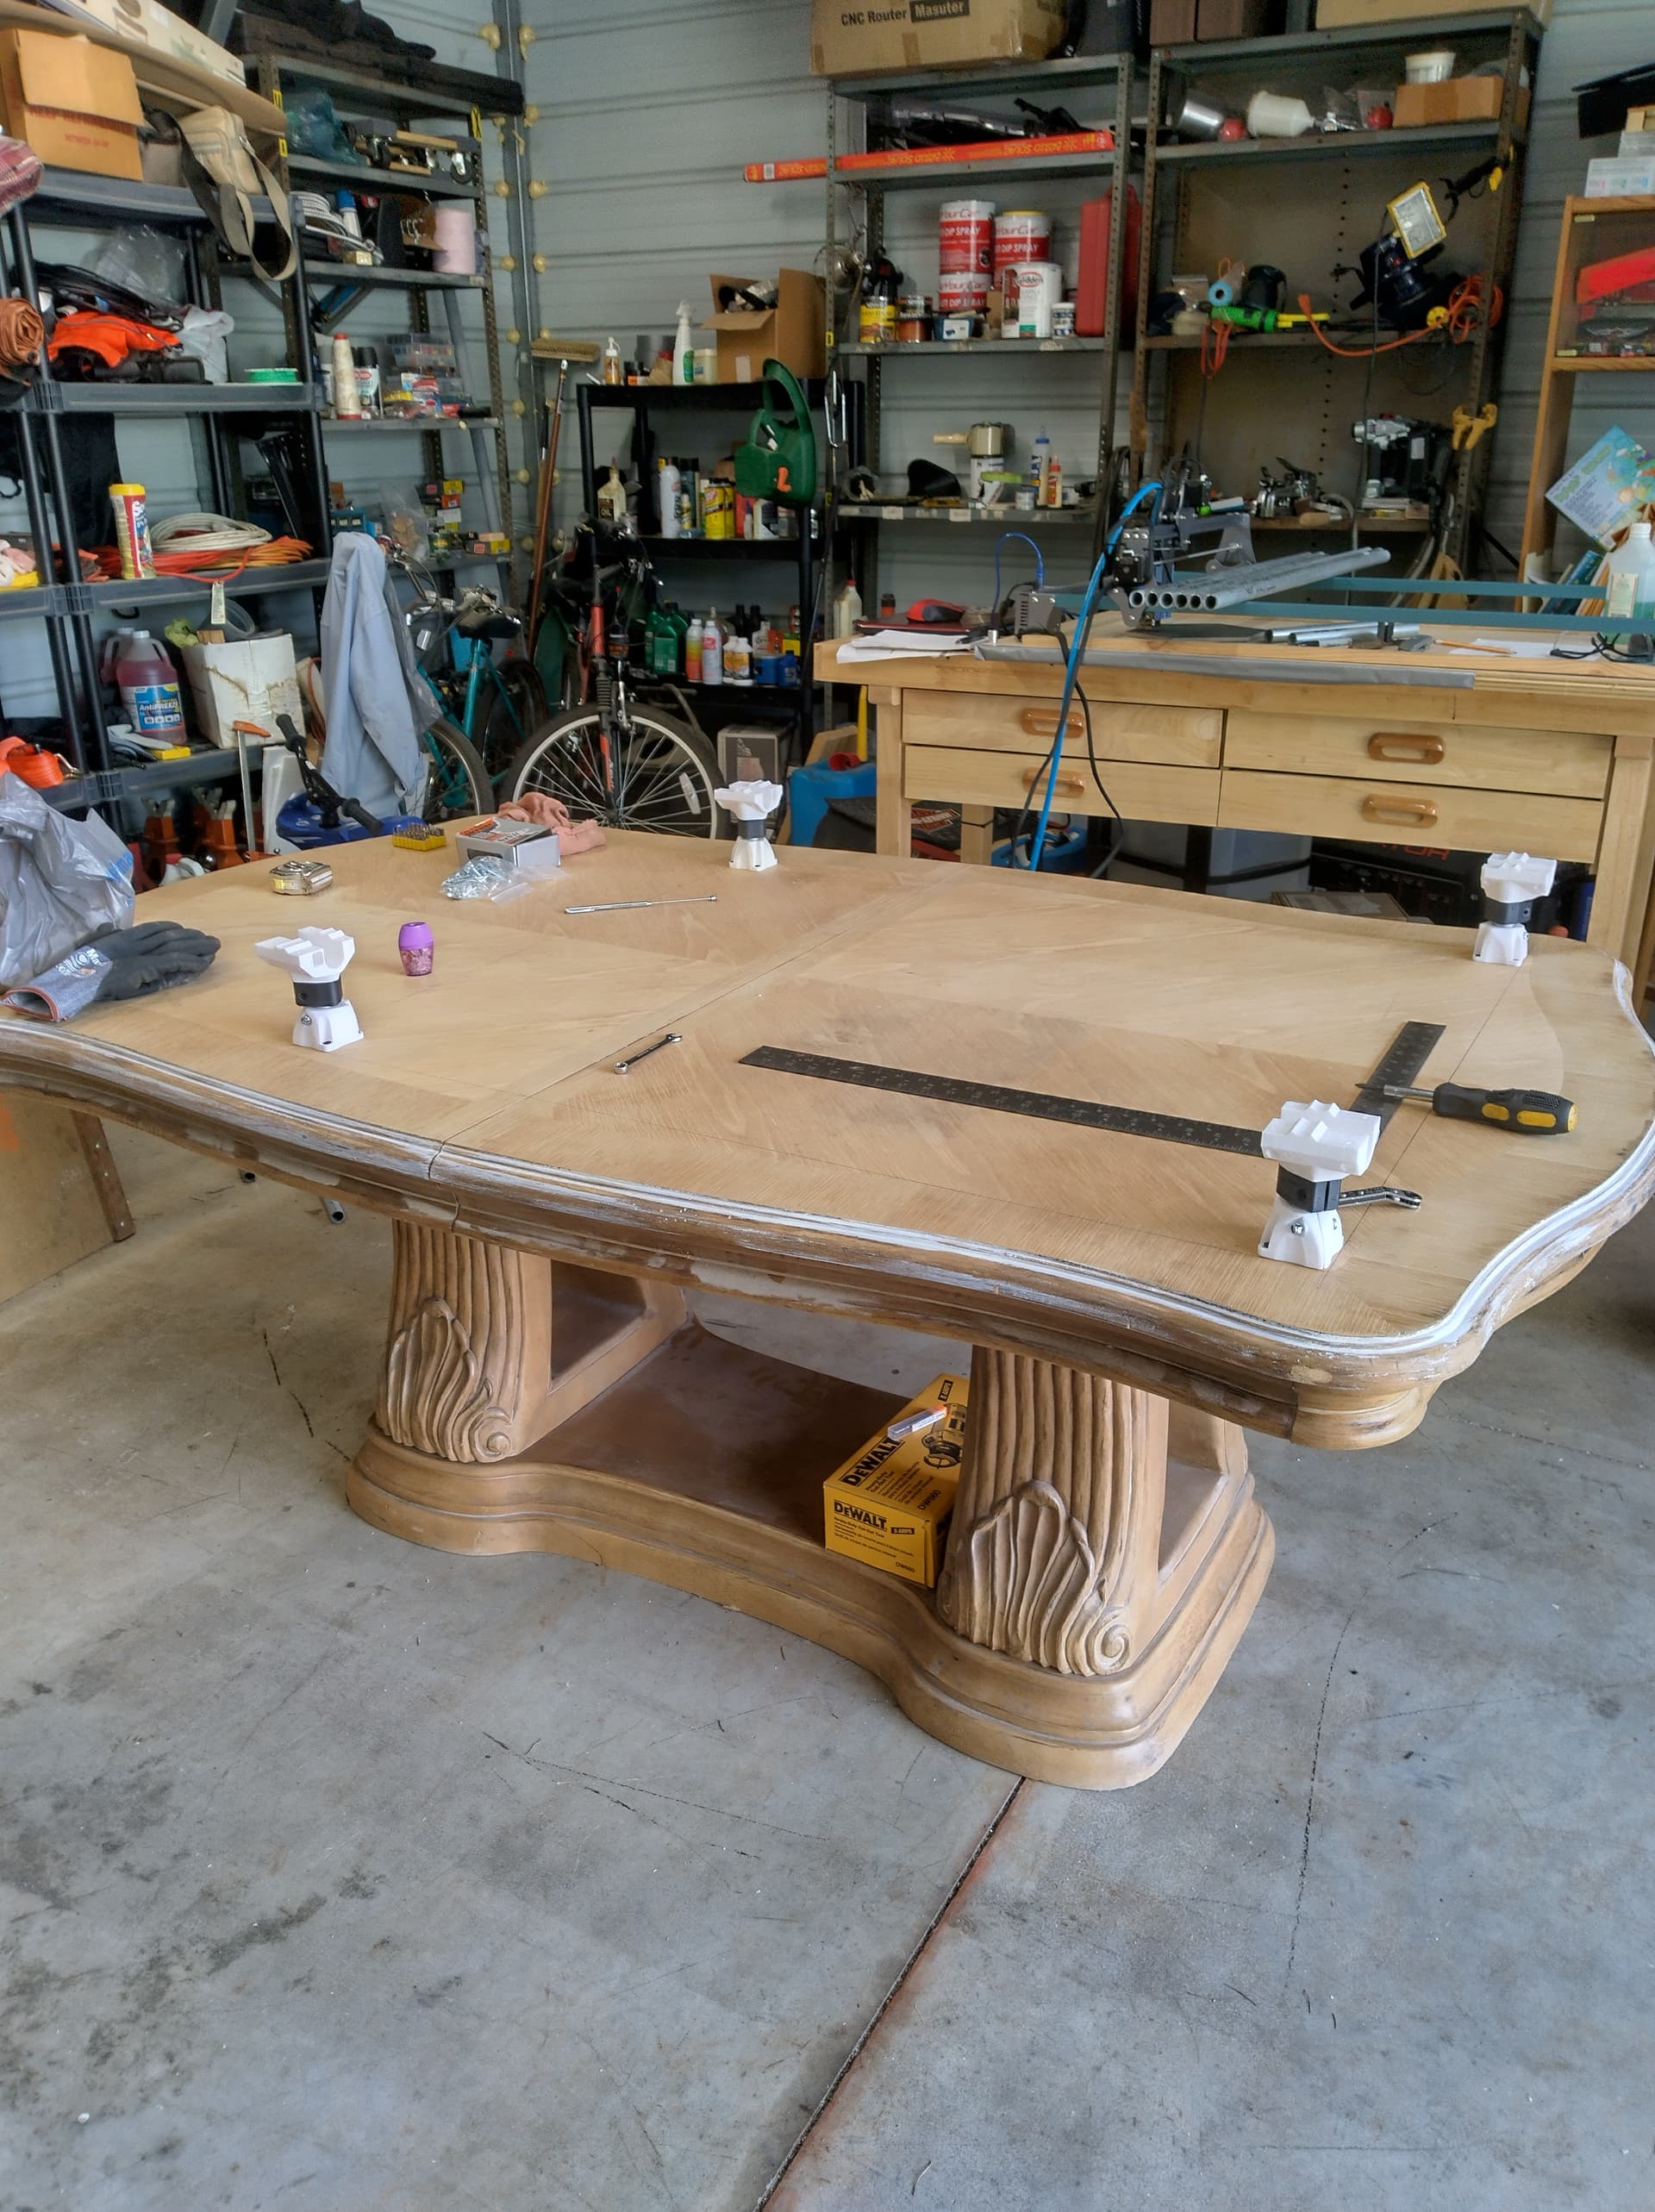
Thanks for letting me into the group. Have already read a bunch, and learning as i go. I currently have a Fox Alien router (small one) and a Sculpfun Laser. Been doing some wood routing already with stl files. So wanting something bigger, i decided on the mpcnc. I’m going with a 24" X 30" platform. I’ve included a few pics of me getting started. Looking forward to posting more as i get her built.
9 Likes
That’s a sensational table!
I really want to see the tubes bent to follow the edges - I’m sure someone round here could help you with the maths!! ![]()
![]()
2 Likes
Welcome @hommer26652 ! That is a great work surface! Build looks good. I had to build mine 2x before learning how to square it properly. Someone suggested using wood with holes drilled for the legs to space and square the base. That worked well. The little details now will matter later.
2 Likes
That table is AWESOME!
2 Likes
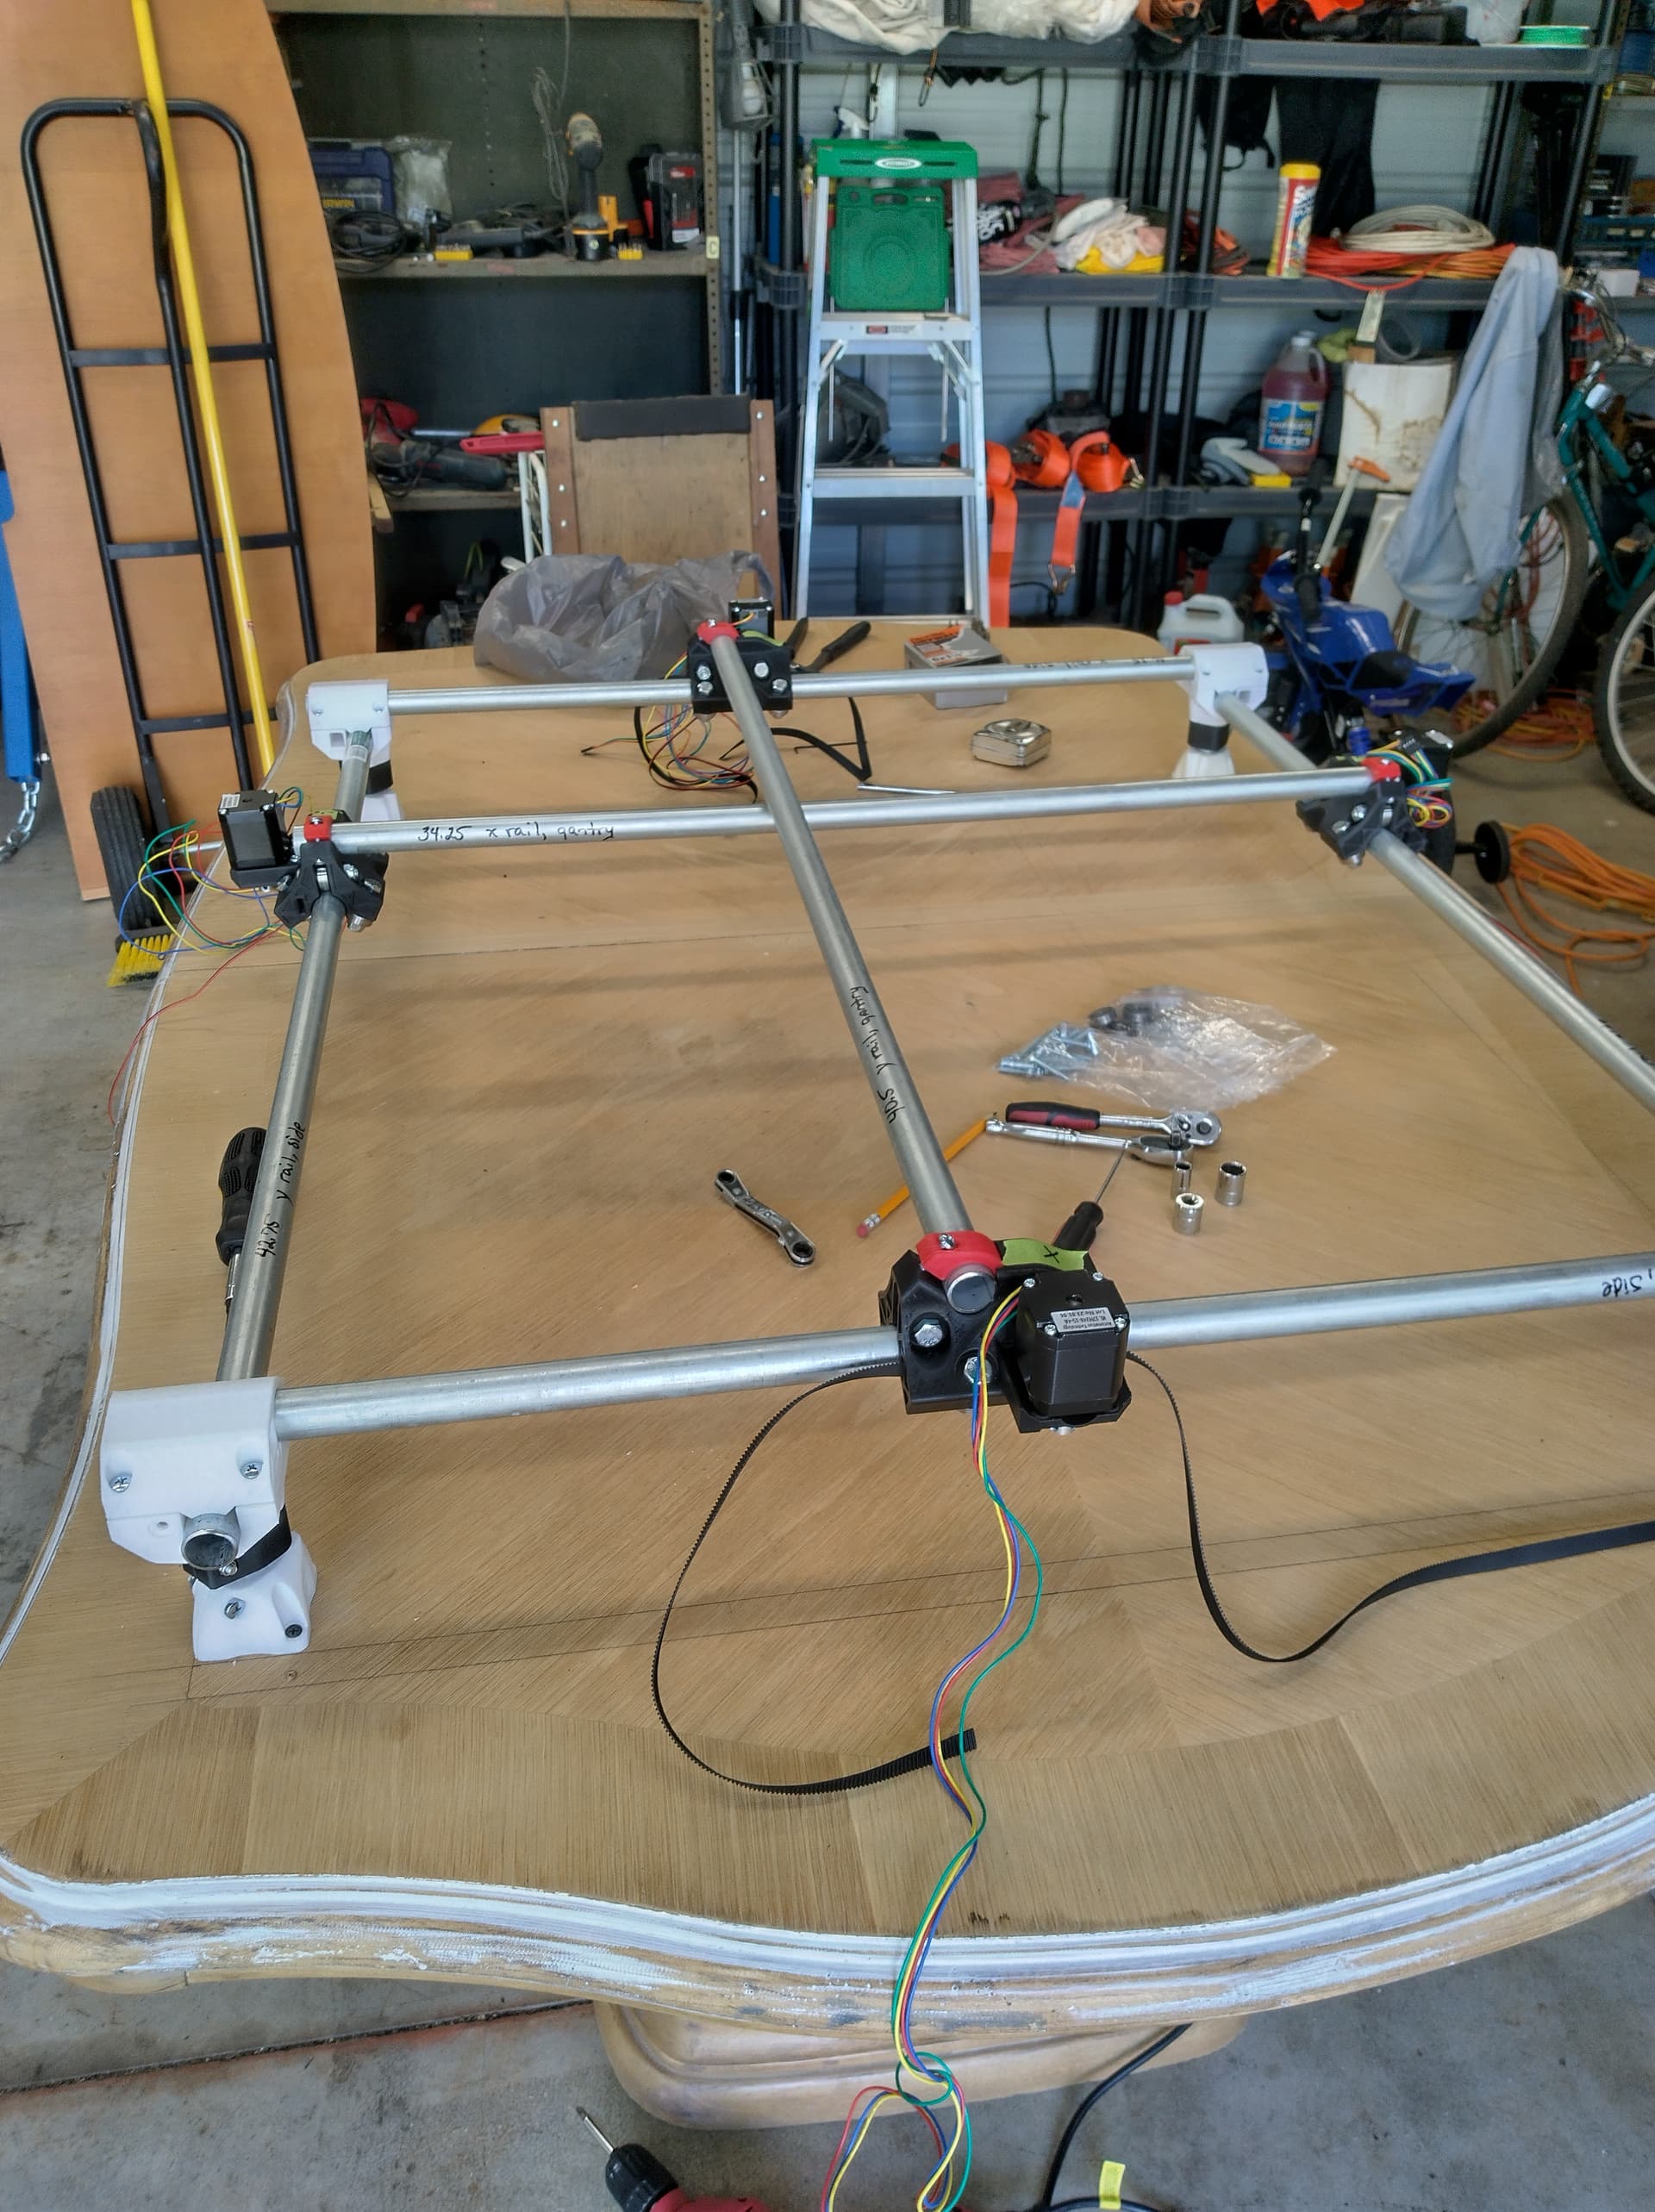
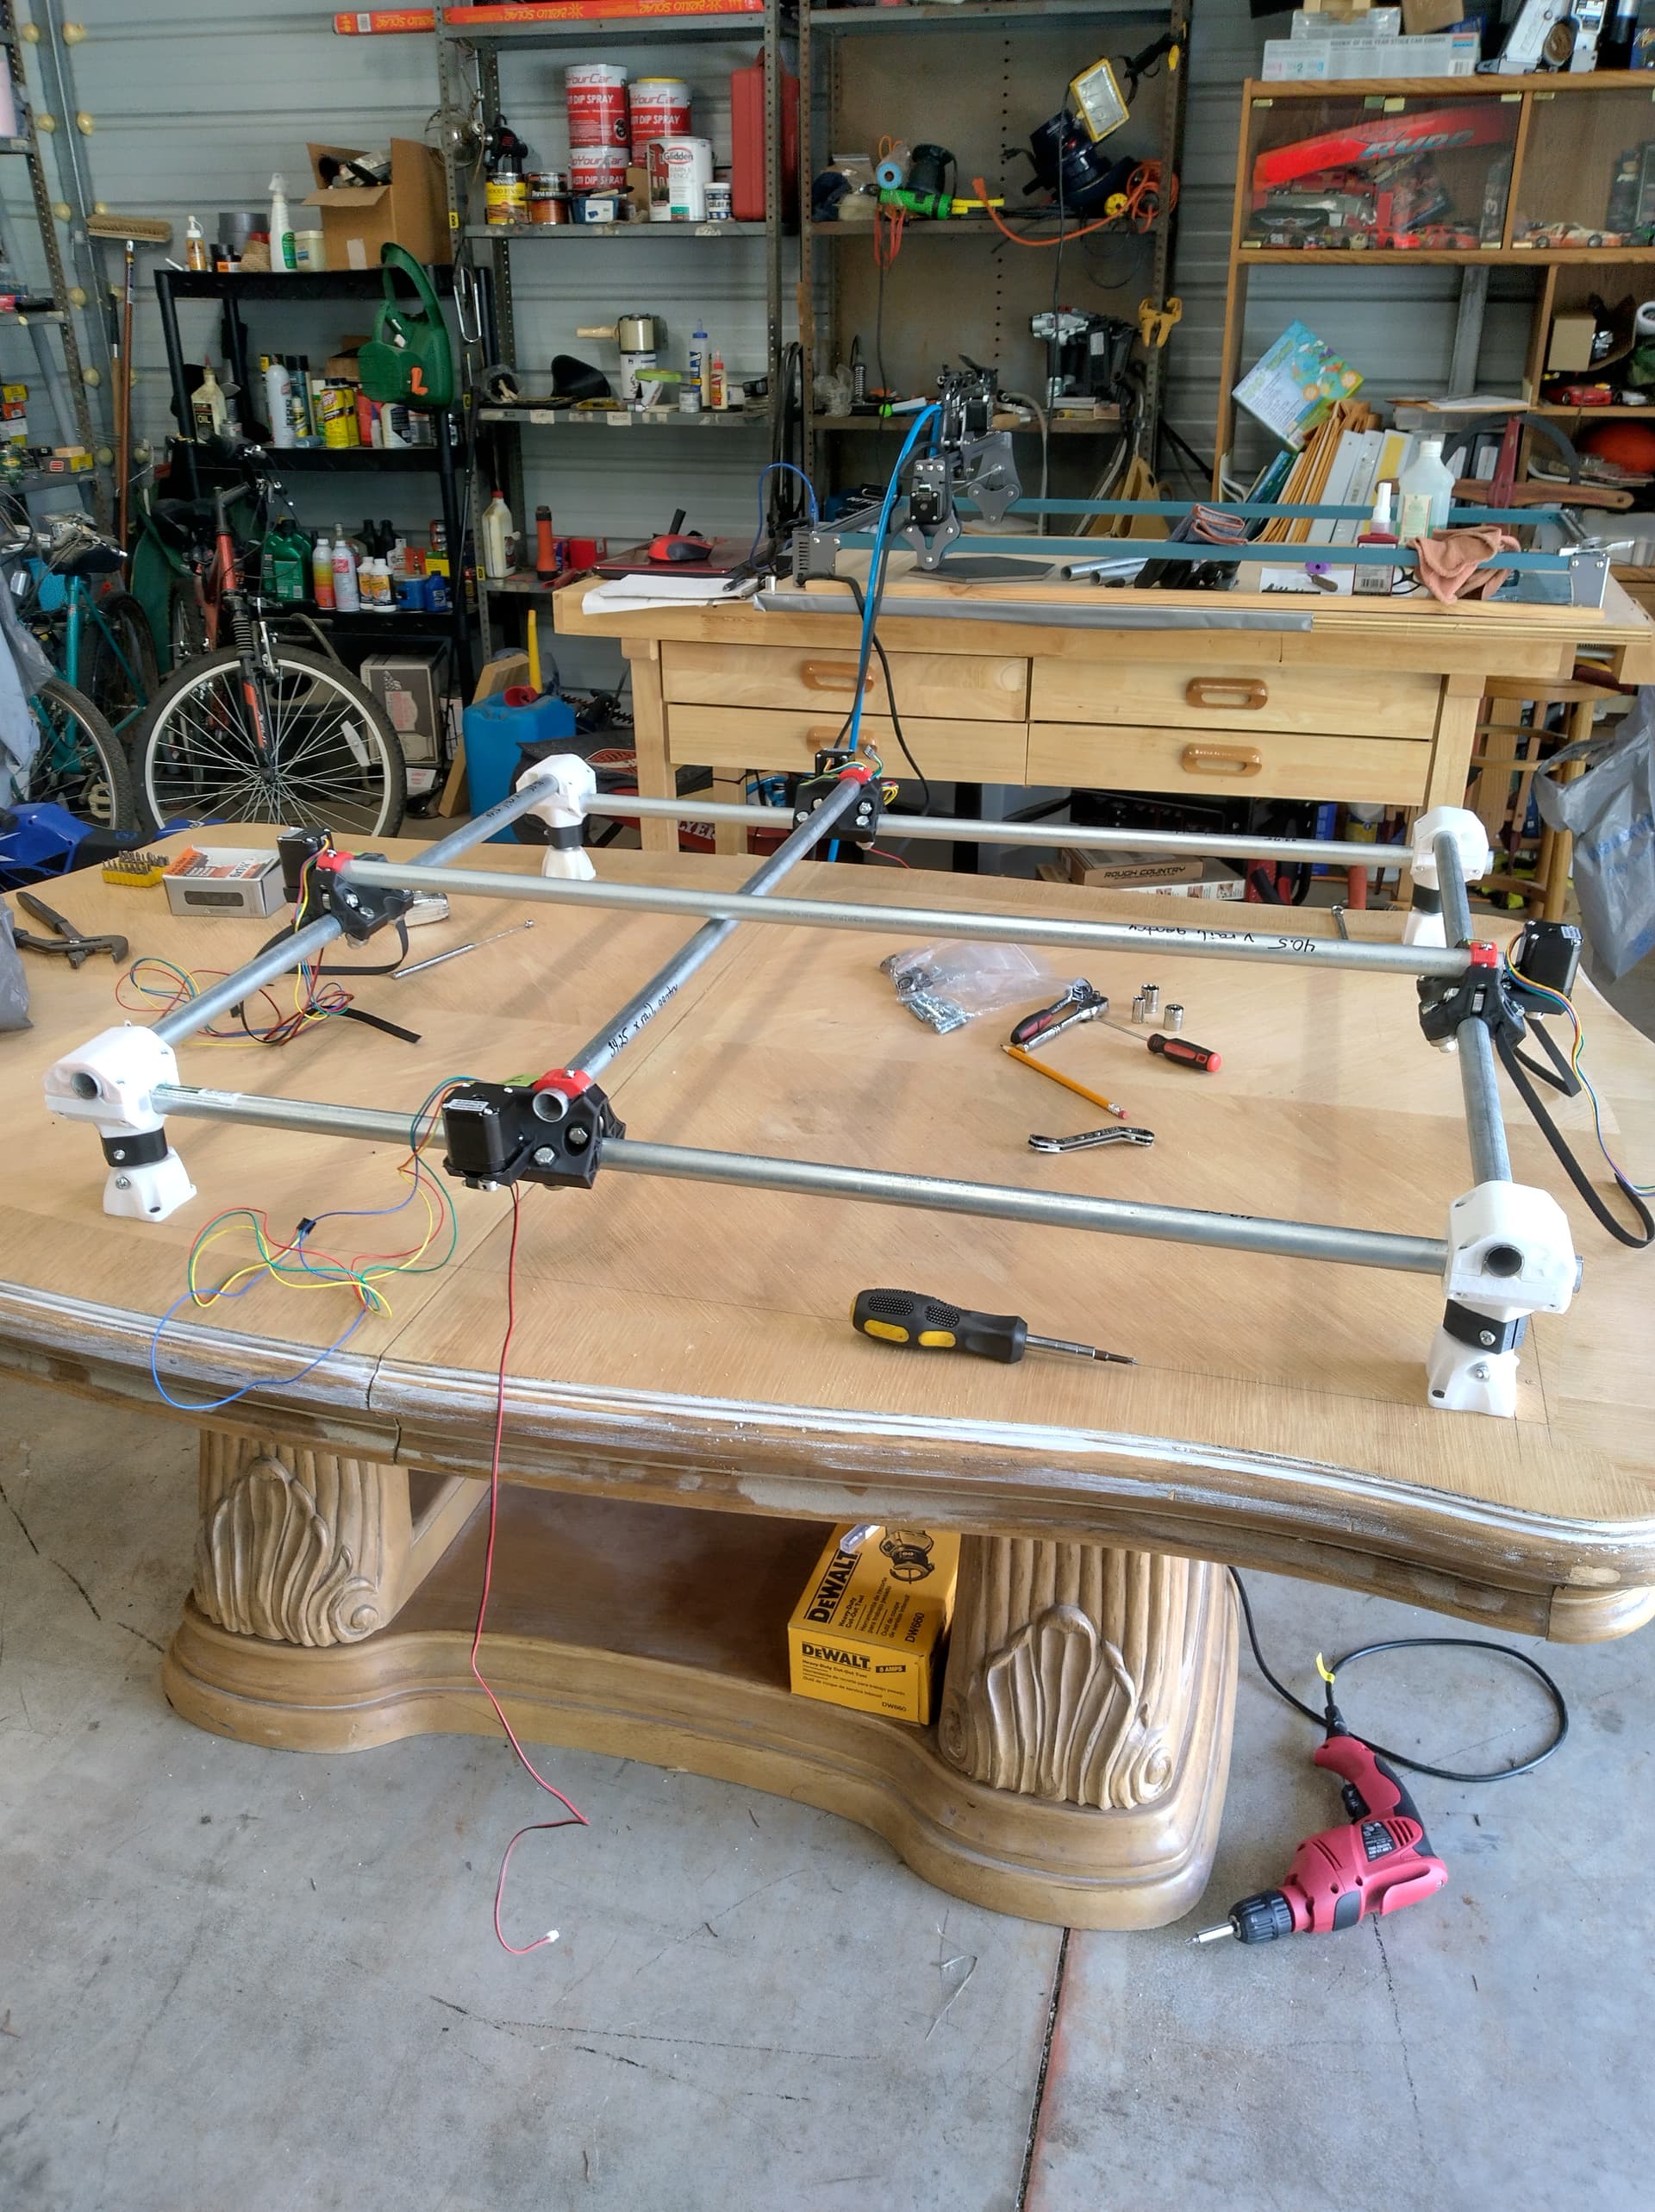
Just letting you all know i’m still working on the build. i have the Z axis core on now, and test fitted the router. (see pics) I do have a few questions though? I was wondering how some of you installed the Zaxis limit switch. i don’t see anything in the instructions about installing one. Plus, one the control box, i am mounting (2) fans, however they have a two pin connector. don’t see where on the board i would install the connectors. i’m using a SKR-Pro V1. Any help would be greatly appreciated.
2 Likes
thanks.
on the primo, you don’t have a z axis limit, you have a touch plate that can be optionally purchased to ground with the mill bit when it plunges down and touches it on top of your milling surface. I don’t have one, so I manually move the z into position and then use the custom v1 menu to reset the z axis home position followed by a beep. If you search the documentation for “touch plate” you should be able to find this
I went the same route using an old dining table. Very sturdy base
1 Like