Hello All, I just replaced my ramps board with the jackpot board. I am using one homing switch on each axis because that is all I need. I have the one switch tied to both pins on each axis on the board. Both lights are on when off the switch and off when on the switch. I have the config file with all four motors set to true for hard limits. When I home, one motor will stop and the other on the axis will not when it hits the limits. Anybody have an idea what is not set right? thanks Mark Z Lowell, Indiana
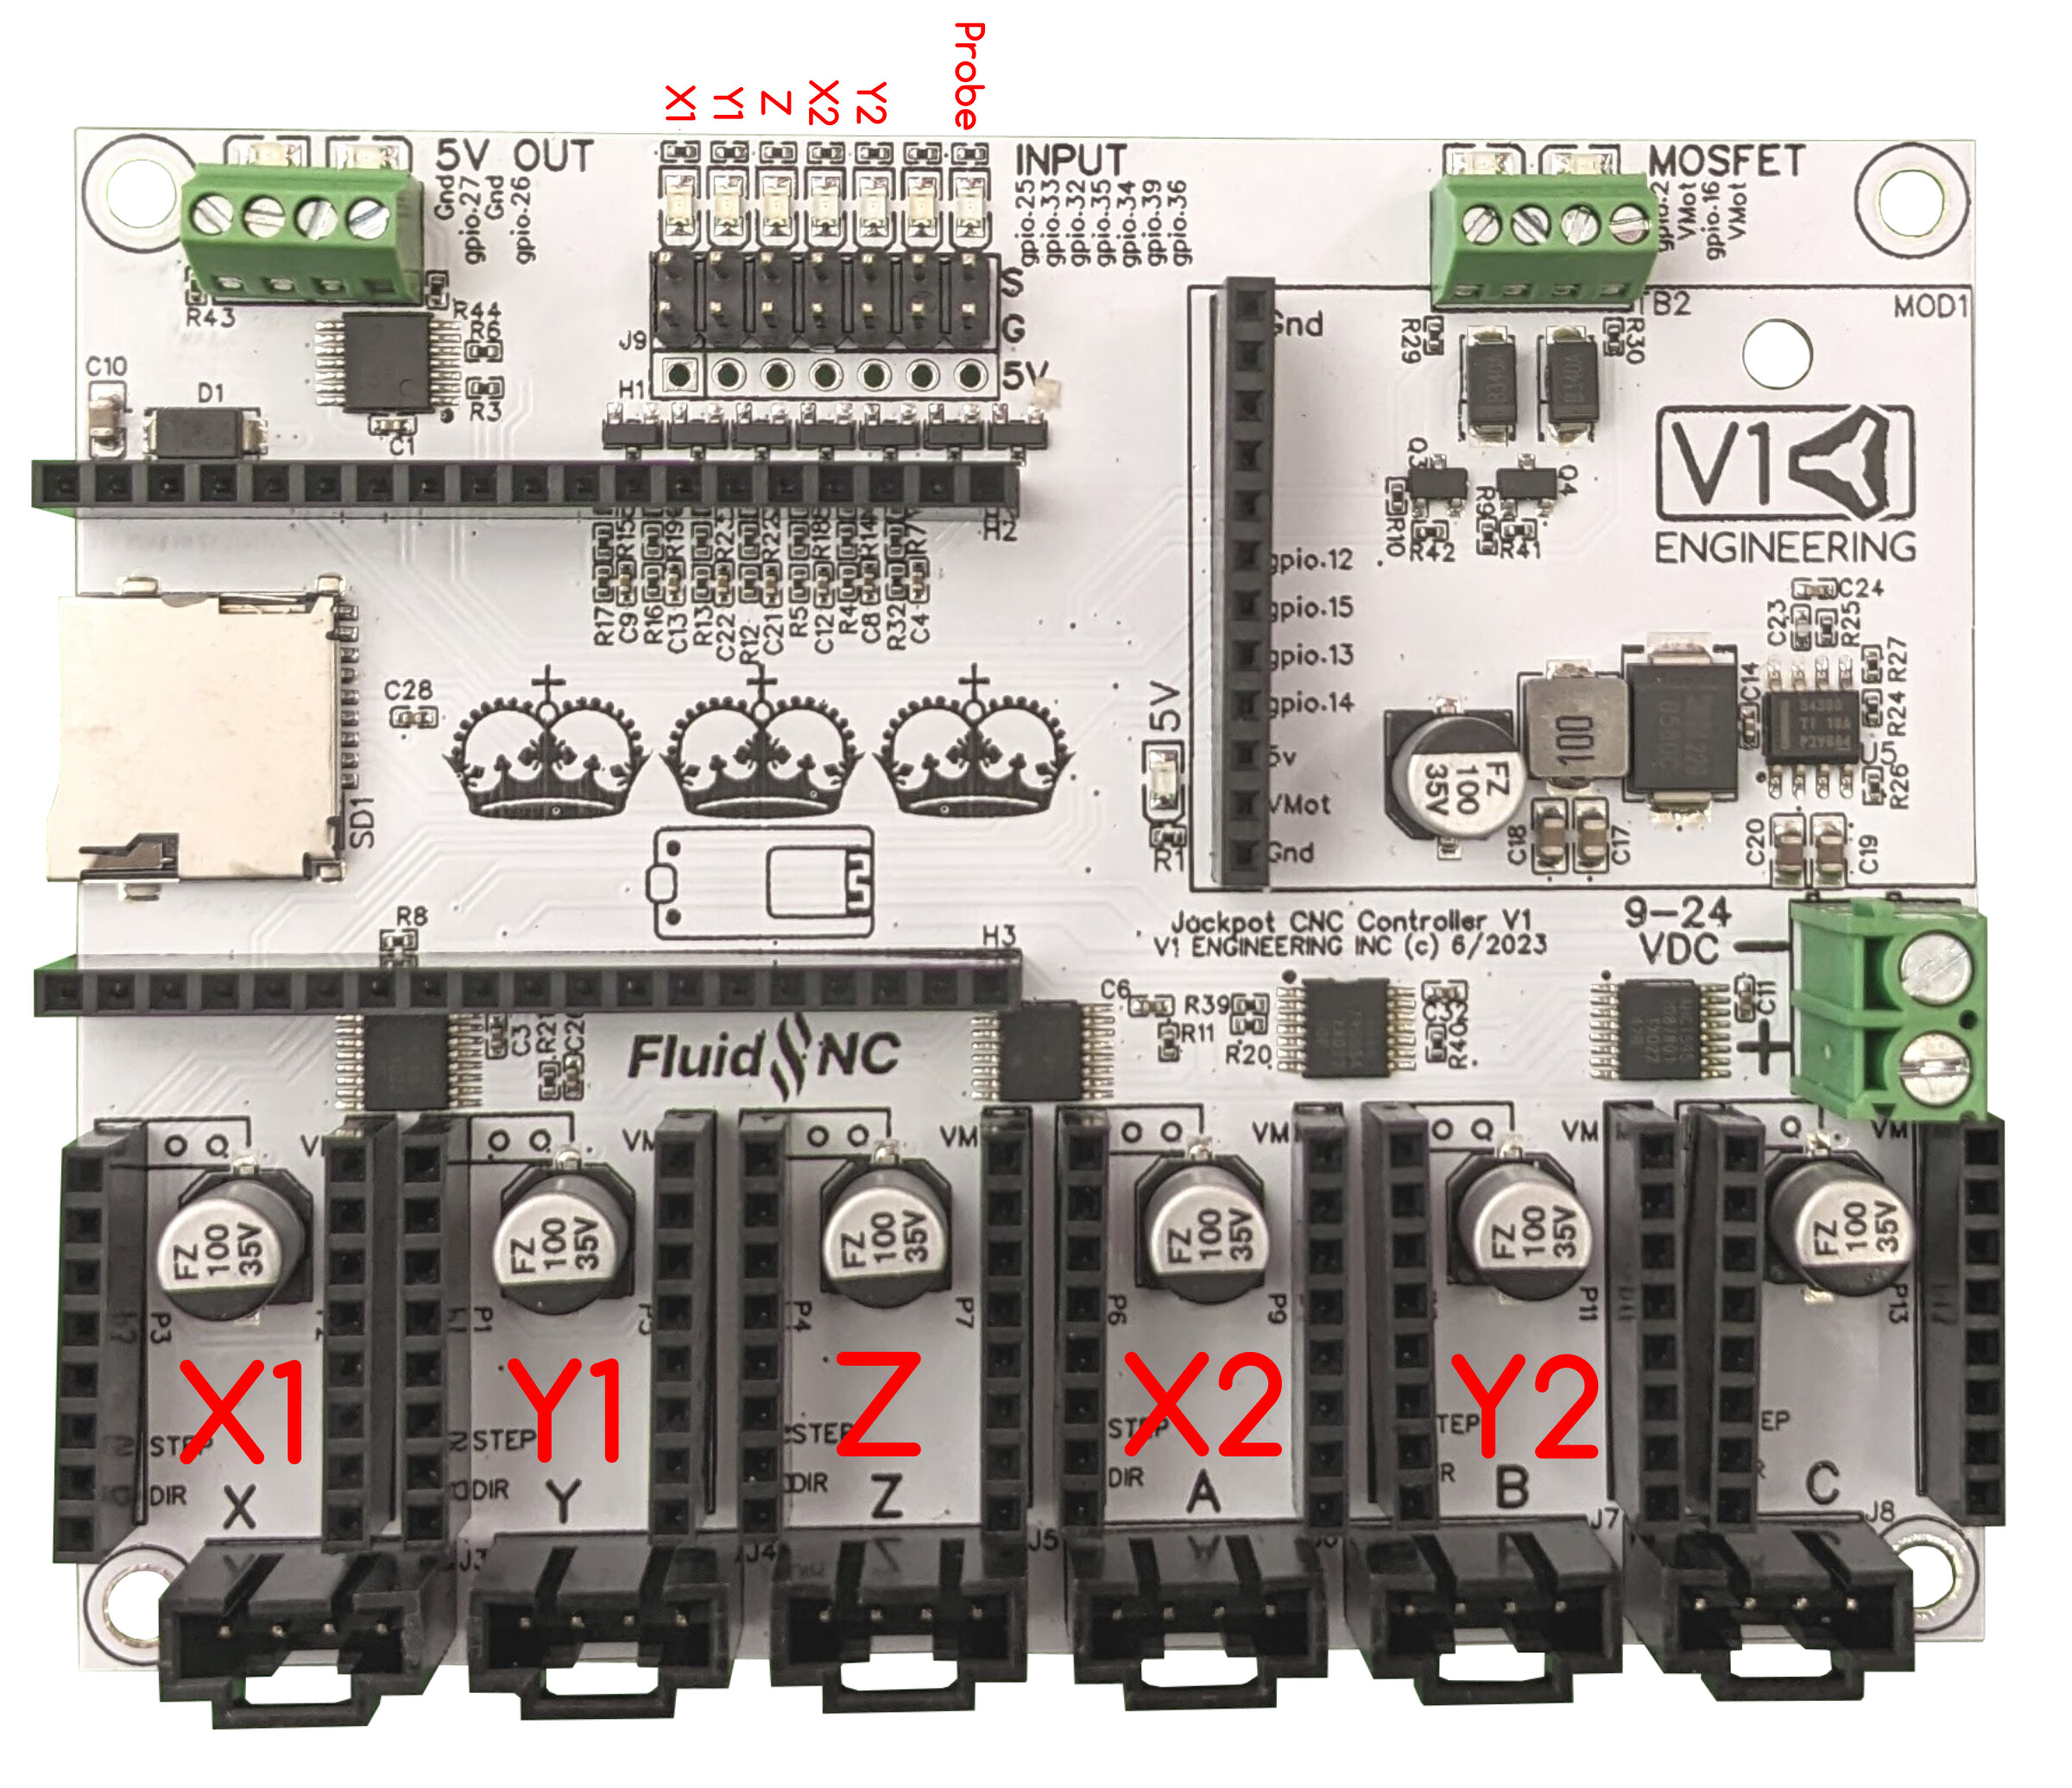
This is the first time I have ever heard of someone setting it up that way. But technically if you are getting the trigger to both endstop pins then it should stop both motors. Are you sure you are on both x pins and both y pins for each switch? if you are hitting one x and one y at the same time you would only stop one motor. have a look at this pic and make sure you are on the right pins…
post up a pic of how you have it wired
That won’t work. The homing sequence looks for the endstop to trigger, backs off, then slows down and re-triggers it.
Because you have a motor config that isn’t driving a motor into the stop, the sequence will fail.
What you need to do is to create a correct configuration for your machine that only defines the motors and endstops that are present.
Hello Jonathan, Thanks for the response. Upon close examination, I found I had the 2nd x axis in the Z spot on the board. By 70 year old eyes are not what they used to be. Now, all is working as it should. I looked at your picture and that showed me. I thought the x and y axises would be in order, not divided by the Z axis pins. I only use one switch because squaring is not that important to me. The machine does what I want and I am not cutting parts for Elon, just NASA if you get my humor. Thanks so much and have a good new year. Stay warm, it’s supposed to hit -25 here with wind chill.
It should work as is. As long as he has both motors running off the same end stop, as far as the board knows both motors are hitting their mark at the exact same time. You can’t square off this set up, but it should put him at a home position.
Single end stop works for me. I dont need the squaring. For what I do, it is fine the way it is. It is amaising how square things come out if you make sure to square the frame up when building it. I have been running this way for 3 years. I just saw the jackpot board and I was using a ramps board. I just wanted to run with the varsity instead of the minors. Besides I love the wireless feature and the onboard web GUI. So quick and easy.
1 Like
That’s what is most important- it’s working for you!
That’s one of the major steps forward with the Jackpot board, FluidNC, and the ESP3D Web interface.
This should be a great setup for you and a big leap forward from the RAMPS setup.
It’s only a config file change away from not trying to do double motor squaring.
The setup works but will introduce a small amount of racking. Depending on how well coupled the Y axis is, it may not even be noticeable. If racking is ever noticed to be a problem, then modifying the configuration is still an option at that time- and I’m sure help will be available in the forum if so.
But again, if the machine is working to expectations then all is well.
I’m just finishing up my 3rd or maybe 4th build of mpcnc, going back to v1.
Having spent way too much time manually squaring, setting zero, wondering WTF is wrong, fiddling, doing math in my head on both MPCNC and lowrider, this time I’m rather excited about having dual endstops and a reliable, repeatable origin.
It was all wonky and weird this morning. So I took everything apart, marked and labeled all my wires, and then methodically plugged everything into the correct pins.
Et, voila!
Still fighting with what seems to be a… problematic, unpredictable WiFi stack on the Jackpot. Thing is literally surrounded by other devices that connect to my network with no issues, but the Jackpot connects about 1 time in 10.
1 Like
Go ahead and create a new thread for that issue in the Software/Firmware section, with details.
Once that topic is created, we can dive into the specifics of what you’re seeing after getting some more information.
1 Like
I was doing that, but I’m gonna try a couple of other things first, maybe to offer some solution.
can you explain where in the config file to set up single motor endstop? And I’m curious, what is racking? Not sure what that is but I guess it refers to jerkiness in axis movement? thanks for your input. It is very welcome here! best wishes, from Mark Z in Lowell Indiana
I originally found V1 engineering because I was interested in Ryan’s awesome machine designs.
I hang around here because of the community that he has fostered, and try to participate in this sense of community helping each other. It’s refreshing given the state of so many other things out there in the world.
We’d delete the unneeded 2nd motor limit switch for any motor that doesn’t have its own limit switch.
If you post the config you’re using we can take a look. We also need to know which machine (MPCNC?), and which motors have limit switches on their side. (X1 and Y1?)
Note again that if what you have works great for you that there isn’t any urgency to do this.
Racking is when you get the machine out of square. To see how much you might end up seeing you can get a sense of it by taking either X or Y axis and pushing one side forward while pushing the other side back. That shows you how much out of square, worst case, you could be. It’s never as bad as that- but it gives an idea.
Since you are only using one limit switch on an axis, when the opposite side is doing its’ homing, it has to move the gantry all the way across to trigger/release the endstop on the far side. It works, because V1 machines are fairly tightly coupled- but if you aren’t going to use dual limit switches you don’t need to have the machine even try to home the side without the limit switch. That prevents the motor from pushing that side any further out of true.
I hope I explained that satisfactorily. It is easier to show this in person than to describe it with words- at least for me.
Once upon a time, I thought I didn’t “need” endstop. Then, for a while, I thought one on each axis would do.
This is because I suck at soldering and generally hate fiddling around with little wires.
On my third build I finally did dual endstops.
OMG. You totally need dual endstops.