Made some progress after forcing a few locknuts with 2 screwdrivers jammed to stop them moving… Then they are replaced with regular nuts and 4mm shorter screws that can actually clamp the bar. When drive belts gets tensioned the construction gets even stronger.
Now I have some drive belts and pulleys to add and extension of wires.
The infamous Crown test…this one is the “lazy” one…12mm .gcode from ESTLCam basics page…
A few tweaks must be done…shorter legs (pen don’t reach table) or elevated working area/spoilboards…hmmm might be an idea.
Moving around making measurement (draw rectangle) confirming square and level setup measuring diagonals/ using M666 to adjust endstop offsets and possibly adjust corners
Must print out a holder for my dial gauge in order to do so…
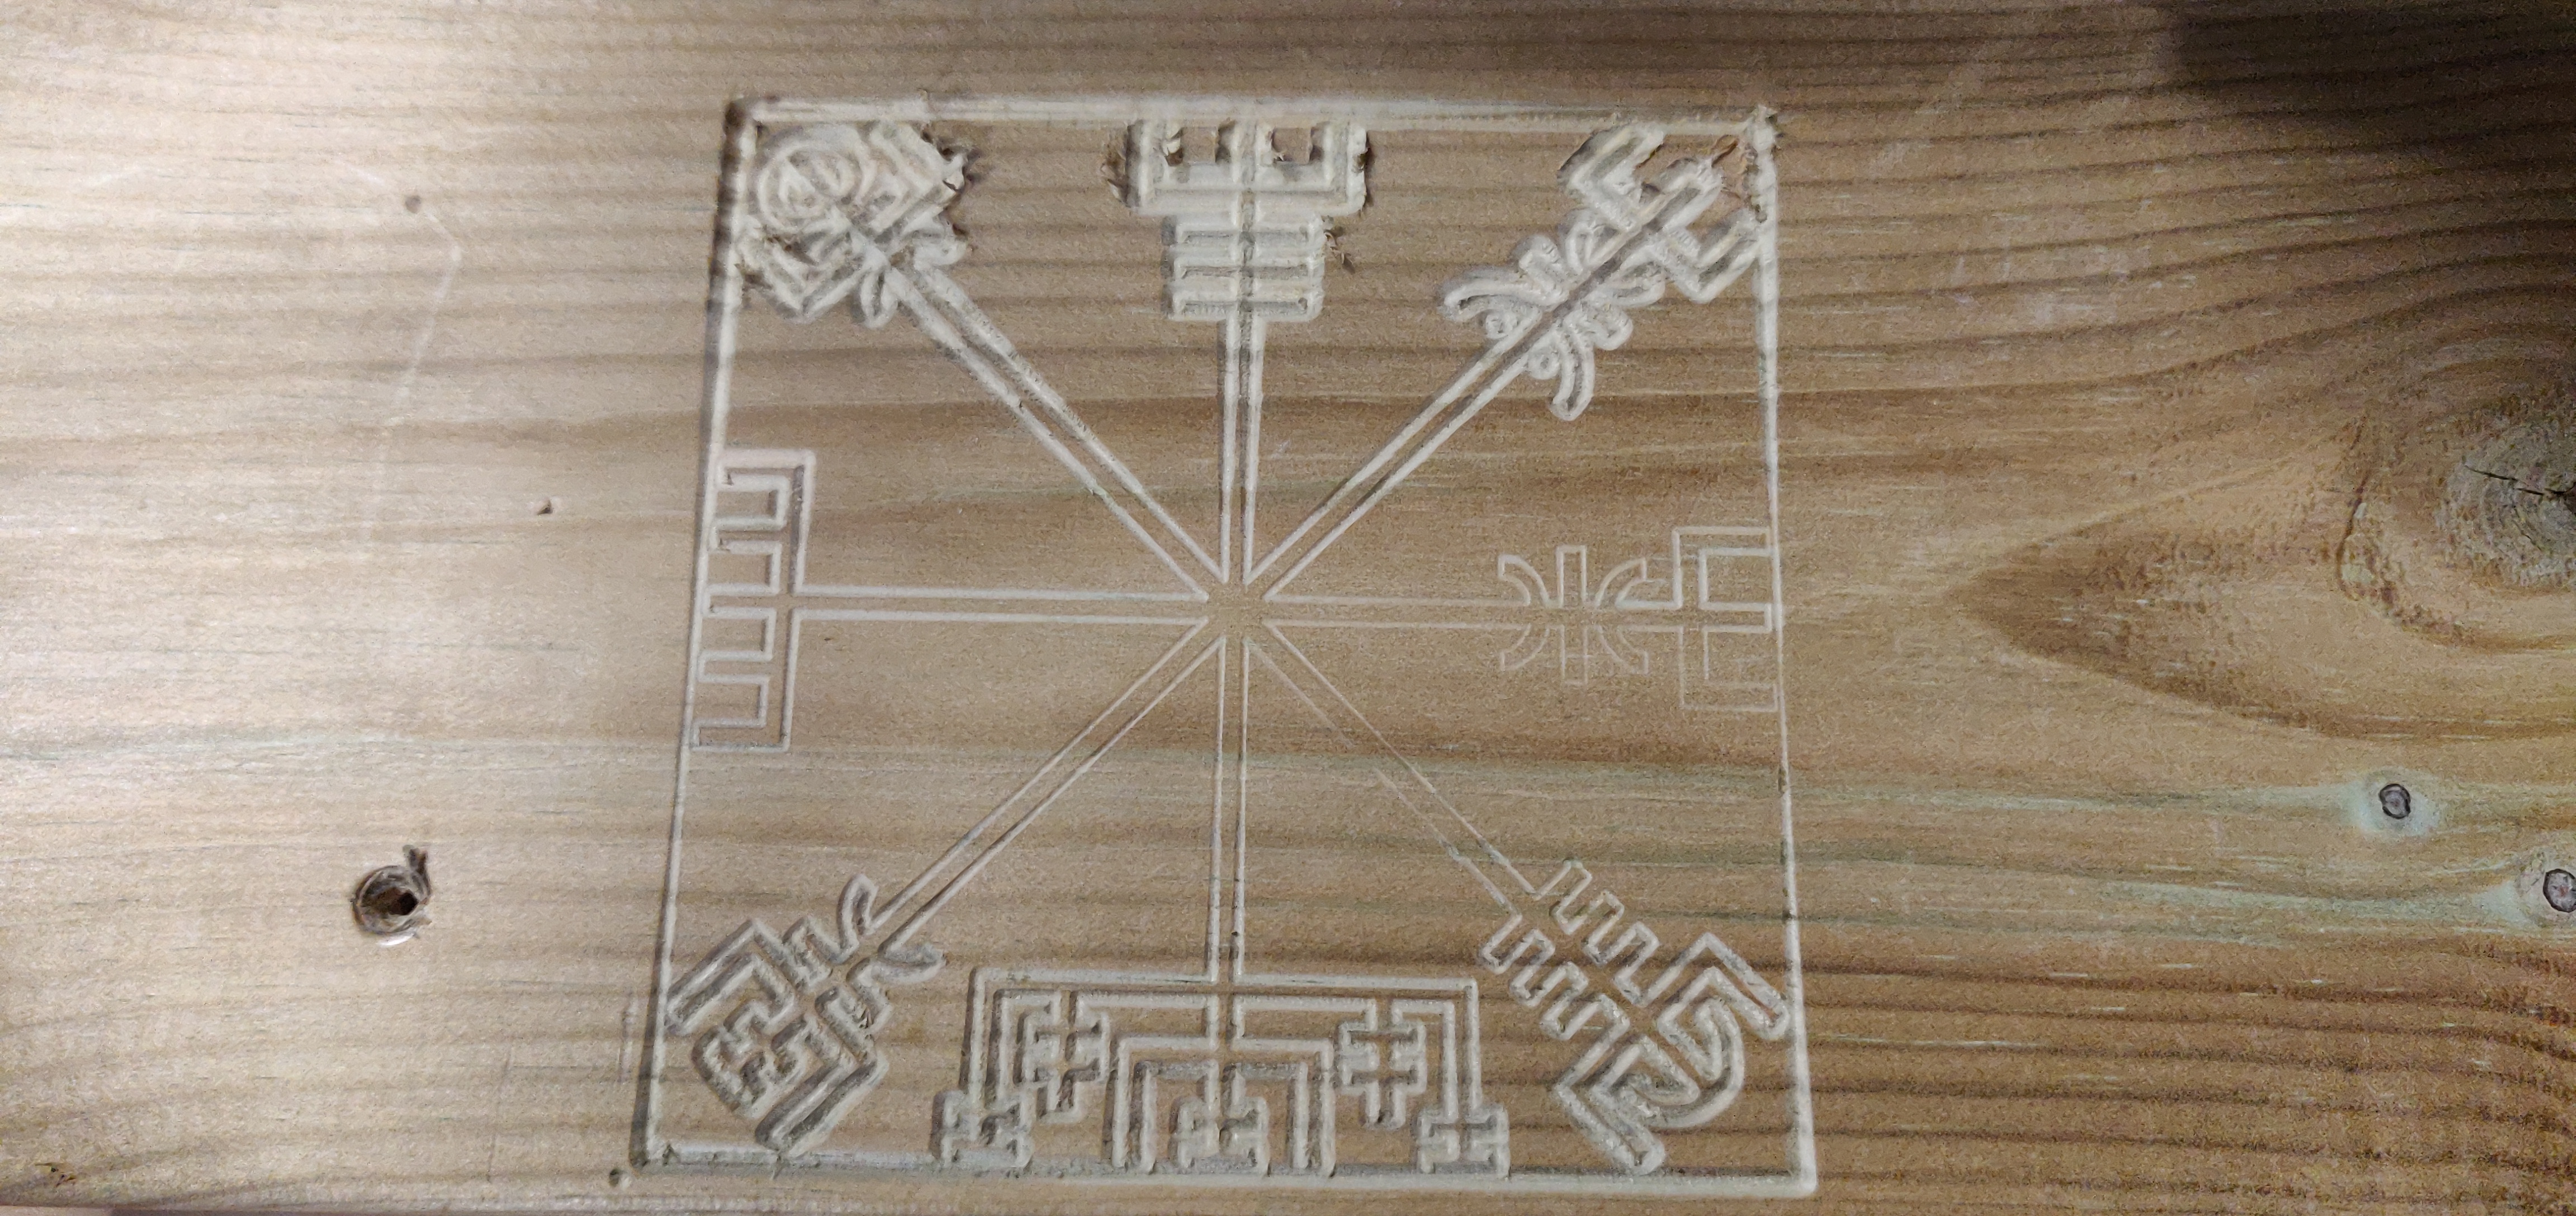
This is for you who doesn’t know the symbol “Vegvisir” (Icelandic wayfinder)
It is also a cool symbol to test my MPCNC with so I added a border 20*20cm and scaled up the svg to fit (minor work in InkScape) Import into ESTLCam and select the only tool atm…my pen and off you go…
8 minutes later I have this wonderful symbol with a nice 20*20 rectangle that I can measure with my steel ruler and I bet it is spot on! Incredible, not adjustments at all…and it is also square so I don’t need to adjust anything there either…cannot wait to get my wires sorted so I can start using my router.
Noobie mistakes has been made
I downloaded a random logo and tweaked it in InkScape (added a frame/border around it)
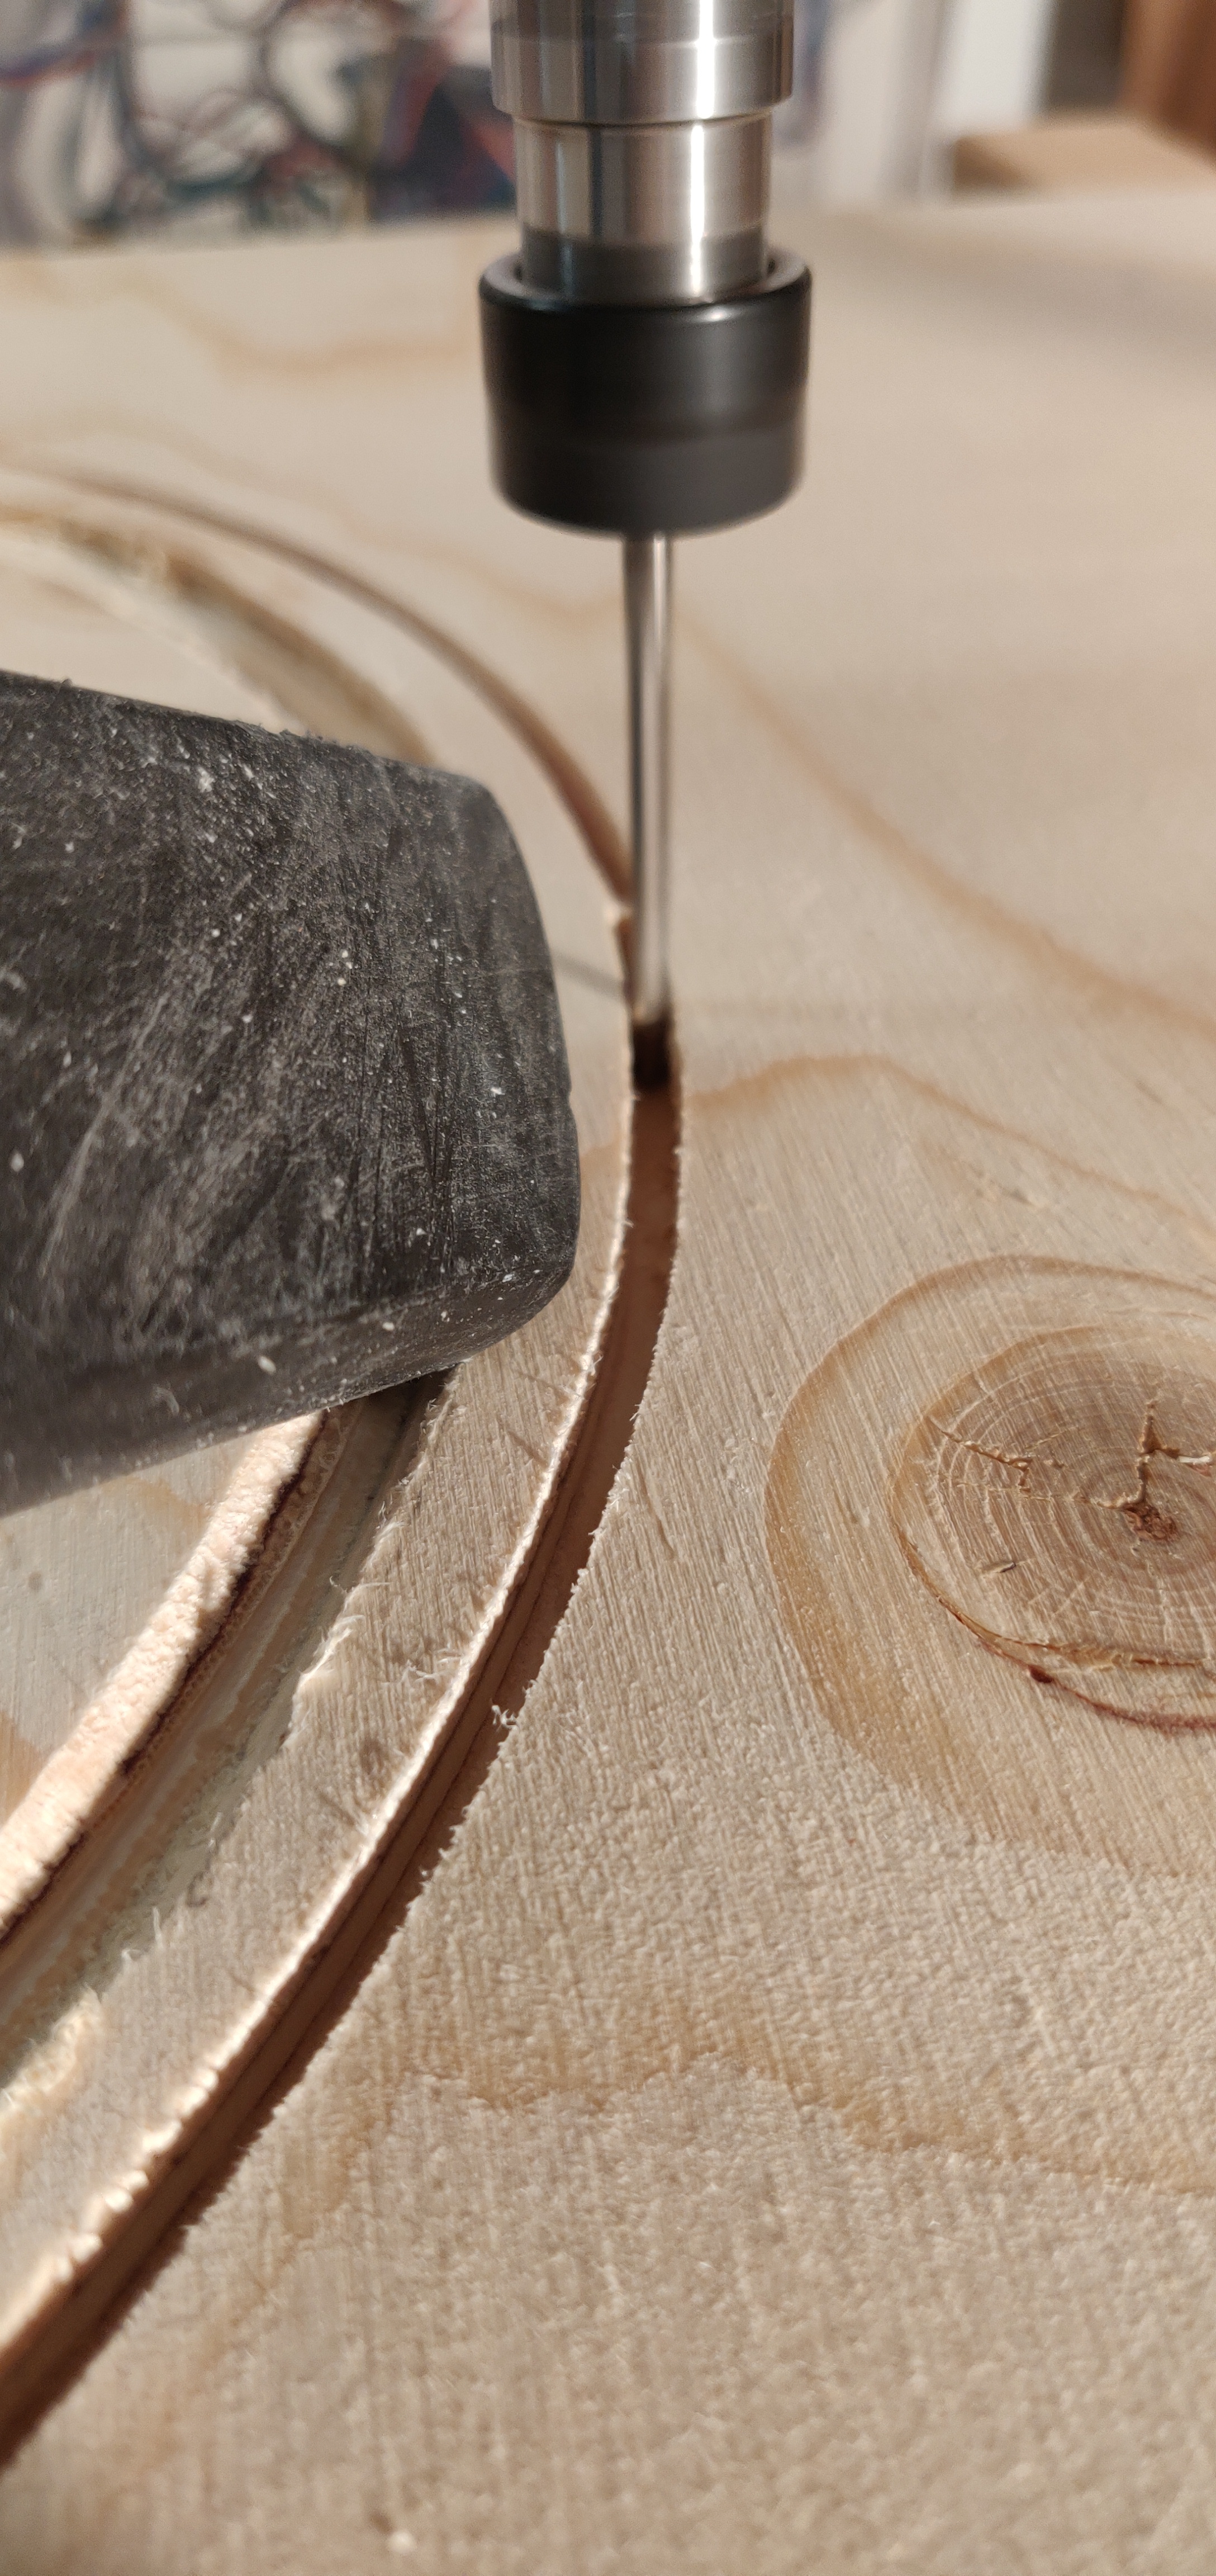
Open up ESTLCam and start working with the holes to leave logo but mill out the area around it to the border I made…and set a depth…save as Gcode, move to SDcard, change tool, start vacuum and spin up router…all fine and dandy, worked just great if you want a wooden sign 83mm wide and 3 mm depth and pick a 3.2mm bit instead of a 3.0mm that was set in ESTLCam…
So all in all - great experience - nothing broken. Back to ESTLCam and size carving properly…how about 20cm instead so you can actually see the finer details and change tool in ESTL to 3.2mm as well…reduce depth to 1mm instead. and we will see what happens. Back to the garage…
Ill even try to add a gauge to level the board out a bit…Too bad it always requires tool changes…Pen, Gauge, Router…
At least size is OK but what the heck happened in the end at E and R router did not go up and after creating bounding box it went routing at same depth back to home…
Must troubleshoot more but connectors are fine and I can move Z up and down from LCD…and voltage are correct to my motors, steppers are cool by touch and chilled with 60 mm fan.
That is odd - it must have lifted the Z-axis for the other moves, just not the ones at the end. When you say your steppers were cool, do you mean the drivers?
If you look through the G code, can you find the G00 moves and check the height? (select the tool path for the ‘er’ in estlcam and see what it’s called, because each block of code is labelled).
Interesting to hear about your setup, and how only larger debris goes in the bucket. Are you able to turn the power down a little? Does it change it? Does any of the tubes have a small opening that you can slide open to ease the suction?
I think we have quite similar setups, but I use an in-house vacuum to run the cyclone, which I assume is weaker than a shop-type. Even the finest dust end up in the bucket, and next to nothing in the vacuum itself.