MPCNC Primo Soundproof Box

As mentioned in my original Primo Build thread I had a complaint from the neighbours about the noise, so I decided to try my hand at a soundproofing box for my Primo.

I’m getting close to being able to test and refine now, but I wanted to share some of the in-progress shots along the way.

For a stand I went down to Bunnings (our local big box hardware store) and bought a bunch of 900mm 90x45mm pine shorts. I created a basic cube with uprights reinforced by double pine shorts in an L. It was based around this design https://www.youtube.com/watch?v=WG-6897GTx4 that I used for my table saw stand - super simple for carpentry noobs like me and reasonably stable.
Because of the dimensions I added reinforced diagonal braces on 3 sides using wire rope and turnbuckles to tighten. This meant effectively zero lateral movement, which I wanted as the box itself would end up being pretty heavy.
I added castors that I bought in 4 packs from Amazon to move it around.

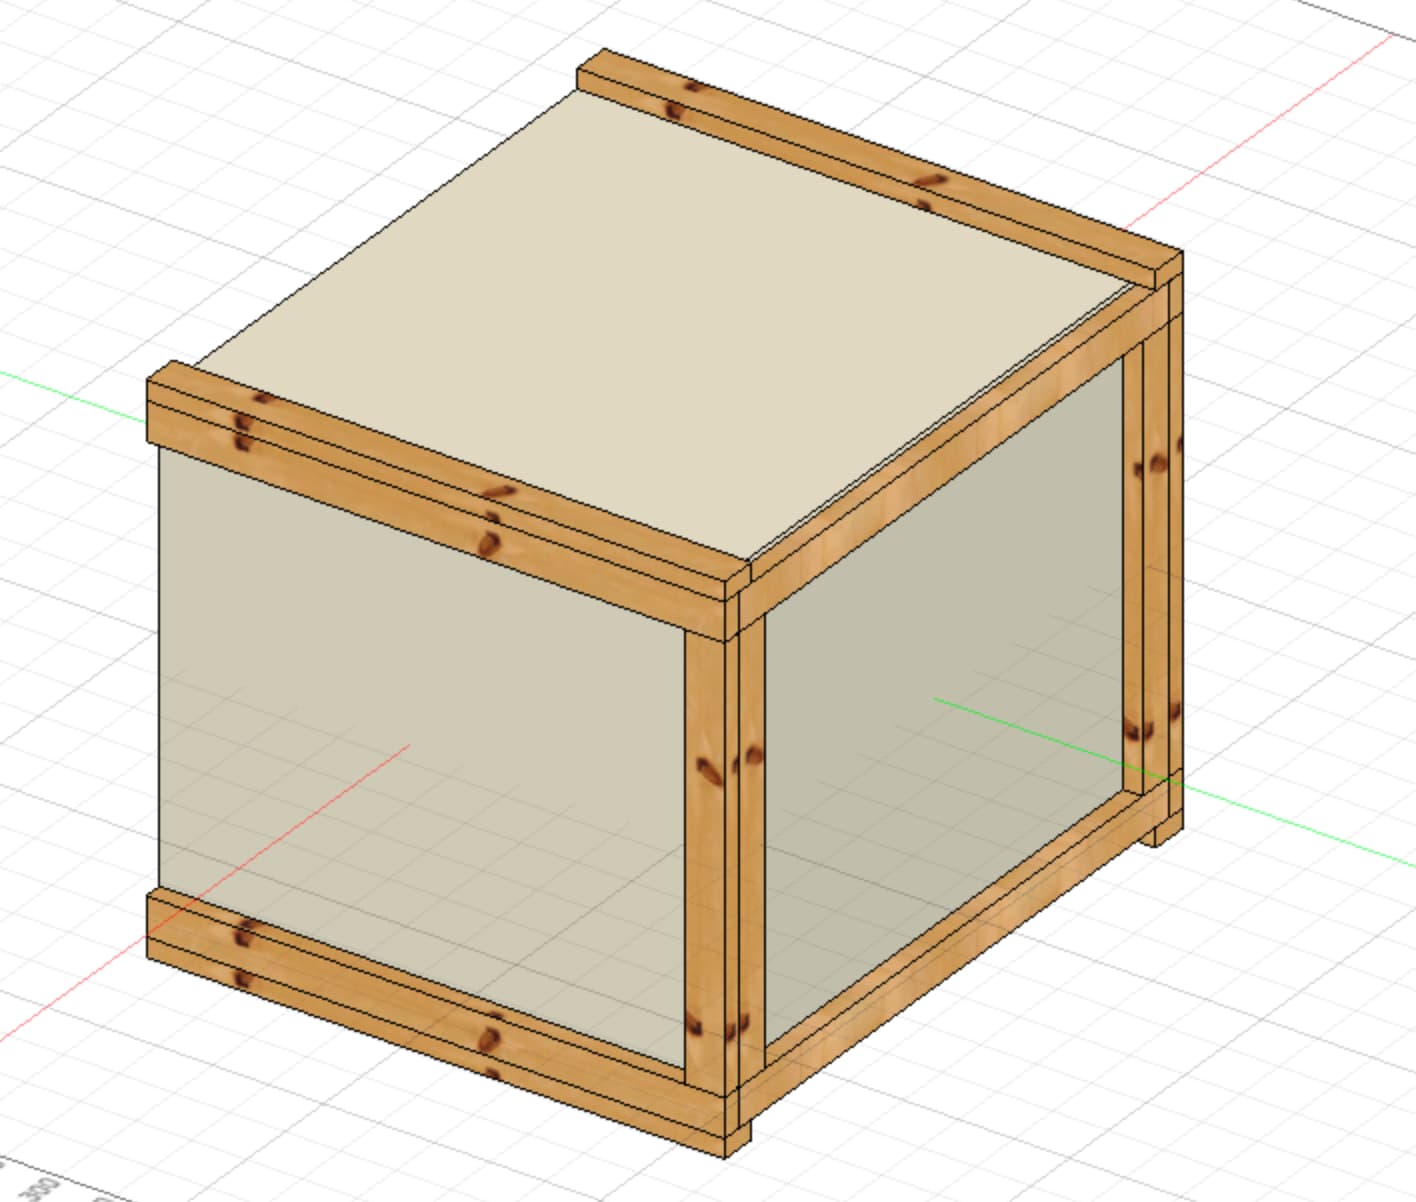
My soundproof box design was created in fusion 360. I build a parameterised interior cube the size of my primo base (with some extra space in each dimension). Then I added a layer of gyprock (plasterboard), rockwool soundchek insulation, waterproof gyprock, then an outer wooden frame.

Back view:

Front view (a bit chopped away so you can see it)

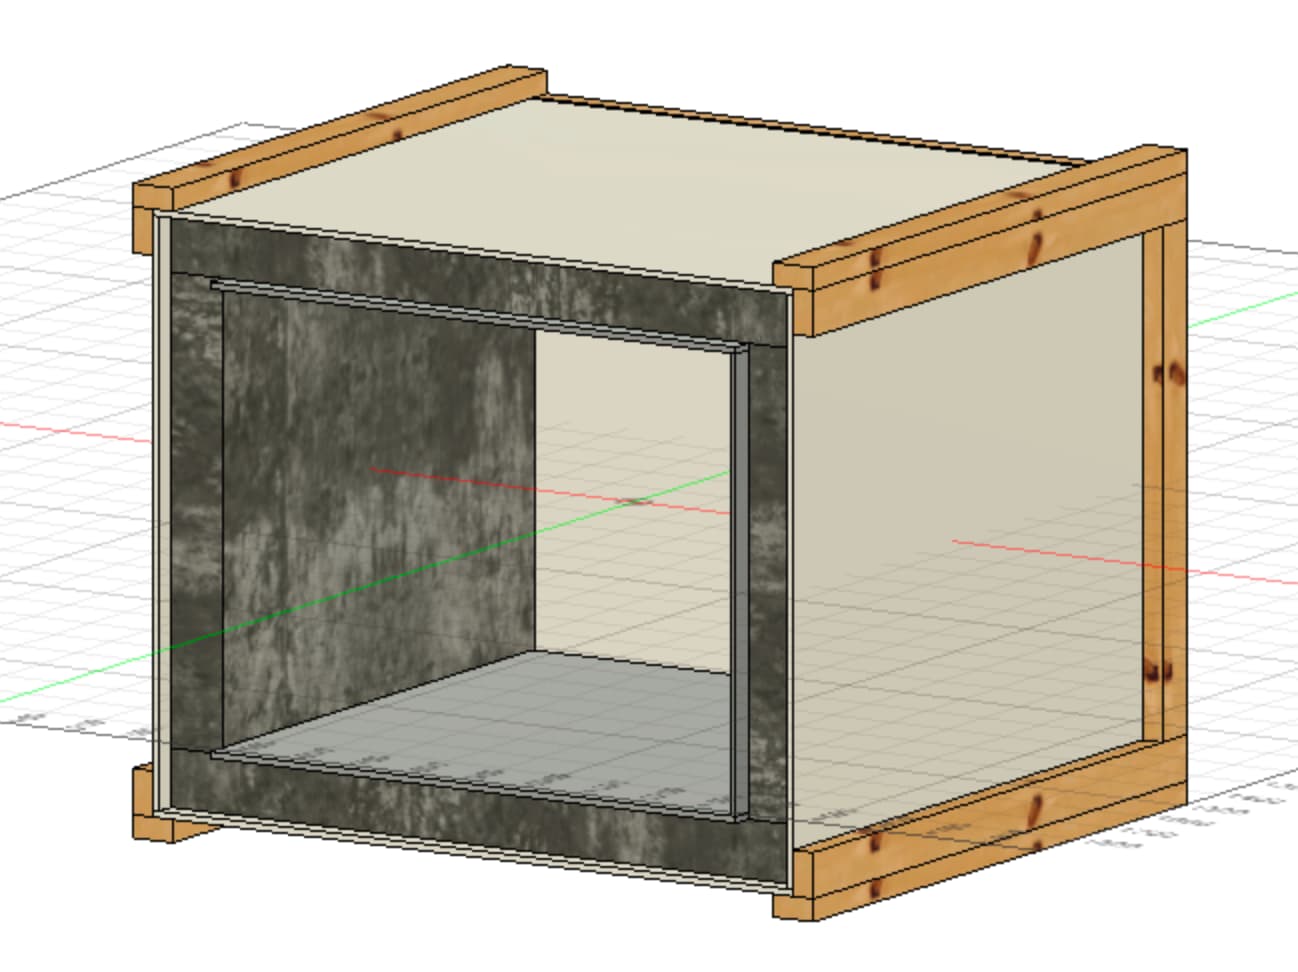
Design-wise I made two mishaps. One was that there was no interior framing, so the gyprock wasn’t mounted to anything. I remedied this by making two additional square interior frames one at the very rear and one in the middle.

Here’s a progress shot showing the base constructed and outer portions of the box:

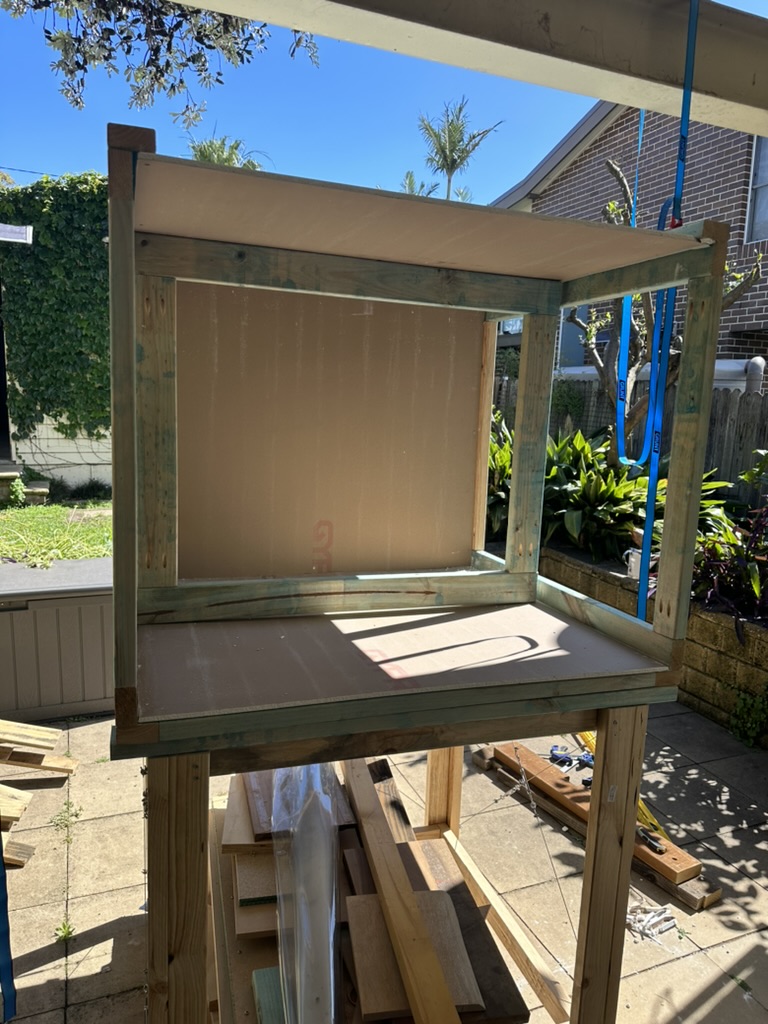
You can see the wire bracing on the right bottom, there are 2 more sets of that on the back and left.
The base is being used to store my wood pile at the moment, I’ve yet to find a spot for that :slight_smile:
In this shot I have the bottom outer gyprock, and ceiling outer gyprock. I didn’t have an extra pair of hands so I used the roof beam and some tie down straps to macguyver up a winch to get the roof gyprock in place.

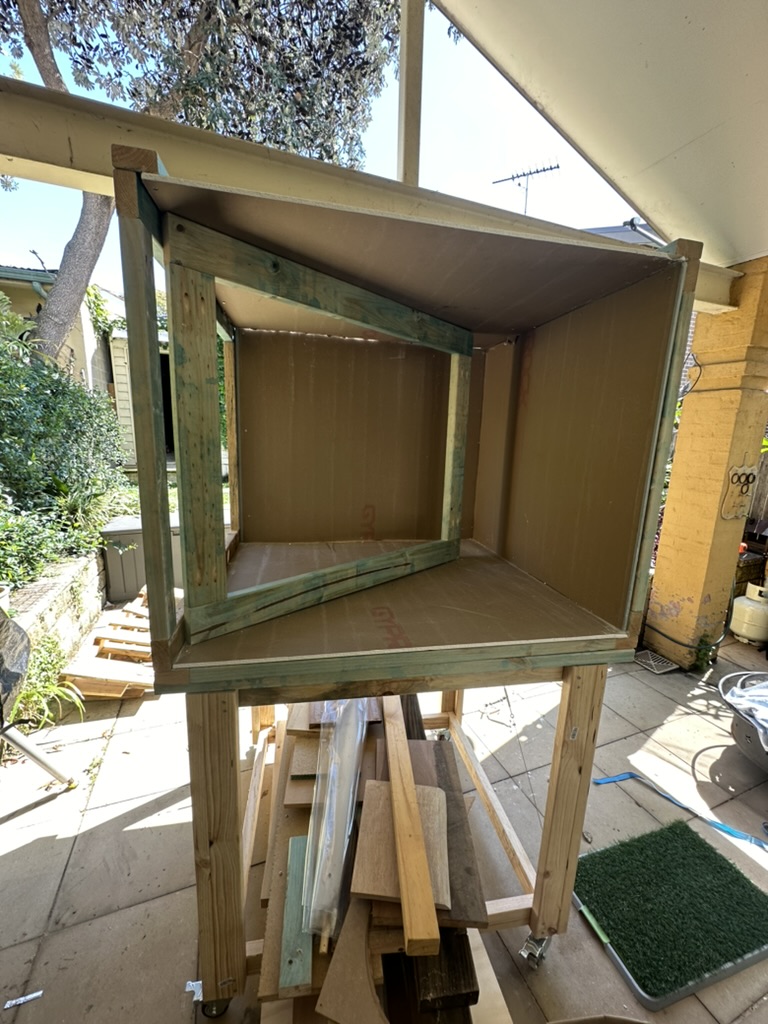
In this shot you can see my inner frames being installed. I ended up using L Brackets and screwing them through to the outside frame at the top and the bottom.

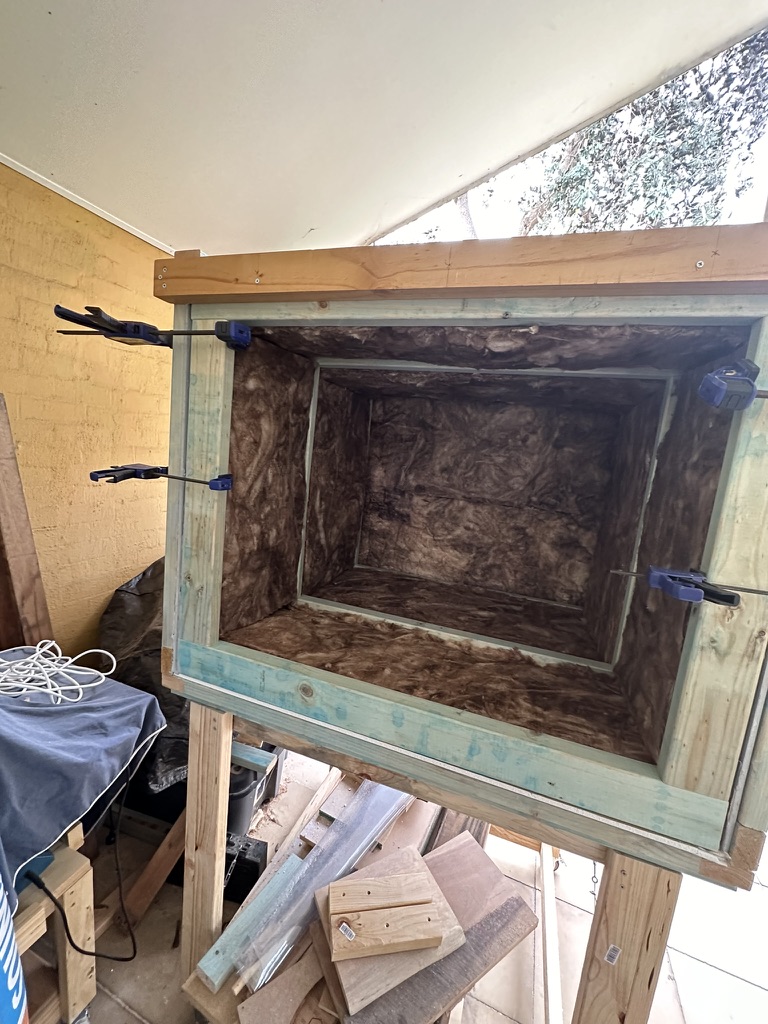
Here’s the full outer shell done, 3 inner frames, and all the rockwool insulation. This is where mistake #2 became apparent. I’d tried to keep the amount of outer framing to a minimum, but realised the front top I had no cross member. This resulted in the outer frame bowing out, so I remedied with some extra scrap wood, and required some fairly hardcore adjustments with ratchet straps to get it aligned.

Here’s my dog.

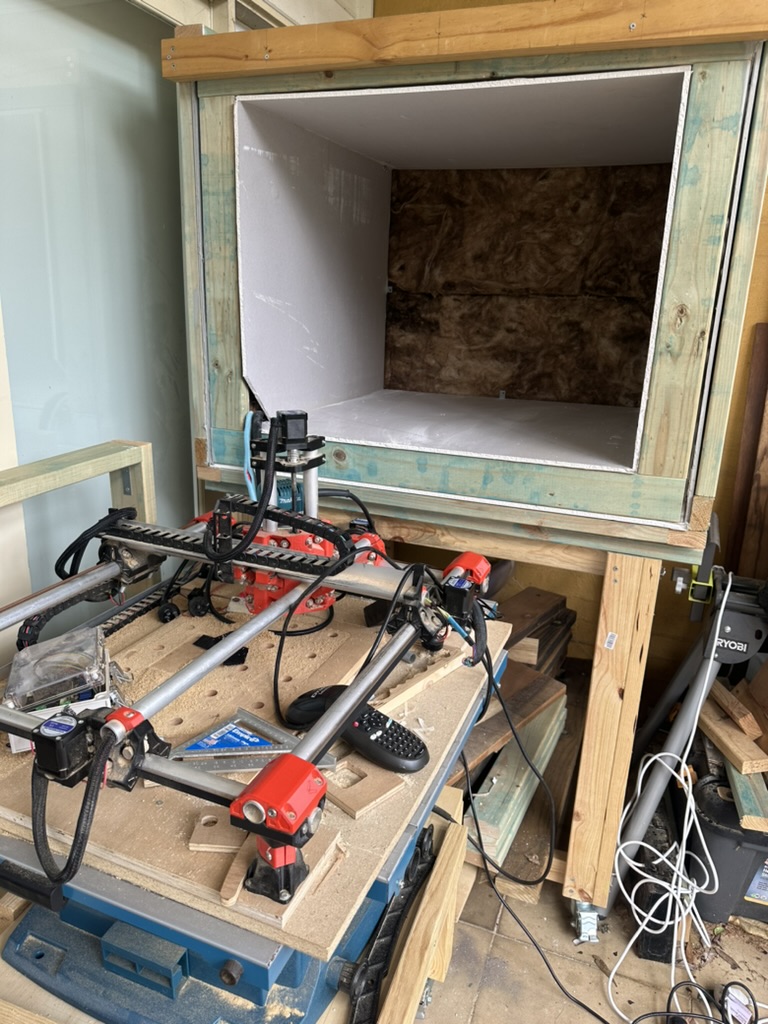
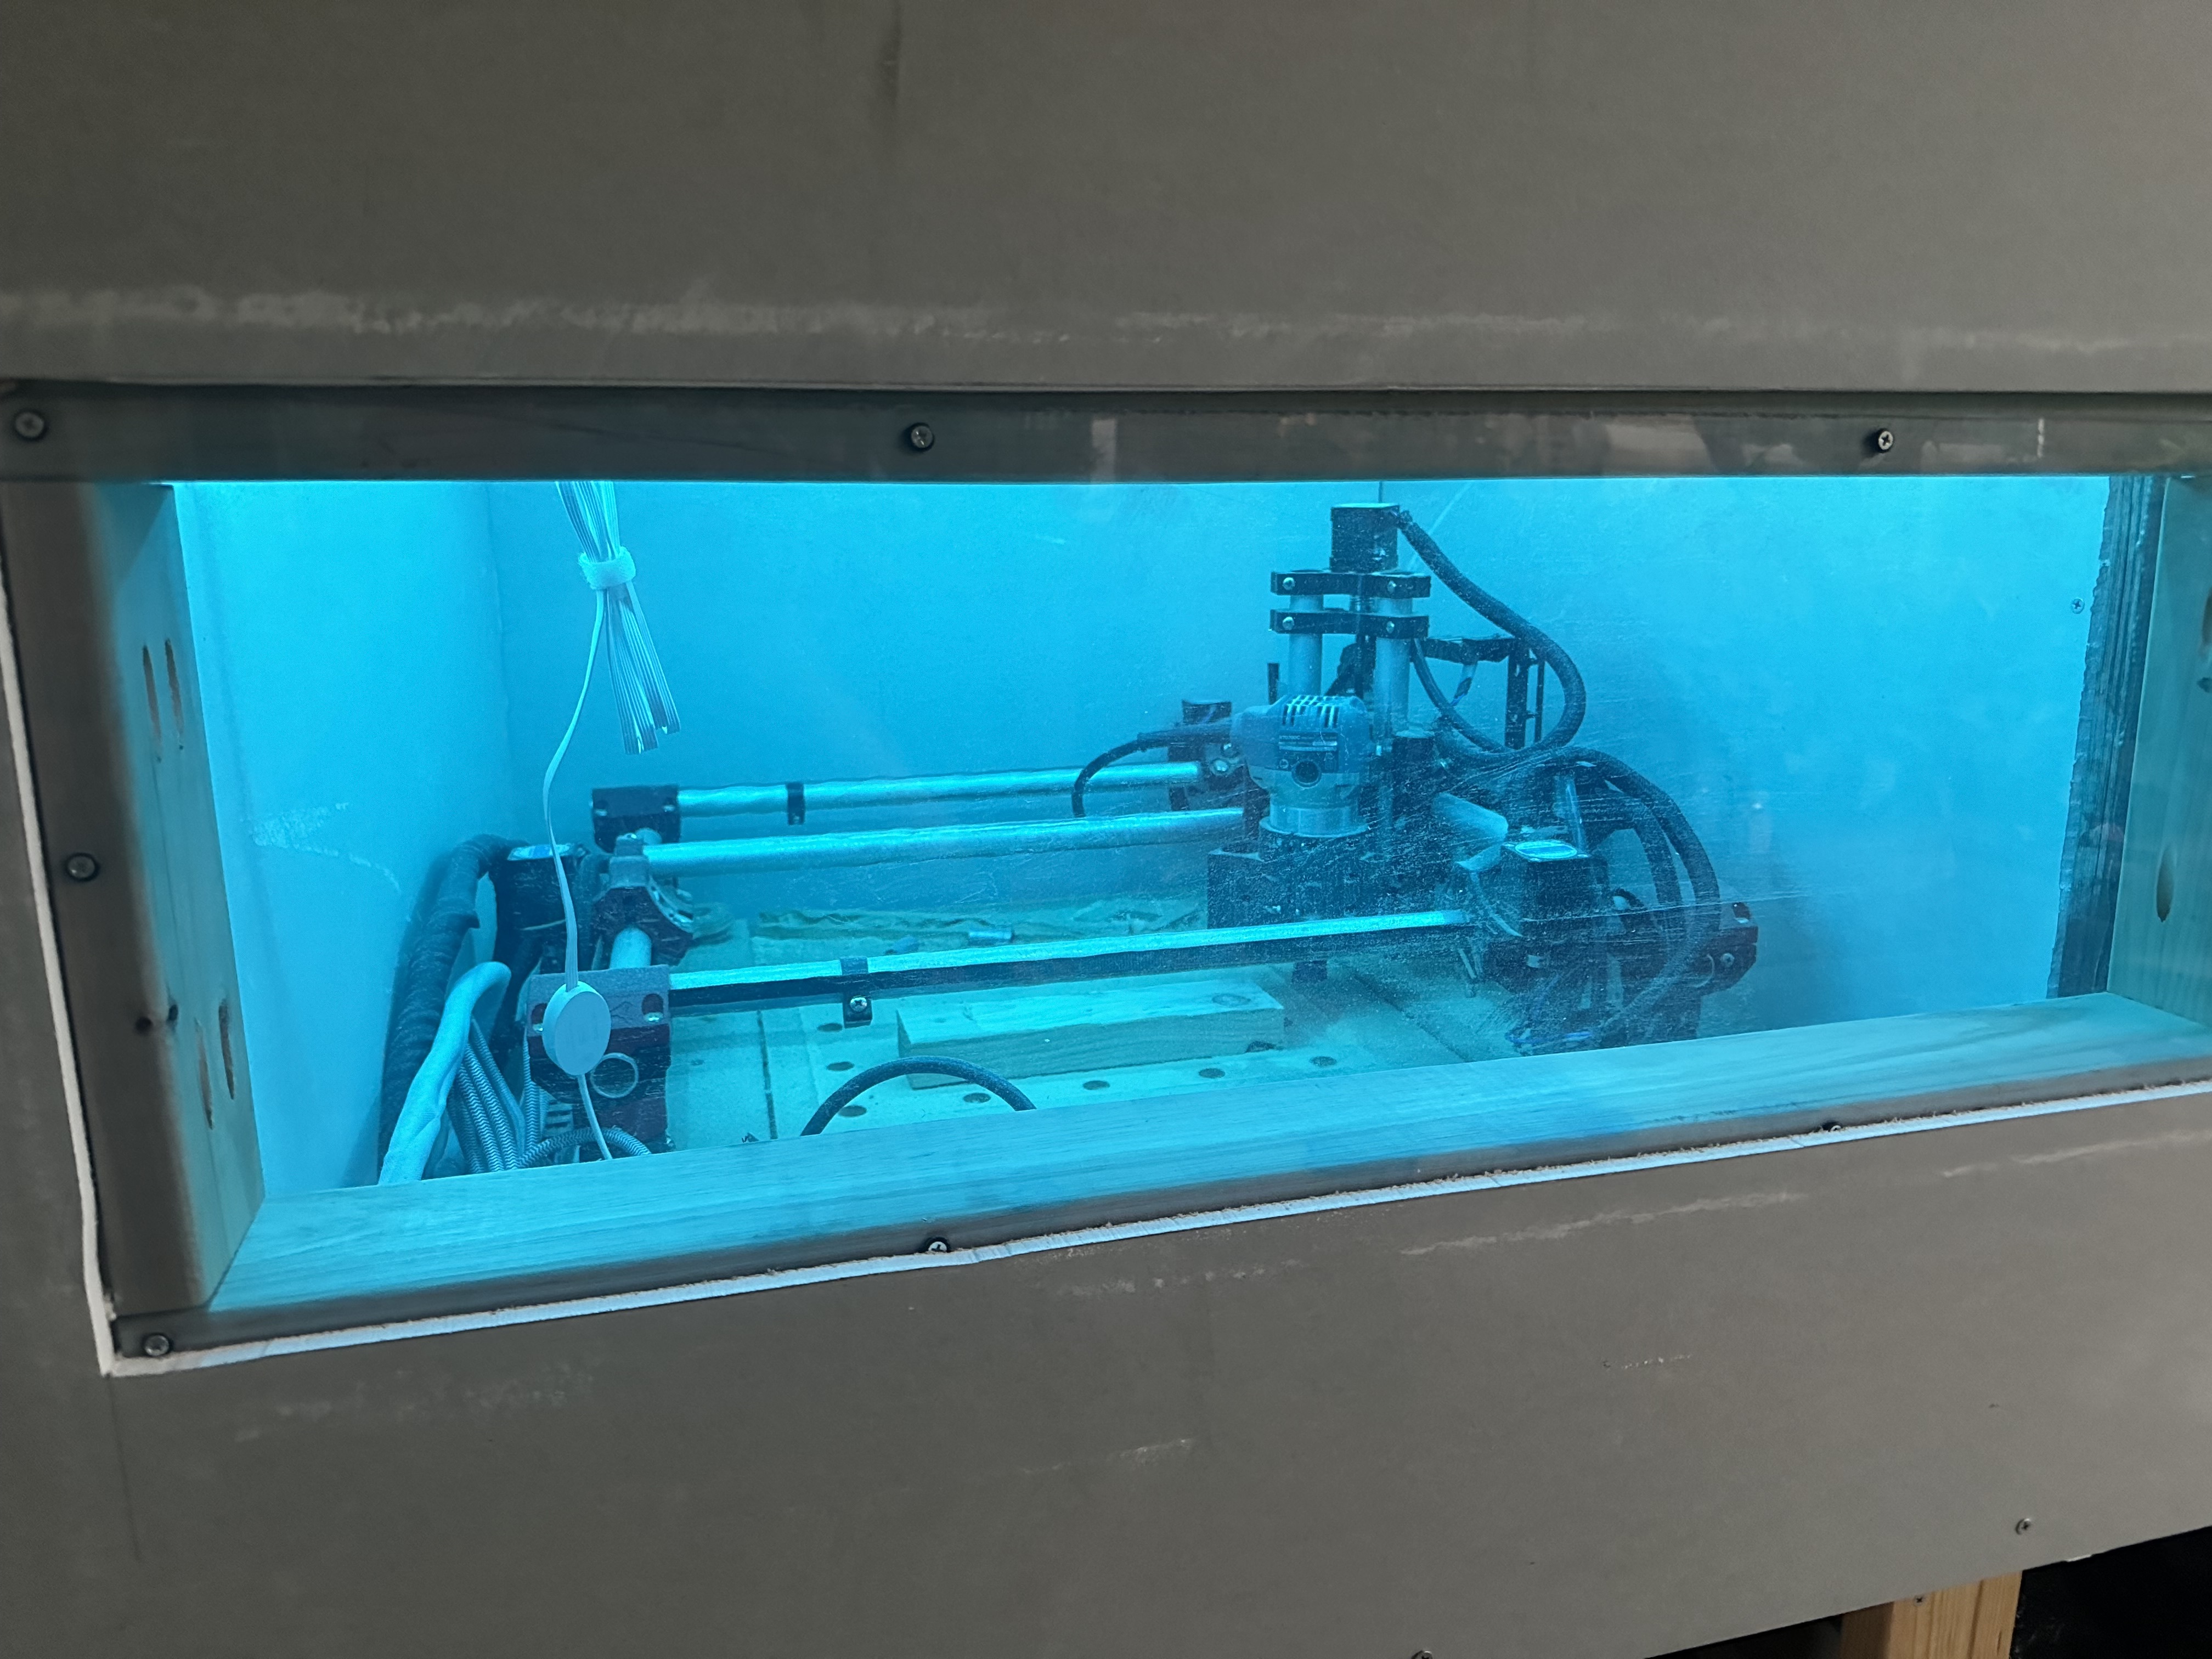
Here’s the full interior done, and the Primo ready to go in. I ran the Primo cabling through a hole in the outer gyprock, along the left bottom insulation then into the inside of the cabinet bottom left corner.

For the door, it was very much a ‘wing it’ at this point. I knew I wanted the same design, so gyprock, insulation and gyprock. I wanted a window, and I had originally planned to open left to right.
I bought some clear acrylic for the window (about 900mm x 600mm) and sliced it in half longways. Then I measured up an interior frame to hold that window and mounted that inside the door frame.
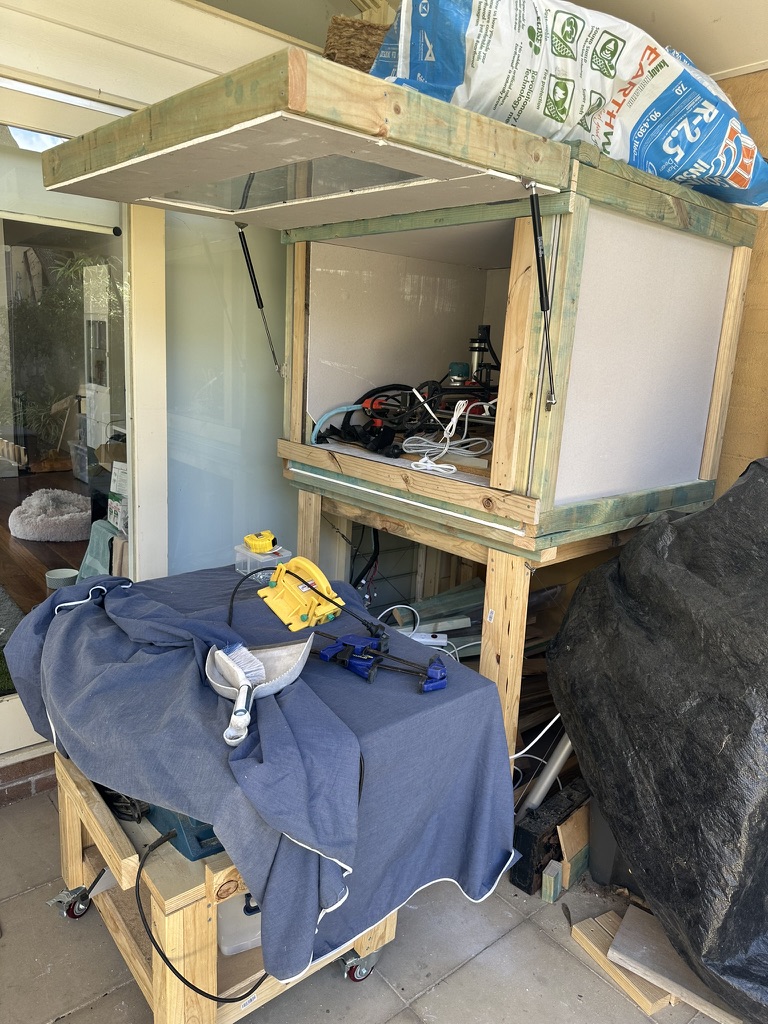
Light bulb moment was to make the door open vertically, with some nice gas lifters.

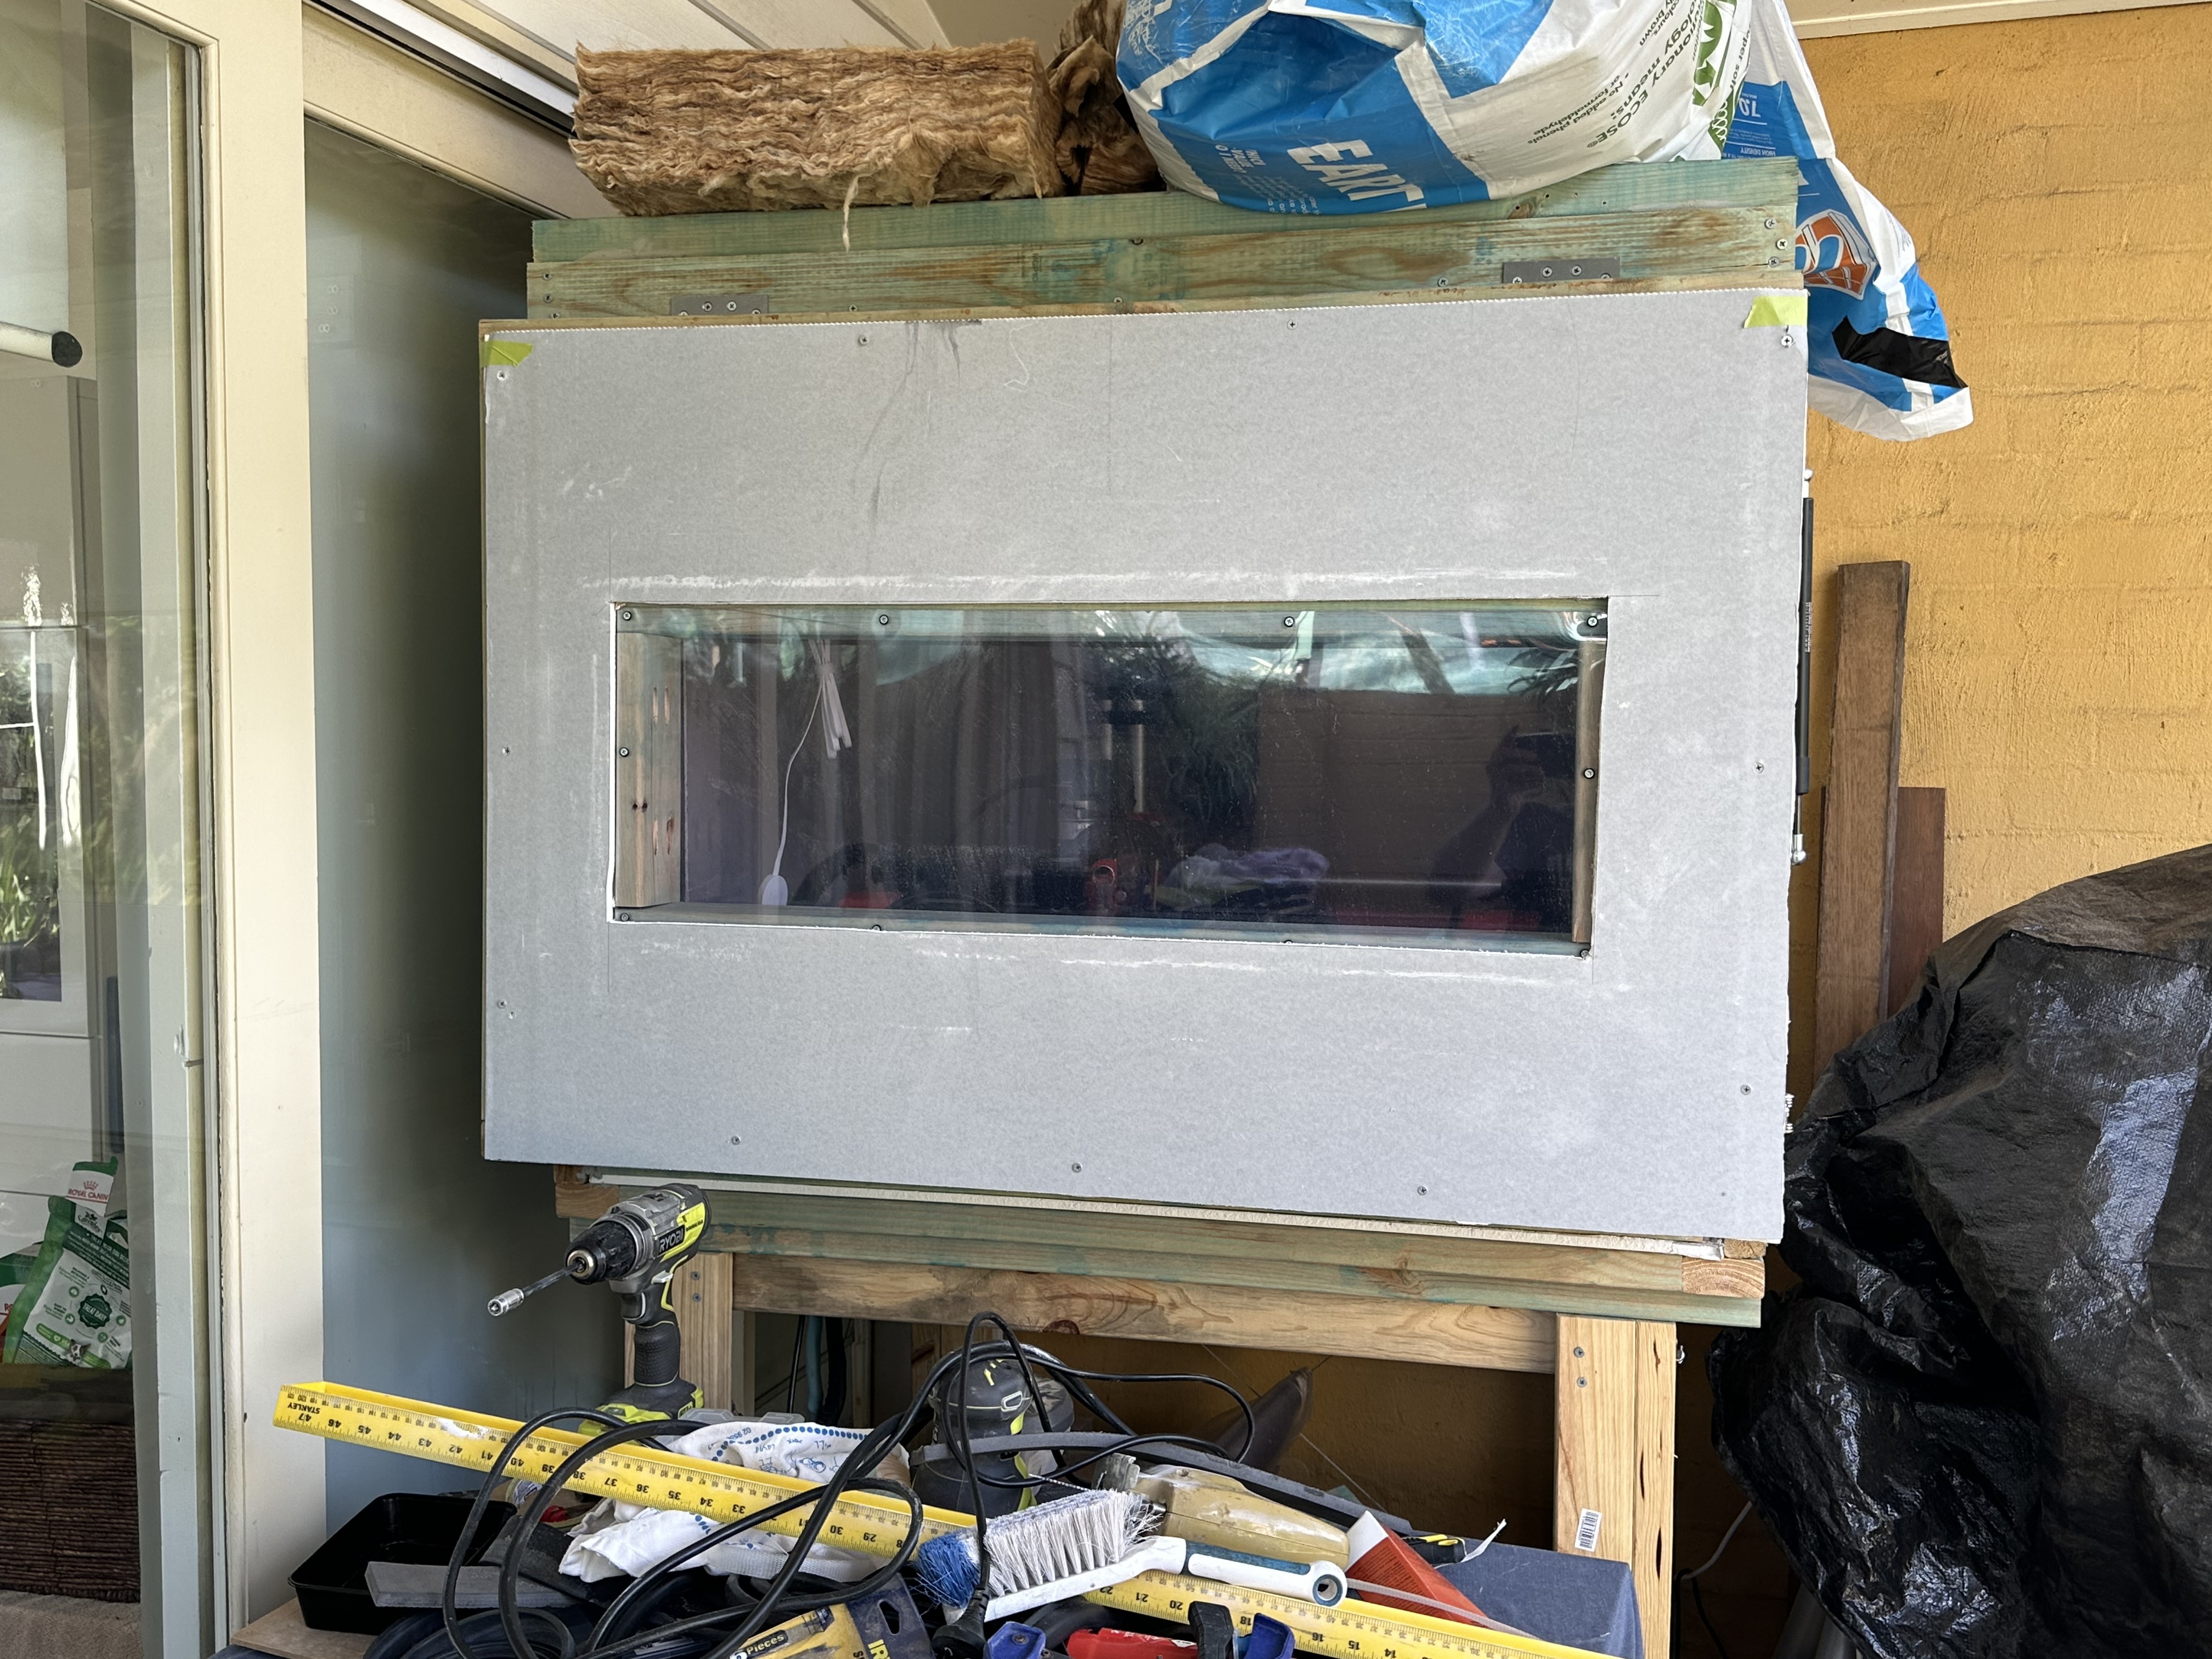
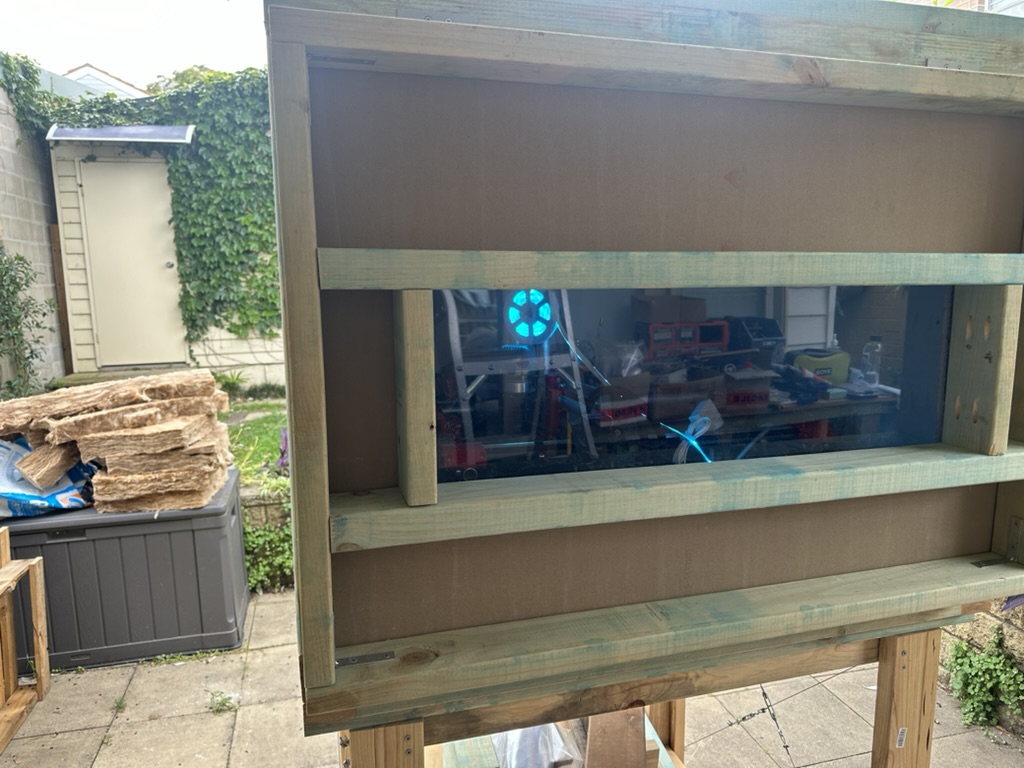
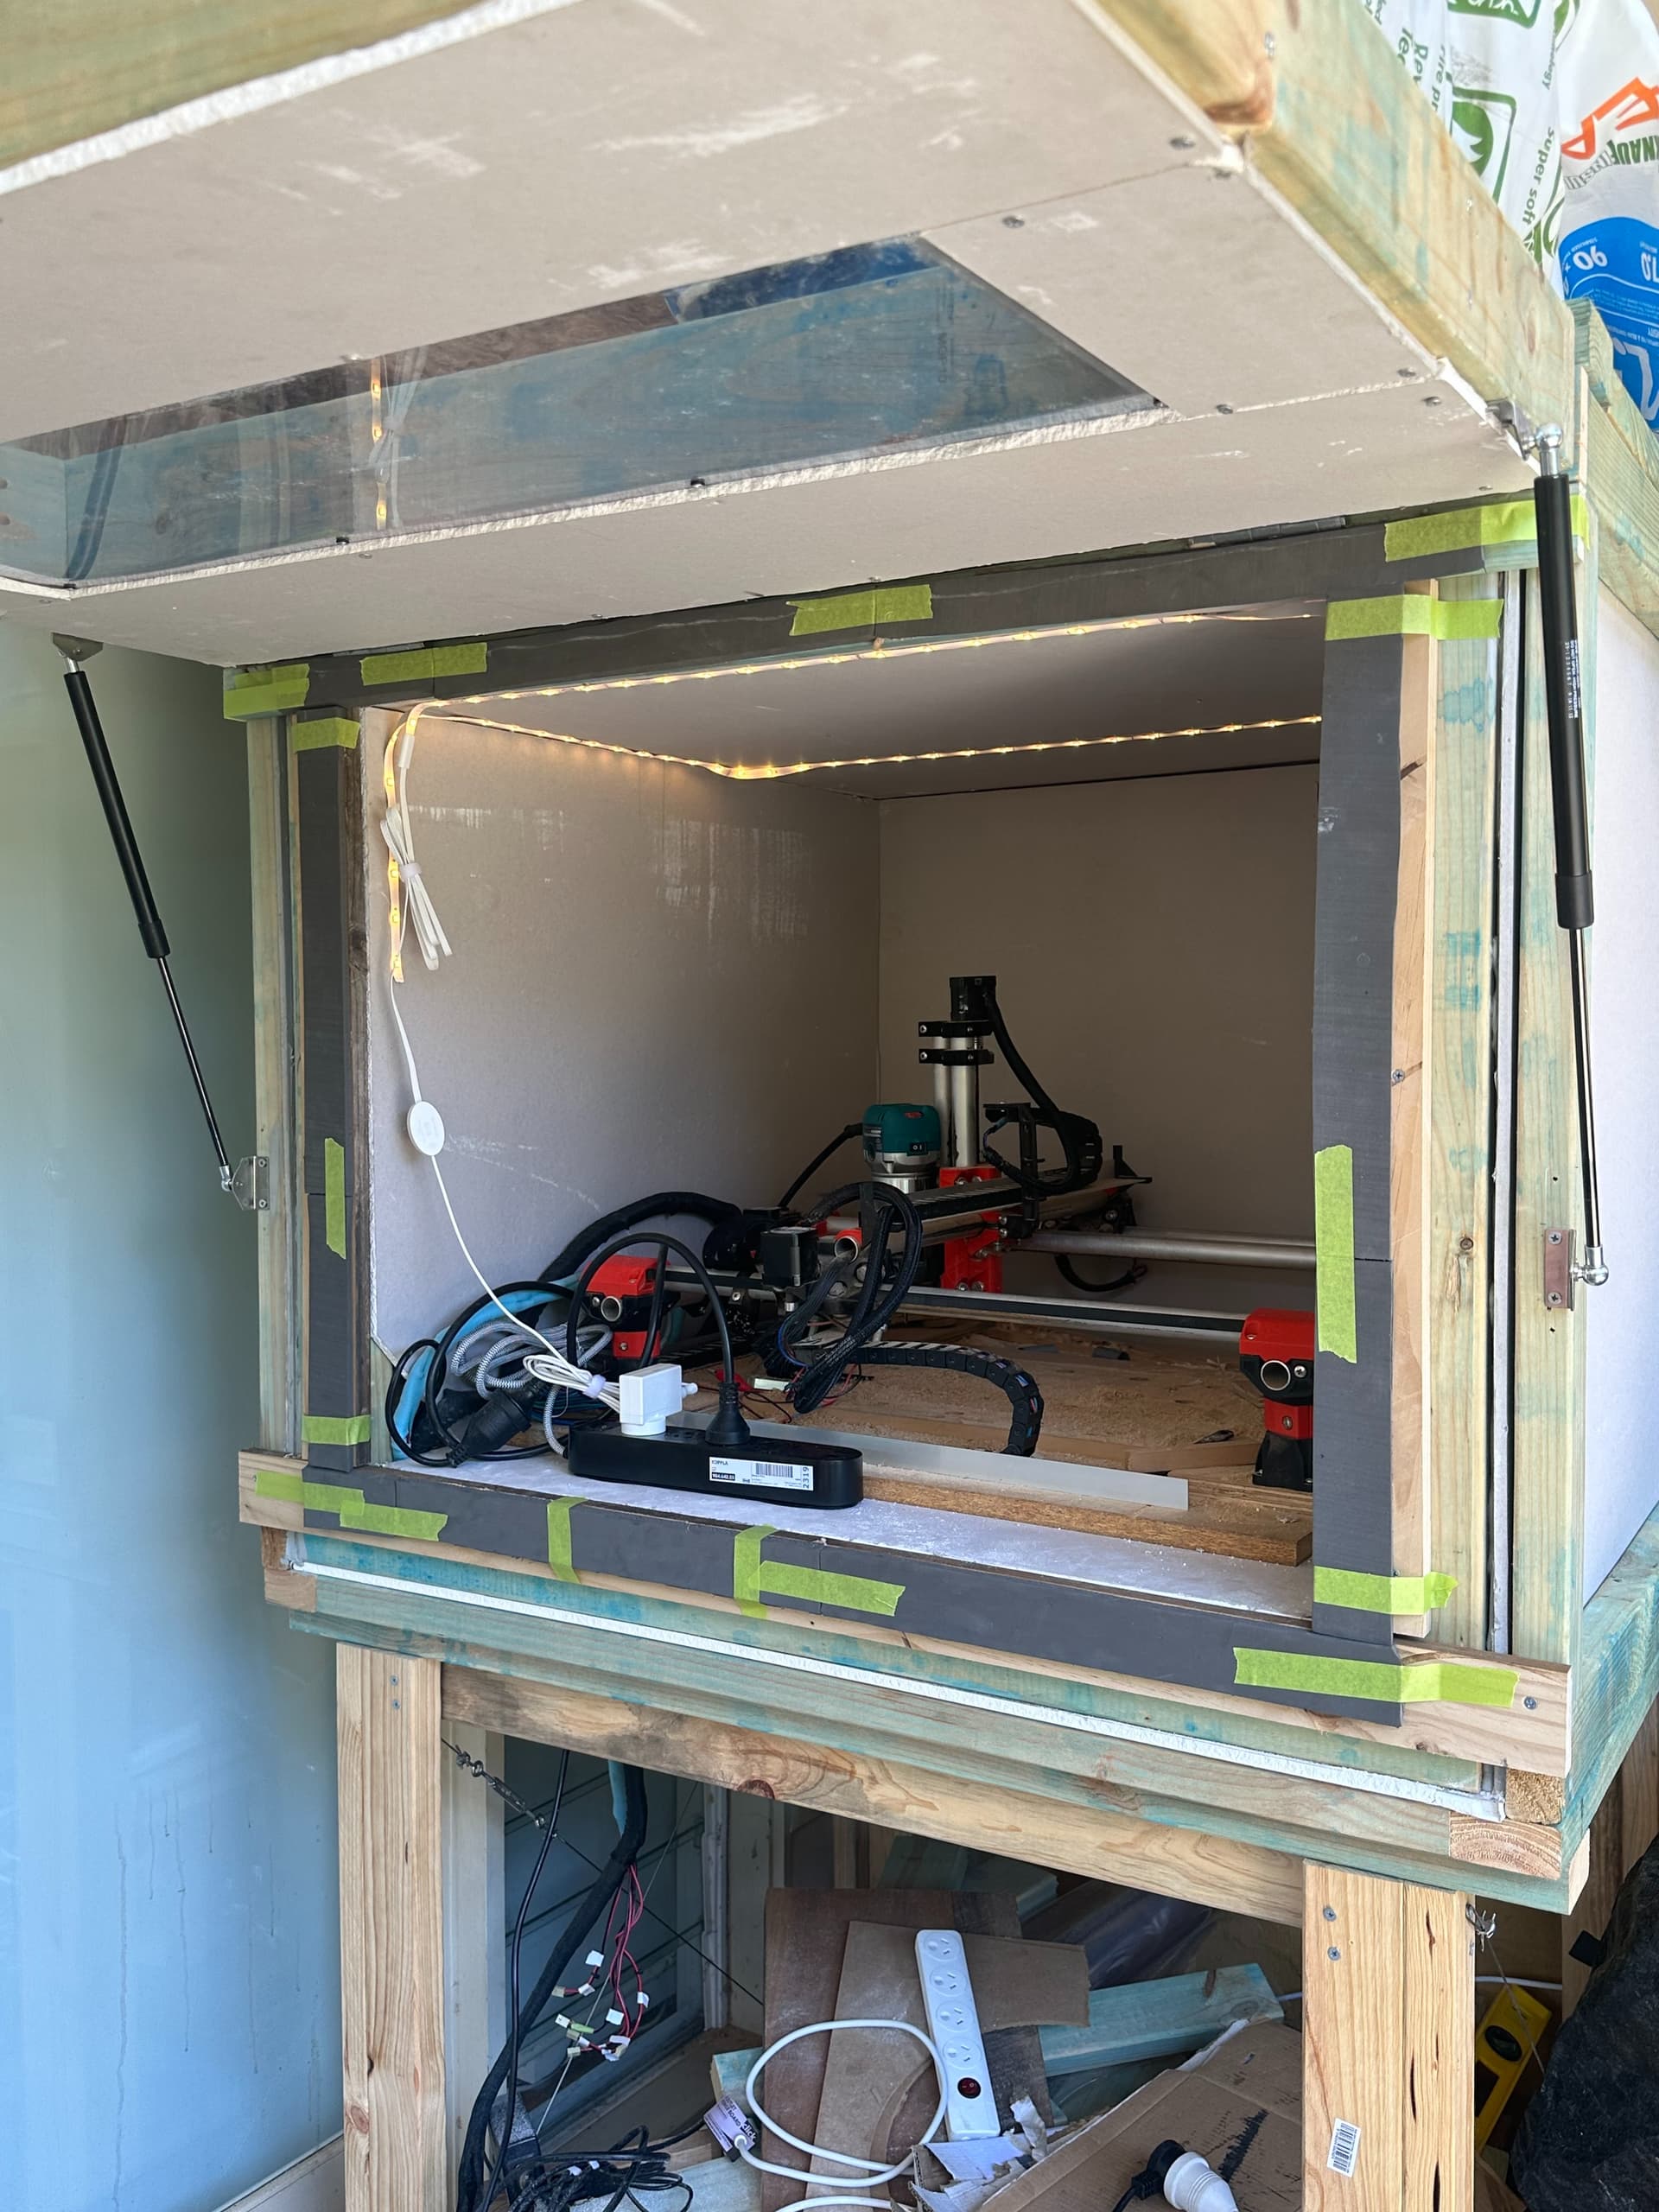
Heres a shot of the door, primo in place, window in place, inner gyprock in place, and my ikea lights. You can only see the reflection unfortunately, but its in there and the circle of lights are inside the box.

Gas struts installed :slight_smile: yeah i did a little strut when they opened too. To get the right pressure (door is pretty damn heavy) took me 3 trips to Bunnings.

Last pic for now - installing rubber matting to make the door sealed when shut.

Waiting for the glue to dry and then I’m going to see how we are travelling sound-wise. I did a quick test before and wasn’t as happy as I’d liked, so I’m going to test a little more later today and see where we’re at.

Price so far - don’t ask. Like everything, the original numbers I estimated don’t get close once you factor in all the random other stuff I had to buy along the way. I’m probably at or above the base cost of the Primo :frowning: Am really hoping I haven’t made an expensive noise amplifier!

3 Likes

Cute dog. Nice build, looks solid! I appreciate the details you’re sharing.

Are the interior sheet rock panels attached using resilient channels?

Totally understand this one. Curious what Gas struts strength/length ended up working out for you?

Nothing smart for the gyprock installation - they are literally sitting on the wooden inner frame. I have some room to move on this if that will improve the soundproofing. The insulation isn’t compressed at all as the frame is effectively like wall studs but in all directions.

So far I’ve only tested just sound blocking of the router noise. It’s still a bit whiny but definitely quieter. I have yet to fully finish the door as well, it has the insulation, another plexiglass window and gyprock outer to go.

You might try running it without the inner gyprock. The exposed fiberglass should absorb a lot more of the higher frequencies. By covering the inside with gyprock the noise just bounces around in the box and eventually vibrates out through the plexiglass.

1 Like

gas struts were 250nm in the end and around 500mm. these guys: https://www.bunnings.com.au/goliath-502mm-250n-black-medium-pressure-gas-strut_p4230025

I used an online chart to get the measure from hinge to door mount and they pretty much worked straight away, once I got the door propped up high enough. It makes the design look pretty pro I think and way better than my original idea of left to right opening. :slight_smile:

(edit - another trip to hardware store- we’re up to 350nm now)

Ooh will definitely give that a try. I’ve not hard mounted the inner walls yet as I expected I’d need some tuning.

1 Like

Nice progress. I’m interested to see decibel reading with door open, then again with door closed. I want to make a similar enclose for mine and also the shop vac.

Will share in the next day or so. My rubber sealing around the door didn’t work as I expected so I am going to replace that with some thinner rubber tomorrow.

I thought about trying the same thing. Most of the reading I’ve come across says insulation etc won’t help with noise and the key is to mechanically separate the interior panels from the framing and exterior. They make panel clips that are supposed to support the interior panels but don’t provide much physical contact between that layer and the actual structure. On drywall I know they make a product called ‘green goo’ or something similar that you use as a glue layer between 2 sandwiched sheets of drywall that is supposed to do wonders. In the end I just said F’it and left it open so no real experience here :laugh:

1 Like

Yeah, we used green glue acoustic caulk during home remodel to help dampen sound. The gooey substance seems to never fully cure solid, always has flex and turns vibrations into heat. Have some left over, hoping to use if/when I build an enclosure. Although, might not if end up building an enclosure without drywall.

i used this stuff as a sealant around the outer shell https://www.bunnings.com.au/selleys-600ml-grey-flame-flex-fire-and-acoustic-sealant_p0035020
but it’s very expensive and i couldn’t imagine using for more than just token gap filling.
The insulation on its own made the interior noticeably quieter when you put your head in. Like your ears were blocked.

I’ve attached some new rubber on the door seal this morning so hopefully it won’t be too long before I can do a bit more of a numbers based test.

Preliminary test (Apple Watch noise app) with just the Makita router running is giving me 85db next to the router and 56db with the door closed, so a noise reduction of about 30db.

Have not tested during carving yet. I also have only two layers of plexiglass on the door, with inner gyprock, no rockwool insulation inside the door frame as of yet.

I’m still not happy with the door seal even with the new rubber and it’s going to take me some time to get that right. I will likely need to make some decent adjustments to close it out.

I will post some tests with wood carving once I’ve got the controller re-hooked up.

3 Likes

You can always use some egg cartons, those diffuse the sound. Or some thick curtains inside the enclosure. At least that’s what we used in our studio. Not the egg cartons but the expensive version, but same idea.

construction complete. distinctly lacking in artwork.

door has been insulated and outer gyprock attached. toggle latches on both bottom sides. rubber refitted.

stay tuned for db tests :slight_smile:

So I’ve tested with some carving, using my surfacing bit against pine.

I’m struggling to get a noise reading from my Apple Watch outside the box while its carving - the ambient noise (birds etc) are triggering it more than the noise from the Primo.

I’m getting a reading of around 96dB while carving, still 86 with just the spindle. Door closed its audible, but so much quieter that you’d not be annoyed by it. Best I could get for a reading was about 51dB. There is still a little sound leakage from the door which I’m going to remedy with a double seal.

All in all, I’m super happy with the outcome. It’s night and day compared to no box. Next door neighbour didnt even know it was running when the door was shut - said it was like an aquarium filter.

I will get some better readings tomorrow with a dedicated app for dB readings. I’m going to have to get on top of dust collection and airflow pretty quickly too :slight_smile:

2 Likes

posterity shot with the lights on

5 Likes