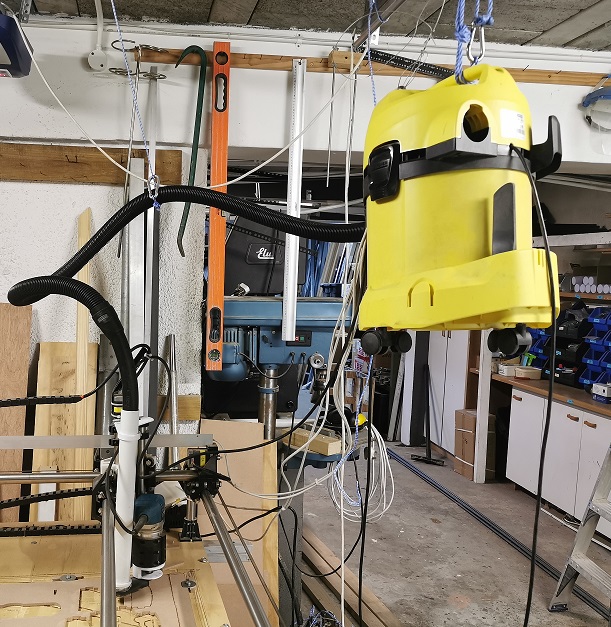
Having to use only what was at hand, I thought I would share my dust extraction for MPCNC, made purely from what was at home due to the Corona lock-down.
Ryan will love the fact that it starts with a pipe sticking out but that was all I had at hand, and it makes sense as it keeps all the flexible parts away from the work area.
Design requirements - Simple - Easy to put on and take off - Easy to change bits - Able to see cutter working - Efficient as is practical - Made from what ever is in the garage (not allowed out to buy stuff.)
Be gentle, this is my first design, had to get my head around Tinkercad which proved to be very simple to use.
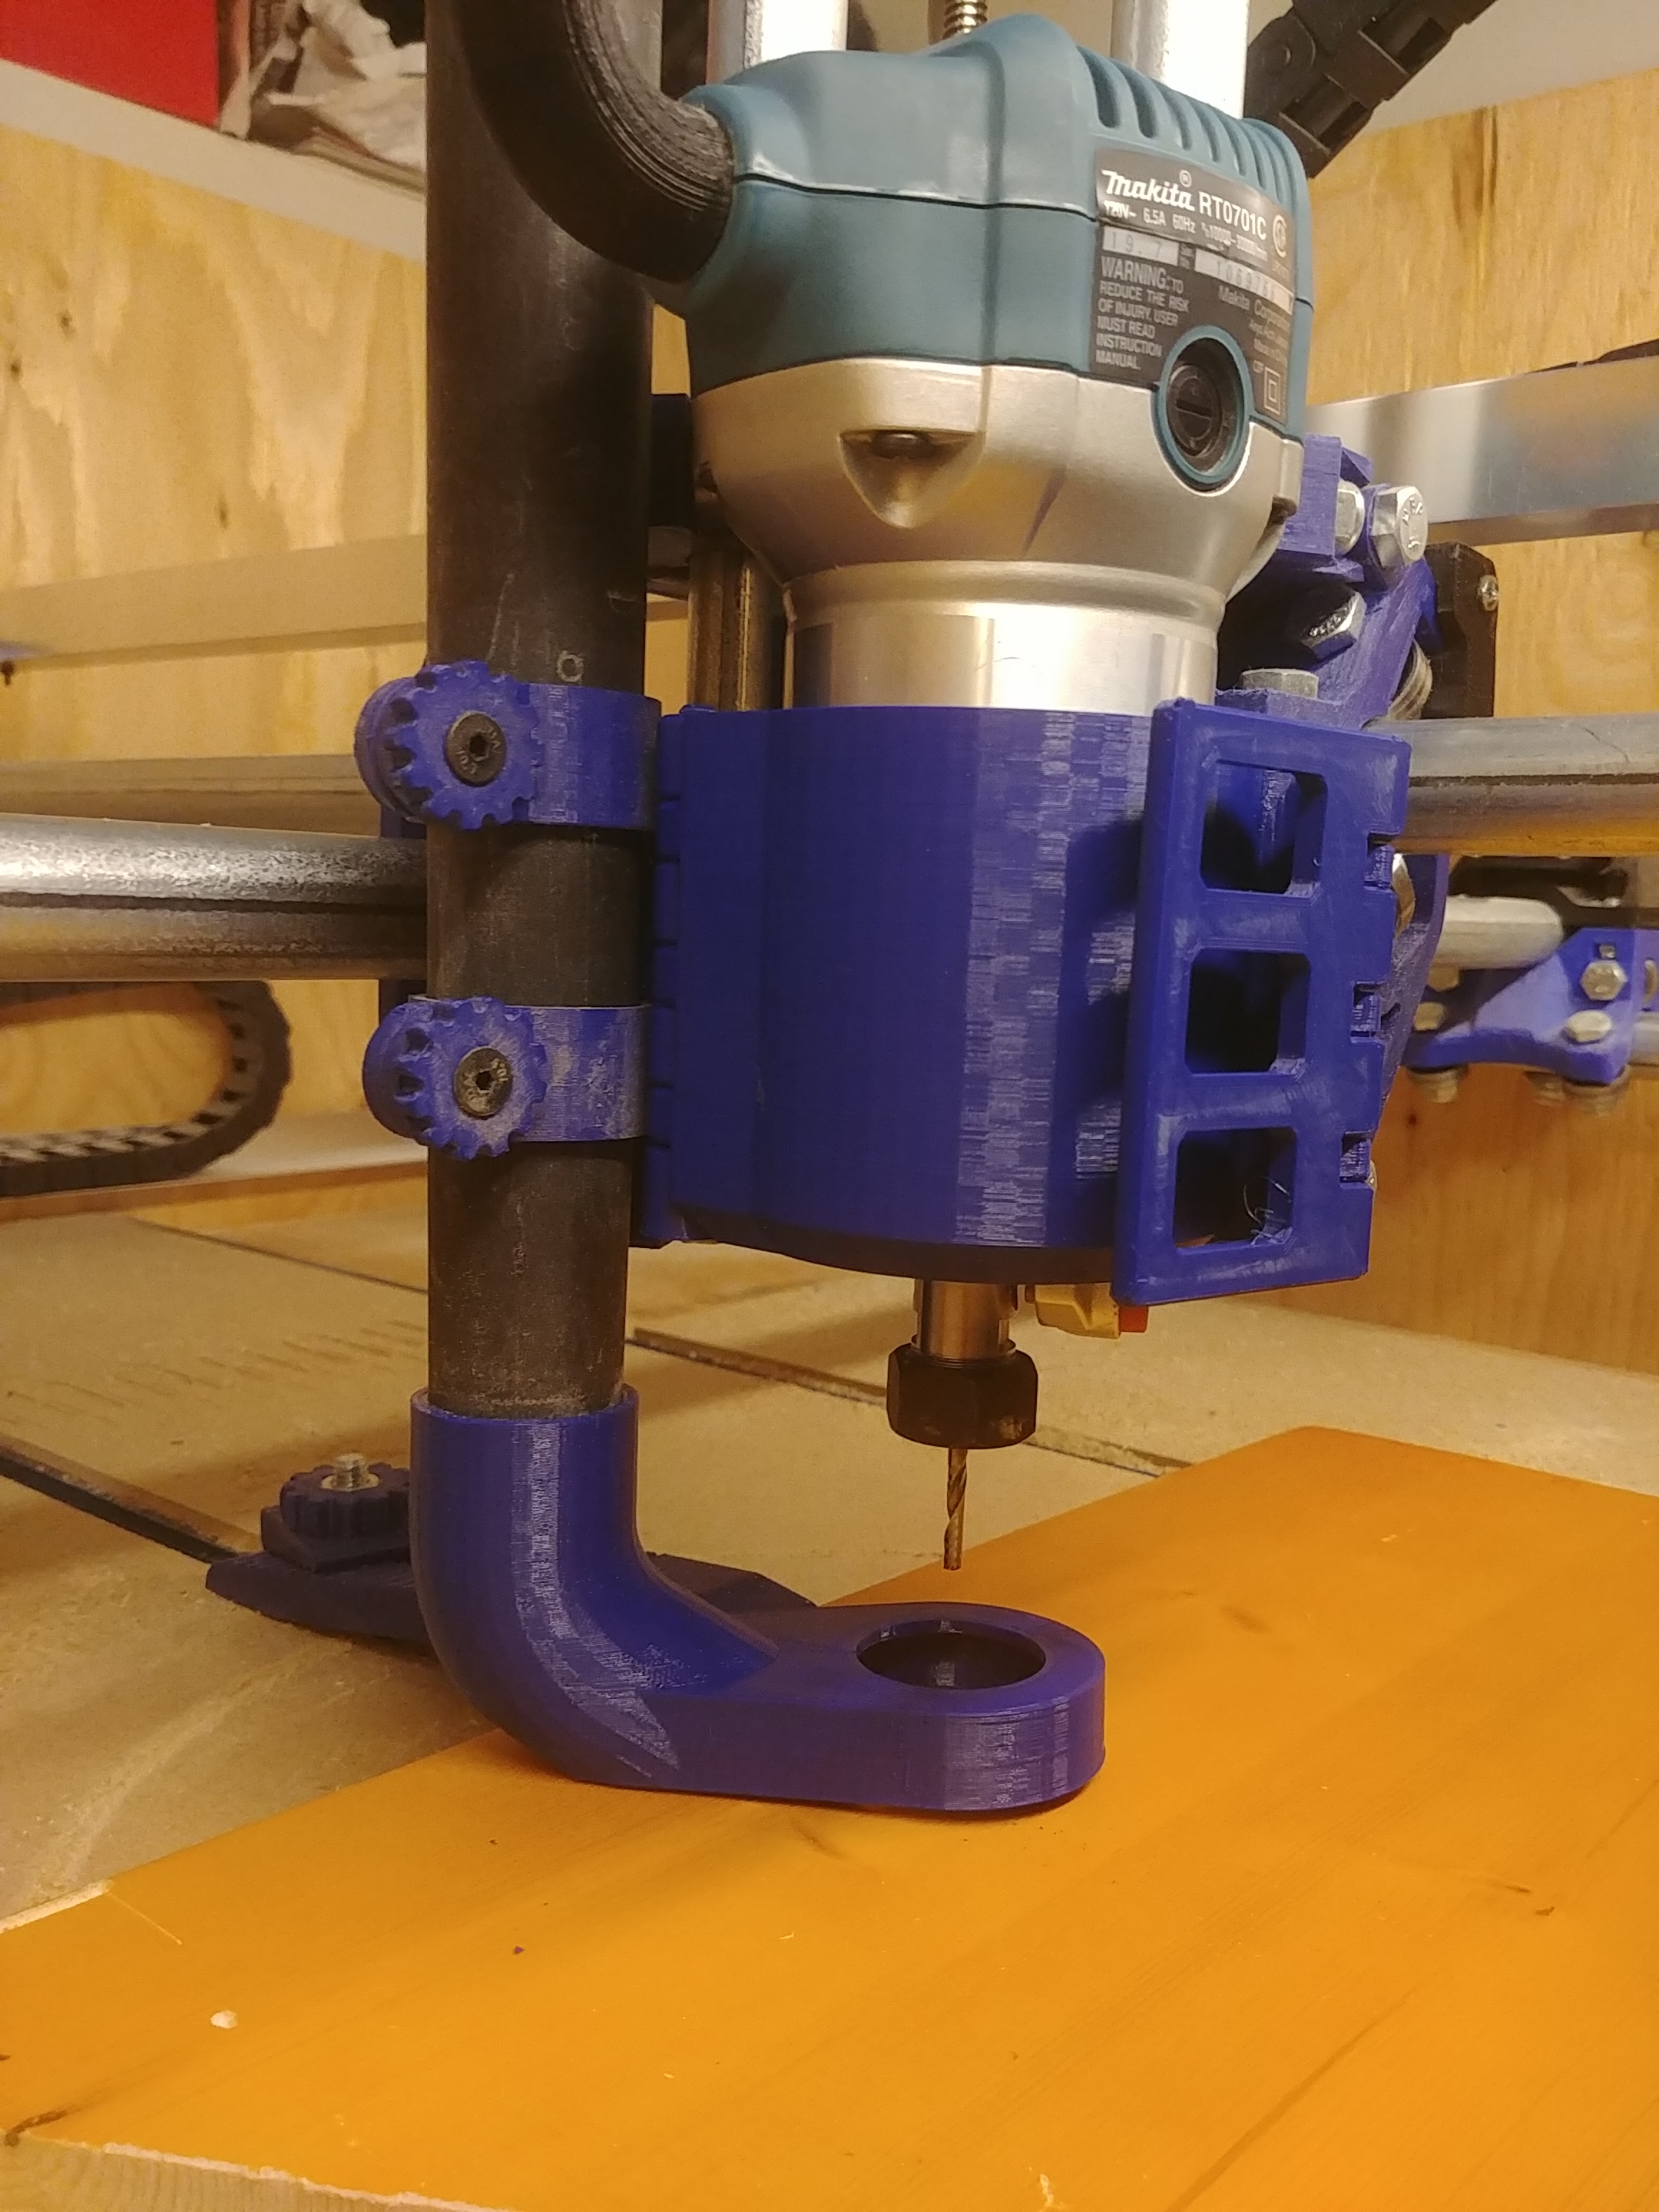
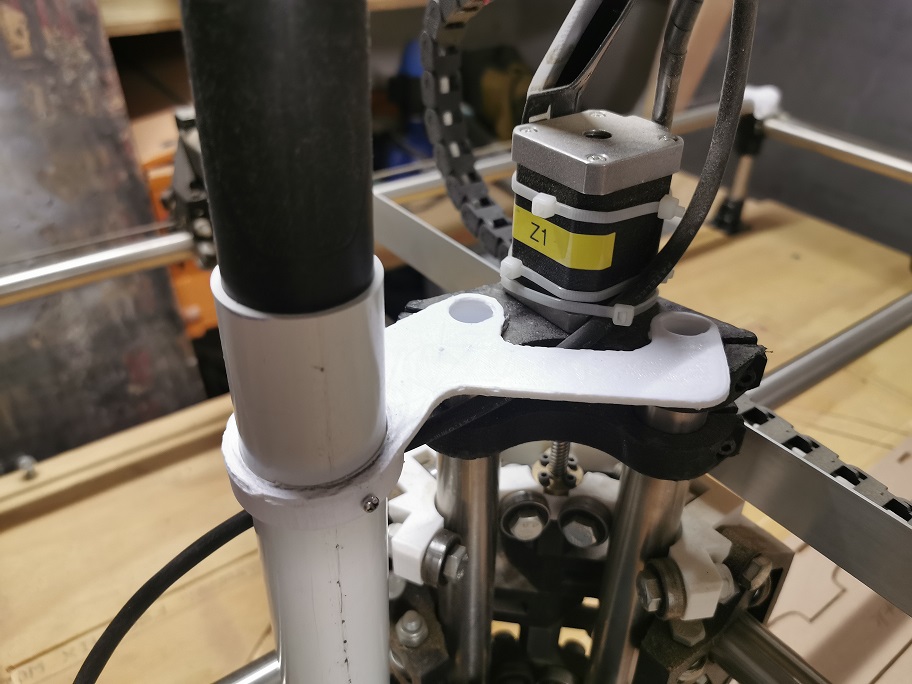
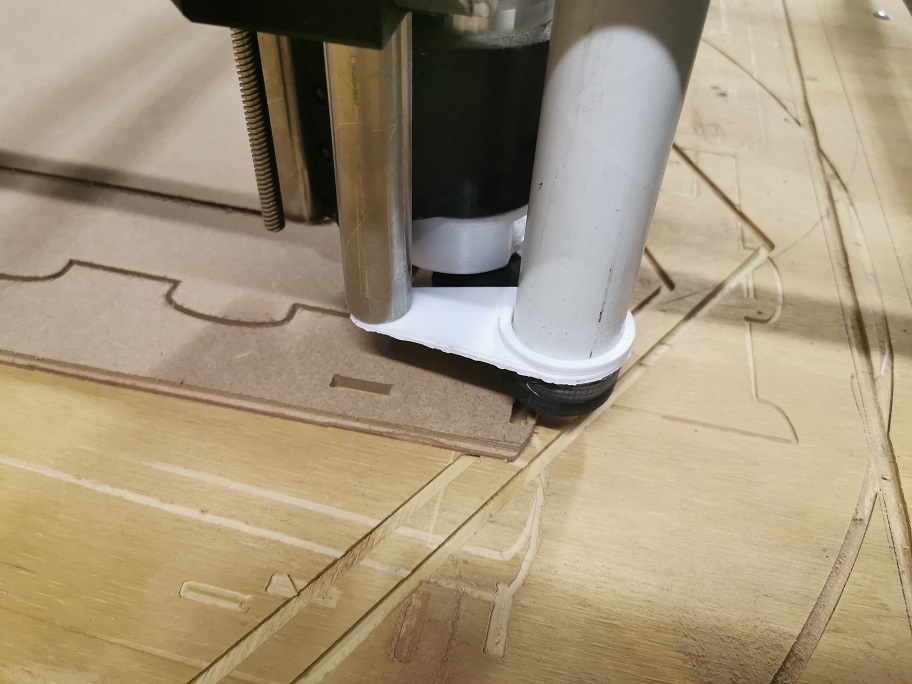
Made using a 40mm plastic plumbing pipe as the base, i printed a top to fit into the top of the Z axis tubes and a bottom to hold in place from the bottom of the Z axis tubes and of course a nozzle.
The prototype proved that the Makita has a strong down draught so a deflector had to be incorporated. I found one already on Thingiverse so utilised that - https://www.thingiverse.com/thing:3634589
Once the deflector was in place, version 2 worked flawlessly, if fact too well as have to be careful it does not suck up small pieces.
I like the hanging vac! Sure beats buying a lot of extra hose! You’re probably gonna catch some flak for attaching the white pipe to the top of the z, though.
Attaching to the Z at all is a no-no. Acts as a giant lever and kills your accuracy. Good first try though. I have one that attaches to the carriage, not the z, and it works pretty well.
I know this is the popular opinion here, but I’m not so sure about it. Suppose you have a very rigid pipe (quite likely) and you’ve attached it quite rigidly. In that case, I don’t think there is any difference between mounting it on the ends of the Z tubes (as in the pictures above) or mounting it anywhere else on the center assembly. In both cases, the torsion forces will be identical. Right?
Having the vacuum on the ceiling (great idea!) and a very flexible hose should exert minimal forces on the center assembly.
My setup is most likely a lot worse, theoretically speaking, and I have not experienced any issues with accuracy.
No… It doesn’t matter how rigidly you attach it, if there are lateral forces that are applied unevenly on the Z axis, it’s a lever that will twist everything. If it’s attached to the carriage, the forces can be counteracted by the forces generated by the steppers. All your unplanned forces should be acting only on your fulcrum. You can control that. Once they start acting on the ends of the levers, you’re giving them the fulcrum they need to push your bit way out of line.
I agree a large lever is bad. The larger the lever, or the larger the force on that lever, the larger the deflection of the end mill will be.
My only point is that, for an identical lever, it doesn’t matter where you attach it. Sorry if I wasn’t very clear.
I do think it matter how rigidly you attach it. More rigid is not good in this case I suspect. If the lever can flex as needed, it will move with the force instead of trying to counteract it. So a tiny rigid pipe with a long hose is good, a very long rigid pipe with a short hose is bad. A not-very-rigid mounting of the rigid pipe will give you something in between. Or at least, that’s my gut feeling.
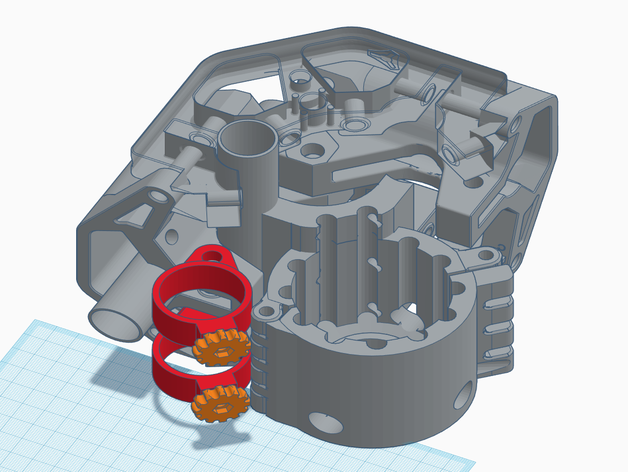
Here’s my setup, it attaches the vacuum tube to the xy carriage with clips that are only 3" apart. That way any lateral forces will just move the tube instead of the Z axis. It also means the vacuum is a stable height, not going up and down with the router on Z.
I thought about doing something like that. I was going to make something to hook up to the large 4" diameter hose from my dust collector but on the back of the XY gantry. Then use some way of getting that around to the end of the spindle. Maybe I’ll give that another go. With the large dust collector, I’m thinking I don’t really need a nozzle on the end. Just something to get it below the XY gantry.
Sorry not been able to reply. Been locked in a battle to get my Laser to work. One of the other long awaited projects that there has never been time for. Managed to get a square burned on a piece of wood last night after a whole day of fighting with Marlin. I now have the Laser and estlcam playing nicely together. Yay! Only took me 2 years.
Thanks to all that took the trouble to reply. yes I understand the engineering principals and you are quiet correct in that the lever principle applies and yes any force on the top of the pipe will have an equal and opposite effect on the cutter end, the longer the pipe the more the lever effect so yes, accuracy will suffer within the tolerance of the machine. Ryans design of the MPCNC seems to tolerate this well enough to get away with it thus far.
Moving the connection lower on the Z axis or attached to the XY assembly will surely reduce this influence, but any drag will still have an effect. Attached to the XY assembly we then have to accommodate the movement of the Z axis. Changing the mounting place will reduce the effect but then we have a mounting securing issue. I will revisit this and see what I can come up with while the MPCNC is busy chugging parts out. Also having the hose as central to the table as possible and with as little influence as possible minimizes the resulting error regardless of mounting position. Any design is going to have a cause and effect so the more important factor in my mind is minimizing the influence of the hose.
There are so many different designs on Thingiverse all with their pro’s and con’s. perhaps we all need to put our collective heads together to come up with ‘THE’ officially approved design.
As I am using this in a situation where we are not looking for micro accuracy, it seems to be a means to an end as the resulting parts being made are totally within spec and the vacuum hose seems to be contributing so little I have not been able to measure it.
If the vacuum hose was left unsupported then I can see that being a major concern regardless of design hence the reason I have hung the vacuum cleaner from the ceiling which is giving me a different engineering problem…the wife wants to vacuum the house and i still have several parts to cut.
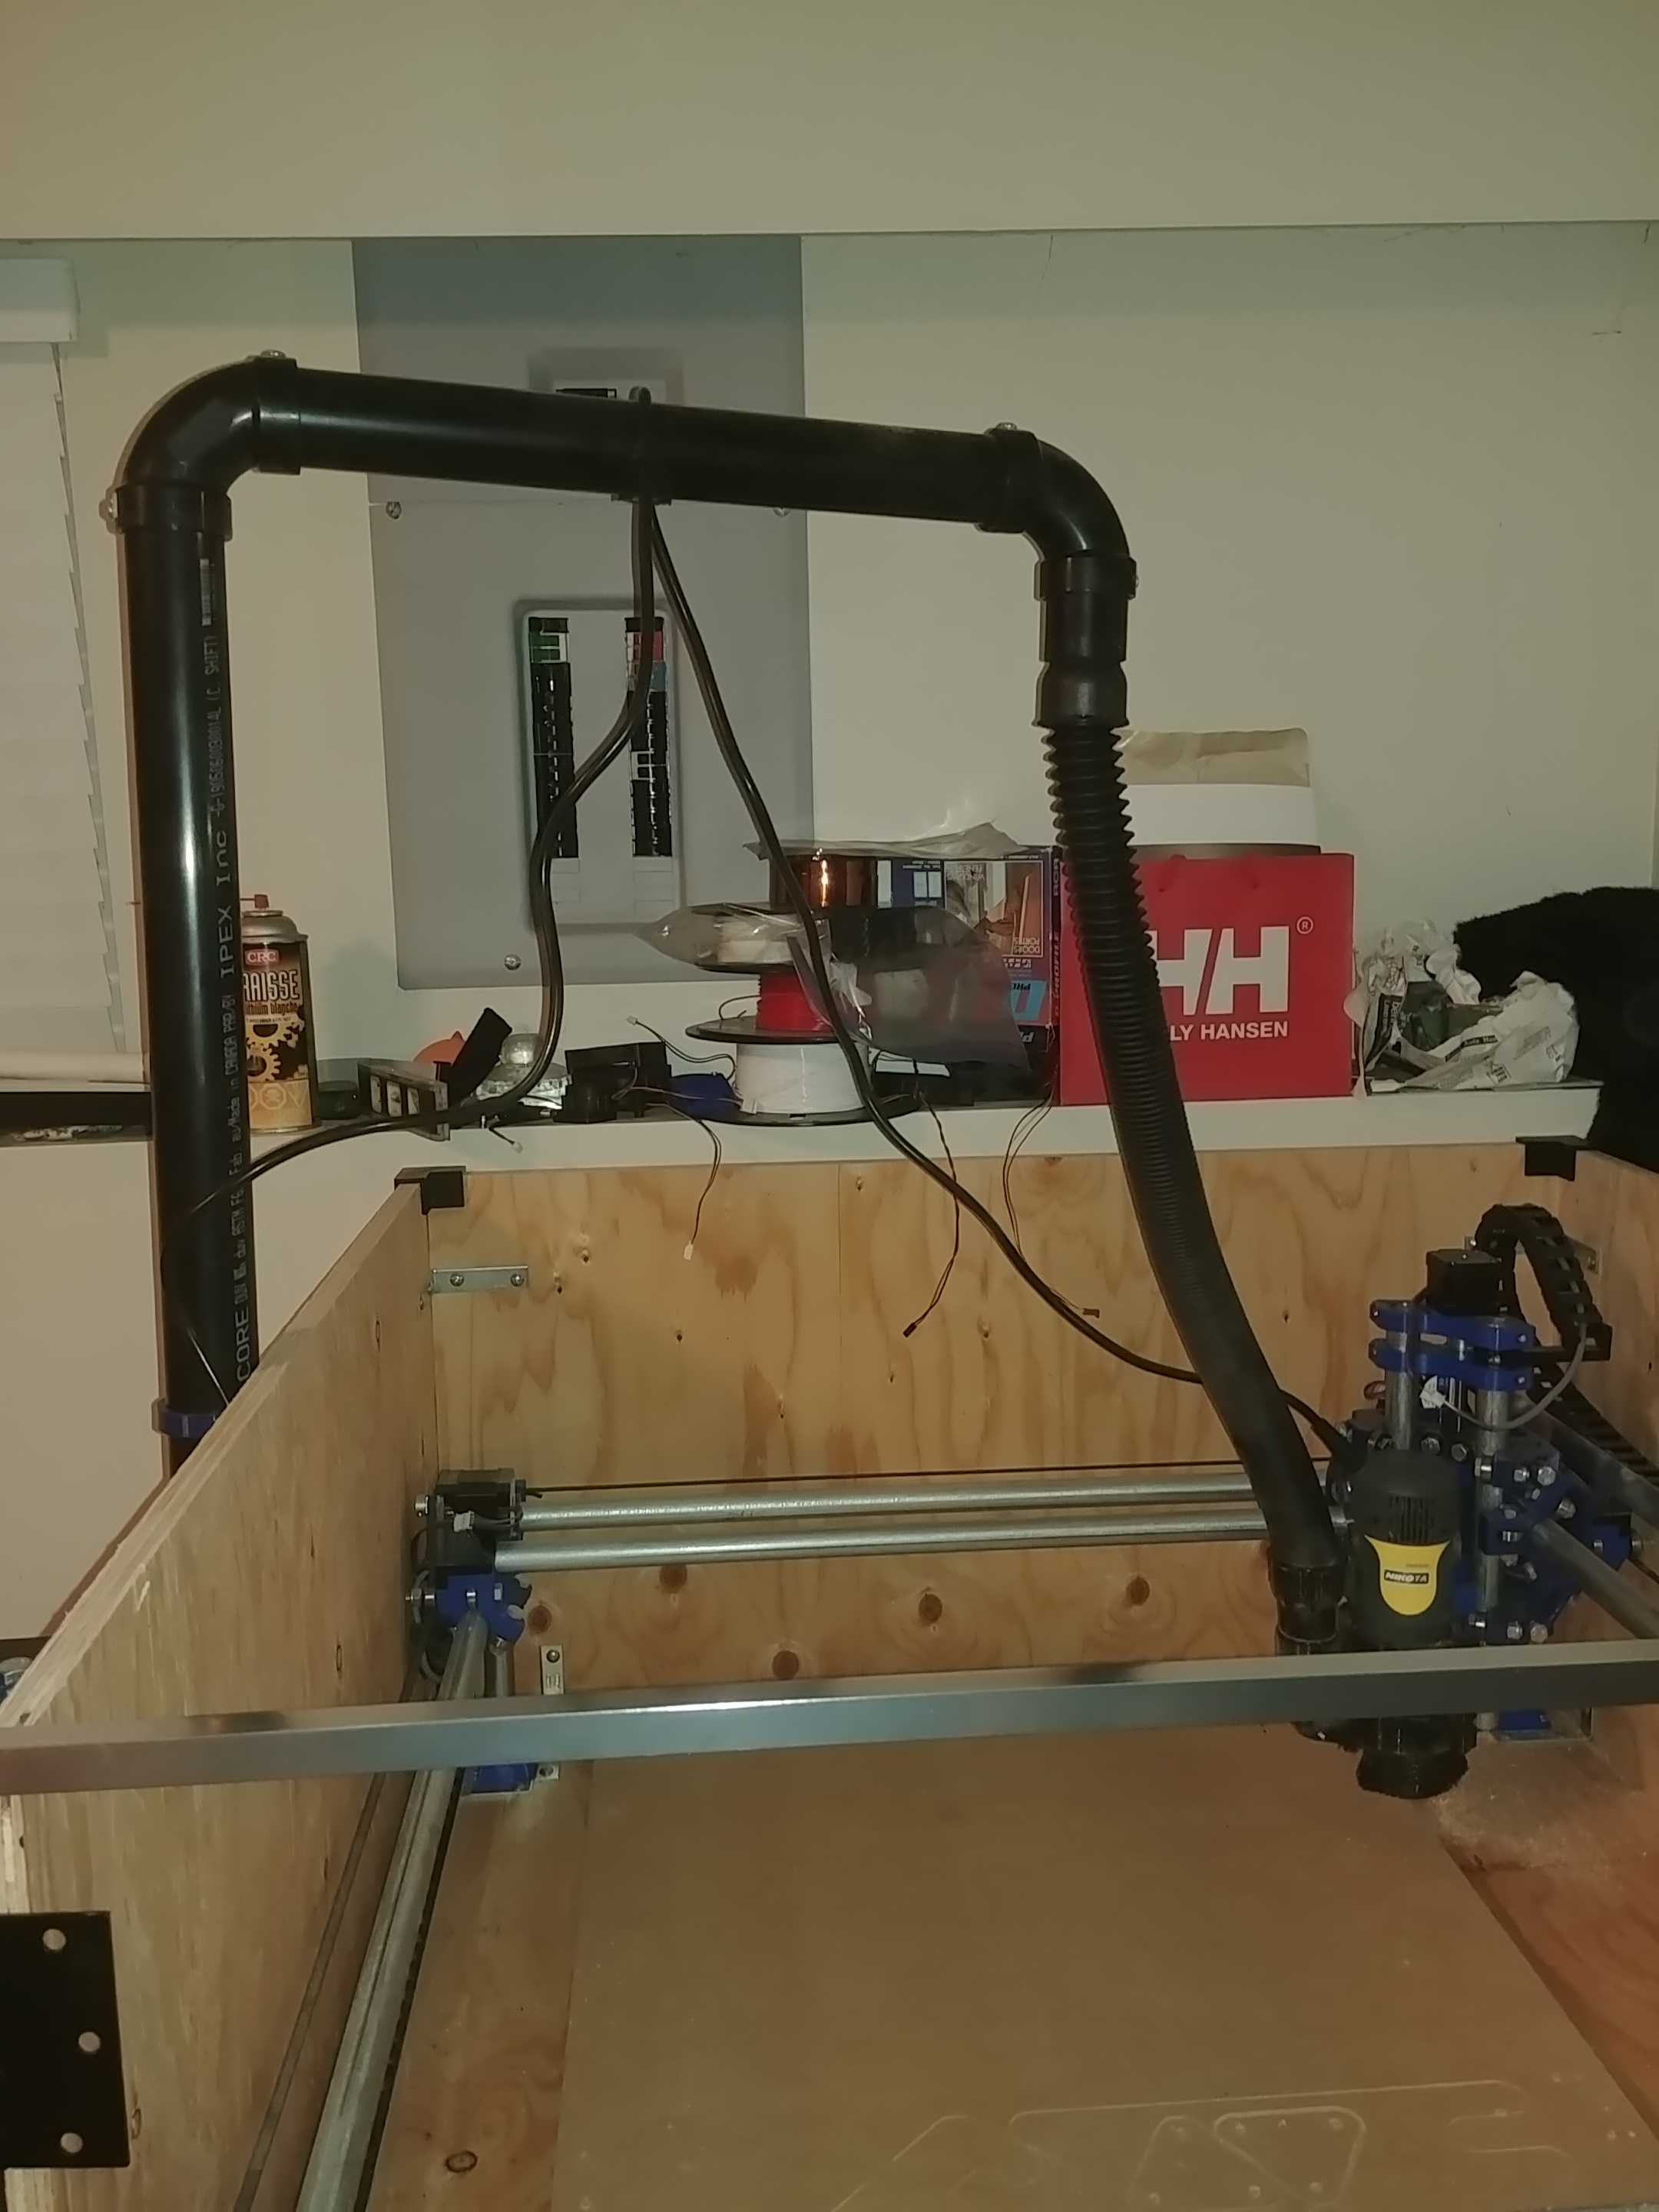
I particularly like the design I saw where the maker used plastic pipe to make its own frame with the exit hole in the middle of the table, and then the flexible hose dropping to the Z axis. I will do something like that once we are allowed to go to the Hardware again after lock down. That makes absolute sense to me and can be attached to the table to keep it all together and the vacuum easily attached. Here is a photo from one of the other V1 posts.
Fact is as long as the vacuum hose is suspended to reduce the amount of influence it has, its still better than having a workshop covered in dust and the wife giving you a hard time.
As Spock said in ‘The Wrath of Khan’. “Logic clearly dictates that the needs of the many outweigh the needs of the few" Or as Kirk answered…“or the one” The need for dust extraction is a gimme, how to go about with minimal effect is the challenge.
Neat solution EdNiedziejko . How have you attached it to the xy carriage? Have you posted it on Thingiverse? Would be interested in seeing your solution.
Yep, it’s on thingiverse. It requires replacing one bearing bolt with a longer one. There’s a cutaway screen cap showing the assembly. https://www.thingiverse.com/thing:4017521
Thanks Edward, nice design and I can see the benefit of having it mounted to the XY bracket.
Sorry to be dense, but I cannot find the file for the two pipe brackets that you screw onto that XY carriage bolt. I see two different pipe brackets for mounting the pipe horizontally, but not the vertical mount that you have shown.
Try MPCNC+525C+525F+Makita+Quick+Release+&+Dust+Boot/files/MPCNC_Vacuum_Boot_-_Pipe_Clamps.stl. I think Thingiverse just has a really bad angle in their preview

 I have one that attaches to the carriage, not the z, and it works pretty well.