Mp3dp v4 slow build

z-tilt runs a while and fails. the bed appears to be tilting up instead of down when it needs to change, so it just gets worse and worse.

Ran into this as well, z-tilt adjustments getting worse with each iteration, I don’t recall fix though. However…

History for my printer.cfg edits mentions …

image

Which included config change to reverse direction for at least one of the steppers…

Consider checking out that change and others made around the same time. Hope that helps. Cheers!

Edit: Separate from this issue, I found my overall bed level variance was better if I did 4 point tests instead of 3.

1 Like

So I just realized that the x and y are reversed on the printer so that could be part of the reason it isn’t tilting correctly… but I just renegotiated space in the storage room to park this thing so that will delay this a week or so. This is good… the space.

Edit: turns out it is more space, but it is just enough to allow the mpcnc to be inside for the winter and I keep the same work bench space. Either way, a win.

Update: tilt still failing. got the x and y correctly identified and wired. can drive +/- in x and y after all axes are homed. still fails z tilt with too many tries or too many points, so no molten plastic yet. I discovered the z rail connections are not mounted solid enough an twist in the mounts, so will need to add more connection points to those.

1 Like

Practicing putting videos on youtube… no editing, just straight from the phone. (need to fix the carriage cabling from flopping)

so I stopped recording once the tilt went a little. After a few minutes, the display started showing the actual height as the probe moved around. The magnetic surface is not attached to the heater plate yet, so that could be part of it, but attaching it will cover the bed screws so I won’t be able to adjust its placement once stuck down without destroying the adhesive. Perhaps some machine screws with a beveled head and flush surface will help with this.

4 Likes

Great video. Gave you a like and a comment. I was already subscribed LOL

2 Likes

Nice!

image

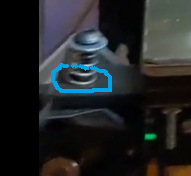
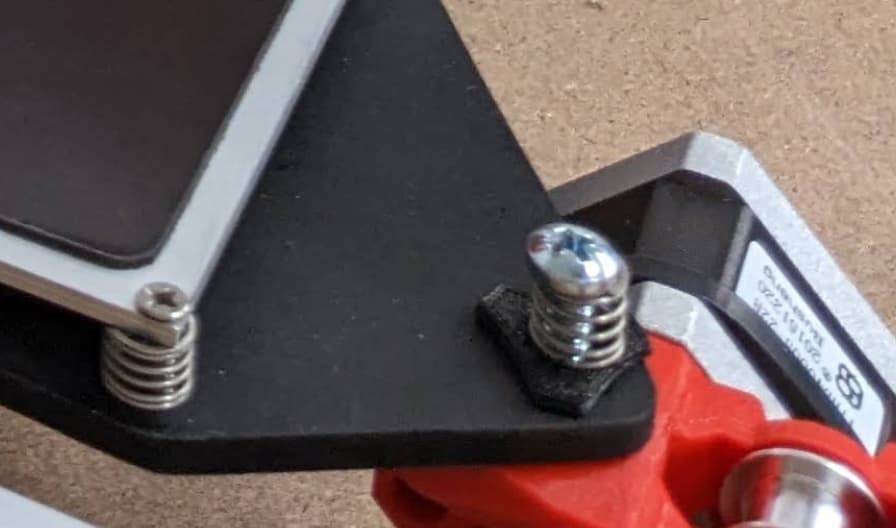
Couldn’t tell if you have washer/spacer to help reduce binding during tilt/Z-motion. Maybe you don’t need them and have metal/printed beam instead of a Ply bed support?

From MP3DP gallery, seen this closeup ?

Good question. The spring attaches to an abs printed 2020 extrusion cap. The extrusion is t shaped holding the base plywood layer that holds a patterned plywood layer that has routings for the bed electrical. The heated bed sits on the patterned ply followed by the magnetic base and removable print surface.

The springs don’t bind, but I may need a washer anyway.

What you need to do is rotate your phone when recording. :yum::joy:

1 Like

But that would make the recording better and generate fewer comments.

I countersunk my screws, then put the magnetic bed on, drilled form the bottom and countersunk the magnet also. Allows me to adjust and the spring steel plate will not dip on that small of an imperfection in the surface.

You didn’t just use the tape backing?

Did similar, made tapered countersunk holes in Alu base and magnet so bolts are accessible. Hoping bolts are small enough that spring steel just bridges over without issue.

1 Like

My magnet had self stick on the back. That is all I used.

Still working on this. After moving shop workspace around, the printer motor wiring plugs are damaged again, so the bed will not zero or level. To remove the wiring issue, ordered new V1 motors are on the way that don’t have the home crimped wire connectors. They should be here tomorrow (thanks @vicious1).

I drilled small access holes in the magnetic plate so I can get to the screw heads. There’s still more than enough magnet left to hold the plate on.

Ok, so I’m back at it. I put on new z motors and got all the homing working again. no more skipping and I fastened the bed down.

So now when it homes, on the tilt command, it moves over to the first point and extends the BLtouch probe, but the bed is too close so the probe flashes red and klipper says the probe deploy errored or something like that. How do you get the bed to back off a bit more once it is z-home?

edit: I changed from 2 to 5:
horizontal_move_z: 5

in printer.cfg and it ACTUALLY leveled after measuring 3 points, adjusting, and then remeasuring!! Now, this probably has nothing to do with the tolerance value being increased to 0.5…

1 Like

and after power cycling and the bed falls all the way down, it won’t tilt again because the front left corner is too high for the BL touch… probably need to shim the right side belt stop so it is slightly higher. It isn’t dropping before testing the front left, but it will drop before testing the back or the front right positions. If it is artificially tilted up on the right side, then it will work… I have a video to show, but it is taking forever to upload.

edit: ignore that ugly red thing on the trolley that is holding up the wiring and the filament tube for now… once I get this thing operational, I have a bunch of parts it needs to print for itself…

@Jonathjon had something similar, I think it was the belts that were too tight.

the only belt that might be too tight is the left z motor (z). the rear z motor (z1) and the right z motor (z2) are pretty loose, but the left one skipped because it was too loose and it may now be tightened a bit too much. The issue is that the bed isn’t lowering down far enough after the zero operation so when it goes to tilt for the first point, if it isn’t super tilted like in the video, the bltouch can’t extend far enough without hitting the bed, which causes the tilt to fail.

The tilt appears to work now that the motor positions are set correctly and the probe locations are reasonably close to the motor locations.

Considered 4 point leveling instead of 3? Am getting better overall level from heightmap test after first Z tilting with 4 corner probing.

Example and rambling about my observations @
https://azab2c.com/make?v=5_18&t=33_38_37&r=1.4 seek to beginning of clip to see config am using.