Assembly, Mount 3D Chameleon Switch near Y Max
Created mount to attach 3D Chameleon Switch to V1E MP3DP v4. 3D Chameleon instructions has links to various mounts for various printers, but I couldn’t find one for my printer :
“Check Thingiverse: https://www.thingiverse.com/search?q=3dchameleon or Printables: Printables”
Shared/latest at https://github.com/aaronse/v1engineering-mods/tree/main/mp3dp-v4/mods/3d-chameleon. Will share on printables when done.
Klipper users can optionally avoid needing the switch, and instead use macros, this involves wiring up (e.g. endstop GPIO + common ground) from the Controller board to the 3DC mcu. This approach will help speed up filament changes after the next 3DC firmware is released. All that said… Wiring up the switch is how most people seem to be setting up, plus having the physical switch makes diagnosing/troublshooting easier. My plan is to reduce variables, get slither of end to end functionality working, then optimize from there. Assuming some other shiney project hasn’t taken priority by then.
Parts
- 2x M3 x 10mm button head bolt
- 2x M3 Hex nuts
- 2x M3 T-Slot nuts
- 1x M3 roll-in half moon T-Slot nut
- 1x M3 x 8mm button head bolt
- Skinny hex/philips drivers
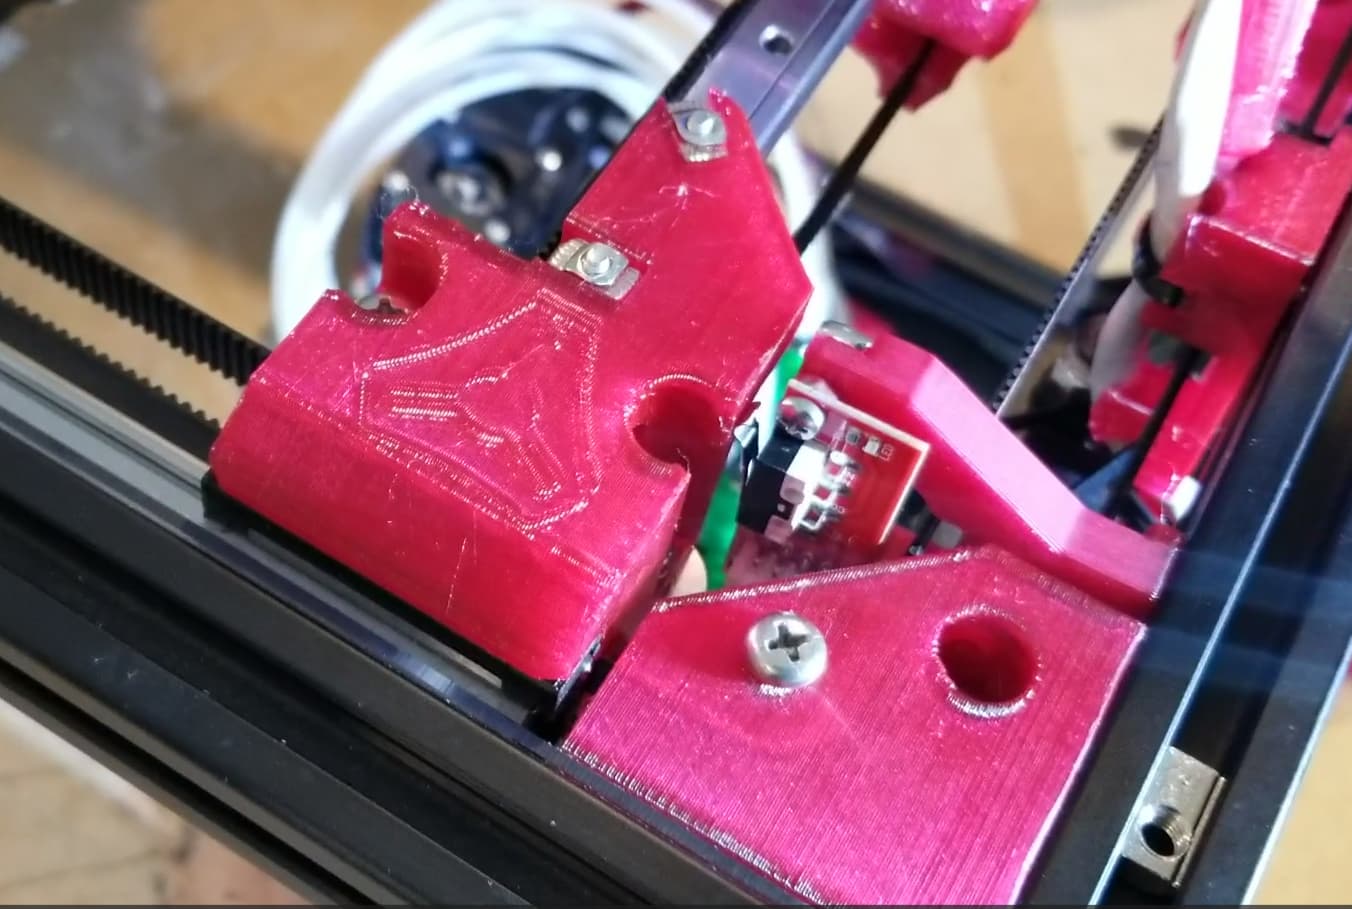
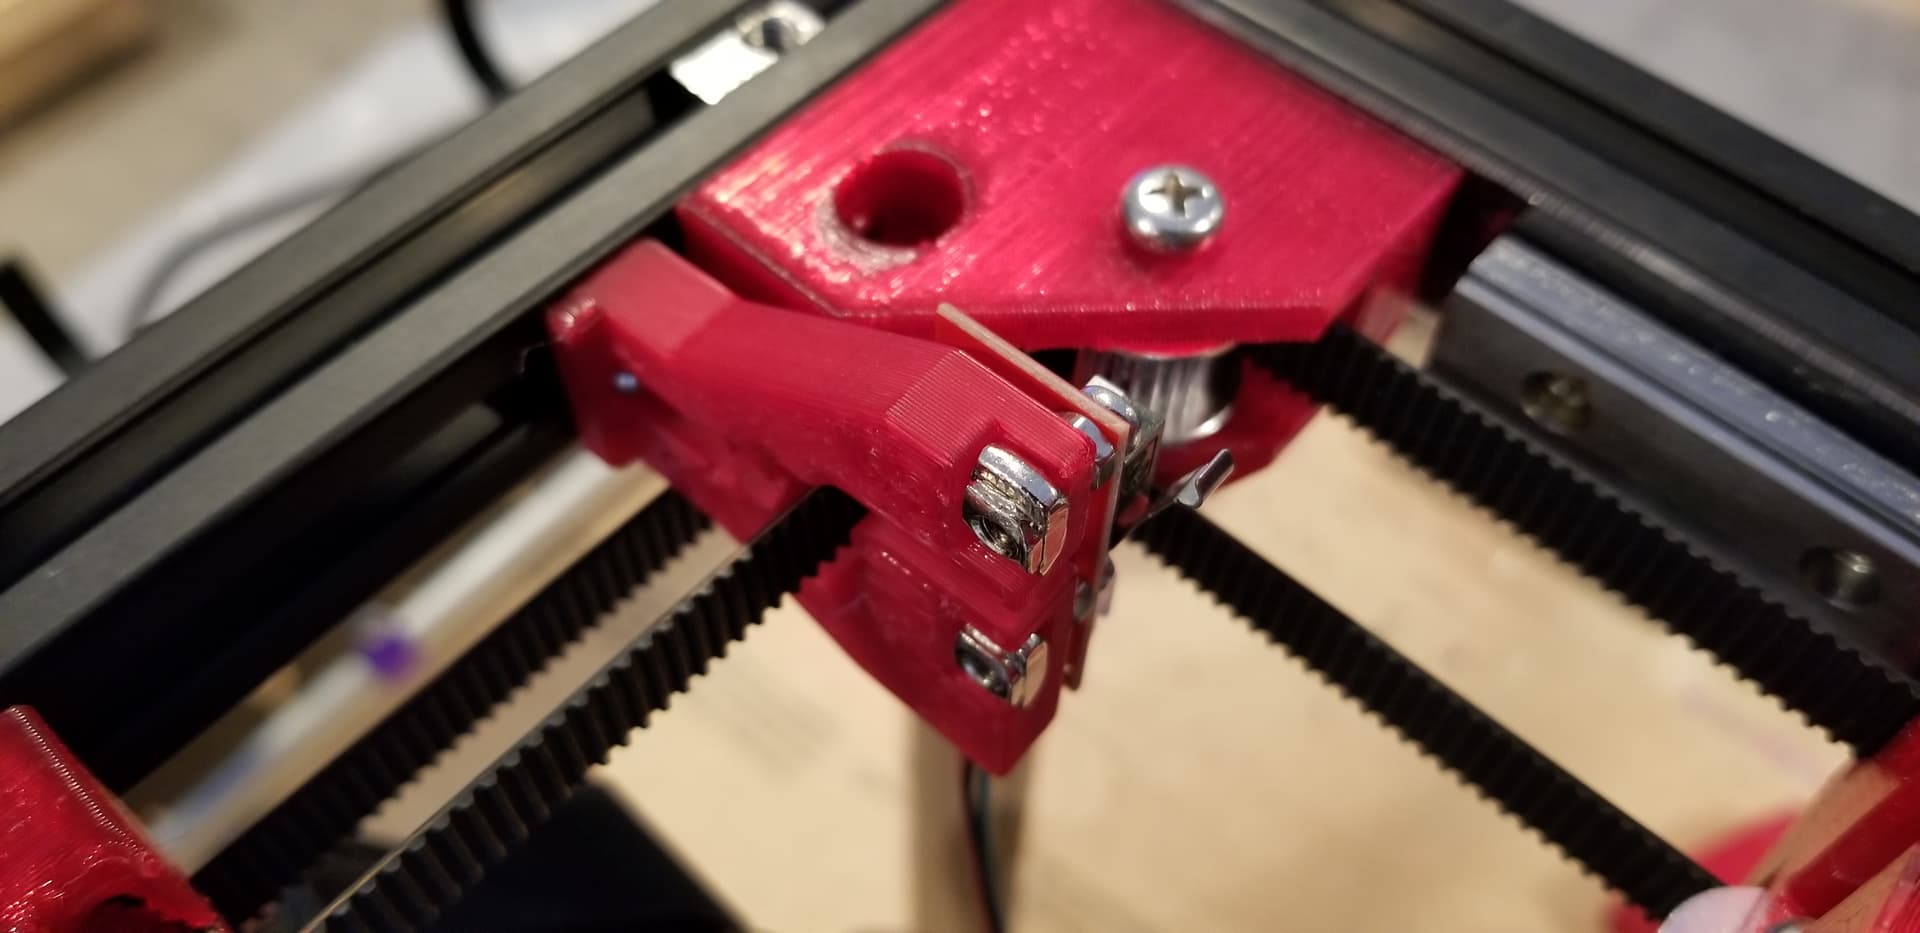
Assemble by threading belt through the printed part’s open slot. Fasten bolts in numbered sequence. 3DC switch has thru hole components, so use the hex nuts as a spacer between the 3DC PCB and printed mount. After snugging up bolts, verify microswitch triggers within 1-2mm Y Max. If extra arm reach is needed, then, carefully bend microswitch arm so arm lands on right gantry truck.
Check your wiring/umbilical expected range of motion is unaffected and nothing gets snagged/blocked. Personally Needed to ziptie and tidy up the loose wiring for my X endstop to avoid snag on the 3DC switch mount.