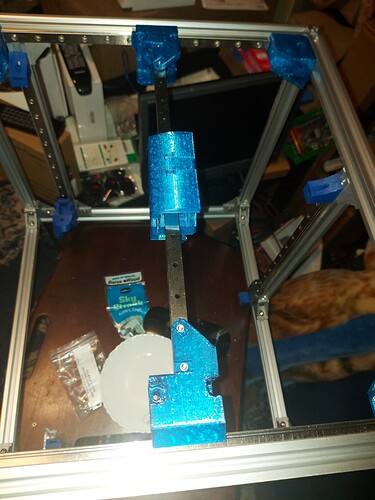
- Install the X axis rail. You cannot install the rail to the XY blocks and install the assembly, but at this point, I found it useful to check the fit, so I uses 2 M3 screws, one on each end, just into the plastic. I then installed each XY block onto the Y axis rails. If you, like me, bought M3 screws with a 2mm hex pan head, this is going to be a royal pain, unless you have long, thin 2mm hex drivers. (I don’t.
 ) Either get phillips head screws, or get a long 2mm driver, because the Z axis is even worse. (I’ll pick up a driver tomorrow, because I have 300 of those screws arriving Tuesday…) Anyway… install the left and right XY blocks to the rails, and the X carrier/core piece to the X rail. It’s slightly easier to do first, and then install the X axis rail to the blocks using 4 M3x10 screws and nuts. We haven’t entirely squared up the frame yet so there might still be a bit of wiggle in the top rails, allowing you to adjust them to the actual length. Mine were a snug fit, which was a relief.
I had planned to get the Z axis done tonight as well, which would complete the parts that I have printed, but as mentioned, I don’t have an appropriate screwdriver, so I will pick up one tomorrow. I think the Dollar store has a set of precision screwdrivers that are kind of crappy, but should last for the 12 screws or so that I will need them for. I keep buying the set and throwing it all away when the M2 and M2.5 drivers break. Maybe this time I’ll look for a better set.
I think this is the end of the printed parts assembly for what I have now.
I will need to print a Hemera hotend mount for it, install the endstops, and then I can cut the heated bed support. I also need to design a control board box, but I bet that someone will have designed a nice box to attach the Duet 6HC to 2020 extrusion already. If not, I’ll mill something that will do the job.
This printer will have no LCD. I had one briefly on my other Duet printer, but with the web control, I never used it. I use them on the CNC machines though.
