I wish I was terrible with engineering stuff like this! Unbelievable project!
Hi Gato,
Thanks for the questions! It’s going to be a while before it runs in anger, I just became obsessed with this mechanism and had to build it. 
Because I haven’t sorted the workflow out yet, I can’t really give you crisp answers. These two steppers (rotation and feed) will basically just substitute for the X and Y steppers. I intend to unwrap each tube, flattening it in Fusion 360 to create simple line perimeters. The SKR will think it is cutting a 2D shape, but instead of scrolling X and Y it will actually be rotating and feeding the tube. I will either have to go back into the Marlin firmware and calibrate steps/mm or warp/scale my 2D design before creating the cut instructions. I went through and customized Marlin for my 1.3 already, to allow me to use all of the heating circuits to control SSRs, and remove the temperature safeties, etc. so I am hoping that this won’t be a big deal.
I have to admit that it probably won’t be well synchronized with the LR, but I intended to make a plasma torch mount for the 611 plate, and I was thinking that I would run the torch over to index in front of the feeding apparatus. Truth is, when I power off and switch over from the LR steppers to the tube feeder steppers, the 611 plate will lose its holding power, so I may need to make this notcher thing into a standalone tool. Thanks, food for thought!
There is (currently) no tensioning to hold the tubes in the three gripper wheels. My intention was to add a single wind of some kind of friction tape to each annular gripper contact, until it held the tube tightly. There should be very little drag that the feeder has to fight. I may also have to look at the acceleration and jerk in Marlin if mechanical tape wraps alone (compression) can’t suppress slippage. I have a feeling that this thing won’t tolerate too much beefing of the tube grip before it just won’t run at all. These aren’t massive steppers after all.
This is probably premature to show anyone, I was just pumped up.  If I redesign this thing it will have some improvements to allow easier assembly for sure.
Cheers!
Brian
Thanks Dan, but I really don’t math well or have any normal engineering skills. I figure that an ME would look at what I was trying to do and say “oh yeah, you just need to use a hyperboloid sinus grind on your reluctor teeth” or something. My fusion models are awful, all my sketches are riddled with horrible geometry shrapnel, etc.
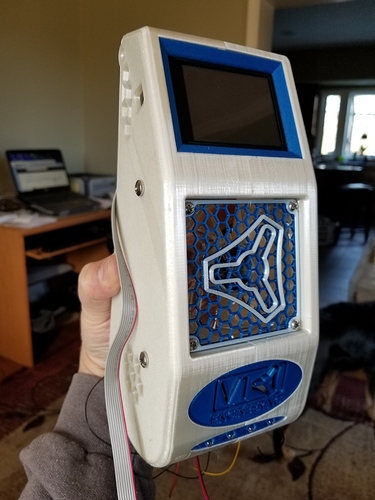
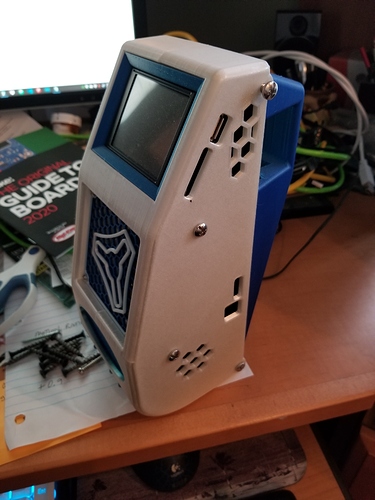
I also Fusioned and printerated what I think is a cool controller box, designed to clamp to the (eventual) CNC unistrut rail. It holds an SKR V1.3, the TFT28, an 80 mm fan, and has some other silly features. All the cabling will go through the unistrut clamp and be hidden in the strut. Eventually. 
But what about this car?
Hi Tony,
I know, I am asking me the same thing.  I have to finish the shop and tools first, then I can start on the car. Two seat, mid engine, manual trans. I kind of want to go for a 1960’s vintage GT vibe, with shades of Jag XJ13, Lola T70, Porsche 917, etc. That is a looong ways down the road.
  I want to design and build it unique, from scratch, so when someone asks me if it’s a kit car or replica, No It Is Not.
Cheers!
Brian
That’s great! Make sure to create an off topic thread, because there are a few gear heads here (present company included) who would enjoy that, and a bunch of other people who would just dig a project that complicated.
Man, a car from scratch is NOT for the faint of heart! I’m looking at something like the Midlana for my next build because I’m not an engineer by any stretch of the imagination, but I’m not so sure about the styling on it. At least by then, you should have this tube notcher figured out!
I’m in the middle of a Factory Five build right now, but mostly stalled at wiring. Decided to rebuild the whole damned harness and then I thought I’d put together a cnc to help me with one-off fiberglass forms and the next thing you know I’m cutting all kinds of stuff for the wife and friends and now we have to move so we can build a house with a bigger shop, lol. But I promise, my thread is coming soon because the weather is finally under 110 out here and the house is under contract (we’re in a rental).
Make sure to take really good notes on the design and build. You might have a book in your head. The guy who designed the Midlana (Kurt) sells both of his for $100 each. I’m not sure how many he sells, but I get the impression at his forum that at least 100 guys have one, and he probably gets half that (based on what I read at the on-demand publisher’s website).
I’m IN! ![]()
Show a video of this running please
Hi Doreen,
Sorry, I don’t have one yet.  It’s going to be a while. It has more internal friction than a tectonic fault line, so I will be redrawing and upgrading the stepper mounts and motors, and revising how the stepper shaft joins the printed drive shaft(s). The redesign will allow me to use a NEMA 23 (I have a 425 oz-in unit on the way) to overcome the internal friction. I also need to figure out how to use the step-enable-direction pins from a BTT SKR V1.4 to run a DM542T external stepper driver for the beefy steppers. It seems like it should be NBD but I always think that right before I fail spectacularly. I hate to be honest, but it might be 6 months or a year before I can post a video of running this for the first time.
If it works as intended I may go back to the drawing board and redesign it with a gripper carrier that would allow swapping of the grippers (to accommodate different sized tubes) without having to take apart the whole thing. Cheers! Brian
This is an incredible machine and design. I am sure this is going to be something you already know. But whenever I make pla stuff that fits together, wax works really well to smooth it out (even on stuff like herringbone gears) and it loosens up a lot when the stiffest peaks wear out, which is pretty fast. If it doesn’t turn at all, then you can exactly wear it in. But if you can move it, it may get loose pretty quick.
Hi Jeff,
Thanks for the feedback.  I did also suspect that it would smooth out after I had “run it in” and it really has helped to keep spinning the green and orange gears by hand. Before assembly I had quickly flamed the parts with a torch to get rid of threads, then I chased all the gear teeth with folded sandpaper, and I think I knocked down a lot of the nubs that would cause early stiction. Comparing now to when I first assembled it, it has really improved. Honestly even early on it rotated fairly easily. It was always (and still is) the tube advance that was stiff. I’m not using wax, but I will look into that (as in paraffin or something) next time. It does work just like the simulation, so take that, 2020!
Cheers! Brian
DAM.
That is one hell of a project. Can’t wait to see it in action. I just found this thread and I was scrolling thinking…please make it, please make it…boom there it is. For your first shot, it looks amazing. So complex and it all works well. I never get that lucky on my first couple tries. The Primo core is V19 in my file system and there were many attempts that did not get numbered…and it is not nearly that complex.
Hi Ryan,
Thanks for the kind words from the master, but this took me so long (seriously, months of time), I don’t think it is really a legit “first shot.” In Fusion it says it is V91 
And let me thank you for organizing this website/forum/knowledge collection and sharing your CNC designs (for free, no less!). After finding a link to your CNC router design (Low Rider, because I needed full 4x8 sheet ability) I was over the moon thinking about the possibilities. I mean, seriously, the LR has dominated my free-time thoughts for a year and a half.
Best wishes!
Brian
I know this is a very old thread, but any update on the tube notcher? And/or the custom car build?
If you never finished the design, please upload what you had and someone will continue with it. It’s a unique concept.
I’m not the original poster, and stopped lurking to be a new community member long after this thread happened.
I have to say, holy crap what an awesome machine design.
Now that we’ve got that out of the way, @stupidlumpyhead 's last post was December 15, 2020- and the last active logon was on December 24, 2022.
I sure hope they’re still around the forum as a lurker and eventually pop back in.
I’m as curious as you are about whatever became of this machine and community member.
Hi! Sorry I have been offline for so long. This site and community is still my jam, it’s just been slow going in my own life.
The notcher as last seen worked as intended by manually moving the thumb wheels, but the NEMA 17 motors weren’t quite up to the task, and I was pretty sure it would be a non-starter trying to manipulate actual chromoly tube in anger. So back then I started designing NEMA 23 mounts to replace the NEMA 17 mounts, and learning how to control those big NEMA 23 steppers from a 3D printer-level board which involved some neat little driver socket adapters and an external high current driver module. I can’t remember where I got them (and that’s all in a box right now) but that took some time to sort. Then some elder care issues came up: we lost my wife’s mom when COVID tore through my in-laws’ assisted living home in 2020, and so we rebuilt the great room into an apartment and moved my FIL in with us.
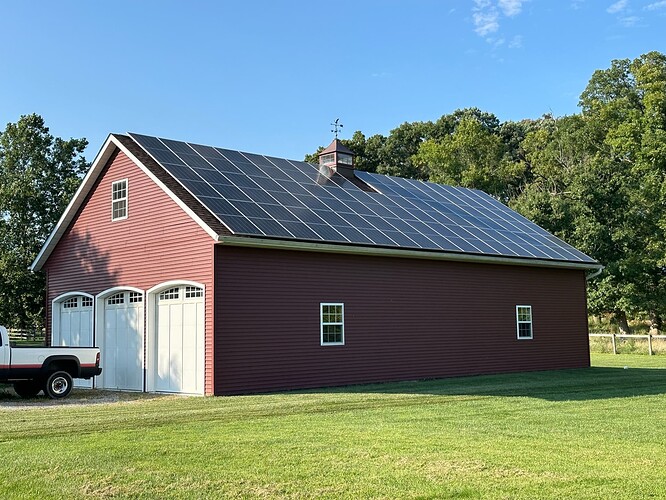
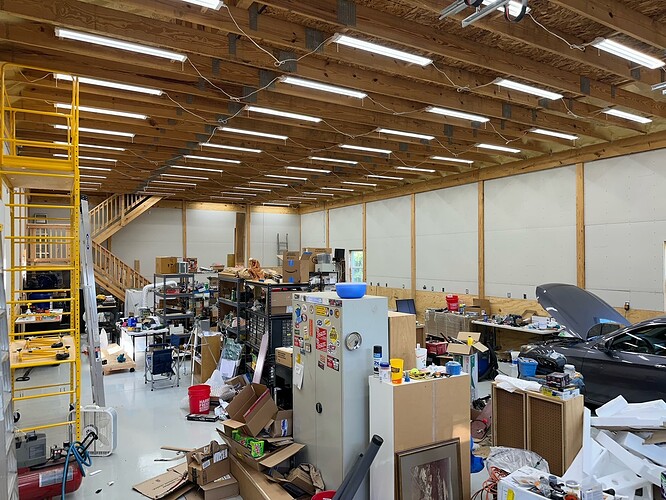
Between being tired from work, hanging out with my own boys through their high school years, and needing to tag team looking after my FIL with my better third, I bit off way more than I could chew building my dream shop. I got all the electric permits, epoxy coated the floor, insulated between the pole stringers with 1.5" foamboard, then built 2x4 walls in front of that which rested the lower plate on the concrete floor. That way I can hang whatever load I want on the walls. Then I ran soldered copper compressed air lines inside the wall, a billion 240/120 outlets and a 3 phase network of outlets that I’ll feed from a rotary converter, speaker cables, ethernet, thermostat wires, and finally rolled batt insulation between those studs. I hung drywall myself which involved building a little electric wall winch thing to lift up the sheets (I have 14’ walls), and sheathed everything the township would need covered for final inspection. After final inspection I had a massive solar panel array installed on one side, then after that was done I went the “hot roof” route with sprayed insulation in the attic. Now the storage attic is not hot at all, and it won’t ruin (especially plastic) things I store up there. I had to rebuild the stairs to the attic to meet local code, and then I hung a bazillion LED lights tucked between the rafters which on paper gives me the same lumen areal density as a hospital operating room.
I am currently working in the shop to paint an intumescent coating on the spray foam, finish running power that I didn’t do before inspection, add some outside lights and such, etc. I have given myself a (currently) 90-task punchlist before the shop is shoperational. THEN I can build the CNC plasma table, CNC router, and start work in earnest on the homebuilt car. I am starting to think that the only thing I will build in my shop will be the shop itself. But, I can see it in my mind and it’s going to be awesome.
I would be happy to post the files for the notcher concept, but I don’t know how or whether this is even the right place for them. Finally, there are places now like SendCutSend, Xometry, etc where you can just order parts made with real deal processes, and some of those have laser tube notchers. Given that recent capability I may not even need to finish the tube notcher at all.
Cheers everyone,
Brian
I am sorry for your loss!
The shop though, sounds fantastic. Care to share some pictures with us? ![]()
Hello, Brian.
I’m very sorry to hear of your loss.
I hope you feel motivated to share your progress as you build out your shop and move forward with your projects, whatever they may be.
Thanks for the well wishes. We’re all doing fine now.
I didn’t mean to derail the notcher discussion with shop talk, but just for context here are pictures of the outside and inside. I need to finish this and build out the work areas and office and and and so I don’t know when I can really move forward with the fun stuff. It’s embarassing to show this dump in the middle of the process, it will be much cleaner and organized etc when it is done.
Cheers everyone, hope you are all well. ![]() Brian
Brian
You shouldn’t be embarrassed at all.
That is a sweet building and will be one awesome shop when you finish building it out.
I’ll keep watching for updates. Thank you for sharing.


