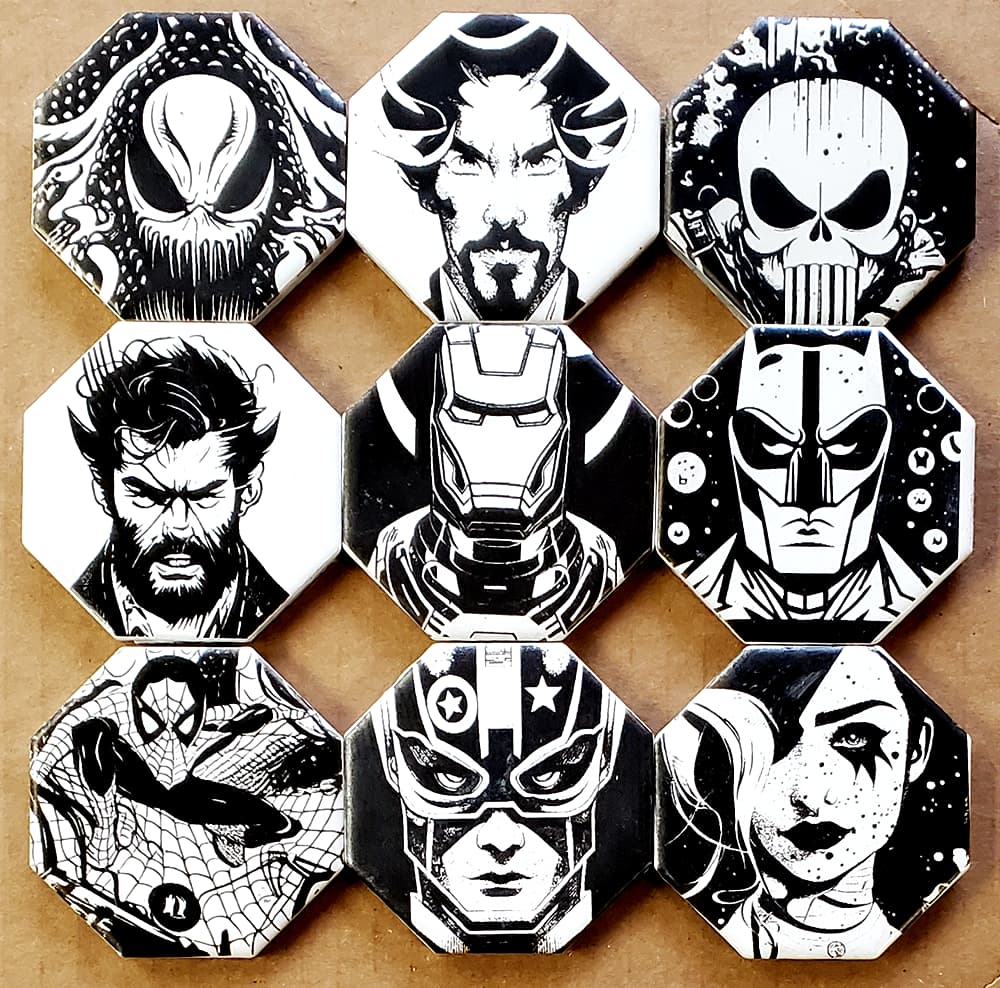
Here is the next batch of laser engraved tiles. Some of these tiles were done on my Primo, but a majority used the JL1. All images came from Midjourney.
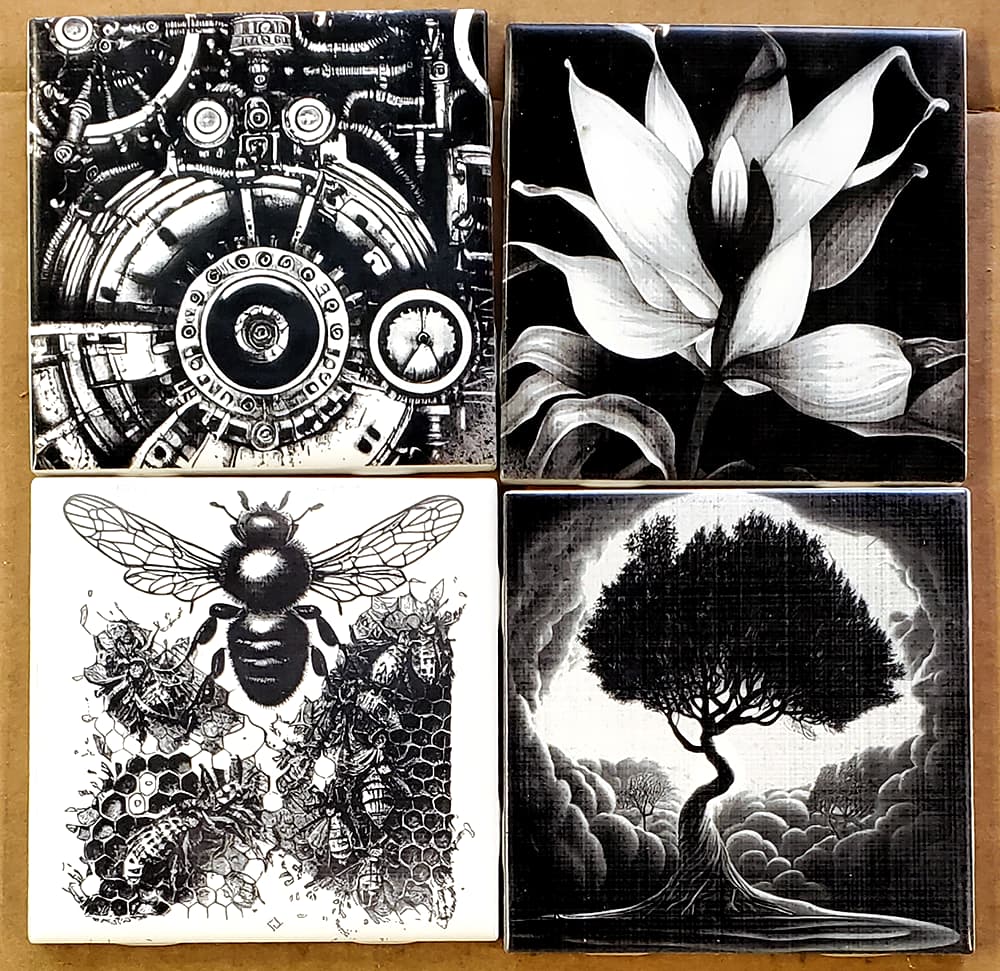
The first two images (four tiles in each) are using a new-to-me recipe with an attempt at grayscale. It has been very frustrating trying to nail down a consistent set of steps. I have a lot of rejects, but these are the best so far. When it works, I love the results.
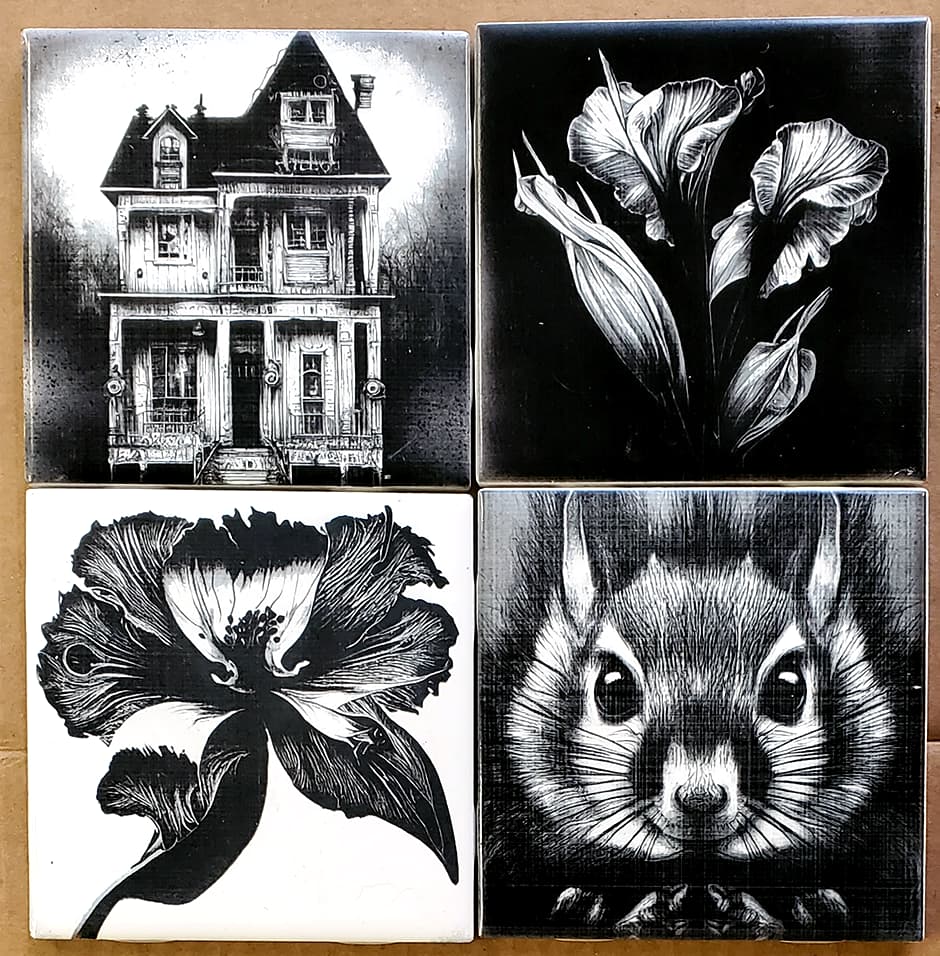
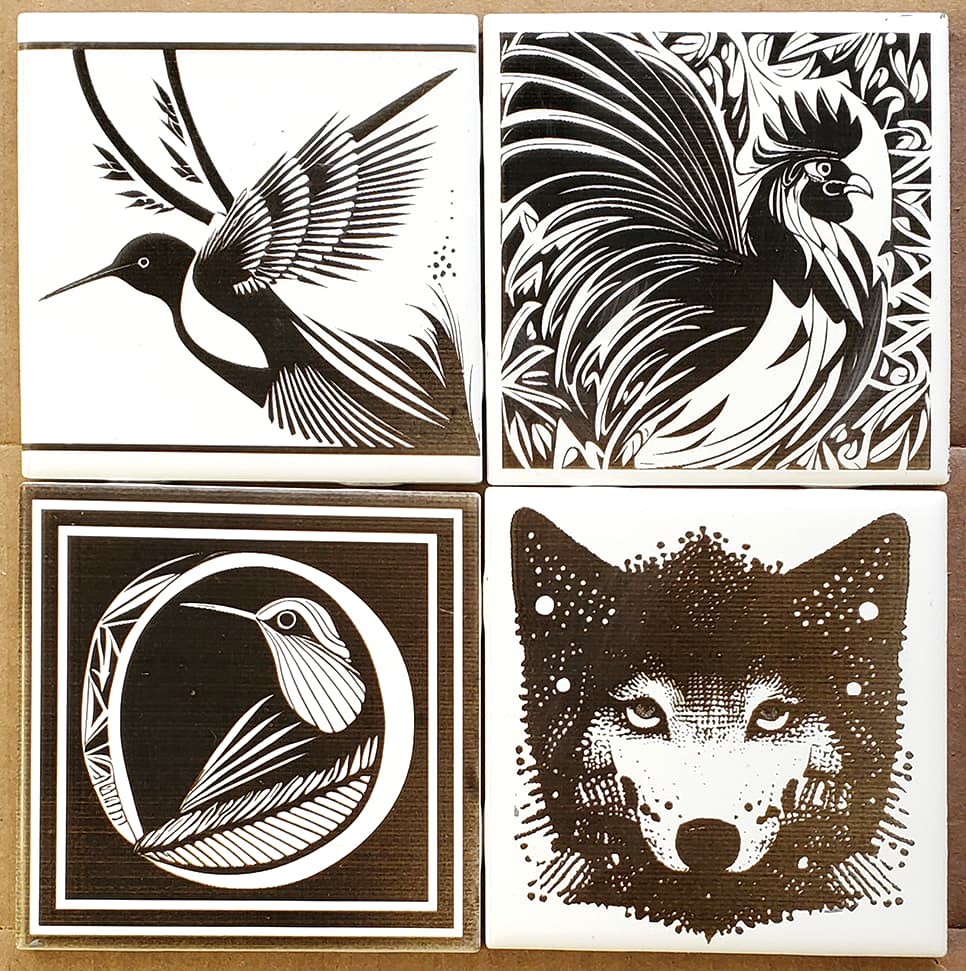
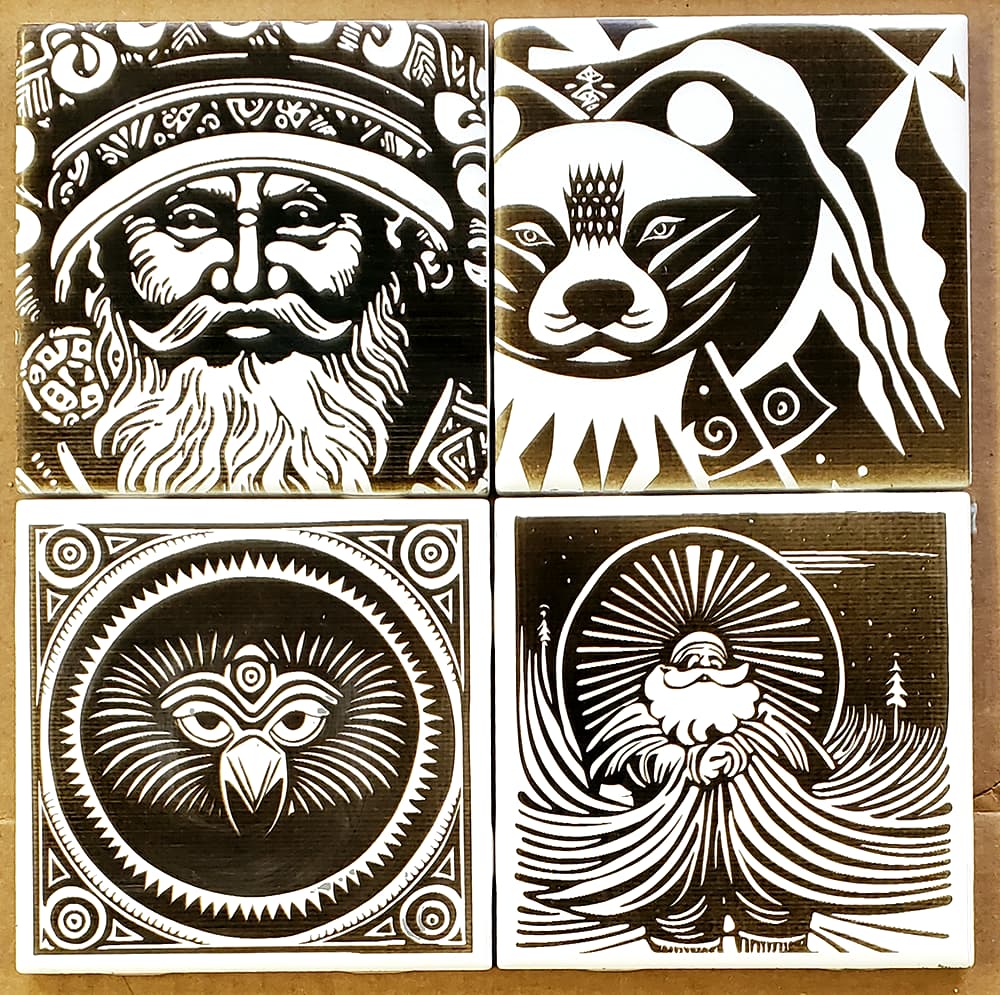
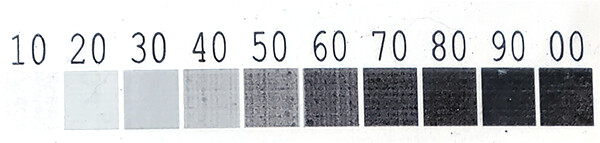
The following images were done with my previous recipe. Any gray is dithered. I selected and/or manipulated the images to remove any light gray, so the white areas would appear clean and crisp. Midjourney images always have gray in them, even done in what would be a pure B/W style irl like pen and ink or block print. The banding in the photographs is not nearly as apparent when viewing the real tiles.
When I first started using Midjourney, I tried superheroes in the prompt. All I got was distorted versions of logos. I thought this limit might be due to Midjourney trying to limit their copyright infringement exposure, but with the beta/test version, I produced some interesting images. Midjourney did well on some superheroes, but didn’t seem to know other, popular superheroes.
When I started out attempting to engrave tiles, I ran tests of the cold galvanizing compound (CGC) vs. Rustoleum 2X white paint. I found the CGC superior for a number reasons, the strongest being that it does not disturb the shiny surface of the tile. I find when I use white paint, the tile is dulled and must be coated to restore the shine.
When I tried to do grayscale engraving on CGC, I received zero positive response. The two “colors” I got were splotchy and black. Then I tried the white paint tiles left over from my original testing, and I received this beautiful grayscale response.
So, I did a couple of the tiles above and thought I found the holy grail. Then I ran out of the original tiles (painted weeks before), and I could not reproduce the grayscale. After much testing and frustration, I found that cure time is one critical component. Twenty-four hours is not enough. Five days (I took a trip), is enough and I’m currently working through that stack. I expect the cure time will vary by conditions and be somewhere in that range.
A couple of additions. Imo, there is a missing light gray tone between the white of the tile and first gray in the scale, and the white can look funny/unnatural. I try to minimize the impact through image selection and image manipulation. Also, there is a banding issue I’ve yet to figure out.
A longer answer then you were probably looking for. The short answer is that the grayscale tiles above use white paint. All others used CGC.
I have a toaster oven in my shop area. I tried these steps in the evening:
Spray and let dry to the touch (20 minutes)
10 minutes in the toaster oven at 50C.
In the warm house overnight
10 more minutes in the toaster oven
Cool to house temperature
Engrave the tile
The results were splotchy, indicating it cured in some areas and not others. So overnight with heat is not enough. I’m sure heat helps, and there is probably some minimal recipe. Each tile takes 80 minutes to engrave, and I have limited time to hang in the shop, so it can be a slow process figuring some of this stuff out.
Nope, that was exactly the amount of detail I was hoping for but didn’t want bother you asking for.
I’m also struggling to get good results. I’ve seen some other posts saying laser the tile as soon as its tacky and you can handle it but that hasn’t been working out for me too well. I have some other issues I need to work through but also don’t have a lot of time.
Thanks for posting everything you’re trying! I’m reading with interest and awe at your results.
@robertbu, Neje sent me an email about a laser contest. I think your tiles and your methods could stand out in something like that:
It is for original works only. It also looks like they won’t have any prizes unless there are 100 submissions. I am sure you have much better than 3/100 chance at winning.
I only found out about the Norton White Tile method this weekend and I’m experimenting with it (much Thanks to Robert for helping me troubleshoot my laser on my Primo!)
I started with the Rustoleum and CGC but I also tried the homemade titanium dioxide and denatured alcohol applied with a sponge. I’m still way to new at it to be offering any kind of rock solid advice, but I will say that cleaning the tiles afterward is a breeze with the homemade mixture. All I do is hand wash
it clean under warm water.
On a side note, I’m going to see what happens if try the Norton White Tile method on stainless steel. I doubt it’ll work, if it did companies like Cermark wouldn’t exist.
But I always like to try things myself just to see.
Also BTW, I bought some blue iron oxide power to see if it works. Blue Iron Oxide Powder.