More fun with lasers, Lightburn, and ceramic tile

that second one I can only see text in the middle, but not the top and bottom parts the others are saying that is all they can see. The logo one floats out for me as well. Very nice!

1 Like

Dude, all of your projects are so awesome! You inspired me to give it a try, got a bit of work to do to get to your level but I’m still happy with it.

!

Keep on posting your cool projects!

4 Likes

Thank you for the kind words. It is pretty fun, isn’t it? And addictive! Keep up the good work.

2 Likes

Thanks for sharing! It has been ~ 25 years since I tried seeing one of those. It took me several minutes to lock on to “What is this?” My eyes kept burning, forcing me to blink and start all over, lol.

2 Likes

Remembered the trick… crossing your eyes, lol!

3 Likes

Another fun and enlightening test…

On another of the forums I keep up with, the subject of engraving ceramic tiles and glass was being discussed. One of the posters (@DrPete) was suggesting using black tempera paint to coat the glass prior to lasering… and showed a simple test he’d done, a few circles etched on a piece of glass. Because the circles had an etched/frosted look to them (as opposed to the black images fused onto the surface with NWT) and the method was simple enough, I decided to give it try.

So, not really knowing what to expect and taking no particular pains to be neat, I followed @DrPete’s instructions as best I could. I quickly brushed Walmart black tempera paint on a not-so-clean piece of broken window pane and lasered an image with the same little Eleksmaker 2.3W diode laser I use for the NWT ceramic tiles. To say I’m pleasantly surprised with the result would be an understatement…

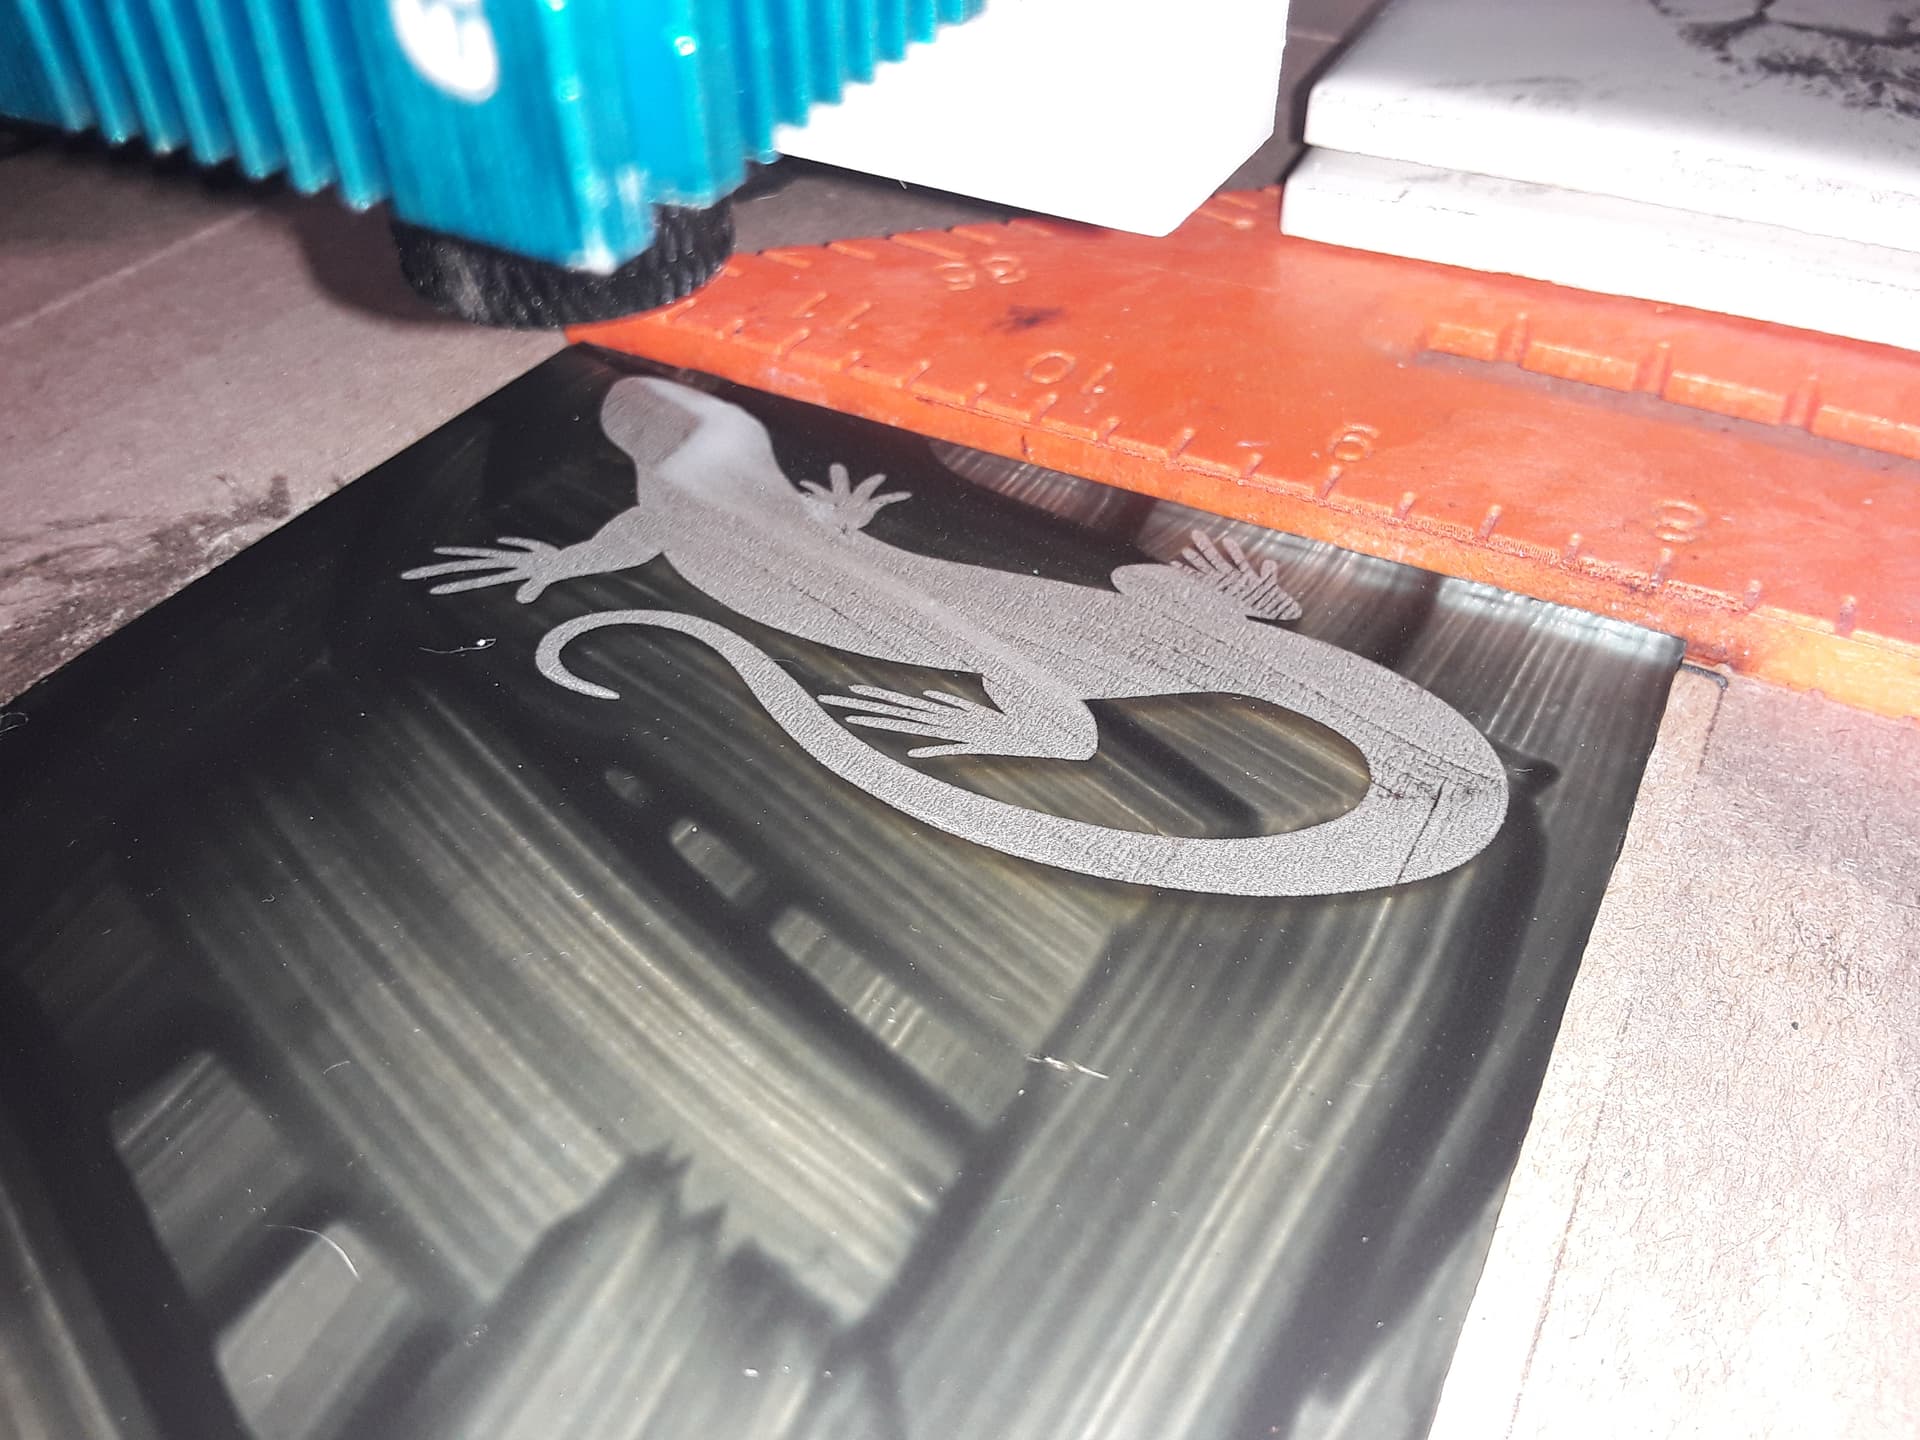
To adjust for my lesser-powered laser (compared to @DrPete’s 10W laser) I used 1000 mm/min and 90% power… and got a genuinely frosted/etched image on the glass on my first attempt. Given the brush strokes in the paint were so inconsistent and streaky, I was surprised the etched surface still shows a relatively nice opaque image. But there are a few lines and streaks can be seen to coincide with some of the inconsistencies in the painted surface so I suspect a more uniform painted surface would yield a better result. Anyway, I’m encouraged with the attempt and feel it warrants a bit more playing, especially with trying to get a more uniform painted surface.

In summary… with the same laser, same glass, same image, but different paint…

flat-WHITE spray paint yields DARK embossed image… BLACK tempera paint yields LIGHT frosted image

How weird is that?

– David

13 Likes

darker paint absorbs more and ablates maybe while the lighter paint darkens? This is fascinating. We picked up a variety of white tiles from the tile shop the other day to give it a go.

1 Like

Yeah, it’s something like that I sure. I know it’s the titanium dioxide in the flat-white paint that is the magic ingredient and it fuses with the surface of the glass/tile… leaving a slightly-raised, embossed dark image. The tempera paint OTOH appears sand-blasted/ablated… leaving a lighter, frosted image. TBH I’m thrilled to find that either effect can be achieved equally easily… hopefully, they’ll be equally permanent. :stuck_out_tongue_winking_eye:

4 Likes

Thank you for sharing this with us it is great information.

1 Like

Now you have to figure out a two step process to do black and white on the same glass.

You use acetone to remove the extra paint, right? So it probably doesn’t matter which order it goes.

3 Likes

I wonder if you get Gray if you layer balck on white or white on black?

oh that sounds cool… make a multi-tone image. though you can do that with a dithering pattern.

Still playing with tempera paint and glass… and getting even, consistent, coat of paint. Currently trying to use a bit of Dawn dish soap, water, and tempera paint to break the surface tension but haven’t found a way to spread it without streaks.

Multiple coats can help a bit but, again, still has streaks…

Tim O. mentioned that this might make neat edge-lit signs… so did the following quick and dirty test…

– David

8 Likes

Of course I love it!

What about spraying it, https://amzn.to/39rG0ne

4 Likes

Here’s our trusty Garfield shaded (dithered) image… not much to look at

until you edge-light it…

Still needs to have a more consistent paint coating. I’m gonna give Ryan’s pump sprayer idea a rip tomorrow… my daughter uses those in her greenhouse to spritz plant seedlings. My SIL also has airbrush equipment and – if push comes to shove – I may have him help give that a try if I can’t find something simpler…

Ir’s late. Night all!

– David

6 Likes

I don’t know how much experience you’ve got with spraying, so excuse me if I’m telling you something you already know.

I suggest running the paint through a fine sieve, or multiple layers of cheese cloth, when putting it in the sprayer. My experience with Tempera paint is that it often had “lumps” over and above it’s general graininess. Filtering may help prevent the sprayer from clogging.

2 Likes

I wonder if rolling the paint on is another possibility?

1 Like

I want to thank everyone profusely for their suggestions about how to get smooth, consistent, tempera paint coating but, in my best Elon Musk-like “optimization-speak”,

  • the best paint coating is no paint coating at all!

Quite by accident, I discovered one of my early test burns was actually etched on both sides of the glass…

and looking at the surface I had put the glass blank on, it was just a battle-scarred piece of cereal-box cardboard…

so I put down a fresh piece of cardboard and laid the glass intimately in contact with it… and lasered through the glass (I mirrored and inverted the image in LightBurn)…

the trapped smoke/soot/gases/residue of the lasered cardboard left on the bottom-side of the glass resulted in the mirrored image …

which, when washed with dish soapy-water, revealed a quite nice etched image…

So, it appears the tempera paint isn’t necessary at all… just a dark-colored backing in close contact with the glass. I’m pretty sure it’s the laser energy locally-heating the backing and ablating chips from the glass as it travels. Maybe black construction paper would be better than the plain brown chipboard.

Or, hey, maybe I could paint the chipboard first… with black tempera paint! :thinking:

– David

14 Likes

Give you something to do with the 2 litter bottles of black paint :art:. That was a cool find :sunglasses:

1 Like

Found this unsavory character hiding on my hard drive…

and decided to immortalize him on a sliver of glass using my new-found method…

focused at surface of chipboard, 1000 mm/min, 90% power, 339 dpi… and looking pretty rough…

remember to mirror and invert the image… we’re etching the backside, which will become the frontside…

Washed in soapy dishwater and edge-lit…

It turned out far better than I expected… he’s almost recognizable.

He looks familiar… I’m pretty sure I’ve seen him someplace :wink:

– David

9 Likes